General Dynamics Itronix IX250RIM902 User Manual Help
General Dynamics Itronix Corporation Help
UserManual.wiki
>
General Dynamics Itronix
>
IX250RIM902 User Manual
>
IX550 Users Manual
Contents
1.
Users Manual
2.
IX550 Users Manual
IX550 Users Manual
Navigation menu
Upload a User Manual
Namespaces
Wiki Guide
HTML
PDF
Info
Views
User Manual
Discussion / Help
Navigation


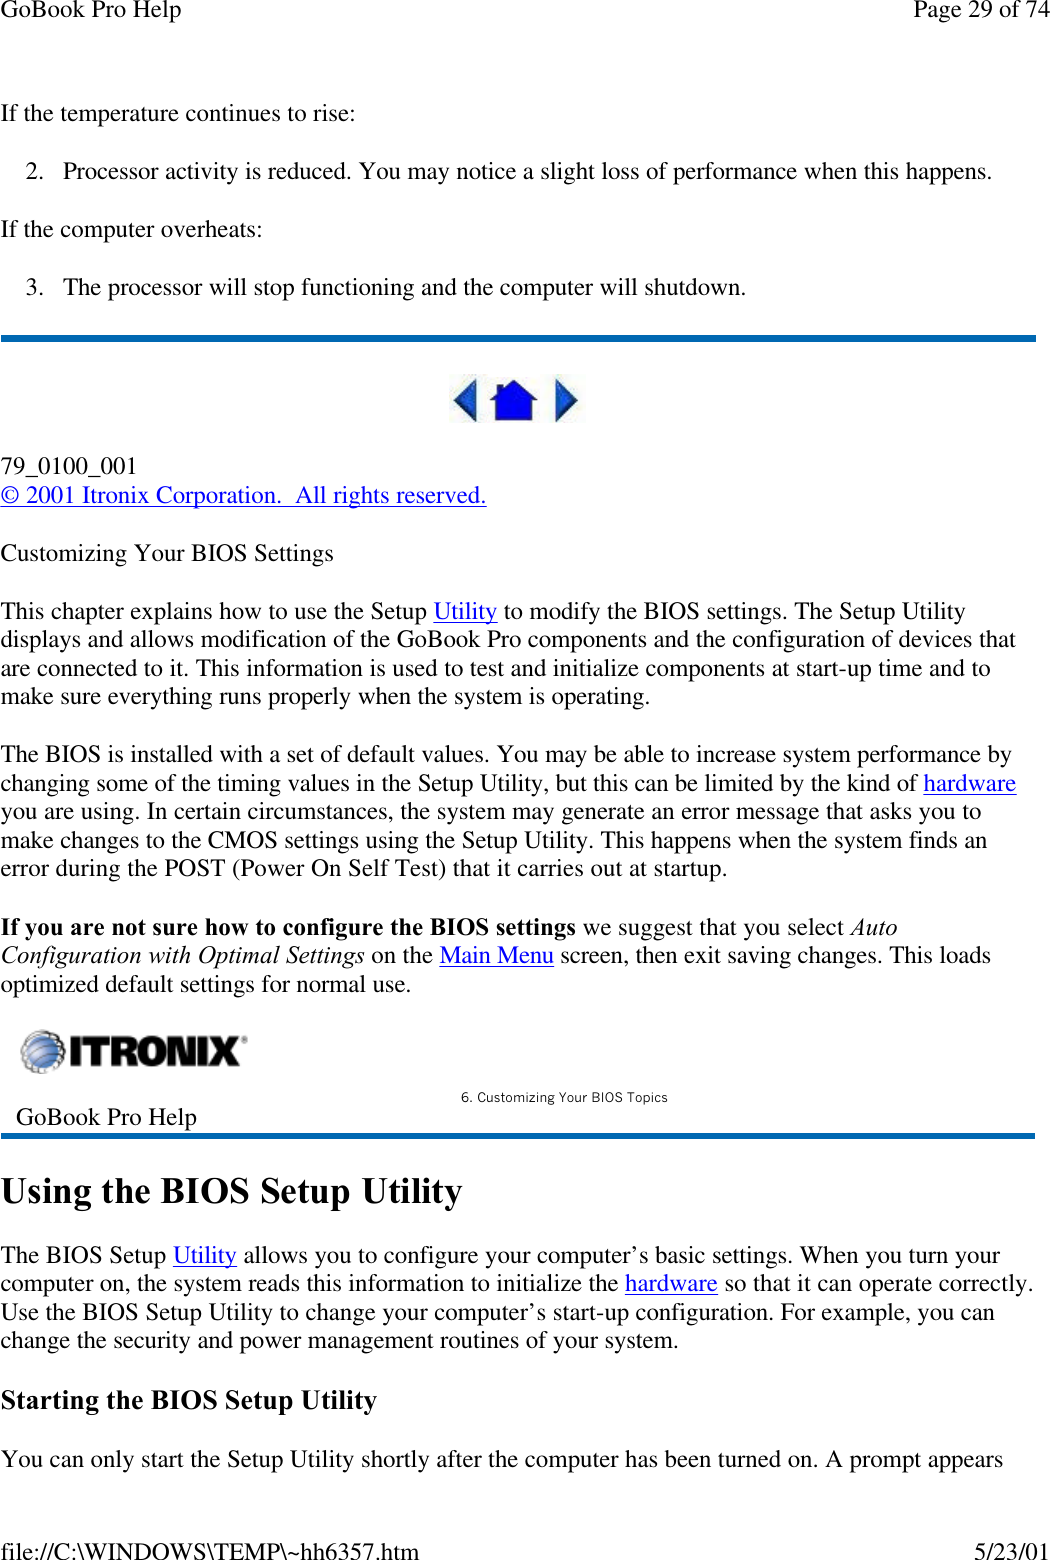

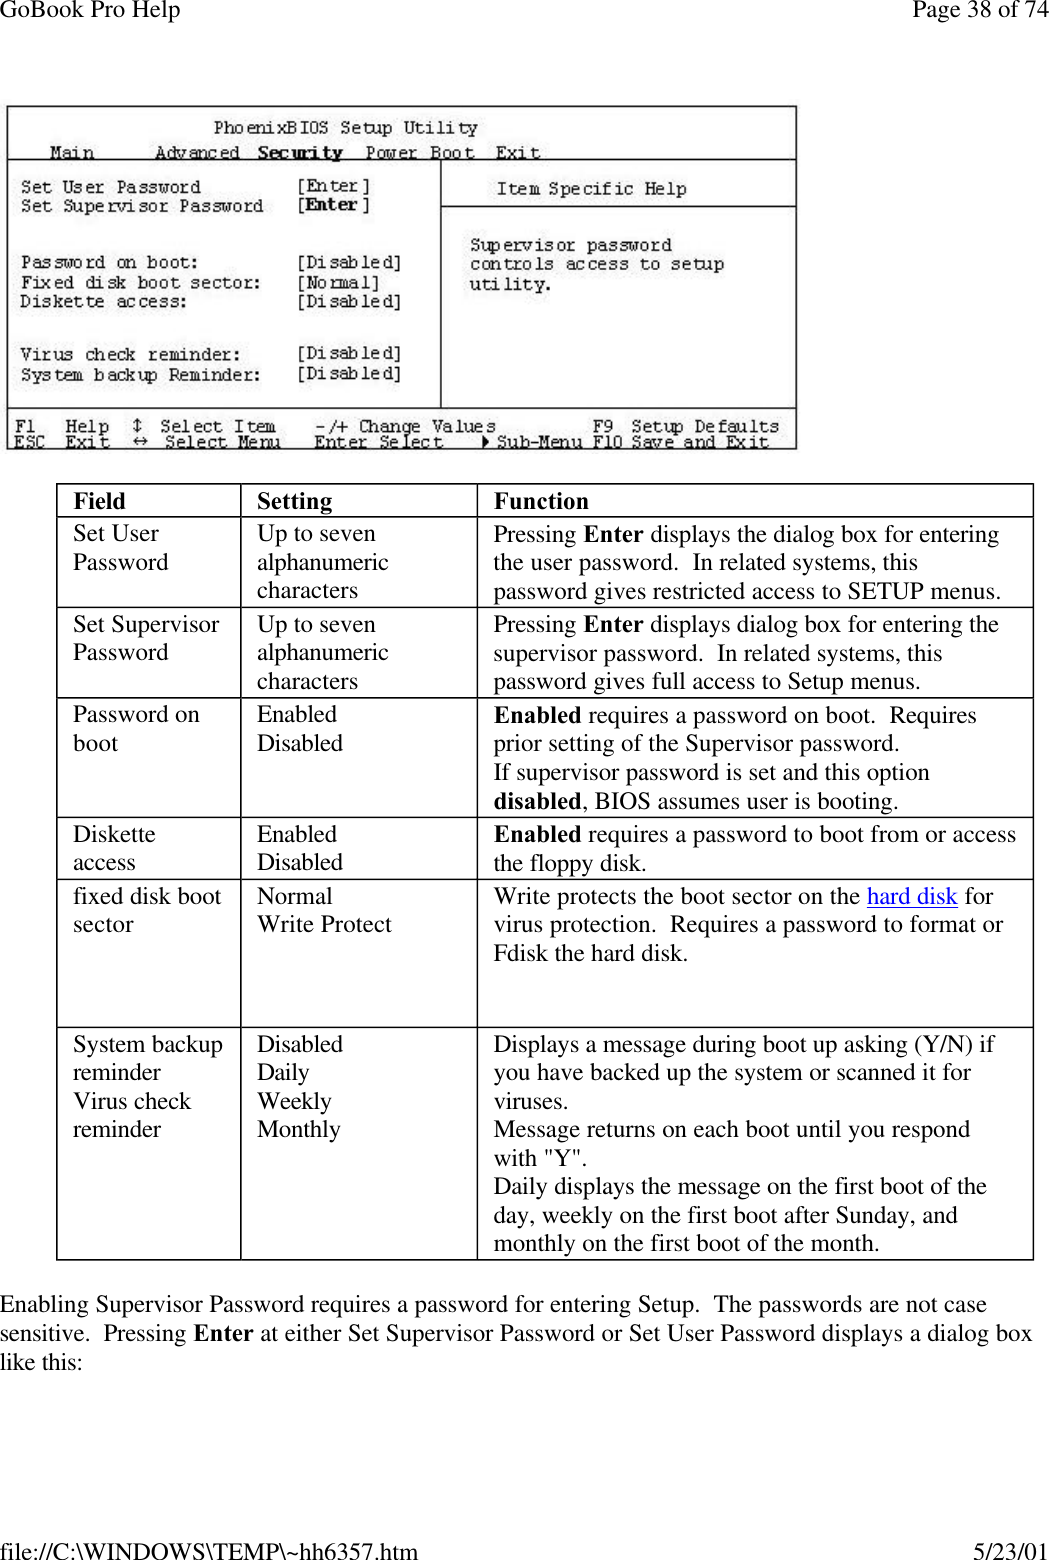

![GoBook Pro Help Page 43 of 74file://C:\WINDOWS\TEMP\~hh6357.htm 5/23/01 79_0100_001© 2001 Itronix Corporation. All rights reserved.Optional Equipment and AccessoriesField FunctionExit Saving Changes After making your selections on the Setup menus, this option stores the selections displayed in the menus in CMOS, a special section of memory that stays on after your turn your system off. It then exits the SETUP program. The next time you boot your computer, the BIOS configures your system according to the Setup selections stored in CMOS. During boot up, PhoenixBIOS attempts to load the values saved in CMOS. If those values cause the system boot to fail, reboot and press [F2] to enter Setup. In setup, you can get the Default Values or try to change the selections that caused the boot to fail.Exit Discarding ChangesUse this option to exit Setup without storing in CMOS any new selections you may have made. The selections previously in effect remain in effect.Use Setup Settings Load Setup Defaults To display the default values for all Setup menus, select "Load Setup Defaults" from the Main Menu. If during boot up, the BIOS program detects a problem in the integrity of values stored in CMOS, it displays these messages: System CMOS checksum bad - run SETUPPress <F1> to resume, <F2> to Setup The CMOS values have been corrupted or modified incorrectly, perhaps by an application program that changes data stored in CMOS. Press [F1] to resume the boot or [F2] to run Setup with the ROM default values already loaded into the menus. You can make other changes before saving the values to CMOS. Discard Changes If during a Setup Session, you change your mind about changes you have made and have not yet saved the values to CMOS, you can restore the values you previously saved to CMOS. Save Changes Saves all the selections without exiting Setup. You can return to the other menus if you want to review and change your selections.](https://usermanual.wiki/General-Dynamics-Itronix/IX250RIM902.IX550-Users-Manual/User-Guide-151874-Page-43.png)


![GoBook Pro Help Page 65 of 74file://C:\WINDOWS\TEMP\~hh6357.htm 5/23/01lMake the online hypertext jumps black by adding the line JumpColor=0,0,0 to the [Windows Help] section of WIN.INI.I can’t see the cursor while using the DOS editorlPress FN+insert to change from insert mode to overwrite mode to enable a block cursor. When it defaults to insert mode, the DOS editor uses an underline cursor which is less visible than the block cursor for overwrite mode. The display appears to have random pixels darkened after scrollinglContact your supervisor or your organization’s help desk for information about correcting this problem.I changed my display resolution, but I see no difference on the screenlTry restarting your computer for the changes to take effect. 79_0100_001© 2001 Itronix Corporation. All rights reserved. Hard Disk The hard disk will not spin up so the computer can’t boot uplThis occurs if the unit is exposed to extreme low temperatures. This is not a hardware failure associated with the hard disk . Allow the computer to warm to room temperature. I can’t save files because the disk is fulllReport this situation to your supervisor or your organization’s help desk.Diskette Read ErrorlAny card in the PC card socket except for a properly formatted memory card will cause this error since it is trying to read the PC card.GoBook Pro Help B. Troubleshooting Topics](https://usermanual.wiki/General-Dynamics-Itronix/IX250RIM902.IX550-Users-Manual/User-Guide-151874-Page-65.png)
![GoBook Pro Help Page 71 of 74file://C:\WINDOWS\TEMP\~hh6357.htm 5/23/01I can’t remove the PC card lPress the ejector button located inside the PC card door on the side of the computer. The button will pop out. Press the ejector button again to eject the PC card. Slide the card out. lIf the ejector button malfunctions when you press it, release the button and then press it again. Diskette Read ErrorlAny card in the PC Card socket except for a properly formatted memory card will cause this error since it is trying to read the PC Card.The system does not recognize the PC Card CD-ROM when it is inserted into the PC Card socketlThere is a delay of 10 to 15 seconds before the CD-ROM drive is recognized.lDrivers may not be installed. Contact your organization’s help desk for assistance.The computer locks up when I remove the PC cardlBefore you remove the card, select the PC card icon in the system “tray” area of the screen (near the clock in the lower right corner), and choose “Stop [card name] card.”79_0100_001© 2001 Itronix Corporation. All rights reserved. Pen/Touch ScreenWhen I try to use the stylus on my touch screen, nothing happenslIf you cannot select objects accurately with the stylus, you may need to recalibrate the touch screen. To calibrate the touch screen1. From the Start Menu, select Programs, UPDD, and then choose Calibrate.GoBook Pro Help B. Troubleshooting Topics](https://usermanual.wiki/General-Dynamics-Itronix/IX250RIM902.IX550-Users-Manual/User-Guide-151874-Page-71.png)