GE Medical Systems Information Technologies 340MT WMTS Transmitter User Manual TRANSMITTER
GE Medical Systems Information Technologies Inc. WMTS Transmitter TRANSMITTER
UserManual.wiki
>
GE Medical Systems Information Technologies
>
340MT User Manual
>
Ex 13c 18921273
Contents
1.
Ex 13b service manual
2.
Ex 13c 18921273
3.
Ex 13d 18921274
4.
Ex 13e 500serprogram
5.
Ex 13f simple inst 340
6.
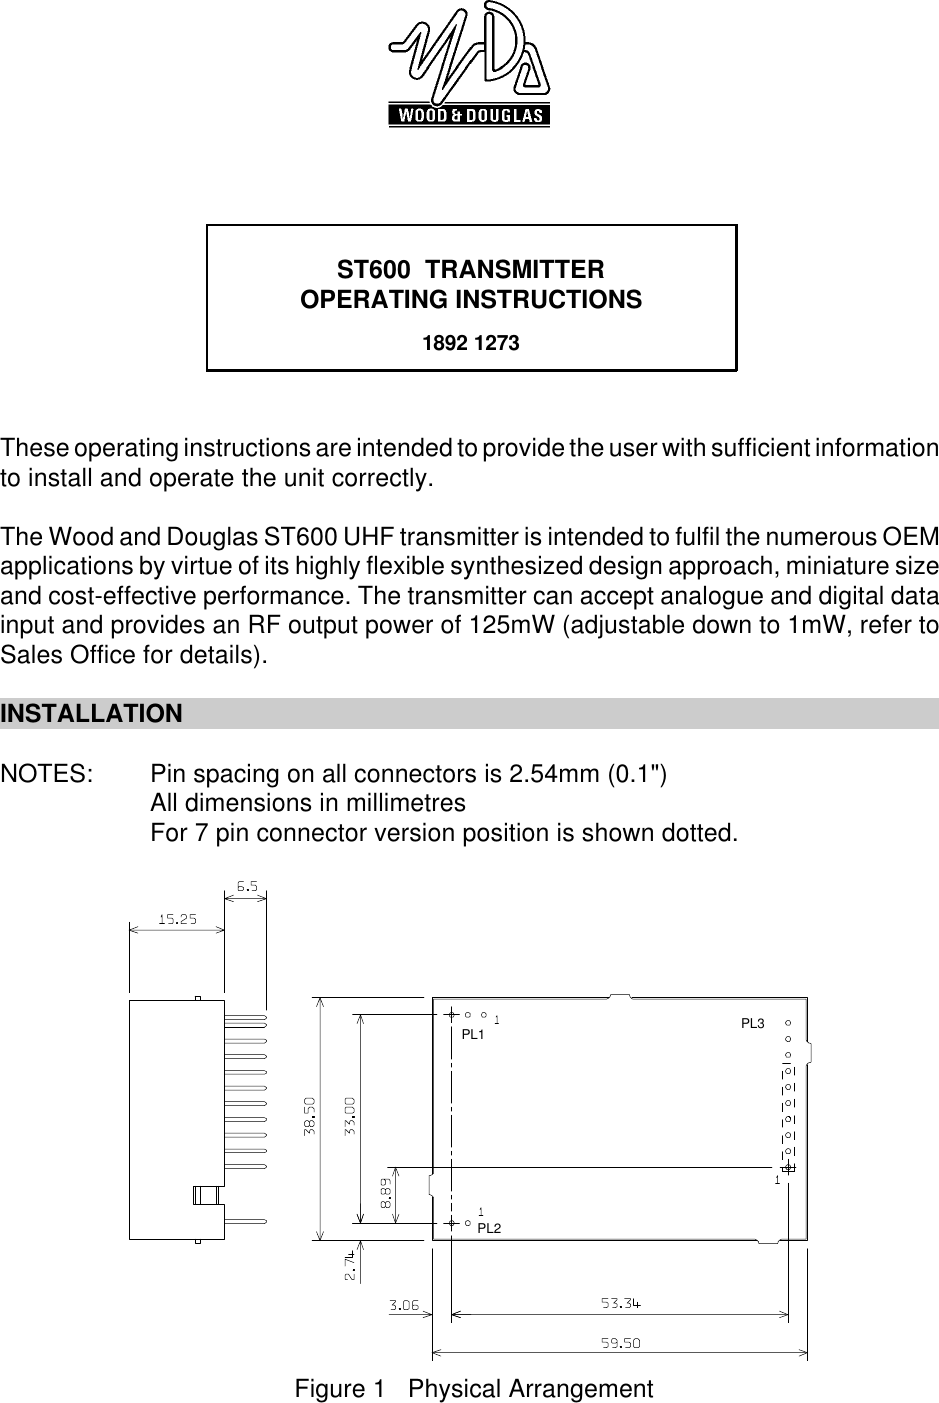
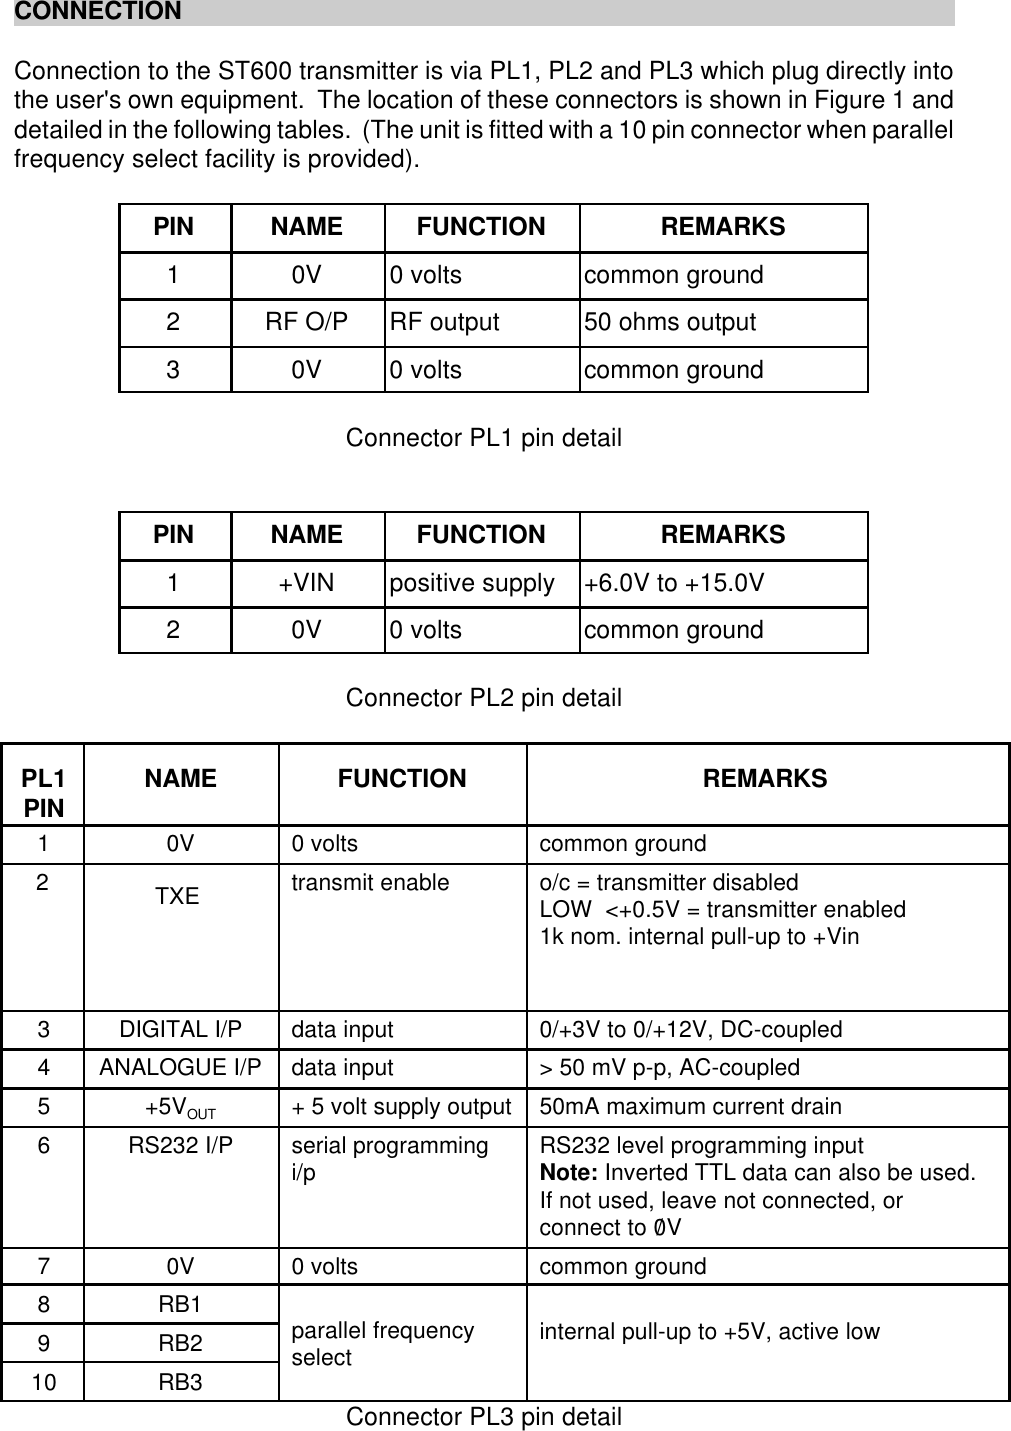
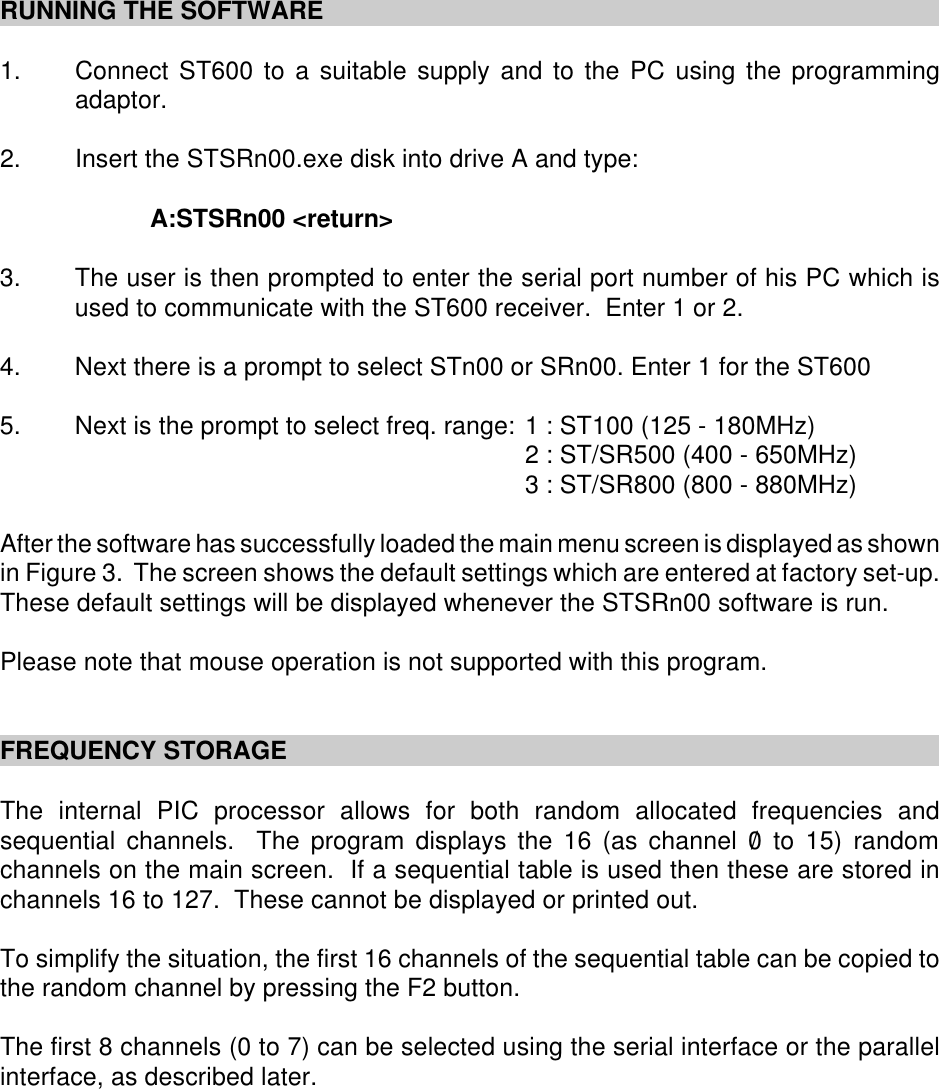
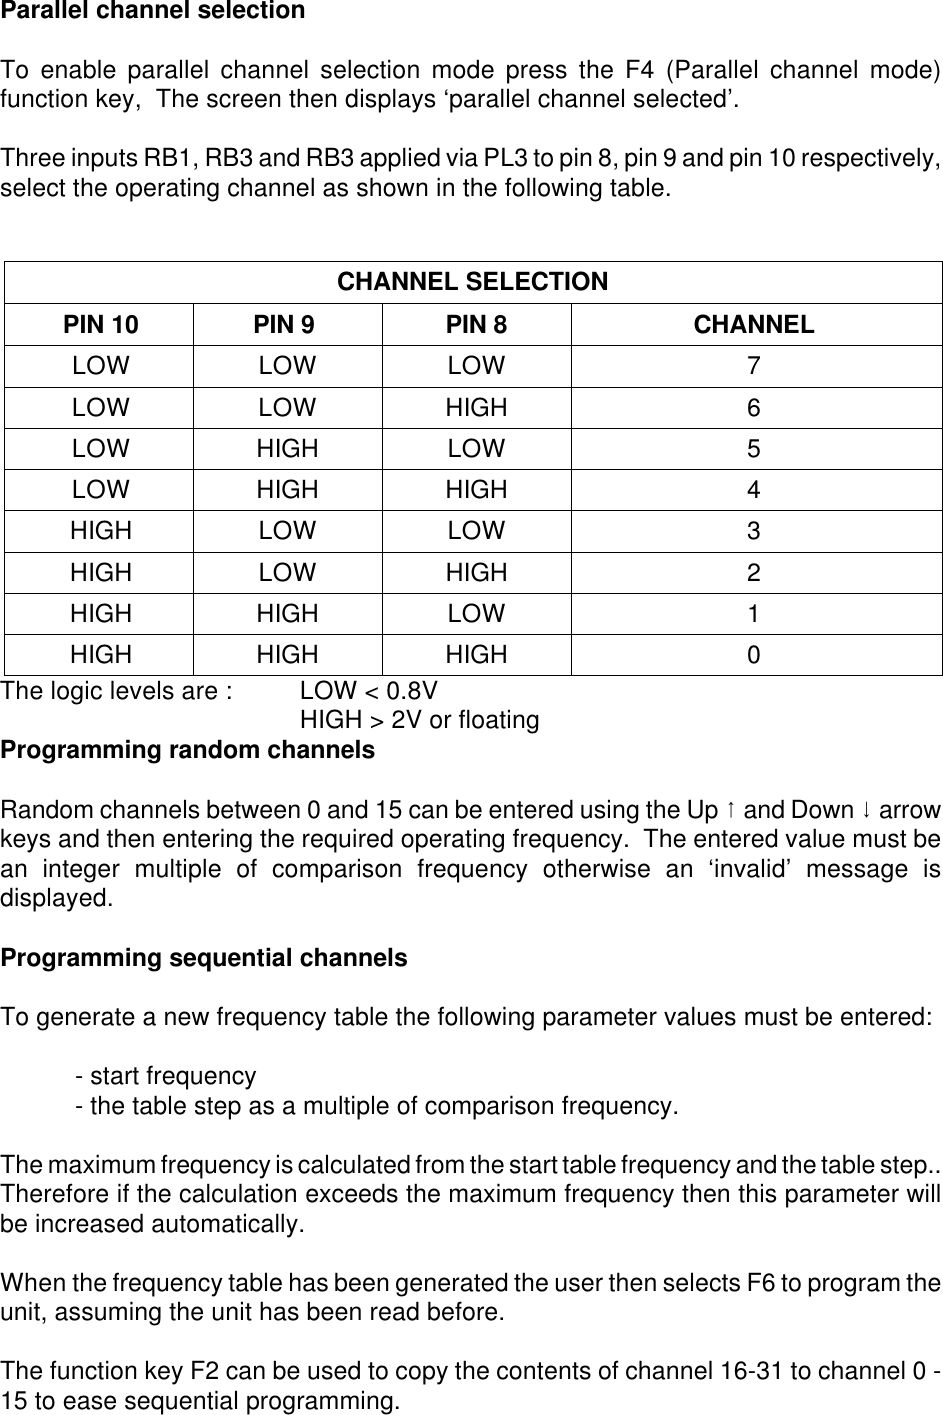
Ex 13a pages 1 to 40
7.
Ex 13a pages 41 to 82
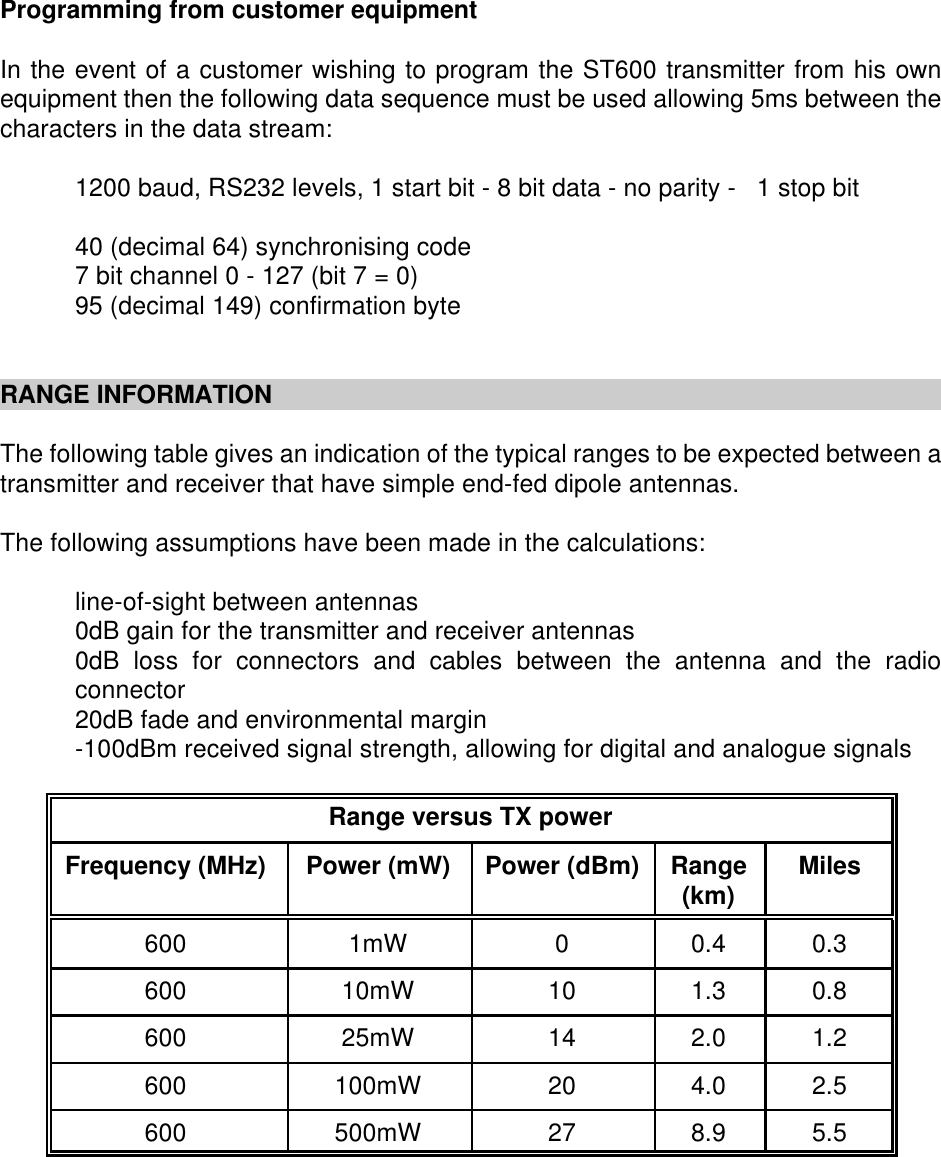
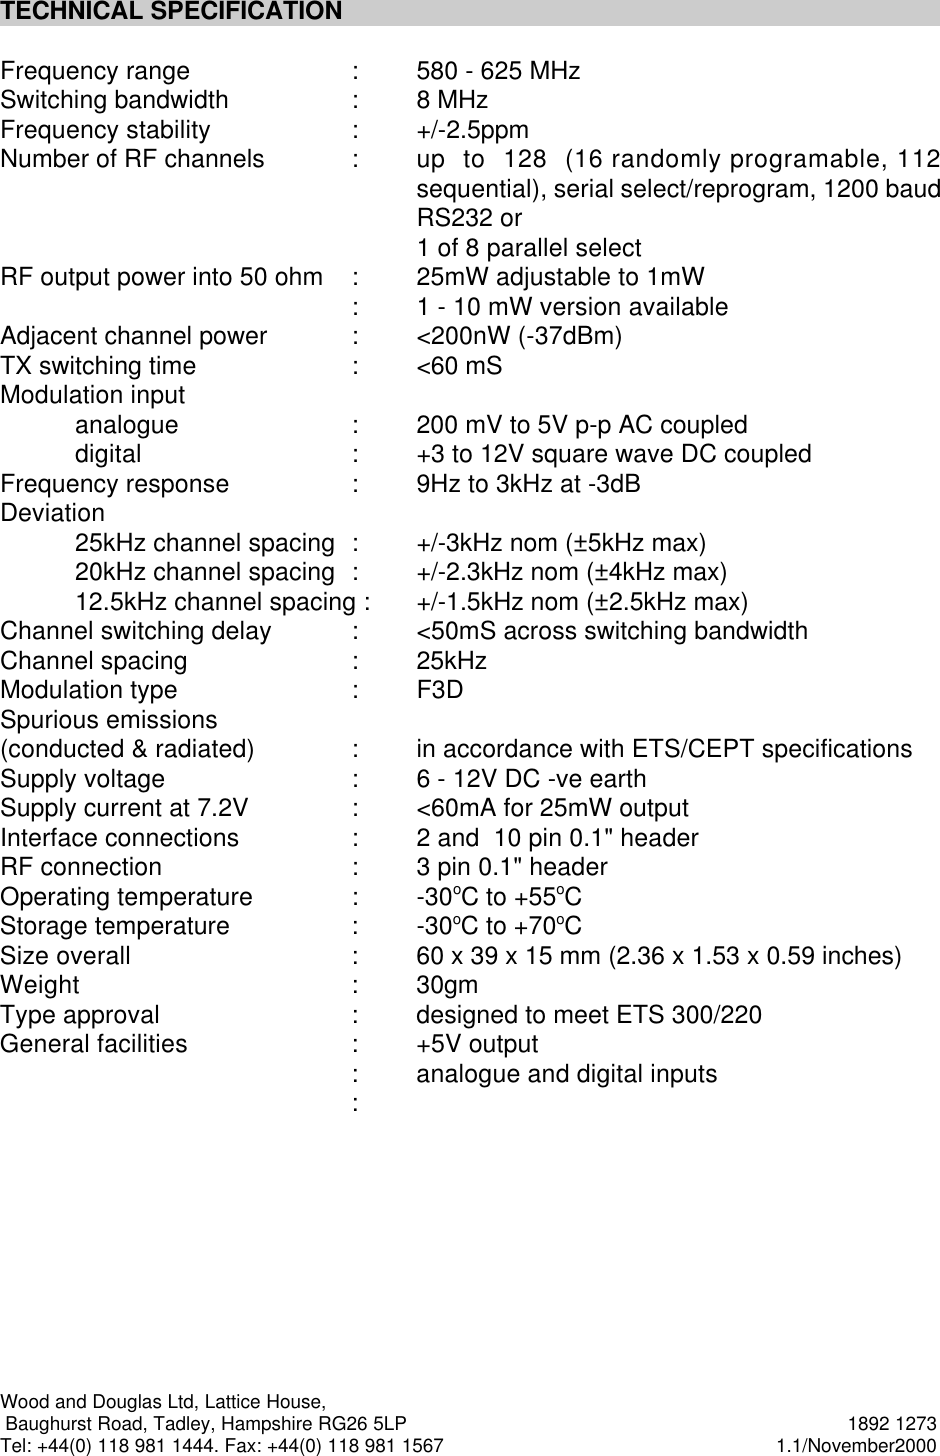
Ex 13c 18921273
Navigation menu
Upload a User Manual
Namespaces
Wiki Guide
HTML
PDF
Info
Views
User Manual
Discussion / Help
Navigation