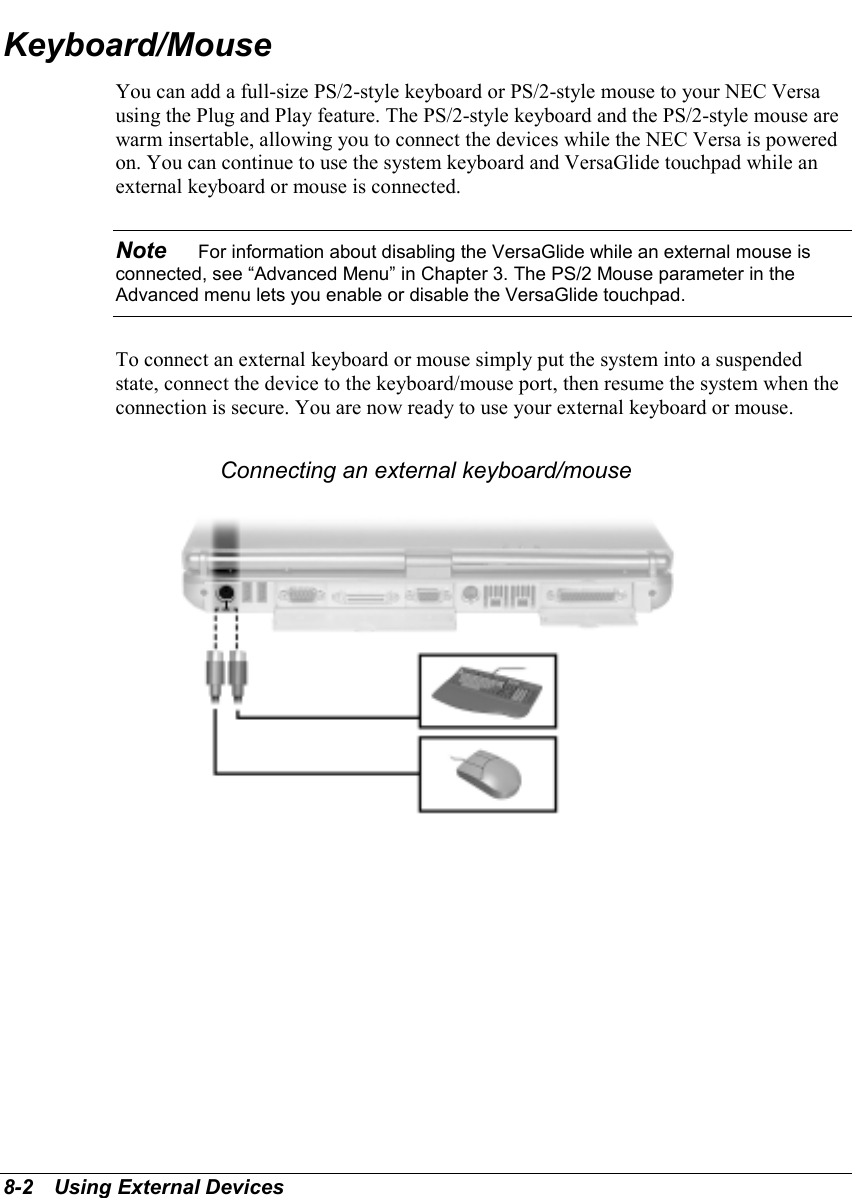
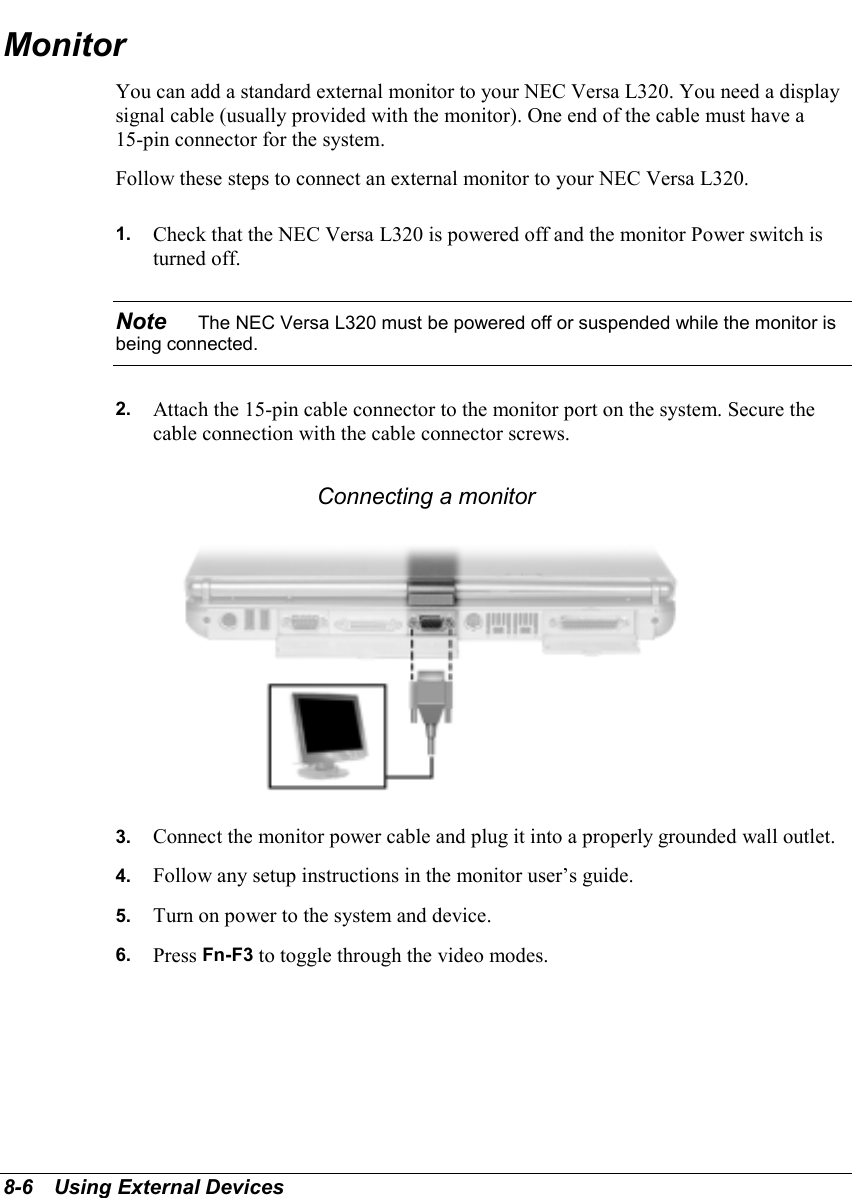
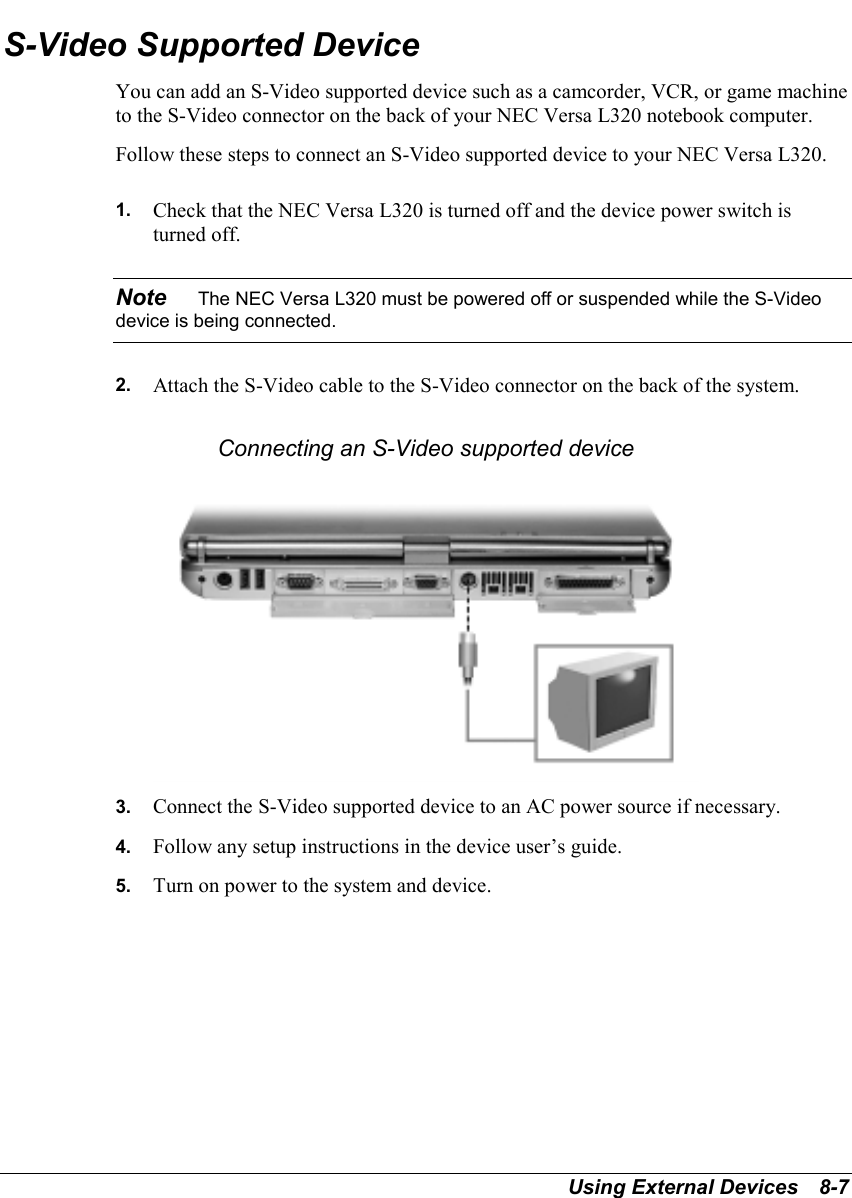
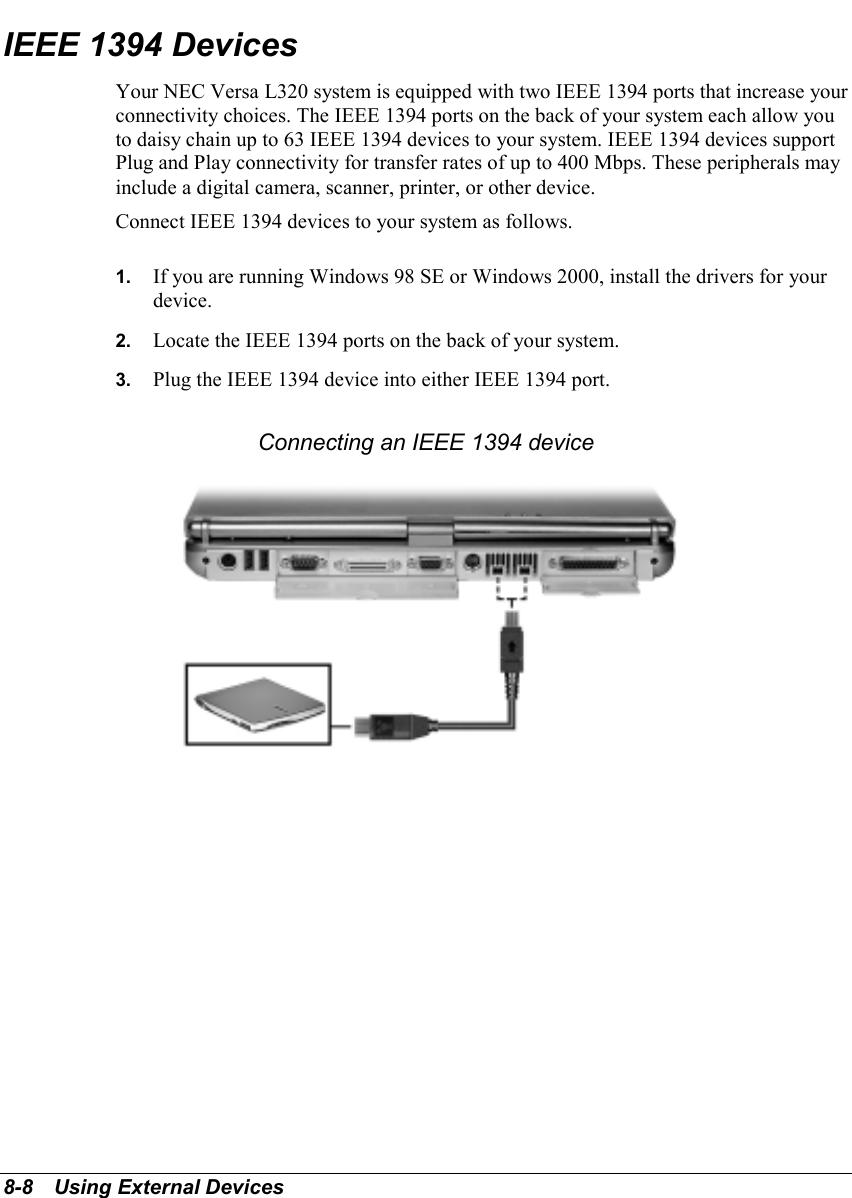
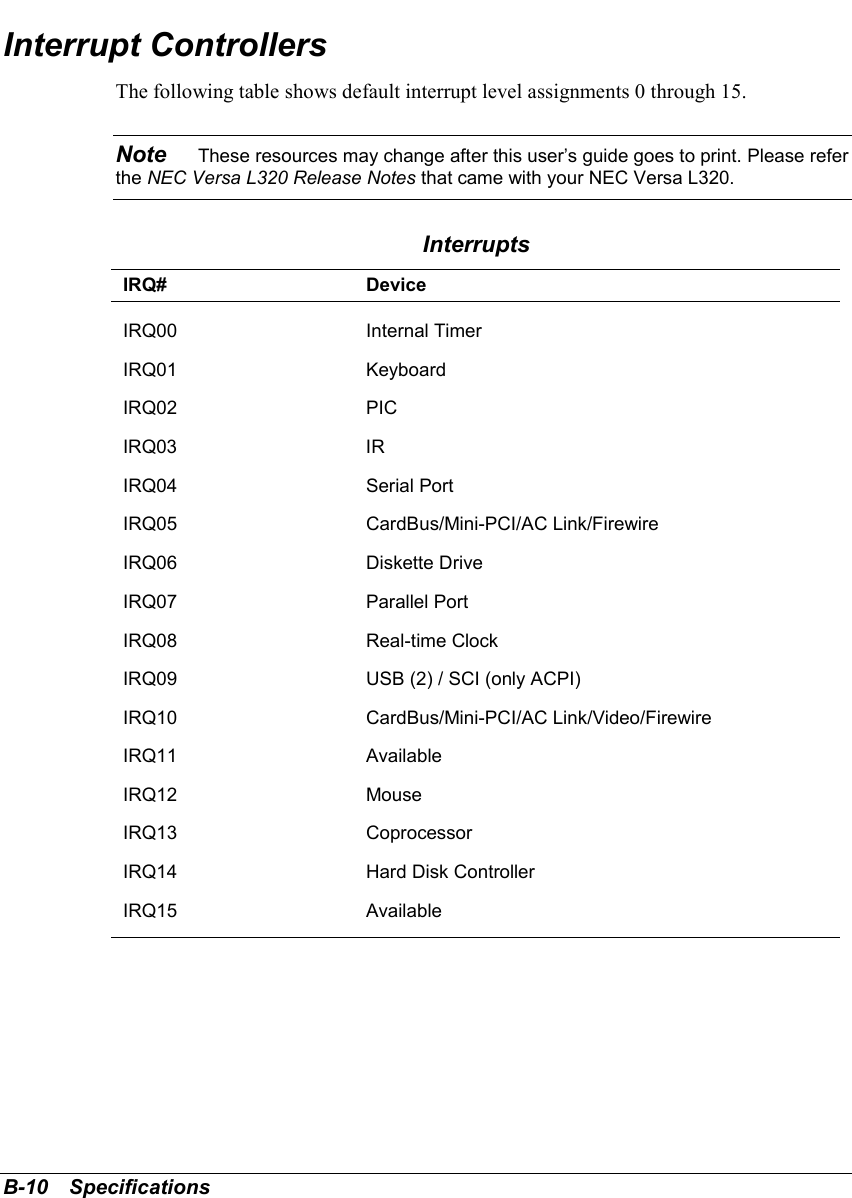
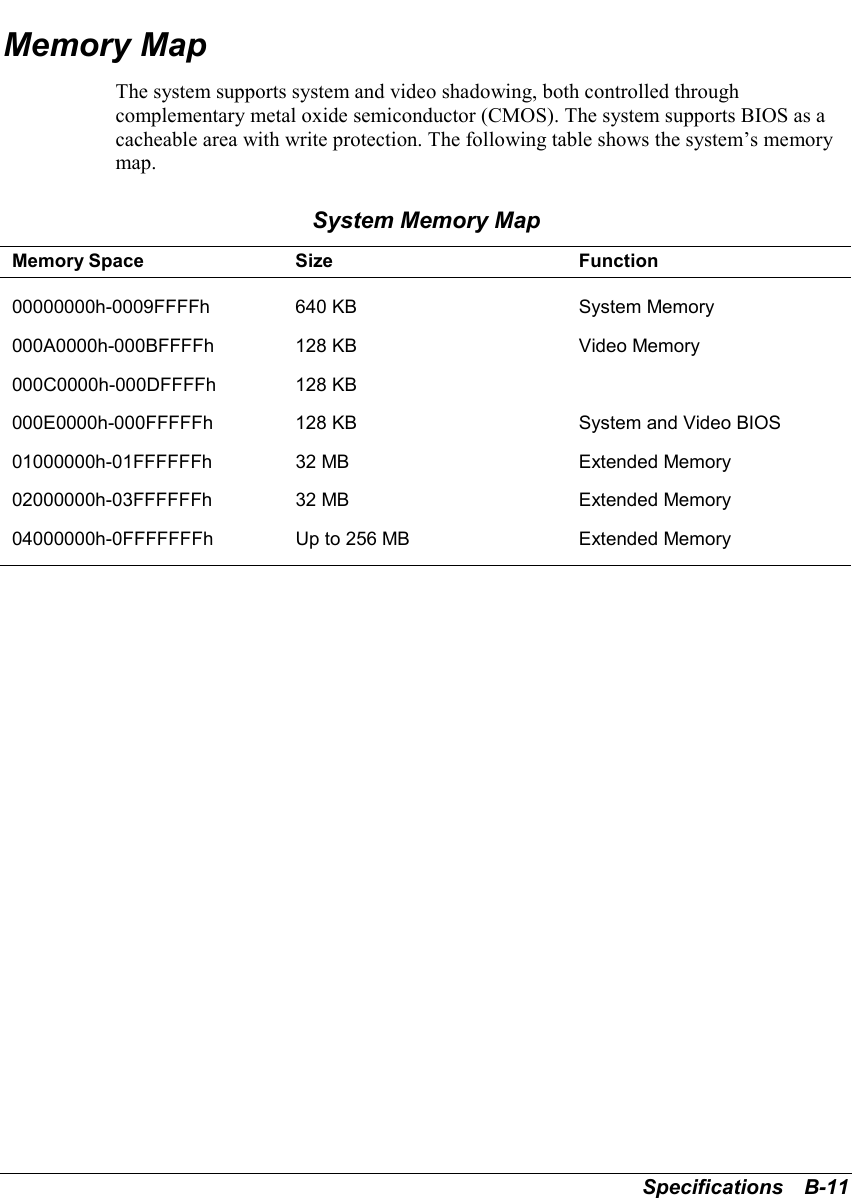
First Computer MPC13A Notebook Computer with DSSS Data Transceiver User Manual PROPRIETARY NOTICE AND LIABILITY DISCLAIMER
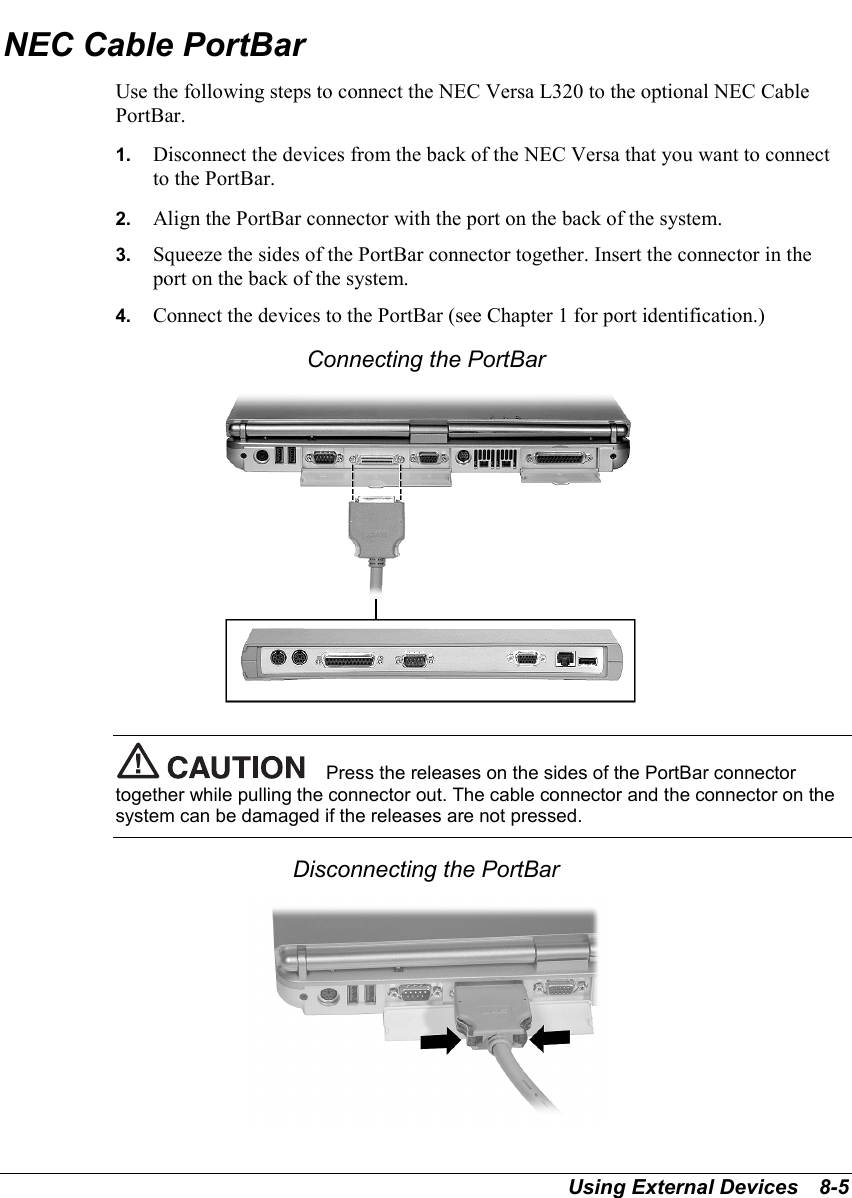
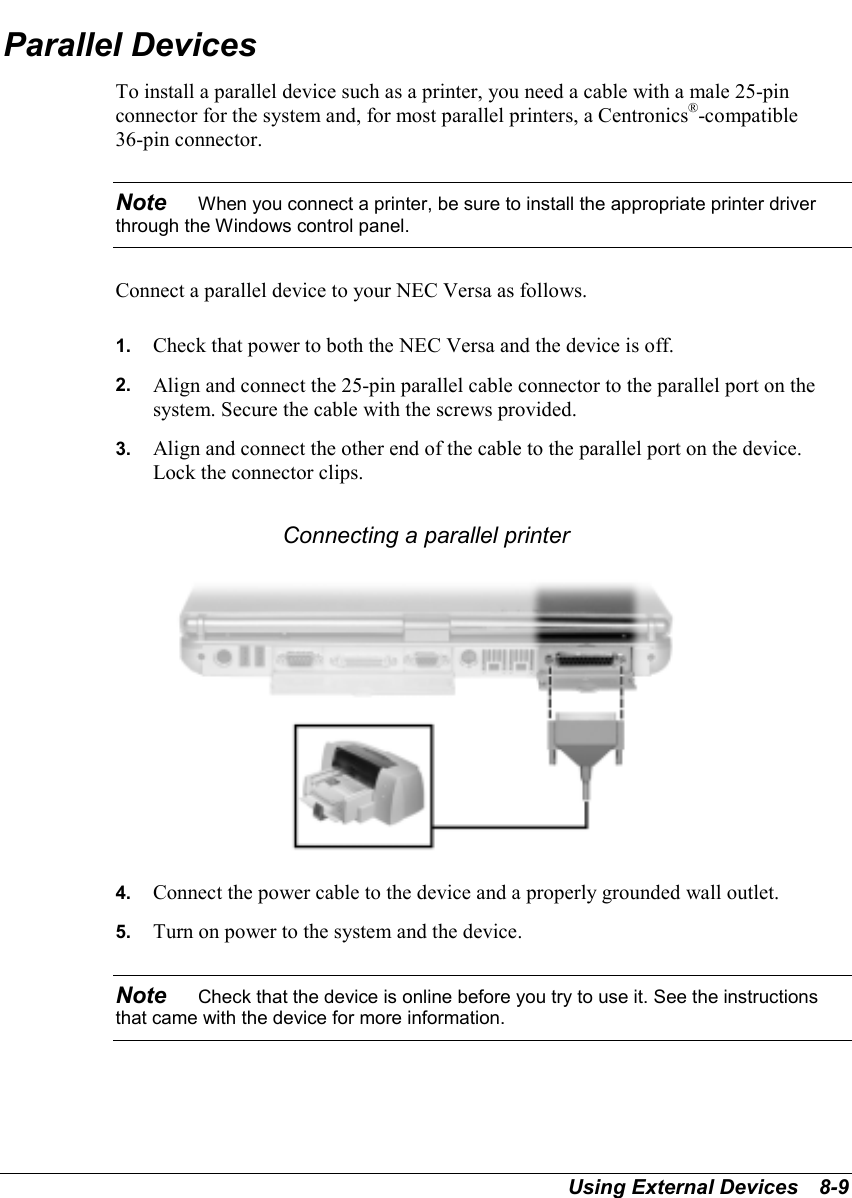
First International Computer Inc Notebook Computer with DSSS Data Transceiver PROPRIETARY NOTICE AND LIABILITY DISCLAIMER
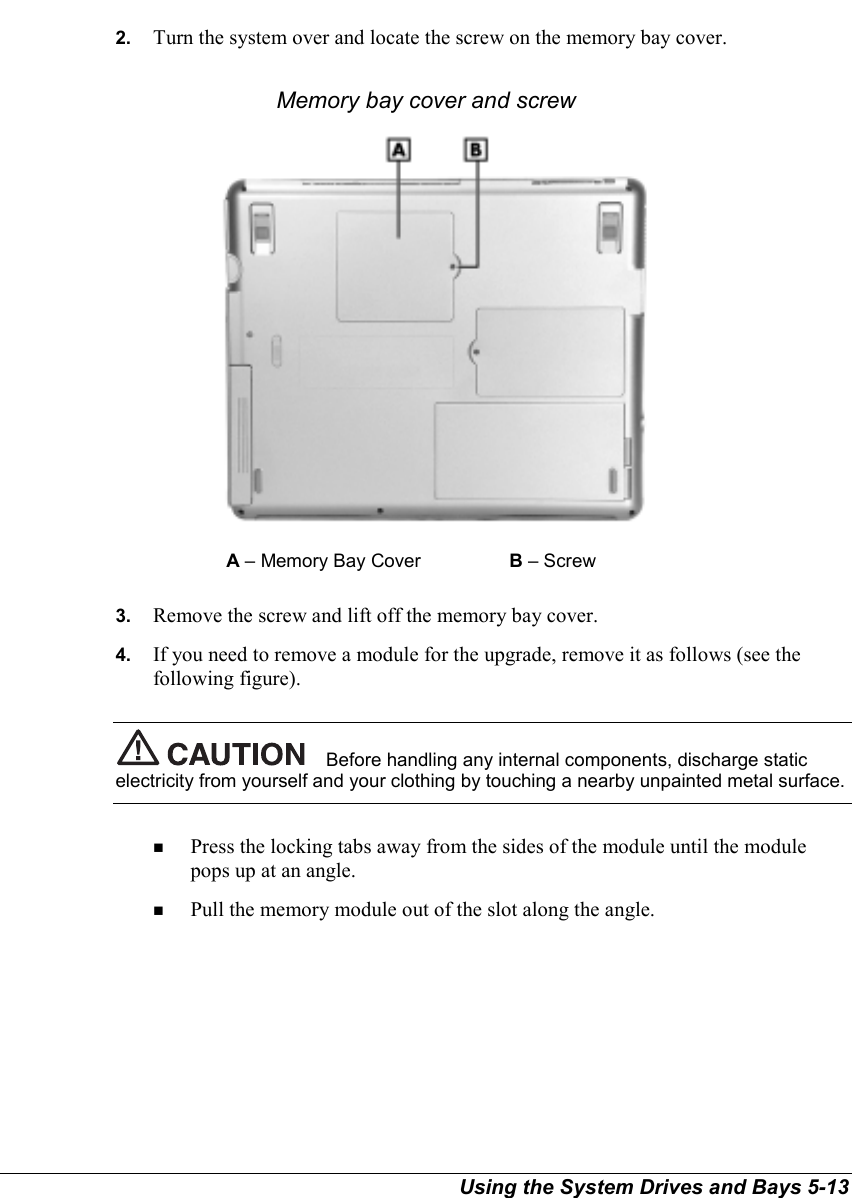
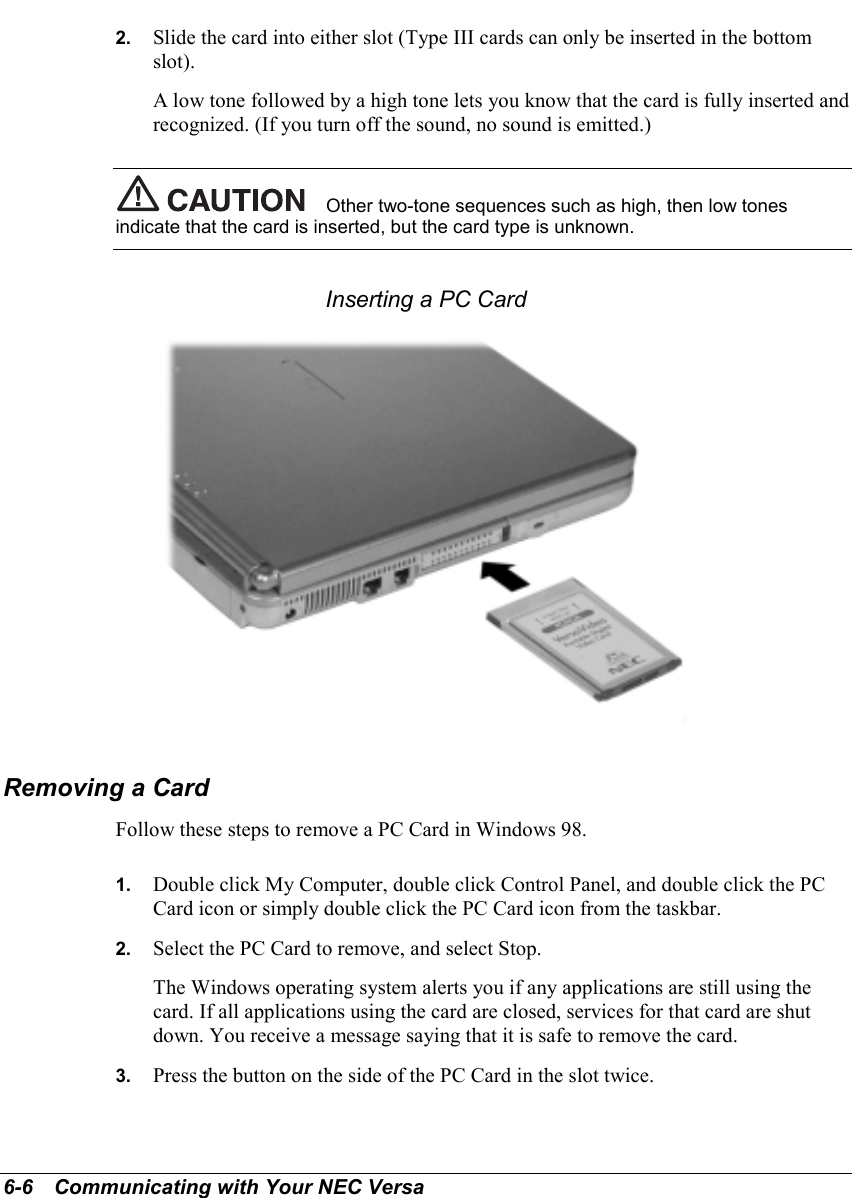
Contents
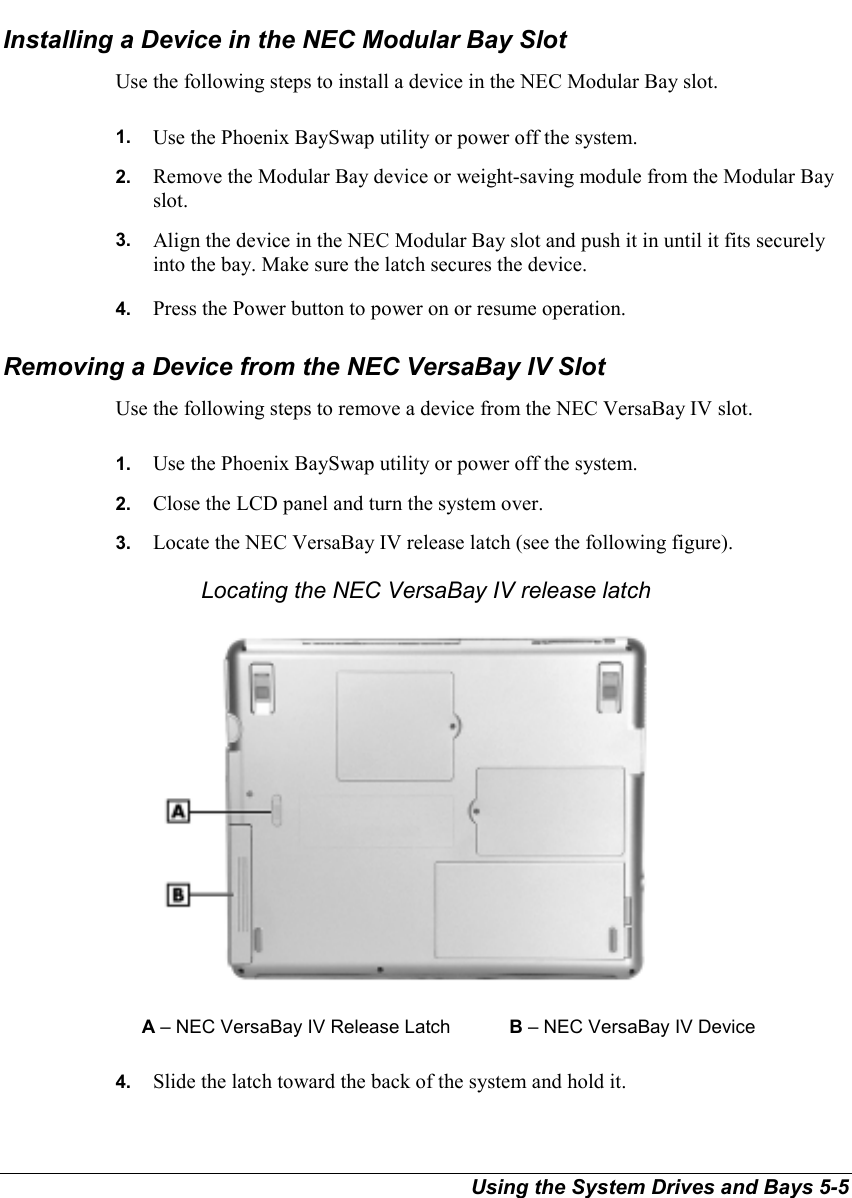
- 1. User Manual 1of 2
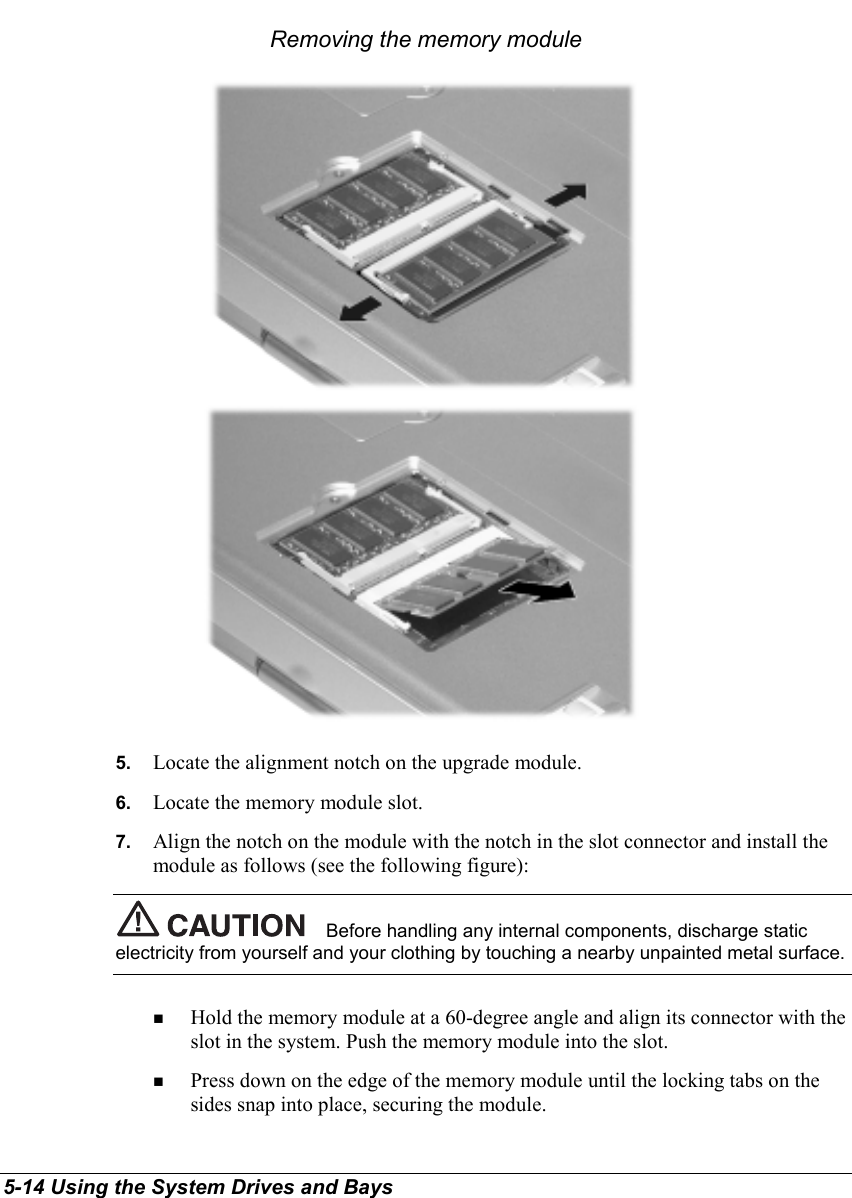
- 2. User Manual 2 of 2
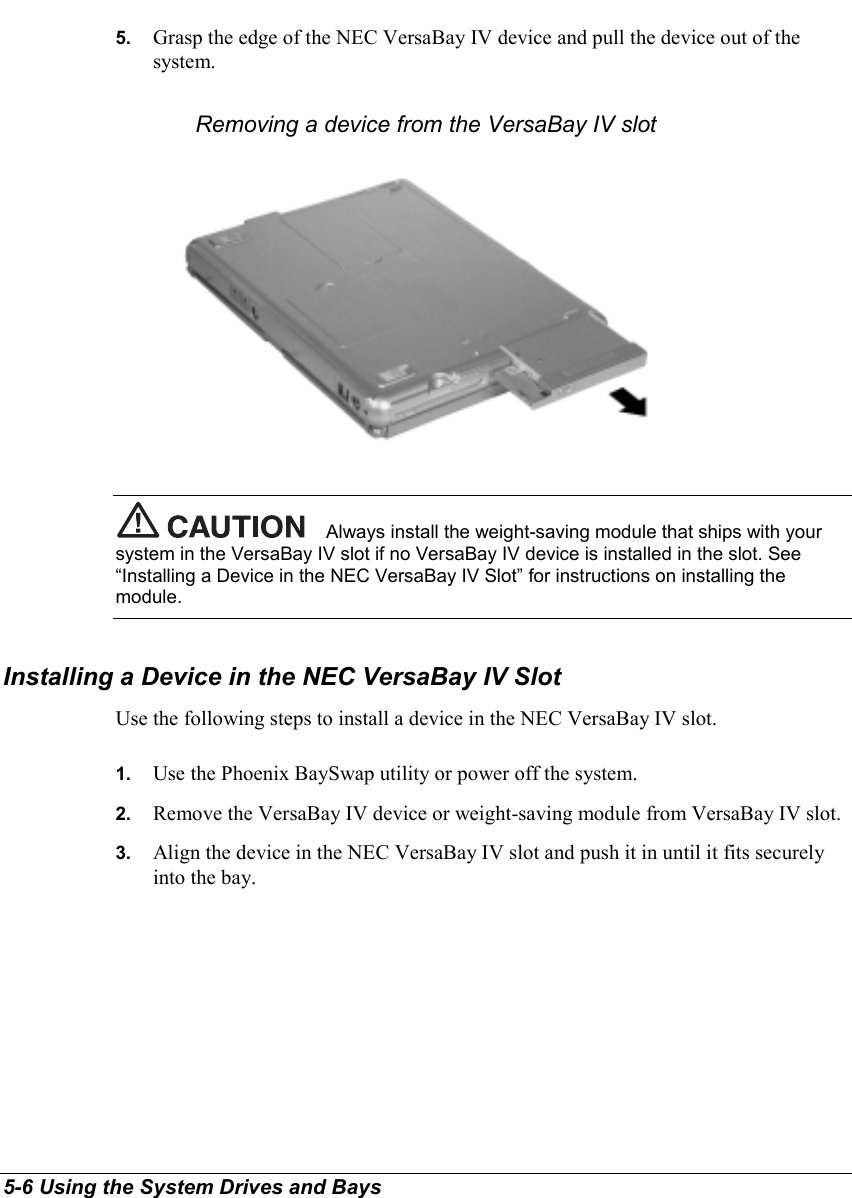
User Manual 2 of 2