First Computer DN95W3BB Notebook Computer With 802.11/b WLAN Module User Manual 2 of 2
First International Computer Inc Notebook Computer With 802.11/b WLAN Module 2 of 2
UserManual.wiki
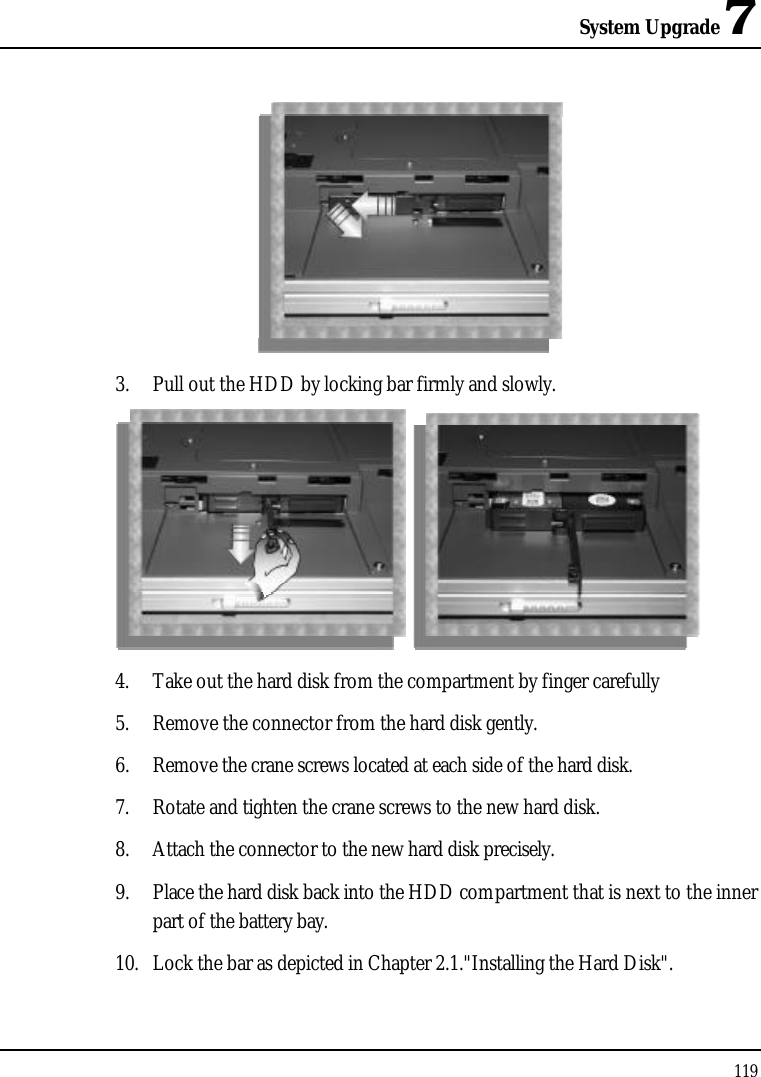
>
First Computer
>
DN95W3BB User Manual
>
User Manual 2 of 2
Contents
1.
User Manual 1 of 2
2.
User Manual 2 of 2
User Manual 2 of 2
Navigation menu
Upload a User Manual
Namespaces
Wiki Guide
HTML
PDF
Info
Views
User Manual
Discussion / Help
Navigation

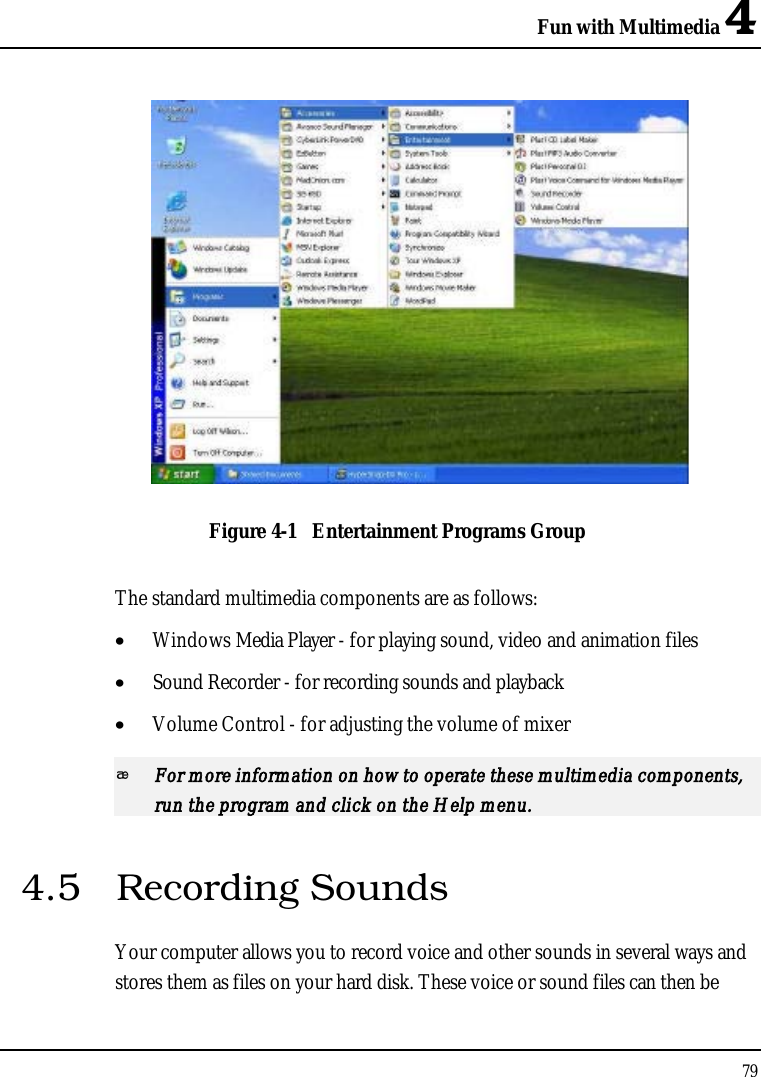
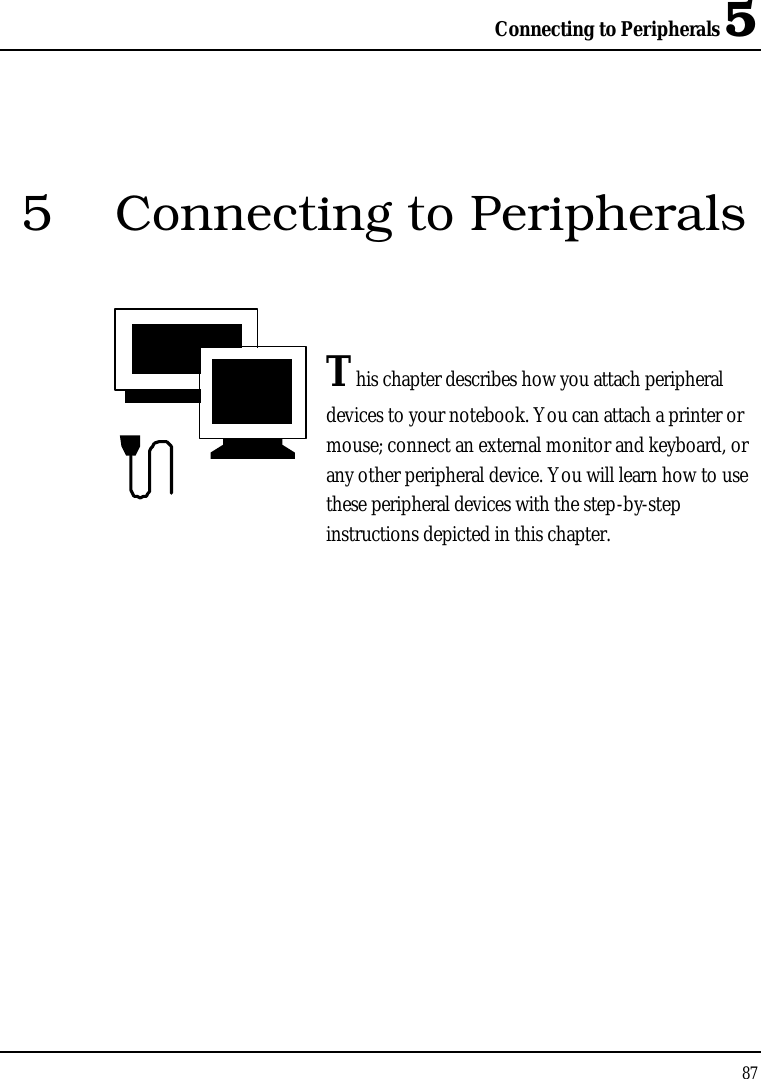
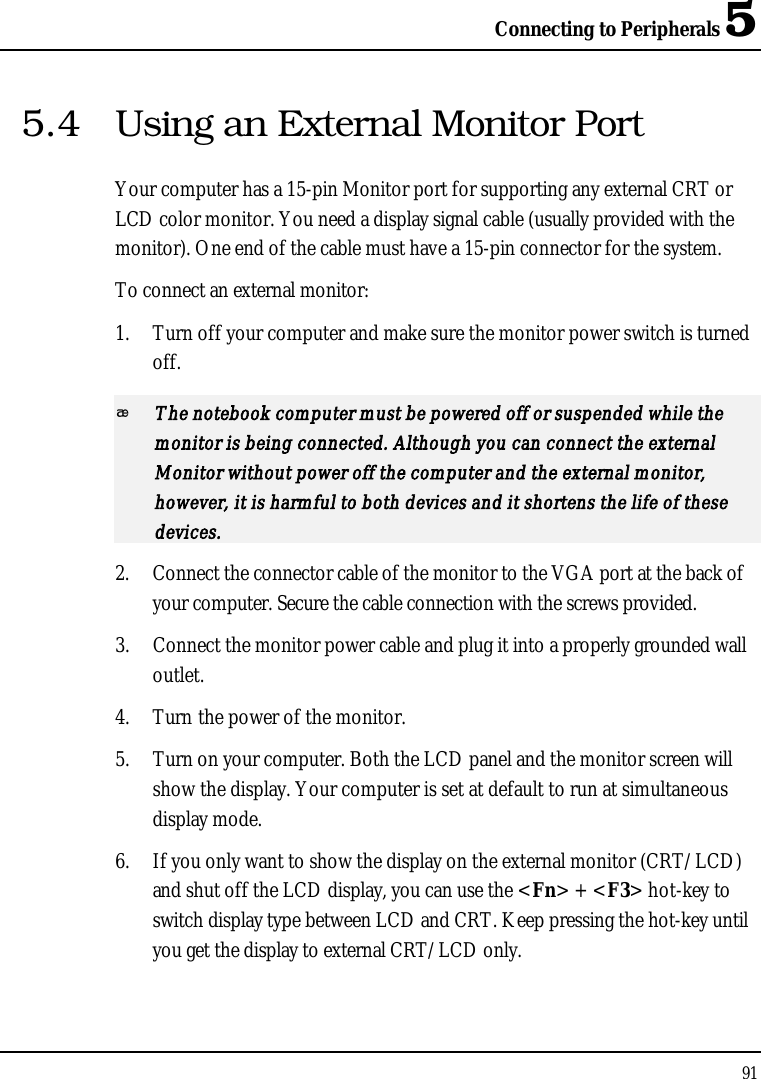


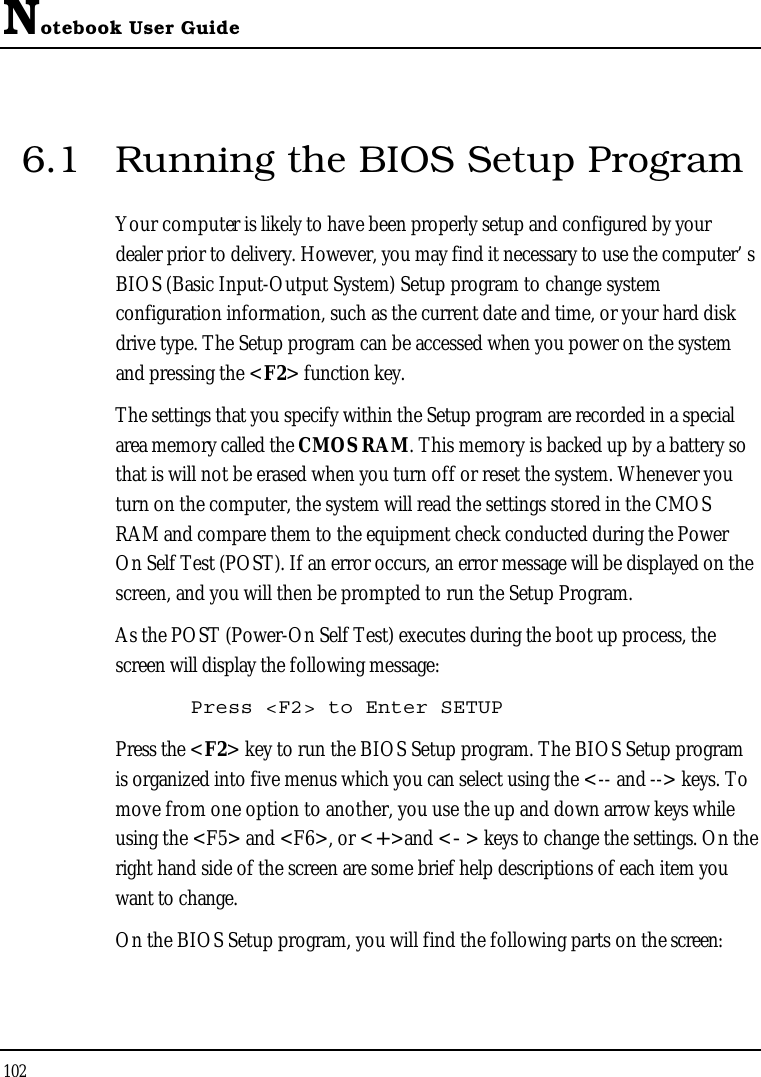
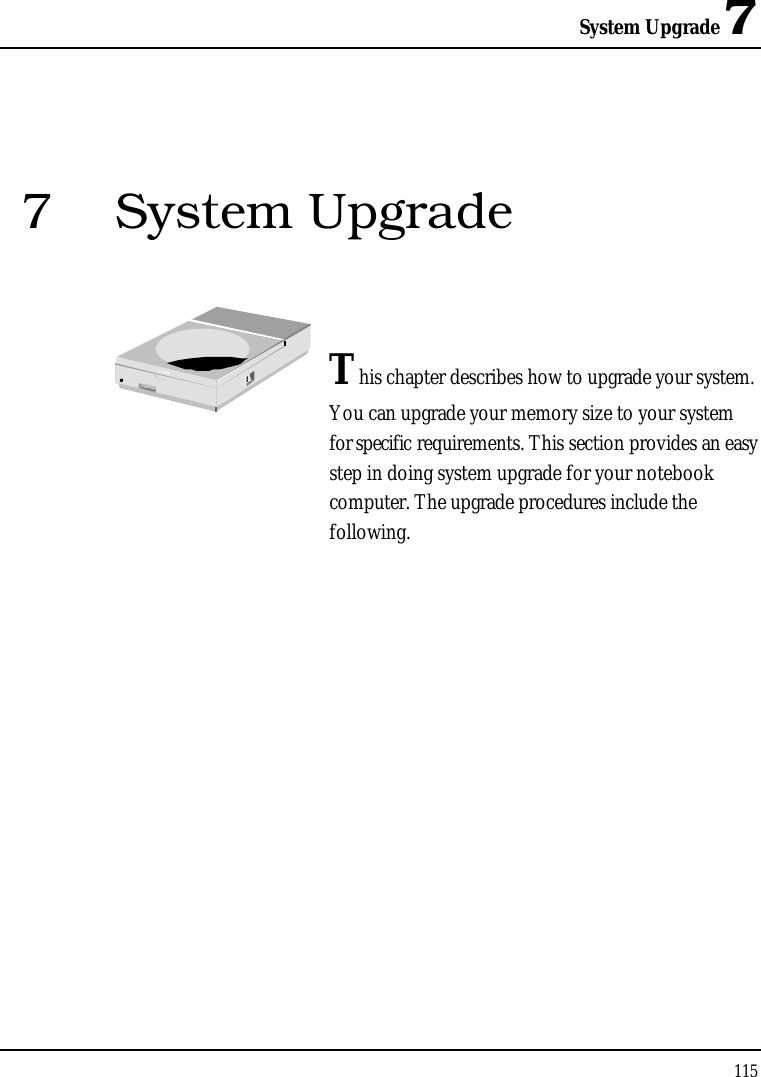
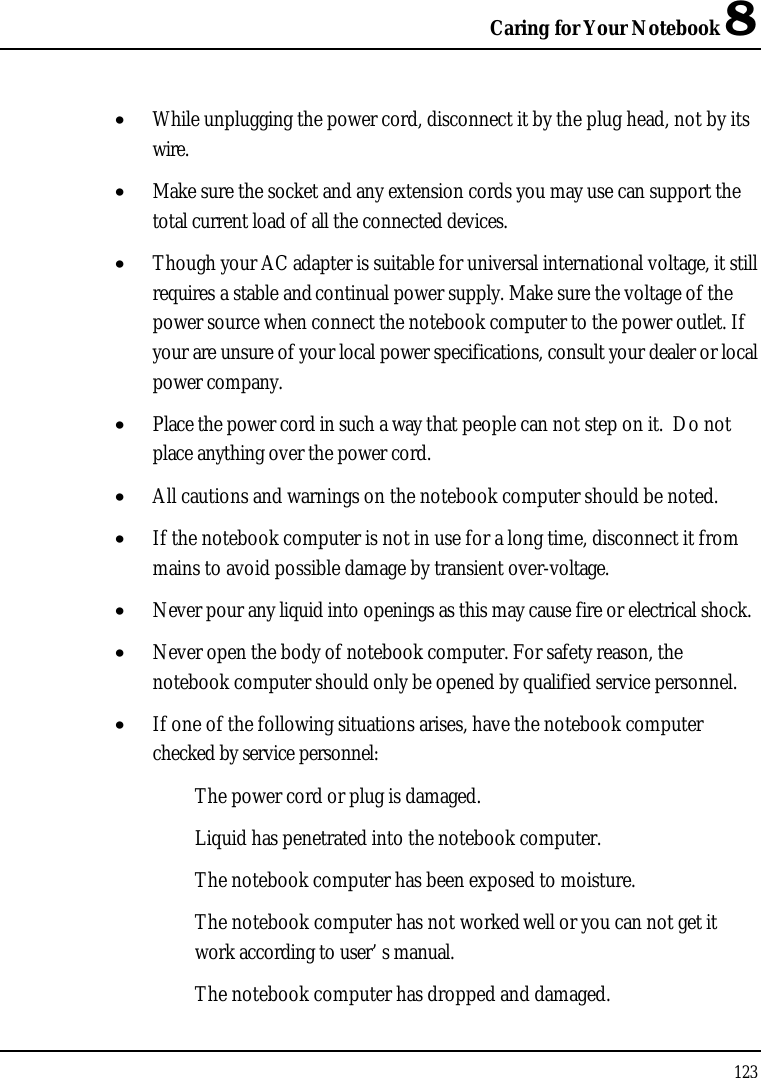
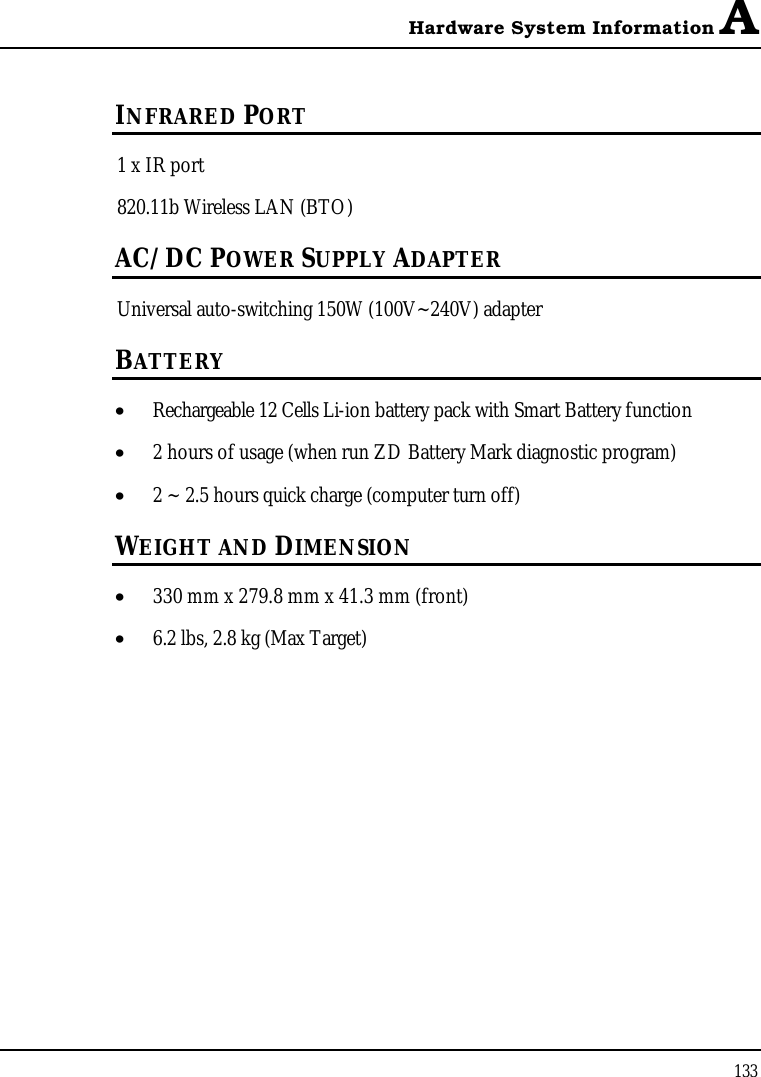
![Notebook User Guide1046.2 Using the Main Menu SetupPhoenix BIOS Setup UtilityMain Advanced Security Boot ExitItem Specific System Time:[12 :00 :00]<Tab>, <Shift-System Date: [03/03/2003] or <Enter> selects Language: [English (US)] field.Boot Display Device: [Both]4Primary Master [Primary Master - (PM)]Secondary Master Installed CD/DVDSystem Memory: 640 KBExtended Memory: 512 KBCPU Type: Intel (R) Pentium ® 4CPU Speed: 2600 MHzBIOS Version: A.3A-08BB-0812F1 Help Select Item -/+ Change Values F9 SetupDefaultsEsc Exit --> Select Menu Enter Select Sub-MenuF10 Save and Exit](https://usermanual.wiki/First-Computer/DN95W3BB.User-Manual-2-of-2/User-Guide-322154-Page-30.png)
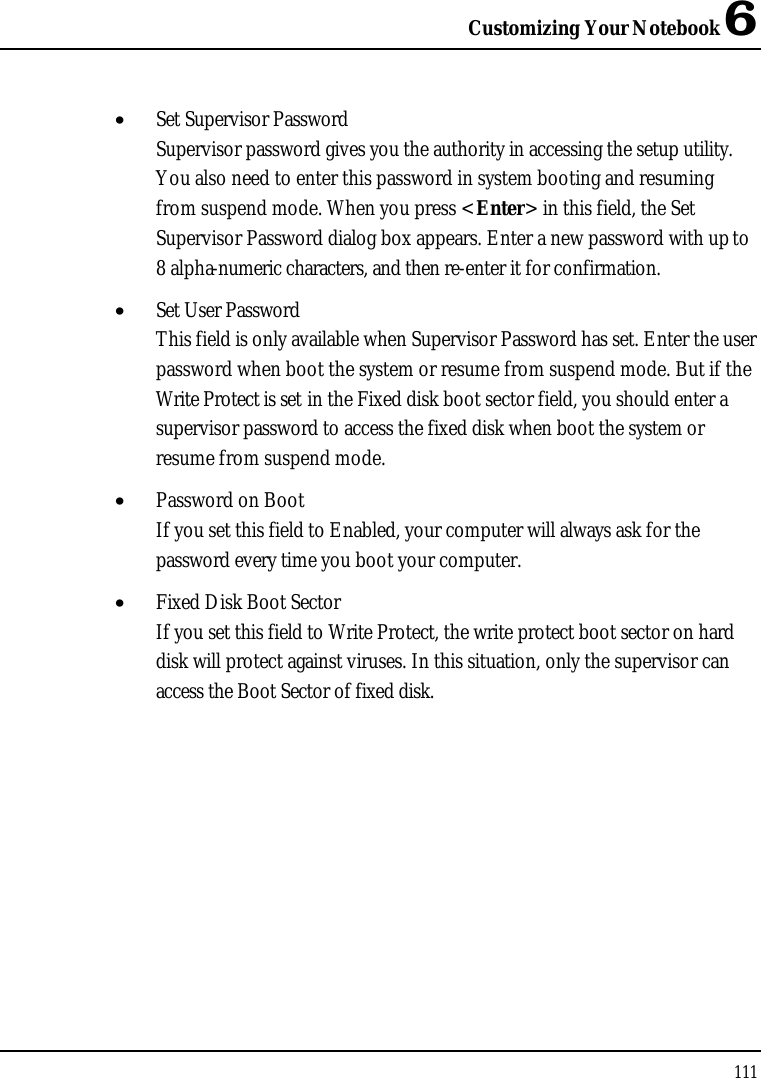
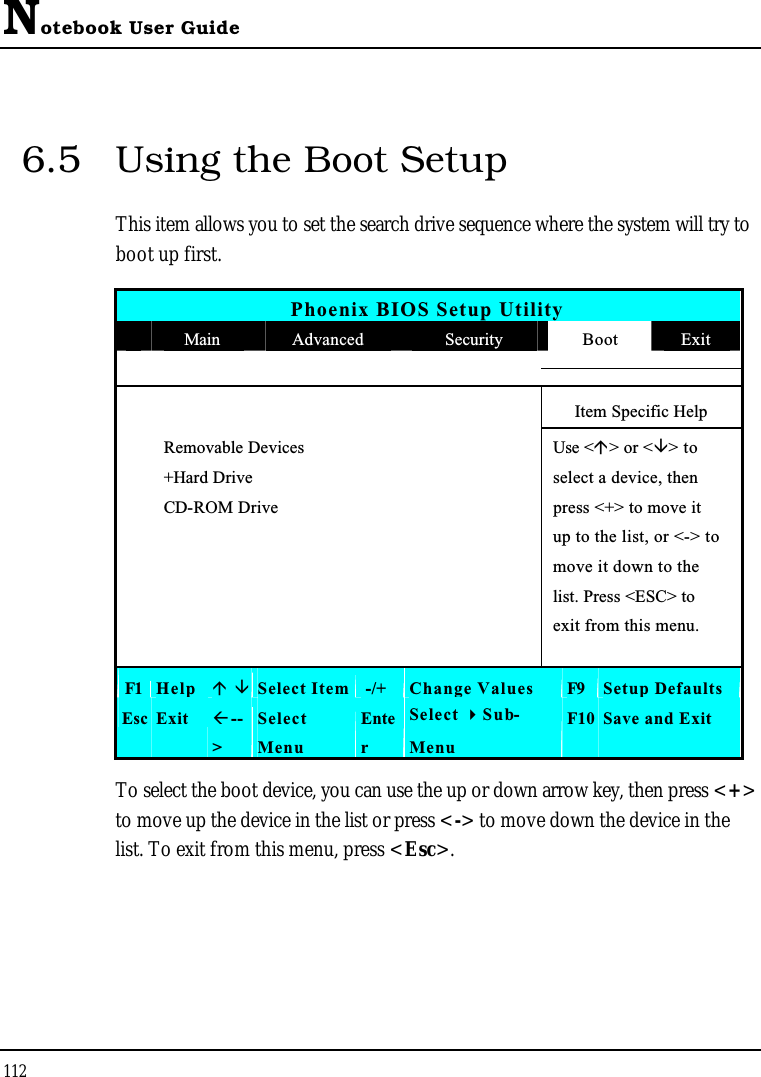
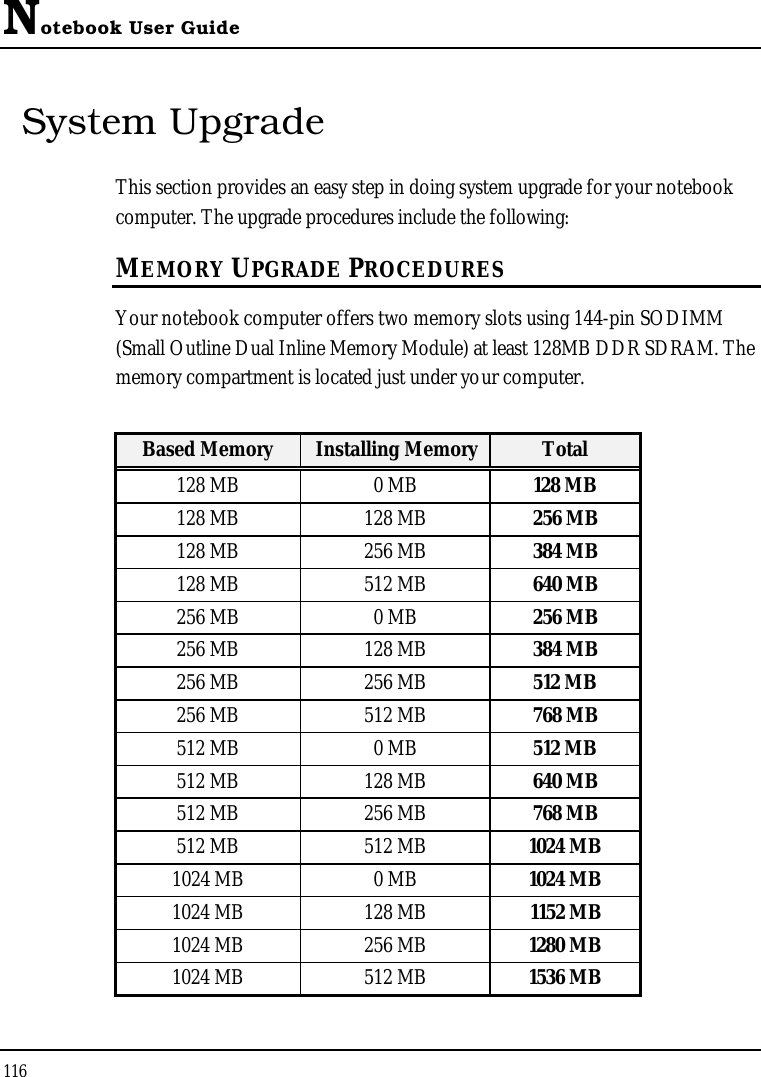
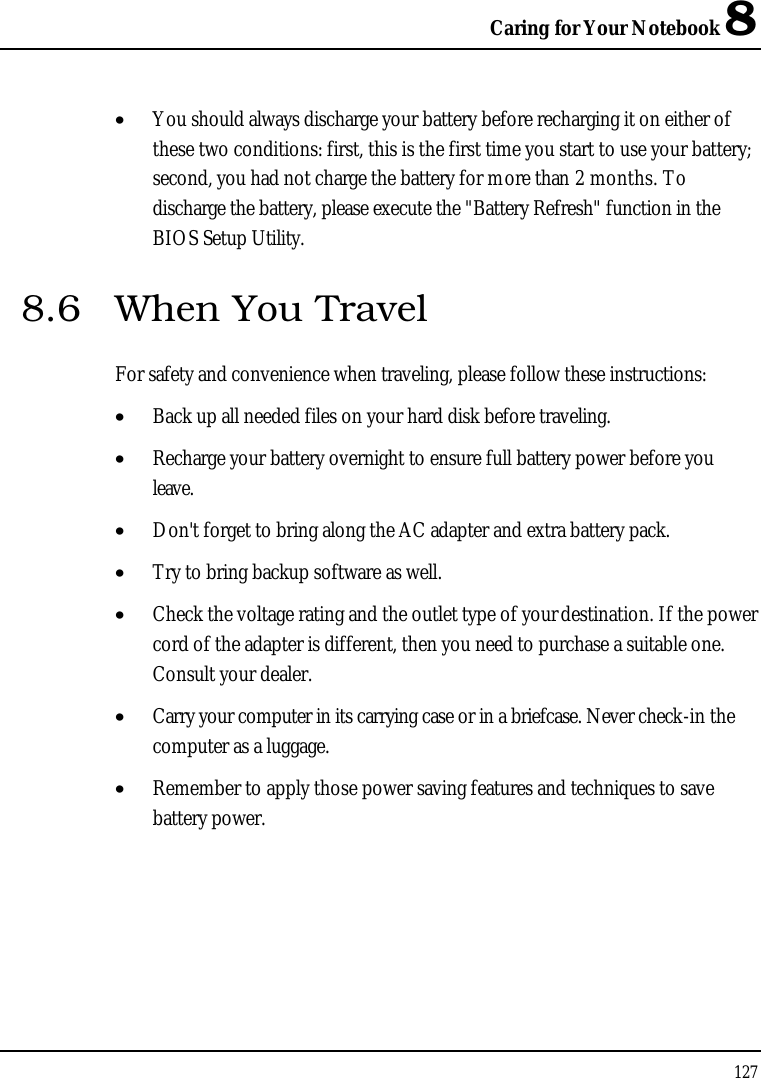
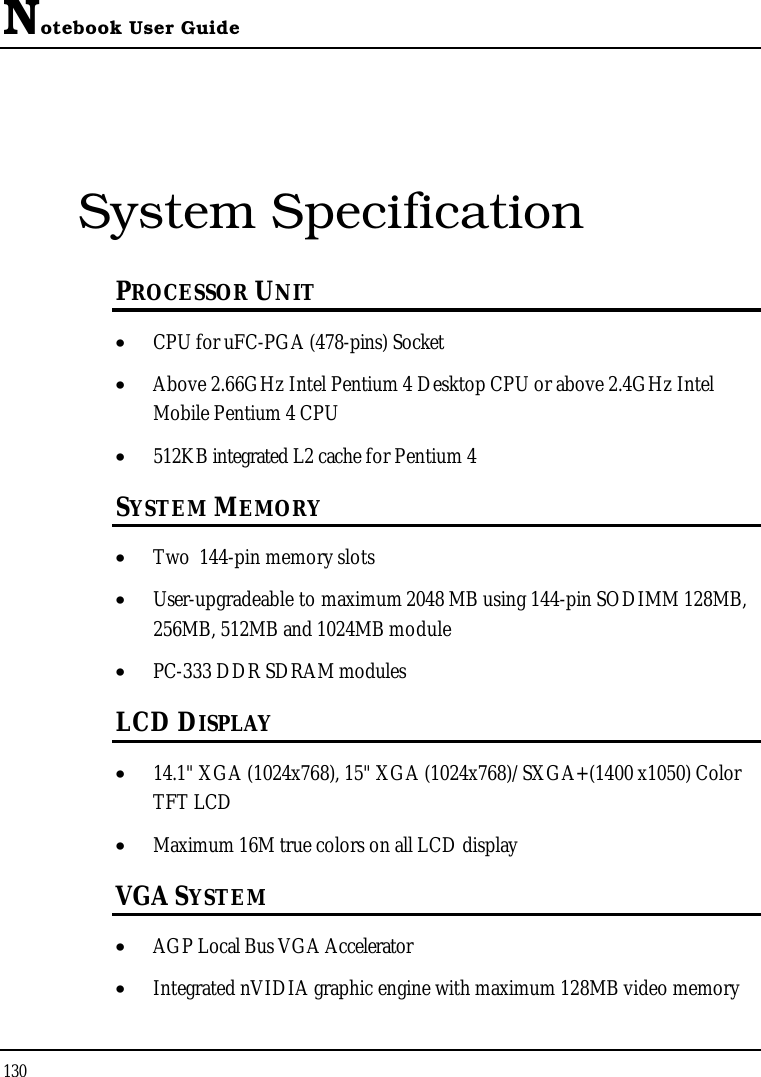
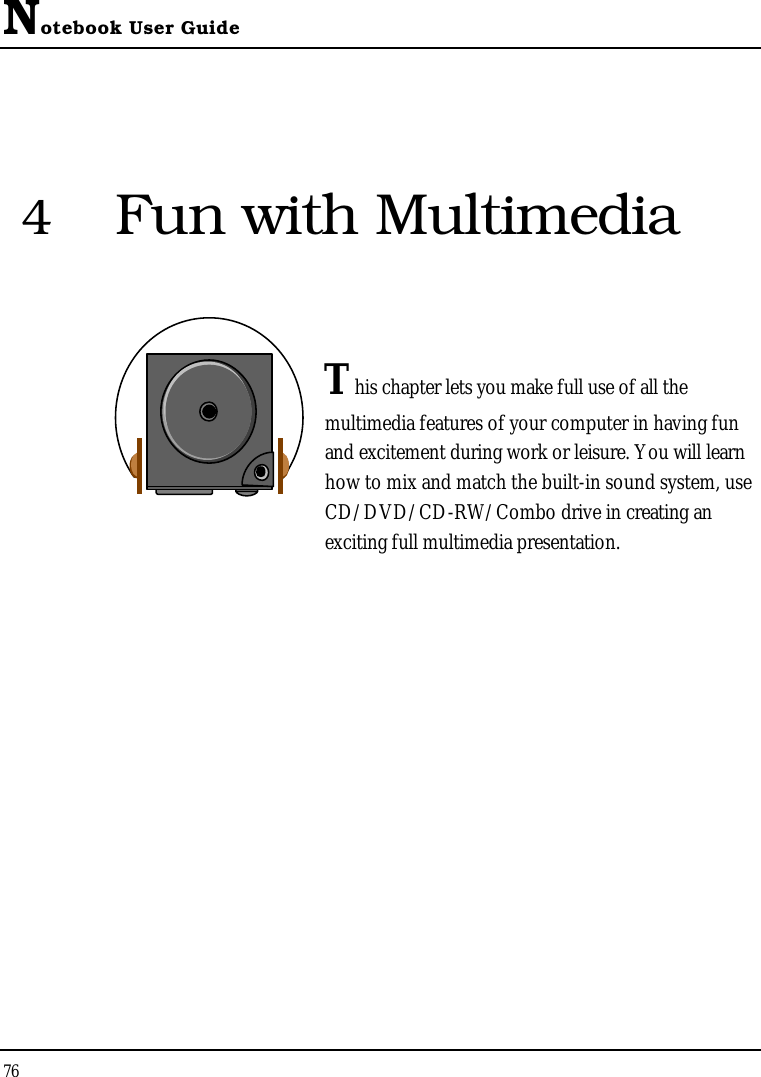
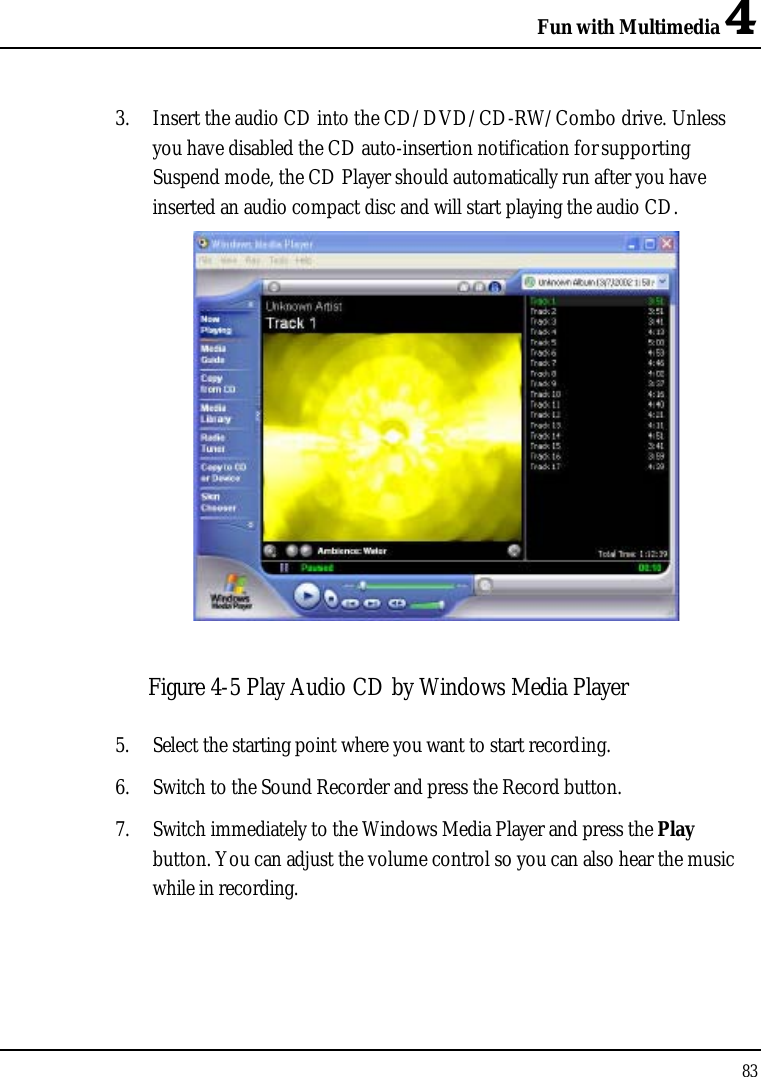
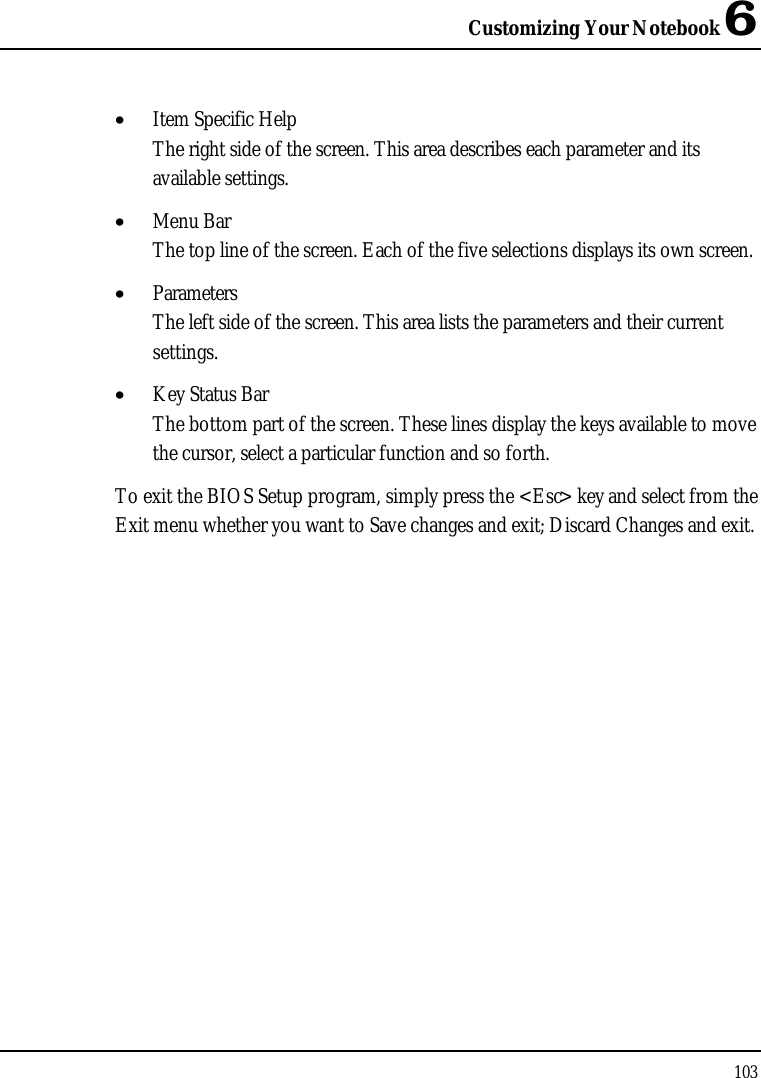
![Customizing Your Notebook 6105• System TimeAllows you to change the system time using the hour:minute:second format of the computer.Enter the current time for reach field and use the <Tab>, <Shift>+<Tab>, or <Enter> key to move from one field or back to another.You can also change the system time from your operating system.• System DateAllows you to set the system date using the month/date/year format. Enter the current time for reach field and use the <Tab>, <Shift>+<Tab>, or <Enter> key to move from one field or back to another.You can also change the system time from your operating system.• LanguageAllows you to set the display language in English or Japanese version for the BIOS Setup program. • Boot Display DeviceLets you select the display device.• Primary MasterThis field display various parameters for the hard disk drive. If type [Auto] is selected, the system automatically sets these parameters. If type [User] is selected, Cylinders, Heads and Sectors can be edited.• Secondary MasterThis field is for information only as the BIOS automatically detects the CD-ROM/DVD-ROM.• System MemoryThis field reports the amount of base (or conventional) memory found by the BIOS during Power-On Self-Test (POST).](https://usermanual.wiki/First-Computer/DN95W3BB.User-Manual-2-of-2/User-Guide-322154-Page-31.png)
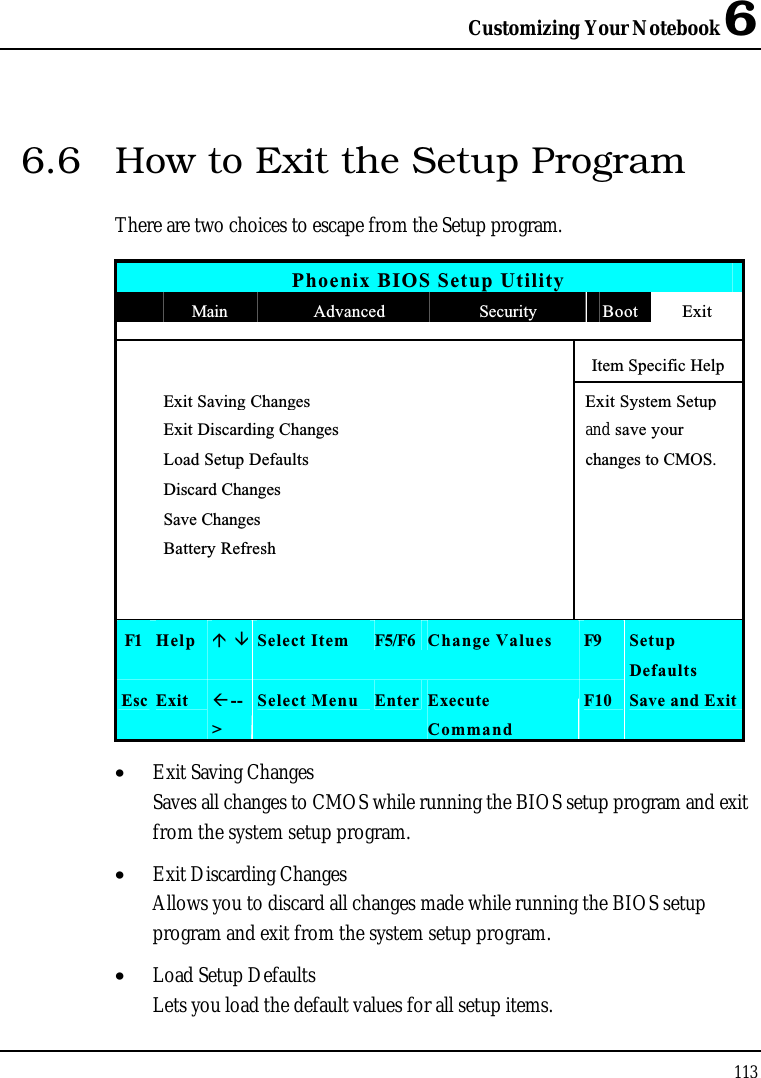
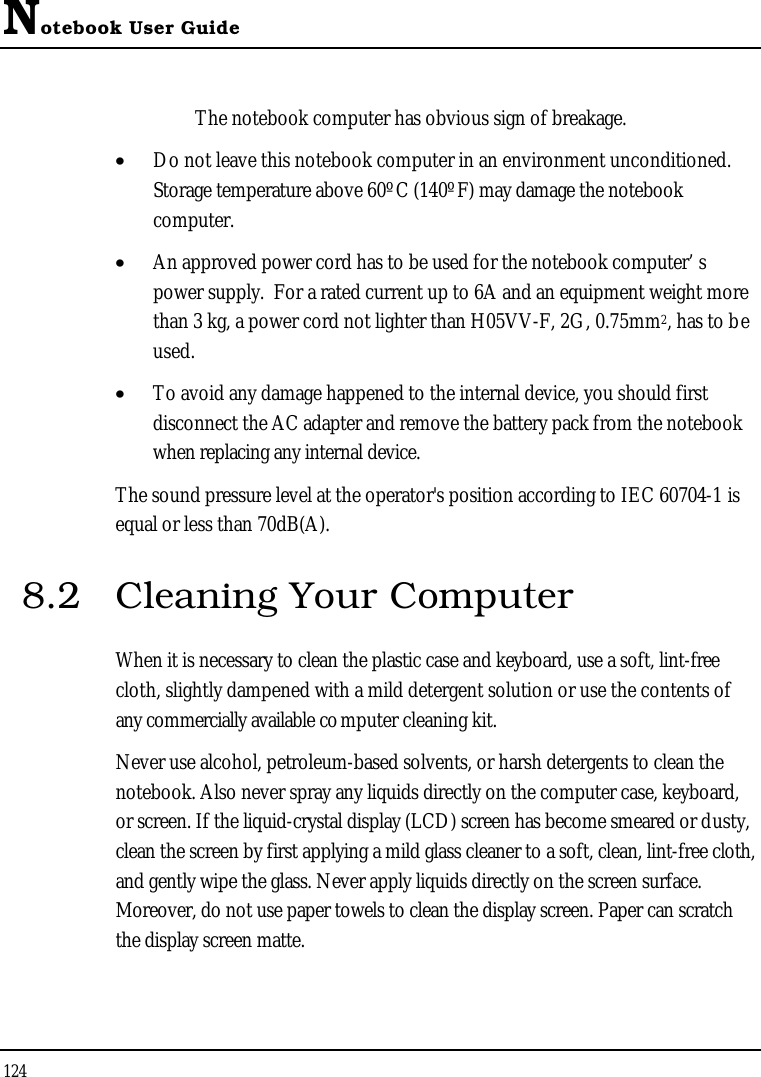
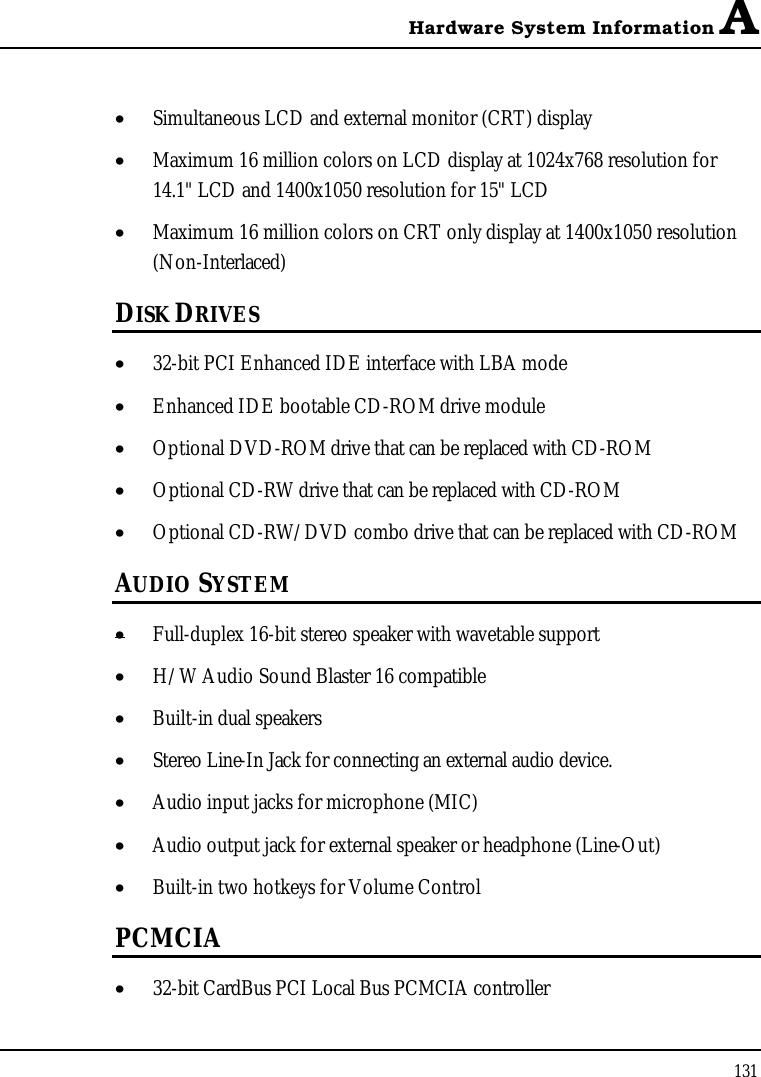
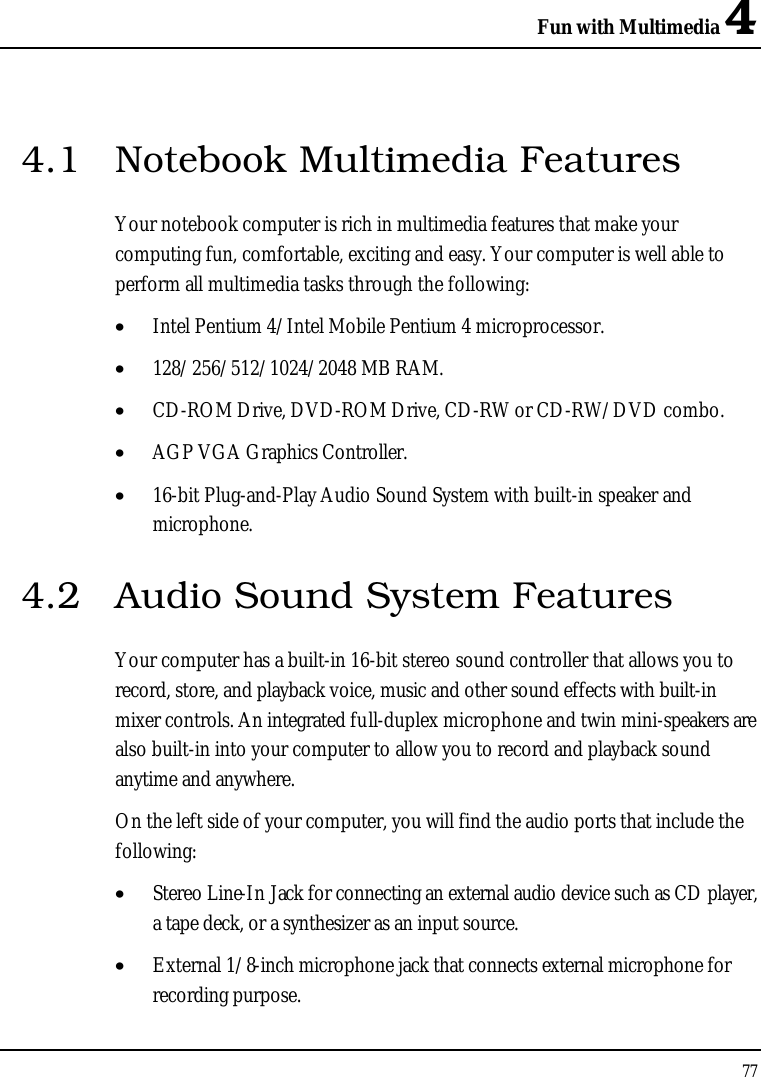
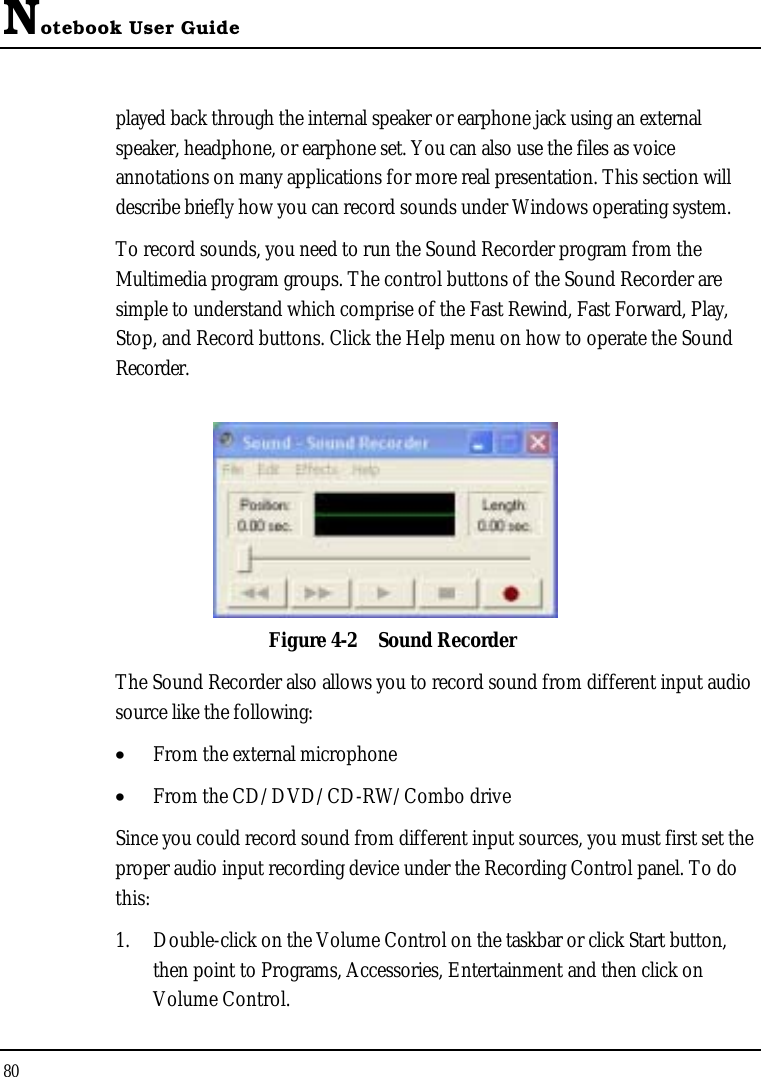
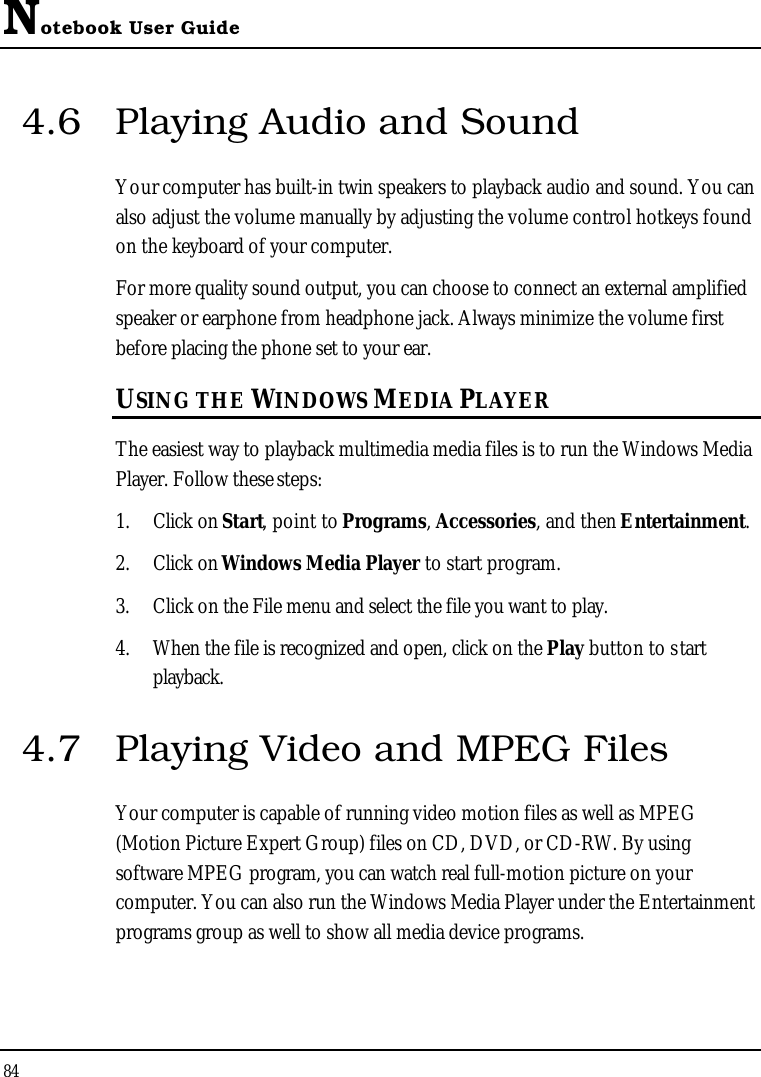
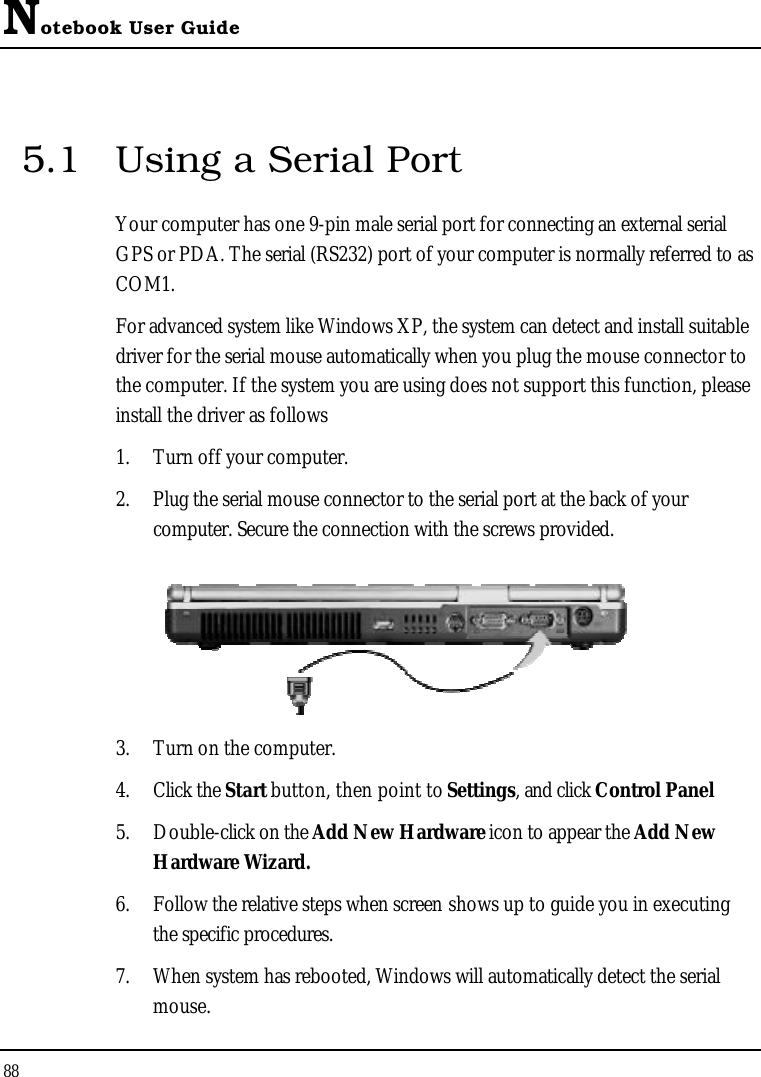
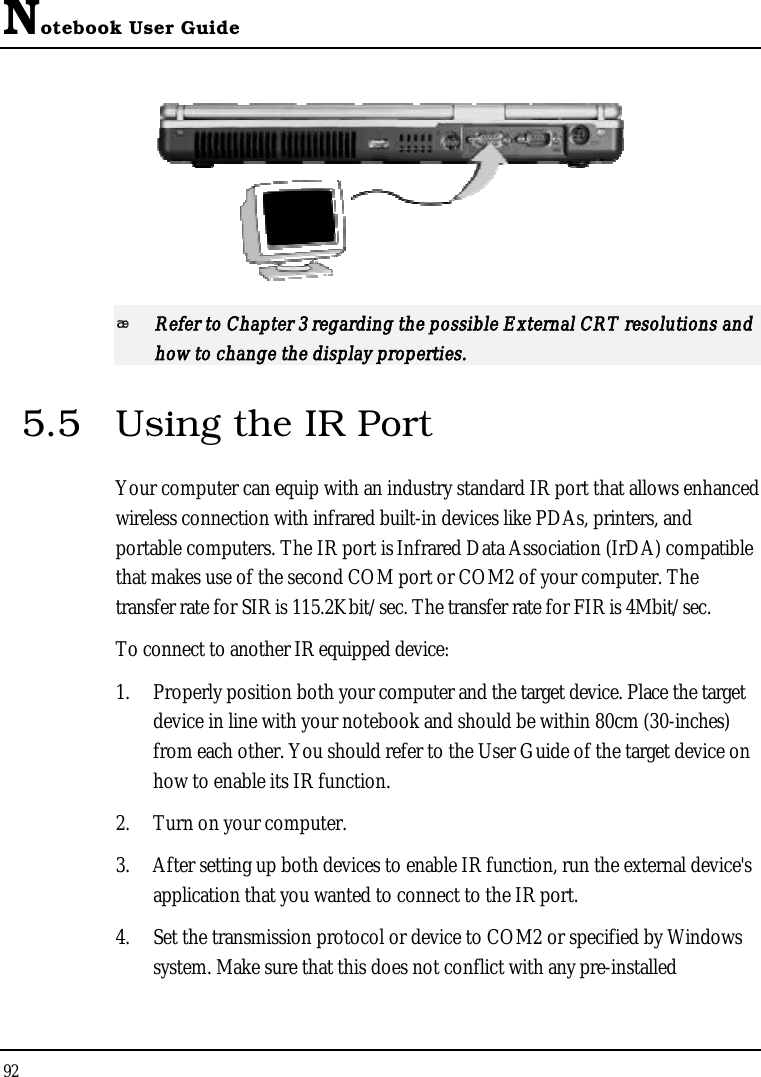
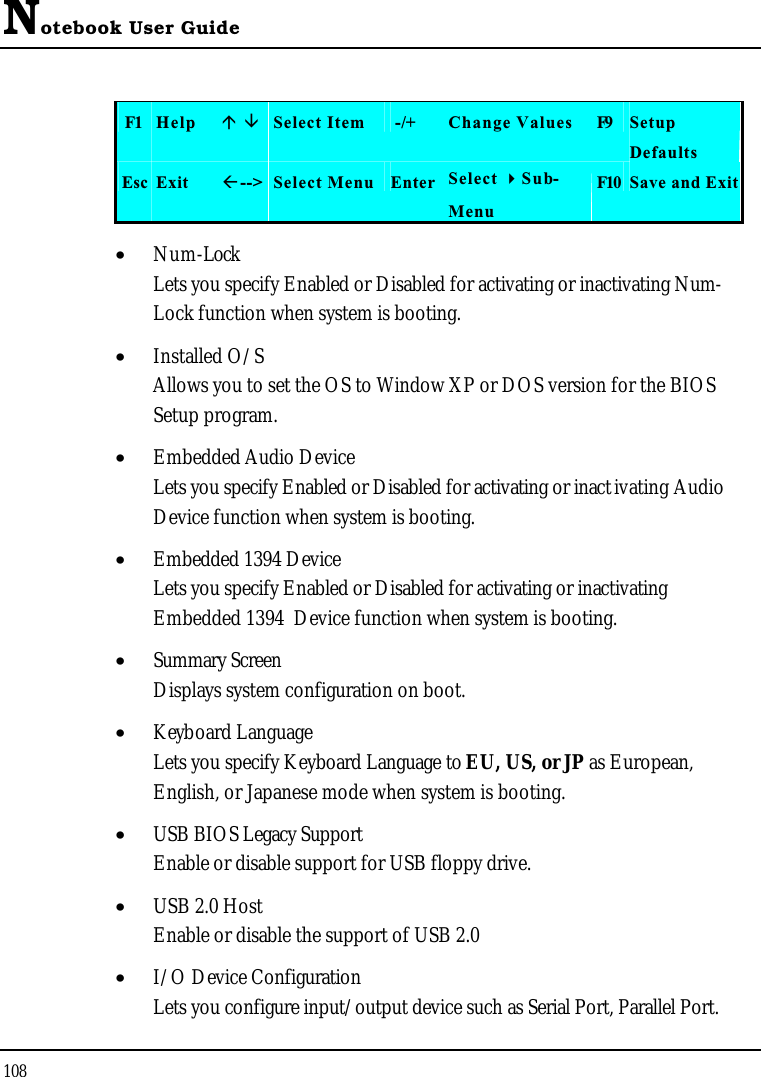
![Notebook User Guide106• Extended MemoryThis field reports the amount of extended memory found by the BIOS during Power-On Self-Test (POST).• CPU TypeThis field reports the CPU type information detected by the BIOS during Power-On Self-Test (POST).• CPU SpeedThis field reports the CPU speed information detected by the BIOS during Power-On Self-Test (POST).• BIOS VersionThis field is for information only as the BIOS displays the BIOS version during the Power-On Self-Test (POST).6.2.1 INTERNAL HDD SUB-MENUPhoenix BIOS Setup UtilityMain Advanced Security Boot ExitPrimary Master [Primary Master - (PM)] Item Specific HelpType:[Auto]User = you enter parameters of hard-diskMulti-Sector Transfers: [16 Sectors] drive installed at thisLBA Mode Control: [Enabled] connection.32 Bit I/O: [Disabled] Auto = autotypes hard-Transfer Mode: [Fast PIO 4] disk drive installed here.Ultra DMA Mode: [Mode 5] CD-ROM = a CD-ROMdrive is installed here.ATAPI Removable = Removable disk drive is](https://usermanual.wiki/First-Computer/DN95W3BB.User-Manual-2-of-2/User-Guide-322154-Page-32.png)
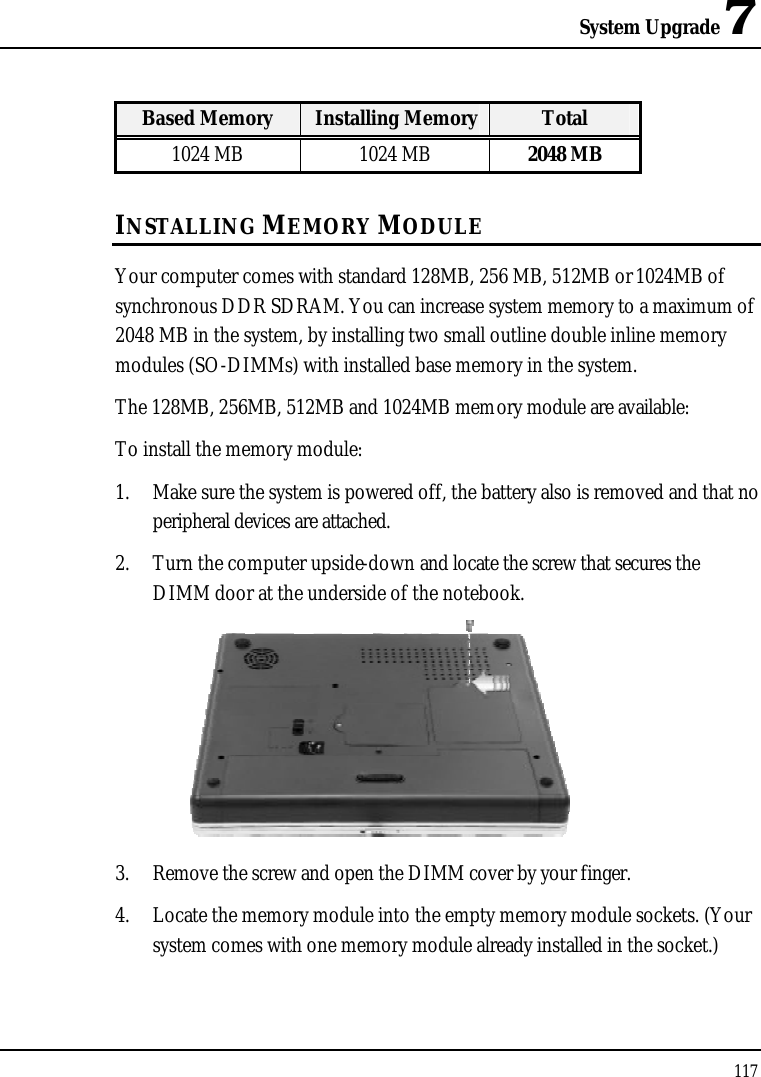
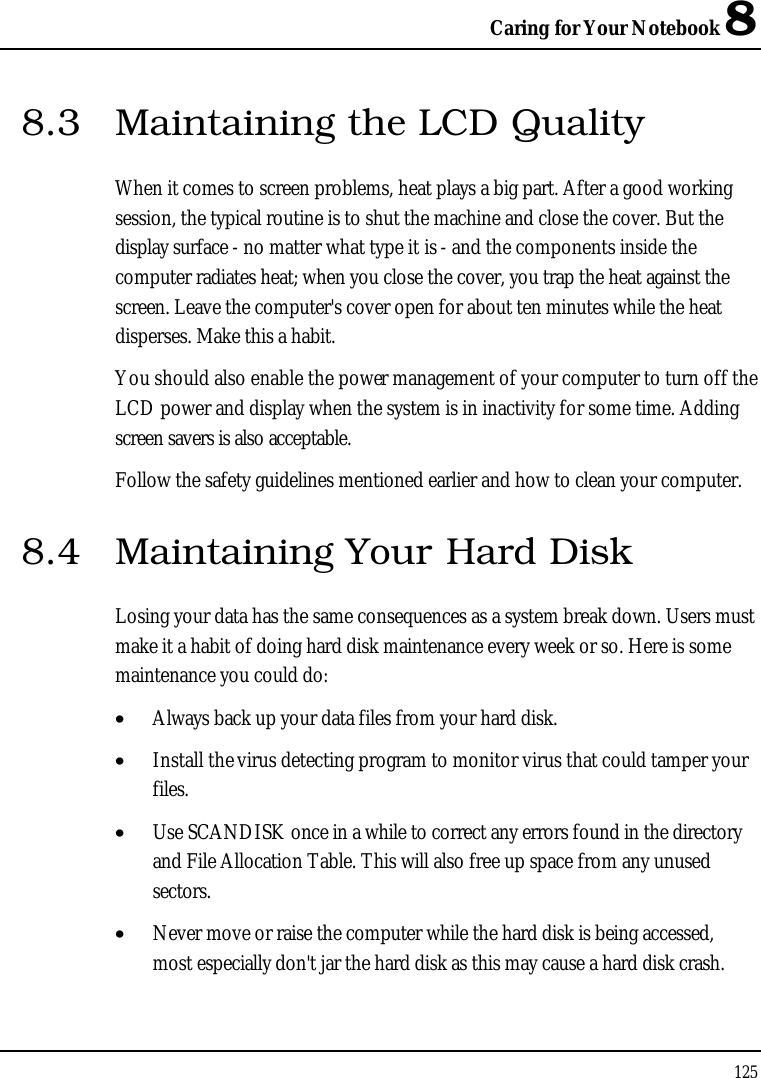
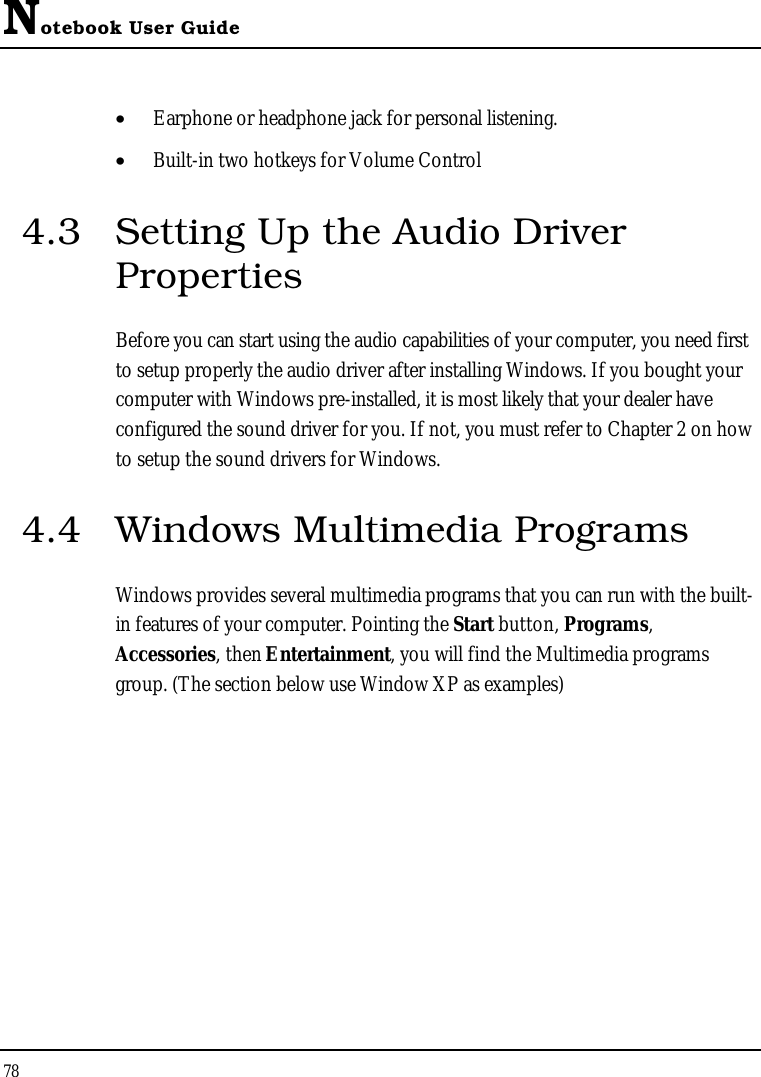
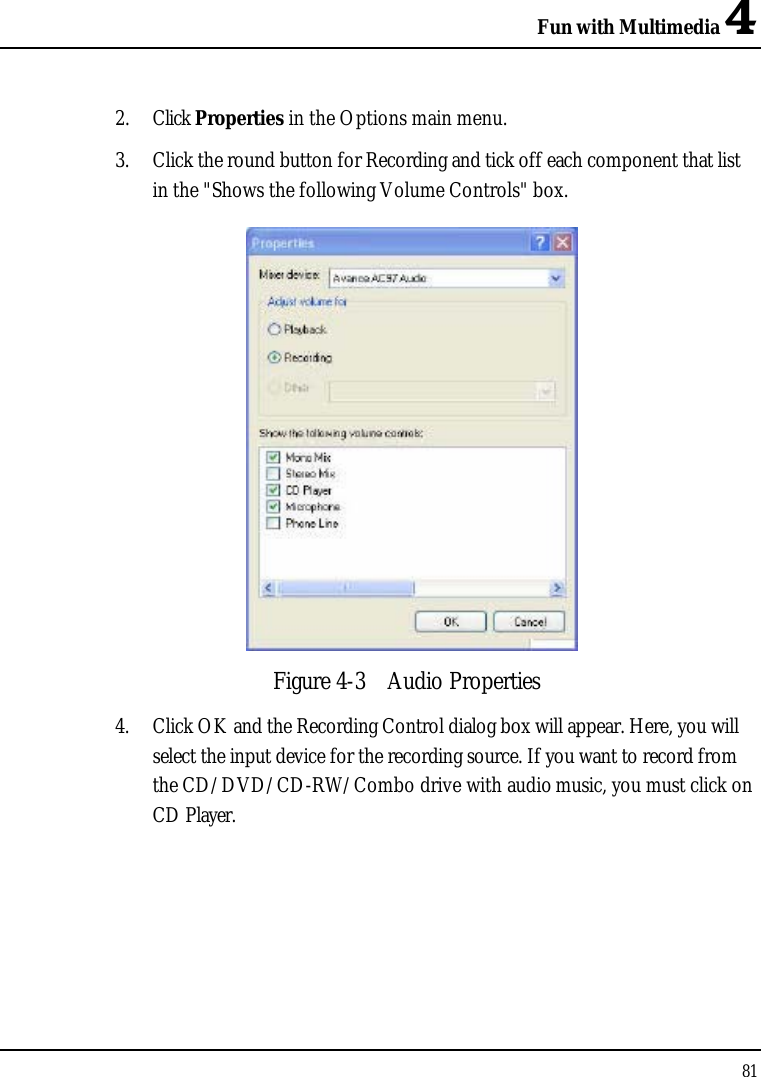
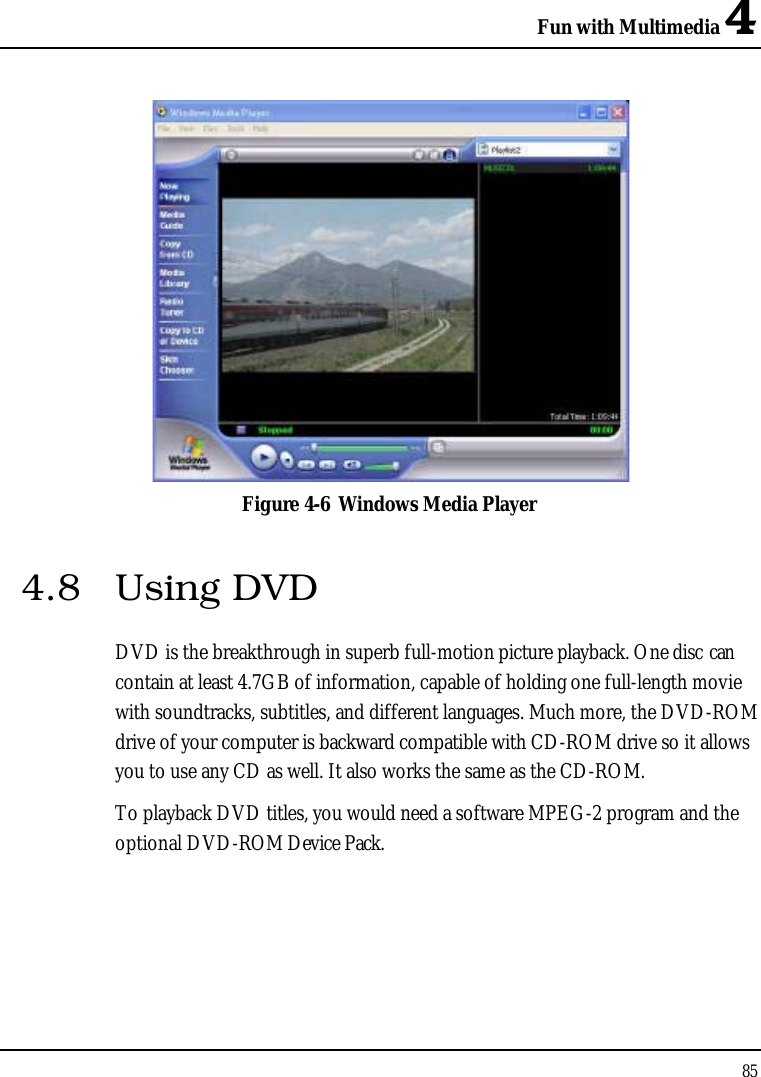
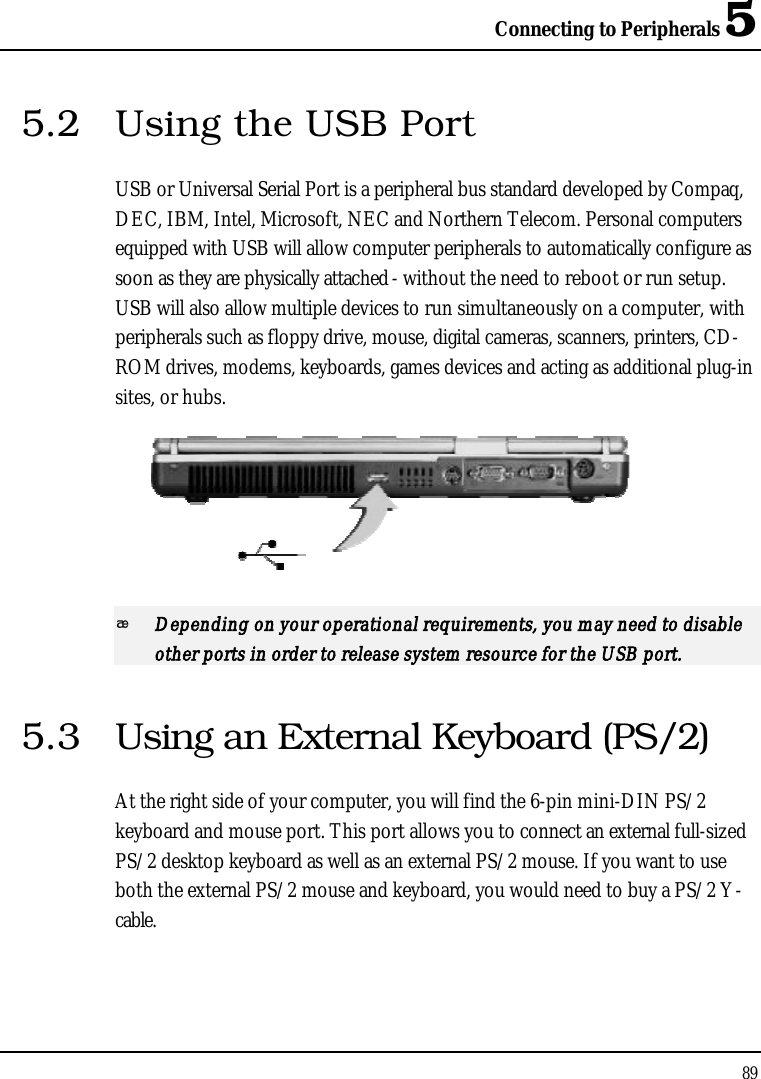
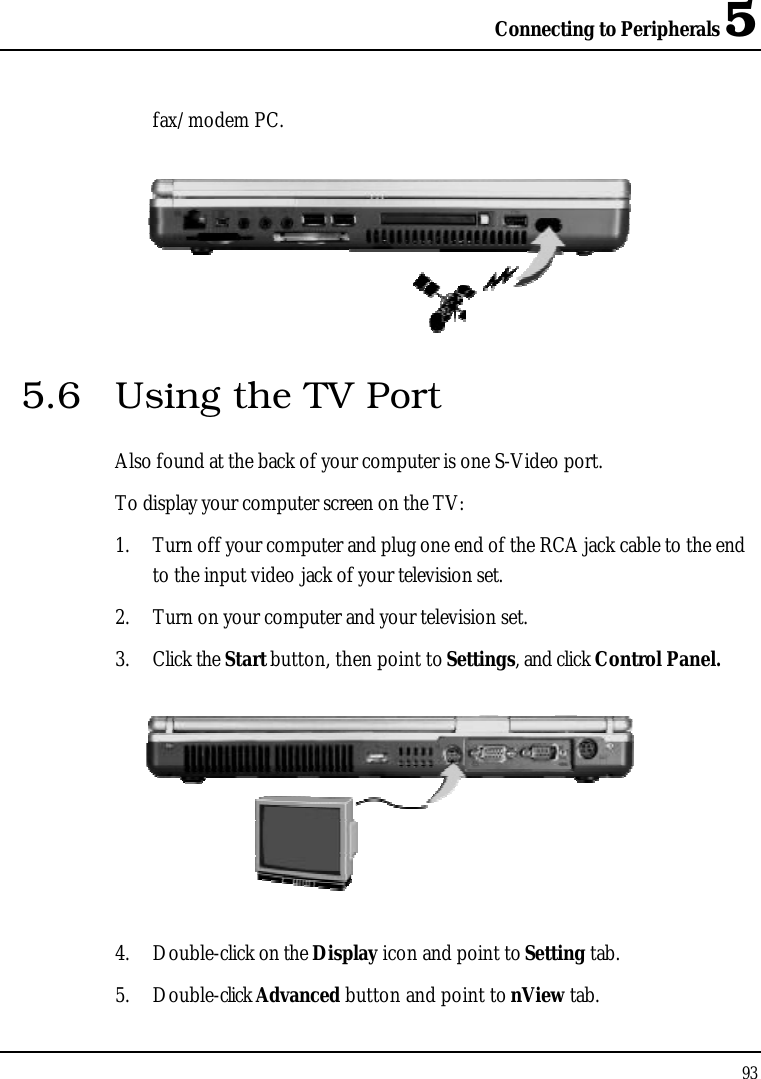
![Customizing Your Notebook 6107Installed here.F1 Help Select Item -/+ Change Values F9 SetupDefaultsEsc Exit --> Select Menu Enter Select Sub-MenuF10 Save and ExitUse the Type field to select the drive type installed. You can select different drive types as CD-ROM,User,Auto or None by pressing <Space> bar. Set this option to Auto so your computer will automatically detect the drive type during power on. Set this option to None when your computer is not installed any devices. Press <Esc> to return to the Main Menu.6.3 Using the Advanced CMOS SetupPhoenix BIOS Setup UtilityMain Advanced Security Boot ExitItem Specific HelpNumLock [Off] Selects Power-on stateFor NumLockInstalled O/S [Windows XP]Embedded Audio Device [Enable]Embedded 1394 Device [Enable]Summary Screen [Disable]Keyboard Language [EU]USB BIOS Legacy Support: [Enable] USB 2.0 Host: [Enable]4I/O Device Configuration](https://usermanual.wiki/First-Computer/DN95W3BB.User-Manual-2-of-2/User-Guide-322154-Page-33.png)
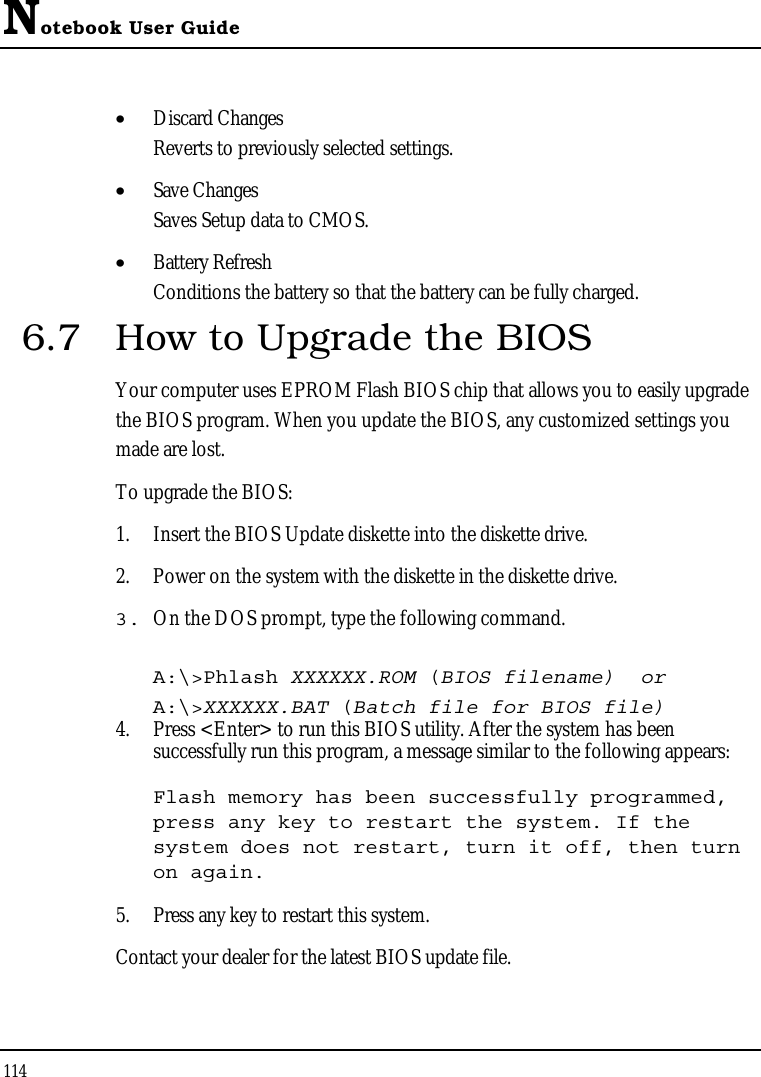
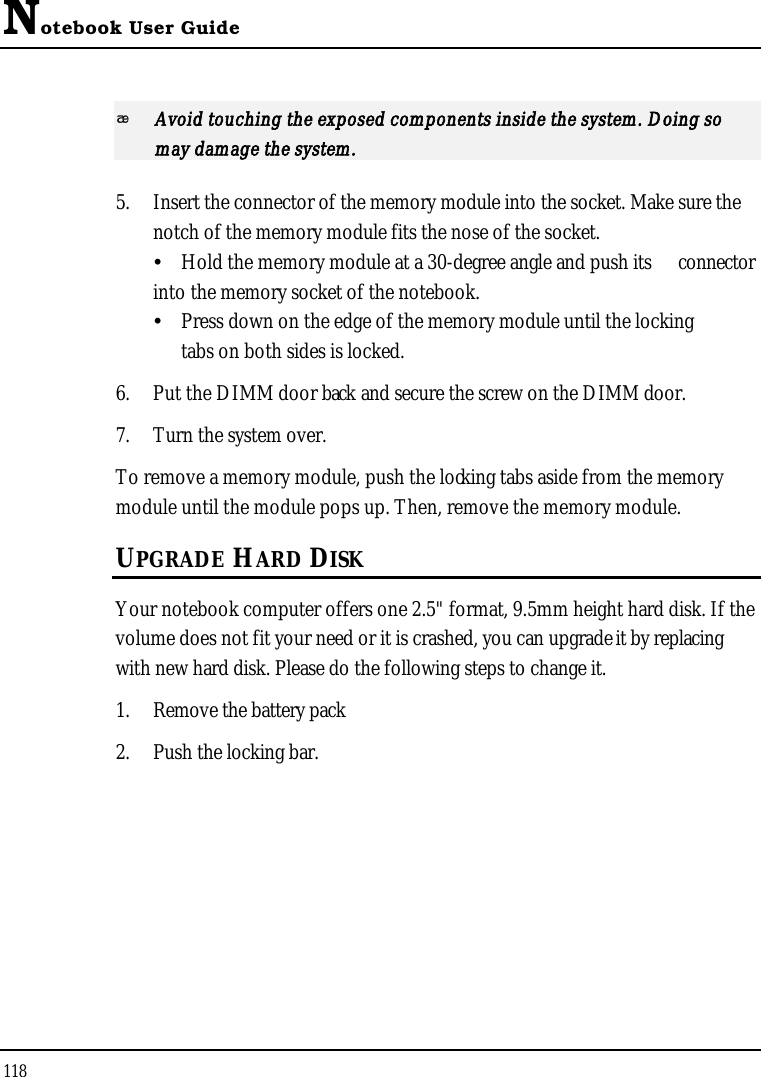
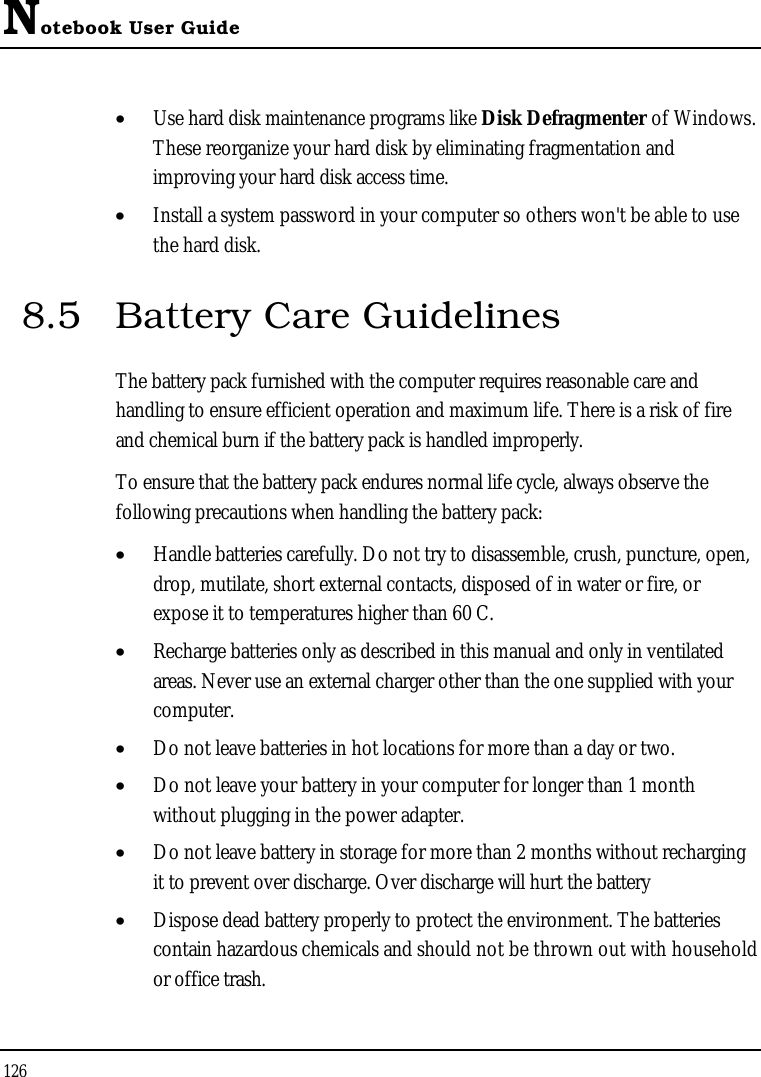
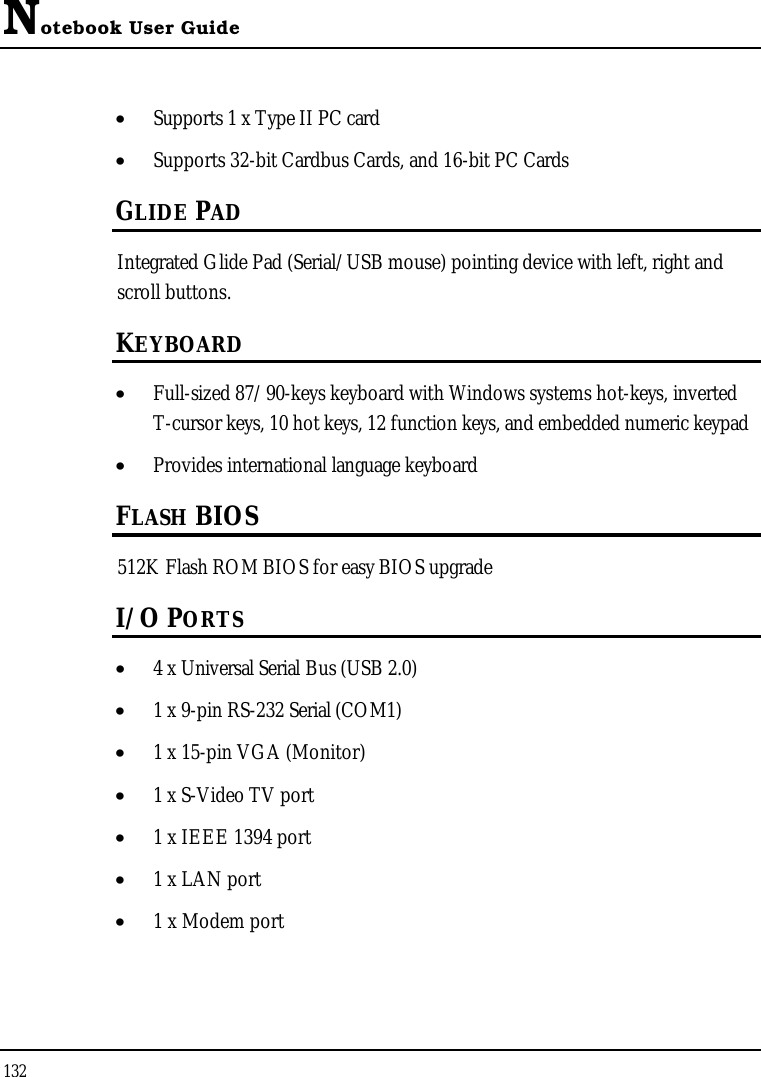
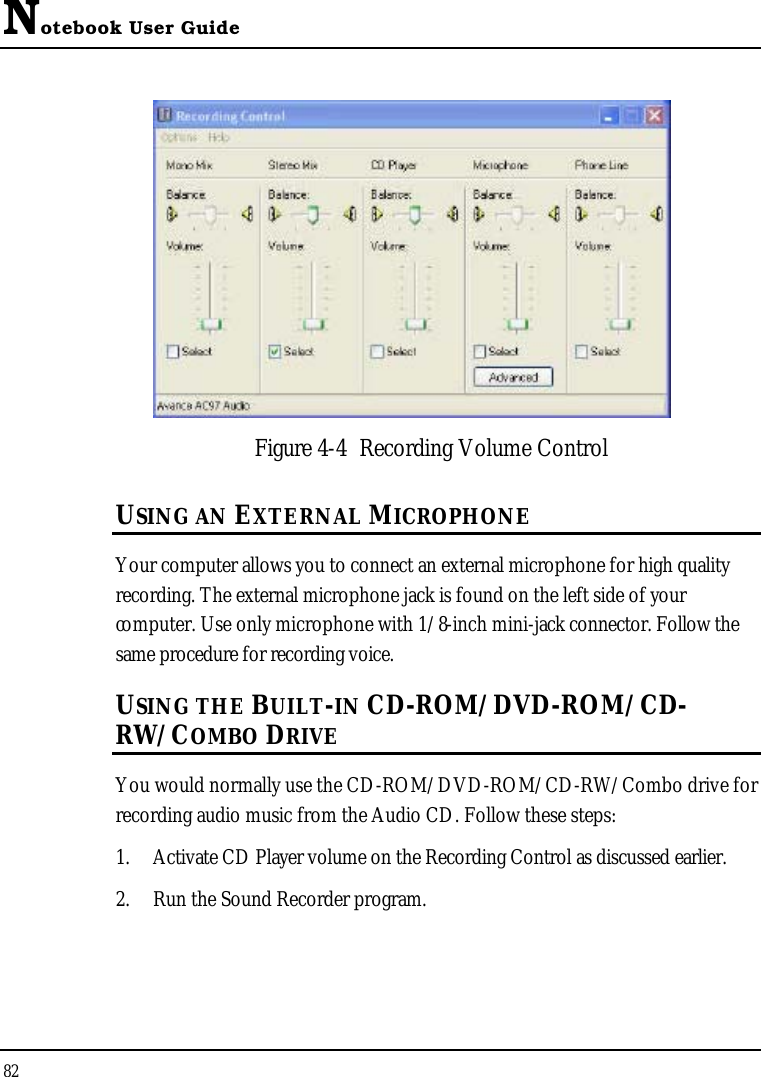
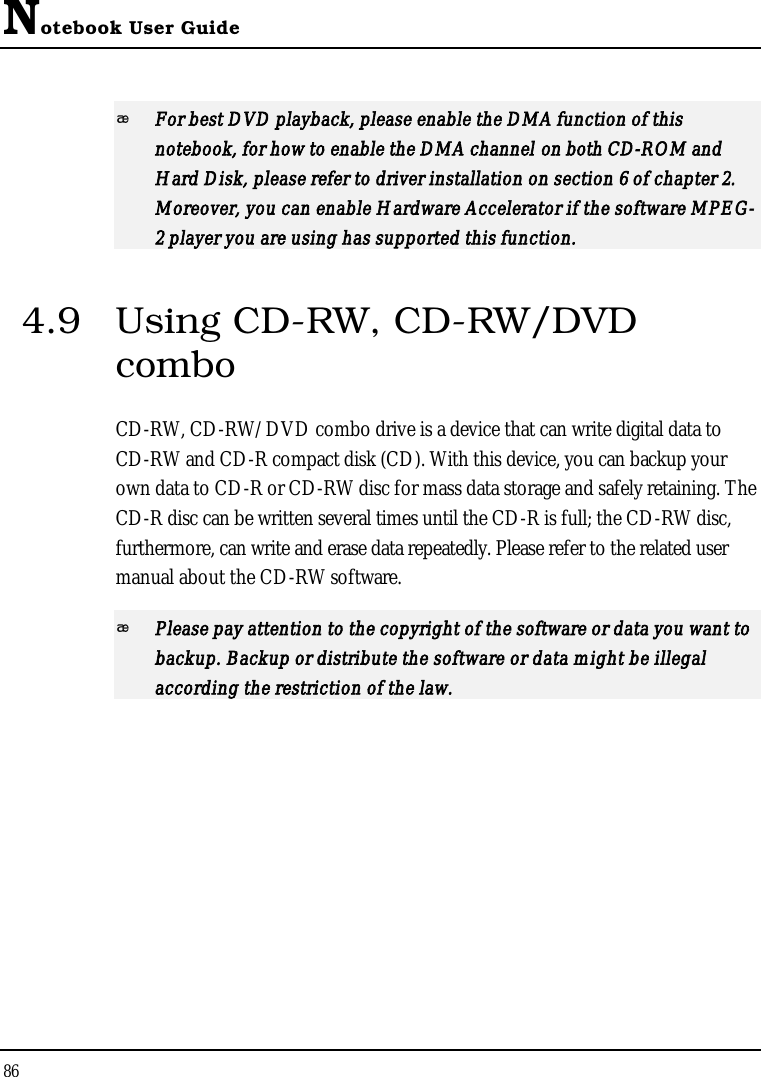
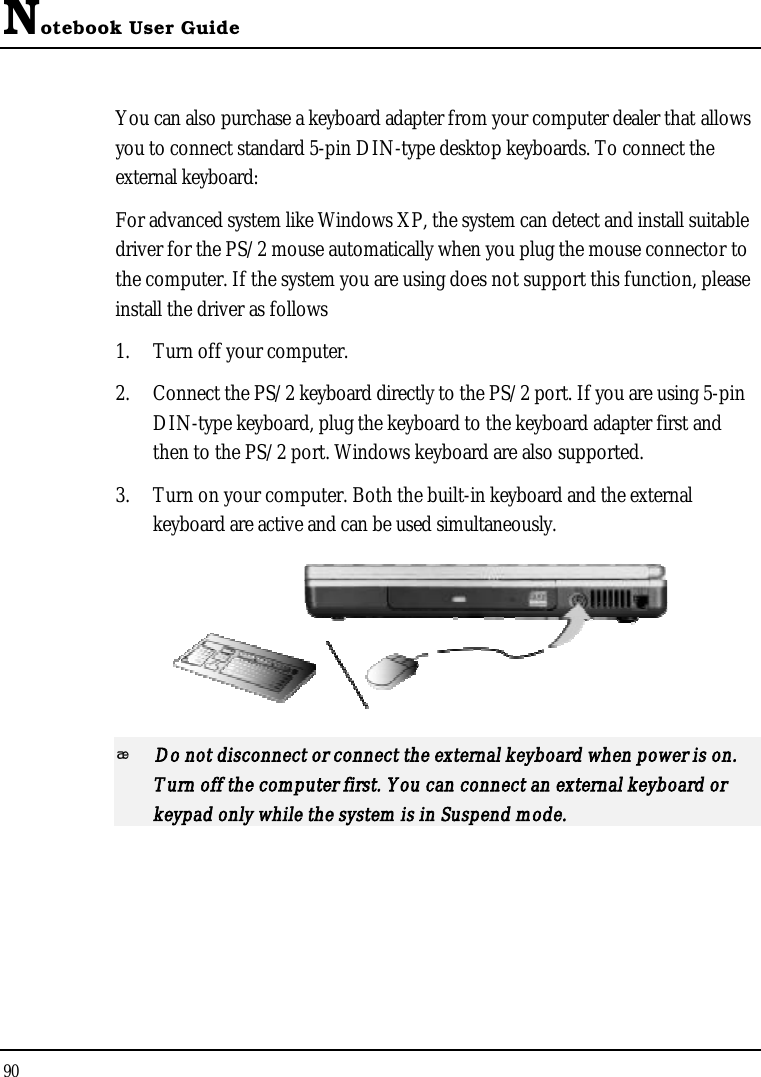
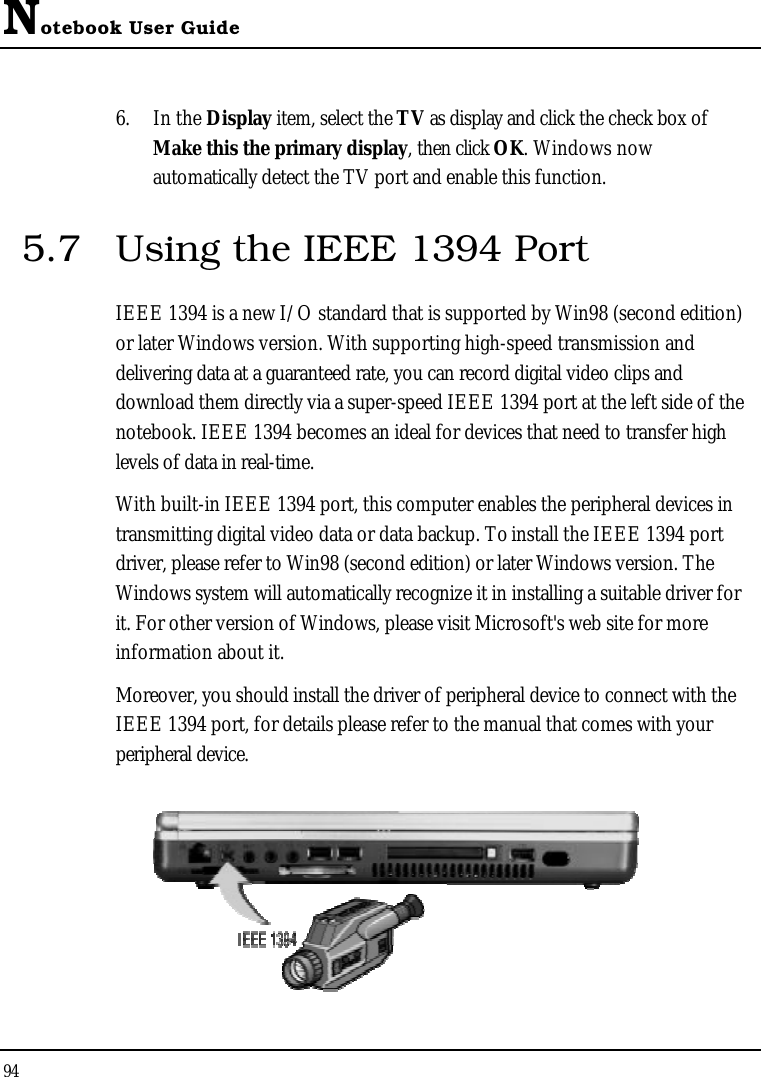
![Customizing Your Notebook 61096.3.1 PERIPHERAL SUB-MENUPhoenix BIOS Setup UtilityMain Advanced Security Boot ExitI/O Device Configuration Item Specific HelpSerial port A: [Auto] Configure serial port Serial port B: [Enabled] using options: Mode: [FIR] [Disabled]Base I/O address [2F8] No configuration,[Enabled]User configuration,[Auto]BIOS or OS chooses configuration,F1 Help Select Item -/+ Change Values F9 SetupDefaultsEsc Exit --> Select Menu Enter Select Sub-MenuF10 Save and Exit• Serial port AYou can select the Enabled, Disabled, or Auto option for enabled or disabled the port, or automatically sensed by BIOS or OS.• Serial port BYou can select the Enabled, Disabled, or Auto option for enabled or disabled the port, or automatically sensed by BIOS or OS. If you select Enable, you also need to set the IR mode, Base I/O for the IR device.](https://usermanual.wiki/First-Computer/DN95W3BB.User-Manual-2-of-2/User-Guide-322154-Page-35.png)
![Notebook User Guide1106.4 Security Menu SetupPhoenix BIOS Setup UtilityMain Advanced Security Boot ExitItem Specific HelpSupervisor Password IsClearSupervisor PasswordUser Password Is Clear controls access to theSet Supervisor Password [Enter] setup utility.Set User Password [Enter]Password on boot [Disabled]Fixed disk boot sector [Normal]F1 Help Select Item -/+ Change Values F9 SetupDefaultsEsc Exit --> SelectMenuEnter Select Sub-MenuF10 Save and Exit• Supervisor Password IsSet/Clear selections show that the notebook is under controlled by Supervisor Password or not.• User Password IsSet/Clear selections show that the notebook is under controlled by User Password or not.](https://usermanual.wiki/First-Computer/DN95W3BB.User-Manual-2-of-2/User-Guide-322154-Page-36.png)