Faurecia Clarion Electronics QY5014 2DIN DVD AUDIO-VISUAL-NAVI UNIT User Manual Installation Manual
Clarion Co Ltd 2DIN DVD AUDIO-VISUAL-NAVI UNIT Installation Manual
Contents
- 1. BT Manual
- 2. Installation Manual
- 3. Navigation Manual
- 4. Quick Start Guide
Installation Manual
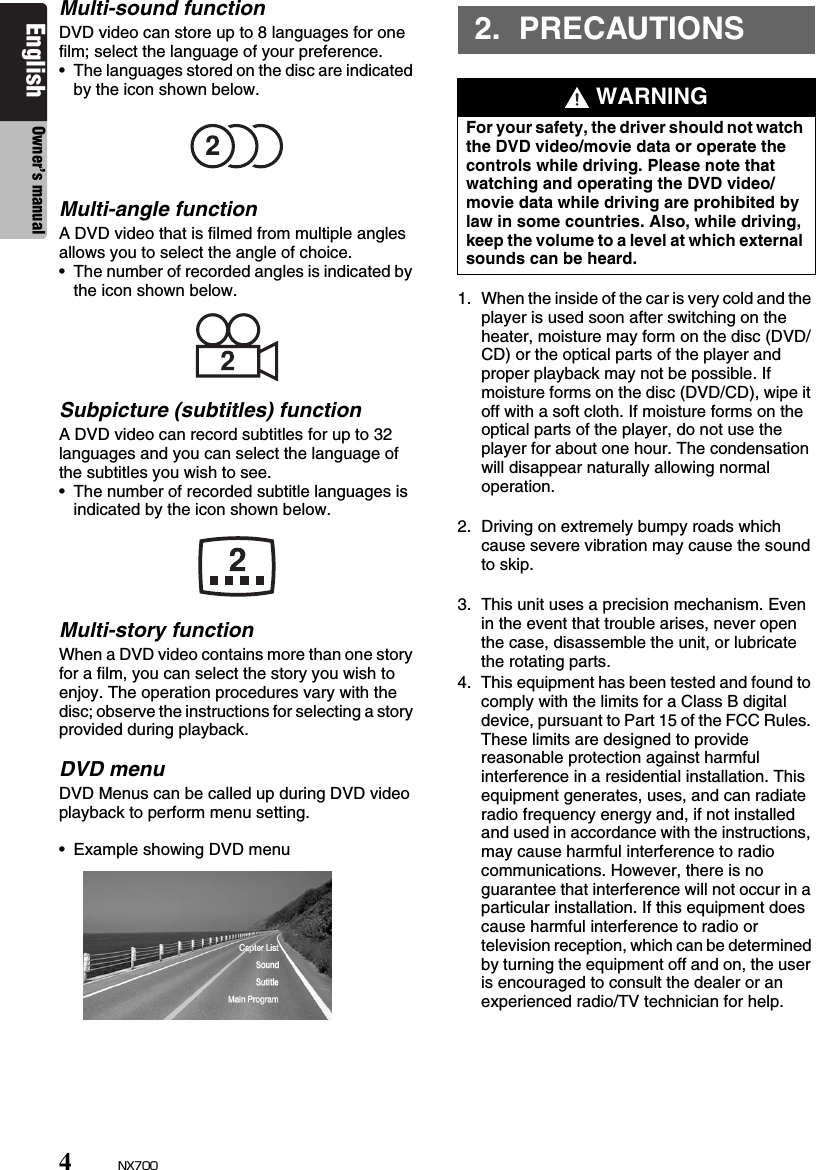
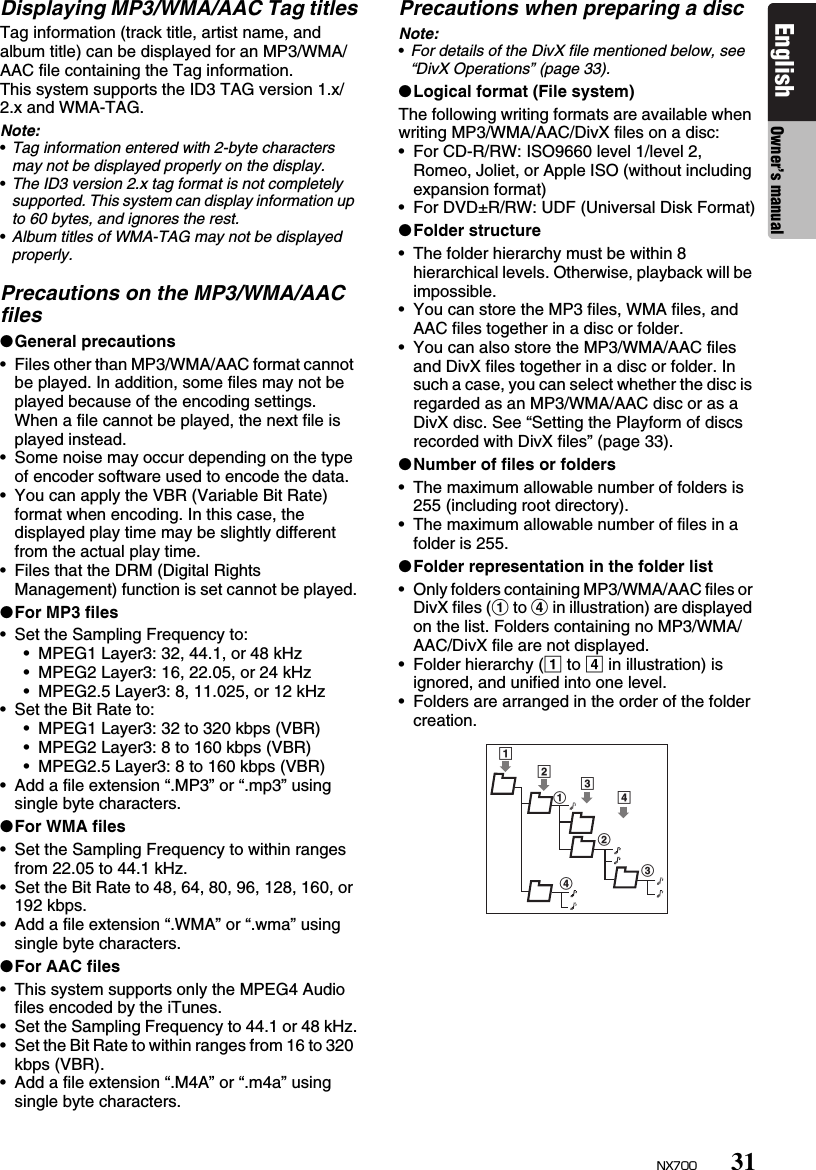
![6NX700English Owner’s manualAbout the Registered Marks, etc.• This product incorporates copyright protection technology that is protected by U.S. patents and other intellectual property rights. Use of this copyright protection technology must be authorized by Macrovision, and is intended for home and other limited viewing uses only unless otherwise authorized by Macrovision. Reverse engineering or disassembly is prohibited.• Manufactured under license from Dolby Laboratories.“Dolby” and the double-D symbol are trademarks of Dolby Laboratories.• “DivX”, “DivX Certified”, and associated logos are trademarks of DivX, Inc., and are used under license.• ©2009 SIRIUS XM Radio Inc., SIRIUS, XM and all related marks and logos are trademarks of SIRIUS XM Radio Inc. and its subsidiaries.All other marks, channel names and logos are the property of their respective owners.• The Bluetooth word mark and logos are owned by the Bluetooth SIG, Inc. and any use of such marks by Clarion Co., Ltd. is under license. Other trademarks and trade names are those of their respective owners.• “Made for iPod” means that an electronic accessory has been designed to connect specifically to iPod and has been certified by the developer to meet Apple performance standards.“Works with iPhone” means that an electronic accessory has been designed to connect specifically to iPhone and has been certified by the developer to meet Apple performance standards.Apple is not responsible for the operation of this device or its compliance with safety and regulatory standards.iPod is a trademark of Apple Inc., registered in the U.S. and other countries.iPhone is a trademark of Apple Inc.• BBE MP (Minimized Polynomial Non-Linear Saturation) Process improves digitally compressed sound, such as MP3, by restoring and enhancing the harmonics lost through compression. BBE MP works by regenerating harmonics from the source material, effectively recovering warmth, details and nuance.• Manufactured under license from BBE Sound, Inc.• Licensed by BBE Sound, Inc. under one or more of the following US patents: 5510752, 5736897. BBE and BBE symbol are registered trademarks of BBE Sound, Inc.●Operation Panel●With the operation panel openFunctions of ButtonsNote:•Be sure to read this section while referring to the front diagram.Sensor• Receiver for the remote control unit (operating range: 30° in all directions).[VOL –], [VOL +] buttons• Use these buttons to increase/decrease the volume.3. CONTROLSNX700[VOL –][VOL +][SRC]Sensor Blink LED/Reset buttonSD memory card slot](https://usermanual.wiki/Faurecia-Clarion-Electronics/QY5014.Installation-Manual/User-Guide-1211545-Page-8.png)
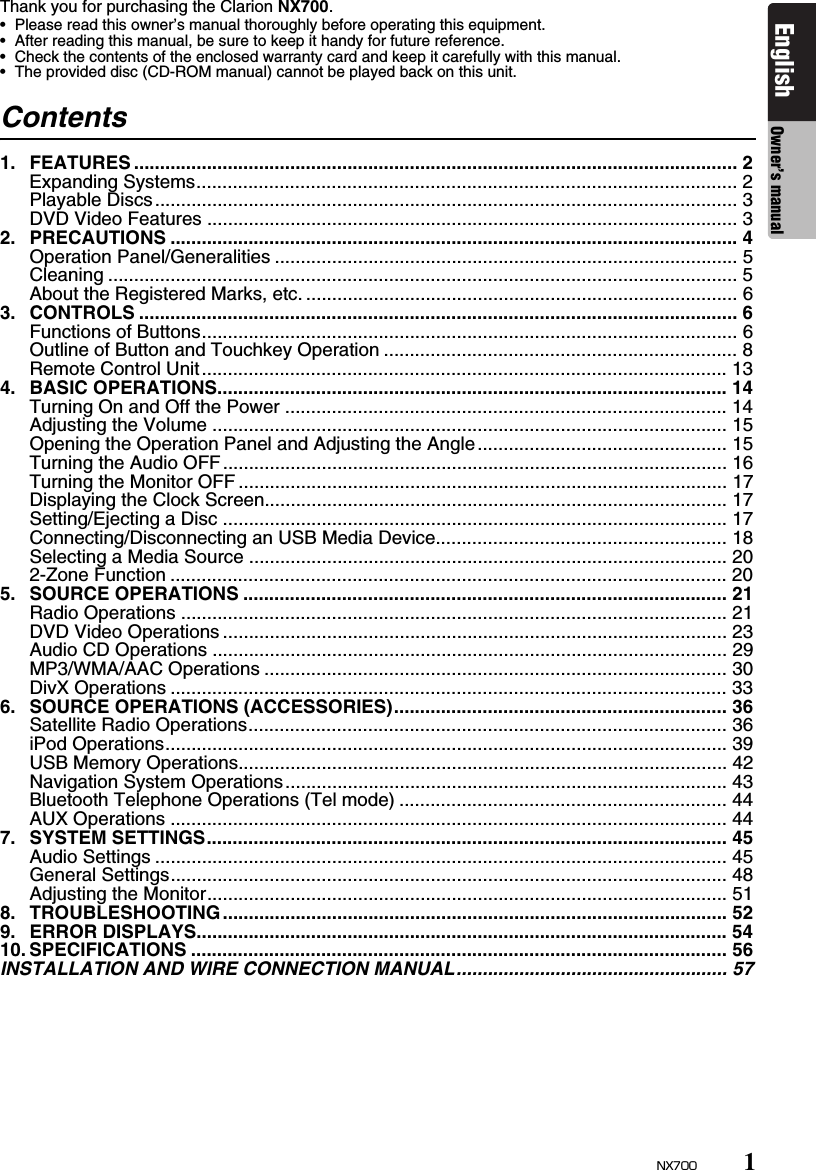
![7NX700English Owner’s manual[SRC] button• Press this button to display/hide the Source screen to switch the source mode.Blink LED• When the Blink LED function is set to “On” from the System tab menu on the General screen, blinks when the ACC power is turned off.SD memory card slot• SD memory card function is available in the Navi mode. For more information about the SD memory card function, see your User Manual (for the Navi mode).Note:•When you insert the SD memory card stored music files, they cannot be read in this unit.](https://usermanual.wiki/Faurecia-Clarion-Electronics/QY5014.Installation-Manual/User-Guide-1211545-Page-9.png)
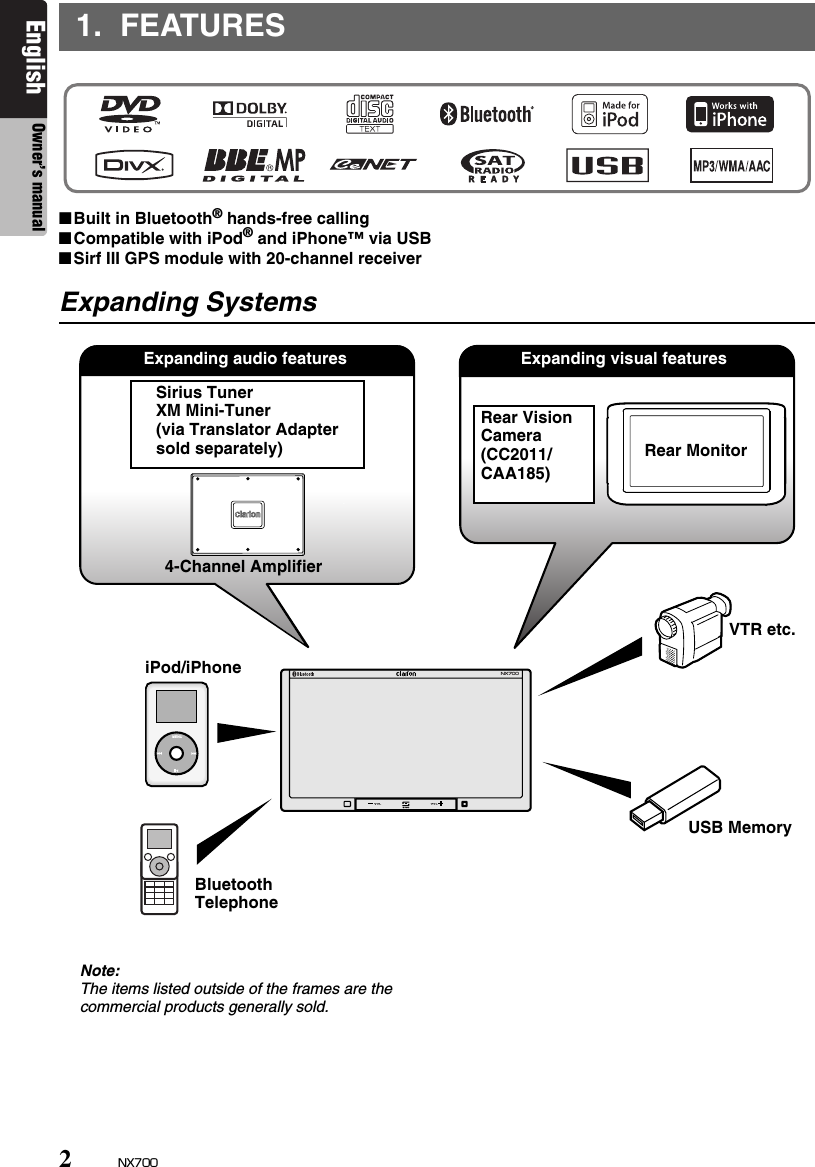
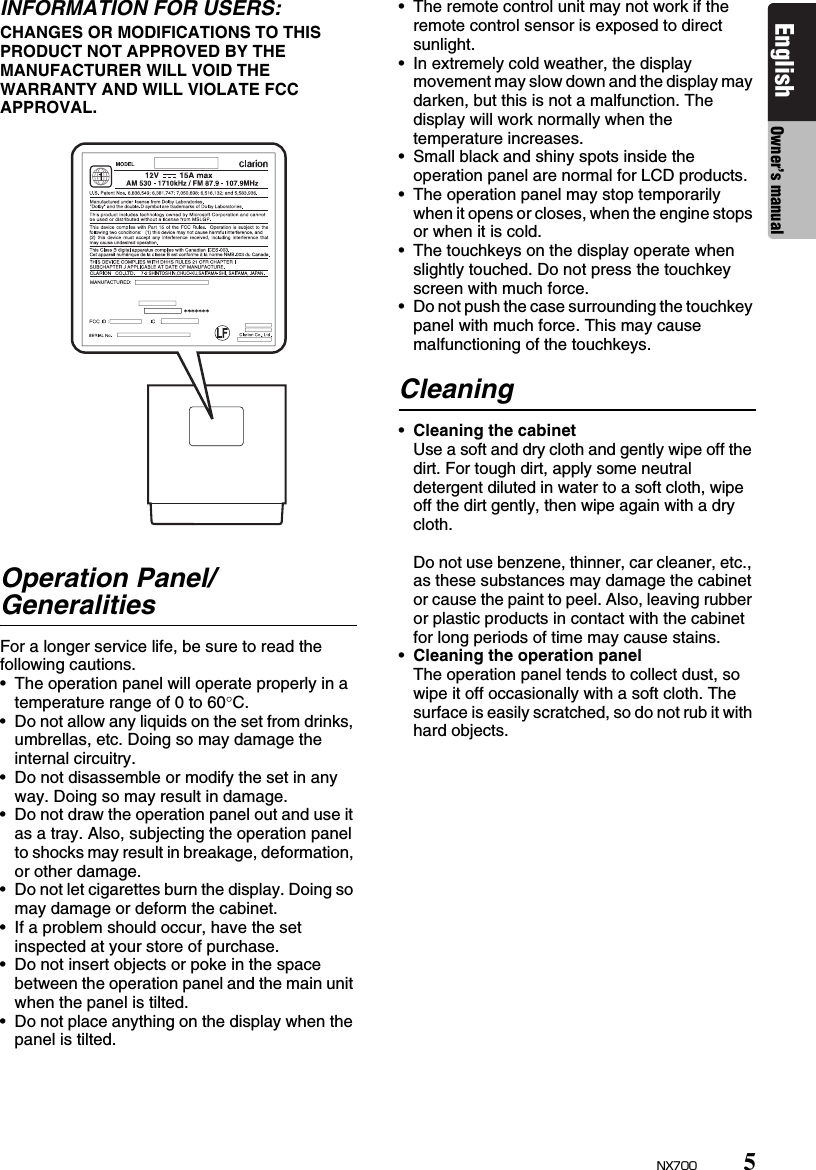
![13NX700English Owner’s manualRemote Control Unit❏Names of buttons❏Inserting the Battery1. Slide the rear cover in the direction of the arrow, and remove it.2. Insert the CR2025 battery bundled with the remote control unit in the directions shown in the figure, then close the rear cover.CAUTIONCAUTIONDanger of explosion if battery is incorrectly replaced.Replace only with the same or equivalent type.Note:Using battery improperly can cause it to explode. Take note of the following points:•Do not short-circuit, disassemble or heat battery.•Do not dispose of battery into fire or flames.•Dispose of spent battery properly.❏Functions of Remote Control Unit ButtonsYou can use the remote control unit to control the NX700. When the 2-Zone function is ON, the controls work upon the Sub zone only.Note:•The steering wheel remote control operations work upon the Main zone even when the 2-Zone function is ON.[AUDIO] button• Press to set the Audio language. (in DVD Video and DivX modes)[SUBTITLE] button• Press to display subtitles. (in DVD Video and DivX modes)[ANGLE] button• Press to switch among the angles when DVD video discs recorded in multiple angles are played back.[TOP MENU] button• Press to display the DVD top menu stored on the DVD video disc. Some discs are not displayed the DVD top menu. (in DVD Video mode)[MENU] button• Press to display the DVD menu stored on the DVD video disc. (in DVD Video mode)[ENT] button• Press to fix the selected menu item on the DVD menu. (in DVD Video mode)[E], [e], [T], [t] buttons• Press to select desired menu item displayed on the DVD menu. (in DVD Video mode)Signal transmitterOperating range: 30° in all directions[AUDIO][TOP MENU][ENT][SOURCE][BAND][6][SUBTITLE][ANGLE][MENU][E], [e], [T], [t][–], [+][RETURN][R], [F]CR2025 batteryRear sideRear cover](https://usermanual.wiki/Faurecia-Clarion-Electronics/QY5014.Installation-Manual/User-Guide-1211545-Page-15.png)
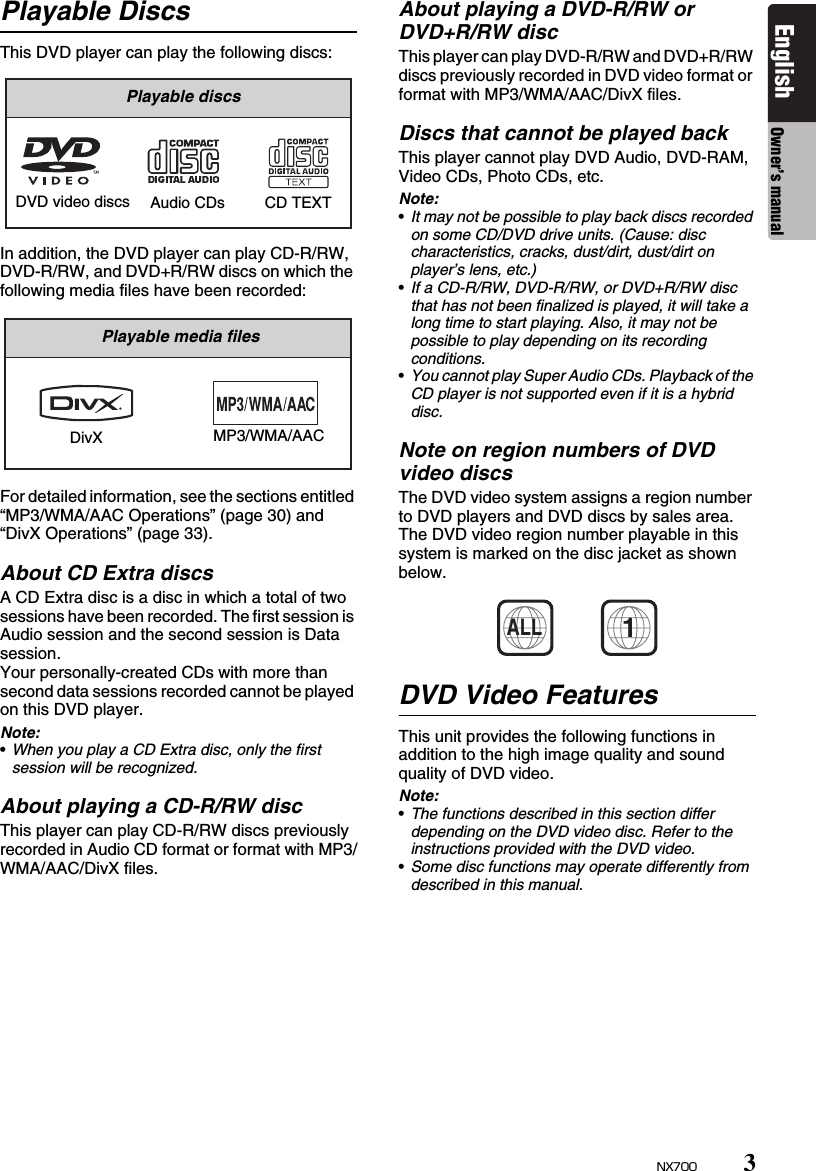
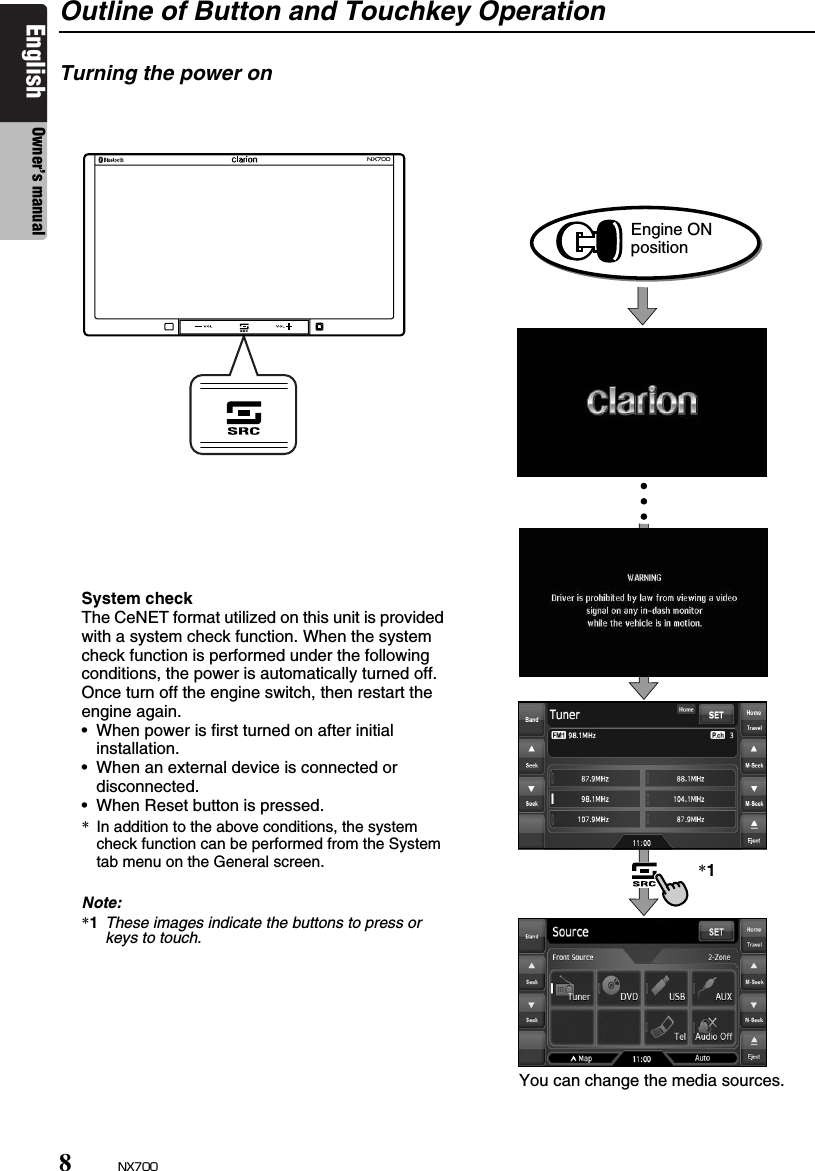
![14 NX700English Owner’s manual[SOURCE] button• Press to switch the source modes such as Tuner mode, DVD mode, etc. (in any mode)*Only DVD, USB, and AUX modes are selectable when 2-Zone ON.• Keep pressing more than 1 second to turn the 2-Zone function ON/OFF. (in any mode)[RETURN] button• Press to return to the previous screen while the DVD menu is being displayed. However, it may occur that this button operation dose not work on some discs. (in DVD Video mode)[BAND] button• Switches reception bands. (in Tuner, Sirius, and XM modes; disabled when 2-Zone ON)• Keep pressing more than 1 second to switch the Home/Travel modes. (in Tuner mode; disabled when 2-Zone ON)• Press to select the next higher folder. (in MP3/WMA/AAC/DivX and USB memory modes)[VOL –], [VOL +] buttons• Decreases or increases the volume. (in any mode; disabled when 2-Zone ON)[6] button• Press to play or pause video and audio media. (in DVD and USB modes; disabled in USB mode when 2-Zone ON)• Keep pressing more than 1 second to stop video playback. (in DVD Video mode)[R], [F] buttons• Press to select the next lower or higher preset station. (in Tuner, Sirius, and XM modes; disabled when 2-Zone ON)• Press to select the next lower or higher chapter number. (in DVD Video mode)• Press to select the next lower or higher track. (in CDDA, MP3/WMA/AAC/DivX, and USB modes)• Keep pressing to perform fast backward or fast forward playback. (in DVD and USB modes)Note:•Be sure to read this chapter referring to the chapter “3. CONTROLS” (page 6).Turning On and Off the PowerCAUTIONCAUTIONWhen the unit is turned on, starting and stopping the engine with its volume raised to the maximum level may harm your hearings. Be careful about adjusting the volume.Note:•Start the engine before using this unit.•Be careful about using this unit for a long time without running the engine. If you drain the car’s battery too far, you may not be able to start the engine and this can reduce the service life of the battery.1. Start the engine. The power is supplied to this unit.The unit automatically memorizes its last operation mode and will automatically switch to display that mode.2. To turn off the power, turn off the engine switch.●About the CT (Clock Time) display• The displayed clock data is based on the CT (clock time) data in the Navigation system.• When the CT data cannot be received, “--:--” appears in the display.4. BASIC OPERATIONSEngine ONposition](https://usermanual.wiki/Faurecia-Clarion-Electronics/QY5014.Installation-Manual/User-Guide-1211545-Page-16.png)
![15NX700English Owner’s manualAdjusting the Volume1. Press the [VOL –]/[VOL +] buttons to adjust the volume.[VOL –]: Decreases the volume.[VOL +]: Increases the volume.• The volume level indicated in the display is in a range from 0 (min.) to 33 (max.).CAUTIONCAUTIONWhile driving, keep the volume level at which external sounds can be heard.Opening the Operation Panel and Adjusting the AngleThe operation panel can be opened/closed to insert/eject a disc. The angle of the operation panel can be adjusted depending on the mounting angle of the unit or light coming into the car.Opening/closing the operation panel1. Touch the [o (Eject)] key to display the following Eject screen:2. Touch the [Open/Close] key.The operation panel will be opened.3. Touch the [Open/Close] key when the operation panel is open.The operation panel will be closed.• The operation panel will close automatically when leaving it open for a while.4. Touch the [Back] key to return to the previous screen. WARNING•To prevent the battery from going dead, operate this unit with the engine running if possible.•When the operation panel is operating, be careful not to get your hand or finger caught between the panel and main unit or the instrument panel of the car.•Do not move the operation panel by hand.](https://usermanual.wiki/Faurecia-Clarion-Electronics/QY5014.Installation-Manual/User-Guide-1211545-Page-17.png)
![16 NX700English Owner’s manualAdjusting the angle of the operation panelThe angle of the operation panel can be adjusted in the range of 0° to 30°1. Touch the [o (Eject)] key to display the Eject screen.2. Repeat touching the [Tilt] key to adjust the angle of the operation panel. Every touching the [Tilt] key tilts the operation panel forward or backward.The adjusted angle is stored in memory.Once you adjust the angle of the operation panel, the operation panel will return to the adjusted angle even after it is opened/closed.3. When the adjustment is finished, touch the [Back] key to return to the previous screen.Returning the operation panel to the original angle1. Touch and hold the [Tilt] key.The operation panel will move and stop at 30°.2. Touch and hold the [Tilt] key again.The operation panel will move and stop at 0°.Turning the Audio OFFYou can turn off all of the AV features.1. Press the [SRC] button to display the Source screen.2. Touch the [Audio Off] key.The AV features are turned off.Note:•The Audio OFF function does not work in the Tel mode.Turning the AV features on1. Press the [SRC] button to display the Source screen.2. Touch the desired Source key.The AV features are turned on, and the system enters into the specified mode.](https://usermanual.wiki/Faurecia-Clarion-Electronics/QY5014.Installation-Manual/User-Guide-1211545-Page-18.png)
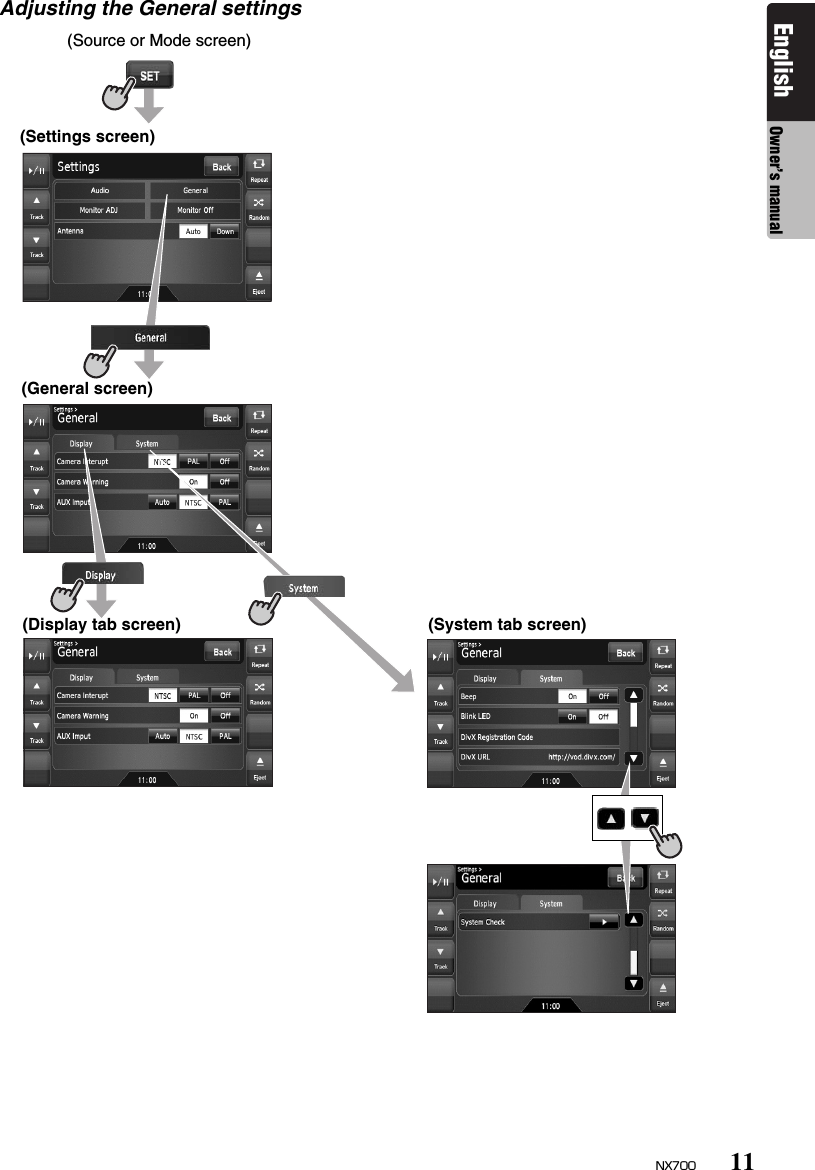
![17NX700English Owner’s manualTurning the Monitor OFFYou can turn off the monitor screen, and change it to a black screen.1. Touch the [SET] key to display the Settings screen.2. Touch the [Monitor Off] key.The monitor screen is turned off.Turning the monitor on1. Touch the monitor screen.The monitor screen is turned on, and resumes the last screen.• You can also turn on the monitor by pressing the [SRC] button.Displaying the Clock ScreenYou can change the screen to display only the digital clock on a black screen.1. Touch the clock display on most screens.The Clock screen is displayed.2. To return to the current mode screen, touch the monitor screen.• Pressing the [SRC] button displays the Source screen.Note:•The Clock screen cannot be displayed while in the Tel mode.Setting/Ejecting a Disc❏Notes on handling discsHandling• New discs may have some roughness around the edges. If such discs are used, the player may not work or the sound may skip. Use a ball-point pen or the like to remove any roughness from the edge of the disc.• Never stick labels on the surface of the disc or mark the surface with a pencil or pen.• Never play a disc with any cellophane tape or other glue on it or with peeling off marks. If you try to play such a disc, you may not be able to get it back out of the DVD player or it may damage the DVD player.• Do not use discs that have large scratches, are misshapen, cracked, etc. Use of such discs may cause misoperation or damage.• To remove a disc from its storage case, press down on the center of the case and lift the disc out, holding it carefully by the edges.• Do not use commercially available disc protection sheets or discs equipped with stabilizers, etc. These may damage the disc or cause breakdown of the internal mechanism.Storage• Do not expose discs to direct sunlight or any heat source.• Do not expose discs to excess humidity or dust.• Do not expose discs to direct heat from heaters.Cleaning• To remove fingermarks and dust, use a soft cloth and wipe in a straight line from the center of the disc to the circumference.• Do not use any solvents, such as commercially available cleaners, anti-static spray, or thinner to clean discs.• After using special disc cleaner, let the disc dry off well before playing it.On Discs• Exercise a good precaution when loading a disc with the panel open.• Never turn off the power and remove the unit from the car with a disc loaded.• Do not use lens cleaning discs. These may damage the lens of this unit.• When there seems to be something wrong with reading discs, please consult your dealer or an authorized Clarion service center.Ball-point penRoughness](https://usermanual.wiki/Faurecia-Clarion-Electronics/QY5014.Installation-Manual/User-Guide-1211545-Page-19.png)
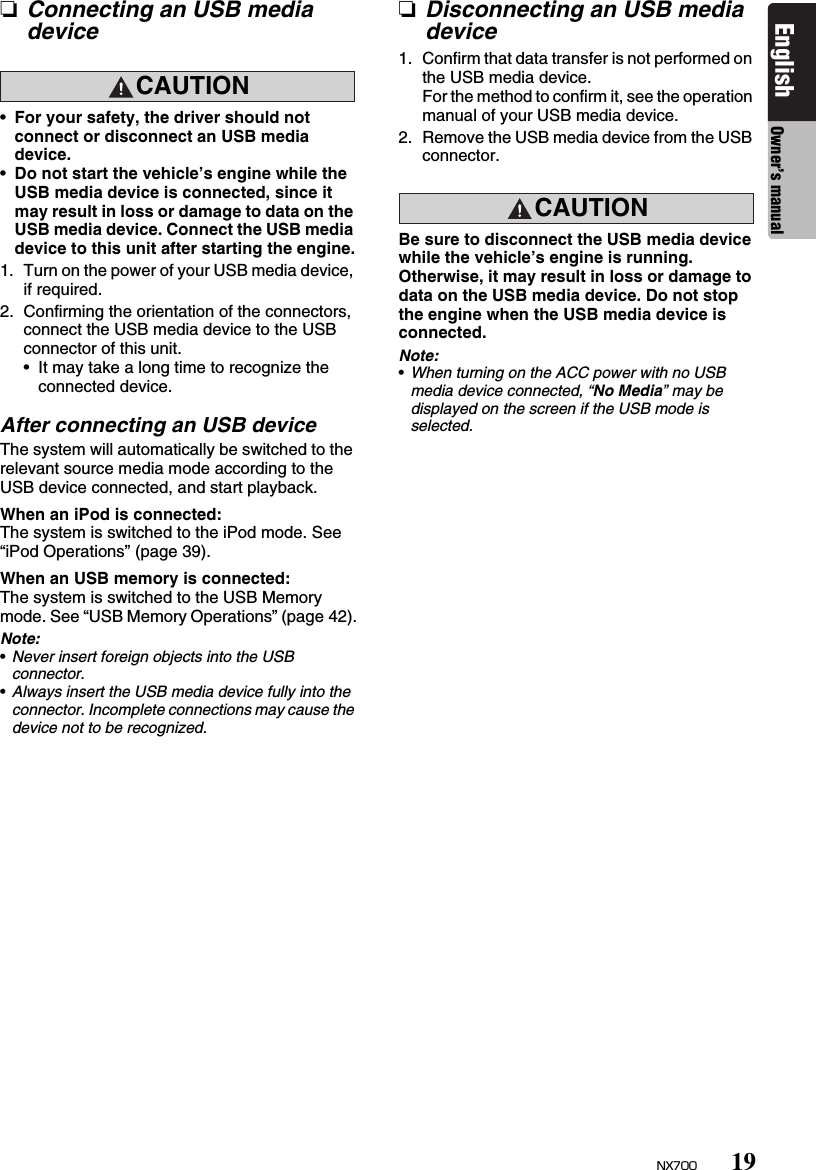
![18 NX700English Owner’s manual❏Setting a disc1. Touch the [o (Eject)] key to display the Eject screen.2. Touch the [Open/Close] key.The operation panel will be opened.3. Insert a disc into the center of the insertion slot with the label side facing up.The disc will automatically be drawn into the DVD player.After setting a discThe system will automatically be switched to the relevant source media mode according to the disc, and start playing back the disc.When a DVD video disc is set:The system is switched to the DVD Video mode. See “DVD Video Operations” (page 23).When an Audio CD is set:The system is switched to the CDDA mode. See “Audio CD Operations” (page 29).When a CD/DVD with MP3/WMA/AAC/DivX files is set:The system is switched to the MP3/WMA/AAC mode or DivX mode according to the Playform setting. See “MP3/WMA/AAC Operations” (page 30) or “DivX Operations” (page 33).Note:•Never insert foreign objects into the disc insertion slot.•If the disc is not inserted easily, there may be another disc in the mechanism or the unit may require service.•8 cm (single play) discs cannot be used.CAUTIONFor your safety, the driver should not insert or eject a disc while driving.❏Ejecting a disc1. Touch the [o (Eject)] key to display the Eject screen.2. Touch the [Eject] key to eject the disc.The operation panel will be opened and the disc will be ejected.• If a disc is left in the ejected position for 15 seconds, the disc is automatically reloaded (Auto reload).3. Remove the disc carefully.4. Touch the [Open/Close] key to close the operation panel.• The operation panel will close automatically when leaving it open for a while.5. Touch the [Back] key.Note:•If you force a disc into the insertion slot before auto reloading, this can damage the disc.Connecting/Disconnecting an USB Media DeviceThis unit has one USB (Universal Serial Bus) connector which is compatible with USB 1.1 and USB 2.0.❏Playable USB media devicesThis system can control the following USB media devices connected to the USB connector.• Apple iPod• USB memoryAbout the Apple iPodiPods can be connected by using the connection cable supplied with the iPod you use, but in this case, you can enjoy its audio sound only. To enjoy video movies stored in the iPod with video displaying them on this unit, it is required to use the special connection cable separately sold.Note:•iPhones can also be connected to this system and “iPod” appearing in this manual should be referred to as “iPod/iPhone”.•This system will not operate or may operate improperly with unsupported versions.•For detailed information on the playable iPod models, see our home page: www.clarion.com•For the other limitations, see “iPod Operations” (page 39).About the USB memoryThis system can play audio files (MP3/WMA/AAC) stored in an USB memory which is recognized as “USB Mass Storage Class device”. You can use your USB memory as an audio device by simply copying desired audio files into it.Note:•This system will not operate or may operate improperly with some USB memory.•Files protected with any DRM can not be played.•For the other limitations, see “USB Memory Operations” (page 42).](https://usermanual.wiki/Faurecia-Clarion-Electronics/QY5014.Installation-Manual/User-Guide-1211545-Page-20.png)
![20 NX700English Owner’s manualSelecting a Media SourceChanging the source mode1. Press the [SRC] button to display the Source screen.2. Touch the desired Source key you wish to change to.The system is switched to the corresponding source media mode.Note:•The Source keys have no effect in the Tel mode. Touch the [[] key at top left of the Phone Menu screen to cancel the Tel mode; this will resume the last operation mode.Available media sources*1:These keys are displayed only when the Sirius tuner and/or XM tuner are connected to this unit.*2:The source media mode to be selected differs depending on the data format of the disc set in the DVD player. When no disc is set, “No Disc” will be displayed.*3:The source media mode to be selected differs depending on the type of the USB media device connected. When no USB media device is connected, “No Media” will be displayed.Note:•When the USB mode is selected, video images input from the iPod video input terminal will be output to the rear monitor. This is normal.2-Zone FunctionAbout the 2-Zone functionThe 2-Zone function is a function that assigns separate source output to the Main zone (this unit) and Sub zone (the optional rear monitor) by simultaneously playing two sources in this system. Therefore, the rear passengers are allowed to enjoy a different video source from the source played on the operation panel of this unit.• The source sounds of the Main zone are output from the speakers of the vehicle side, and those of the Sub zone are from the optional headphone systems.• Controlling a source assigned to the Sub zone can be made by using the optional remote control unit. To control it from this unit, once assign the same source to the Main zone, then control it.• When a media without video images is played on the Sub zone, a black screen is output to the rear monitor.Note:•When an interrupt of the navigation system arises during the 2-Zone function is turned on, the sound of the Main zone is muted, but the sound of the Sub zone is output normally.•When it arises during the 2-Zone function is turned off, the audio signals to the 4ch speakers are attenuated, and the voice from the navigation system is output from the front two speakers.•You cannot operate the 2-Zone function during the interrupt of the navigation system.•When the same source is assigned for Main and Sub zones, operations in a zone are also applied for another zone.Source modeCorresponding source media modeRefer toTuner mode Tuner mode page 21Sirius mode*1Sirius mode page 36XM mode*1XM mode page 36DVD mode*2DVD Video mode page 23CDDA mode page 29MP3/WMA/AAC modepage 30DivX mode page 33USB mode*3iPod mode page 39USB Memory mode page 42AUX mode AUX mode page 44Tel mode Tel mode page 44Navi mode Navi mode page 43](https://usermanual.wiki/Faurecia-Clarion-Electronics/QY5014.Installation-Manual/User-Guide-1211545-Page-22.png)
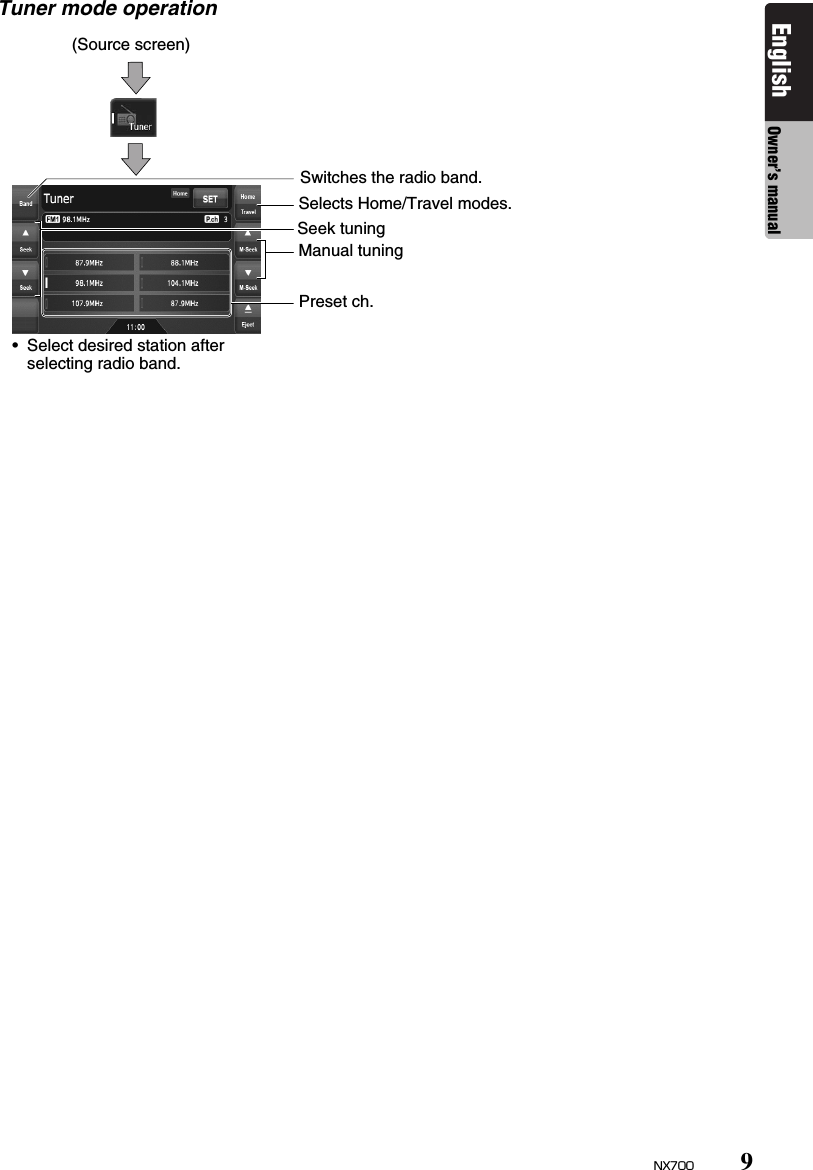
![21NX700English Owner’s manualAssignable source mode for Main/Sub zones●For Main zoneAll the source modes can be assigned for the Front zone.●For Sub zoneThe following source modes can be assigned:• DVD mode•USB mode•AUX modeSetting the 2-Zone function• The factory default setting is OFF.1. Press the [SRC] button to display the Source screen.2. Touch the [2-Zone] tab to display the 2-Zone tab screen.The source keys for the Sub zone are displayed.3. Touch the desired source key you wish to assign to the Sub zone.The 2-Zone function is turned on with the selected source mode assigned to the Sub zone.4. Touch the [Back] key to return to the previous screen.Note:•Use the remote control unit to control the source assigned to the Sub zone. To control it from this unit, once select the same source mode as assigned to the Sub zone for the Main zone, and then control it.Turning off the 2-Zone function1. Press the [SRC] button to display the Source screen.2. Touch the [2-Zone] tab to display the 2-Zone tab screen.3. Touch and hold the [2-Zone Off] key for more than 1 second.Radio OperationsListening to the radio1. Press the [SRC] button, and touch the [Tuner] key.The Tuner mode screen is displayed, and the system resumes the last status of the Tuner mode.2. Touch the [Home Travel] key to select the Home or Travel mode.The Home/Travel modes are provided to manage the preset stations separately in your home location and in a location during a trip.3. Touch the [Band] key to select the radio band.Each time the key is touched, the radio reception band changes in the following order:• In Home mode: FM Home 1 ➜ FM Home 2 ➜ AM Home ➜ FM Home 1...• In Travel mode: FM Travel ➜ AM Travel ➜ FM Travel...4. Touch the desired Preset key to tune in the corresponding preset station.5. SOURCE OPERATIONS](https://usermanual.wiki/Faurecia-Clarion-Electronics/QY5014.Installation-Manual/User-Guide-1211545-Page-23.png)
![22 NX700English Owner’s manualSeek tuning1. Touch the [Band] key to select the desired band (FM or AM).2. Touch the [{ (Seek)] or [} (Seek)] key to automatically seek a station.• When touching the [{ (Seek)] key, the station is sought in the direction of higher frequencies.• When touching the [} (Seek)] key, the station is sought in the direction of lower frequencies.Manual tuningThere are 2 ways available: Quick tuning and step tuning.When it is in the step tuning mode, the frequency changes one step at a time. In quick tuning mode, you can quickly tune the desired frequency.1. Touch the [Band] key to select the desired band (FM or AM).2. Tune into a station.Quick tuning:Touch and hold the [{ (M-Seek)] or [} (M-Seek)] key to tune in a station.Step tuning:Touch the [{ (M-Seek)] or [} (M-Seek)] key to manually tune in a station.Recalling a preset stationThere are total of 30 preset positions (6-FM Home 1, 6-FM Home 2, 6-AM Home, 6-FM Travel, and 6-AM Travel) to store individual radio stations in memory.1. Touch the [Home Travel] key to select the Home or Travel mode.2. Touch the [Band] key to select the band.3. Touch the corresponding Preset key to recall the stored station.• Touching and holding the desired Preset key for more than 2 seconds will store the current station to the preset memory.Manual memory1. Touch the [Home Travel] key to select the Home or Travel mode.2. Touch the [Band] key to select the band you wish to store.3. Tune in the station you wish to store using the seek tuning, manual tuning, or preset tuning.4. Touch and hold the desired Preset key you wish to store the current station for more than 2 seconds.Auto StoreThe Auto Store is a function for storing up to 6 stations that are automatically tuned in sequentially. If 6 receivable stations cannot be received, a previously stored station remains unoverwritten at the memory position.• The Auto Store function works only in the Travel mode.1. Touch the [Home Travel] key to select the Travel mode.2. Touch the [Band] key to select the band.3. Touch the [Auto Store] key to start scanning stations.A beep sounds and the stations with good reception are stored automatically to the preset channels.•“AS” appears during scanning stations. To stop the scanning, touch the [Auto Store] key again.](https://usermanual.wiki/Faurecia-Clarion-Electronics/QY5014.Installation-Manual/User-Guide-1211545-Page-24.png)
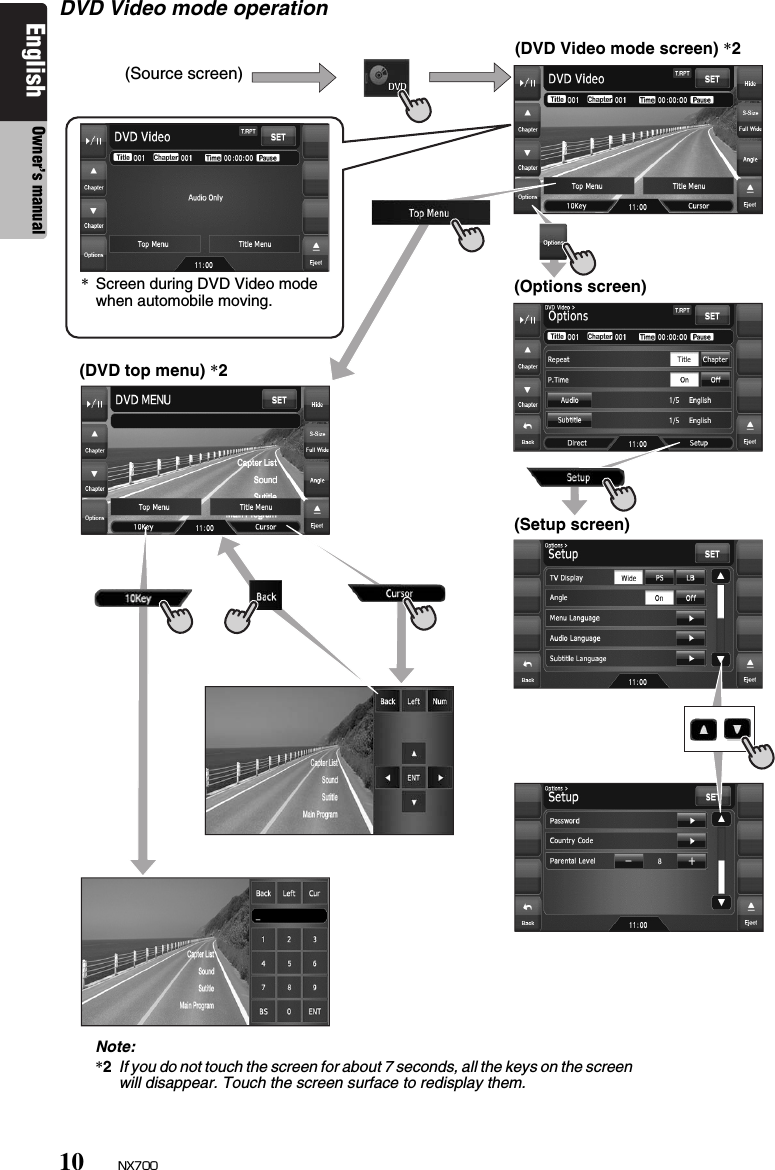
![23NX700English Owner’s manualDVD Video Operations❏Selecting the DVD Video mode1. Set a DVD video disc to the DVD player.The system will automatically read the disc data, change to the DVD mode (DVD Video mode), and start playback after a while.See also “Setting/Ejecting a Disc” (page 17).Note:•For your safety, this system has a safety function which turns off the picture when the car is moving, so only the audio can be heard. The picture can only be watched when the car is stopped and the parking brake is applied.•If “Audio Only” appears on the screen just after turning on the ACC power of the car, release the parking brake while confirming safety, and then engage the parking brake again.●When a DVD video disc is already set1. Press the [SRC] button to display the Source screen.2. Touch the [DVD] key to select the DVD Video mode.The system changes to the DVD mode (DVD Video mode), and starts playback from the previous position.❏Changing the DVD System SettingsNote:•If the Setup operation is performed in the middle of DVD video play, the disc will restart from beginning.Displaying the DVD Setup screen1. Touch the screen to display the DVD Video mode screen.2. Touch the [Options] key to display the Options menu.3. Touch the [Setup] key to display the Setup screen.• Touch the [}] key to display the next page.• Touch the [{] key to return to the previous page.4. Perform setting for the desired setting items.See the following sections for detail.• In the following sections, only the details of settings are described, the procedures to select items are skipped.5. Touch the [Back] key.Setting up the screen sizeSet up the screen size according to the optional rear monitor which is connected to this unit.• The factory default setting is “Wide”. WARNING•Some videos may be recorded at a higher volume level than desired. Increase the volume gradually from the minimal setting after the video has started.•For your safety, the driver should not watch the video or operate the controls while driving. Please note that watching and operating the video while driving are prohibited by law in some countries.4-1. Touch the [Wide], [PS], or [LB] key of the TV Display item to change the screen size to “Wide”, “Pan Scan” or “Letter Box”.](https://usermanual.wiki/Faurecia-Clarion-Electronics/QY5014.Installation-Manual/User-Guide-1211545-Page-25.png)
![24 NX700English Owner’s manual●When watching through a wide type of the rear monitor (16:9)Wide:●When watching through a conventional type of the rear monitor (4:3)Pan Scan:The leftmost and rightmost areas of the screen are cut off.This function allows displaying the important part of image fully on the screen. In some cases, image is displayed while being panned (scrolled).Letter Box:A black zone is created in the top and bottom areas of the screen.This method displays Cinema Scope and Vista Vision images without cutting them off by creating a black zone on the top and bottom gaps.Setting up the angle mark displayYou can set up so that the angle mark appears on scenes where the angles can be switched.• The factory default setting is “Off”.Setting up the disc menu language• The factory default setting is “English”.Setting up the audio language• The factory default setting is “English”.Setting up the subtitle language• The factory default setting is “English”.Setting up the password for setting up of the parental level• The factory default setting is “0000”.Note:•When a disc with view restrictions is inserted, you will be prompted to input a password. The disc will not be viewable until the correct password is entered.4-1. Touch the [On] or [Off] key of the Angle item to turn the Angle function ON or OFF.4-1. Touch the []] key of the Menu Language item.4-2. Touch the desired Language key you wish to set.4-3. Touch the [Back] key.4-1. Touch the []] key of the Audio Language item.4-2. Touch the desired Language key you wish to set.4-3. Touch the [Back] key.4-1. Touch the []] key of the Subtitle Language item.4-2. Touch the desired Language key you wish to set.• To turn off the subtitle, select the [Off] key.4-3. Touch the [Back] key.4-1. Touch the []] key of the Password item.4-2. Touch the ten-key (0 to 9) to input a 4-digit password.• Input the old password, and touch the [ENT] key. Input “4356” to reset password.• Input a new password, and touch the [ENT] key.• Input the same new password again, and touch the [ENT] key.](https://usermanual.wiki/Faurecia-Clarion-Electronics/QY5014.Installation-Manual/User-Guide-1211545-Page-26.png)
![25NX700English Owner’s manualSetting up the country codeSet up the country number for setting up of the parental level.• The factory default setting is “8583” (U.S.A.).Country code list:Setting up the parental levelYou can change the level of parental lock (audiovisual restriction).This function allows cutting scenes that are unfavorable for children or replacing them automatically with other scenes prepared in advance. For example, by replacing scenes of radical violence or portrayals of sex with safe scenes, you can make a trouble-free story as if it were so from the beginning.• The factory default setting is “8”.• The contents that the parental level restricts vary with the country code.❏Operating a DVD videoWatching a DVD VideoAfter disc loading, the play mode is automatically engaged.• When playback is not started, touch the [p] key.• Operations may differ depending on the story of the disc.●About the volume adjustment when playing DVD Video discsThis system has the independent volume data for playing DVD Video discs. The volume setting during DVD playback does not affect the volume of the other modes, and the volume setting in the other modes does not affect the DVD playback.●When the DVD menu is displayedFor general DVD Video discs, the DVD menu may appear.After the DVD menu is displayed, select an item in the operations described as follows.4-1. Touch the []] key of the Country Code item.4-2. Touch the ten-key (0 to 9) to input a 4-digit country code (see the following table).4-3. Touch the [ENT] key.Country Input codeCanada 6765United States 8583American Samoa 6583Bermuda 6677Puerto Rico 8082St. Pierre and Miquelon 8077Virgin Islands (U.S.) 86734-1. Touch the [–] or [+] key of the Parental Level item.The Password input screen is displayed.4-2. Touch the ten-key (0 to 9) to input a 4-digit password, and touch the [ENT] key.• The factory default setting of the password is “0000”.4-3. Touch the [–] or [+] key to select level “1” to “8”, or “Off”.The relationship between DVD video category codes and parental level are shown in the following table. Use this table when setting the parental level.LEVEL7 NC-17(NO ONE 17 AND UNDER ADMITTED)LEVEL6 R(RESTRICTED)LEVEL4 PG-13(PARENTS STRONGLY CAUTIONED)LEVEL3 PG(PARENTAL GUIDANCE SUGGESTED)LEVEL1 G(GENERAL AUDIENCES)](https://usermanual.wiki/Faurecia-Clarion-Electronics/QY5014.Installation-Manual/User-Guide-1211545-Page-27.png)
![26 NX700English Owner’s manualShowing the DVD Video mode screenThe DVD Video mode screen is used to control the playback mode from the screen.1. Touch the screen.The DVD Video mode screen is displayed.If you do not touch the screen for 7 seconds, the display will return to the playback screen. Selecting the screen sizeYou can change the screen size to suit to the playback film.• The factory default setting is “Full Wide”.1. Touch the screen to display the DVD Video mode screen.2. Repeat touching the [S-Size] key until your desired screen size is selected.•This key shows the current screen size setting.[Full Wide]:The image is expanded so that the rectangle of the image fits to the screen (16:9). The aspect ratio of the image may be changed.[Cinema]:The image is expanded so that the top and bottom edges of the image fit to the screen.Suitable for letterbox-format images. Subtitles of non-letterboxed images may be cut off in this mode.[Normal]:The image is expanded so that the top and bottom edges of the image fit to the screen, and that the aspect ratio of the image becomes 4:3. The aspect ratio of the image may be changed.[Wide]:The image is expanded so that the left and right edges of the image fit to the screen. The top and bottom areas of the image may be cut off.3. Touch the [Hide] key to return to the playback screen.DVD menu operations●Showing the DVD menu1. Showing the DVD Video mode screen, touch the [Top Menu] or [Title Menu] key during playback.The DVD menu appears.• The displayed contents for each key differ depending on the DVD software.• An example shown below is the DVD menu display:●Operating the DVD menuYou can operate the menu items by displaying the Key Pad panel.1. Showing the DVD Video mode screen, touch the [Cursor] or [10key] key.The Cursor-Key Pad panel or the Numeric-Key Pad panel is displayed on the screen.• Touching the [Num] key or [Cur] key changes to the each other panel.2. Select the desired menu item using either the Cursor-Key or the Nummeric-Key according to the menu contents.3. Touch the [ENT] key to specify the selected menu item.4. Touch the [Back] key to hide the Key Pad panel.](https://usermanual.wiki/Faurecia-Clarion-Electronics/QY5014.Installation-Manual/User-Guide-1211545-Page-28.png)
![27NX700English Owner’s manual●Switching Key Pad positionWhen the menu items become difficult to view by the Key Pad buttons, you can move the Key Pad panel to the other side of the screen.Stopping playback1. Showing the DVD Video mode screen, touch and hold the [p] key for more than 1 second during playback.Playback is stopped.2. To resume playback, touch the [p] key.Playback resumes from the scene where playback is stopped.Pausing playback1. Showing the DVD Video mode screen, touch the [p] key during playback.Playback pauses.2. To resume playback, touch the [p] key again.Playback resumes.Slow playback1. Showing the DVD Video mode screen, touch the [p] key during playback to pause playback.2. Touch and hold the [{ (Chapter)] key.While touching the key, slow playback continues at 1/3 speed.Releasing the key resumes the normal playback.• Slow playback cannot be performed in the backward direction. In addition, audio cannot be reproduced during slow playback.Fast forward and fast backward1. Showing the DVD Video mode screen, touch and hold the [{ (Chapter)] or [} (Chapter)] key during playback.[{ (Chapter)] key: Fast forward[} (Chapter)] key: Fast backwardThe playback speed becomes 4-time faster at first and then 16-time faster 3 seconds later.Releasing the key resumes the normal speed playback.• No audio is reproduced during fast forward and fast backward operation.• The fast forward and fast backward speed may differ depending on the disc.Skipping chapters (searching)“Chapter” means a small segment to divide the “Title” (film) which is recorded on the disc.1. Showing the DVD Video mode screen, touch the [{ (Chapter)] or [} (Chapter)] key during playback.Chapters are skipped as many as the times touching the key, and playback starts.• Touching the [{ (Chapter)] key starts playback from the beginning of the next chapter.• Touching the [} (Chapter)] key starts playback from the beginning of the current chapter.When touching this key again within about 4 seconds, playback starts from the beginning of the previous chapter.Key PadKey PadCurrent locationdownChapter ChapterChapterup](https://usermanual.wiki/Faurecia-Clarion-Electronics/QY5014.Installation-Manual/User-Guide-1211545-Page-29.png)
![28 NX700English Owner’s manualSearching with a chapter/title numberYou can locate the beginning of a scene using the chapter numbers or title numbers recorded on the DVD video disc.• “Chapter” means a small segment to divide the “Title” (film) which is recorded on the disc.1. Showing the DVD Video mode screen, touch the [Options] key.2. Touch the [Direct] key.The Key Pad screen appears.• You can specify the title number by touching the [Title] key.3. Input the chapter number that you want to play back using the [0] to [9] key.4. Touch the [ENT] key.Playback starts from the scene of the input chapter number of the selected title.• If the input chapter number does not exist or searching with a chapter number is not allowed, the screen image will not change.Repeat playbackThis operation plays back the current title or chapter repeatedly.1. Showing the DVD Video mode screen, touch the [Options] key.2. Touch the [Title] or [Chapter] key of the Repeat item, then touch the [Back] key.The “T.RPT” or “C.RPT” will be displayed.3. Touch the [Back] key to return to the previous screen.4. Perform the same operation to turn off the repeat playback.Switching among languagesOn discs in which two or more audios or audio languages have been recorded, you can switch among the audio languages during playback.1. Showing the DVD Video mode screen, touch the [Options] key.2. Touch the [Audio] key during playback.Each time you touch the key, you can switch among audio languages.• Depending on the disc, up to 8 audios may be recorded. For details, see the mark of the disc ( : Indicates that 8 audios have been recorded).• Depending on the disc, switching may be completely impossible or impossible on some scenes.• It may take time to switch among audios.• When the power is turned on and the disc is changed to a new one, the language set as the factory default is selected. If that language has not been recorded, the language is specified on the disc.3. Touch the [Back] key to return to the previous screen.Switching subtitlesOn DVD discs in which two or more subtitle languages have been recorded, you can switch among the subtitle languages during playback.1. Showing the DVD Video mode screen, touch the [Options] key.2. Touch the [Subtitle] key during playback.The Subtitle Language screen appears.3. Touch the Language key you wish to display.• Depending on the disc, up to 32 kinds of subtitles may be recorded. For details, see the mark of the disc ( : Indicates that 8 kinds of subtitles have been recorded).• To turn off subtitles, select “OFF”.• Depending on the disc, switching may be completely impossible or impossible on some scenes.• It may take time to switch among subtitles.4. Touch the [Back] key to return to the previous screen.88](https://usermanual.wiki/Faurecia-Clarion-Electronics/QY5014.Installation-Manual/User-Guide-1211545-Page-30.png)
![29NX700English Owner’s manualSwitching anglesOn DVD discs in which video images have been recorded in two or more angles, you can switch among the angles during playback.• When the Angle function is set to “On”, the angle mark will appear on scenes where the angles can be switched (see page 24).1. Showing the DVD Video mode screen, touch the [Angle] key during playback.Each time you touch the key, you can switch among angles.• Depending on the disc, up to 9 angles may be recorded. For details, see the mark of the disc ( : Indicates multi-angle).• Depending on the disc, angles may switch smoothly or switch with a momentary still image.• Depending on the disc, switching may be completely impossible or impossible on some scenes.• It may take time to switch among angles.• Depending on the disc, scenes recorded in two or more angles may be played back.• When the power is turned on and the disc is changed to a new one, the language set at the time of factory shipment is selected. If that language has not been recorded, the language is specified on the disc.Displaying/hiding the playback status1. Showing the DVD Video mode screen, touch the [Options] key.2. Touch the [On] or [Off] key of the P.Time item during playback.3. Touch the [Back] key to return to the previous screen.Playback status is displayed on the screen.Audio CD OperationsThis system is a CD TEXT compatible model, and supports the display of the DISC TITLE, TRACK TITLE, and TRACK ARTIST (or DISK ARTIST) of the CD TEXT.Note:•This unit supports only CD TEXT in English. Also, some character data may not be reproduced properly on the display.❏Selecting the CDDA mode1. Set an audio CD to the DVD player.The system will automatically read the disc data, change to the DVD mode (CDDA mode), and start playback after a while. See also “Setting/Ejecting a Disc” (page 17).●When an audio CD is already set1. Press the [SRC] button to display the Source screen.2. Touch the [DVD] key to select the CDDA mode.The system changes to the DVD mode (CDDA mode), and starts playback from the previous position.❏Operating an audio CDListening to an audio CDAfter disc loading, the play mode is automatically engaged.• When playback is not started, touch the [p] key.91:00:00 100C 10TTitle numberChapter numberPlayback time WARNING•Some CDs may be recorded at a higher volume level than desired. Increase the volume gradually from the minimal setting after playback has started.•For your safety, the driver should not operate the controls while driving.](https://usermanual.wiki/Faurecia-Clarion-Electronics/QY5014.Installation-Manual/User-Guide-1211545-Page-31.png)
![30 NX700English Owner’s manualPausing playback1. Touch the [p] key during playback.Playback pauses.2. To resume playback, touch the [p] key.Playback resumes.Skipping a track (searching)1. Touch the [{ (Track)] or [} (Track)] key during playback.Tracks are skipped, as many as the times the key is touched, and playback starts.• Touching the [{ (Track)] key starts playback from the beginning of the next track.• Touching the [} (Track)] key starts playback from the beginning of the current track.When this key is touched again within about 2 seconds, playback starts from the beginning of the previous track.Fast forward and fast backward1. Touch and hold the [{ (Track)] or [} (Track)] key during playback.The playback speed becomes 4-time faster first and then 16-time faster 3 seconds later.Releasing the key resumes the normal speed playback.Other various play functions1. Touch the [Options] key.2. Touch the [Track] key of the function you want to play.Track repeat playback:Touch the [Track] key of the Repeat item.• This operation plays back the current track repeatedly.•“T.RPT” is displayed on the screen.• You can also specify this function by touching the [Repeat] key on the CDDA mode screen.Track random playback:Touch the [Track] key of the Random item.• This operation plays back all tracks on the disc in no particular order.•“T.RDM” is displayed on the screen.• You can also specify this function by touching the [Random] key on the CDDA mode screen.3. To cancel the play, touch the [Track] key of the function to cancel.4. Touch the [Back] key to return to the previous screen.Scrolling track titlesWhen a title or name displayed on the screen is longer than the text area, you can confirm the entire text by scrolling it.1. Displaying the text you wish to scroll, touch the text area.The text will scroll once.MP3/WMA/AAC OperationsThis system can playback MP3/WMA/AAC files recorded on a disc.❏About the MP3/WMA/AAC filesWhat is MP3/WMA/AAC?MP3, WMA, and AAC are the audio file formats which have penetrated into PC users and become a standard format.MP3 is an audio compression method and classified into audio layer 3 of MPEG standards.WMA (Windows Media Audio) is an audio compression method developed by Microsoft Corporation.AAC (Advanced Audio Coding) is a newer audio compression method developed for used with video compression standards MPEG-2 and MPEG-4, and has been adopted as the standard audio format of the iPod and iTunes by Apple Inc. These features compress the original audio data to about 10 percent of its initial size with a high sound quality. This means that about 10 audio CDs can be recorded on a CD-R/RW disc to allow a long listening time without having to change CDs.](https://usermanual.wiki/Faurecia-Clarion-Electronics/QY5014.Installation-Manual/User-Guide-1211545-Page-32.png)
![32 NX700English Owner’s manual❏Selecting the MP3/WMA/AAC mode1. Set a disc which the MP3/WMA/AAC files are recorded to the DVD player.The system will automatically read the disc data, change to the DVD mode (MP3/WMA/AAC mode), and start playback after a while.See also “Setting/Ejecting a Disc” (page 17).Note:•Note that the system enters to the DivX mode when setting a disc with DivX files if the Playform function has been set to “Video” (see page 33).●When a disc is already set1. Press the [SRC] button to display the Source screen.2. Touch the [DVD] key to select the MP3/WMA/AAC mode.The system changes to the DVD mode (MP3/WMA/AAC mode), and starts playback from the previous position.❏Operating MP3/WMA/AAC playbackNote:•The same operations listed below are also used in the USB Memory mode.Listening to MP3/WMA/AAC filesAfter disc loading, the play mode is automatically engaged.• When playback is not started, touch the [p] key.Pausing playback1. Touch the [p] key during playback.Playback pauses.2. To resume playback, touch the [p] key.Playback resumes.Skipping a track (searching)1. Touch the [{ (Track)] or [} (Track)] key during playback.Tracks are skipped, as many as the times the key is touched, and playback starts.• Touching the [{ (Track)] key starts playback from the beginning of the next track.• Touching the [} (Track)] key starts playback from the beginning of the current track.When this key is touched again within about 2 seconds, playback starts from the beginning of the previous track.• These functions perform in the current folder only.Fast forward and fast backward1. Touch and hold the [{ (Track)] or [} (Track)] key during playback.The playback speed becomes 4-time faster first and then 16-time faster 3 seconds later.Releasing the key resumes the normal speed playback.Skipping the current folder1. Touch the [{ (Folder)] or [} (Folder)] key during playback.The tracks of the current folder are skipped and playback starts from the first track of the next or previous folder.Selecting a folder/track from the list screen1. Touch the [List] key.The Folder List screen is displayed.2. When the desired folder is not displayed, touch the [{] or [}] key to scroll the list.3. Touch the desired Folder key.The Track List screen appears.4. Touch the [{] or [}] key to scroll the list, and touch the desired Track key.The corresponding track is started playback.5. Touch the [Back] key. WARNING•Audio files may be recorded at a higher volume level than desired. Increase the volume gradually from the minimal setting after playback has started.•For your safety, the driver should not operate the controls while driving.](https://usermanual.wiki/Faurecia-Clarion-Electronics/QY5014.Installation-Manual/User-Guide-1211545-Page-34.png)
![33NX700English Owner’s manualOther various play functions1. Touch the [Options] key.2. Touch a touch key of the function you want to play.Folder repeat playback:Touch the [Folder] key of the Repeat item.• This operation plays back tracks in the current folder repeatedly.•“F.RPT” is displayed on the screen.Track repeat playback:Touch the [Track] key of the Repeat item.• This operation plays back the current track repeatedly.•“T.RPT” is displayed on the screen.Folder random playback:Touch the [Folder] key of the Random item.• This operation plays the tracks in the current folder in a random order.•“F.RDM” is displayed on the screen.Track random playback:Touch the [Track] key of the Random item.• This operation plays back tracks recorded in the disc in no particular order.•“T.RDM” is displayed on the screen.3. To cancel the play, touch the same touch key of the function to cancel.4. Touch the [Back] key to return to the previous screen.Scrolling track titlesWhen a title or name displayed on the screen is longer than the text area, you can confirm the entire text by scrolling it.1.Displaying the text you wish to scroll, touch the text area.The text will scroll once.Setting the Playform of discs recorded with DivX filesMP3/WMA/AAC files can be stored together with DivX files in a disc or folder. You can select whether such discs are regarded as MP3/WMA/AAC discs or as DivX discs.1. Touch the [Options] key.2. Touch the [Audio] or [Video] key of the Playform item to specify the setting.[Audio]:Discs are regarded as MP3/WMA/AAC discs.[Video]:Discs are regarded as DivX discs.3. Touch the [Back] key if required.Note:• This setting is disabled when a Mixed Mode CD, which contains both data track and audio tracks, is set in the DVD player.DivX OperationsThis system can playback DivX movie files recorded on a disc.• Official DivX® Certified product• Plays all versions of DivX® video (including DivX® 6) with standard playback of DivX® media files.❏About the DivX fileWhat is DivX?DivX is a popular media technology created by DivX, Inc. DivX media files contain highly compressed video with high visual quality that maintains a relatively small file size. DivX files can also include advanced media features like menus, subtitles, and alternate audio tracks. Many DivX media files are available for download online, and you can create your own using your personal content and easy-to-use tools from DivX.com.Precautions on the DivX file• This system can play DivX version 4.x, 5.x, and 6.x files. DivX Ultra is not supported.• Files other than DivX format (such as the Xvid files) cannot be played. In addition, some files may not be played because of the encoding format. When a file cannot be played, the next file is played instead.](https://usermanual.wiki/Faurecia-Clarion-Electronics/QY5014.Installation-Manual/User-Guide-1211545-Page-35.png)
![34 NX700English Owner’s manual• DivX VOD (Video-on Demand files) that have authorization data can also be played. These files must be authorized on your PC beforehand using the DivX Registration Code displayed on the System tab screen under the General screen (see page 49).• Set the Frame Size to 640 × 480 or 320 × 240 pixels.• Set the Frame Rate to 30 or 15 fps.• Add a file extension “.AVI”, “.avi”, “.DIVX”, or “.divx” using single byte characters.Precautions when preparing a discNote:•The limitations on preparing a disc are same as those in the MP3/WMA/AAC modes. See “Precautions when preparing a disc” (page 31).❏Selecting the DivX mode1. Set a disc which the DivX files are recorded to the DVD player.The system will automatically read the disc data, change to the DVD mode (DivX mode), and start playback after a while.See also “Setting/Ejecting a Disc” (page 17).Note:•For your safety, this system has a safety function which turns off the picture when the car is moving, so only the audio can be heard. The picture can only be watched when the car is stopped and the parking brake is applied.•If “Audio Only” appears on the screen just after turning on the ACC power of the car, release the parking brake while confirming safety, and then engage the parking brake again.•You can store DivX files and the MP3/WMA/AAC files together in a disc or folder. In such a case, you can select whether the disc is regarded as a DivX disc or as an MP3/WMA/AAC disc. See “Setting the Playform of discs recorded with audio files” (page 36).●When a disc is already set1. Press the [SRC] button to display the Source screen.2. Touch the [DVD] key to select the DivX mode.The system changes to the DVD mode (DivX mode), and starts playback from the previous position.❏Operating DivX playbackNote:•The most operations in the DivX mode are same as those in the MP3/WMA/AAC modes. See also “Operating MP3/WMA/AAC playback” (page 32).•The random plays cannot be specified in the DivX mode. Watching DivX moviesAfter disc loading, the play mode is automatically engaged.• When playback is not started, touch the [p] key.●To play a file with Authorization dataWhen a file with Authorization data is played, a message is displayed on the screen. Confirm the message displayed, and touch the [Done] or [Yes] key to play the movie. WARNING•Some movie files may be recorded at a higher volume level than desired. Increase the volume gradually from the minimal setting after the movie has started.•For your safety, the driver should not watch the movie or operate the controls while driving. Please note that watching and operating the movie while driving are prohibited by law in some countries.](https://usermanual.wiki/Faurecia-Clarion-Electronics/QY5014.Installation-Manual/User-Guide-1211545-Page-36.png)
![35NX700English Owner’s manualShowing the DivX mode screenThe DivX mode screen is used to control the playback mode from the screen.1. Touch the screen.The DivX mode screen is displayed.If you do not touch the screen for 7 seconds, the display will return to the playback screen. • You can hide the DivX mode screen by touching the [Hide] key.Selecting the screen sizeYou can change the screen size to suit to the playback film.• The factory default setting is “Full Wide”.1. Touch the screen to display the DivX mode screen.2. Repeat touching the [Full Wide/Cinema/Normal/Wide] key until your desired screen size is selected.•This key shows the current screen size setting.[Full Wide]:The image is expanded so that the rectangle of the image fits to the screen (16:9). The aspect ratio of the image may be changed.[Cinema]:The image is expanded so that the top and bottom edges of the image fit to the screen.Suitable for letterbox-format images. Subtitles of non-letterboxed images may be cut off in this mode.[Normal]:The image is expanded so that the top and bottom edges of the image fit to the screen, and that the aspect ratio of the image becomes 4:3. The aspect ratio of the image may be changed.[Wide]:The image is expanded so that the left and right edges of the image fit to the screen. The top and bottom areas of the image may be cut off.3. Touch the [Hide] key to return to the playback screen.Searching with a folder/track numberYou can specify a file to play using the folder number or track number.1. Showing the DivX mode screen, touch the [Options] key.2. Touch the [Direct] key.The Key Pad screen appears with the folder number input mode. 3. Input the folder/track number that you want to play back using the [0] to [9] key.• Touching the [Track] key turns the Key Pad to the track number input mode.4. Touch the [ENT] key.The system starts playback of the file specified with the input folder/track numbers.• If the input folder/track number does not exist or searching with a folder/track number is not allowed, the screen image will not change.Switching AudiosYou can switch the audio data if the current DivX file has two or more audio data.1. Showing the DivX mode screen, touch the [Options] key.2. Touch the [Audio] key during playback or pause.Each time you touch the key, you can switch among the audio data.• The number of audios recorded and their audio formats may differ depending on the DivX file.• Depending on the DivX file, switching may be impossible.• It may take time to switch the audio data.3. Touch the [Back] key.](https://usermanual.wiki/Faurecia-Clarion-Electronics/QY5014.Installation-Manual/User-Guide-1211545-Page-37.png)
![36 NX700English Owner’s manualSwitching SubtitlesYou can switch the subtitle language if the current DivX file has one or more subtitles.1. Showing the DivX mode screen, touch the [Options] key.2. Touch the [Subtitle] key during playback or pause.Each time you touch the key, you can switch among the subtitle language.• The number of subtitles recorded may differ depending on the DivX file.• Depending on the DivX file, switching may be impossible.• It may take time to switch the subtitle language.3. Touch the [Back] key.Setting the Playform of discs recorded with audio filesDivX files can be stored together with MP3/WMA/AAC files in a disc or folder. You can select whether such discs are regarded as DivX discs or as MP3/WMA/AAC discs.1. Showing the DivX mode screen, touch the [Options] key.2. Touch the [Audio] or [Video] key of the Playform item to specify the setting.[Audio]:Discs are regarded as MP3/WMA/AAC discs.[Video]:Discs are regarded as DivX discs.3. Touch the [Back] key if required.Note:•This setting is disabled when a Mixed Mode CD, which contains both data track and audio tracks, is set in the DVD player.Satellite Radio OperationsThis function is available when a Satellite Radio tuner and Translator adapter are connected.This unit can control the following satellite radio tuners via Translator adapter:• Sirius Tuner• XM Mini-TunerNote:•When a function differs depending on the connected tuner, the following notations are used to distinguish between Sirius and XM:“Sirius”: for the Sirius tuner“XM”: for the XM tuner•Be sure to turn off the ACC power before connecting/disconnecting the tuner.❏Selecting the SIRIUS/XM mode1. Press the [SRC] button, and touch the [Sirius] or [XM] key.The system changes to the Sirius or XM mode.Note:•If the [Sirius] or [XM] key is not displayed, check the connection with the tuner.•The audio output is muted and other button operations are not accepted during channel selection.6.SOURCE OPERATIONS (ACCESSORIES)](https://usermanual.wiki/Faurecia-Clarion-Electronics/QY5014.Installation-Manual/User-Guide-1211545-Page-38.png)
![37NX700English Owner’s manualMessages displayed during receptionThe following messages are displayed when the satellite radio cannot be received normally.●Sirius:• When a channel is being tuned in or no signal is received: “ACQUIRING SIGNAL”• A channel without a broadcast has been selected: “INVALID CHANNEL”• A channel not covered by your contract: “CALL 888-539-SIRIUS TO SUBSCRIBE”• When the tuner is turned on the first time or after a reset: “UPDATING CHANNELS”• When your contract is expired: “SUBSCRIPTION UPDATED”• When the Sirius antenna is not connected correctly : “ANTENNA ERROR”●XM:• When a channel is being tuned in (no signal is yet received): “LOADING”• A channel without a broadcast has been selected: “CHANNEL NOT AVAILABLE”• A channel not covered by your contract: “CHANNEL NOT AUTHORIZED”• When a channel is out of air time: “CHANNEL OFF AIR”• When no signal is received: “NO SIGNAL”• When the XM antenna is not connected correctly : “CHECK ANTENNA”Note:•The messages may vary depending on the XM tuners connected to this unit.❏Selecting a band1. Touch the [Band] key to select a band.This changes the reception band as follows:• Sirius: SR1 ➜ SR2 ➜ SR3 ➜ SR1 ...•XM: XM1 ➜ XM2 ➜ XM3 ➜ XM1 ...❏Confirming your Radio ID●Sirius1. Touch the [Options] key to display the Options screen.Your Sirius ID (12-digit number) will be displayed.2. To return to the previous screen, touch the [Back] key.●XM1. Touch the [Direct] key to display the Key Pad screen.2. Touch the [0] key, then touch the [ENT] key.Receiving the Channel “0” will display your Radio ID (8-digit number).❏Tuning in a stationOnly channels that can be received are selected. Channels without broadcasts and channels not covered by the contract will be skipped.1. Touch the [{ (Channel)] or [} (Channel)] key.The system will tune to the previous or next available channel.• Holding the key continues to seek channels.❏Selecting a station with the channel number1. Touch the [Direct] key to display the Key Pad screen.2. Enter the channel number of your desired station by touching the [0] to [9] keys.• If you enter a wrong number, you can cancel it by touching the [BS] key.• To return to the previous screen, touch the [Back] key.3. Touch the [ENT] key.The radio channel you entered will be tuned.❏Displaying the channel name and other information1. Touch the [Preset Info] key when the Preset keys are displayed.The channel name, category name, and other information are displayed.• When the information displayed is longer than 16 characters, touching the text scrolls the entire text.2. To return to the Preset Key screen, touch the [Preset Info] key again.](https://usermanual.wiki/Faurecia-Clarion-Electronics/QY5014.Installation-Manual/User-Guide-1211545-Page-39.png)
![38 NX700English Owner’s manual❏Recalling a preset stationA total of 18 Sirius stations and 18 XM stations can be stored (Sirius: 6-SR1, 6-SR2, and 6-SR3; XM: 6-XM1, 6-XM2, and 6-XM3). This allows you to store your favorite stations in memory for later recall.1. Display the Preset Key screen by touching the [Preset Info] key.2. Select the desired band by touching the [Band] key.3. Touch the corresponding Preset key to recall the stored station.The system will tune to the specified station.• Touching and holding the desired Preset key for more than 2 seconds stores the current station into the preset memory.❏Manual memory1. Display the Preset Key screen by touching the [Preset Info] key.2. Select the desired band by touching the [Band] key.3. Tune to the station you wish to store.4. Touch and hold the desired Preset key you wish to store to for more than 2 seconds.A beep sounds and the current station is stored into the preset memory.❏Receiving stations selected by categorySatellite Radio allows you to select broadcast channel category (contents).1. Touch the [Category] key to display the Category List screen.2. Touch the desired Category item key to select the category.The system will tune in to the lowest available channel of the specified category.• Touch the [{] or [}] key to scroll the category list.3. Touch the [{ (C-Seek)] or [} (C-Seek)] key to select a station.The system will tune to the previous or next available channel that meets the specified category.4. To return to the previous screen, touch the [Back] key.Note:•Touching the [Back] key within 1 second after selecting the category cancels the category selection and returns to the channel previously received.•If you do not touch the screen for 7 seconds, the display will return to the previous screen.❏Category Scan functionIn a category scan, broadcast channels in the same category as the current channel are selected about every 10 seconds. During scanning channels are performed, the display mode cannot be switched.1. Touch the [Category] key to display the Category List screen.2. Touch the desired Category item key to select the category.• Touch the [{] or [}] key to scroll the category list.3. Touch the [CAT Scan] key.The system will start the category scan from the lowest available channel.4. Touch the [CAT Scan] key again to tune to the channel currently received.The category scan will be terminated.Note:•When you touch the [Back] key during the category scan to return to the previous screen, the category scan will continue.•The category scan can be also performed by touching the [CAT Scan] key on the Sirius/XM mode screen.](https://usermanual.wiki/Faurecia-Clarion-Electronics/QY5014.Installation-Manual/User-Guide-1211545-Page-40.png)
![39NX700English Owner’s manualiPod OperationsiPods can be connected by using the connection cable supplied with the iPod, but in this case, you can enjoy its audio sound only. To enjoy video movies stored in the iPod with video displaying them on this unit, it is required to use the special connection cable (CCA-723/CCA-748) separately sold.Note:•iPhones can also be connected to this system and “iPod” appearing in this manual should be referred to as “iPod/iPhone”.•This system will not operate or may operate improperly with unsupported versions.•For detailed information on the playable iPod models, see our home page: www.clarion.com❏Notes on using Apple iPod• Do not connect an iPod to this unit with a headphone connected to the iPod.• When no data is present, the title display will remain blank.• Set the iPod’s language setting to English before connecting your iPod. Some characters of the other languages may not be displayed correctly in this system.●Precautions on battery consumption:If the iPod is connected to this unit when the iPod’s internal battery has run down, this function may not operate correctly. You must connect the iPod after charging the battery if it has run down.❏Selecting the iPod mode1. Connect your iPod to the USB connector.The system will automatically detect the connected device, and change to the USB mode (iPod mode), and start playback after a while. See also “Connecting/Disconnecting an USB Media Device” (page 18).●When an iPod is already connected1. Press the [SRC] button to display the Source screen.2. Touch the [USB] key to select the iPod mode.The system changes to the USB mode (iPod mode), and starts playback from the previous position.❏Controlling the iPodOperation keys●iPod mode screen[Music/Videos] key:Switches the operation mode to the Video mode or Music mode.• Enabled in the Simple Control mode.List keys:Displays the corresponding list screen to select track to be played.[Videos], [Playlists], and [Music] are available.[Hide] key:Hides the iPod mode screen to display the playback picture.• Displayed only in the Video mode.[Options] key:Displays the Options screen. You can specify play modes and other settings from this screen.Play mode icons:Displays status of Repeat, Shuffle play. : 1-track Repeat : All Repeat : Song Shuffle : Album ShufflePausing playback1. Touch the [p] key during playback.Playback pauses.2. To resume playback, touch the [p] key again.Playback resumes.[Music/Videos] keyPlay mode iconsList keys[Options] key](https://usermanual.wiki/Faurecia-Clarion-Electronics/QY5014.Installation-Manual/User-Guide-1211545-Page-41.png)
![40 NX700English Owner’s manualSkipping a track (searching)1. Touch the [{ (Track)] or [} (Track)] key during playback.Tracks are skipped, as many as the times the key is touched, and playback starts.• Touching the [{ (Track)] key starts playback from the beginning of the next track.• Touching the [} (Track)] key starts playback from the beginning of the current track. When this key is kept touching, playback starts from the beginning of the previous track.Fast forward and fast backward1. Touch and hold the [{ (Track)] or [} (Track)] key during playback.The playback speed becomes faster.Releasing the key resumes the normal speed playback.Scrolling track titlesWhen a title or name displayed on the screen is longer than the text area, you can confirm the entire text by scrolling it.1. Displaying the text you wish to scroll, touch the text area.The text will scroll once.Controlling from the iPodSetting this function to “On” enables to use the iPod buttons to control the iPod.1. Touch the [Options] key.2. Touch the [On] or [Off] key of the Simple Control item to specify the setting.[On]:Enables the iPod buttons. Only the above operations can be performed from this system.[Off]:Disables the iPod buttons. All controls are performed from this system.3. Touch the [Back] key to return to the previous screen.Other various play functions1. Touch the [Options] key.2. Touch a touch key of the function you want to play.1-track repeat:Touch the [One] key of the Repeat item.• This operation plays back the current or selected track repeatedly.All repeat:Touch the [All] key of the Repeat item.• This operation plays back all the tracks currently selected repeatedly.Song shuffle:Touch the [Song] key of the Shuffle item.• This operation plays back all the tracks currently selected in a random order.Album shuffle:Touch the [Album] key of the Shuffle item.• When more than one album is selected, this operation plays back the albums in no particular order. Tracks in an album are played back in the recorded order.3. To cancel the shuffle play, touch the [Off] key of the function to cancel.• The repeat play cannot be canceled. Normally, it should be set to the All repeat play.4. Touch the [Back] key to return to the previous screen.Note:•“All repeat” will be selected automatically when you connect the iPod which is turned off the repeat function.❏Selecting tracks to be playedYou can specify the tracks to be played by touching the following list keys:●[Videos] keyThe following category keys are displayed. You can narrow the listed items by selecting these categories.• The category keys displayed may differ depending on the connected iPod.[Playlists]:The list of all the Video Playlists stored in the iPod is displayed.[Movies]:The list of all the Movies stored in the iPod is displayed.](https://usermanual.wiki/Faurecia-Clarion-Electronics/QY5014.Installation-Manual/User-Guide-1211545-Page-42.png)
![41NX700English Owner’s manual[Music Videos]:You can narrow the Albums to be listed by specifying the Artist name.[Rental]:The list of all the Rental Movies stored in the iPod, which are downloaded with iTunes Movie Rentals, is displayed.[TV Shows]:You can narrow the Seasons to be listed by specifying the Program title.[Video Podcasts]:You can narrow the Tracks to be listed by specifying the Video Podcast name.●[Playlists] keyThe list of all the Playlists and Video Playlists stored in the iPod is displayed.●[Music] keyThe following category keys are displayed. You can narrow the listed items by selecting these categories.• The category keys displayed may differ depending on the connected iPod.[Playlists]:The list of all the Playlists stored in the iPod is displayed.[Artists]:You can narrow the Albums to be listed by specifying the Artist name.[Albums]:The list of all the Albums stored in the iPod is displayed.[Songs]:The list of all the Tracks stored in the iPod is displayed.[Genres]:You can narrow the Artists to be listed by specifying the Genre name.[Composers]:You can narrow the Albums to be listed by specifying the Composer name.Selecting tracks to be played from a list screen1. Touch the desired Category key from the iPod mode screen to display the corresponding list screen.2. Touch the desired item key on the screen to specify it.• Touch the [{] or [}] key to scroll the list. You can also use the ABC Search function to scroll the list (see below).• When a track list of an Album, Playlist, or Video Playlist is displayed, specifying a track starts playback of the specified album/playlist from the specified track.• When the track list of the Songs is displayed, specifying a track starts playback of all the tracks stored in the iPod from the specified track.• When the other list screen is displayed, repeat this operation until you select the tracks to be played back.• When video tracks are specified in the Music mode, only the audio data will be played back.3. Touch the [Back] key to return to the previous screen.●Using the ABC Search function1. Touch the [ABC Search] key when the list screen you wish to scroll is displayed.2. Repeat touching the [A ]], [[ Z], or [0-9] key to specify the initial character of the list item you wish to display.3. Touch the [Search] key.The list will scroll to display the first item started from the specified character (or a following character).](https://usermanual.wiki/Faurecia-Clarion-Electronics/QY5014.Installation-Manual/User-Guide-1211545-Page-43.png)
![42 NX700English Owner’s manual❏Viewing video data in the iPod (only for the iPod with video)When you connect an iPod with video by using the optional connection cable, you can enjoy the video data stored in the iPod showing them on the operation panel of this unit (and the rear monitor if connected).1. Play back your desired video tracks.The system will automatically enter into the Video mode and the playback starts. The specified video image is also displayed on the rear monitor if connected.• When in the Simple Control mode, touch the [Music/Videos] key to switch to the Video mode. To return to the Music mode, touch the [Music/Videos] key again.2. Touch the [Hide] key to hide the iPod mode screen.The video image will be displayed on this unit.3. To display the iPod mode screen, touch the screen.Note:•“Audio Only” is displayed when the automobile is moving.•Video data may not be played back according to the status of the iPod.•The volume setting of video data is relatively lower than audio data. Be sure to lower the volume setting before switching to the other mode.•Do not select the categories with no track registered from a list screen. The iPod may be frozen. If the iPod is frozen, reset the iPod by following the procedure described in the instruction manual of the iPod.Selecting the Output SignalThis setting is used to select the audio signal of video tracks.1. Touch the [Options] key.2. Touch the [Digital] or [Analog] key of the Output Signal item to specify the setting.[Digital]:The digital audio data via the USB will be output. Normally select this setting.[Analog]:The analog audio data via the AUX will be output. Select this setting if your iPod cannot output digital signals.3. Touch the [Back] key to return to the previous screen.Note:•Make sure to reconnect the iPod after changing this setting. The key ([Digital] or [Analog]) indicator and output setting will be changed after reconnecting your iPod.USB Memory OperationsThis system can play audio files (MP3/WMA/AAC) stored in an USB memory which is recognized as “USB Mass Storage Class device”. You can use your USB memory as an audio device by simply copying desired audio files into it.Note:•This system will not operate or may operate improperly with some USB memory.•Files protected with any DRM can not be played.❏Notes on using USB memories●General notes• When no data is present, the message “No File” will be displayed.• The USB memory is used with the equalizer function turned OFF.●Notes on the MP3/WMA/AAC files• This system can play the MP3/WMA/AAC files stored in the USB memory.• This system cannot play DivX files stored in the USB memory.• For AAC files, this system supports only the MPEG4 Audio files encoded by the iTunes.• Set the Sampling Frequency to:For MP3 files:• MPEG1 Layer3: 32, 44.1, or 48 kHz• MPEG2 Layer3: 16, 22.05, or 24 kHz• MPEG2.5 Layer3: 8, 11.025, or 12 kHzFor WMA files: 8 to 48 kHzFor AAC files: 8 to 48 kHz WARNING•Some videos may be recorded at a higher volume level than desired. Increase the volume gradually from the minimal setting after the video has started.•For your safety, the driver should not watch the video or operate the controls while driving. Please note that watching and operating the video while driving are prohibited by law in some countries.](https://usermanual.wiki/Faurecia-Clarion-Electronics/QY5014.Installation-Manual/User-Guide-1211545-Page-44.png)
![43NX700English Owner’s manual• Set the Bit Rate to:For MP3 files:• MPEG1 Layer3: 32 to 320 kbps (VBR)• MPEG2 Layer3: 8 to 160 kbps (VBR)• MPEG2.5 Layer3: 8 to 160 kbps (VBR)For WMA files: 32 to 192 kbps (VBR)For AAC files: 8 to 320 kbps (VBR)• Add the following file extension using single byte characters:For MP3 files: “.MP3” or “.mp3”For WMA files: “.WMA” or “.wma”For AAC files: “.M4A” or “.m4a”Note:•Some files may not be played on this system even though they meet all the above mentioned conditions.●Notes on the folder structure• The folder hierarchy must be within 8 hierarchical levels. Otherwise, playback will be impossible.• The maximum allowable number of folders is 512 (including root directory and folders with no MP3/WMA/AAC file).• The maximum allowable number of files in a folder is 255.• You can store the MP3 files, WMA files, and AAC files together in a folder.●Notes on the Tag titlesThe limitations on the Tag titles are same as those in the MP3/WMA/AAC modes. See “Displaying MP3/WMA/AAC Tag titles” (page 31).●Folder representation in the folder listThe limitations on the folder representation are same as those in the MP3/WMA/AAC modes. See “Folder representation in the folder list” (page 31).❏Selecting the USB Memory mode1. Connect your USB memory to the USB connector.The system will automatically detect the connected device, and change to the USB mode (USB Memory mode), and start playback after a while.See also “Connecting/Disconnecting an USB Media Device” (page 18).●When an USB memory is already connected1. Press the [SRC] button to display the Source screen.2. Touch the [USB] key to select the USB Memory mode.The system changes to the USB mode (USB Memory mode), and starts playback from the previous position.❏Playing back files in the USB memoryThe operations in the USB Memory mode are same as those in the MP3/WMA/AAC modes. See “Operating MP3/WMA/AAC playback” (page 32) for details.Note:•When performing the fast forward or fast backward function, the playback speed will become 10-time faster. For the VBR files, it may differ depending on the file.Navigation System OperationsNotes on the Navi functions• Hereafter in this section, the Navigation system will be called as “Navi”.• The following functions are available:• Showing the Navi display• Showing the current location screen (The [Map] key selection available on the Source screen).• Navi guidance voice interruption• When a voice interrupt of the Navi arises during 2-Zone ON, the sound of the Main zone is muted, and the sound of the Sub zone is output normally. When it arises during 2-Zone OFF, the audio signals to the 4ch speakers are attenuated, and the voice from the navigation system is output from the front two speakers.Navi operationsChanges between the Navi display and the Audio/Visual (hereinafter, referred as “AV”) display.](https://usermanual.wiki/Faurecia-Clarion-Electronics/QY5014.Installation-Manual/User-Guide-1211545-Page-45.png)
![44 NX700English Owner’s manual●When in the AV mode• Touch the [Map] key on the Source screen to switch to the Navi mode.• When the image interruption from the Navi arises, the screen will be changed to the Navi display. When the interruption is finished, the screen will return to the previous AV display.Note:•Depending on the distance to the next guidance point and the vehicle’s speed, the image interruption may continue until the next route guidance finishes.●When in the Navi mode• Touch the [ ] key on the Navigation Menu screen to switch to the AV mode.• Touch the key of the currently selected Source mode on the Source screen to switch to the relevant AV mode.Note:•For more information on the Navi mode, see the User Manual.Bluetooth Telephone Operations (Tel mode)When the connection with your Bluetooth cellular phone is established, the following functions are available on this unit:• Listening to your telephone calls on the car speakers.• Answering to an incoming call.• Making a call using the Phone Dialer screen.• Making a call using the Phonebook data in the selected cellular phone.• Making a call using the Call Log data of the dialed/received calls.• RedialingNote:•You need to register your Bluetooth cellular phone (Pairing) before use.Telephone operationsYou can select the Tel mode from either AV or Navi mode.●When in the AV mode• Touch the [Tel] or [TEL] key on the Source screen to enter the Tel mode.●When in the Navi mode• Touch the [ ] key on the Navigation Menu to enter the Tel mode.• Touch the [TEL] key on the Source screen to enter the Tel mode.Note:•For the details, refer to the supplied Bluetooth telephone operation manual.AUX OperationsThis function is available when a VTR, etc. is connected to the AUX terminal.Note:•For your safety, this system has a safety function which turns off the picture when the car is moving, so only the audio can be heard. The picture can only be watched when the car is stopped and the parking brake is applied.Selecting the AUX mode1. Press the [SRC] button, and touch the [AUX] key. The system will enter into the AUX mode.Showing the AUX mode screenThe AUX mode screen is used to adjust settings concerning the AUX mode.1. Touch the screen.The AUX mode screen is displayed.If you do not touch the screen for 7 seconds, the display will return to the video screen.Switching to another AUX mode1. Showing the AUX mode screen, touch the [AUX] key.The system will enter into another AUX mode.Changing the audio input levelThe input audio level of the AUX terminals can be changed.• The factory default setting is “High”.1. Touch the screen to display the AUX mode screen, then repeat touching the [Sense] key to select the level.High: 10 dBMid: 4 dBLow: 0 dB WARNING•For your safety, the driver should not watch the video or operate the controls while driving. Please note that watching and operating the video while driving are prohibited by law in some countries.](https://usermanual.wiki/Faurecia-Clarion-Electronics/QY5014.Installation-Manual/User-Guide-1211545-Page-46.png)
![45NX700English Owner’s manualSelecting the screen sizeYou can change the screen size to suit to the video image.• The factory default setting is “Full Wide”.1. Touch the screen to display the AUX mode screen.2. Repeat touching the [S-Size] key until your desired screen size is selected.• This key shows the current screen size setting.[Full Wide]:The image is expanded so that the rectangle of the image fits to the screen (16:9). The aspect ratio of the image may be changed.[Cinema]:The image is expanded so that the top and bottom edges of the image fit to the screen.[Normal]:The image is expanded so that the top and bottom edges of the image fit to the screen, and that the aspect ratio of the image becomes 4:3. The aspect ratio of the image may be changed.[Wide]:The image is expanded so that the left and right edges of the image fit to the screen. The top and bottom areas of the image may be cut off.3. Touch the [Hide] key to return to the video screen.Audio Settings❏Displaying the Audio screenYou can customize the various audio settings of this unit from the Audio screen.1. Touch the [SET] key.The Settings screen appears.2. Touch the [Audio] key.The Audio screen appears.3. Touch the desired Tab key, and perform the adjustment.See the following sections for details.• In the following sections, only the details regarding adjustments are described, procedures to select items are skipped.4. When the adjustment completes, touch the [Back] key to return to the previous screen.7.SYSTEM SETTINGS](https://usermanual.wiki/Faurecia-Clarion-Electronics/QY5014.Installation-Manual/User-Guide-1211545-Page-47.png)
![46 NX700English Owner’s manual❏Setting the Beat EQThis system provides 4 types of sound tone adjustment functions. You can select desired function and adjust the effect level.• The factory default setting is “Off”.Notes:•The volume will change each time the Beat EQ function is switched.•Sufficient effects may not be obtained with some speaker systems. In such cases, adjust the volume.Adjusting the custom tone●Adjusting the Bass●Adjusting the Mid●Adjusting the Treble❏Adjusting the Balance/Fader3-1. Touch the [Beat EQ] key to display the Beat EQ tab screen.3-2. Touch the [BEQ1], [BEQ2], [BEQ3], [Custom], or [Off] key to select the function you wish to apply.[BEQ1]:The bass sound area is emphasized.[BEQ2]:The mid sound area is reduced, and the bass and treble sound area are emphasized.[BEQ3]:The mid sound area is lowered, and the bass and treble sound area are extremely emphasized.[Custom]:You can adjust the sound tone of bass, mid, and treble areas individually. For details, see the following section.[Off]:No sound effect is applied.3-3. When you select an item other than “Custom” and “Off” in step 3-2, adjust the effect level by touching the [–] or [+] key.Setting range: –3 to +3• The factory default setting is “0”.3-1. Touch the [Beat EQ] key to display the Beat EQ tab screen.3-2. Touch the [Custom] key.3-3. Perform the following settings to adjust the sound tone.3-4. Touch the [Bass] key.3-5. Touch the [–] or [+] key of the desired item to adjust the effect level.Gain: –7 to +7• The factory default setting is “0”.Frequency: 50Hz, 100Hz, 200Hz• The factory default setting is “100Hz”.Q: 0.7, 1, 1.4, 2• The factory default setting is “1”.3-4. Touch the [Mid] key.3-5. Touch the [–] or [+] key of the desired item to adjust the effect level.Gain: –7 to +7• The factory default setting is “0”.Frequency: 500Hz, 1kHz, 2kHz• The factory default setting is “1kHz”.Q: 0.7, 1, 1.4, 2• The factory default setting is “1”.3-4. Touch the [Treble] key.3-5. Touch the [–] or [+] key of the desired item to adjust the effect level.Gain: –7 to +7• The factory default setting is “0”.Frequency: 5kHz, 10kHz, 15kHz• The factory default setting is “10kHz”.Q: 0.7, 1, 1.4, 2• The factory default setting is “1”.3-1. Touch the [BAL/FAD] key to display the BAL/FAD tab screen.3-2. Touch the [[] or []] key of the Balance item to adjust the balance level.[[]:Emphasizes the sound from the left speakers.[]]:Emphasizes the sound from the right speakers.Adjustment range: left 12 to right 12• The factory default setting is “0”.](https://usermanual.wiki/Faurecia-Clarion-Electronics/QY5014.Installation-Manual/User-Guide-1211545-Page-48.png)
![47NX700English Owner’s manual❏Setting the Sub Woofer ControlYou can adjust the volume output to the Sub Woofer.• The factory default setting is “0”.❏Setting the Sub Woofer PhaseYou can reverse the phase of the Sub Woofer output signal.• The factory default setting is “Normal”.❏Adjusting the High Pass FilterYou can adjust the cut-off frequency of the High Pass Filter for the front/rear speaker output.• The factory default setting is “Through”.❏Adjusting the Low Pass FilterYou can adjust the cut-off frequency of the Low Pass Filter for the subwoofer output.• The factory default setting is “Through”.❏Setting the Amp CancelWhen an external amplifier is used, using this function reduces power noises of the audio lines.• The factory default setting is “Off”.❏Setting the BBE MPThis function works only for the sound in the USB mode, corrects the distorted waveform of the high-pass area when decoding the digital sound.• The factory default setting is “Off”.❏Turning on/off the Magna Bass EXtendThe Magna Bass Extend does not adjust the low sound area like the normal sound adjustment function, but emphasizes the deep bass sound area to provide you with a dynamic sound.• The factory default setting is “Off”3-3. Touch the [{] or [}] key of the Fader item to adjust the fader level.[{]:Emphasizes the sound from the front speakers.[}]:Emphasizes the sound from the rear speakers.Adjustment range: front 12 to rear 12• The factory default setting is “0”.3-1. Touch the [Others] key to display the Others tab screen.3-2. Touch the [–] or [+] key of the Sub Woofer Ctrl item to adjust the output level.Setting range: –6 to +63-1. Touch the [Others] key to display the Others tab screen.3-2. Touch the [Reverse] or [Normal] key of the Sub Woofer Phase item to select the phase setting.3-1. Touch the [Others] key to display the Others tab screen.3-2. Touch the [[] or []] key of the High Pass Filter item to adjust the setting.Settings: Through, 60Hz, 90Hz, 120Hz3-1. Touch the [Others] key to display the Others tab screen.3-2. Touch the [[] or []] key of the Low Pass Filter item to adjust the setting.Settings: Through, 120Hz, 90Hz, 60Hz3-1. Touch the [Others] key to display the Others tab screen.3-2. Touch the [}] key to display the next screen.3-3. Touch the [On] or [Off] key of the Amp Cancel item to turn the Amp Cancel function on or off.3-1. Touch the [Others] key to display the Others tab screen.3-2. Touch the [}] key to display the next screen.3-3. Touch the [[] or []] key of the BBE MP item to set the correction level.Settings: Off, Low, Mid, High3-1. Touch the [Others] key to display the Others tab screen.3-2. Touch the [}] key to display the next screen.3-3. Touch the [On] or [Off] key of the Magna Bass EX item to turn the Magna Bass Extend function on or off.](https://usermanual.wiki/Faurecia-Clarion-Electronics/QY5014.Installation-Manual/User-Guide-1211545-Page-49.png)
![48 NX700English Owner’s manual❏Setting the Audio ATTenuationThe audio output can be attenuated when a voice interrupt of the navigation system arises.• The factory default setting is “High”.General Settings❏Displaying the General screenYou can customize the various settings of this unit from the General screen.1. Touch the [SET] key.The Settings screen appears.2. Touch the [General] key.The General screen appears.3. Touch the desired Tab key, and perform the adjustment.See the following sections for details.• In the following sections, only the details regarding adjustments are described, procedures to select items are skipped.4. When the adjustment completes, touch the [Back] key to return to the previous screen.❏Setting Camera InterruptWhen the optional Rear Vision Camera is connected to this unit, the rear view image is displayed on the screen when the gear lever is put in the reverse gear position.• The factory default setting is “Off”.❏Setting Camera WarningThe following warning message is displayed during use of the Rear Vision Camera: “Make sure of safety around your vehicle”.• The factory default setting is “On”.Note:•This setting is disabled when the Camera Interrupt feature is set to Off.❏Setting the AUX input (NTSC/PAL)• The factory default setting is “NTSC”.Note:•This setting is applied only to the AUX video input.•If nonstandard video signals are input, the video image may be disturbed.•When you set to “Auto”, the video image may be disturbed temporarily depending on the input video signal.3-1. Touch the [Others] key to display the Others tab screen.3-2. Touch the [}] key to display the next screen.3-3. Touch the [[] or []] key of the Audio ATT item to set the volume level when a voice interrupt arises.Settings: Mute, Low, Mid, High3-1. Touch the [Display] key to display the Display tab screen.3-2. Touch the [NTSC], [PAL], or [Off] key of the Camera Interrupt item to set to “NTSC”, “PAL”, or “Off”.[NTSC]:Turn on the function with the NTSC video system.[PAL]:Turn on the function with the PAL video system.[Off]:Turn off the function.3-1. Touch the [Display] key to display the Display tab screen.3-2. Touch the [On] or [Off] key of the Camera Warning item to turn the Camera Warning function on or off.3-1. Touch the [Display] key to display the Display tab screen.3-2. Touch the [Auto], [NTSC], or [PAL] key of the AUX input item to set the VTR system.](https://usermanual.wiki/Faurecia-Clarion-Electronics/QY5014.Installation-Manual/User-Guide-1211545-Page-50.png)
![49NX700English Owner’s manual❏Setting the BeepThe sound heard when you make operations is called “beep”. The system can be set so that it does not produce this beep sound.• The factory default setting is “On”.❏Setting the Blink LEDYou can set the unit to blink the Blink LED indication when the ACC power is turned off.• The factory default setting is “Off”.❏Confirming the DivX Registration Code and DivX URLWhen you download a DivX VOD (Video-on-Demand) file from a web site, entering the registration code of your playback system may be required to authorize the file. You can confirm the registration code of your system and the URL information by the following operation.Note:•The DivX registration code is not displayed when a disc is set in the DVD player.❏Performing the System CheckYou can perform the system check by the following operation.❏Resetting the navigation systemYou can reset the navigation system.3-1. Touch the [System] key to display the System tab screen.3-2. Touch the [On] or [Off] key of the Beep item to turn the Beep function on or off.3-1. Touch the [System] key to display the System tab screen.3-2. Touch the [On] or [Off] key of the Blink LED item to turn the Blink LED function on or off.3-1. Touch the [System] key to display the System tab screen.3-2. Confirm the displayed information of the DivX Registration Code and DivX URL items.3-1. Touch the [System] key to display the System tab screen.3-2. Touch the [}] key to display the next screen.3-3. Touch the []] key of the System Check item.The System Check screen is displayed.3-4. Touch the [Start system check] key to perform the system check manually.The system will be restarted after performing the system check.3-1. Touch the [System] key to display the System tab screen.3-2. Touch the [}] key to display the next screen.3-3. Touch the []] key of the System Check item.3-4. Touch the [Reset NAVI module.] key to reset the navigation system.](https://usermanual.wiki/Faurecia-Clarion-Electronics/QY5014.Installation-Manual/User-Guide-1211545-Page-51.png)
![50 NX700English Owner’s manual❏Setting the anti-theft function (CATS)“CATS” is the acronym of “Clarion Anti-Theft System”. When you set a PIN code (called as “Personal Code”), a theft is prevented by disabling the operation of the unit at the theft.In addition, set the Blink LED function to improve the effect of the CATS function (see page 49).Setting your Personal CodeNote:•Write down your Personal Code in case you forget it.Erasing the Personal CodeWhen the ENTER PERSONAL CODE screen appearsThe Personal Code screen will be displayed when turning the ACC power on after performing the following operations:• The car battery was replaced.• The backup power was cut off.• The Reset button was pressed.Note:•If you forgot your Personal Code, please consult your dealer or an authorized Clarion service center.1. Enter your Personal Code currently set.2. When the correct Personal Code is entered, the unit will restart from the initial startup screen.Note:•When you enter a wrong Personal Code, the message “Code Incorrect” is displayed and the Personal Code entry is prohibited for a while. This prohibited time is changed according to the number of times of wrong code entry as follows:•1 to 6 times: 15 seconds•7 times or more: 15 minutes3-1. Touch the [System] key to display the System tab screen.3-2. Touch the [}] key to display the next screen.3-3. Touch and hold the blank area just below the []] key of the System Check item for more than 2 seconds.The Personal Code screen appears.• When a Personal Code is already set, the Erase Code screen will appear. Retry this operation after erasing the old Personal Code.3-4. Enter your desired 4-digit Personal Code by touching the [0] to [9] keys, then touch the [ENT] key.• Touch the [BS] key when you make a mistake in entering.3-5. Enter the same Personal Code again for confirmation, then touch and hold the [ENT] key for more than 2 seconds.The entered Personal Code will be set, and it will return to the previous screen.3-1. Touch the [System] key to display the System tab screen.3-2. Touch the [}] key to display the next screen.3-3. Touch and hold the blank area below the []] key of the System Check item for more than 2 seconds.The Erase Code screen appears.3-4. Enter the Personal Code currently set by touching the [0] to [9] keys, then touch and hold the [ENT] key for more than 2 seconds.The message “Personal Code has been erased” appears, and it will return to the previous screen.](https://usermanual.wiki/Faurecia-Clarion-Electronics/QY5014.Installation-Manual/User-Guide-1211545-Page-52.png)
![51NX700English Owner’s manual❏Setting the Auto AntennaWhen an auto antenna which is extended automatically is used, you can set so that it is automatically extended/collapsed according to the power setting of this unit.1. Touch the [SET] key to display the Settings screen.2. Touch and hold the [Auto] or [Down] key of the Antenna item for more than 1 second to set this function.Auto:The auto antenna function is turned on.Down:The antenna is collapsed.Adjusting the MonitorYou can customize the various monitor settings by the following operations.❏Setting the Screen modeThe system has two screen modes: the Day mode and Night mode. Each mode has the own dimmer setting. You can select these modes temporarily by performing the following operation.• The factory default setting is “Auto”.1. Press the [SRC] button to display the Source screen.2. Touch the [Day], [Night], or [Auto] key to set the Screen mode.[Day]:Set the dimmer level temporarily to the Day mode (brighter).[Night]:Set the dimmer level temporarily to the Night mode (dimmer).[Auto]:The dimmer level is changed according to the status of the car light:When the car light is off: Day modeWhen the car light is on: Night modeNote:•When the Night Mode setting of the navigation system is set to “Automatic”, this setting also works upon the Color mode of the navigation system.❏Adjusting the Dimmer, Bright, Color, Contrast, and Hue levelNote:•The Bright, Color, Contrast, and Hue settings can be adjusted only when a video image is displayed on the screen, and the car is stopped with applying the parking brake.•The Hue setting can be adjusted only when the NTSC mode is selected.•The navigation screen has own dimmer setting separately from the AV screen. The dimmer adjustment in a mode does not affect each other screen.•The Rear Vision Camera image cannot be adjusted directly. Perform the adjustments when displaying a video image of the other source.1. Touch the [SET] key to display the Settings screen.2. Touch the [Monitor ADJ] key to display the Monitor screen.3. Touch the [Dimmer], [Bright], [Color], [Contrast], or [Hue] key you wish to adjust, then touch the [–] or [+] key to adjust the level.[Dimmer]:Adjusts the panel brightness when the car lights are ON or OFF.[+]: Press to make image brighter.[–]: Press to make image dimmer.[Bright]:Adjusts the brightness of the display.[+]: Press to make image brighter.[–]: Press to make image dimmer.[Color]:Adjusts the color saturation.[+]: Press to increase color depth.[–]: Press to decrease color depth.[Contrast]:Adjusts the contrast of the display.[+]: Press to make contrast higher.[–]: Press to make contrast lower.[Hue]:Adjust the tone of color (red or green is emphasized).[+]: Press to increase green.[–]: Press to increase red.4. When the adjustment completes, touch the [Back] key to return to the previous screen.](https://usermanual.wiki/Faurecia-Clarion-Electronics/QY5014.Installation-Manual/User-Guide-1211545-Page-53.png)
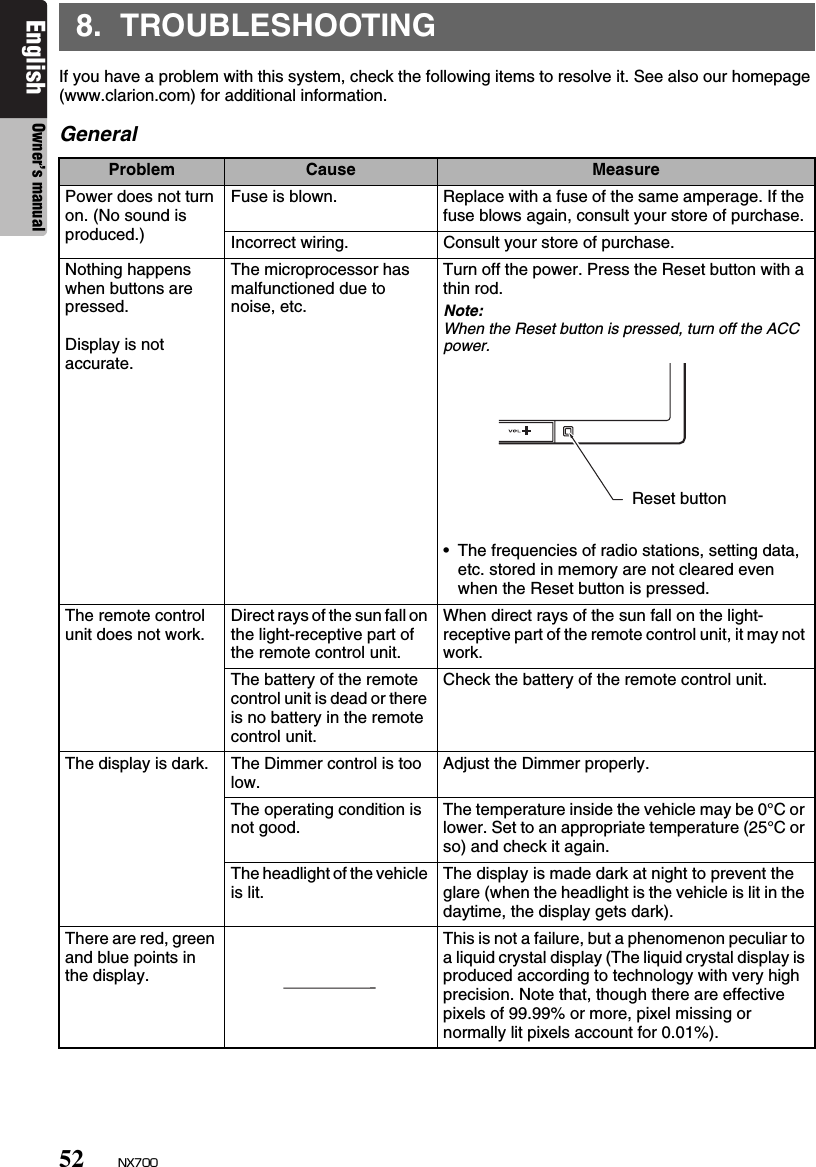
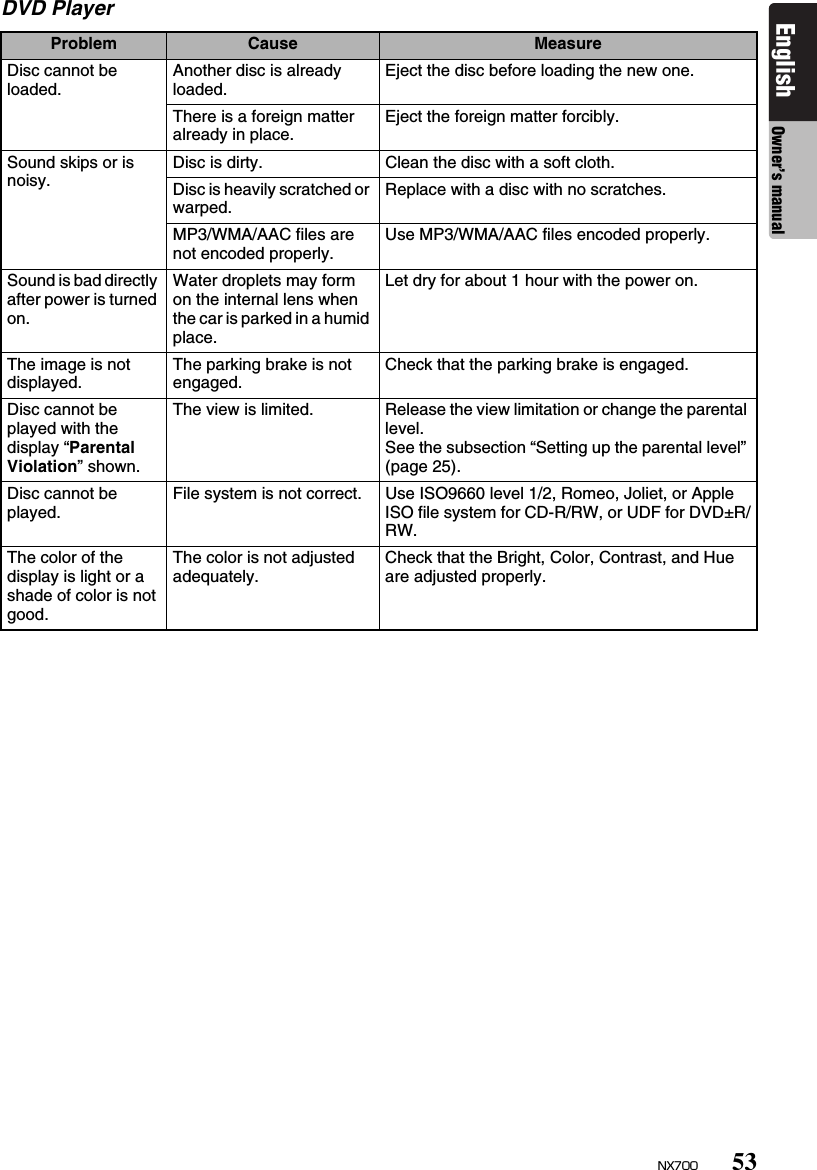
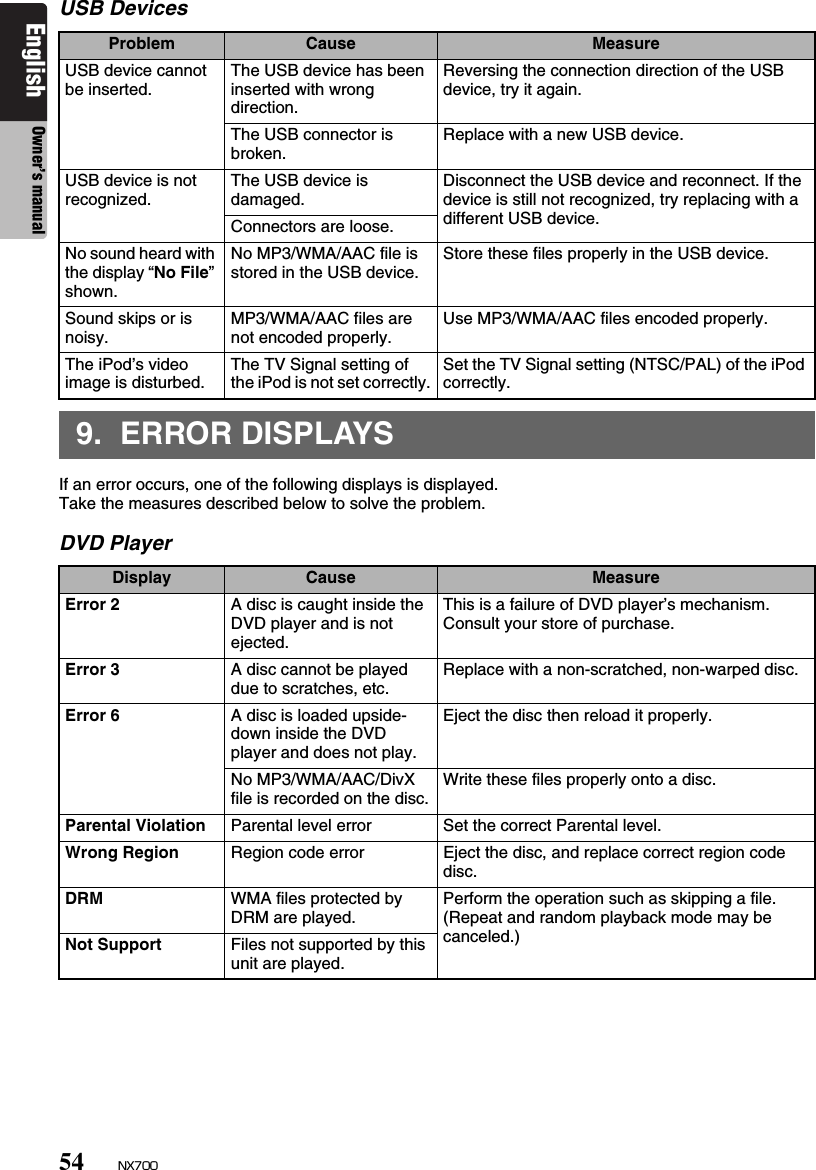
![55NX700English Owner’s manualUSB DevicesIf an error display other than the ones described above appears, press the Reset button. If the problem persists, turn off the power and consult your store of purchase.• The frequencies of radio stations, setting data, etc. stored in memory are not cleared even when the Reset button is pressed.Display Cause MeasureError 2 The connected USB device is not supported.If the USB device is frozen, disconnect it, reset it, and reconnect it again.Connect a proper USB device.Error 3(USB memory)An error occurred when controlling the USB device.Disconnect the USB device, and reconnect it again.Error 3 (iPod) The selected category has no track data.Touch the [{ (Track)] key. If the error is not cleared, disconnect the iPod, and reconnect it again.The iPod is frozen. Disconnect the iPod, reset it, and reconnect it again.Error 5 (iPod) The connected iPod is not recognized.Disconnect the iPod, and reconnect it again. If the iPod is still not recognized, try replacing with a different iPod.If the iPod is frozen, disconnect it, reset it, and reconnect it again.Bus Error Over-current or data error is detected.Turn off the ignition switch, disconnect the device, restart the engine and reconnect it again. If the device is still not recognized, try replacing with a different device.Device Error The device is connected via the USB Hub.Disconnect the device, and reconnect directly to the USB connector of this unit without using the USB Hub.DRM WMA files protected by DRM are played.Perform the operation such as skipping a file. (Repeat and random playback mode may be canceled.)Not Support Files not supported by this unit are played.](https://usermanual.wiki/Faurecia-Clarion-Electronics/QY5014.Installation-Manual/User-Guide-1211545-Page-57.png)
![56 NX700English Owner’s manualFM TunerFrequency Range: 87.9 MHz to 107.9 MHzUsable Sensitivity: 9 dBf50dB Quieting Sensitivity: 15 dBfAlternate Channel Selectivity: 70 dBStereo Separation (1 kHz): 38 dBFrequency Response (±3 dB): 30 Hz to 15 kHzAM TunerFrequency Range: 530 kHz to 1710 kHzUsable Sensitivity: 28 dBμVDVD PlayerSystem:Digital Versatile Disc System with CDDA capableUsable discs: DVD video disc, Compact discFrequency Response:20 Hz to 20 kHz (CD) (±1 dB)Signal to Noise Ratio: 100 dB (1 kHz)Dynamic Range: 100 dB (1 kHz)Distortion: 0.01%USBSpecification: USB 2.0 Full SpeedFile system: FAT12/16/32, non-VFAT-compliantPlayable audio format:MP3 (.mp3): MPEG 1/2 Audio Layer-3WMA (.wma): Ver. 7/8/9.1/9.2AAC (.m4a): AAC format encoded by iTunes and iTunes+ onlyMaximum number of folders: 512Maximum number of files: 255 (for a folder)Maximum folder hierarchy: 8 levels (including Root)Maximum power supply: 500 mABluetoothSpecification: Bluetooth Ver. 2.0 + EDRProfile:HFP (Hands-Free Profile)DUN (Dial-up Networking Profile)SPP (Serial Port Profile)Send/Receive Sensitivity: Class 2Audio AmplifierMaximum power output:200 W (50 W × 4)Speaker impedance: 4 Ω (4 to 8 Ω allowable)InputAudio input sensitivity:High: 0.65 V (at 2 V output)Mid: 1.3 V (at 2 V output)Low: 2.0 V (at 2 V output)(input impedance 10 kΩ or greater)Video input:1.0 ±0.2 Vp-p (input impedance 75 Ω)Video OutputVideo output:1.0 ±0.2 Vp-p (output impedance 75 Ω)LCD MonitorScreen Size: 7-inch wide type6" Width (152 mm) × 3-5/16" Height (85 mm)Display method:Transmission type TN liquid crystal displayDrive method: TFT (thin-film transistor)active matrix drivingPixels: 336,960 (1440 × 234)GeneralPower source voltage:14.4 V DC (10.8 to 15.6 V allowable)Ground: NegativeCurrent consumption: 3.5 A (1 W)Auto Antenna Rated Current: 500 mA lessDimensions of the Main Unit:7" Width (178 mm) × 3-15/16" Height (100 mm) × 6-5/16" Depth (160 mm)Weight of the Main Unit: 2.6 kgDimensions of the Remote Control Unit: 1-3/4" Width (43.4 mm) × 1/2" Height (12.5 mm) × 4-1/2" Depth (112.7 mm)Weight of the Remote Control Unit:60 g (including battery)Note:•Specifications comply with JEITA Standards.•Specifications and design are subject to change without notice for further improvement.10.SPECIFICATIONS6-3/4" (171 mm)7" (178 mm)2" (25mm)6-5/16" (160mm)3-15/16"100 mmPower Output:20 W x 4 Channels RMS [4 Ω @ 14.4 V ≤ 1 % THD+N]Signal to Noise Ratio:84 dBA (reference: 1 W into 4 Ω)](https://usermanual.wiki/Faurecia-Clarion-Electronics/QY5014.Installation-Manual/User-Guide-1211545-Page-58.png)
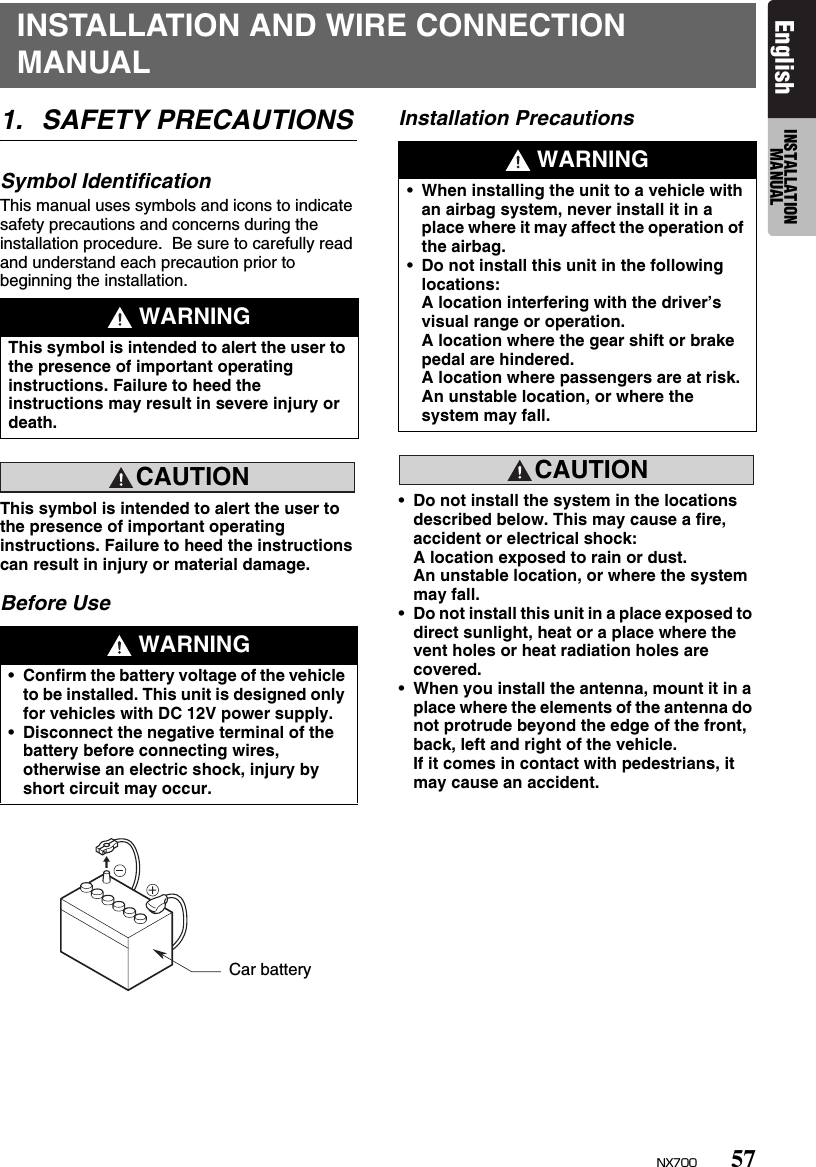
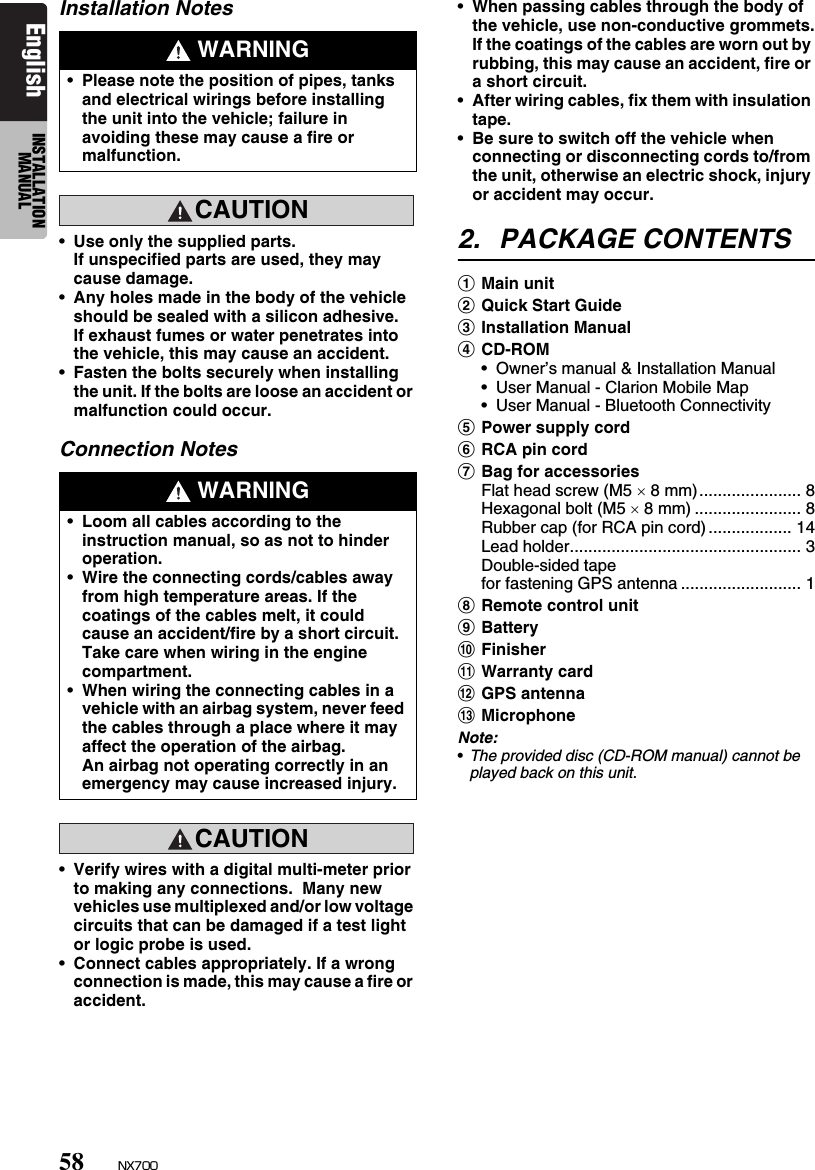
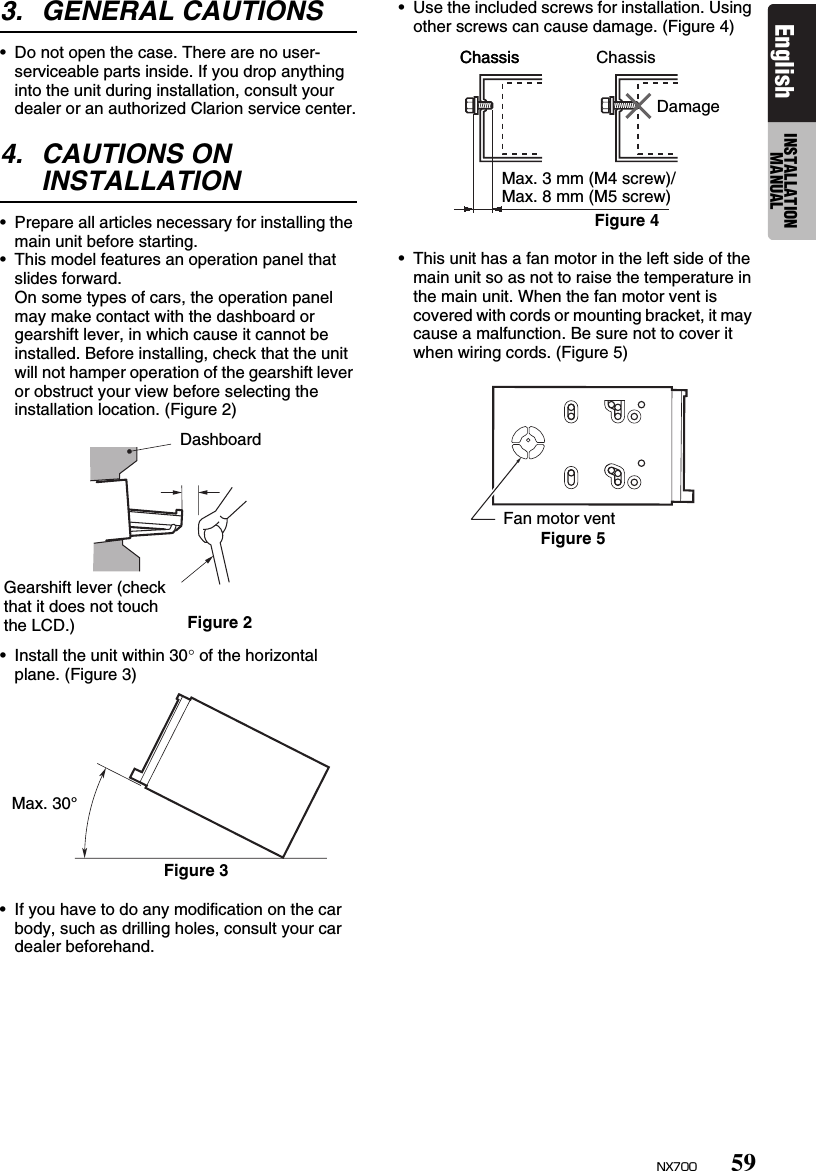
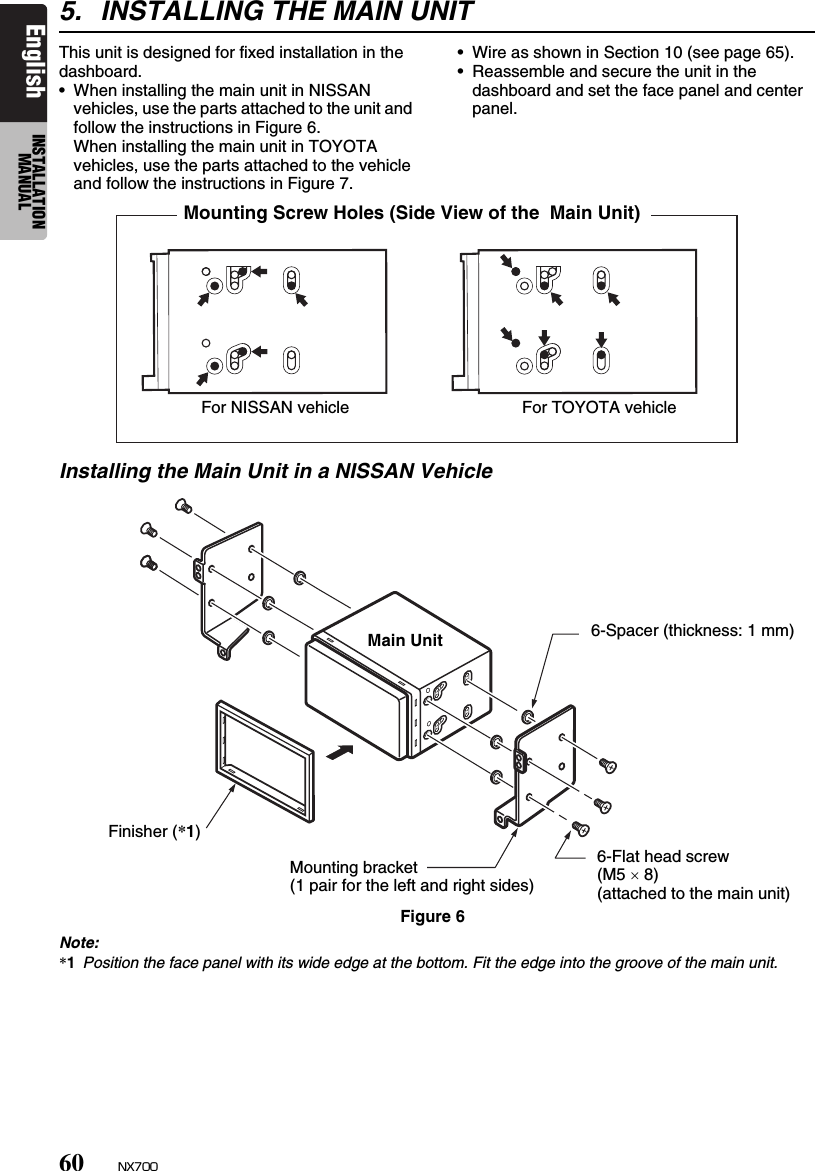
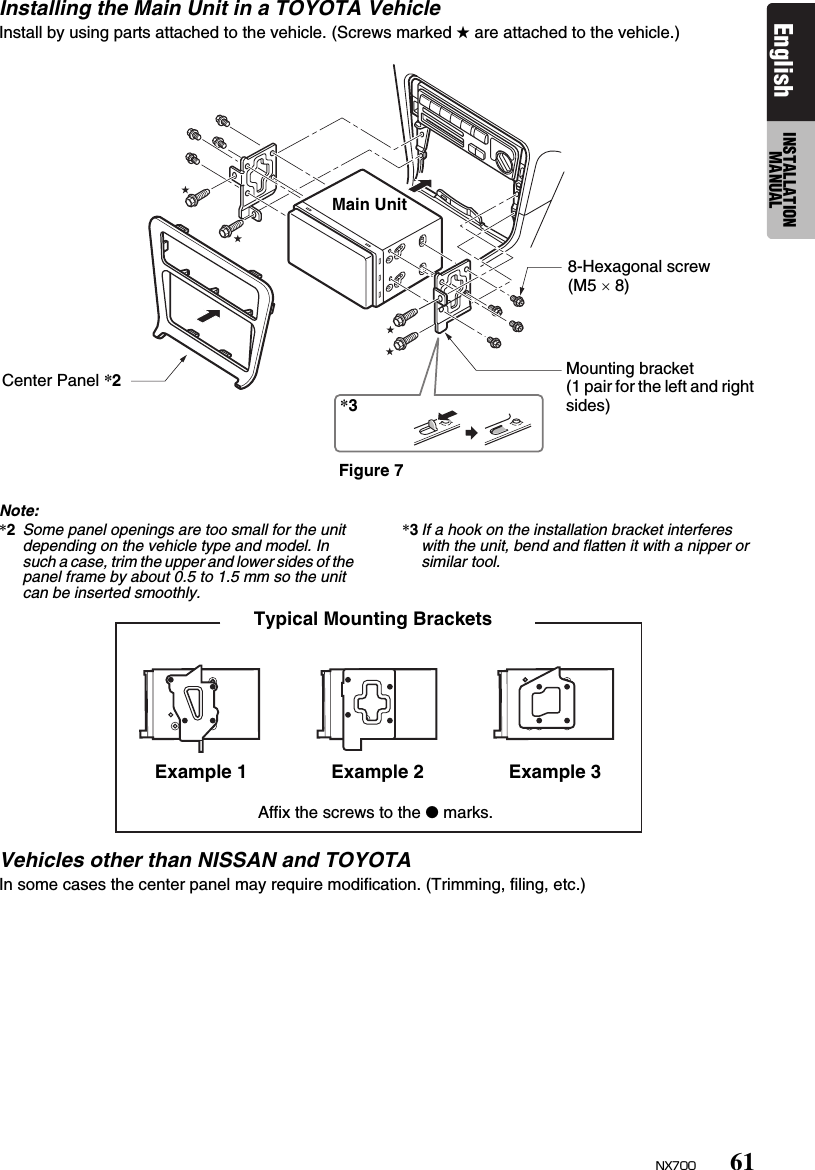
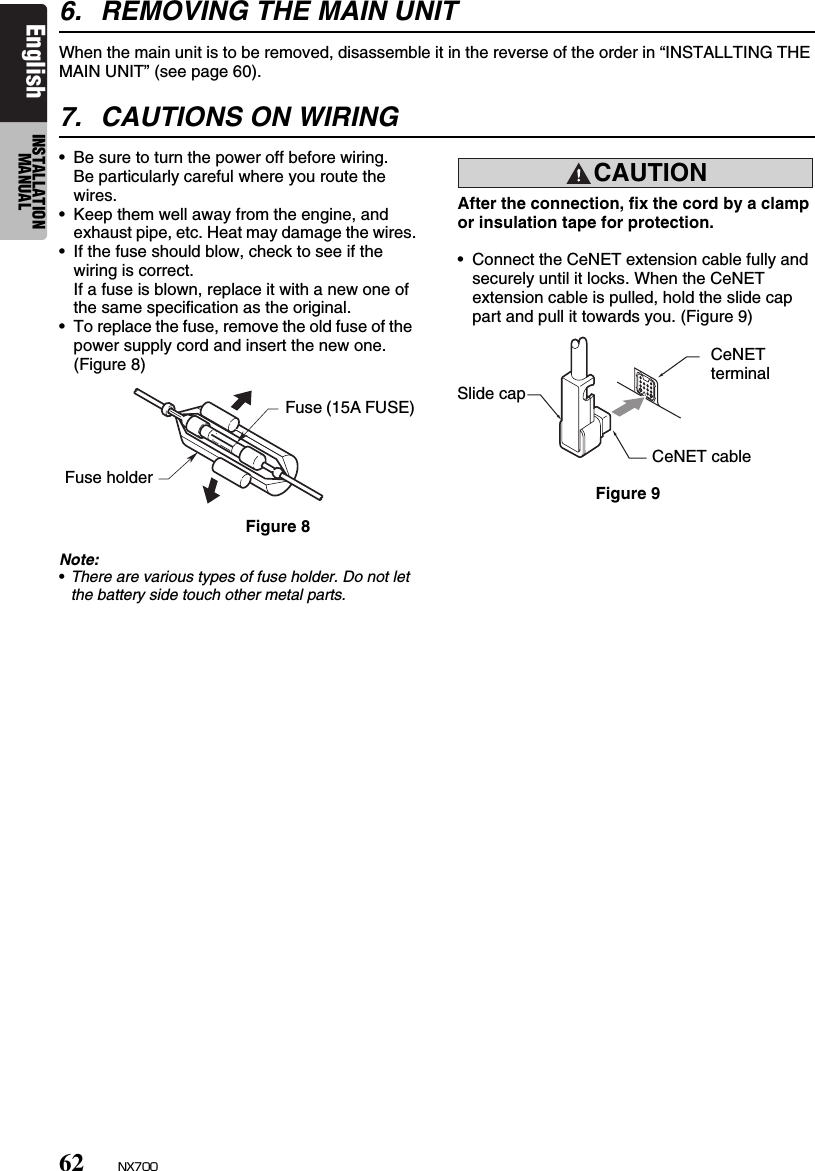
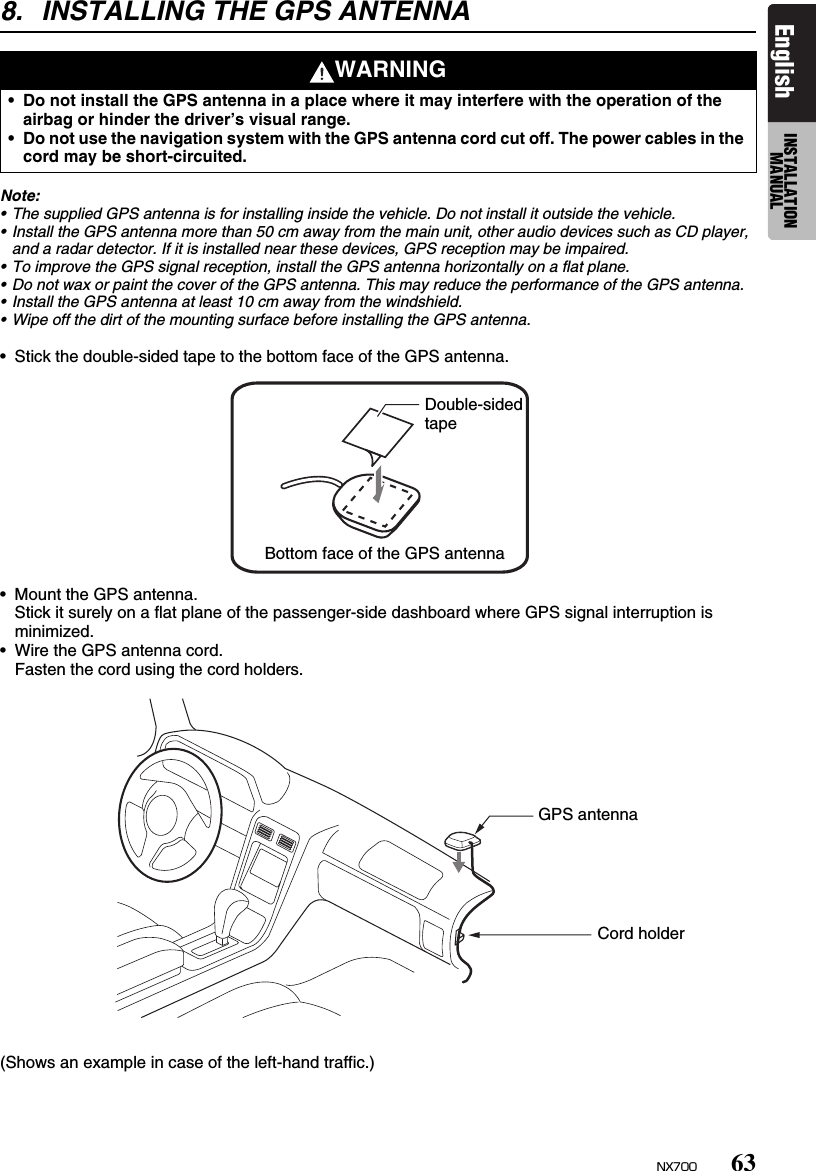
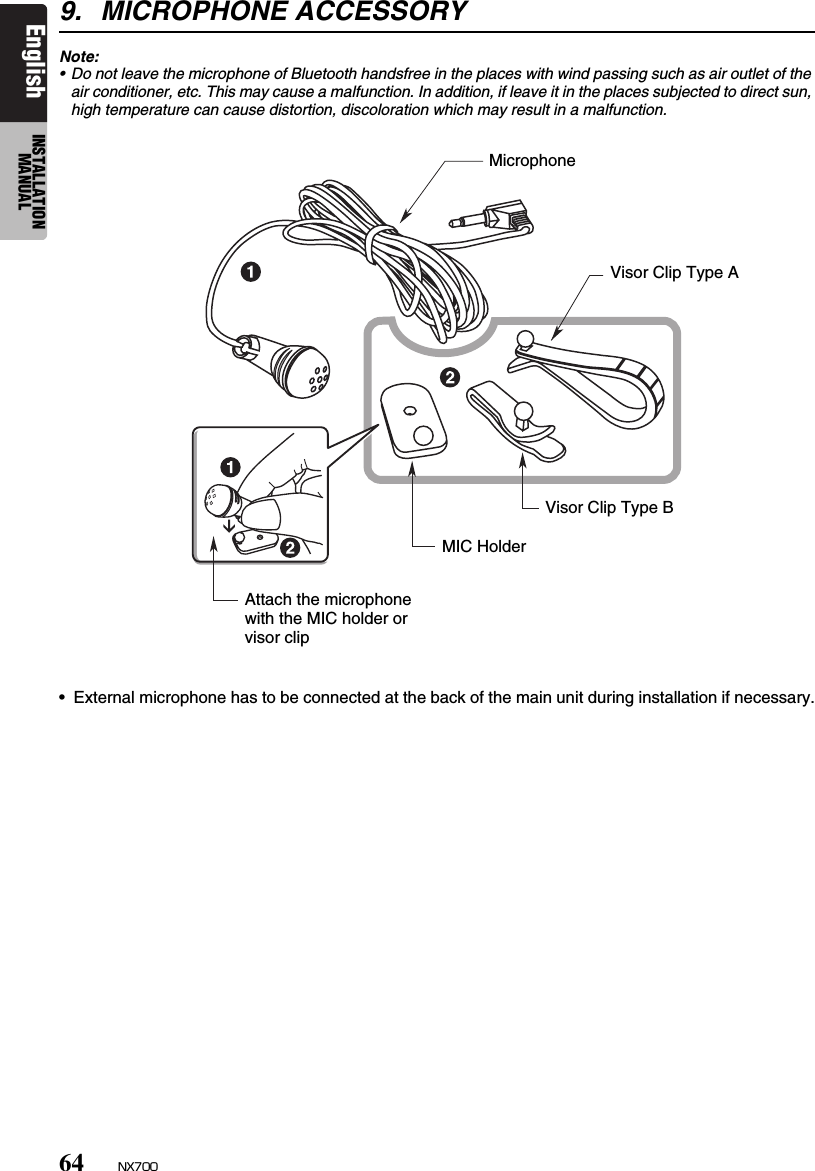
![65NX700English INSTALLATION MANUAL10. WIRE CONNECTIONRadio antenna jackConnect to the AUX audio input terminal* and the iPod video input terminal.*Audio connection is required only when [Analog] is selected for the iPod output signal (page 42).oriPod/iPhoneConnection cable (included in your iPod/iPhone)Connection cable(CCA-723/CCA-748)iPod with video/iPhoneRefer to the following page.GrayPurpleGrayGreenBlackRedWhiteRedWhiteRedWhiteYellowYellowWhiteRedYellowRightLeftRightLeftRightLeftRightLeftRear audio output terminalSubwoofer output terminal (MONO 2ch)Video output terminal(2-Zone audio output terminal)AUX audio input terminalRear Vision Camera terminal4-Channel AmplifierRear MonitorWireless HeadphoneVTR etc.USB terminalRedWhiteBlackGPS antenna jackBlackBlack iPod video input terminalConnect to the AUX audio/video input terminal.RedAUX video input terminalFront audio output terminalYellowSteering wheel remote control terminalCeNETterminalMicrophone](https://usermanual.wiki/Faurecia-Clarion-Electronics/QY5014.Installation-Manual/User-Guide-1211545-Page-67.png)