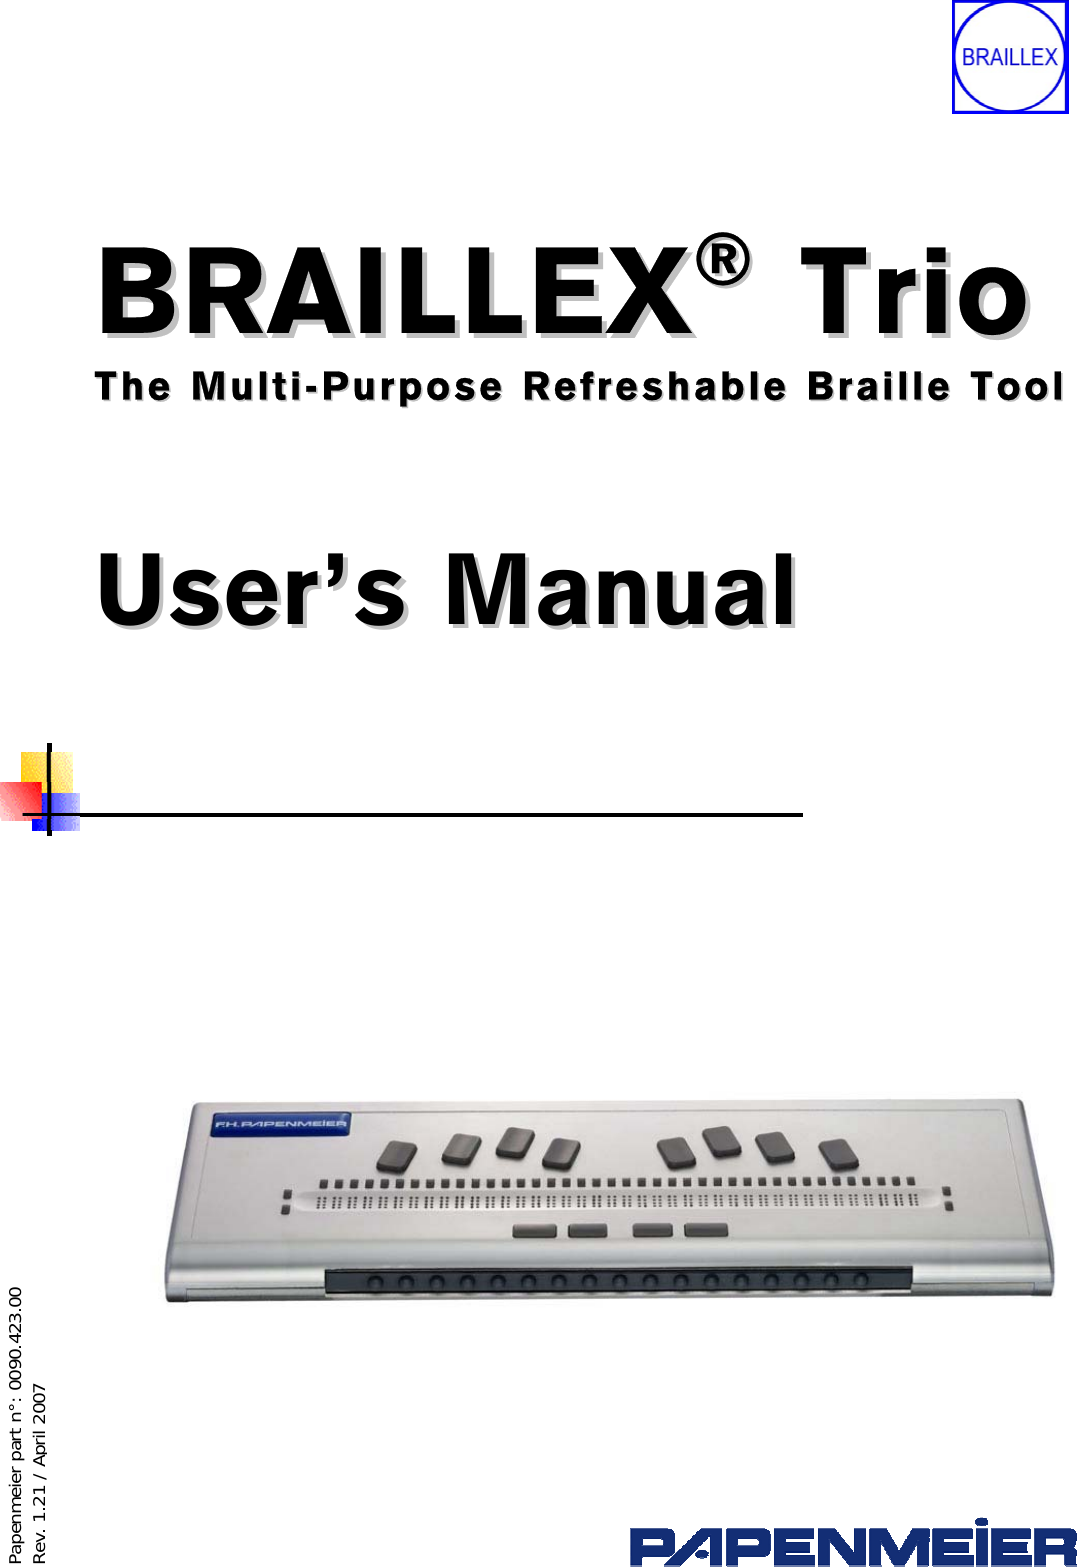
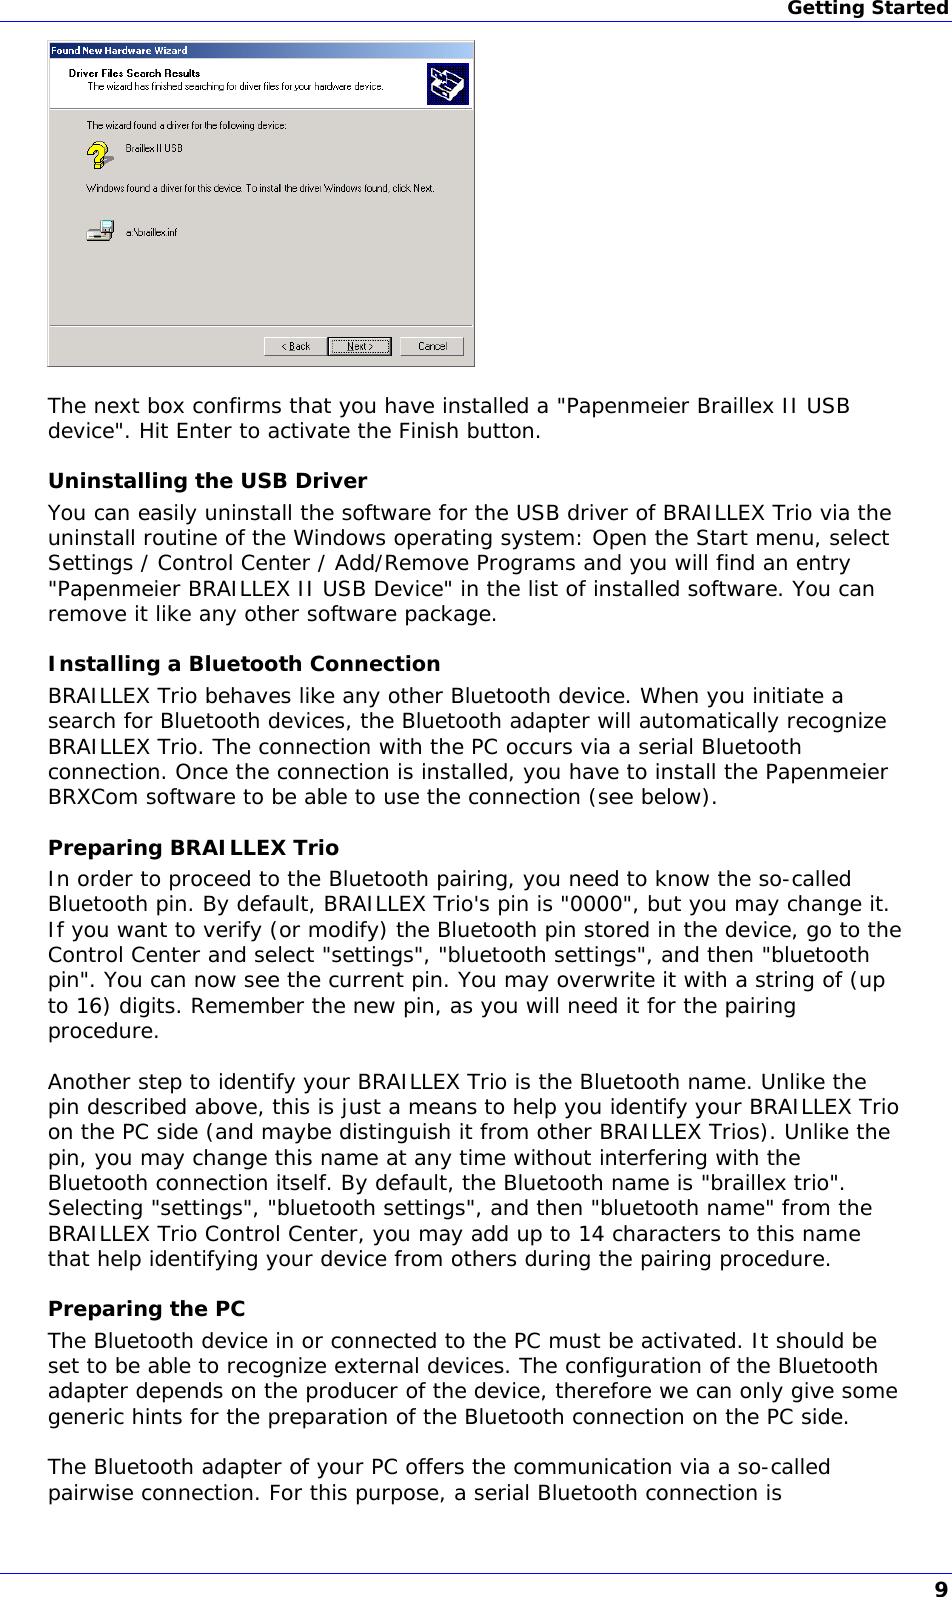
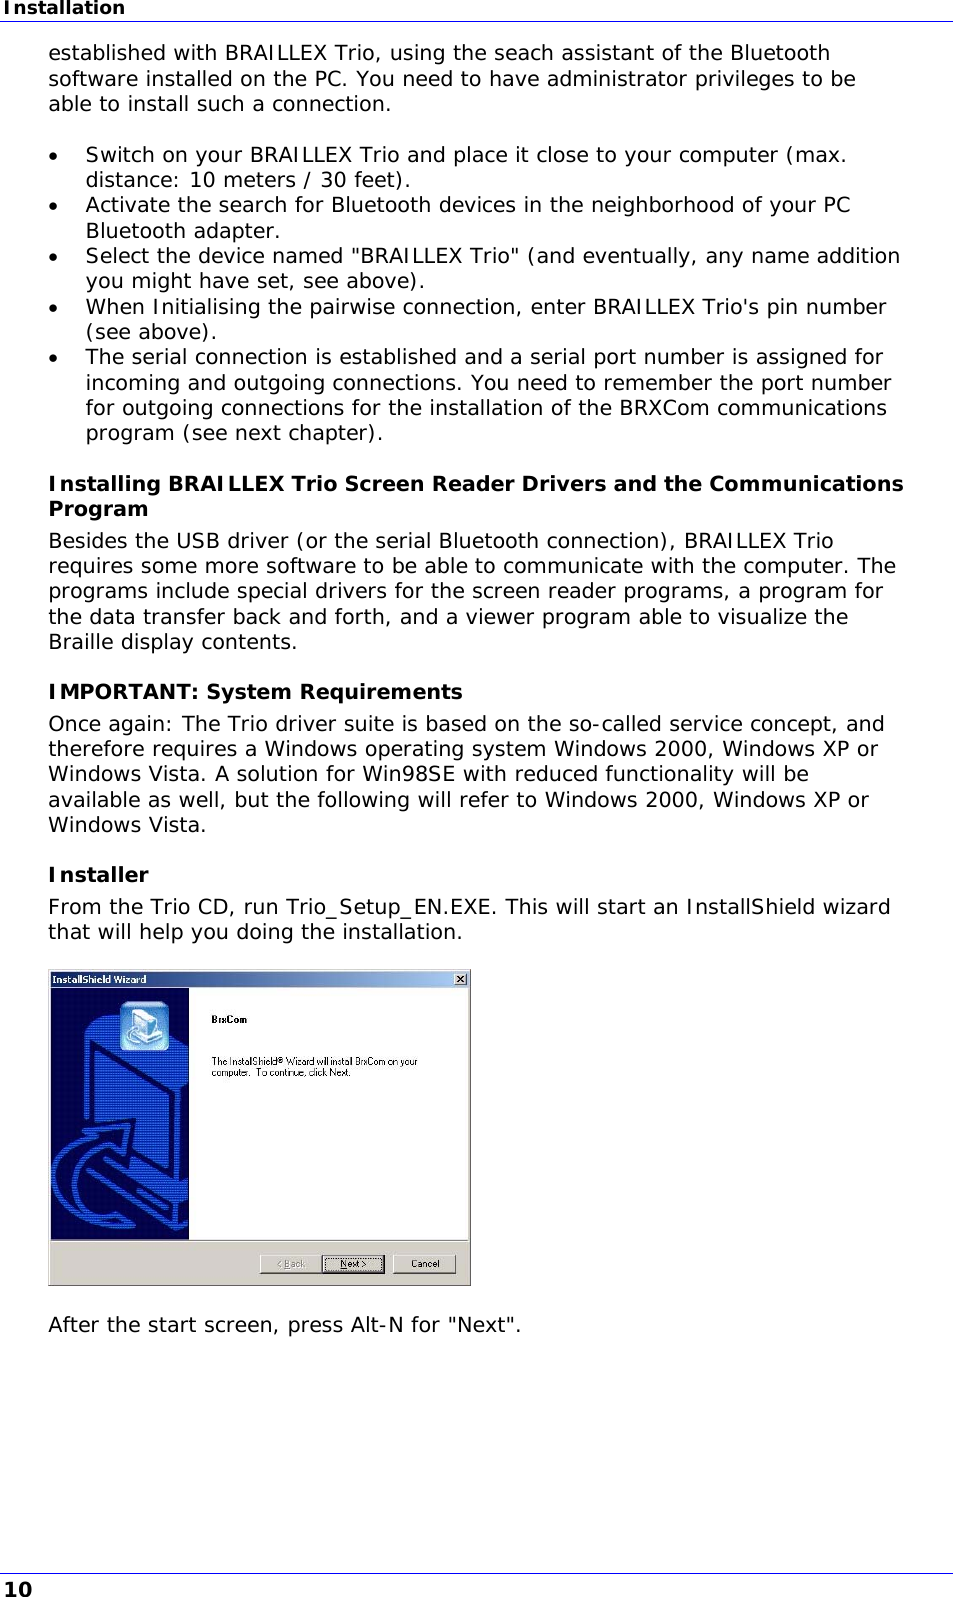
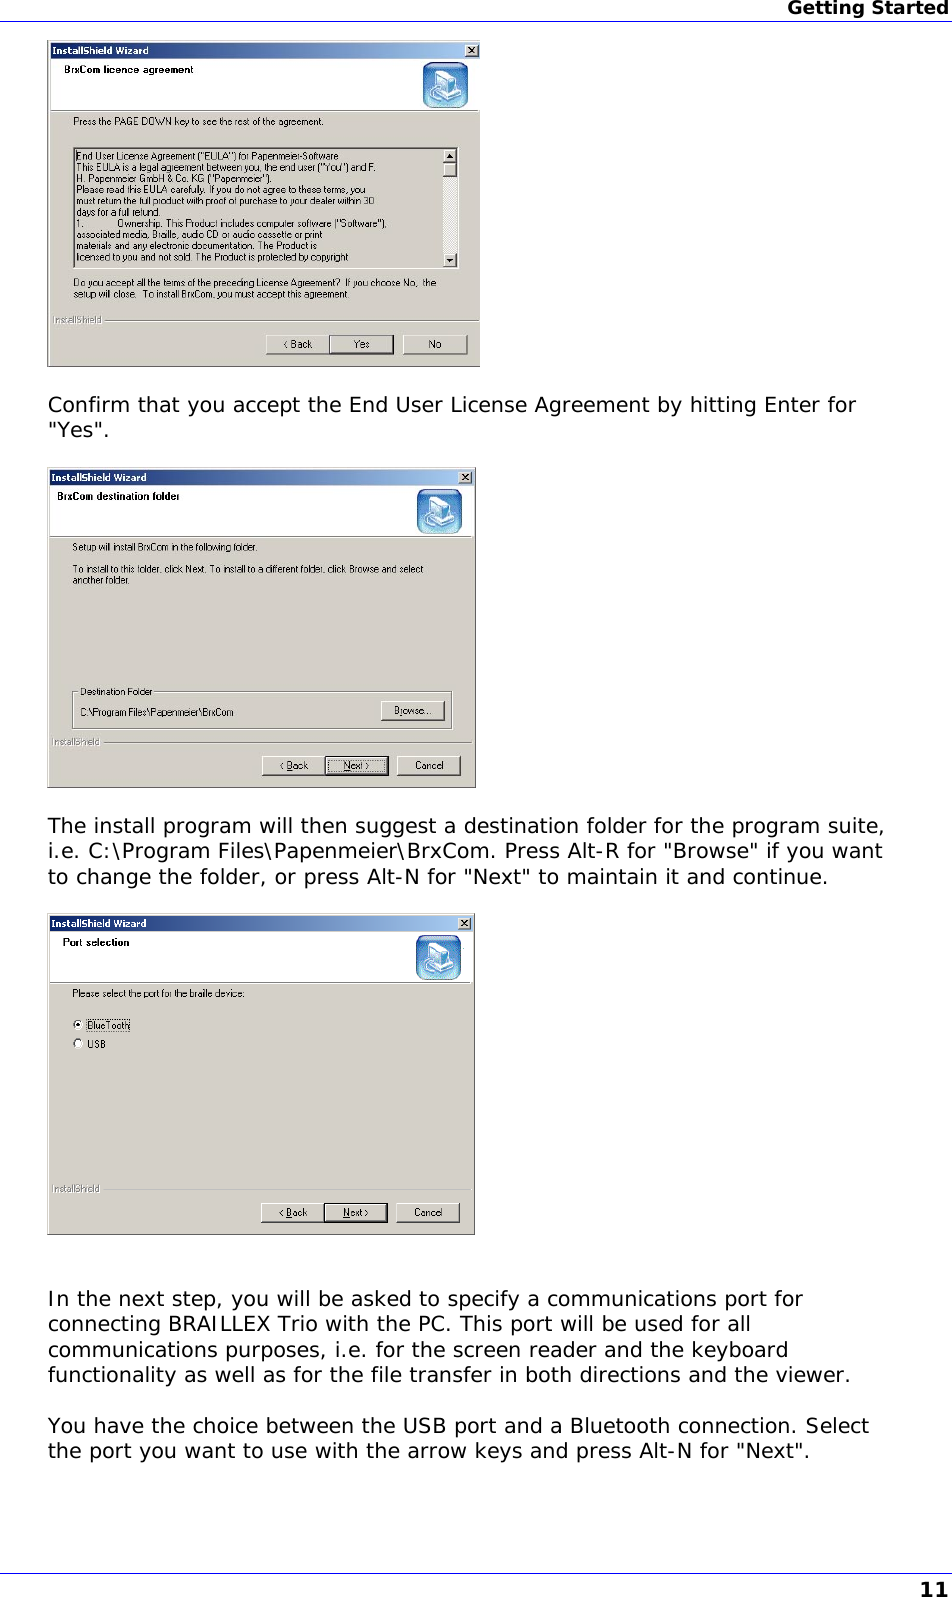
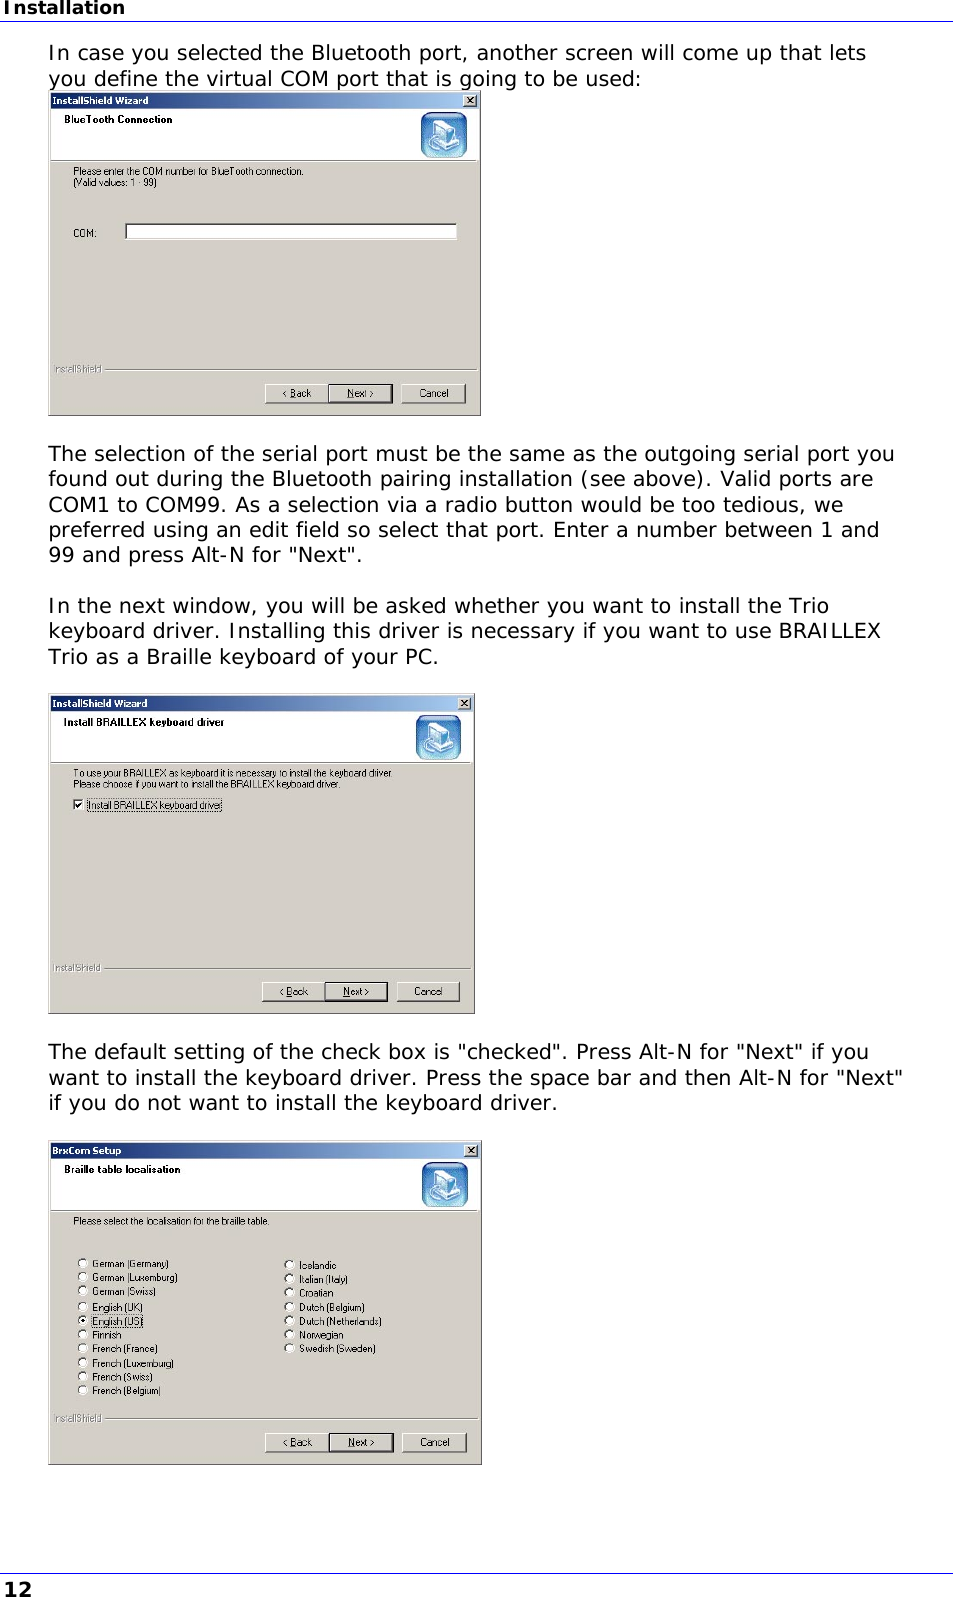
F H Papenmeier 1860-TRIO Braillex TRIO,Multipurpose Refreshable BrailleTool User Manual BRAILLEX EL The Efficiency Line

F.H.Papenmeier Braillex TRIO,Multipurpose Refreshable BrailleTool BRAILLEX EL The Efficiency Line

Users Manual

BBRRAAIILLLLEEXX®®  TTrriioo  TThhee  MMuullttii--PPuurrppoossee  RReeffrreesshhaabbllee  BBrraaiillllee  TTooooll    UUsseerr’’ss  MMaannuuaall    Papenmeier part n°: 0090.423.00 Rev. 1.21 / April 2007
Introduction   Table of Contents  Introduction ........................................................................ 1 CE Medical Devices Directive............................................................ 2 Generalities................................................................................... 3 System Requirements .............................................................. 3 Scope Of Delivery .................................................................... 3 Copyright and Trademarks........................................................ 3 Getting Started .................................................................... 4 Physical Description........................................................................ 4 Initial Operation............................................................................. 5 Connection with the PC............................................................. 5 Power supply .......................................................................... 5 Switching On and Off BRAILLEX Trio........................................... 5 Sleep Time ............................................................................. 6 Battery Handling...................................................................... 6 Recharging the Batteries........................................................... 6 Checking the Battery Charge..................................................... 7 Installation.................................................................................... 8 Installing the Screen Reader...................................................... 8 USB Connection....................................................................... 8 Uninstalling the USB Driver ....................................................... 9 Installing a Bluetooth Connection............................................... 9 Installing BRAILLEX Trio Screen Reader Drivers and the Communications Program ........................................................10 Modifications of the Installation Settings ....................................15 Safety Advice................................................................................17 Service and Maintenance................................................................17 BRAILLEX Trio's Standalone Functions .............................. 19 Braille Keyboard Functions..............................................................19 PC keystrokes with the Braille keyboard.....................................19 Special BRAILLEX Trio Keystokes ..............................................20 Braille-Emulation of PC-Shift, Alt, Ctrl, Win.................................20 BRAILLEX Trio's Note-Taking Functions.............................................21 The BRAILLEX Trio Control Center.............................................21 The Editor..............................................................................21 The Clipboard.........................................................................23 File Management within the editor.............................................24 Overview of Key Commands within the Editor .............................25 The Calculator........................................................................25 Day Planner...........................................................................25 Date and Time........................................................................25 Settings ................................................................................25 Tools.....................................................................................28 Info ......................................................................................29 Overview: Menu Structure and Shortcuts..........................................30
 BRAILLEX Trio's Terminal Functions..........................31Basic Functions............................................................................. 31 Using the BRAILLEX Trio Braille keyboard to access a PC.............. 31 File Transfer From and To BRAILLEX Trio.......................................... 32 The BRAILLEX Trio Filemanager................................................ 32 BRAILLEX Trio And Jaws For Windows.............................................. 34 Selecting the Working Modes ................................................... 34 Easy Access Bar Assignment in the Three Working Modes ............ 35 Cursor Tracking ..................................................................... 36 Braille presentation ................................................................ 37 Reveal Text Attributes............................................................. 38 Mouse Functions .................................................................... 39 BRAILLEX Trio with Dolphin HAL / Supernova.................................... 40 Selecting the Working Modes ................................................... 40 Easy Access Bar Assignment in the Three Working Modes ............ 41 Cursor Tracking ..................................................................... 42 Braille presentation ................................................................ 42 Reveal Text Attributes............................................................. 43 Mouse Functions .................................................................... 44 Important Advice...............................................................45 Purpose of the Device.................................................................... 45 Safety Advice............................................................................... 45 General Precautions ...................................................................... 45 CE-Marking.................................................................................. 46 CE Medical Devices Directive .......................................................... 46 EC Declaration of Conformity .............................................47 FCC  ....................48Radio Frequency Interference StatementIndex .................................................................................49
Introduction   Copyright 2006-2007 by F.H. Papenmeier GmbH & Co. KG All rights reserved  User's Manual BRAILLEX Trio  Revision: Jan 06  All technical data, information about and properties of the product described in this manual were compiled to our best knowledge and correspond to the facts at the date of publication.  Modifications and improvements of the product can be introduced at any time.   III
Introduction       Introduction  BRAILLEX Trio is a real multi-talent. It unites the most modern communications technology with highest ergonomic features in a light, portable Braille note taking device.  BRAILLEX Trio stands for three highlights:  a 40-cell Braille display with the proven Efficiency Line (EL) and SingleChannel technologies  a Braille keyboard for external devices (PCs, off-the-shelf PDAs or mobile phones with appropriate screen readers)  a basic notetaker. The internal functions of BRAILLEX Trio include an editor, a calculator, clock and calendar — and, obviously, the data exchange with other devices.  The newly developed seamless SingleChannel Braille display stands for highest reading comfort: Your fingers slide like on paper on the slightly concave display that is perfectly adapted to the shape of your fingertips.  The ergonomic Braille keyboard is ideally positioned around the Braille display. The space bars and special function keys are located in front of the display, the Braille keys behind. The distance between the Braille keyboard and the display is only 3.5 cm (1.38").  Obviously, BRAILLEX Trio, like all Papenmeier EL displays, is equipped with the patented Easy Access Bar, a long single lever (like a space bar) situated on the front side of the device, all along the Braille display.   You use the joystick-like Easy Access Bar with the thumb of the reading hand. It lets you navigate around the screen without you ever taking your hand off the Braille display. You can go back and forth, up and down - or tab through a dialog box, if you switch it to interactive mode.  Traditionally, Braille displays have a number of function keys, on the front panel, or left and right of the display. In any case, you usually have to take your hands off the display when you navigate around the screen or interact with the computer. With the Easy Access Bar, you can execute the commands from any place on the Braille display. This means less hand movement, more comfort, higher speed, and more efficiency.  With BRAILLEX Trio, you stay connected. Via its USB port, you communicate with a PC or notebook. Thanks to its Bluetooth® interface, BRAILLEX Trio is independent from any connection cables. Within a range of 10 meters (33 ft), BRAILLEX Trio talks to other Bluetooth devices.  This document will describe the installation and use of the device, alone and with the different possible peripheral devices. 1
CE Medical Devices Directive CE Medical Devices Directive BRAILLEX Trio complies with the requirements of the European Union Medical Devices Directive, as an active class I medical product intended to be used for the purpose of compensation for a handicap.   This product may only be used in home or office environments. In medical facilities, this product may only be used in office rooms.  Please read this manual and the information on medical devices carefully.   2
Introduction  Generalities System Requirements For BRAILLEX Trio's stand-alone functions, you only need a set of charged batteries (4 standard AA-type batteries) that provide the device with power.  For a full PC functionality, you furthermore need a PC with a USB or and Bluetooth interface running Windows 2000 or Windows XP, and a screen reader program (Jaws 6 and up, Dolphin HAL / Supernova, Window Eyes xx.xx) and the appropriate driver (will be shipped with Braillex Trio) Scope Of Delivery Braillex Trio ships with the following components:   BRAILLEX Trio device  Set of 4 AA-type rechargeable NIMH batteries  External battery charger  USB cable  Soft carrying pouch with shoulder strap  Software (drivers on CD)  Manual in print and in electronic format Copyright and Trademarks Copyright  2006 by F. H. Papenmeier. All rights reserved.  BRAILLEX® is a registered trademark of F. H. Papenmeier GmbH & Co. KG  All other trademarks and proper names mentioned in this manual are properties of their respective holders.  Address: F. H. Papenmeier GmbH & Co. KG Talweg 2 58239 Schwerte, Germany  Phone: +49-2304-946 0 Fax: +49-2304-946 246 E-mail: info.reha@papenmeier.de Internet: http://www.papenmeier.de  3
Physical Description       Getting Started  Physical Description  BRAILLEX Trio has a 40-character Braille display with a seamless surface. The Braille display is placed along the front line. It almost occupies the whole width of the device. Behind each of the characters, you will find a routing key. To the left and the right of the display, there are two keys on each side, one behind the other one. We will call them the left and right front and rear keys.  Behind the Braille display, you find the ergonomic 8 key Braille keyboard. The space keys are located in front of the Braille display. When you have your hands on the keyboard, your thumbs will automatically be located above the two space keys. Of the four keys in the space key row, the space keys are the two inner ones. The two external ones will be called the left and right thumb key. The thumb keys are used for special functions.  In the rounded front you will find the integrated Easy Access Bar. The bar has a rubber profile.    The only visible connection of the device is on the left side of BRAILLEX Trio.   On the left side you find, starting from the front,  The on-off switch  The USB port  On the right side of the back panel (device turned to you in working position), you will find the battery compartment.  For further technical data, please refer to page Error! Bookmark not defined..  4
Getting Started   Initial Operation The device may only be put into operation if no damages of the device itself or of the connection cables can be discerned. Connection with the PC You connect BRAILLEX Trio with a PC either via the USB port or via a Bluetooth connection. USB Connection You can use the USB connection under the operating systems Windows 2000 or Windows XP. Plug the flat end of the supplied USB cable into a free USB port of the PC. The square connector goes into the plug on the left side of BRAILLEX Trio. Power supply If BRAILLEX Trio is not connected to a USB port, it is battery powered. For battery operation, you need 4 AA type cells. Papenmeier suggests rechargeable NiMH batteries. Four of those come with the device.  If connected to a USB port of a computer, BRAILLEX Trio may be powered through the USB port, in case it provides enough power. If this is not the case, BRAILLEX Trio takes the power from the internal batteries. As BRAILLEX Trio's battery autonomy is pretty high, higher than that of most notebook PCs, you can also generally use the internal batteries when using the USB connection (this is by the way the default setting when you get the device).  In Bluetooth operation, BRAILLEX Trio is powered by the internal batteries. Switching On and Off BRAILLEX Trio You power on BRAILLEX Trio with the on-off switch on the left side of the device. A short beep indicates that the device has been switched on. An LED next to the on-off switch is lit while the device is on.  If you have batteries inside the device, BRAILLEX Trio will typically come back in the status you left it in when you last switched it off, i.e. the last used application will automatically coma back.  Special case: If you use the device without internal batteries, you also switch it on by connecting it to a PC via the USB port. In this case, BRAILLEX Trio will automatically activate the "external" mode, i.e. keyboard and display function to an external device.  You switch off BRAILLEX Trio by pressing the on-off switch for more than a second. You will see the message "switch off trio?". If you keep the on-off switch pressed then, the message "off" will appear. The LED goes out and a double beep can be heard when the device is switched off. For a short while, you will also see the message "off" in Braille, then the Braille will fade away. If you release the on-off switch after you get the first message, you can continue working. 5
Initial Operation Sleep Time BRAILLEX Trio will automatically switch off after a period of inactivity defined in the device settings. When you first get the device, this period is 10 minutes. In order to reactivate the device, press the on-off switch. Battery Handling BRAILLEX Trio comes with a set of four rechargeable AA type NiMH batteries. Please make sure that before you start using the device, you first charge the batteries.  With freshly recharged batteries, BRAILLEX Trio has an operation time of ca. 20 hours; in Bluetooth operation, you have 10 hours autonomy. Please note that even if the device is switched off, it will use a minimal amount of energy. So if you know that you will not use BRAILLEX Trio for a longer period, we suggest that you take the batteries out. All data will be safe then, the only thing to do after you put the batteries in will be to set date and time again, as the internal clock does not have a separate battery buffer.  A number of factors will influence the battery autonomy. A very important one is the Bluetooth module inside the device that drains an important amount of energy. By default, this Bluetooth module is active when you first switch on BRAILLEX Trio. If you do not use it, it makes sense to disable it in order to save energy. This is how you proceed:   From the BRAILLEX Trio Control Center, select "settings", "bluetooth settings", "bluetooth on/off" and chose "bluetooth off". Confirm with Enter (Space + dot 8, or simply dot 8) or push the Easy Access Bar 2 steps down. Recharging the Batteries You have two possibilities to recharge BRAILLEX Trio's batteries:   If you use NiMH batteries (one set of those is provided with the units), you can recharge them inside the unit connecting the provided charger with the USB port of the device;  You can also take the batteries out and recharge them in a separate charger. Recharging the Batteries Inside the Unit If you want to recharge BRAILLEX Trio's batteries inside the unit, use the provided charger. It is marked with the word "trio" in Braille, it connects to the power outlet via a 3 conductor detachable cord, and to the BRAILLEX Trio via USB cord. For recharging the batteries, please keep in mind a number of rules:   You have to use the external USB charger. It is not possible to charge the batteries while BRAILLEX Trio is connected to a computer via its USB port — the USB specifications do not allow draining sufficient energy to both run the device and charge the batteries. BRAILLEX Trio is able to detect a computer connected to it and will abort the recharging operation with an error message.  You must have the right battery type inside the unit. Please make sure not to try and charge Alcaline batteries! Trio will most likely detect those and abort the charging with an error message, but it might be safer not to try. We strongly suggest the use of NiMH batteries. Caution: If there are no batteries inside the unit when you UNPLUG the charger, you may lose BRAILLEX Trio's memory!  It is not sufficient to plug in the charger; you must also activate the charge. Select "tools" from the Control Center, then "battery recharge", and "battery 6
Getting Started recharge active". Only then the recharging process will be started, unless any error is detected and the process stopped.  While the batteries are being recharged, you may continue working, either via Bluetooth, or using the notetaking functions of the device.  The complete recharging process will last approximately 8 hours, so it might be a good idea to do it overnight.  You may check the progress of the charging process: Select "info" from the Control Center, then "power". Sighted people can also see that the charging process is active, as the LED blinks while the batteries are being recharged. Once the charging is completed, you will find the message "batteries full".  Like many intelligent chargers, BRAILLEX Trio will NOT try and recharge batteries that are completely drained, because it will consider them defective. If your batteries are completely flat, use an inexpensive external charger to charge them at least a little bit. Recharging the Batteries Outside the Unit You can easily exchange the BRAILLEX Trio batteries. Please keep in mind, though, that the device will have energy for only about approximately 1/2 minute without the batteries. If you have them out for longer than this period, you will have to reset date and time in the device.  For exchanging the batteries, please proceed as follows:   You find the battery compartment on the backside of the device, on the right side when you have the device in working position. On the upper edge of the compartment, you will find an easily discernable dot.  The cover of the compartment has a tactile surface. In order to open it, push the cover towards the bottom of the device. The cover can be completely removed.  The battery compartment contains four batteries, two in a row at a time. The tactile dot at the upper edge of the compartment indicates the direction (polarity) in which the batteries have to be inserted. The positive pole of the battery also has a tangible rise in the center, whereas the negative pole is flat. The (outer) compartment that is marked with the dot above will get the 2 batteries with the positive pole showing towards the outside, the other 2 ones go in the other way round.  Please make sure that the battery polarity is correct. Never introduce the batteries the wrong way round!  Once you have inserted the batteries, you can put the lid back on.  You use the provided external battery charger to recharge the batteries. Papenmeier strongly recommends the use of rechargeable NiMH batteries. The recharging time depends on the type of batteries. New batteries should be charged for 14 hours prior to being used. Checking the Battery Charge You can check the battery charge in the Braille display: In the control center, press "i" for "info" and then "p" for "power". You will get the battery charge in percent.  If the battery level goes below 10% of the capacity, you will get a warning:  "battery capacity less than 10%".   7
Installation  Installation Installing the Screen Reader If you want to read the computer screen on the Braille display, you need to install and run a screen reader package. This should be done before you install any further software for BRAILLEX Trio. USB Connection You connect the BRAILLEX EL device with the PC with the supplied USB cable. After a short while, a box will pop up: "Found new hardware, Braillex II USB".    After a couple of seconds, the Found New Hardware Wizard dialog starts. Hit Enter to activate the Next button.    In the next box, check "Search for a suitable driver for my device (recommended)" and hit Enter to activate the Next button.  In the next box, you can specify the search locations to reduce the searching time. Check " Floppy disk drives" if you have the driver on a floppy disk, or "CD ROM drives" if you have it on s CD-ROM. Hit Enter to activate the Next button.  Finally, confirm that you want to install the "BRAILLEX.INF" driver that Windows found on the media you specified and hit Enter to activate the Next button.  8
Getting Started   The next box confirms that you have installed a "Papenmeier Braillex II USB device". Hit Enter to activate the Finish button. Uninstalling the USB Driver You can easily uninstall the software for the USB driver of BRAILLEX Trio via the uninstall routine of the Windows operating system: Open the Start menu, select Settings / Control Center / Add/Remove Programs and you will find an entry "Papenmeier BRAILLEX II USB Device" in the list of installed software. You can remove it like any other software package. Installing a Bluetooth Connection BRAILLEX Trio behaves like any other Bluetooth device. When you initiate a search for Bluetooth devices, the Bluetooth adapter will automatically recognize BRAILLEX Trio. The connection with the PC occurs via a serial Bluetooth connection. Once the connection is installed, you have to install the Papenmeier BRXCom software to be able to use the connection (see below). Preparing BRAILLEX Trio In order to proceed to the Bluetooth pairing, you need to know the so-called Bluetooth pin. By default, BRAILLEX Trio's pin is "0000", but you may change it. If you want to verify (or modify) the Bluetooth pin stored in the device, go to the Control Center and select "settings", "bluetooth settings", and then "bluetooth pin". You can now see the current pin. You may overwrite it with a string of (up to 16) digits. Remember the new pin, as you will need it for the pairing procedure.  Another step to identify your BRAILLEX Trio is the Bluetooth name. Unlike the pin described above, this is just a means to help you identify your BRAILLEX Trio on the PC side (and maybe distinguish it from other BRAILLEX Trios). Unlike the pin, you may change this name at any time without interfering with the Bluetooth connection itself. By default, the Bluetooth name is "braillex trio". Selecting "settings", "bluetooth settings", and then "bluetooth name" from the BRAILLEX Trio Control Center, you may add up to 14 characters to this name that help identifying your device from others during the pairing procedure. Preparing the PC The Bluetooth device in or connected to the PC must be activated. It should be set to be able to recognize external devices. The configuration of the Bluetooth adapter depends on the producer of the device, therefore we can only give some generic hints for the preparation of the Bluetooth connection on the PC side.  The Bluetooth adapter of your PC offers the communication via a so-called pairwise connection. For this purpose, a serial Bluetooth connection is 9
Installation established with BRAILLEX Trio, using the seach assistant of the Bluetooth software installed on the PC. You need to have administrator privileges to be able to install such a connection.   Switch on your BRAILLEX Trio and place it close to your computer (max. distance: 10 meters / 30 feet).  Activate the search for Bluetooth devices in the neighborhood of your PC Bluetooth adapter.  Select the device named "BRAILLEX Trio" (and eventually, any name addition you might have set, see above).  When Initialising the pairwise connection, enter BRAILLEX Trio's pin number (see above).  The serial connection is established and a serial port number is assigned for incoming and outgoing connections. You need to remember the port number for outgoing connections for the installation of the BRXCom communications program (see next chapter). Installing BRAILLEX Trio Screen Reader Drivers and the Communications Program Besides the USB driver (or the serial Bluetooth connection), BRAILLEX Trio requires some more software to be able to communicate with the computer. The programs include special drivers for the screen reader programs, a program for the data transfer back and forth, and a viewer program able to visualize the Braille display contents. IMPORTANT: System Requirements Once again: The Trio driver suite is based on the so-called service concept, and therefore requires a Windows operating system Windows 2000, Windows XP or Windows Vista. A solution for Win98SE with reduced functionality will be available as well, but the following will refer to Windows 2000, Windows XP or Windows Vista. Installer From the Trio CD, run Trio_Setup_EN.EXE. This will start an InstallShield wizard that will help you doing the installation.    After the start screen, press Alt-N for "Next".  10
Getting Started   Confirm that you accept the End User License Agreement by hitting Enter for "Yes".    The install program will then suggest a destination folder for the program suite, i.e. C:\Program Files\Papenmeier\BrxCom. Press Alt-R for "Browse" if you want to change the folder, or press Alt-N for "Next" to maintain it and continue.     In the next step, you will be asked to specify a communications port for connecting BRAILLEX Trio with the PC. This port will be used for all communications purposes, i.e. for the screen reader and the keyboard functionality as well as for the file transfer in both directions and the viewer.  You have the choice between the USB port and a Bluetooth connection. Select the port you want to use with the arrow keys and press Alt-N for "Next".  11
Installation In case you selected the Bluetooth port, another screen will come up that lets you define the virtual COM port that is going to be used:   The selection of the serial port must be the same as the outgoing serial port you found out during the Bluetooth pairing installation (see above). Valid ports are COM1 to COM99. As a selection via a radio button would be too tedious, we preferred using an edit field so select that port. Enter a number between 1 and 99 and press Alt-N for "Next".  In the next window, you will be asked whether you want to install the Trio keyboard driver. Installing this driver is necessary if you want to use BRAILLEX Trio as a Braille keyboard of your PC.    The default setting of the check box is "checked". Press Alt-N for "Next" if you want to install the keyboard driver. Press the space bar and then Alt-N for "Next" if you do not want to install the keyboard driver.    12
Getting Started If you choose to install the keyboard driver, you then have to select the localization settings. Select the required keyboard layout and Braille table combination Press Alt-N for "Next" to continue. The program will then check for the installed screen reader program(s). If you have Jaws installed, a new window will come up asking you whether you want to install BrxCom for Jaws. Use the arrow keys to select whether you want to install the driver for Jaws or not.    If you have more that one version of Jaws installed on your computer, you will be asked whether you want to install the driver for all valid Jaws versions, i.e. the versions from 6.0 and above (see below).    If you select "no" with the arrow key and press Alt-N for "Next", a new window will appear letting you select the Jaws versions you want to adapt:    Jaws users will notice that only versions from 6.0 on will appear in the above Window. The BRAILLEX Trio software installation program will install a 2nd 13
Installation generation Jaws driver that is NOT compatible with Jaws versions prior to 6.0. If you wish or need to use an elder version of the screen reader program, the same applies as for Windows versions below the Win2000 level: You then have restricted possibilities, i.e. you can then only use BRAILLEX Trio as a display (no PC keyboard function and no file transfer).  Press Alt-N for "Next" to continue.    If you have Dolphin HAL or Supernova installed, a new window will come up asking you whether you want to install BrxCom for Dolphin. By default, the answer "yes" is checked.  In the special case you use a Dolphin Pen, you will be asked whether you want to install it on the pen drive, in a separate window. This means the pen drive must be connected to your computer during the installation if you want to install it there. It also must have the copy protection removed.  The setup program now has all user definable settings and will present those in a new window. If you are satisfied with the settings, press Alt-N for "Next" to continue. If not, you can go back with Alt-B for "Back".    If you had chosen to install the Trio keyboard driver, you now will get a warning. The Trio keyboard driver (here called FHP filtered keyboard) does not have a Microsoft digital signature, and this generates an error message. Ignore this message and press Alt-Y for "Yes" to continue, otherwise the keyboard driver will NOT be installed.  14
Getting Started   InstallShield will inform you about the successful installation of BrxCom. In order to complete the installation (and activate the keyboard driver), you have to reboot the system.    Once you have finished the installation, you will find two icons on your desktop, the Braillex File manager and the Braillex Viewer:    Furthermore, you will find a couple of new items in your start menu: Under Programs / Braillex, besides the already mentioned Braillex File manager and the Braillex Viewer, you will find "BRXCom Configuration" and "Uninstall BRXCom".   Modifications of the Installation Settings Two of the settings described above might be subject to frequent changes, so we condensed them in a separate configuration program. From the start menu, under Programs / Braillex, you find the item "BRXCom Configuration". This works in a similar way as the general setup program, but is limited to two parameters: the communication port and the Braille table for the external Braille keyboard.  15
Installation The first option regards the communications port. As in the setup program, you chose between the USB and the Bluetooth port, and in the latter case, you are also asked to specify the virtual serial port.  The Braille table selection offers less options than the setup program, as in this case, you do not select a combination of Braille table and PC keyboard (regional) settings, but only the Braille table. This means that if your default settings are US keyboard and US Braille, you can here change to French Braille (if you want to write in French), the PC keyboard still being the US key layout.   If you wish to make any further changes to the settings you had chosen above, run Trio_Setup_EN.EXE again. The install shield will offer 3 options: "Modify" (Alt-m), "Repair" (Alt-e), and "Remove" (Alt-r). Select "Modify" with Alt-m, and you will have the same dialogs you had above, allowing you to change your settings.    16
Getting Started  Safety Advice  Please read the information in this manual carefully, so you will be able to avoid problems.  Use BRAILLEX Trio in a dry environment only. Even if the device is not powered up, it must not get wet.  Never place any heavy objects on the Braille display.  Service and Maintenance Avoid touching the device with dirty hands. You may clean the surface of the device (NOT the Braille cells) with a soft, damp cloth. Do not use any aggressive detergent or soap.  In case of any defect of the Braille display unit, please contact an authorized Papenmeier service center. If you are in doubt about the service center responsible for your area, please contact Papenmeier:   F. H. Papenmeier GmbH & Co. KG Talweg 2 58239 Schwerte, Germany  Phone: +49-2304-9460 Fax: +49-2304-946 246 E-mail: info.reha@papenmeier.de  If possible give a short description of the kind of disturbance. 17
BRAILLEX Trio's Standalone Functions      BRAILLEX Trio's Standalone Functions   Braille Keyboard Functions  BRAILLEX Trio has a Braille keyboard that can be used both for internal (note taking) and external (terminal) functions. It has 8 Braille keys and 4 keys that are activated with the thumb.  Especially in terminal mode, the BRAILLEX Trio Braille keyboard can emulate almost all keys or key combinations of a regular PC keyboard.  Dots 7 and 8 are typically used for computer Braille entry. Dot 7 (to the left of dot 3) for example makes the difference between lower case and capital characters, a capital "A" for example, is written with dots 1+7. Dot 8 is often used in languages that have accented characters.  Of the 4 keys between the Braille display and the Easy Access Bar, the two internal ones are used as space keys. The two external ones are used for special functions (see below).  Please note that the Braille keys are only activated once they have been released. PC keystrokes with the Braille keyboard PC keystrokes with the Braille keyboard Enter  Space + dot 8; alternatively: dot 8 Escape  Space + dot 7 Left arrow  Space + dot 1 Right arrow  Space + dot 4 Up arrow  Space + dot 2 Down arrow  Space + dot 5 Page up  Space + dot 3 Page down  Space + dot 6 Home  Space + dots 1,2 End  Space + dots 4,5 Insert  Space + dots 2,3 Del  Space + dots 5,6 Tab  Space + dots 3,7 Backspace  Space + dots 6,8; alternatively: dot 7 F1-F12  Right thumb + letters a-l NumPad 1-0  Right thumb + numbers 1-0 NumPad-operators  Right thumb + "+", "-", "*", "/" NumPad Enter  Right thumb + dot 8 NumPad NumLock  Right thumb + letter "n"  19
BRAILLEX Trio's Standalone Functions  Special BRAILLEX Trio Keystokes Special BRAILLEX Trio Keystokes Control Center (Ctrl+Esc)  Space + dots 1,2,3,4,5,6 Toggle Internal functions - Terminal functions Space + dots 7,8  Braille-Emulation of PC-Shift, Alt, Ctrl, Win A special problem when emulating a full PC keyboard is the fact that you can combine just about any key with Ctrl, Alt or Shift. Computer Braille typically gives the possibility to write capitalized characters, such as "A" (typically dot 1+7), but there is no generally accepted code for Ctrl-Esc, for example, or Shift-F1.  The Braille keyboard of BRAILLEX Trio enables you to write just about any PC key combination, especially with these keys (and with Insert, which is commonly used in combination with other keys in a popular screen reader program).  Rather than defining a key combination (for example with combinations of thumb keys, space and Braille) for all these key combination, BRAILLEX Trio makes the key modifiers Shift, Alt, Ctrl and Insert available in the way of "sticky keys", as a prefix for combinations with other keys.  So if you want to write a key combination with Shift for example, you write the "Shift" code first, and the other key afterwards. In case you type one of these prefixes by mistake, you can also disable it again.   Braille keyboard emulation of Shift, Alt, Ctrl, Ins Shift  Left thumb + dot 1 Ctrl  Left thumb + dot 2 Alt  Left thumb + dot 3 Shift + Ctrl  Left thumb + dots 1,2 Alt + Shift   Left thumb + dots 1,3 Alt + Ctrl  Left thumb + dots 2,3 Shift + Alt + Ctrl  Left thumb + dots 1,2,3 Insert (as a prefix)  Left thumb + dots 3,7 Win key (as a prefix)  Left thumb + dot 4 Disable prefix  Left thumb + dot 7  Please note that these prefixes currently only apply in the external mode, i.e. when you type on the computer connected to Trio. In stand-alone mode (i.e. in the editor), Ctrl combinations must be written with dots 7 and 8.   20
BRAILLEX Trio's Standalone Functions   BRAILLEX Trio's Note-Taking Functions  The BRAILLEX Trio Control Center Introduction When you first switch on BRAILLEX Trio, you will get a message "editor". You are in the control center that offers, like the Windows start menu, a selection of activities. Some (like "editor") will take you to a program right away, some (like "settings") will lead to sub-menus.  Inside the control center, you can either navigate with the arrow keys (see PC keystrokes with the Braille keyboard page 19) or with the Easy Access Bar. 1 step up or left will bring you to the previous item, 1 step down or right to the next. 2 steps down will select the current item (like Enter), 2 steps up will bring you to the superior level (like Escape).  You can activate the control center at any time using Space + dots 1,2,3,4,5,6.  Please note that when you switch off the device and on again, it will come back where you left it when you switched it off. So if you had been writing a text, it will come back with the editor open and will show the cursor position. The same applies when you had been working in terminal mode. If the connection to the external device is not active then or as long as no new data have been transferred to BRAILLEX Trio, you will then see the message "external". Menu Items In the following you will see the BRAILLEX Trio main menu. It contains 6 items. The separate letters do not appear in all languages, but they indicate shortcuts that will get you to the functions when you write the corresponding letter in the control center.  e  editor c  calculator p  day planner d  date and time s  settings t  tools i  info  The Editor In the control center, select "Editor" (shortcut key: e)  and hit Enter (Space + dot 8, or simply dot 8) or push the EAB two steps down.  If you had opened a file previously and had not closed it, will get back to that file immediately. Otherwise, you will get the message "file name?" followed by the cursor sign.  Enter a file name and hit Enter (Space + dot 8, or simply dot 8).   The message will disappear and, if the file name had not been assigned yet, you will have a blank line with the cursor in the first cell, and you can start typing.  21
BRAILLEX Trio's Standalone Functions If you want to edit a file that is already existing, hit Enter (Space + dot 8, or simply dot 8) instead of writing a file name, and you will get to the list of existing files. use the up and down arrow keys to browse your files and once you find the file you want to edit, hit Enter again. Cursor Movements within the Editor Generally, the Braille display follows the cursor movements . If you move the display with the Easy Access Bar, though, in order to read it, the cursor will not follow. If you want to get back to the cursor position, press the front key to the right of the Braille display.  The cursor movements correspond to those of other word processors:  Cursor movements within the editor PC key  Braille Keys  Cursor Movement Left arrow  Space + dot 1  Move the cursor one character to the left Right arrow  Space + dot 4  Move the cursor one character to the right Up arrow  Space + dot 2  Move the cursor one line up Down arrow  Space + dot 5  Move the cursor one line down Page up  Space + dot 3  Move the cursor 25 lines up Page down  Space + dot 6  Move the cursor 25 lines down Home  Space + dots 1,2  Move the cursor to the start of the line End  Space + dots 4,5  Move the cursor to the end of the line Ctrl + A  Dots 1,7,8  Move the cursor to the start of text Ctrl + E  Dots 1,5,7,8  Move the cursor to the end of text Routing key    The routing keys move the cursor to the place where the key had been pressed. Movements with the Easy Access Bar With the Easy Access Bar, you can read texts that you opened with the editor, without changing the cursor position.   These are the Easy Access Bar actions within the editor:  Easy Access Bar movements within the editor EAB movement  Action 1 step left  Read backward. Moves the display 40 characters to the left. Once you have reached the beginning of a line, the next movement will bring the display to the end of the previous line. 1 step right  Read forward. Moves the display 40 characters to the right. Once you have reached the end of a line, the next movement will bring the display to the start of the next line. 1 step up  Previous line: Moves the display one line up. 1 step down  Next line: Moves the display one line down. 2 steps left  Start of line: Moves the display to the beginning of the line 2 steps right  End of line: Moves the display to the end of the line 2 steps up  Moves the display 1 page (25 lines) up 2 steps down  Moves the display 1 page (25 lines) down  22
BRAILLEX Trio's Standalone Functions  The Clipboard BRAILLEX Trio has a clipboard that you can use to transfer texts within a file or chunks of text from one file to another. You can copy marked text to the clipboard or cut it out and insert it to the clipboard.  Text that you bring to the clipboard will replace any text that was there. Text from the clipboard can be inserted into any other application. Mark text If you want to mark a portion of text (for cutting and pasting, deleting, etc.), please proceed as follows:  Bring the cursor to the start of the text you want to mark. Press Ctrl+T (dots 2,3,4,5,7,8).  Move the display to the end of text to be marked and get the cursor to that place. You may use the cursor routing key to get the cursor to the place. You will see the marked portion of text underlined with dots 7 and 8.  You can now copy, cut or delete the marked text. You can also disable marking by pressing Ctrl+T again. Cut text In order to cut a text area, mark it first (see previous chapter). Now press Ctrl+X ("x" with dots 7 and 8). The previously marked text has disappeared. Copy text In order to copy a text area, mark it first (see previous chapter). Now press Ctrl+C ("c" with dots 7 and 8). The previously marked text has been copied to the clipboard. Paste text You have cut a portion of text and want to insert it (either at the place where you cut it in order to undo the last command, or elsewhere), move the cursor to the place where you want to insert it and press Ctrl+V ("v" with dots 7 and 8). The text will be inserted at the cursor position and you will find the cursor behind the inserted text. Search for a word You can search for a word in the active document, forwards and backwards.    Start the search procedure with Ctrl+F (dots 1,2,4,7,8)  Write the word you want to search for  Press Ctrl+R (dots 1, 2, 3, 5, 7, 8) if you wish to invert the search direction. Backwards search is marked with an (r).   Hit Enter (Space + dot 8, or simply dot 8) to start the search.  You will find the cursor on the first character of the word you searched for.   If you want to search for the same word again, press F3 (right thumb + dots 1, 4).  If you start the search somewhere in the middle of the document, once the search has reached the end of the document, it will automatically continue the search at the start of the document.  If the word you searched for could not be found, you will get the message "not found ". Confirm this message with any key. 23
BRAILLEX Trio's Standalone Functions Replace a word In order to replace a word with another one, please proceed as follows:   Start the search procedure with Ctrl+H (dots 1,2,5,7,8).  Write the word you want to replace.  Hit Enter (Space + dot 8, or simply dot 8). In the second edit field, enter the word you wish to have instead. Hit Enter again.  If the search word is found, it is automatically replaced.   You can repeat the same operation with F3 (right thumb + dots 1, 4).  If the word you searched for could not be found, you will get the message "not found ". Confirm this message with any key. File Management within the editor Create a new file  Within the editor, with a file open, press the key combination CTRL + N (Braille dots 1,3,4,5,7,8). You will get the message: "close current file?"  Write the letter "y" to close the current file. Any other key will abort the operation.  You will be asked to enter a new file name. Enter a filename (maximum: 25 characters) and hit Enter (Space + dot 8, or simply dot 8). Open a file  Within the editor, with a file open, press the key combination CTRL + O (Braille dots 1,3, 5,7,8). You will get the message: "close current file?"  Write the letter "y" to close the current file. Any other key will abort the operation.  You will get to the list of existing files. Select the file you want to open with the arrow keys or the Easy Access Bar and hit Enter or press the EAB 2 steps down to confirm.  It might be that the file is too big for being edited; in that case you will be asked whether you want to open it for read only operation. Delete a file  Within the editor, with a file open, press the key combination CTRL + O (Braille dots 1,3, 5,7,8). You will get the message: "close current file?"  Write the letter "y" to close the current file. Any other key will abort the operation.  You will get to the list of existing files. Select the file you want to delete with the arrow keys or the Easy Access Bar.  Press Del (Space + dots 5,6). You will get the message "delete?"  Write the letter "y" to confirm. Rename a file  Within the editor, with a file open, press the key combination CTRL + O (Braille dots 1,3, 5,7,8). You will get the message: "close current file?"  Write the letter "y" to close the current file. Any other key will abort the operation.  You will get to the list of existing files. Select the file you want to rename with the arrow keys or the Easy Access Bar.  Press F2 (Right thumb + dots 1,2). You will get the message "new name?"  Enter a filename (maximum: 25 characters) and hit Enter (Space + dot 8, or simply dot 8).  24
BRAILLEX Trio's Standalone Functions  Overview of Key Commands within the Editor Key commands in the BRAILLEX Trio Editor Ctrl + O  Open a file Ctrl + N  New file Ctrl + S  Close file Ctrl + F  Search in text Ctrl + H  Search and replace Ctrl + A  jump to beginning of text Ctrl + E  Jump to end of text Ctrl + R  Toggle search direction Ctrl + T  Set text marker Ctrl + X  Cut Ctrl + C  Copy Ctrl + V  Paste DEL (in file list)  Delete a file F2 (in file list)  Rename a file  The Calculator Once you have selected the calculator  from the Control Center (shortcut key: "c"), you get a prompt ">" followed by the cursor sign. You can now start the calculation. The BRAILLEX Trio calculator knows the four basic arithmetic operations.  The calculation starts with a number you type in, followed by an operand (+, - / or *) that makes disappear the number. The operand is displayed in Braille cell 40. You then type the second number (the operand will stay in cell 40) and close the operation either by pressing Enter (Space + dot 8, or simply dot 8) or by pushing the Easy Access Bar 2 steps down.  You abort an operation or clear the memory by pressing Escape (space + dot 7) or by pushing the Easy Access Bar 2 steps up. Day Planner Not yet implemented. Date and Time If you select "Date and Time" from the Control Center (shortcut key: "d"), Trio will show the current time followed by the date. You exit the time and date display by pressing Escape (space + dot 7) or by pushing the Easy Access Bar 2 steps up.  At this place, you cannot change the time and date settings. For this purpose, you have to go to "tools", "set date and time".  Please note that BRAILLEX Trio does not have a separate battery to buffer the internal clock. This means, you will have to adjust the date and time settings when Trio has been without batteries or disconnected from a USB power source for some time. If you just replace the batteries with a set of fresh ones you won't have to adjust date and time. Settings Selecting "Settings" from the Control Center  (shortcut key: "s"), you can adjust the internal clock, the Bluetooth settings, select the Braille table you want to 25
BRAILLEX Trio's Standalone Functions work with; the battery management when you use Trio in a USB connection, the sleep times, and last but not least the Braille dot firmness.  Within the Settings menu, you use the same commands as in the Conrol Center, i.e. Enter (Space + dot 8, or simply dot 8) or EAB two steps down for selecting a menu item, Escape (space + dot 7) to exit, etc. Set Date and Time All time and date settings can be adjusted in this menu. When you select it, you will get to a sub-menu with four entries:   Time If you want to adjust the time settings , select this menu item. You see the current clock settings. You can now modify the time in the format hhmmss. If the date format is set to "12 hours am/pm", you should also check this setting and eventually change it entering "a" or "p" at the correspondent place. You may skip (and maintain) part of the settings by moving the cursor sign with the arrow keys (space + dot 4 for right arrow, space + dot 1 for left arrow; the cursor routing keys have no function in this menu). Confirm and exit this menu item with Enter (Space + dot 8, or simply dot 8) or EAB two steps down. You may also cancel the operation with Escape (space + dot 7) or EAB two steps up.  Date Select this item to modify the date settings. Depending on the date format settings (see below) you now enter the date in the format ddmmyy (European date format) or in the format mmddyy. In both cases the first two digits "20" of the year are preset and cannot be modified. Confirm and exit this menu item with Enter (Space + dot 8, or simply dot 8) or EAB two steps down. You may also cancel the operation with Escape (space + dot 7) or EAB two steps up.  Time Format Select this item to select the time format. You can chose between "24 hours" and "12 hours am/pm" using the arrow keys or the EAB. The star in front of the item indicates the current selection. Confirm and exit this menu item with Enter (Space + dot 8, or simply dot 8) or EAB two steps down. You may also cancel the operation with Escape (space + dot 7) or EAB two steps up.  Date Format Select this item to select the date format. You can chose between "European" (dd-mm-yyyy) and "American" (mm-dd-yyyy) formats using the arrow keys or the EAB. The star in front of the item indicates the current selection. Confirm and exit this menu item with Enter (Space + dot 8, or simply dot 8) or EAB two steps down. You may also cancel the operation with Escape (space + dot 7) or EAB two steps up. Bluetooth Settings In the Bluetooth Settings menu, you find three submenu items that will allow you to activate or disable Trio's Bluetooth port, and to personalize your BRAILLEX Trio.   Bluetooth on/off In this sub-menu,  you generally activate or disable BRTAILLEX Trio's Bluetooth port. Default is "active". If you do not use the Bluetooth port to communicate with other Bluetooth devices, we strongly suggest disabling it in order to save battery life. With Bluetooth disabled, the battery life will be almost doubled. You can chose between "bluetooth active" and "bluetooth off" using the arrow keys or the EAB. The star in front of the item indicates the current selection. Confirm and exit this menu item with Enter (Space + 26
BRAILLEX Trio's Standalone Functions  dot 8, or simply dot 8) or EAB two steps down. You may also cancel the operation with Escape (space + dot 7) or EAB two steps up.  Bluetooth Name Here you find the name used to identify BRAILLEX Trio as a Bluetooth device. By default this is "braillex trio". In environments where moe than one BRAILLEX Trios may appear, we suggest that you specify the name, adding the serial no. of the device to its name, for example. Confirm and exit this menu item with Enter (Space + dot 8, or simply dot 8) or EAB two steps down. You may also cancel the operation with Escape (space + dot 7) or EAB two steps up.  Bluetooth Pin When two Bluetooth devices are connected, a pin code is used as a security feature. By default, BRAILLEX Trio's pin code is "0000". You can overwrite it with a new one and confirm with Enter (Space + dot 8, or simply dot 8) or EAB two steps down. Please keep in mind that those pin codes may only contain numbers. Select Braille Table When selecting this item you will enter a list of national Braille codes both for the Braille display and for the Braille keyboard.  Chose the one that fits your preference using the arrow keys or the EAB. The star in front of the item indicates the current selection. Confirm and exit this menu item with Enter (Space + dot 8, or simply dot 8) or EAB two steps down. You may also cancel the operation with Escape (space + dot 7) or EAB two steps up.  Please note that this selection will only concern BRAILLEX Trio's internal functions, not the PC access functions. Power in USB Operation Here you can define BRAILLEX Trio's power source when in USB operation. The choices are "use USB power" or "use internal battery".  When selecting "use USB power", you decide to drain power from the USB host (typically a PC) BRAILLEX Trio is connected to. If this PC is a notebook PC, the second choice "use internal battery" may make sense, though, as BRAILLEX Trio's batteries last way longer than the notebook batteries typically do.  Make your choice using the arrow keys or the EAB. The star in front of the item indicates the current selection. Confirm and exit this menu item with Enter (Space + dot 8, or simply dot 8) or EAB two steps down. You may also cancel the operation with Escape (space + dot 7) or EAB two steps up.  Please note that in case the PC does NOT supply enough power, BRAILLEX Trio will use the internal batteries, and in case the internal batteries are empty, it will try to get the necessary power from the USB port. Sleep times This menu contains two items that both open a sub-menu:  Sleep Time Display defines the inactivity time before the Braille display is switched off in order to save energy. Default is 5 minutes. Enter the desired sleep time and confirm with Enter (Space + dot 8, or simply dot 8). If you do not wish the display to switch off at all, enter "0".  Once the display has gone to sleep, you activate it again by pushing the Easy Access Bar in any key direction. 27
BRAILLEX Trio's Standalone Functions  Sleep Time Trio You can also set a time of inactivity before the device completely switches off. Default is 10 minutes. If you do not wish the device to switch off at all, enter "0".  Once Braillex Trio has gone to sleep, you switch it on again using the on-off switch. It will come back in the same situation you left it before it switched off. Dot Firmness Here you can adjust the firmness of BRAILLEX Trio's Braille dots to your reading preferences. The possible values go from "0" (soft) to "7" (strong).    Tools The tools menu offers a number of options to reset the device to factory standard and to recharge the batteries. Format Flash Memory The flash memory contains all data you might have stored in your BRAILLEX Trio. When formatting Trio's flash memory, you do not erase any of Trio's programs, but delete all texts, all day planner appointments, and the contents of the clipboard.  This is how you proceed:  From the "Tools" menu, select "format flash memory" (shortcut key: "f").  You will see the message "are you sure? all data will be lost!"  Confirm the fact that you want to format the flash memory typing "y" or cancel the operation with Escape (space + dot 7) or EAB two steps up. After you have confirmed, you will see the message "formatting flash", and after ashort while, "flash successfully formatted". Restore Default Values When restoring BRAILLEX Trio's default values, you do not modify the contents of the flash memory (see above), i.e. you keep all of your data, but you reset all the settings to the (language depending) default values (Braille character set, sleep times, Bluetooth settings, etc.).  This is how you proceed:  From the "Tools" menu, select "restore default values" (shortcut key: "d").  You will see the message "reset default values?"  Confirm the message typing "y" or cancel the operation with Escape (space + dot 7) or EAB two steps up. After you have confirmed, you will see the message "default values restored". Battery Recharge You need this menu item if you want to recharge BRAILLEX Trio's batteries with the supplied USB charger.  When activating this menu item, you will get a sub-menu containing two entries: "battery recharge active" and "battery recharge off". By default, it is set to "off". Switch it to "on" if you have the USB charger connected, if you have the right NiMH rechargeable batteries inside the unit, and if you want to start the charging procedure.  28
BRAILLEX Trio's Standalone Functions  For charging Trio's batteries, please also refer to chapter Battery Handling, page 6    Info The Info section of BRAILLEX Trio's Control Center contains three items. You can check the battery status, the remaining memory capacity, and Trio's program version. The shortcut key for info is "i". Power When you select "power" (shortcut key: "p"), you get the current energy status. In the first place, you see the remaining battery power in a percentage value, and then you see the current charging status if applicable. Memory The memory section (shortcut key: "m") shows you the overall memory capacity and then the remaining free memory of BRAILLEX Trio in kb; example:  "total:  4195kb  free: 4178kb" Program Version Here you can check the current program version of BRAILLEX Trio. Example: "braillex trio rev. 370". The shortcut key for this item is "v".  29
BRAILLEX Trio's Standalone Functions Overview: Menu Structure and Shortcuts e  editor       c  calculator       p  day planner       d  date and time       s  settings  d  set date and time  time      date      time format  12 hours am/pm     24 hours         date format european     american    b  bluetooth settings  bluetooth on/off  Bluetooth active     Bluetooth off    bluetooth name     bluetooth pin    t  select braille table  german      british     american     french     italian     dutch     swedish     croatian     finnish     flemish     icelandic     norwegian    f  dot firmness       p  power in usb operation  use internal battery       use usb power     s  sleep times  sleep time display       sleep time trio        t  tools  f  format flash memory       d  restore default values       b  battery recharge  battery recharge off      battery recharge on   i  info  p  power       m  memory       v  program version      30
BRAILLEX Trio's Terminal Functions       BRAILLEX Trio's Terminal Functions  BRAILLEX Trio offers 40 Braille cells for reading the screen. You can move this reading window across the screen with the Easy Access Bar. With the routing keys integrated into the Braille cells you move the mouse pointer to any desired place on the screen. Basic Functions You control the Braille display either with the Easy Access Bar alone, or in combination with the keys.  In any case, the behavior of the Braille display depends on the screen reader software. Depending on the software package used in conjunction with BRAILLEX Trio, a key or key combination might have different meanings.  Some screen reader programs such as Jaws for Windows and Dolphin HAL/ Supernova also support the Papenmeier Simple User Interface, a series of on-screen menus that make the key + Easy Access Bar combinations redundant.  Some of the basic functions are identical for all screen readers, though: Moving the Braille display (Reading Window) For navigating across the screen, you just use the Easy Access Bar.  Push the Easy Access Bar one step up to move the display up one line. Push the Easy Access Bar one step down to move the display down one line. You maintain the column position of your Braille display when you push the Easy Access Bar up or down.  The Easy Access Bar positions one step left and one step right have the meaning "Read backward" and "Read forward".  Push the Easy Access Bar one step left to move the reading window 40 columns to the left.  Push the Easy Access Bar one step right to move the reading window 40 columns to the right.  Using the "Read forward" function, you continuously read the screen, i.e. once the display has finished reading the screen line, it will go to the next line if you continue pushing the Easy Access Bar. Using the BRAILLEX Trio Braille keyboard to access a PC If you have installed the keyboard driver during the BRXCom installation, as soon as you switch to terminal mode, BRAILLEX Trio's Braille keyboard becomes a PC keyboard.   The Braille Emulation of PC function keys is described above (see PC keystrokes with the Braille keyboard page 19). 31
BRAILLEX Trio's Terminal Functions  File Transfer From and To BRAILLEX Trio When installing the drivers for your screen reader programs, you also automatically install two auxiliary programs that help you transferring and managing the files you have stored in your BRAILLEX Trio, and a viewer that will allow sighted people to see what is going on on Trio's Braille display when you are in stand-alone mode. The BRAILLEX Trio Filemanager With the TRIO Filemanager (BRXCom Filemanager) you can manage the texts stored in BRAILLEX Trio, from your PC. You will find a shortcut to "BRAILLEX Filemanager" on the desktop of your PC.  Before starting the BRAILLEX Filemanager, please make sure BRAILLEX Trio is switched on and connected to the PC (either via a USB or via a Bluetooth connection). For the actual file transfer, Trio's working mode is not important, but if you want to check the transfer on your Braille display you better switch to terminal mode using space + dots 78 and start your screen reader. If BRAILLEX Trio is not properly connected to the PC, the BRAILLEX Filemanager will issue an error message and will not be started.  The BRAILLEX Filemanager first comes up with a blank window. If you press F5 (right thumb key + dots 15), you update the list of files contained in BRAILLEX Trio. You move through that list using the arrow keys.  All files contained in BRAILLEX Trio have file extension, i.e. "test.txt". Behind the file name, you see the size, the date and time of the files. The list is sorted in alphabetical order. Copying Files Transferring Files from the PC to BRAILLEX Trio Currently, only files with the file extension "TXT" can be transferred to BRAILLEX Trio. The file name length must not exceed 12 characters and should not contain any spaces. If you want to copy a file from the PC to Braillex Trio, please proceed as follows:   In the BRAILLEX Filemanager, press Ctrl+T.  A regular Windows dialog will come up that lets you select the name of the file to be transferred.  Select the file you want to transfer and hit Enter.  The file will then be transferred. Especially for longer files, this may take some time. You will get a message when the file transfer has been completed successfully.  Once you have acknowledged this message by hitting Enter, you will see the updated file list. Transferring Files from BRAILLEX Trio to the PC If you want to copy a file from Braillex Trio to the PC, please proceed as follows:   In the BRAILLEX Filemanager file list, select the file you want to transfer with the arrow keys.  Once the desired file is highlighted, hit Enter.  A regular Windows dialog comes up that lets you select the target folder for the file you want to transfer. 32
BRAILLEX Trio's Terminal Functions   Within a selected folder, you may create a new folder pressing Alt+O.  Confirm the selected folder with Enter.  The successful file transfer is confirmed by a message. Acknowledge this message with Enter. BRAILLEX Viewer The BRAILLEX Trio viewer is a program that will help sighted persons to visualize the contents on the Braille display when Trio is in stand-alone mode.  The viewer is automatically installed on your when you install BRXCom. You will find a shortcut named "BRAILLEX Viewer" on the desktop of your PC.  Before starting up the viewer, you need to connect BRAILLEX Trio to the PC and either start the BRAILLEX Filemanager or your screen reader. Once you have started the viewer, make sure that the display contents changes once (by moving the Easy Access Bar, for example) in order to update the blank viewer window. From that time on, you will be able to see the Braille display contents in this window, at least as long as the connection with the PC is maintained.   Please note that the viewer only shows the display contents when you are in stand-alone mode. 33
BRAILLEX Trio's Terminal Functions  BRAILLEX Trio And Jaws For Windows  In combination with Jaws for Windows, BRAILLEX Trio works like any of Papenmeier's world-famous BRAILLEX EL displays. The handling and the functionality are identical.  When navigating in the active window, you can choose between three different working modes, which influence the assignment of the Easy Access Bar:  Navigation Mode In the Navigation Mode, you just read across the screen when using the navigation keys as described above; the cursor is NOT moved. This also means that you can explore parts of the screen where the cursor can't go.  PC Mode  The PC mode is the opposite: Instead of moving the display across the screen when pushing the Easy Access Bar, you move the cursor. Please note that as long as the active cursor moves the Braille display, this obviously also influences the Braille display position.  Combined Mode  The so-called Combined Mode is a mix of the two modes described above. It is useful especially when it comes to reading long text documents. Whenever you press a reading key and a line border is crossed, the PC cursor is moved to the new line as well. This means that you can read a text without having to bother about screen pages. Selecting the Working Modes In order to select the working modes, press the right key towards the rear. You will get a dialog box that looks like follows:    The mode displayed is the one currently selected. Move the Easy Access Bar one step left or right to change the values. Once you have reached the end of the list, you will see the first value again. The options are the following:  Navigation mode  PC Mode  Combined Mode  For setting the value temporarily, push the Easy Access Bar 2 steps up. This will set the value displayed and return to the application you came from.  If you want to save the setting as a new default for the current application, push the Easy Access Bar 2 steps down. You will hear the message "settings saved", the value displayed will be activated, and you will return to the application you came from. 34
BRAILLEX Trio's Terminal Functions   Easy Access Bar Assignment in the Three Working Modes In the following you will see the assignment of the Easy Access Bar in the three different working modes: Navigation Mode Used for normal screen navigation. The cursor position is not changed. Two marker positions can be reached directly: the title bar (with 2 steps up) and the last window line, which typically corresponds to a status line (with 2 steps down). The main reading functions (read forwards and backwards) have a double assignment: they can be reached with both the first step and the second step right or left.  Navigation Mode Functions Easy Access Bar  Function One step up  Moves the display one line up. One step down  Moves the display one line down. One step left  Read backwards. Two steps left  Same as one step left. One step right  Read forwards. Two steps right  Same as one step right. Two steps up  Moves the display to the title bar Two steps down  Moves the display to the last line of the window. PC Mode In PC mode, the Easy Access Bar allows to navigate through an application. Easy Access Bar keys will emulate PC keyboard functions:  PC Mode Functions Easy Access Bar  Function One step left  PC Left arrow key One step up  PC Up arrow key One step right  PC Right arrow key One step down  PC Down arrow key Two steps left  (Shift)+(Tab) Two steps up  (Alt); within a dialog box or menu: (Esc) Two steps right  (Tab) Two steps down  (Enter) Combined Mode The combined mode includes both screen navigation and cursor movement features. When you move the Easy Access Bar up or down, the cursor is moved one line up or down as well (cf. PC mode). When you move the Easy Access Bar to the right, the function is the same as in navigation mode if the text line is longer than the display is. The cursor remains at the original position. Once all the text of that line has been displayed, another “read forwards” command will move both the cursor and the display to the next line. Pushing the Easy Access Bar one step left corresponds to “read backwards” if you are within a long line of text. Otherwise, both cursor and display are moved one line up.  In analogy to the navigation mode, two marker positions can be reached directly: the title bar (with 2 steps up) and the last window line, which typically 35
BRAILLEX Trio's Terminal Functions corresponds to a status line (with 2 steps down). This will NOT move the cursor. The main reading functions (read forwards and backwards) have a double assignment: they can be reached with both the first step and the second step right or left.   Combined Mode Functions Easy Access Bar  Function One step left  Read backwards (within a long line), or: move cursor and display to previous line Two steps left  Same as one step left One step up  Move cursor and display to previous line One step right  Read forwards (within a long line), or: move cursor and display to next line Two steps right  Same as one step right. One step down  Move cursor and display to next line Two steps up  Moves the display to the title bar Two steps down  Moves the display to the last line of the window. Cursor Tracking When navigating across the screen with the Braille display, you do not always take the cursor with you. You can return to the cursor position at any time. If the cursor is not present within the Braille display and you want to move the display back to the cursor position, press the right key towards the front. This will move the display to the cursor location and make sure that when the cursor is moved, the display will follow.  You can also decide not to have the Braille display follow the cursor movements. For this purpose, press the right key towards the front while the cursor is visible on the display. You will hear the message "the active cursor will not move the Braille display", and the automatic tracking is disabled. In order to enable the cursor tracking again, move the display away from the cursor and press right key towards the front again.  Cursor Tracking Key  Function Right key in front position while cursor is NOT within Braille window  Enable cursor tracking and move display to the cursor position Right key in front position while cursor is visible within Braille window Disable cursor tracking  36
BRAILLEX Trio's Terminal Functions  Braille presentation When pressing the left key in front position, you access a number of Braille presentation options. A dialog box with six different parameters will pop up:    In this dialog, you can adjust the most frequently used Braille presentation options. The choices you have refer to the Braille verbosity settings within Jaws. The settings displayed are the ones that are currently selected.  Move the Easy Access Bar one step down or up to move between the different parameters. Move the Easy Access Bar one step left or right to change the values. The options are the following:  Braille presentation options Parameters  Options Braille mode  Line Structured Grade two translation  On Off Translate word under cursor Translating whole line Expanding current word Mark with dots 7 and 8  On Off Text display in Braille  As on screen Line up text Display in  Eight dot Braille Six dot Braille  For setting the values temporarily, push the Easy Access Bar 2 steps up. This will set the value displayed and return to the application you came from.  If you want to save the setting as a new default for the current application, push the Easy Access Bar 2 steps down. You will hear the message "settings saved", the value displayed will be activated, and you will return to the application you came from. 37
BRAILLEX Trio's Terminal Functions Reveal Text Attributes You can have the Braille display reveal different text attributes. The Braille display then underlines the corresponding portion of text with dots 7+8. You can select any of the different attributes directly, or you can choose to get all available attributes revealed. You can, of course, also disable this function.  Press the left key in rear position to activate the selection. You will see a dialog that looks like follows:    The first line in the dialog box shows the current attribute value at the cursor position of the application you are in. You can obviously also use this function to just look up the exact attribute at the cursor position.  The next line contains the global attribute display choices:  Attribute display: Braille marking all  Attribute display: Braille marking off  Attribute display: Braille marking see below for current settings  If you select "Braille marking all", all text with screen attributes other than normal will be marked with dots 7 and 8. This only works if in the Braille presentation options, the "mark with dots 7 and 8" option is enabled.  The "Braille marking off" option disables the Braille marking function for all attributes.  If you have chosen one or several attributes you want to get revealed with dots 7 and 8, you get the message "Braille marking see below for current settings".  Push the Easy Access Bar one step to the left or to the right to select the settings.  In the next lines, you see the list of attributes that can be revealed with dots 7 and 8. You enable or disable the marking by pushing the Easy Access Bar one step to the left or to the right. If you modify any of the settings in this part of the dialog, line 2 will change to " Attribute display: modified". If you go back to line 2 you can then also restore the initial selection of attributes to be displayed, by chosing "Braille marking see below for current settings".  For setting the values temporarily, push the Easy Access Bar 2 steps up. This will set the value displayed and return to the application you came from.  If you want to save the setting as a new default for the current application, push the Easy Access Bar 2 steps down. You will hear the message "settings saved", 38
BRAILLEX Trio's Terminal Functions  the value displayed will be activated, and you will return to the application you came from. Mouse Functions You can activate mouse functions with all BRAILLEX EL devices, using the routing keys.   In order to execute a mouse click, you first move the Braille display to the relevant position. Then you press a routing key at the desired position. This corresponds to a left mouse click.  You can also use the routing keys to select text, for example in a word processing program. Move the display to the starting point of the marker. Hold the left key in front position while you press the routing key at the start position. Then move the display to the end point and repeat the key combination.  Mouse functions Key  Function Routing key  Route mouse to the key position and execute a left mouse click Left front key + routing key   Text selection  39
BRAILLEX Trio's Terminal Functions  BRAILLEX Trio with Dolphin HAL / Supernova  In combination with Dolphin HAL / Supernova, BRAILLEX Trio works like any of Papenmeier's world-famous BRAILLEX EL displays. The handling and the functionality are identical.  When navigating in the active window, you can choose between three different working modes, which influence the assignment of the Easy Access Bar:  Navigation Mode In the Navigation Mode, you just read across the screen when using the navigation keys as described above; the cursor is NOT moved. This also means that you can explore parts of the screen where the cursor can't go.  PC Mode  The PC mode is the opposite: Instead of moving the display across the screen when pushing the Easy Access Bar, you move the cursor. Please note that as long as the active cursor moves the Braille display, this obviously also influences the Braille display position.  Combined Mode  The so-called Combined Mode is a mix of the two modes described above. It is useful especially when it comes to reading long text documents. Whenever you press a reading key and a line border is crossed, the PC cursor is moved to the new line as well. This means that you can read a text without having to bother about screen pages. Selecting the Working Modes In order to select the working modes, press the right key towards the rear. You will get a dialog box that looks like follows:    The mode displayed is the one currently selected. Move the Easy Access Bar one step left or right to change the values. Once you have reached the end of the list, you will see the first value again. The options are the following:  Navigation mode  PC Mode  Combined Mode  If you want to save the setting, push the Easy Access Bar 2 steps down. The value displayed will be activated, and you will return to the application you came from.  If you want to exit without saving the changes, push the Easy Access Bar 2 steps up. You will then return to the application you came from.  40
BRAILLEX Trio's Terminal Functions  Easy Access Bar Assignment in the Three Working Modes In the following you will see the assignment of the Easy Access Bar in the three different working modes: Navigation Mode Used for normal screen navigation. The cursor position is not changed. Two marker positions can be reached directly: the title bar (with 2 steps up) and the last window line, which typically corresponds to a status line (with 2 steps down). The main reading functions (read forwards and backwards) have a double assignment: they can be reached with both the first step and the second step right or left.  Navigation Mode Functions Easy Access Bar  Function One step up  Moves the display one line up. One step down  Moves the display one line down. One step left  Read backwards. Two steps left  Same as one step left. One step right  Read forwards. Two steps right  Same as one step right. Two steps up  Moves the display to the title bar Two steps down  Moves the display to the last line of the window. PC Mode In PC mode, the Easy Access Bar allows to navigate through an application. Easy Access Bar keys will emulate PC keyboard functions:  PC Mode Functions Easy Access Bar  Function One step left  PC Left arrow key One step up  PC Up arrow key One step right  PC Right arrow key One step down  PC Down arrow key Two steps left  (Shift)+(Tab) Two steps up  (Esc) Two steps right  (Tab) Two steps down  (Enter) Combined Mode The combined mode includes both screen navigation and cursor movement features. When you move the Easy Access Bar up or down, the cursor is moved one line up or down as well (cf. PC mode). When you move the Easy Access Bar to the right, the function is the same as in navigation mode if the text line is longer than the display is. The cursor remains at the original position. Once all the text of that line has been displayed, another “read forwards” command will move both the cursor and the display to the next line. Pushing the Easy Access Bar one step left corresponds to “read backwards” if you are within a long line of text. Otherwise, both cursor and display are moved one line up.  In analogy to the navigation mode, two marker positions can be reached directly: the title bar (with 2 steps up) and the last window line, which typically corresponds to a status line (with 2 steps down). This will NOT move the cursor. The main reading functions (read forwards and backwards) have a double 41
BRAILLEX Trio's Terminal Functions assignment: they can be reached with both the first step and the second step right or left.   Combined Mode Functions Easy Access Bar  Function One step left  Read backwards (within a long line), or: move cursor and display to previous line Two steps left  Same as one step left One step up  Move cursor and display to previous line One step right  Read forwards (within a long line), or: move cursor and display to next line Two steps right  Same as one step right. One step down  Move cursor and display to next line Two steps up  Moves the display to the title bar Two steps down  Moves the display to the last line of the window. Cursor Tracking When navigating across the screen with the Braille display, you do not always take the cursor with you. You can return to the cursor position at any time. If you want to move the display back to the cursor position, press the right key towards the front. This will move the display to the cursor location.  Cursor Tracking Key  Function Right key in front position  Move display to the cursor position  Braille presentation When pressing the left key in front position, you access a number of Braille presentation options. A dialog box with six different parameters will pop up:     In this dialog, you can adjust the most frequently used Braille presentation options. The choices you have refer to the Braille verbosity settings within Jaws. The settings displayed are the ones that are currently selected.  Move the Easy Access Bar one step down or up to move between the different parameters. Move the Easy Access Bar one step left or right to change the values. The options are the following:  Braille presentation options 42
BRAILLEX Trio's Terminal Functions  Parameters  Options Braille mode  Logical Physical Literary Braille  On Off Cursor at word uncontracted  On Off Enhanced characters  On Off Expand gaps  On Off Display in eight dot  On Off  If you want to save the setting, push the Easy Access Bar 2 steps down. The value displayed will be activated, and you will return to the application you came from.  If you want to exit without saving the changes, push the Easy Access Bar 2 steps up. You will then return to the application you came from. Reveal Text Attributes You can have the Braille display reveal different text attributes. The Braille display then underlines the corresponding portion of text with dots 7+8. You can select any of the different attributes directly, or you can choose to get all available attributes revealed. You can, of course, also disable this function.  Press the left key in rear position to activate the selection. You will see a dialog that looks like follows:    The first line in the dialog box shows the current attribute value at the cursor position of the application you are in. You can obviously also use this function to just look up the exact attribute at the cursor position.  The next line contains the global attribute display choices:  Attribute display: Braille marking all  Attribute display: Braille marking off  Attribute display: See below for current settings  If you select "Braille marking all", all text with screen attributes other than normal will be marked with dots 7 and 8. This only works if in the Braille presentation options, the "mark with dots 7 and 8" option is enabled.  43
BRAILLEX Trio's Terminal Functions The "Braille marking off" option disables the Braille marking function for all attributes.  If you have chosen one or several attributes you want to get revealed with dots 7 and 8, you get the message "Braille marking see below for current settings".  Push the Easy Access Bar one step to the left or to the right to select the settings.  In the next lines, you see the list of attributes that can be revealed with dots 7 and 8. You enable or disable the marking by pushing the Easy Access Bar one step to the left or to the right. If you modify any of the settings in this part of the dialog, line 2 will change to " Attribute display: modified". If you go back to line 2 you can then also restore the initial selection of attributes to be displayed, by chosing "Braille marking see below for current settings".  If you want to save the setting, push the Easy Access Bar 2 steps down. The value displayed will be activated, and you will return to the application you came from.  If you want to exit without saving the changes, push the Easy Access Bar 2 steps up. You will then return to the application you came from.  Mouse Functions You can activate mouse functions with all BRAILLEX EL devices, using the routing keys. In order to execute a mouse click, you first move the Braille display to the relevant position. Then you press a routing key at the desired position. This corresponds to a left mouse click.  Mouse functions Key  Function Routing key  Route mouse to the key position and execute a left mouse click   44
Important Advice  Important Advice  Purpose of the Device BRAILLEX Trio is intended to be used for the purpose of compensation for the visual handicap of blind people.  According to the European Council directive 93/42/EEC (Medical Devices Directive), they have therefore been classified as active class I medical devices.  These products may only be used in home or office environments. In medical facilities, this product may only be used in office rooms.  The connected PC must comply with the standards regarding safety and EMC (electro-magnetic compatibility) relevant for the area where it is used. Safety Advice Before starting to operate the BRAILLEX EL device, the user should read this manual. The device shall only be installed by a trained person. The device may only be used with the original accessories and in combination with the products foreseen for this purpose by F. H. Papenmeier. If a combination with other devices is necessary, those devices must comply with the relevant standards.   The device may only be used in closed and dry rooms. The ambient temperature must not exceed 40° C (ca. 105° F). Do not expose the device to direct sunlight or humidity (rain).  Repairs and maintenance work may only be undertaken by Papenmeier or by authorized service centers.  There are no known risks for your health that might be caused by the use of this product. General Precautions Our products guarantee optimum safety and reduce to a minimum the strain caused through over-exertion. However, when respecting some precautions you can contribute to avoid prejudice to your health or damage to the product.  If a cellular phone is used close to the product, a minimum distance of 30 cm (1 ft) shall be respected.  Do not expose the product to strong pressure, and do not drop any objects on the product. This might damage the product or lead to misfunctions.   In order to avoid repetitive strain injury at your hands caused through long-time use of the function elements and reading the Braille display, we suggest pauses and relaxation exercise. In specialized bookshops you also find literature on how to equip a workplace in an ergonomical way and on how to avoid strain through an appropriate sitting position. 45
Important Advice CE-Marking  The BRAILLEX EL devices and their original accessories comply with the relevant standards regarding the electro-magnetic compatibility (EMC) and the safety, and are marked with the CE sign.  FHP cannot guarantee however that these products still comply with these EMC standards if they are connected to cables or devices not produced by F. H. Papenmeier. In this case, the person(s) who connected the cables or devices are responsible for taking care that the combination complies with the required standards. In order to avoid EMC problems, you should observe the following advice:  Only connect accessories and devices marked with the CE mark.  Only use shielded connecting cables.  CE Medical Devices Directive  BRAILLEX Trio complies with the requirements of the European Union Medical Devices Directive, as an active class I medical product intended to be used for the purpose of compensation for a handicap.   This product may only be used in home or office environments. In medical facilities, this product may only be used in office rooms.  Please read this manual and the information on medical devices carefully.     46
EC Declaration of Conformity   EC Declaration of Conformity acc. to Article 10.1 of the Directive 89/336/EEC (EMC-Directive)  We,  F. H. Papenmeier GmbH & Co KG  Talweg 2   D-58239 Schwerte, Germany   Name and address of the manufacturer or of the introducer of the product on the market who is established in the EU  herewith take the sole responsibility to confirm that the product:   Braille Terminal  BRAILLEX Trio   is in accordance with the following standards or standardized documents:  1.  EN 55022:1998 + A1:2000 + A2:2003  Kl. B  RF emission   EN 55022:1998 + A1:2000 + A2:2003  Kl. B  conducted noise   EN 55022:1998 + A1:2000 + A2:2003  Kl. B  radiated noise   EN 61000-3-2:2000 + A2:2003  Kl B  harmonics   EN 61000-3-3:1995 + A1:2001  flicker 2. EN 55024:1998  immunity   EN 61000-4-6:1996 + A1:2001  injected HF currents   EN 61000-4-3:2002 + A1:2002  radiated HF fields   EN 61000-4-4:1995 + A1:2001 + A2:2001  Burst   EN 61000-4-5:1995 + A1:2001  Surge   EN 61000-4-11:1994 + A1:2001  voltage variations   EN 61000-4-2:1995 + A1:1998 + A2:2001  ESD   EN 61000-4-8:1993 + A1:2001  magnetic fields  (Title and/or number and date of the standard(s) or other standardized documents)   The following operating conditions and installation arrangements have to be presumed:    This confirmation is based on test report  21126235_001  TÜV Rheinland Product Safety GmbH, 51101 Köln, Germany       Jürgen Bornschein, Chief Engineer F.H. Papenmeier GmbH & Co KG, Talweg 2, D-58239 Schwerte, Germany Schwerte, Ausust 24, 2006  Name, address, date and legally binding signature of the person being responsible  47
Radio Frequency Interference Statement      Federal Communication Commission (FCC) Radio Frequency Interference Statement This equipment has been tested and found to comply with the limits for a Class B digital device, pursuant to Part 15 of the FCC Rules. These limits are designed to provide reasonable protection against harmful interference in a residential installation.   This equipment generates, uses and can radiate radio frequency energy and, if not installed and used in accordance with the instructions, may cause harmful interference to radio communications. However, there is no guarantee that interference will not occur in a particular installation. If this equipment does cause harmful interference to radio or television reception, which can be determined by turning the equipment off and on, the user is encouraged to try to correct the interference by one of the following measures:  Reorient or relocate the receiving antenna.  Increase the separation between the equipment and receiver.  Connect the equipment into an outlet on a circuit different from that to which the receiver is connected.  Consult the dealer or an experienced radio/TV technician for help.  FCC Caution : To assure continued compliance, any changes or modifications not expressly approved by the party responsible for compliance could void the user's authority to operate this equipment. (Example - use only shielded interface cables when connecting to computer or peripheral devices).   This device complies with Part 15 of the FCC Rules. Operation is subject to the following two conditions:  (1) This device may not cause harmful interference, and (2) This device must accept any interference received, including interference that may cause undesired operation.    Product name:  BRAILLEX Trio FCC-ID: UI9-1860-TRIO  48
   Index A Attributes (Dolphin)........................ 43 Attributes (Jaws)............................ 38 B Bluetooth name.....................................9, 27 on/off ....................................... 26 Pin ........................................9, 27 Preparing the PC .......................... 9 Braille keyboard............................. 19 Braille presentation options (Dolphin) 42 Braille presentation options (Jaws) ... 37 Braille table select ....................................... 27 C Calculator ..................................... 25 CE Medical Devices Directive.........2, 46 CE sign......................................... 46 Cleaning ....................................... 17 Connection Personal computer........................ 5 Copyright and Trademarks ................ 3 Cursor active cursor (Jaws).................... 36 disable cursor tracking (Jaws) ...... 36 move to cursor position (Dolphin). 42 Movements within the editor........ 22 D Date adjust....................................... 26 read ......................................... 25 Date format select ....................................... 26 E Easy Access Bar Movements within the editor........ 22 EC Declaration of Conformity ........... 47 Editor Clipboard................................... 23 Copy text .................................. 23 Cut text..................................... 23 Delete file.................................. 24 Launching.................................. 21 Mark text................................... 23 New file..................................... 24 Open file ................................... 24 Paste text.................................. 23 Rename file ............................... 24 Replace..................................... 24 Search - invert search direction .... 23 Search for word.......................... 23 EU Medical Devices Directive........ 2, 46 F FCC Radio Frequency Interference Statement ................................. 48 Features Efficiency Line..............................1 ergonomic Braille keyboard............1 SingleChannel Braille display..........1 I Info power ....................................... 29 program version......................... 29 remaining memory capacity ......... 29 Installation......................................8 Bluetooth connection.....................9 USB connection ............................8 M Misfunctions .................................. 45 N Navigation Screen navigation....................... 31 P Power supply batteries......................................5 Battery Operation Time .................6 Recharging the Batteries................6 USB Connection............................5 USB operation............................ 27 49
Index R Repair service................................ 17 Routing Mouse routing (Dolphin).............. 44 Mouse routing (Jaws).................. 39 Text selection (Jaws) .................. 39 S Safety .......................................... 45 Scope Of Delivery.............................3 Settings........................................ 26 Braille dot firmness..................... 28 Sleep time display...................................... 27 Trio .......................................... 28 System Requirements.......................3 T Time adjust .......................................26 read..........................................25 Time format select........................................26 Tools battery recharge.........................28 format flash memory...................28 restore default values..................28 W Working Modes Combined mode (Dolphin)............41 Combined mode (Jaws) ............... 35 Navigation mode (Dolphin)...........41 Navigation mode (Jaws)...............35 PC mode (Dolphin)......................41 PC mode (Jaws)..........................35 50
    51

Navigation menu