Ericsson LG WP-1000N WIRELESS PCI ADAPTER User Manual 3 of 4
Ericsson-LG Co., Ltd. WIRELESS PCI ADAPTER 3 of 4
UserManual.wiki
>
Ericsson LG
>
WP-1000N User Manual
>
User manual 3 of 4
Contents
1.
User manaul 1 of 4
2.
User manual 2 of 4
3.
User manual 3 of 4
4.
User manual 4 of 4
User manual 3 of 4
Navigation menu
Upload a User Manual
Namespaces
Wiki Guide
HTML
PDF
Info
Views
User Manual
Discussion / Help
Navigation
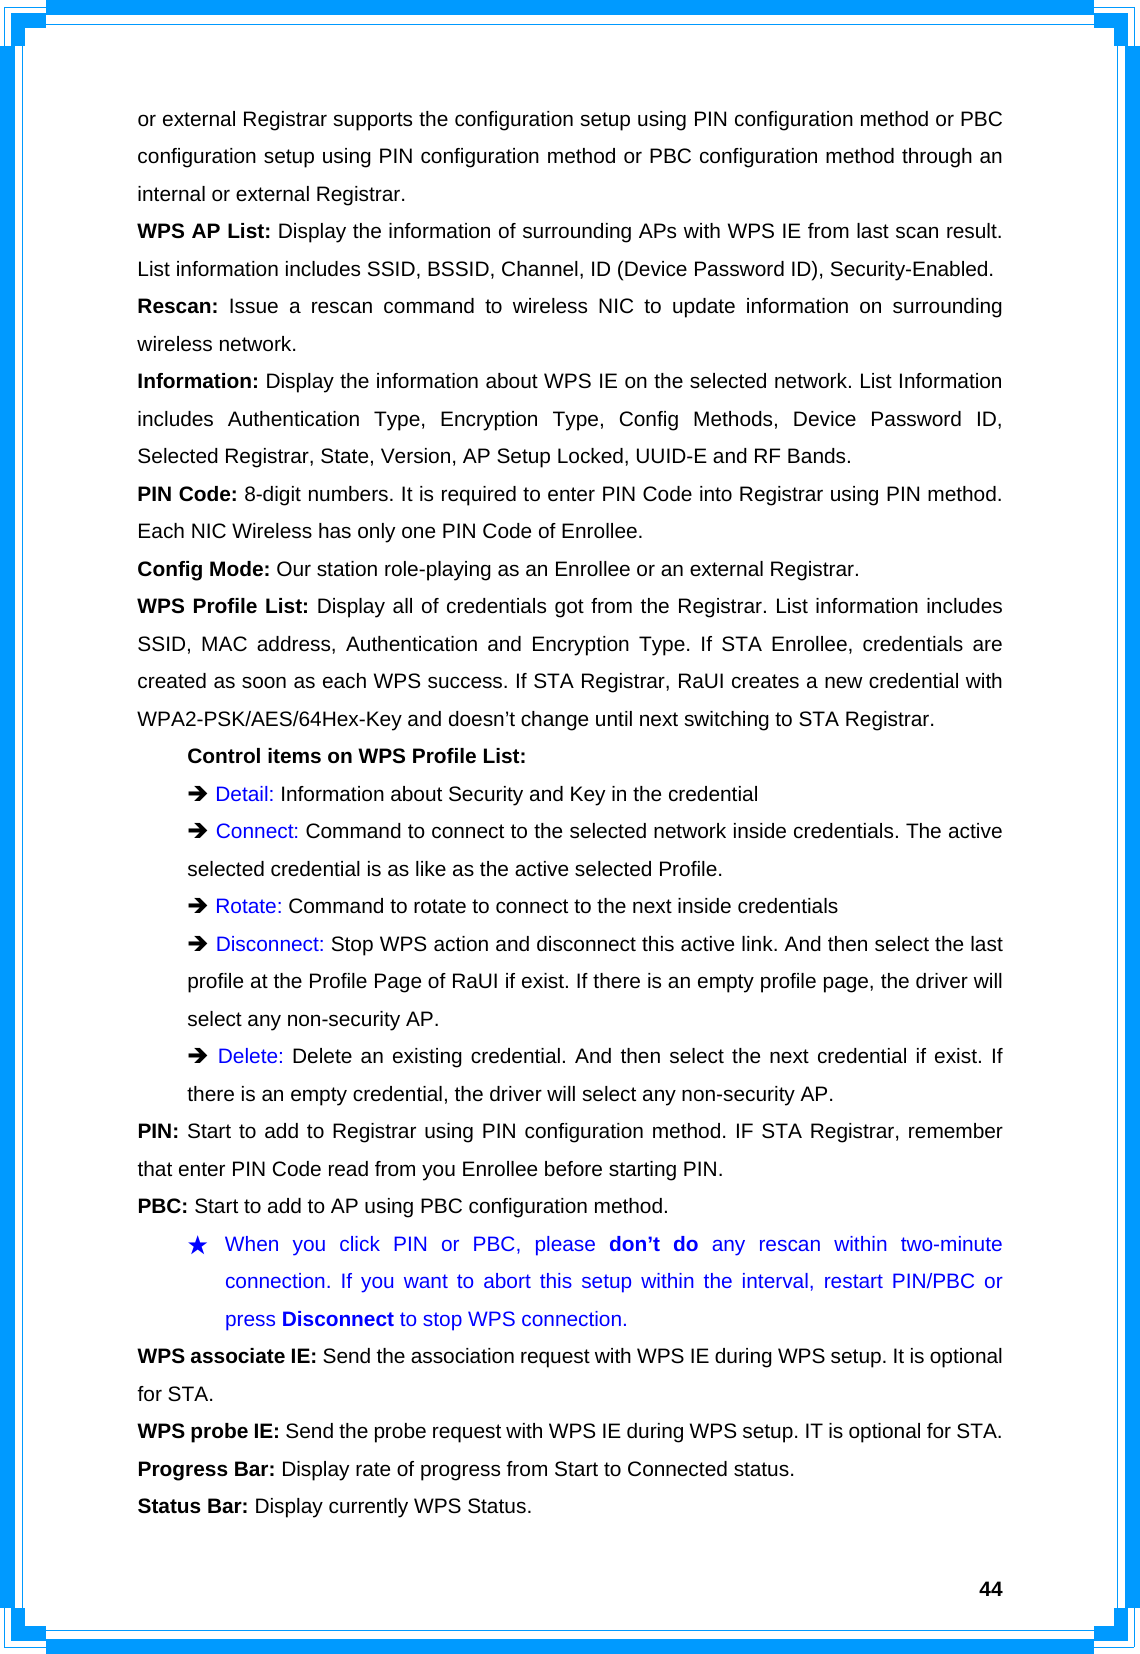
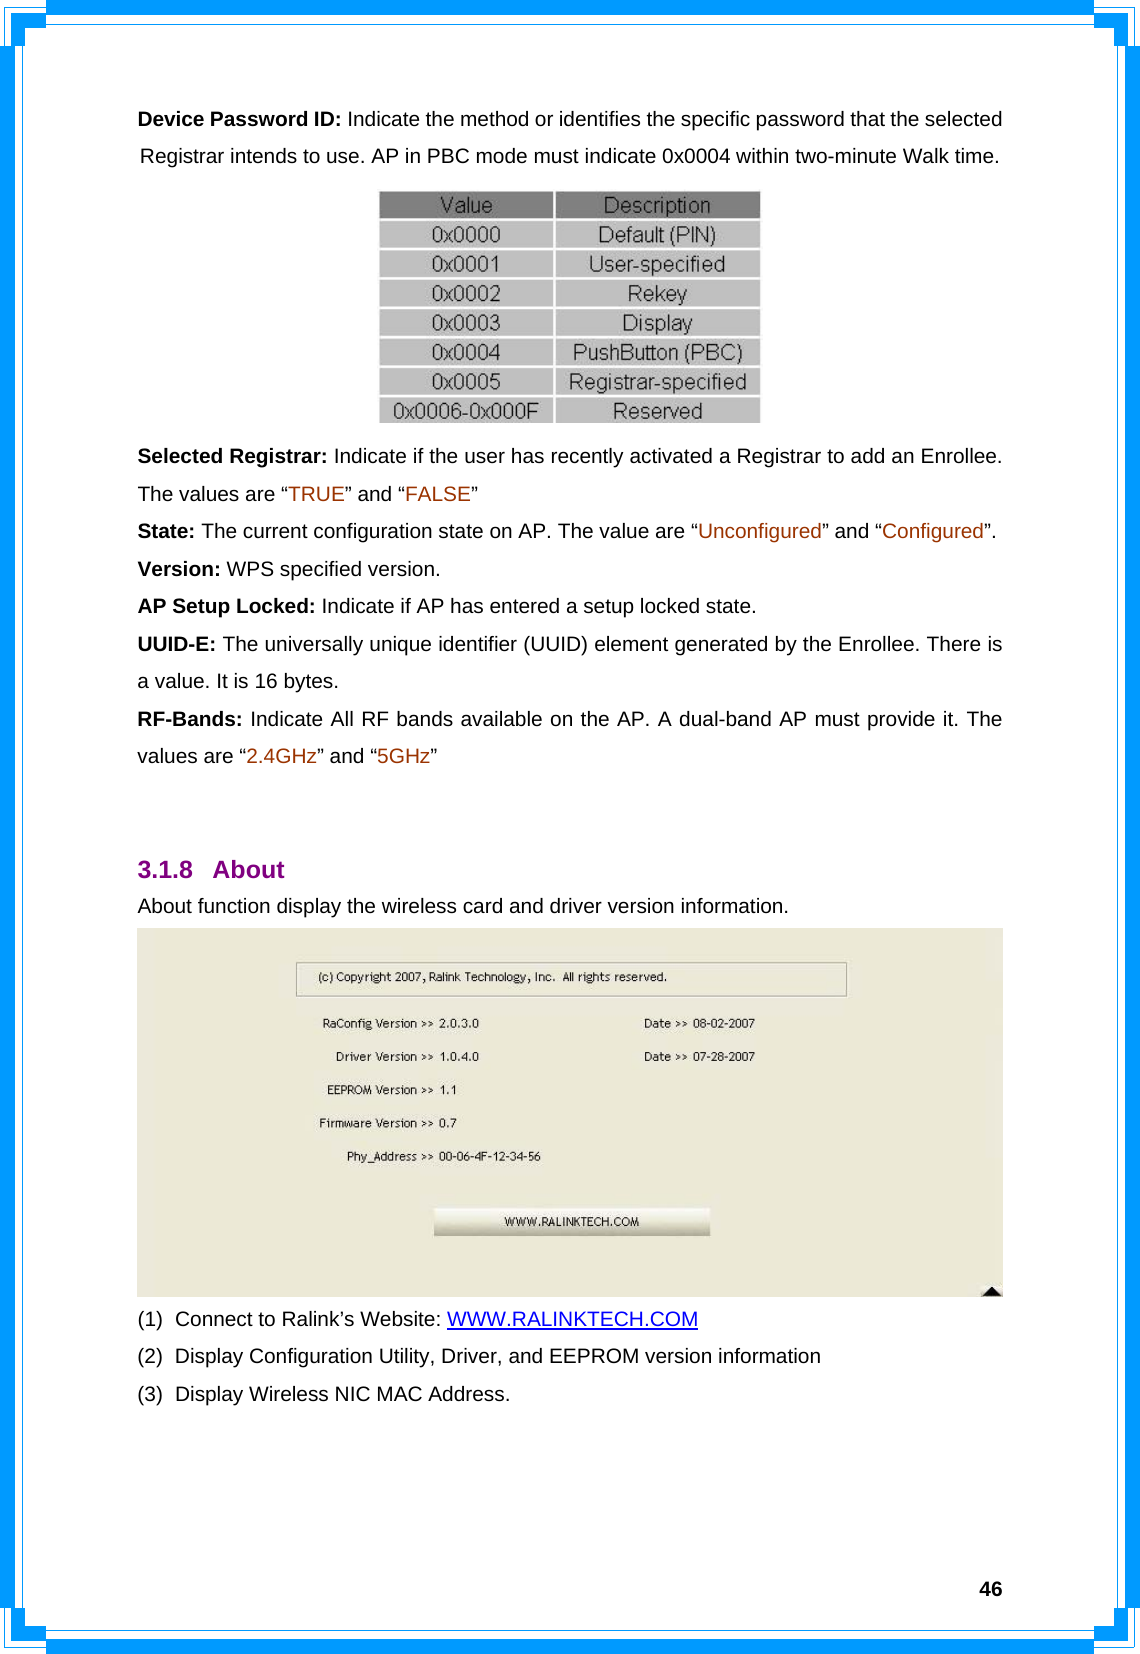
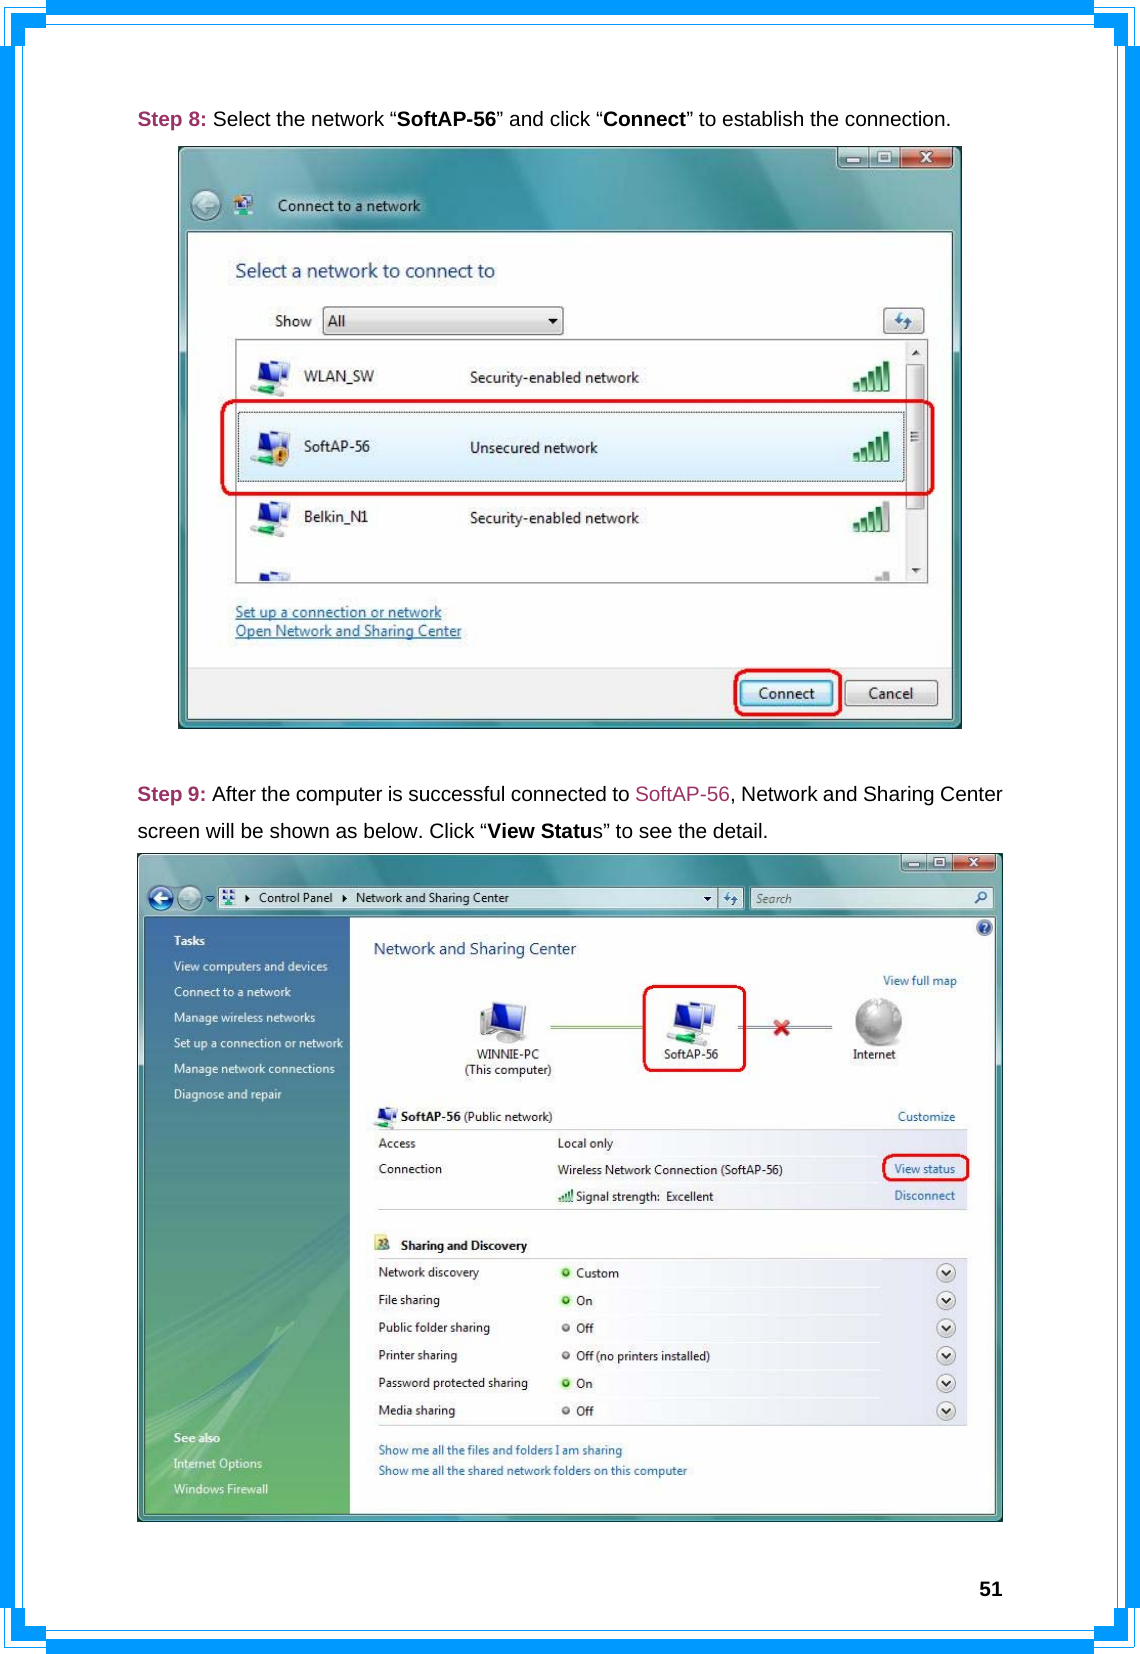
![45[WPS Information on AP] WPS information contain authentication type, encryption type, config methods, device password ID, selected registrar, state, version, AP setup locked, UUID-E and RF bands. Authentication Type: There are three types of authentication modes supported by RaConfig. There are Open, Shared, WPA-PSK, and WPA system. Encryption Type: For Open and shared authentication mode, the selection of encryption are None and WEP. For WPA, WPA2, WPA-PSK, and WPA2-PSK authentication mode, the encryption type supports both TKIP and AES. Config Methods: Correspond to the methods the AP supports as an Enrollee for adding external Registrars. (A bitwise OR of values)](https://usermanual.wiki/Ericsson-LG/WP-1000N.User-manual-3-of-4/User-Guide-1072294-Page-2.png)
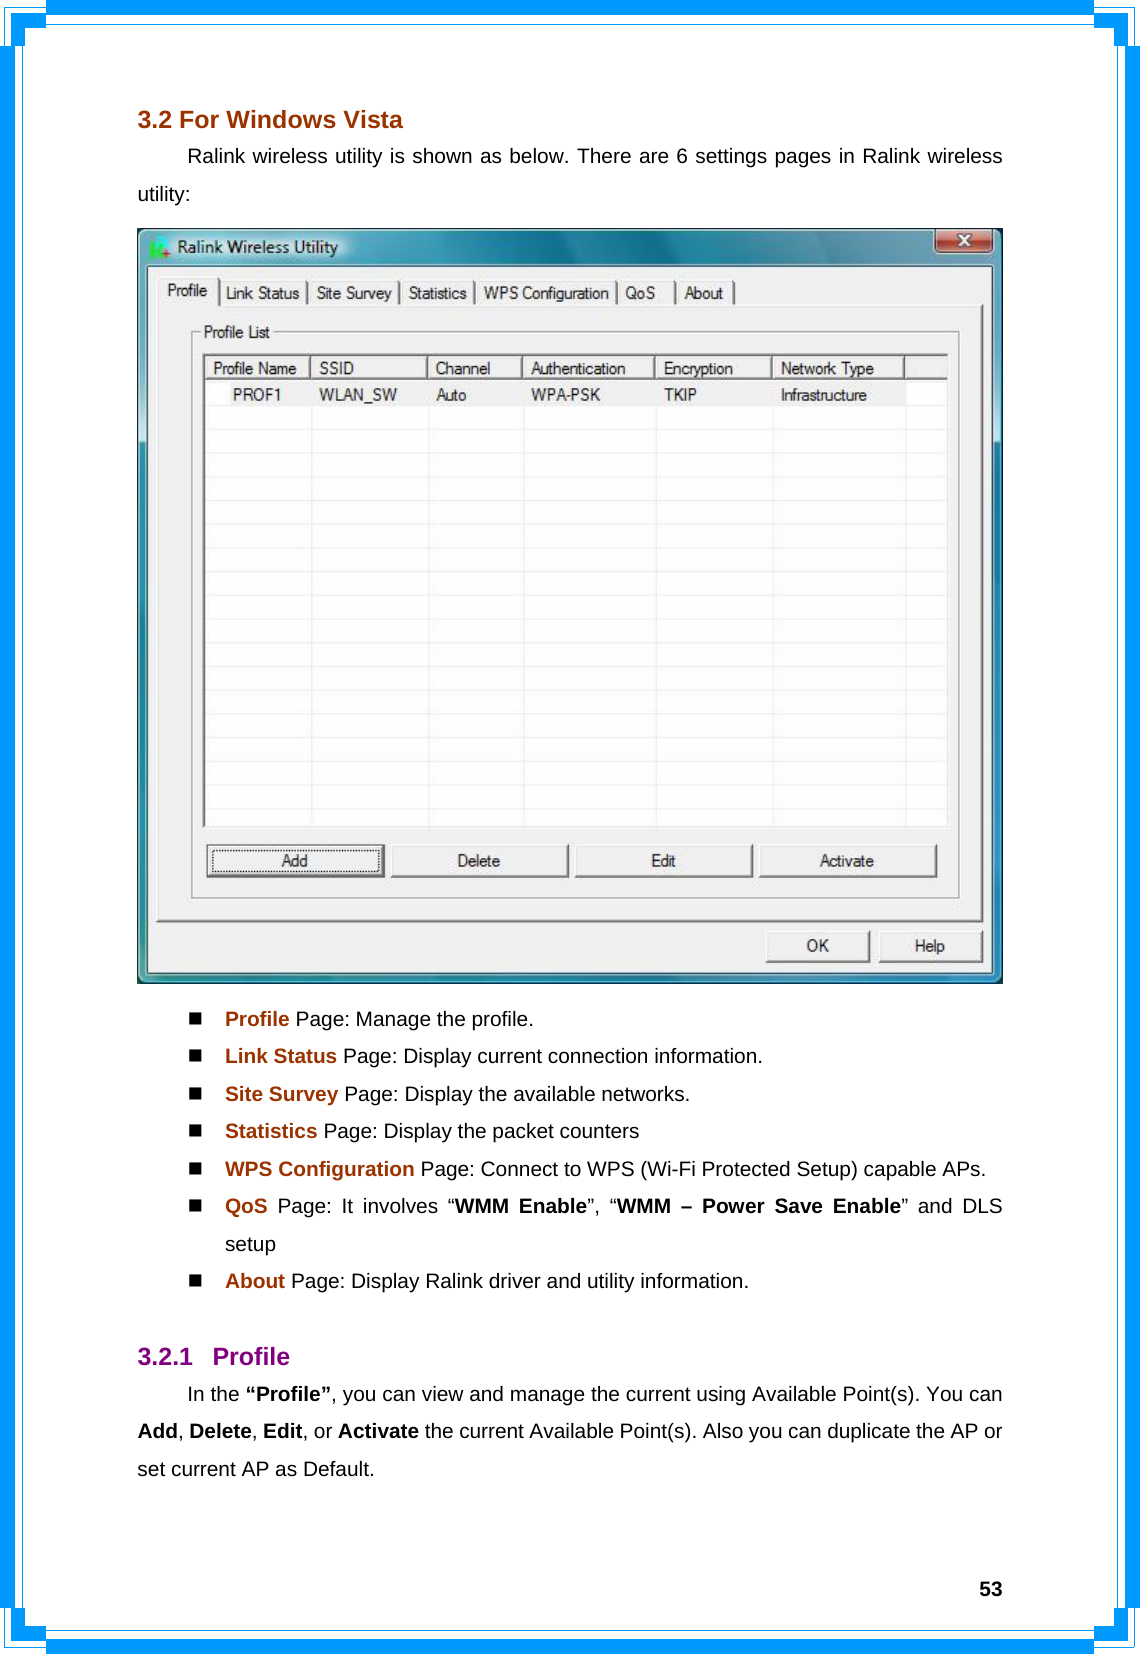
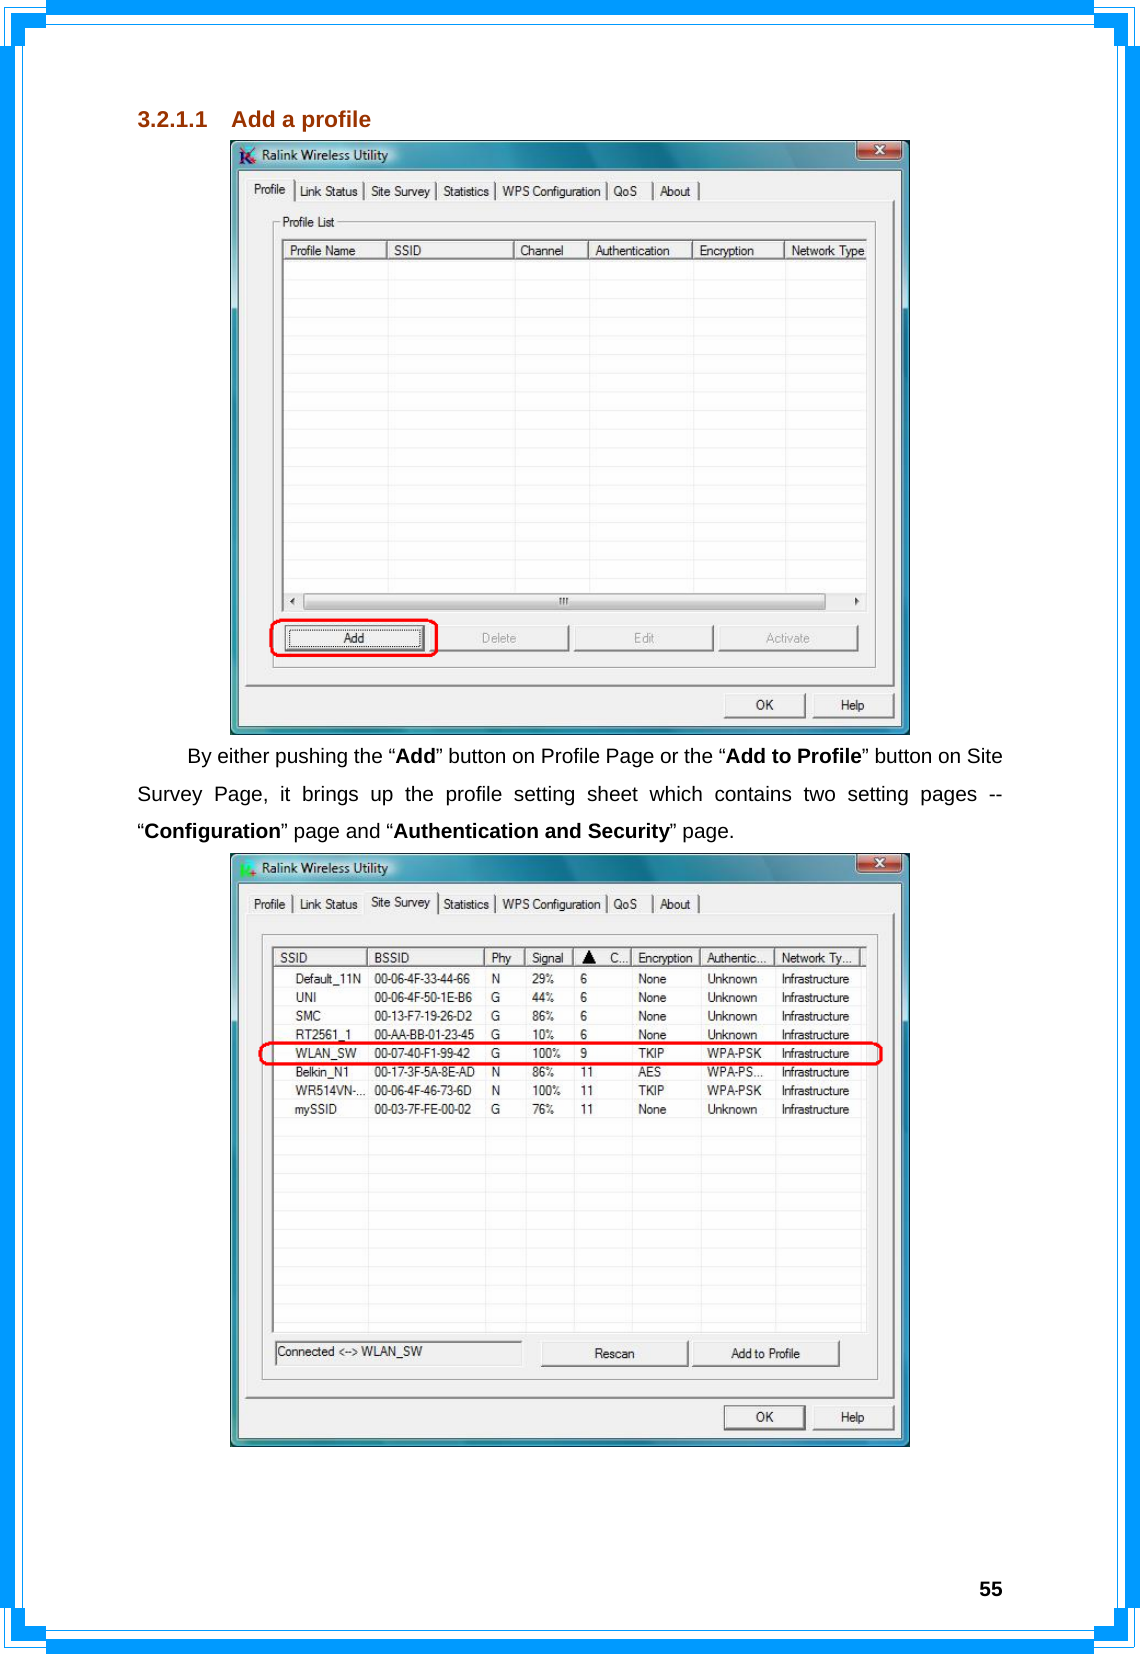
![56 [Configuration page] Profile Name: Name of the profile SSID: Name of the desire network Network Type: Network of the desired network, either infrastructure or Ad-Hoc. Infrastructure – This operation mode requires the presence of a wireless Access Point. All communication is done via the Access Point or Router. Ad-Hoc – Select this mode if you want to connect to another wireless station in the Wireless LAN network without through an Access Point or Router. Tx-Power: The desired TX power level; the available options are 100%, 75%, 50% and Auto. If you want to lower the transmit power of the adapter for saving the power of the system, you can select the lower percentages from the list. The lower power will cause the lower signal strength and the coverage range.](https://usermanual.wiki/Ericsson-LG/WP-1000N.User-manual-3-of-4/User-Guide-1072294-Page-13.png)
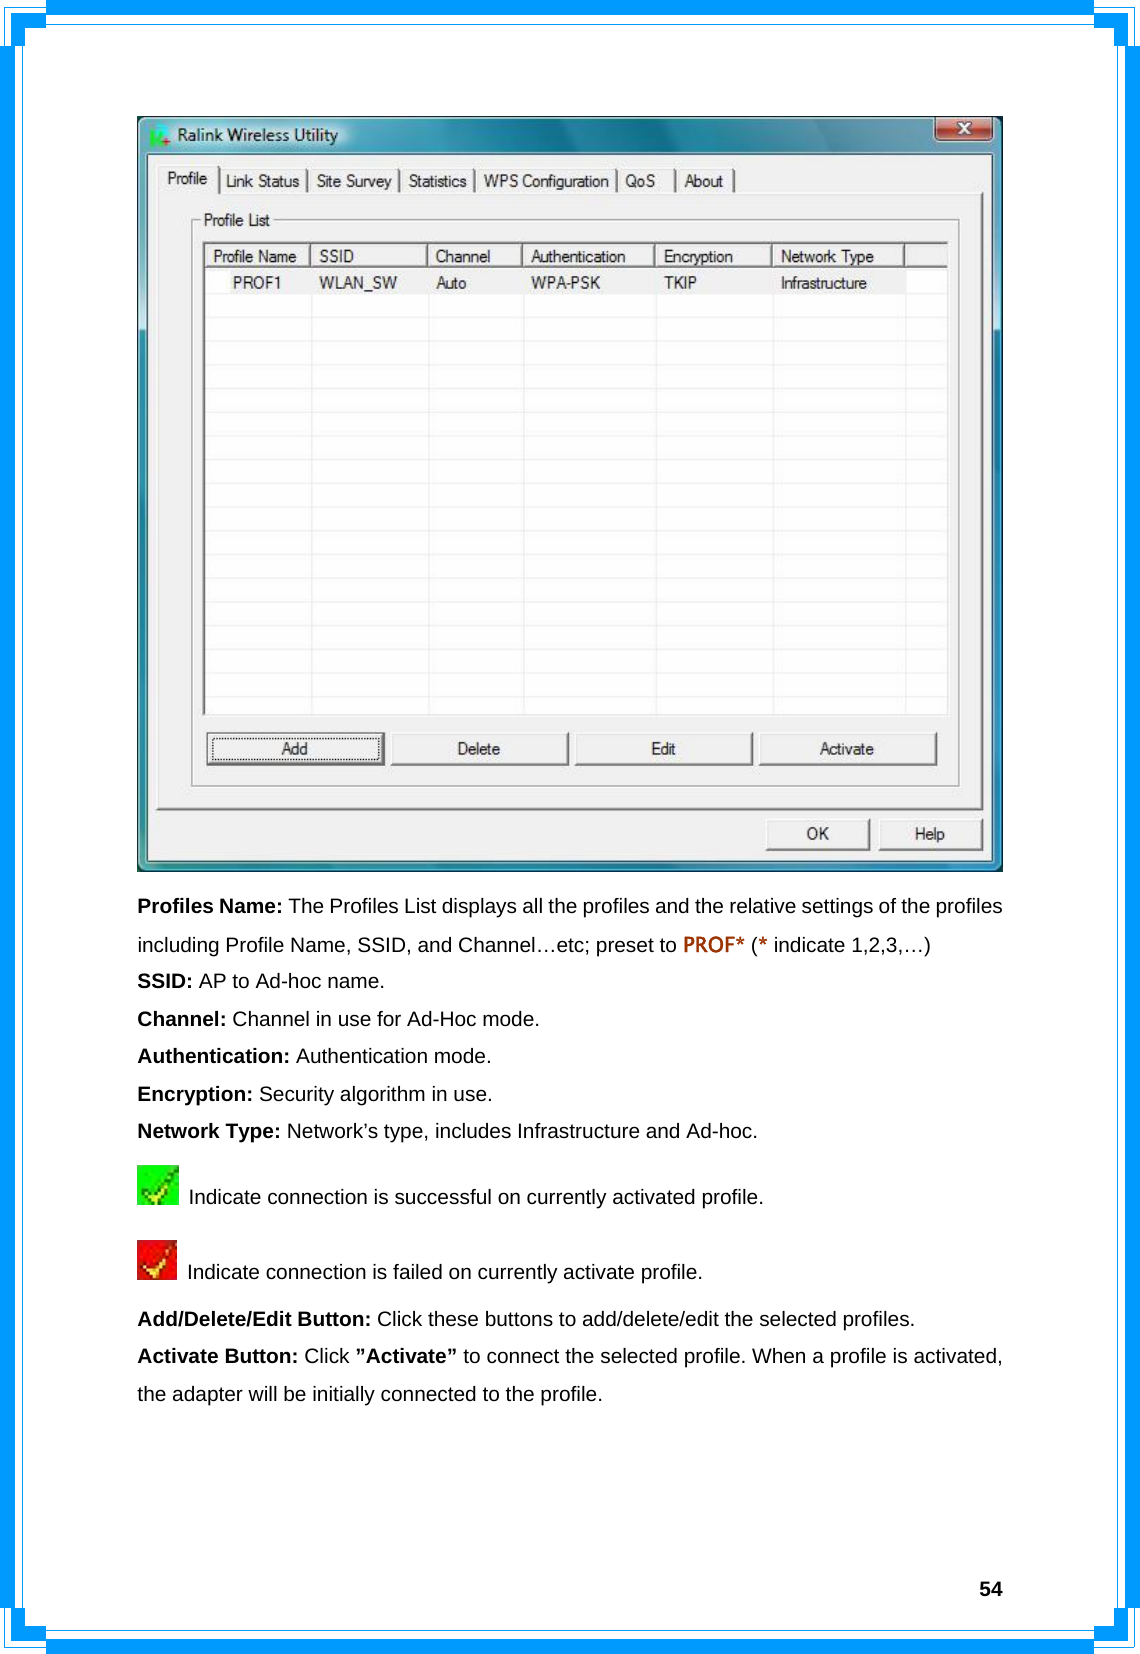
![57 [Authentication and Security page] Authentication Type: The authentication of the desired network. For infrastructure network, the available modes are Open, Shared, WPA, WPA-PSK, WPA2, and WPA2-PSK. Open: No authentication is needed among the wireless devices. Shared: Only Wireless device using a shared key (WEP Key identified) is allowed to connecting each other. Setup the same key as the wireless device that the adapter intends to connect. WPA: WPA provides a scheme of mutual authentication using either IEEE 802.1x/Extensible Authentication Protocol (EAP) authentication or pre-shared key (PSK) technology. It provides a high level of assurance to enterprise, small business and home users that data will remain protected and that only authorized users may access their networks. For enterprises that have already deployed IEEE 802.1x authentication, WPA offers the advantage of leveraging existing authentication databases and infrastructure. WPA-PSK – It is a special mode designed for home and small business users who do not have access to network authentication servers. In this mode, known as Pre-Shared Key, the user manually enters the starting password in their access point or gateway, as well as in each wireless station in the network. WPA-PSK takes over automatically from that point, keeping unauthorized users that don’t have the matching password from joining the network, while encrypting the data traveling between authorized devices.](https://usermanual.wiki/Ericsson-LG/WP-1000N.User-manual-3-of-4/User-Guide-1072294-Page-14.png)
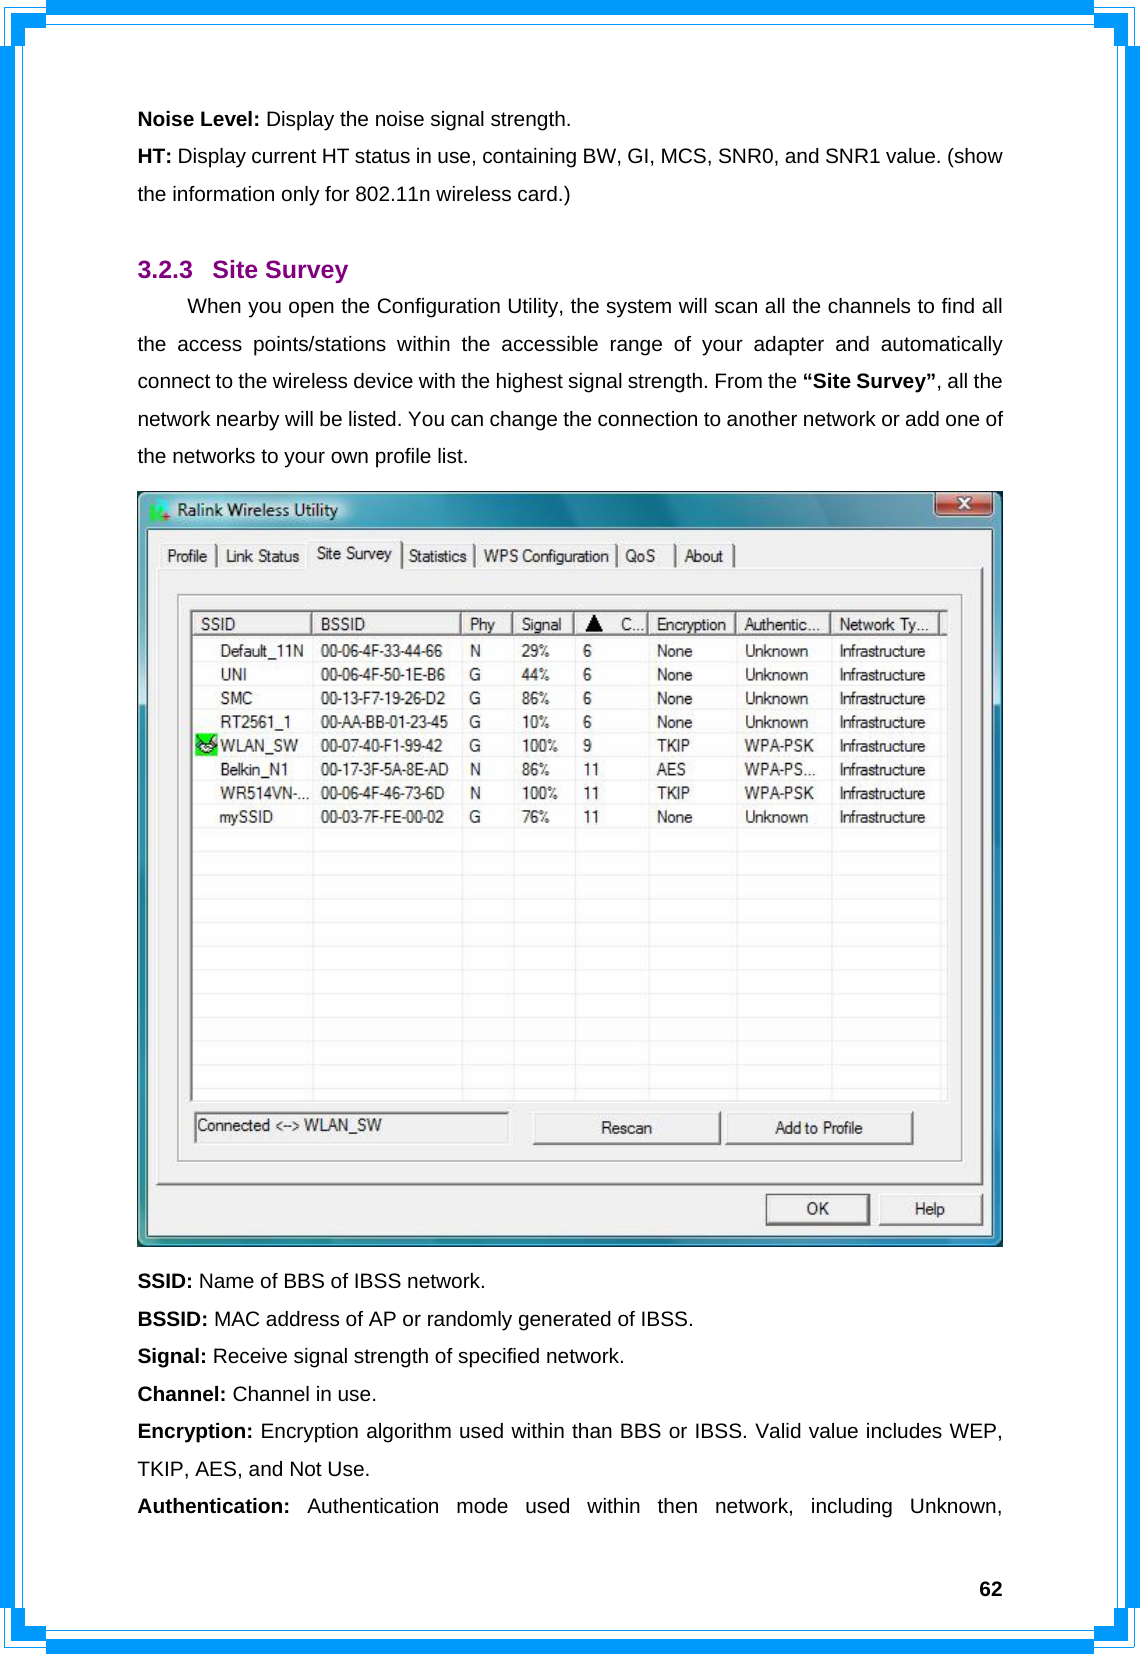
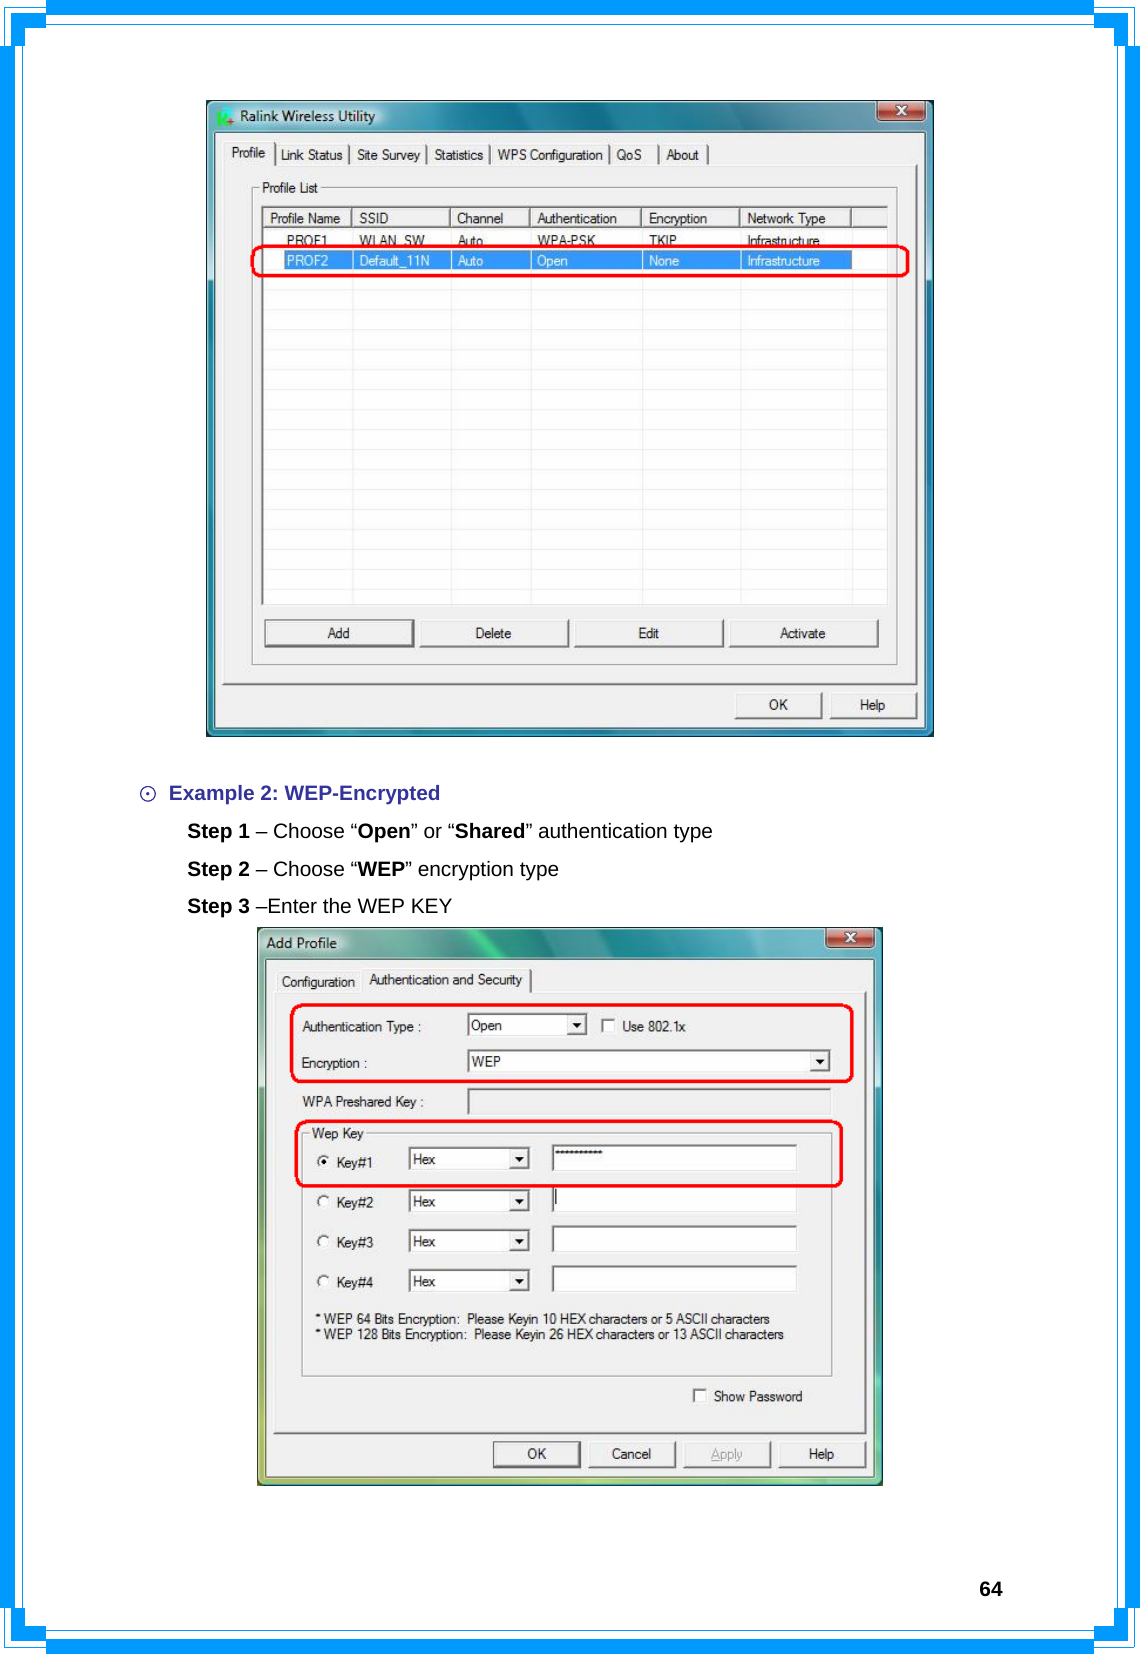
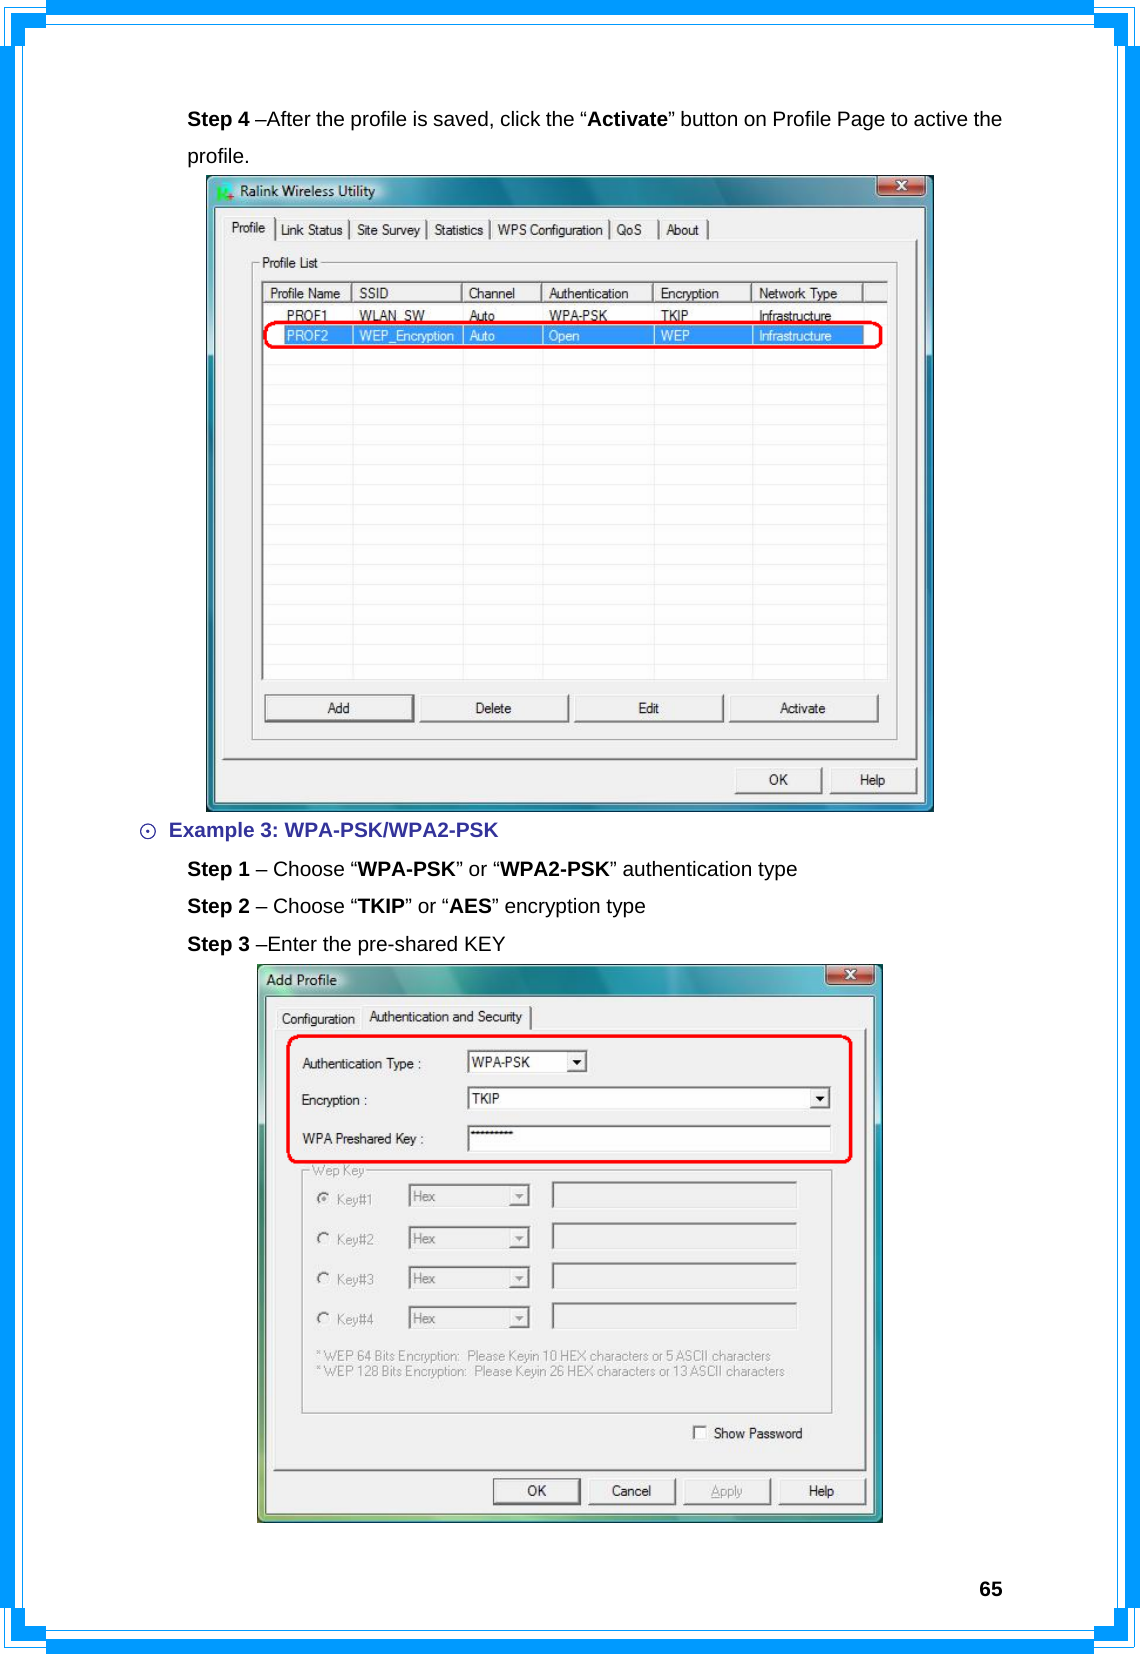
![63WPA-PSK, WPA2-PSK, WPA and WPA2. Network Type: Network type in use, Infrastructure or Ad-Hoc. Rescan: Issue a rescan command to wireless NIC to update information on surrounding wireless network. Re-Scanning: Clicking the re-scan button to perform the re-scanning action. Add to Profile: Add the selected AP to Profile setting. It will bring up profile page and save user’s setting to a new profile. [Connect A Network] (1) When Raconfig first ran, it will select the best AP to connect automatically. (2) If user wants to connect to other AP, he can double-click mouse on the intended AP to make connection. (3) If the intended network has encryption other than “Not Use”, Raconfig will bring up the security page and let use input the appropriate information to make the connection. This icon indicates the change is successful. ☉Example 1: Open and Non-Encrypted Step 1 – Choose “Open” authentication type Step 2 – Choose “None” encryption type Step 3 – After the profile is saved, click “Activate” button on Profile Page to activate the profile.](https://usermanual.wiki/Ericsson-LG/WP-1000N.User-manual-3-of-4/User-Guide-1072294-Page-20.png)