Ericsson LG IP88XX IP Phone User Manual Portion Two
Ericsson-LG Co., Ltd. IP Phone Portion Two
UserManual.wiki
>
Ericsson LG
>
IP88XX User Manual
>
User Manual Portion Two
Contents
1.
User Manual Part One
2.
User Manual Portion Two
3.
Regulatory Information
User Manual Portion Two
Navigation menu
Upload a User Manual
Namespaces
Wiki Guide
HTML
PDF
Info
Views
User Manual
Discussion / Help
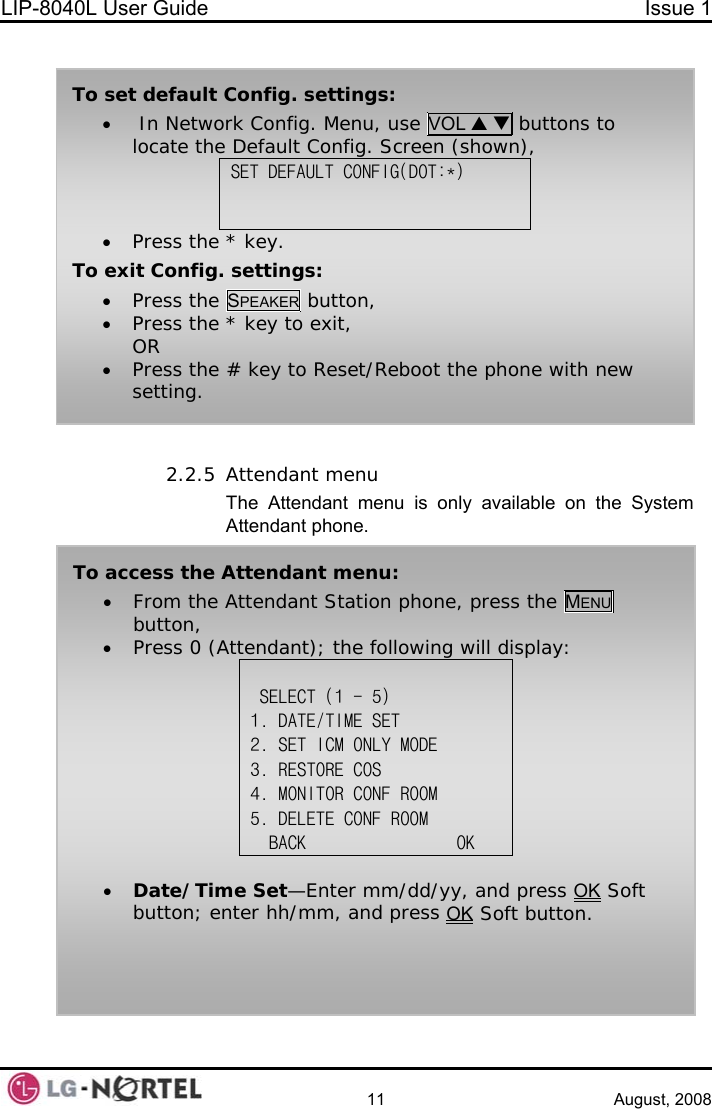
Navigation


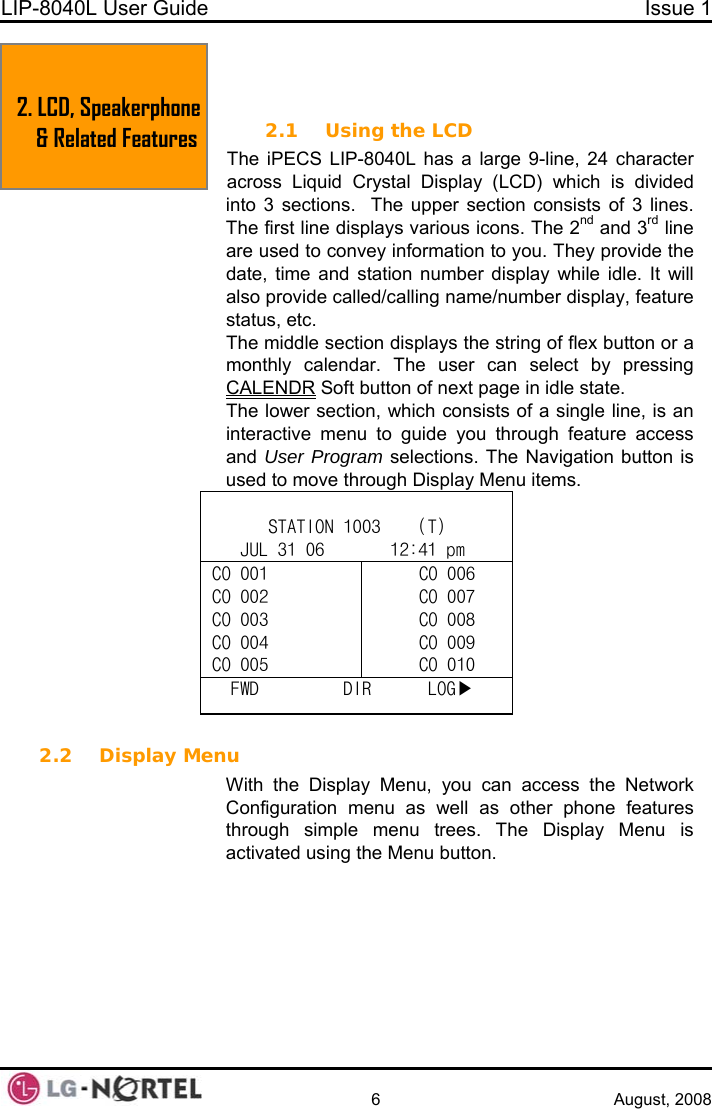
![LIP-8040L User Guide Issue 1 10 August, 2008 2.2.4 Network Config The User can review the current network configuration or modify a new phone network configuration. To access Network Config. settings: • Press MENU button and 4 (Network Config), • Enter the password (default=147*); the following will display: MFIM #[1/2] ? MFIM #1 - CHANGE[#] • Press the # key to toggle between multiple profiles (MFIM), • Press the VOL S T buttons to advance to the next network configuration item, • Press the HOLD/SAVE button to save each setting. • Dial 1 to send a message, • Dial 1 if resending, or 2 to send a new message (edit), • Enter the Station number and message (if sending message), • Press the OK Soft button. To retrieve a SMS message: • Press MENU button and 3 (ICM SMS), • The following menu displays: SELECT (1-2) 1. SEND MESSAGE 2. IN BOX(03) BACK OK • Press the Navigation up/down keys to highlight and then press the OK Soft button to select, OR • Dial 2 to retrieve a message. • • Dial 1 to send a message, Dial 1 if resending or 2 to send a new message (edit)](https://usermanual.wiki/Ericsson-LG/IP88XX.User-Manual-Portion-Two/User-Guide-1008574-Page-18.png)