EnGenius Technologies EMD1 AC1300 Dual-Band Mesh AP User Manual EMD2 QSG 20180601 for

EnGenius Technologies AC1300 Dual-Band Mesh AP EMD2 QSG 20180601 for

Contents

User Manual EMD2

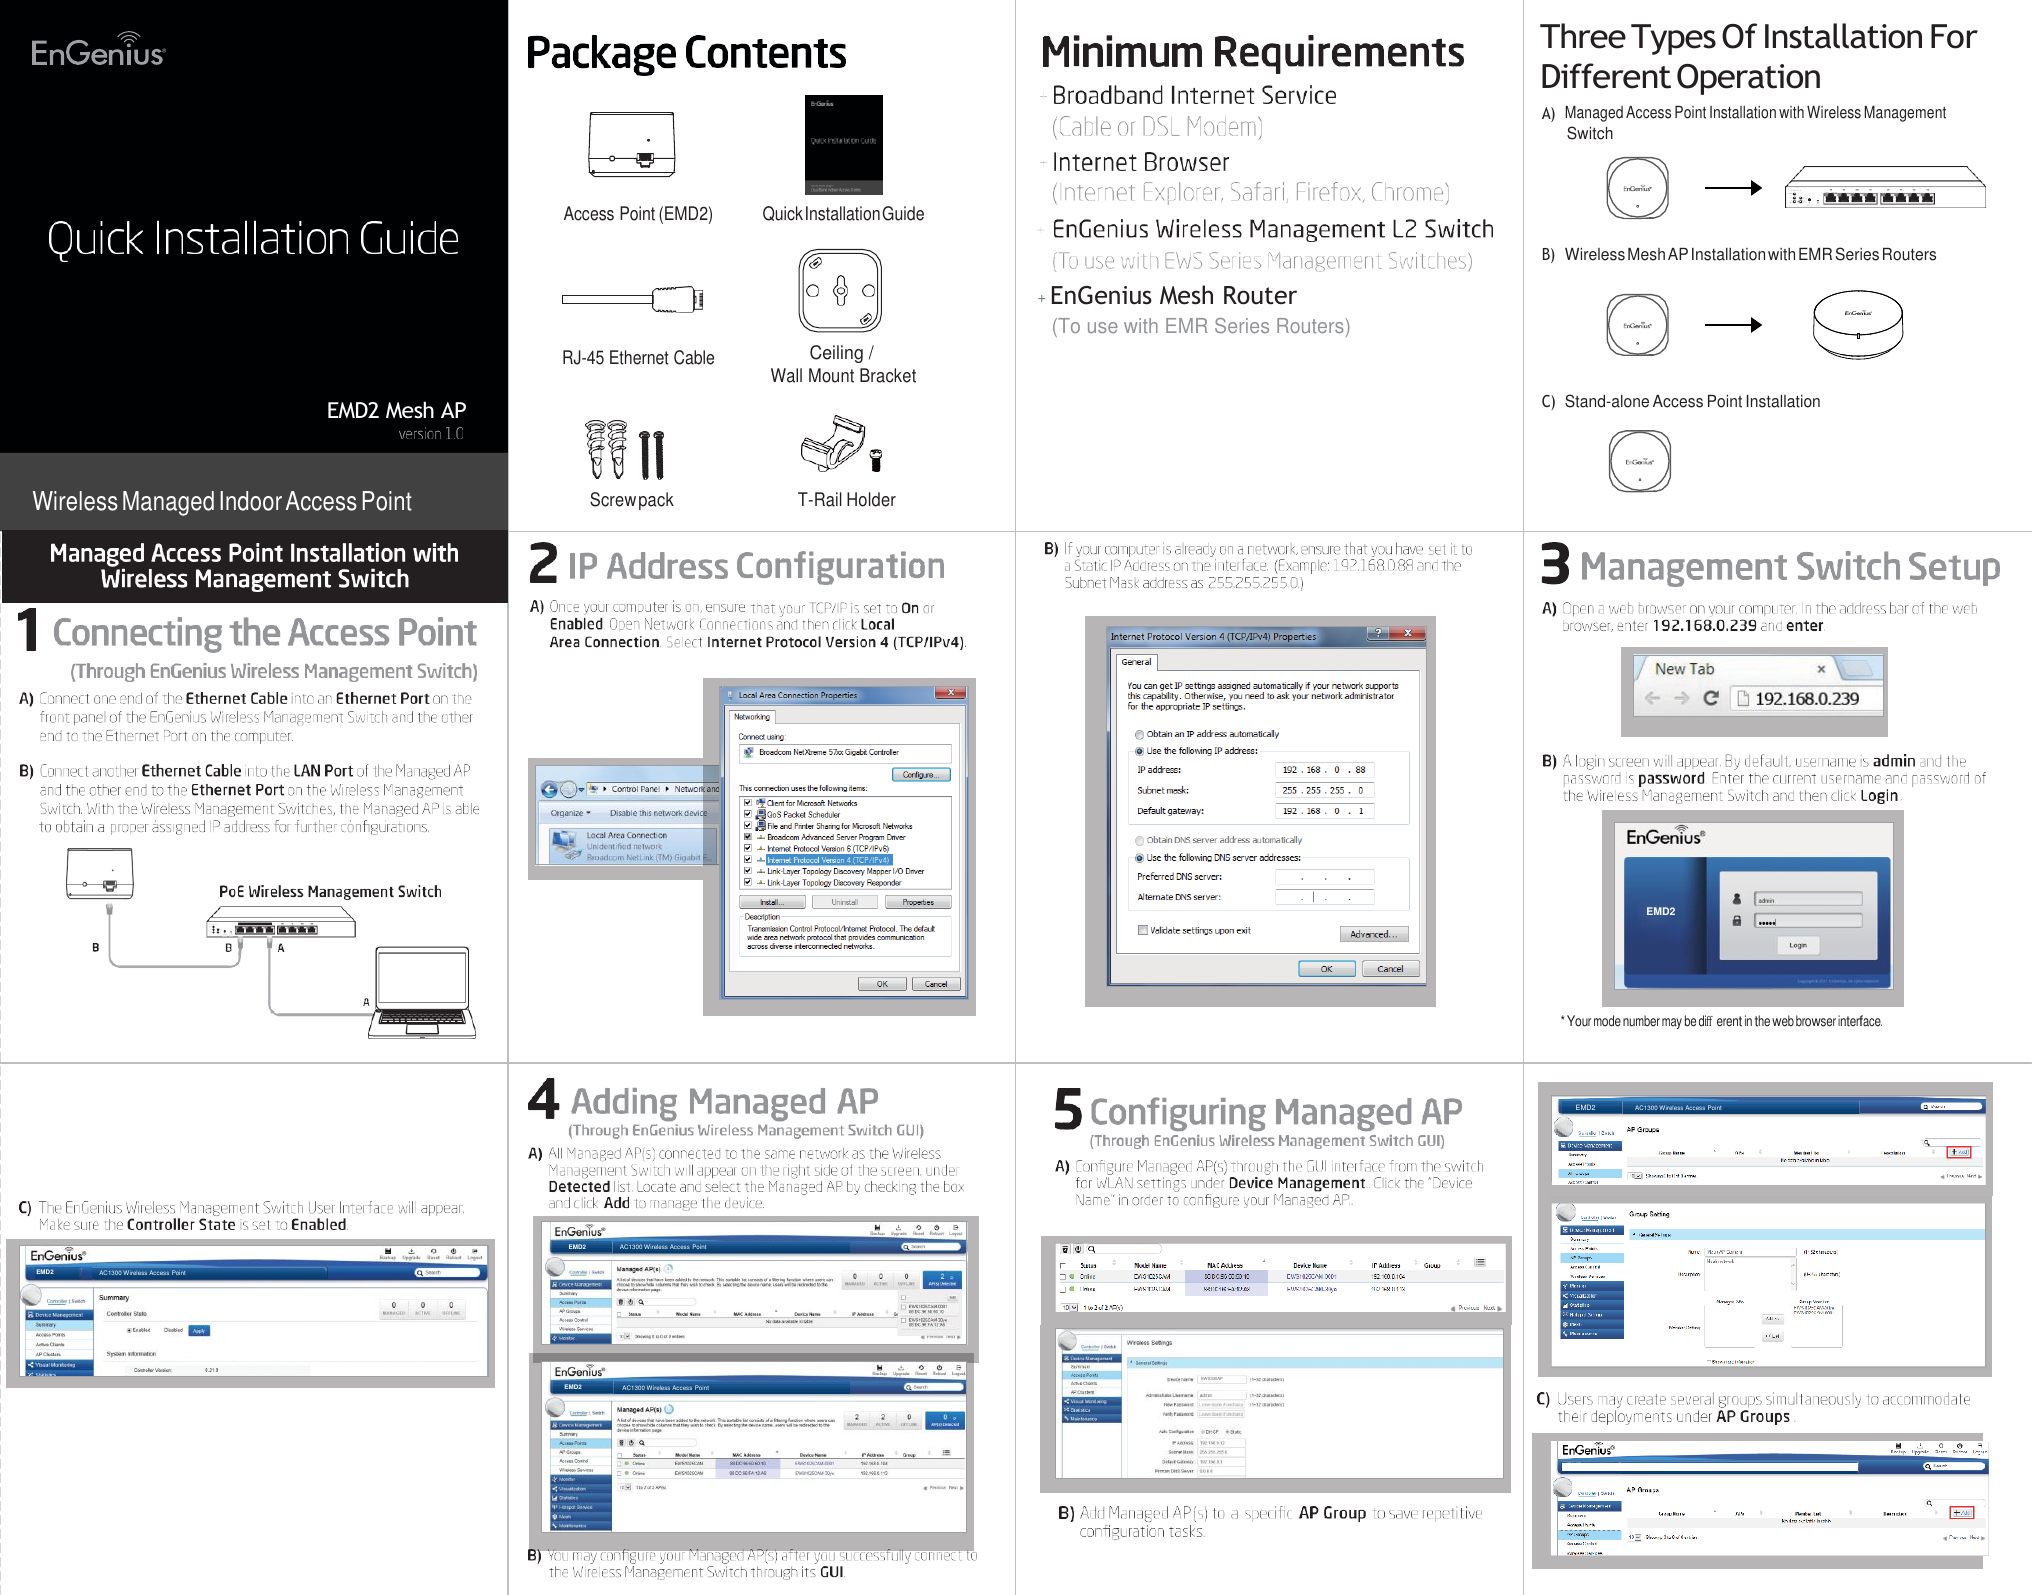
EMD2 Mesh AP Wireless Managed Indoor Access Point      EMD2 Three Types Of Installation For Different Operation A) Managed Access Point Installation with Wireless Management    Switch   Access Point (EMD2)    RJ-45 Ethernet Cable Quick Installation Guide  Ceiling / Wall Mount Bracket   + EnGenius Mesh Router (To use with EMR Series Routers)   B) Wireless Mesh AP Installation with EMR Series Routers   C) Stand-alone Access Point Installation      Screw pack  T-Rail Holder           * Your mode number may be different in the web browser interface.     EMD2  AC1300 Wireless Access Point    EMD2  AC1300 Wireless Access Point    EMD2  AC1300 Wireless Access Point    EMD2  AC1300 Wireless Access Point     EMD2  AC1300 Wireless Access Point             EWS330AP
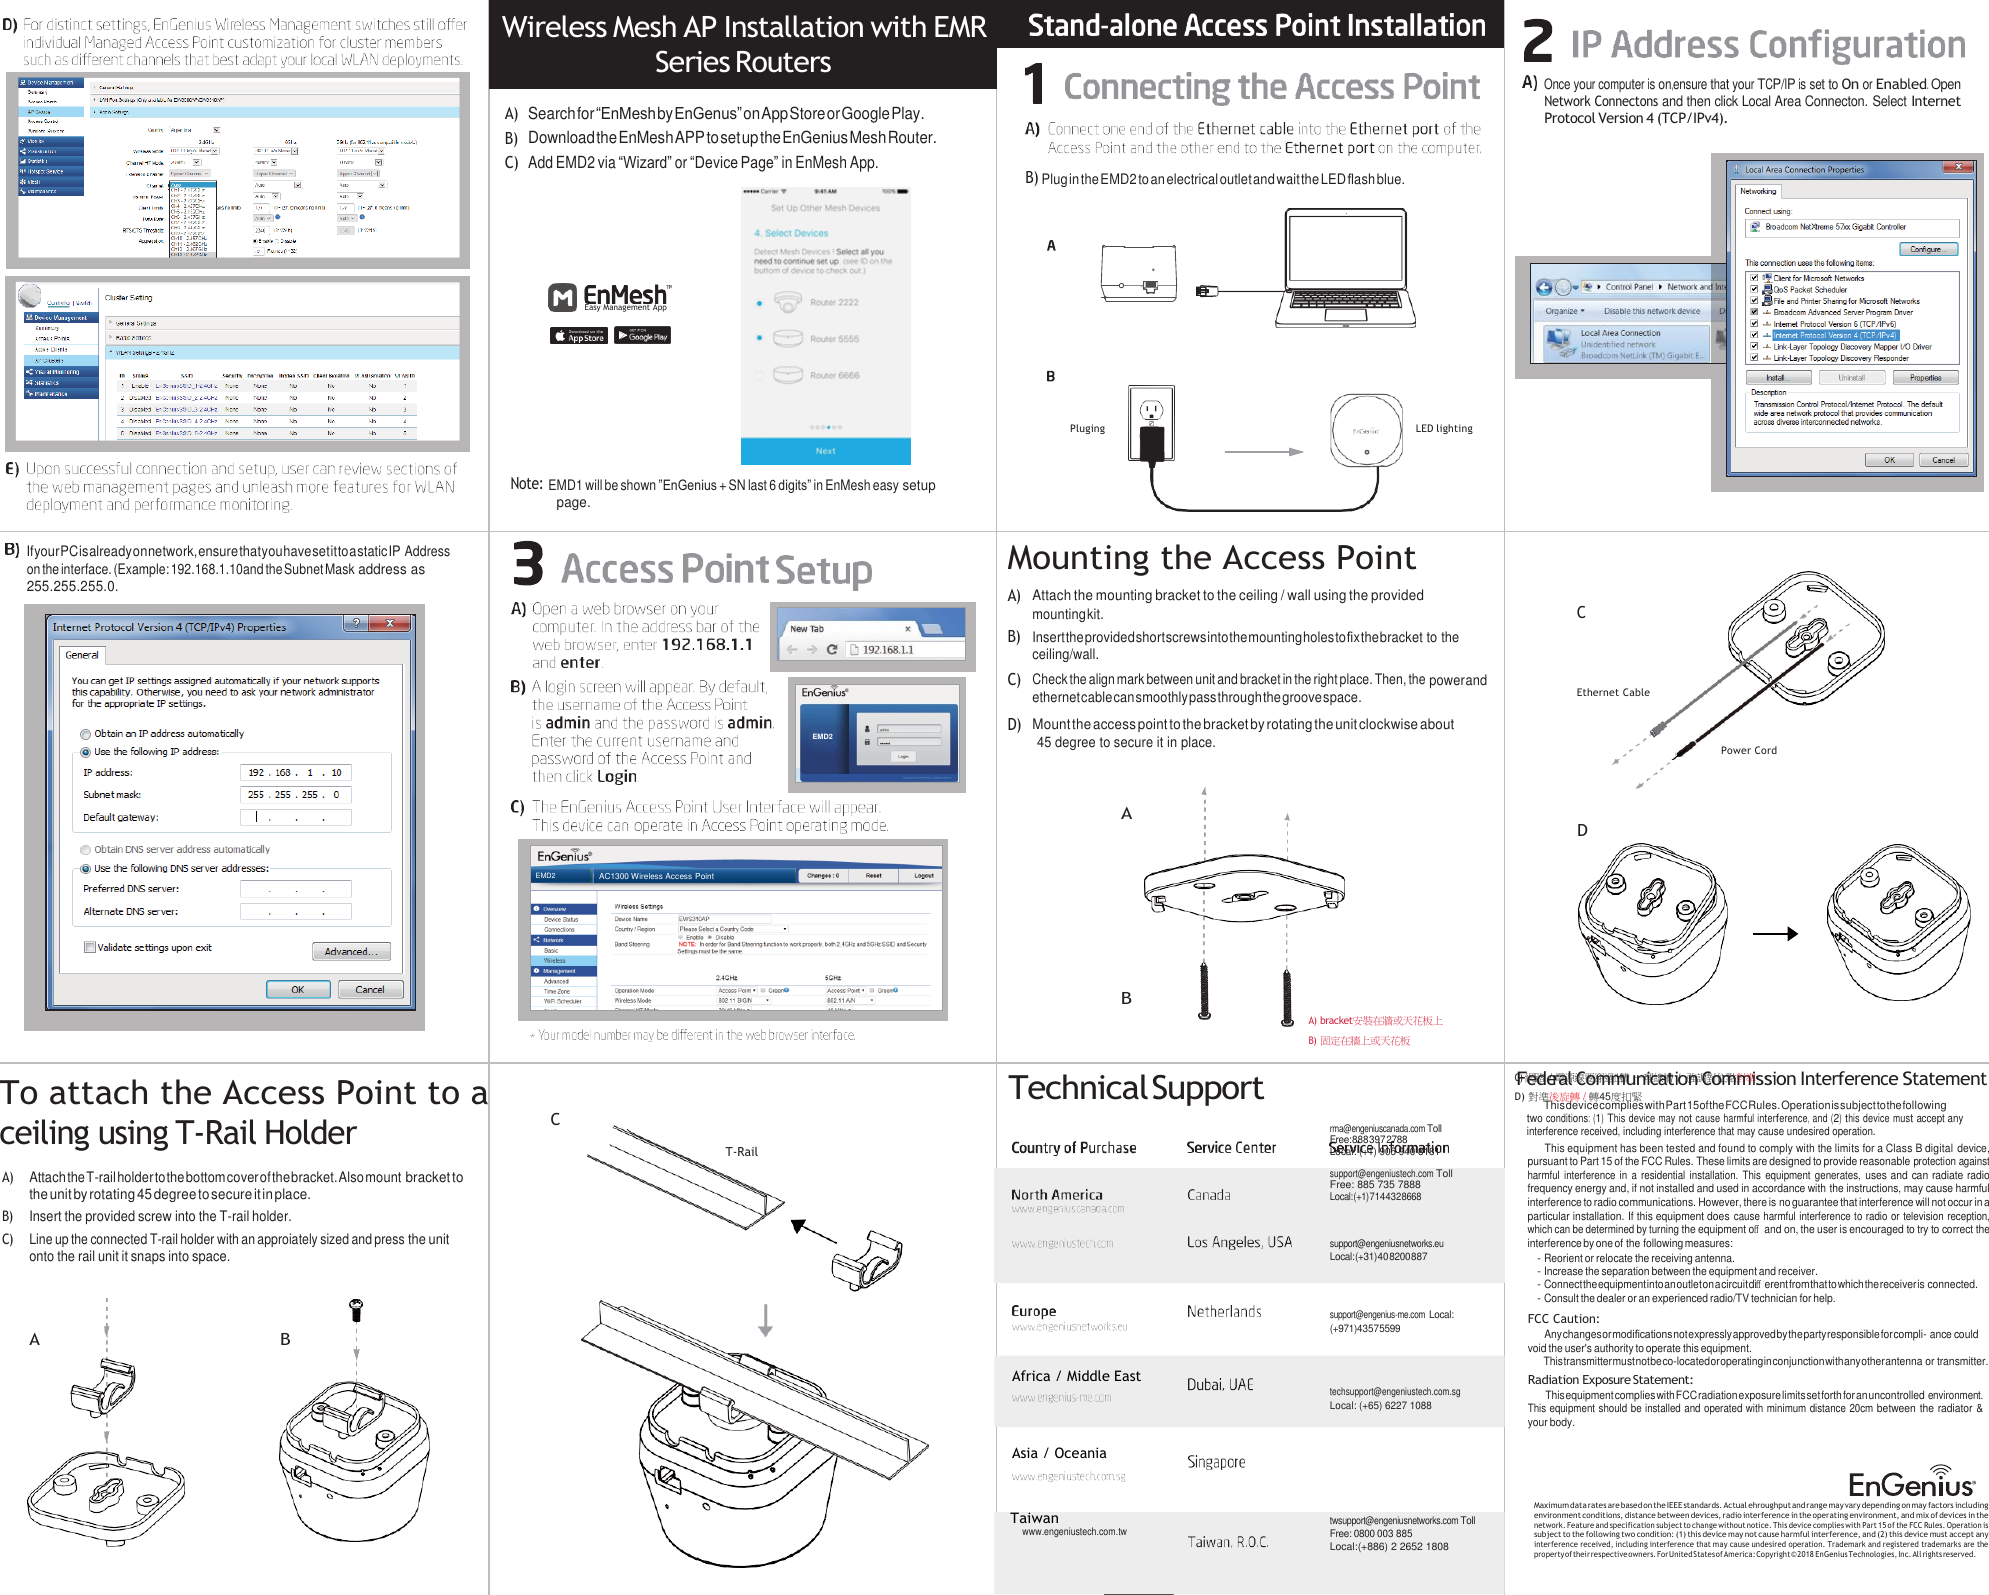
Wireless Mesh AP Installation with EMR Series Routers A)  Search for “EnMesh by EnGenus” on App Store or Google Play. B) Download the EnMesh APP to set up the EnGenius Mesh Router. C) Add EMD2 via “Wizard” or “Device Page” in EnMesh App.      Easy Management App        B) Plug in the EMD2 to an electrical outlet and wait the LED flash blue.     Once your computer is on,ensure that your TCP/IP is set to On or Enabled. Open Network Connectons and then click Local Area Connecton. Select Internet Protocol Version 4 (TCP/IPv4).      Pluging  LED lighting      If your PC is already on network, ensure that you have set it to a static IP Address on the interface. (Example: 192.168.1.10and the Subnet Mask address as 255.255.255.0. Note: EMD1 will be shown ”EnGenius + SN last 6 digits” in EnMesh easy setup page.       Mounting the Access Point A) Attach the mounting bracket to the ceiling / wall using the provided mounting kit. C B) Insert the provided short screws into the mounting holes to fix the bracket to the ceiling/wall. C) Check the align mark between unit and bracket in the right place. Then, the power and ethernet cable can smoothly pass through the groove space.  Ethernet Cable D) Mount the access point to the bracket by rotating the unit clockwise about 45 degree to secure it in place.    A D   Power Cord         To attach the Access Point to a ceiling using T-Rail Holder  C A)  Attach the T-rail holder to the bottom cover of the bracket. Also mount bracket to the unit by rotating 45 degree to secure it in place. B)  Insert the provided screw into the T-rail holder. C) Line up the connected T-rail holder with an approiately sized and press the unit onto the rail unit it snaps into space.           T-Rail B   Technical Support      Africa / Middle East    Asia / Oceania   A) bracket安裝在牆或天花板上 B) 固定在牆上或天花板      rma@engeniuscanada.com Toll Free: 888 397 2788 Local: (+1) 905 940 8181  support@engeniustech.com Toll Free: 885 735 7888 Local: (+1) 714 432 8668    support@engeniusnetworks.eu Local: (+31) 40 8200 887    support@engenius-me.com Local: (+971) 4 357 5599     techsupport@engeniustech.com.sg Local: (+65) 6227 1088    CF) 網e路de/ r電a源l 線C要o穿m過m凹槽u-n理ic線a槽ti/o強n調C對o位m點對m準ission Interference Statement D) 對準後旋轉 / 轉45度扣緊 This device complies with Part 15 of the FCC Rules. Operation is subject to the following two conditions: (1) This device may not cause harmful interference, and (2) this device must accept any interference received, including interference that may cause undesired operation. This equipment has been tested and found to comply with the limits for a Class B digital device, pursuant to Part 15 of the FCC Rules. These limits are designed to provide reasonable protection against harmful  interference in a residential installation.  This  equipment  generates, uses and can radiate radio frequency energy and, if not installed and used in accordance with the instructions, may cause harmful interference to radio communications. However, there is no guarantee that interference will not occur in a particular installation. If this equipment does cause harmful interference to radio or television reception, which can be determined by turning the equipment off and on, the user is encouraged to try to correct the interference by one of the following measures: - Reorient or relocate the receiving antenna. - Increase the separation between the equipment and receiver. - Connect the equipment into an outlet on a circuit different from that to which the receiver is connected. - Consult the dealer or an experienced radio/TV technician for help. FCC Caution: Any changes or modifications not expressly approved by the party responsible for compli- ance could void the user's authority to operate this equipment. This transmitter must not be co-located or operating in conjunction with any other antenna or transmitter. Radiation Exposure Statement: This equipment complies with FCC radiation exposure limits set forth for an uncontrolled environment. This equipment should be installed and operated with minimum distance 20cm between the radiator & your body.  Taiwan www.engeniustech.com.tw  twsupport@engeniusnetworks.com Toll Free: 0800 003 885 Local:(+886) 2 2652 1808 Maximum data rates are based on the IEEE standards. Actual ehroughput and range may vary depending on may factors including environment conditions, distance between devices, radio interference in the operating environment, and mix of devices in the network. Feature and specification subject to change without notice. This device complies with Part 15 of the FCC Rules. Operation is subject to the following two condition: (1) this device may not cause harmful interference, and (2) this device must accept any interference received, including interference that may cause undesired operation. Trademark and registered trademarks are the property of their respective owners. For United States of America: Copyright ©  2018 EnGenius Technologies, Inc. All rights reserved.      EMD2 EMD2  AC1300 Wireless Access Point B A

User Manual (EMD2)

EMD2 Mesh AP Wireless Managed Indoor Access Point      EMD2 Three Types Of Installation For Different Operation A) Managed Access Point Installation with Wireless Management    Switch   Access Point (EMD2)    RJ-45 Ethernet Cable Quick Installation Guide  Ceiling / Wall Mount Bracket   + EnGenius Mesh Router (To use with EMR Series Routers)   B) Wireless Mesh AP Installation with EMR Series Routers   C) Stand-alone Access Point Installation      Screw pack  T-Rail Holder           * Your mode number may be different in the web browser interface.     EMD2  AC1300 Wireless Access Point    EMD2  AC1300 Wireless Access Point    EMD2  AC1300 Wireless Access Point    EMD2  AC1300 Wireless Access Point     EMD2  AC1300 Wireless Access Point             EWS330AP
Wireless Mesh AP Installation with EMR Series Routers A)  Search for “EnMesh by EnGenus” on App Store or Google Play. B) Download the EnMesh APP to set up the EnGenius Mesh Router. C) Add EMD2 via “Wizard” or “Device Page” in EnMesh App.      Easy Management App        B) Plug in the EMD2 to an electrical outlet and wait the LED flash blue.     Once your computer is on,ensure that your TCP/IP is set to On or Enabled. Open Network Connectons and then click Local Area Connecton. Select Internet Protocol Version 4 (TCP/IPv4).      Pluging  LED lighting      If your PC is already on network, ensure that you have set it to a static IP Address on the interface. (Example: 192.168.1.10and the Subnet Mask address as 255.255.255.0. Note: EMD1 will be shown ”EnGenius + SN last 6 digits” in EnMesh easy setup page.       Mounting the Access Point A) Attach the mounting bracket to the ceiling / wall using the provided mounting kit. C B) Insert the provided short screws into the mounting holes to fix the bracket to the ceiling/wall. C) Check the align mark between unit and bracket in the right place. Then, the power and ethernet cable can smoothly pass through the groove space.  Ethernet Cable D) Mount the access point to the bracket by rotating the unit clockwise about 45 degree to secure it in place.    A D   Power Cord         To attach the Access Point to a ceiling using T-Rail Holder  C A)  Attach the T-rail holder to the bottom cover of the bracket. Also mount bracket to the unit by rotating 45 degree to secure it in place. B)  Insert the provided screw into the T-rail holder. C) Line up the connected T-rail holder with an approiately sized and press the unit onto the rail unit it snaps into space.           T-Rail B   Technical Support      Africa / Middle East    Asia / Oceania   A) bracket安裝在牆或天花板上 B) 固定在牆上或天花板      rma@engeniuscanada.com Toll Free: 888 397 2788 Local: (+1) 905 940 8181  support@engeniustech.com Toll Free: 885 735 7888 Local: (+1) 714 432 8668    support@engeniusnetworks.eu Local: (+31) 40 8200 887    support@engenius-me.com Local: (+971) 4 357 5599     techsupport@engeniustech.com.sg Local: (+65) 6227 1088    CF) 網e路de/ r電a源l 線C要o穿m過m凹槽u-n理ic線a槽ti/o強n調C對o位m點對m準ission Interference Statement D) 對準後旋轉 / 轉45度扣緊 This device complies with Part 15 of the FCC Rules. Operation is subject to the following two conditions: (1) This device may not cause harmful interference, and (2) this device must accept any interference received, including interference that may cause undesired operation. This equipment has been tested and found to comply with the limits for a Class B digital device, pursuant to Part 15 of the FCC Rules. These limits are designed to provide reasonable protection against harmful  interference in a residential installation.  This  equipment  generates, uses and can radiate radio frequency energy and, if not installed and used in accordance with the instructions, may cause harmful interference to radio communications. However, there is no guarantee that interference will not occur in a particular installation. If this equipment does cause harmful interference to radio or television reception, which can be determined by turning the equipment off and on, the user is encouraged to try to correct the interference by one of the following measures: - Reorient or relocate the receiving antenna. - Increase the separation between the equipment and receiver. - Connect the equipment into an outlet on a circuit different from that to which the receiver is connected. - Consult the dealer or an experienced radio/TV technician for help. FCC Caution: Any changes or modifications not expressly approved by the party responsible for compli- ance could void the user's authority to operate this equipment. This transmitter must not be co-located or operating in conjunction with any other antenna or transmitter. Radiation Exposure Statement: This equipment complies with FCC radiation exposure limits set forth for an uncontrolled environment. This equipment should be installed and operated with minimum distance 20cm between the radiator & your body.  Taiwan www.engeniustech.com.tw  twsupport@engeniusnetworks.com Toll Free: 0800 003 885 Local:(+886) 2 2652 1808 Maximum data rates are based on the IEEE standards. Actual ehroughput and range may vary depending on may factors including environment conditions, distance between devices, radio interference in the operating environment, and mix of devices in the network. Feature and specification subject to change without notice. This device complies with Part 15 of the FCC Rules. Operation is subject to the following two condition: (1) this device may not cause harmful interference, and (2) this device must accept any interference received, including interference that may cause undesired operation. Trademark and registered trademarks are the property of their respective owners. For United States of America: Copyright ©  2018 EnGenius Technologies, Inc. All rights reserved.      EMD2 EMD2  AC1300 Wireless Access Point B A

Navigation menu