DigitalWay MPIO-FY300 MP3 Player User Manual
DigitalWay Co., Ltd. MP3 Player
UserManual.wiki
>
DigitalWay
>
MPIO FY300 User Manual
users manual
Navigation menu
Upload a User Manual
Namespaces
Wiki Guide
HTML
PDF
Info
Views
User Manual
Discussion / Help
Navigation
![3. Click [Install/Uninstall] button with Windows Drivers. Step 3. Transfer Music 1. Turn the player on by pressing PWR button for long. 2. When you connect your player and PC, the PC recognizes it as a removable disk that you can use to transport music files. This means you can drag and drop files using Microsoft Windows Explorer or save a file by selecting the player.](https://usermanual.wiki/DigitalWay/MPIO-FY300/User-Guide-418702-Page-5.png)
![In case of pause status: If you push the stick button to right or left, player plays the next track or previous track. In case of during playback: If you push the stick button to right or left, player performs the forward or rewind function. Volume control (Volume Level: 0 ~30): +: To increase volume -: To decrease volume <Additional Functions> Repeat Segmentation 1. Press the function button at the start point. 2. Press the function button again at the end point. 3. If you want to cancel this function, press the function button again. Delete the file or the folder on the player 1. Press the stick button to pause playback. 2. Select the file to delete by using the stick button. 3. Press and hold the function button. insert picture 4. Select “YES” by using the stick button to delete. Format the memory on the player in windows. !!! Make sure all data is deleted after format. You should be back up the data before run format. 1. Select the [Format] by right clicking the removable disk(= FY300) in windows explorer. 2. Designate [FAT] for the File System.](https://usermanual.wiki/DigitalWay/MPIO-FY300/User-Guide-418702-Page-7.png)
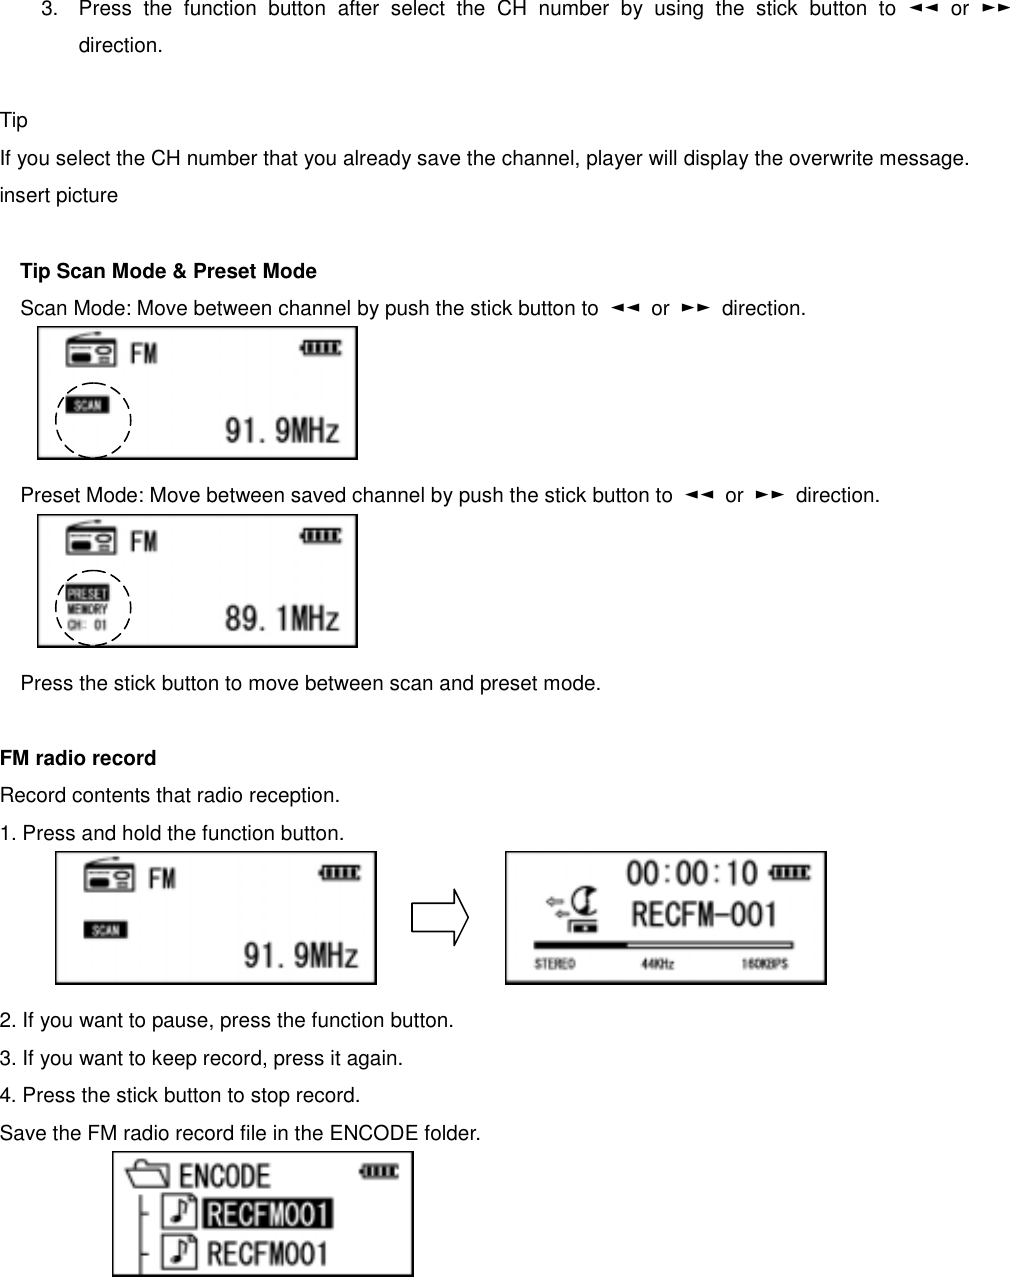
![You are not supported the [FAT 32] and [NTFS] format. 3. Press the [Start] button. Warning : Removing the device from the computer while formatting is going on may cause Device damage. Please take extra precautions. Listen to FM Radio Step 1. Move to FM Radio Mode 1. Press the PWR button. 2. Select the FM Radio Mode by using the stick button. 3. Press the stick button. Step 2. Channel Control 1. Push the stick button to ◄◄ or ►► direction. 2. If you push and hold the stick button to ◄◄ or ►► direction, player performs the auto scan function. 그림삽입 <Additional Functions> Save Channel 1. Select the channel that you want to save it by using the stick button to ◄◄ or ►► direction. 2. Press the function button, display the CH number on the LCD.](https://usermanual.wiki/DigitalWay/MPIO-FY300/User-Guide-418702-Page-8.png)
![4. Audio REC Setup: Set the recording quality when voice record or FM record. 5. Off Time Setup: Automatically turns power off at pause status. 6. Format: Format on the player’s memory. Fast- delete saved file on the player. Low level – Format on the player’s memory. After low level format, the font file should be installed. 7. Language Select: Select the language for OS. Music file’s information is affected on the PC OS that was used to create it. 8. Firmware Upgrade: Upgrade firmware and font file. You should be installed the X-Manager program on the PC before run the Firmware upgrade menu. Warning Removing the device from the computer while firmware upgrade is going on may cause Device damage. And you should be needed the customer service. Change the Menu Option Ex) Change the setting in [Off Time Setup] menu 1. Press and hold the stick button.](https://usermanual.wiki/DigitalWay/MPIO-FY300/User-Guide-418702-Page-14.png)
![2. Select the System Setup menu by push the stick button to ◄◄ or ►► direction. 4. Press the stick button. 5. Select the Off Time Setup menu by push the stick button to ◄◄ or ►► direction. insert picture 6. Press the stick button. 7. Press the stick button after select the item that you want to by push the + or – direction. 8. If you select the Exit, you move to upper menu. Install the USB Disk Software 1. Insert the install CD into the CD-Rom Drive on the your PC. 2. USB Disk Software automatically runs. ( If the install CD is not run automatically, double click the setup.exe file on the install CD. ) X-Manager for MP3 Press the [Install/Uninstall] button on the X-Manager for MP3.](https://usermanual.wiki/DigitalWay/MPIO-FY300/User-Guide-418702-Page-15.png)
![How to use the X-Manager for MP3 Double click [X-Manager for MP3] icon. The newest Firmware / Font Data is offered from the MPIO web-site ( www.mpio.com). [ICON] [X-Manager Program] ① Upgrade Firmware: 1. Press the [Upgrade Firmware] button. 3. Press the [Open] button after select the folder that saved firmware file.](https://usermanual.wiki/DigitalWay/MPIO-FY300/User-Guide-418702-Page-16.png)
![Warning Removing the device from the computer while firmware upgrade is going on may cause Device damage. And you should be needed the customer service. ② Upgrade Font: 1. Press the [Upgrade Font] button. 2. Press the [Open] button after select the folder that saved font file. TVF Codec If you install the TVF Codec program, you can listen to TVF file that record on the player form the windows media player. Troubleshooting Q1. The Player doesn’t power on A1. Battery may be discharged. (Refer to charge battery section) Q2. No sound is heard from player or distortion is heard during playback. A2. Check whether the earphones are connected properly. Q3. Characters on LCD are abnormal. A3. Check the language is setting to “English” in language menu. Q4. FM Radio doesn’t work. A4. Adjust the position of the player and earphones. Turn off the power of other electric devices near the player. Q5. I can’t transfer music files (MP3 or WMA) saved in the player to PC. A5. Transfer music files to PC are prohibited for copyright. Other files as data files and created MP3 file on the player can be transfer to your PC.](https://usermanual.wiki/DigitalWay/MPIO-FY300/User-Guide-418702-Page-17.png)