Dearborn Group 13EAVOX Vehicle Interface User Manual DPA5 User Manual
Dearborn Group Vehicle Interface DPA5 User Manual
UserManual.wiki
>
Dearborn Group
>
13EAVOX User Manual
Users Manual
Navigation menu
Upload a User Manual
Namespaces
Wiki Guide
HTML
PDF
Info
Views
User Manual
Discussion / Help
Navigation
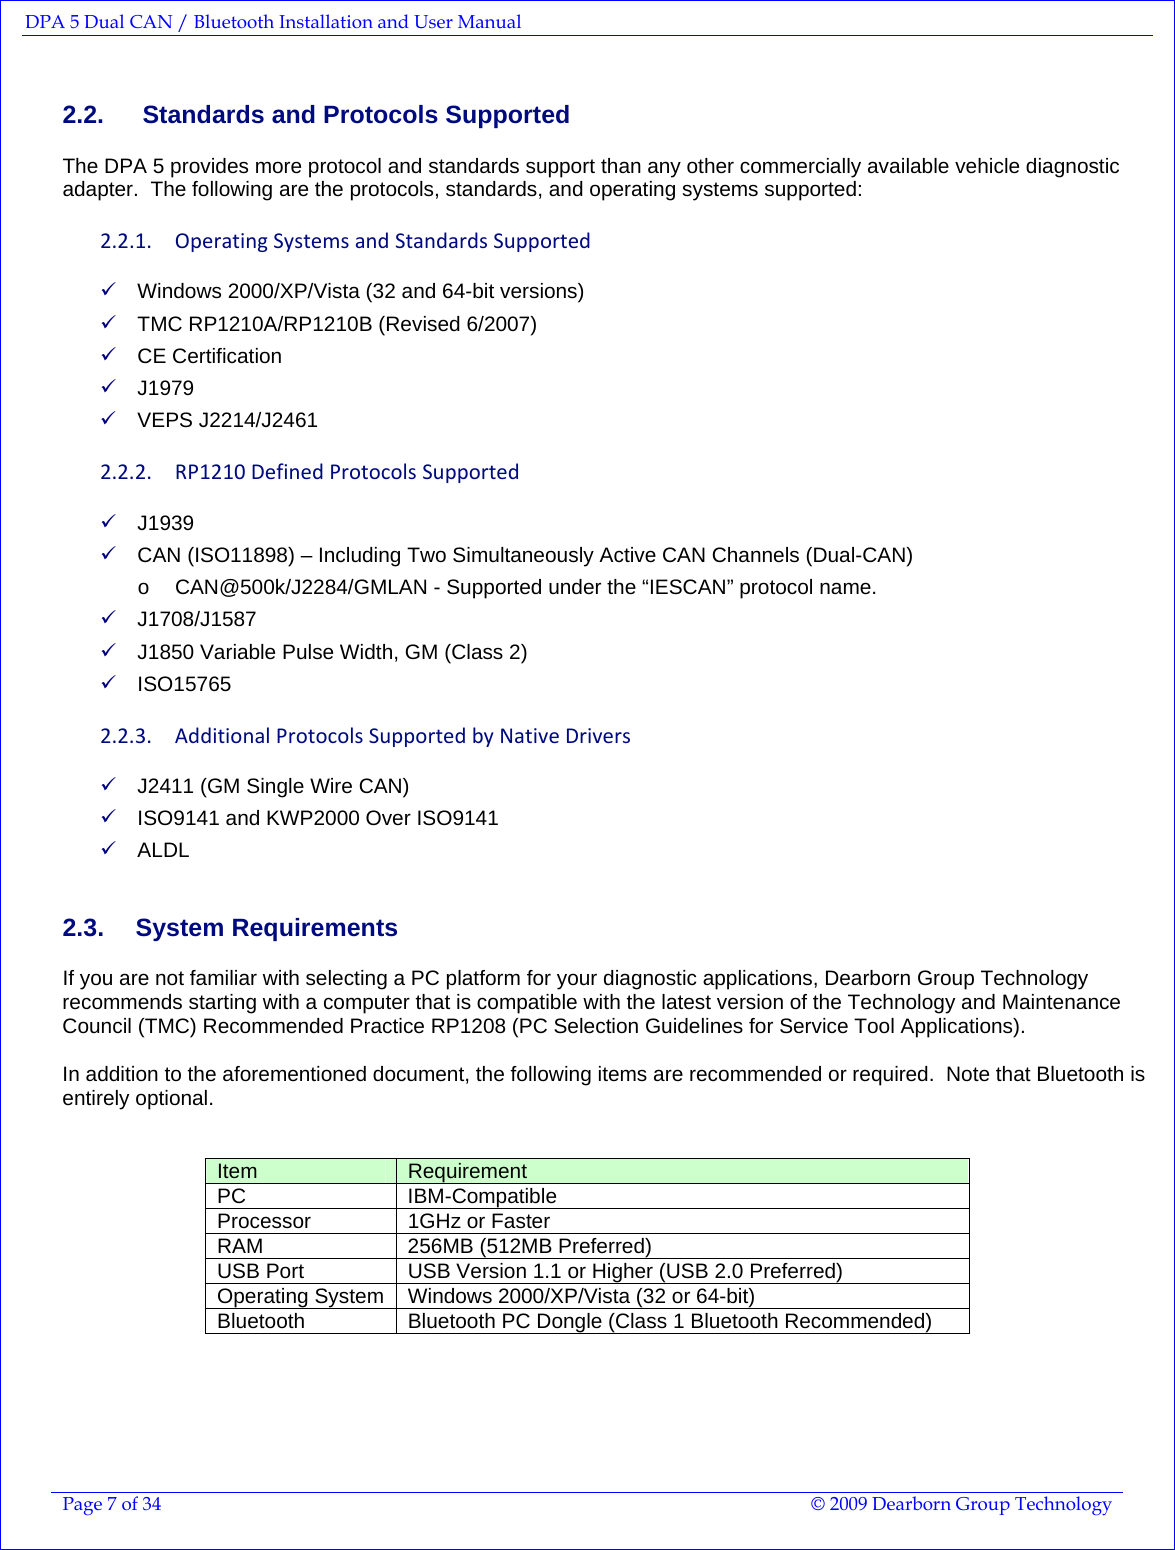

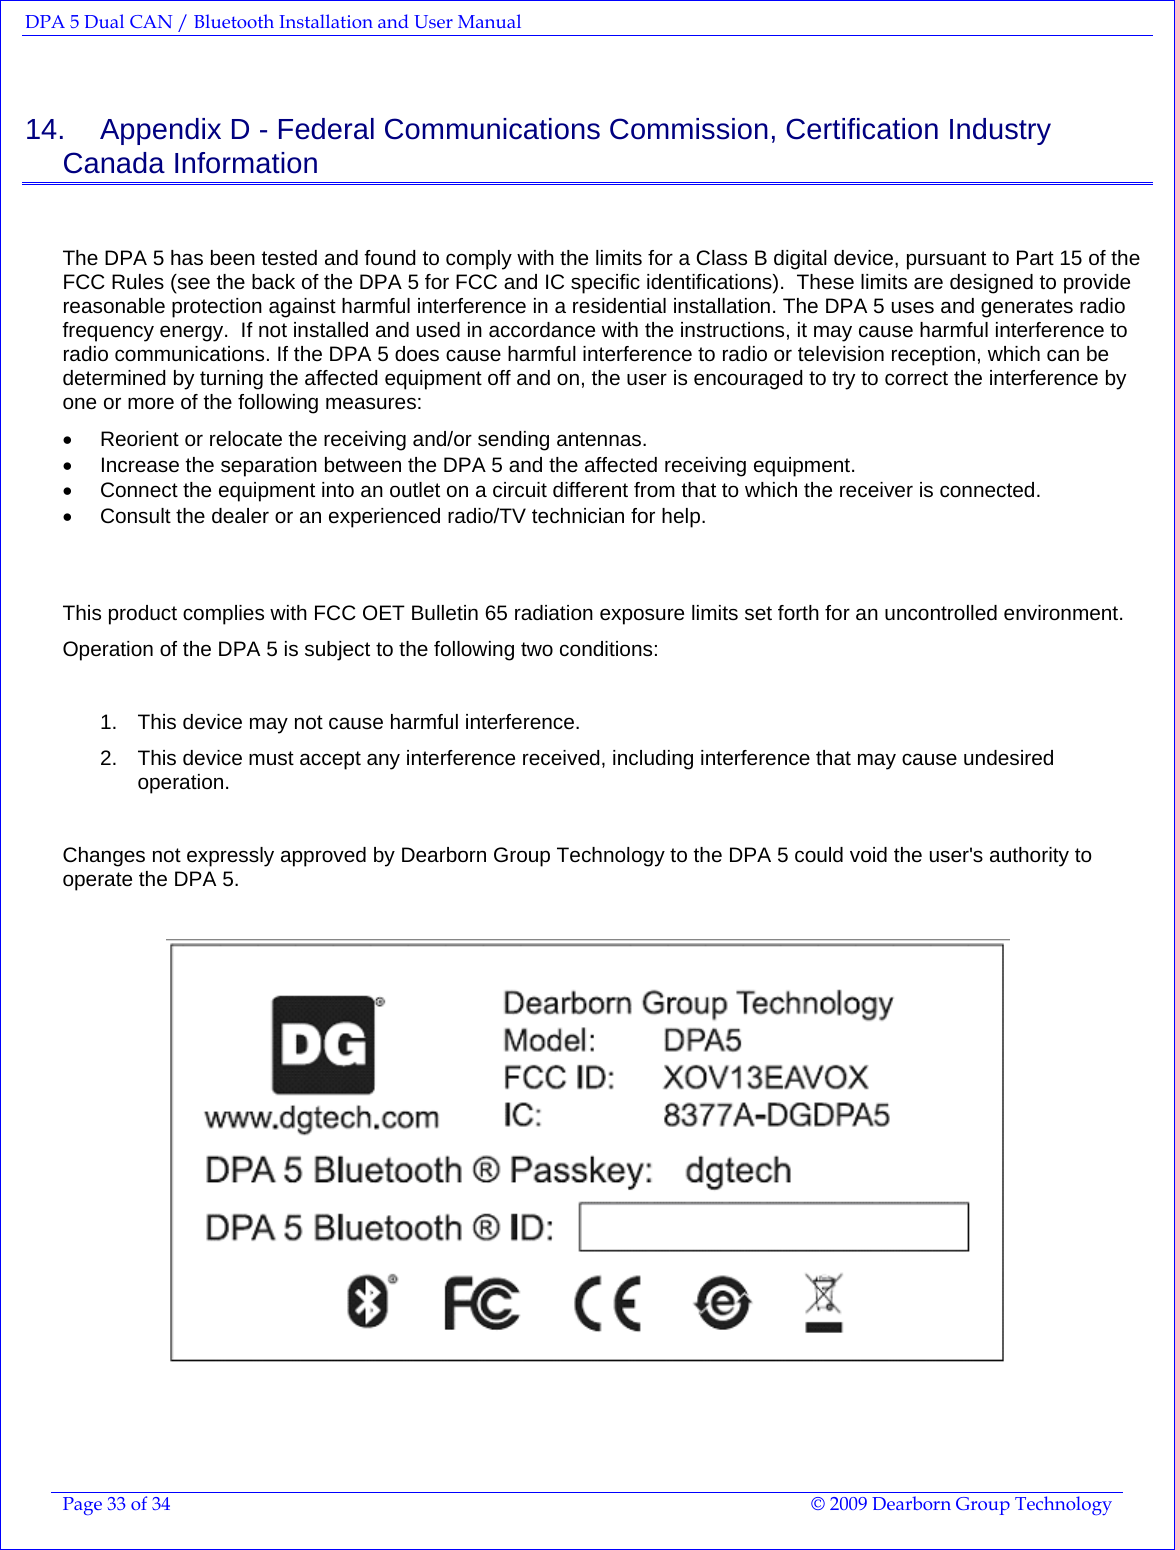
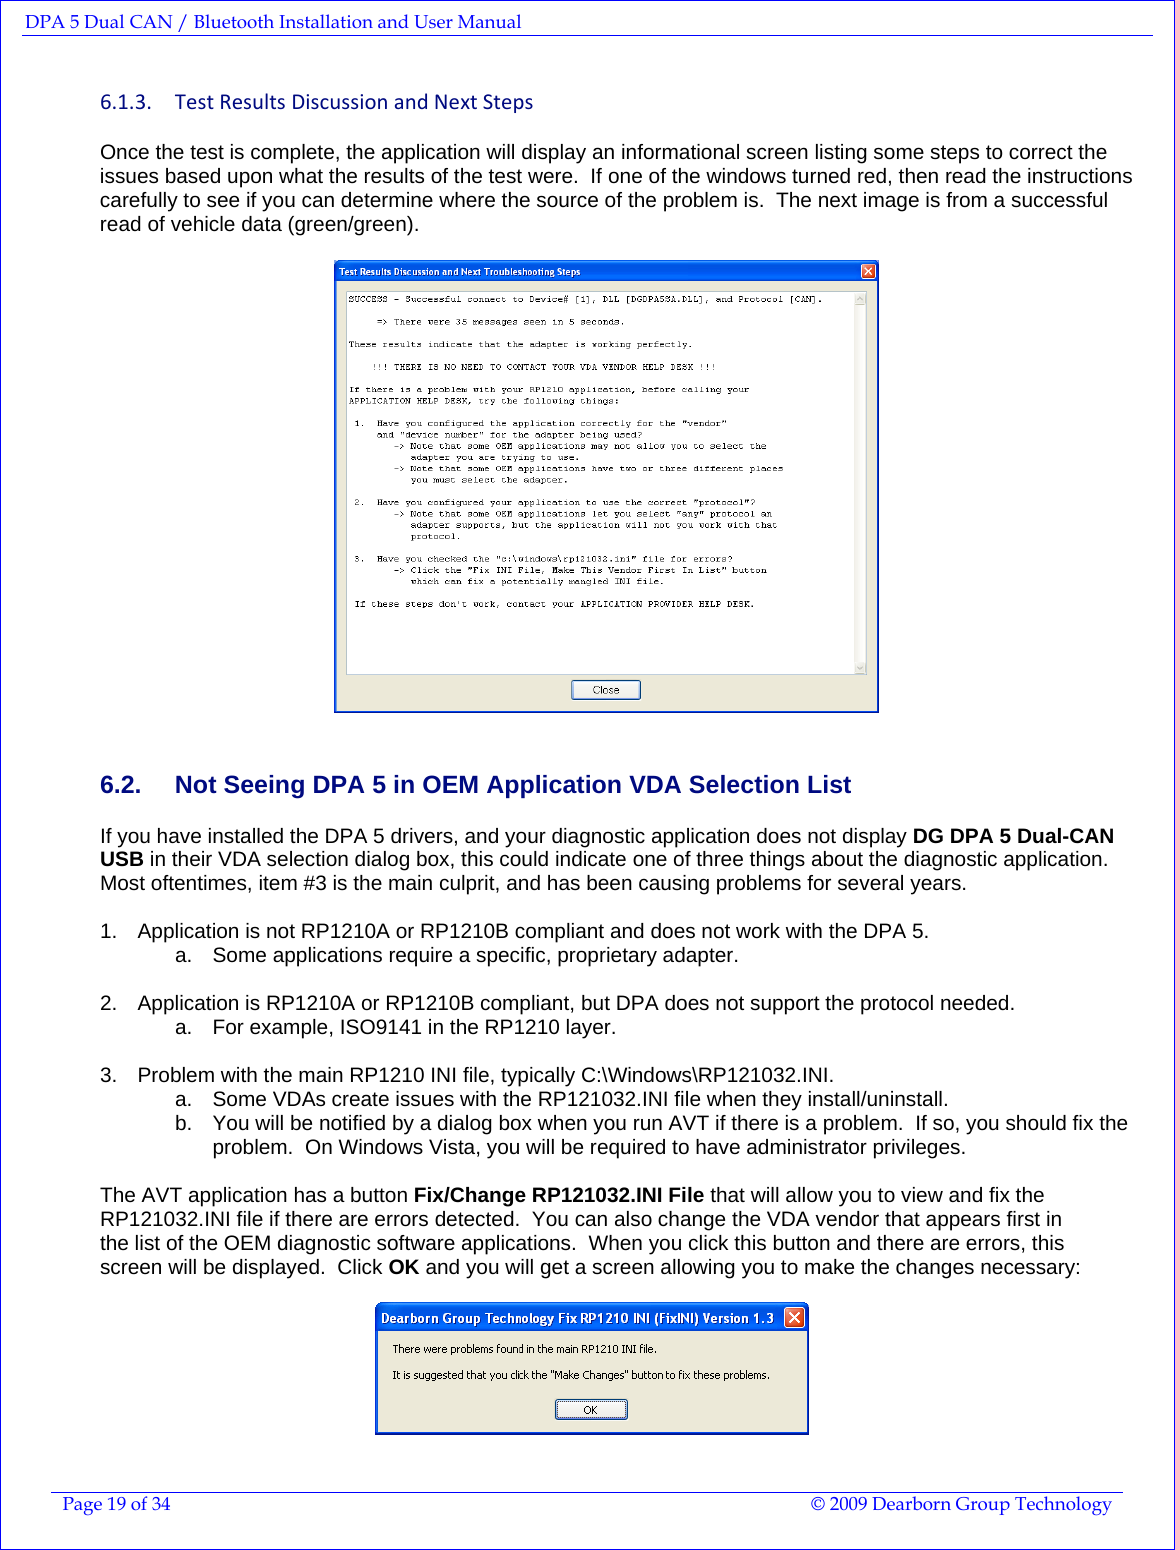
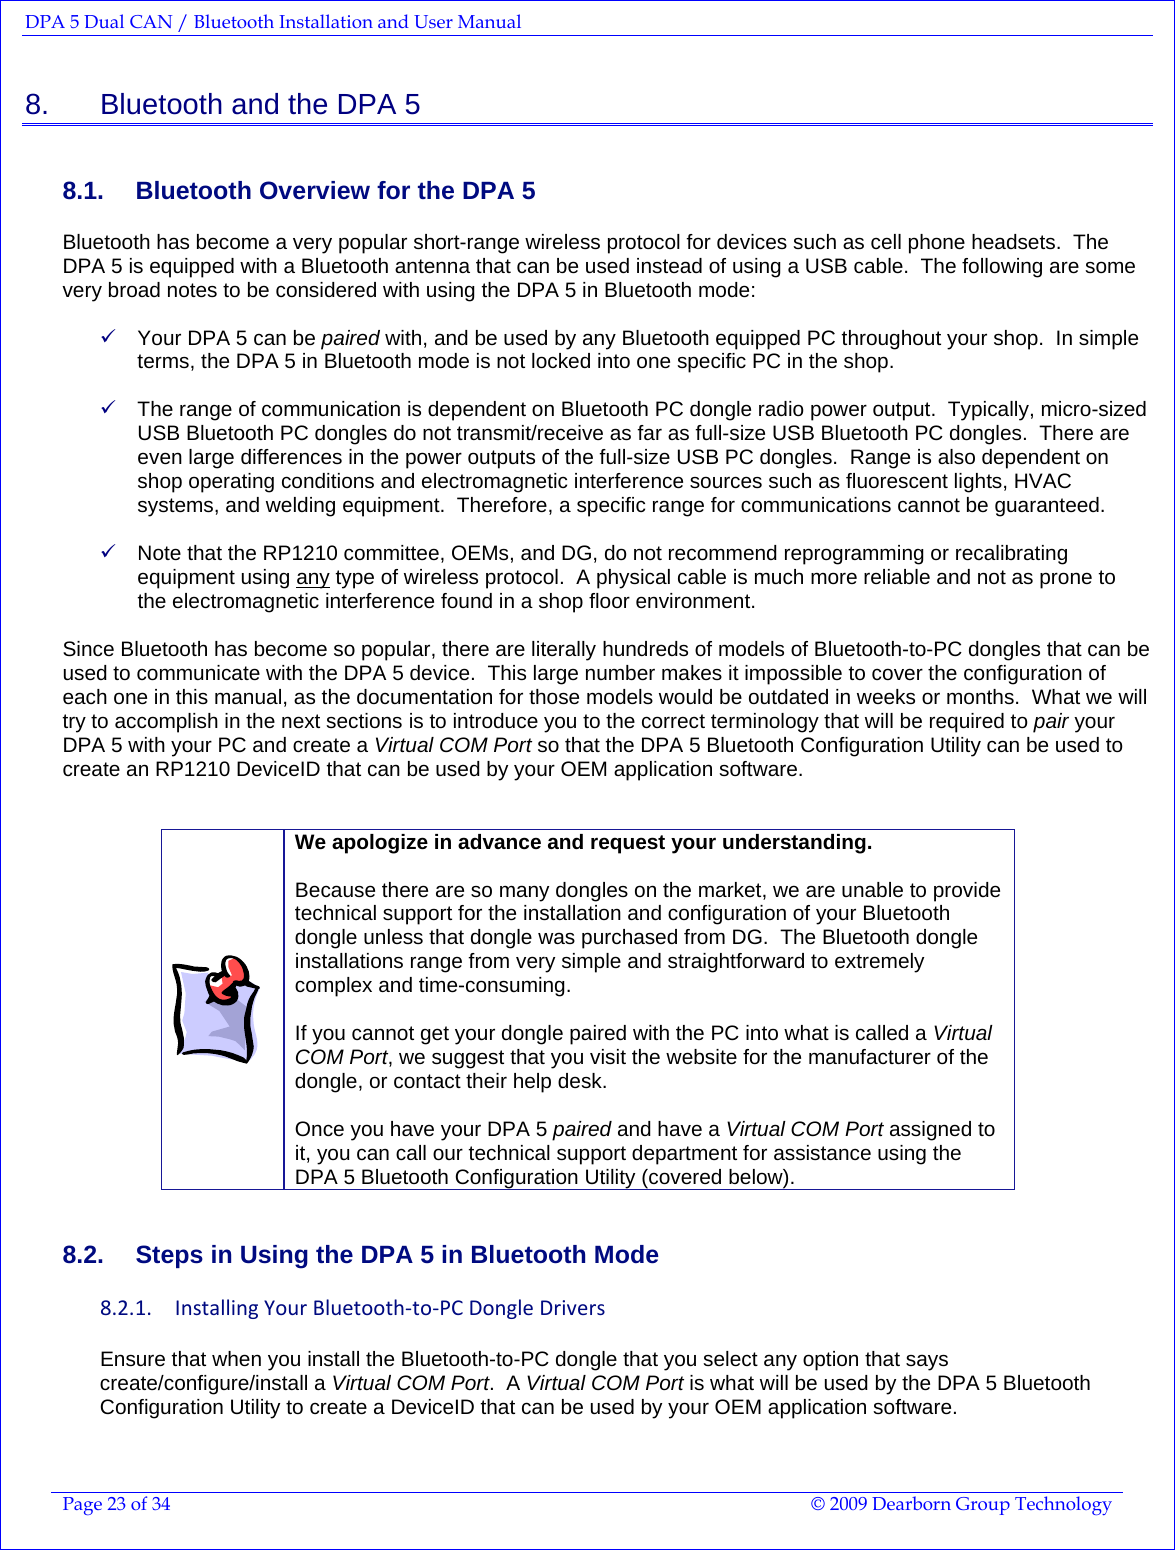
![DPA 5 Dual CAN / Bluetooth Installation and User Manual Page 9 of 34 © 2009 Dearborn Group Technology 3. Installation and Getting Started with the DPA Items included with the DPA 5 diagnostic tool are the Dearborn Group Technology DPA Installation Disc and a printed Quick Start Sheet. If you ordered the standard DPA 5 Kit, it should include the following items: 9 Rugged Plastic Carrying Case 9 DPA 5 Diagnostic Tool 9 6-pin/9-pin Deutsch Connector “Y” Cable, for vehicle-side connection 9 USB Cable, gold-plated with screw-in ears to secure the cable to the DPA 5 case 9 Printed Quick Start Sheet 9 Dearborn Group Technology DPA 5 Installation Disc Please note that Dearborn Group Technology customizes our kits for our vendors. If you order your DPA through someone other than Dearborn Group Technology what you receive may vary. 3.1. Step 1. Driver Installation Attention – Do Not Connect the DPA 5 to the PC! 9 Do Not Connect the DPA 5 to the PC until the drivers have been installed! 9 Install DPA 5 drivers from CD or from your internet download. o To install drivers you must have administrator privileges. 9 If you have problems installing the drivers, please contact technical support at (248) 888-2000. Attention The DPA drivers provided on the installation CD are installed by inserting the disc into your PC’s CD-ROM drive. The latest drivers and firmware are always available at www.dgtech.com/download.php. If you have any questions about the install, please contact our technical support staff. If setup does not begin automatically, use the following sequence for Windows XP: Start Î Run Î [CD_Drive_Letter]:\DPA5Install.exe and click OK](https://usermanual.wiki/Dearborn-Group/13EAVOX/User-Guide-1215461-Page-9.png)
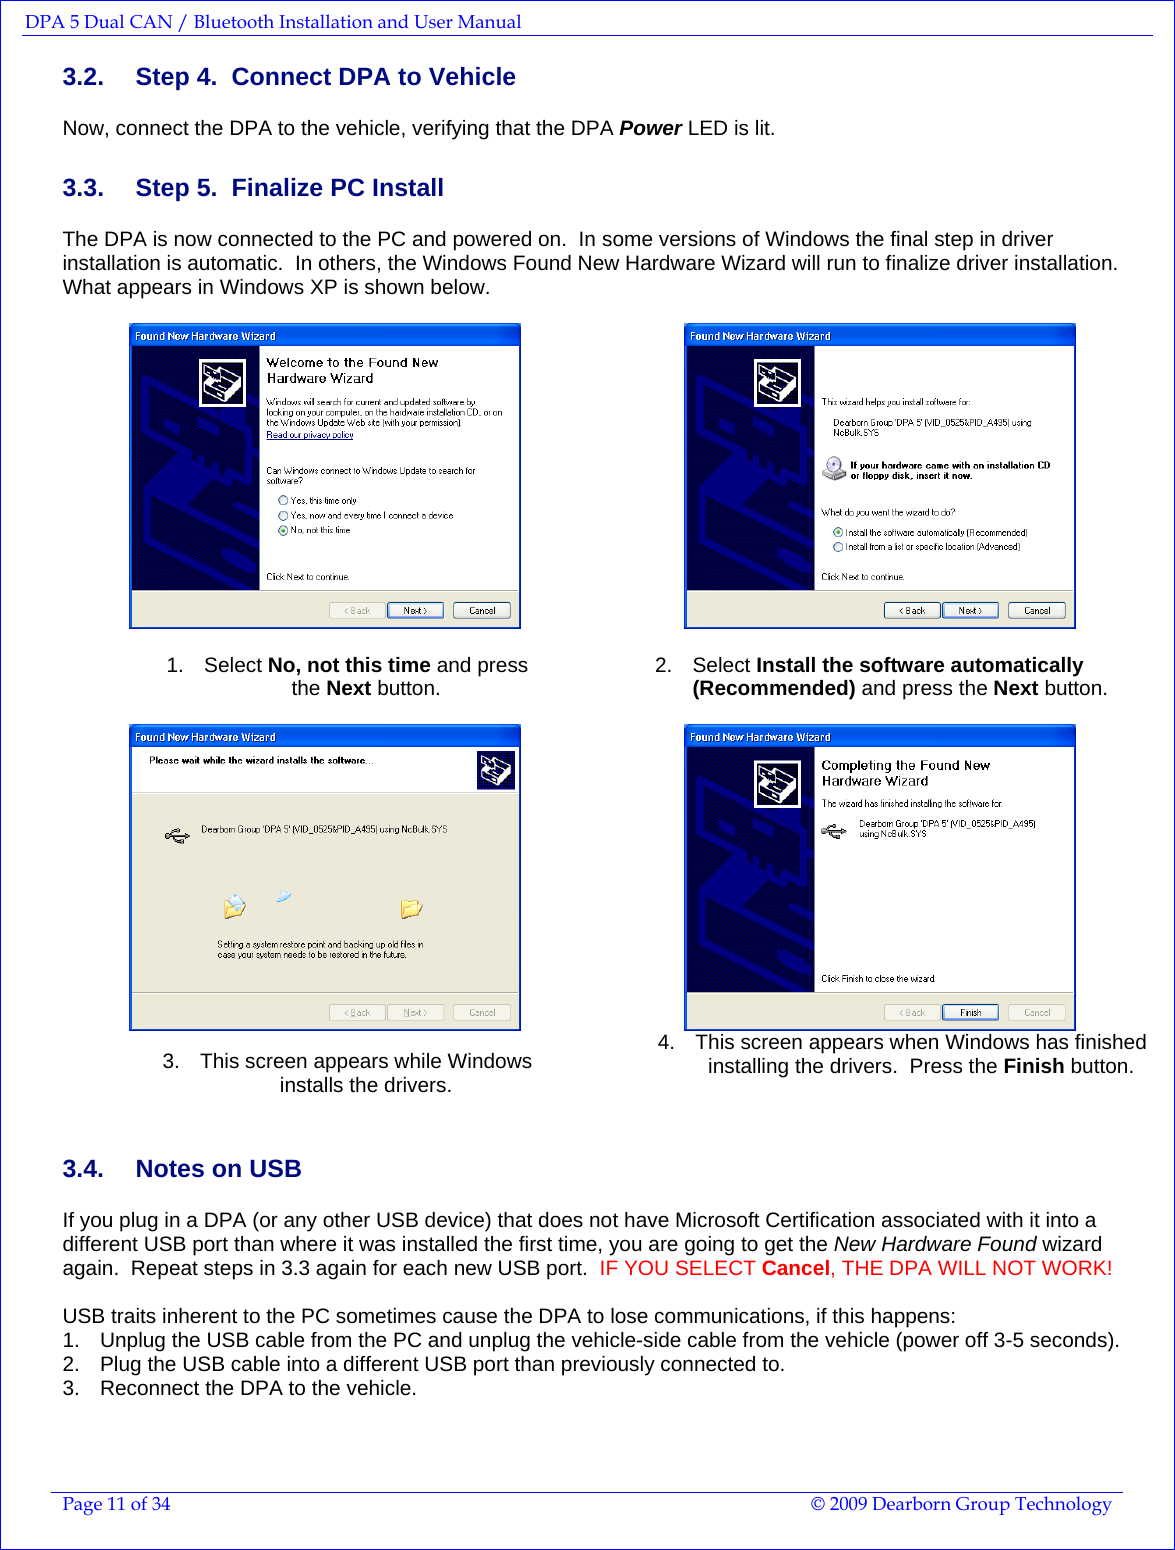
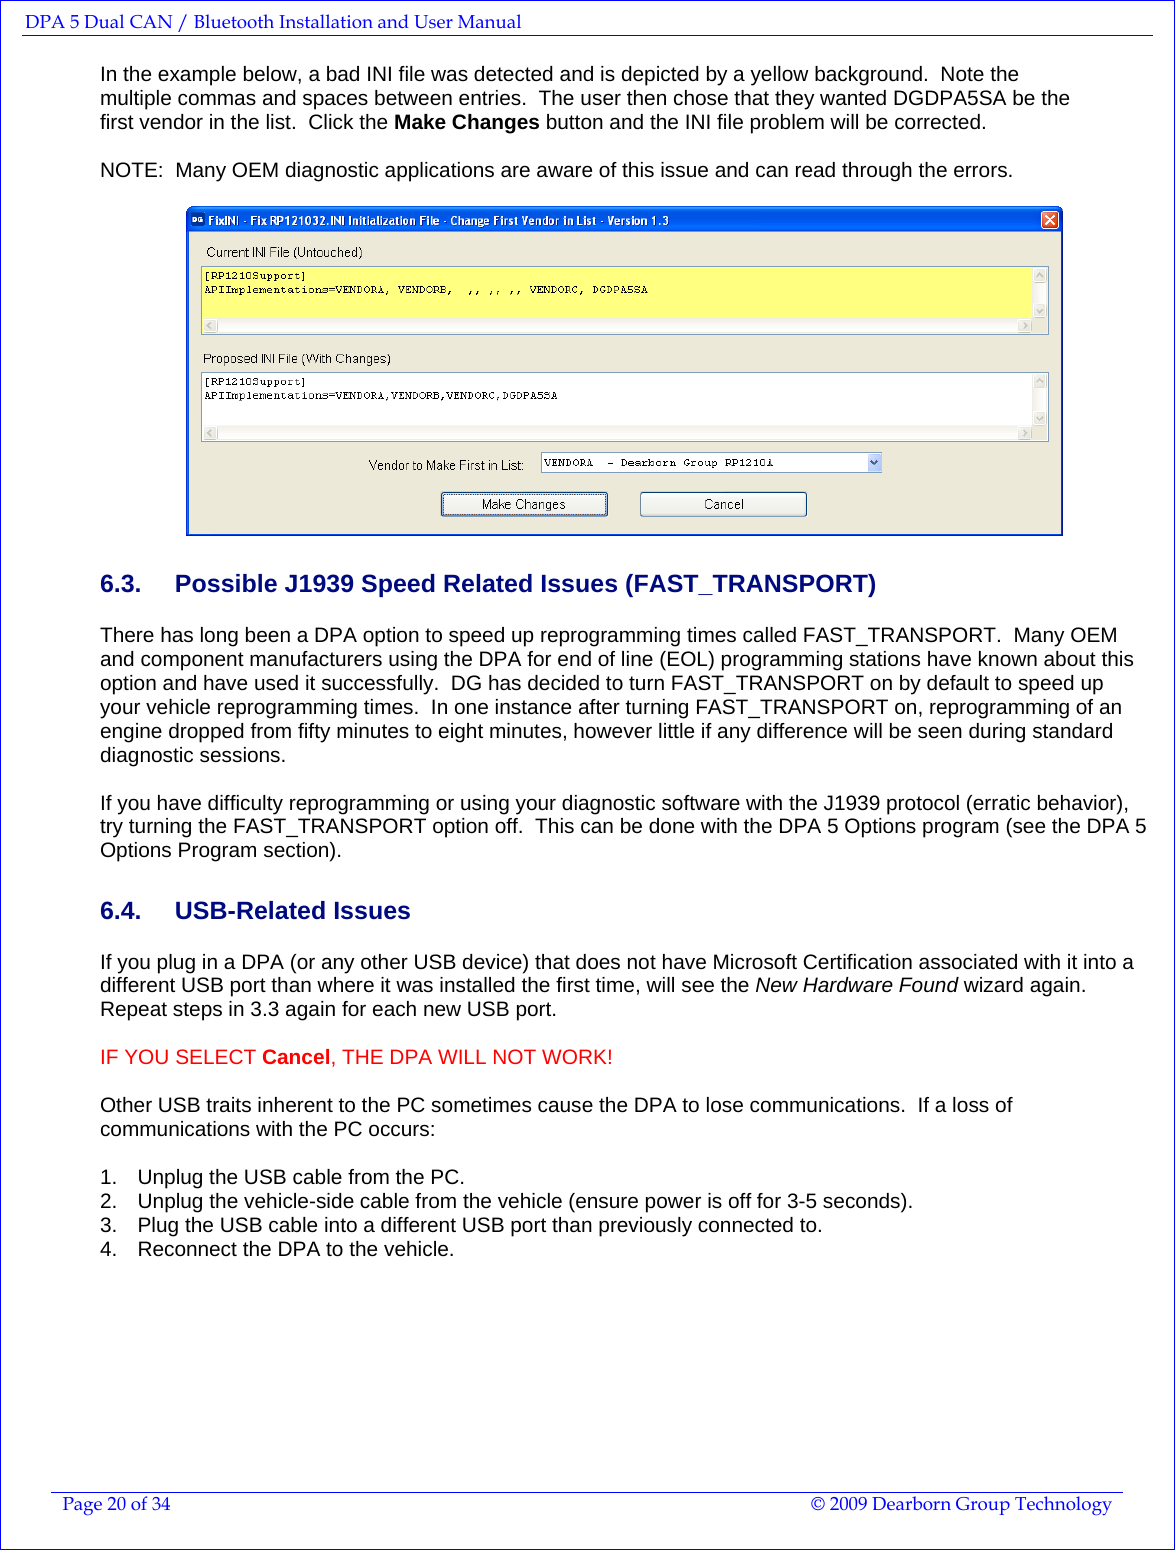
![DPA 5 Dual CAN / Bluetooth Installation and User Manual Page 10 of 34 © 2009 Dearborn Group Technology If setup does not begin automatically, use the following sequence for Windows Vista: Start Î All Programs Î Accessories Î Run Î [CD_Drive_Letter]:\DPA5Install.exe and click OK After the drivers are installed, you will be prompted to restart your computer. While your PC is rebooting, continue following the next instructions. 3.2. Step 2. Connect USB Cable to the DPA and PC Remove the sticker covering the USB port and connect the USB cable to the DPA and PC. The USB cable that comes with the DPA 5 has ears that allow the cable to be screwed into standoff screws on the DPA 5 frame, greatly reducing the chance of breaking the USB connector on the DPA circuit board. PC-side USB Cable 3.1. Step 3. Connect Vehicle-Side Cable to the DPA Connect the vehicle-side of the cable (the DB25 connector) to your DPA before you connect to the vehicle (see the note below). 9 Do not connect to vehicle first! Pins 6 and 8 on the DB25 connector are power and ground and are very close together. Vehicle-side Cable 6-pin/9-pin Deutsch “Y” Cable (Heavy-Duty)](https://usermanual.wiki/Dearborn-Group/13EAVOX/User-Guide-1215461-Page-10.png)
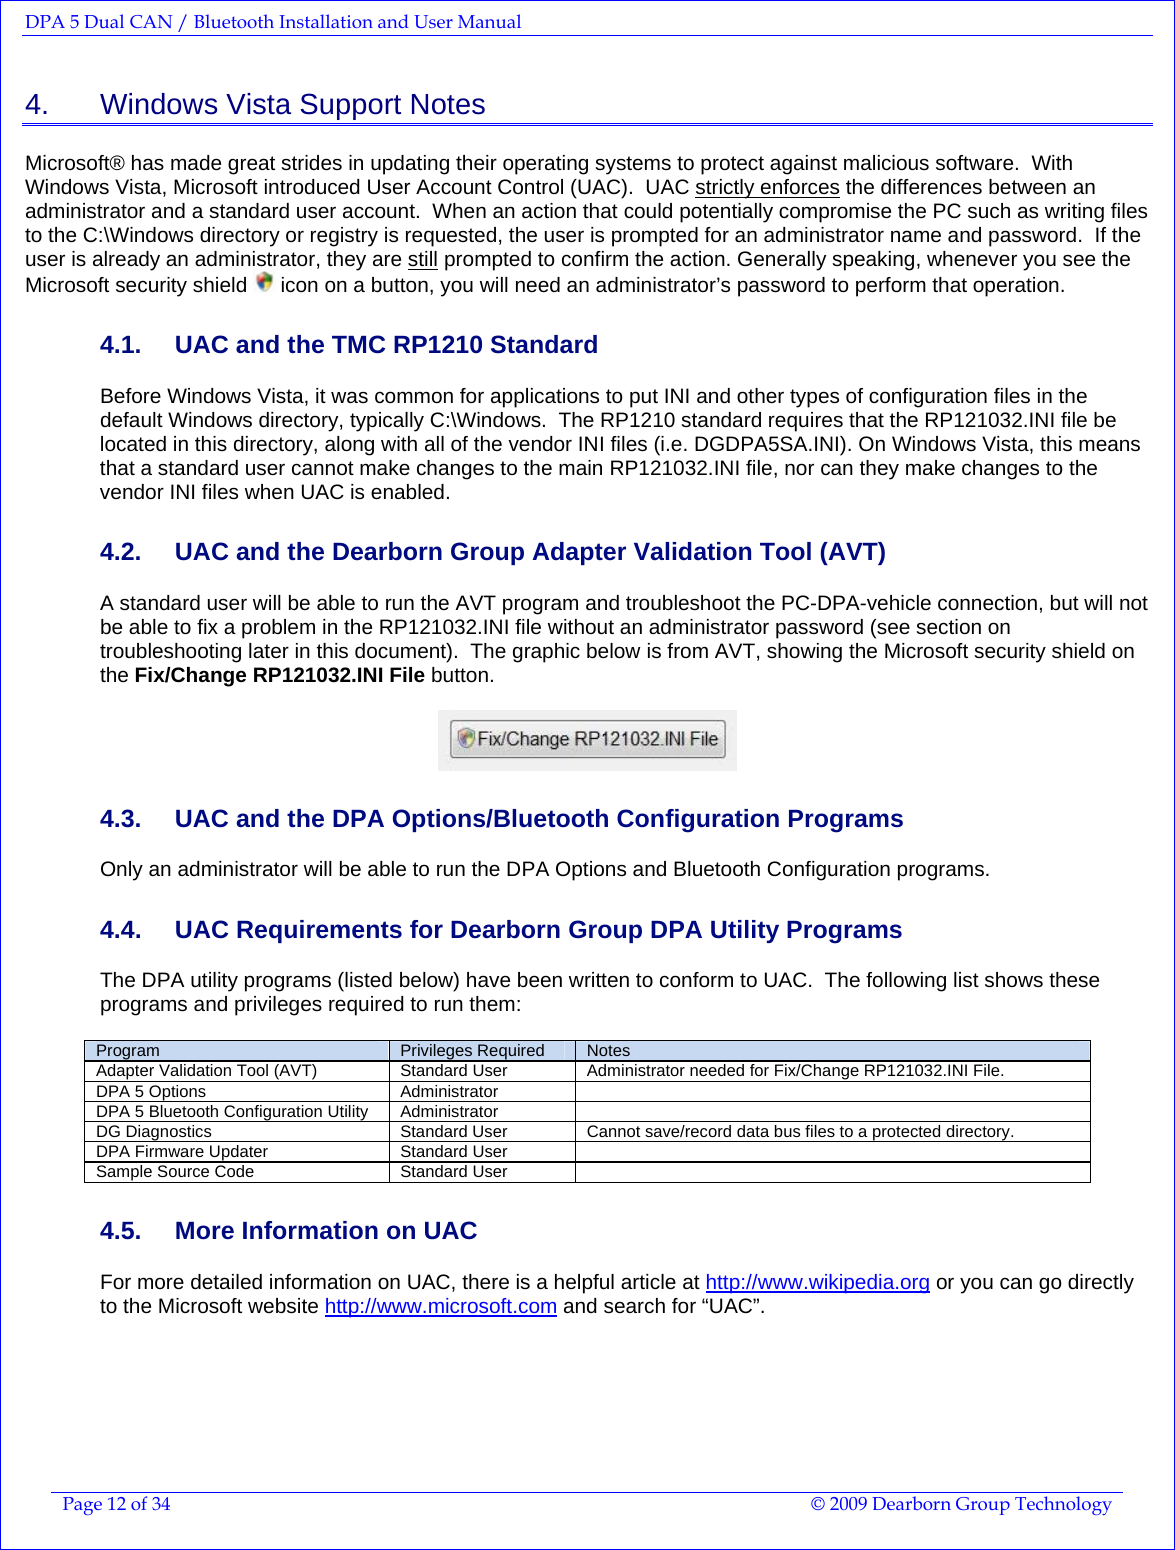
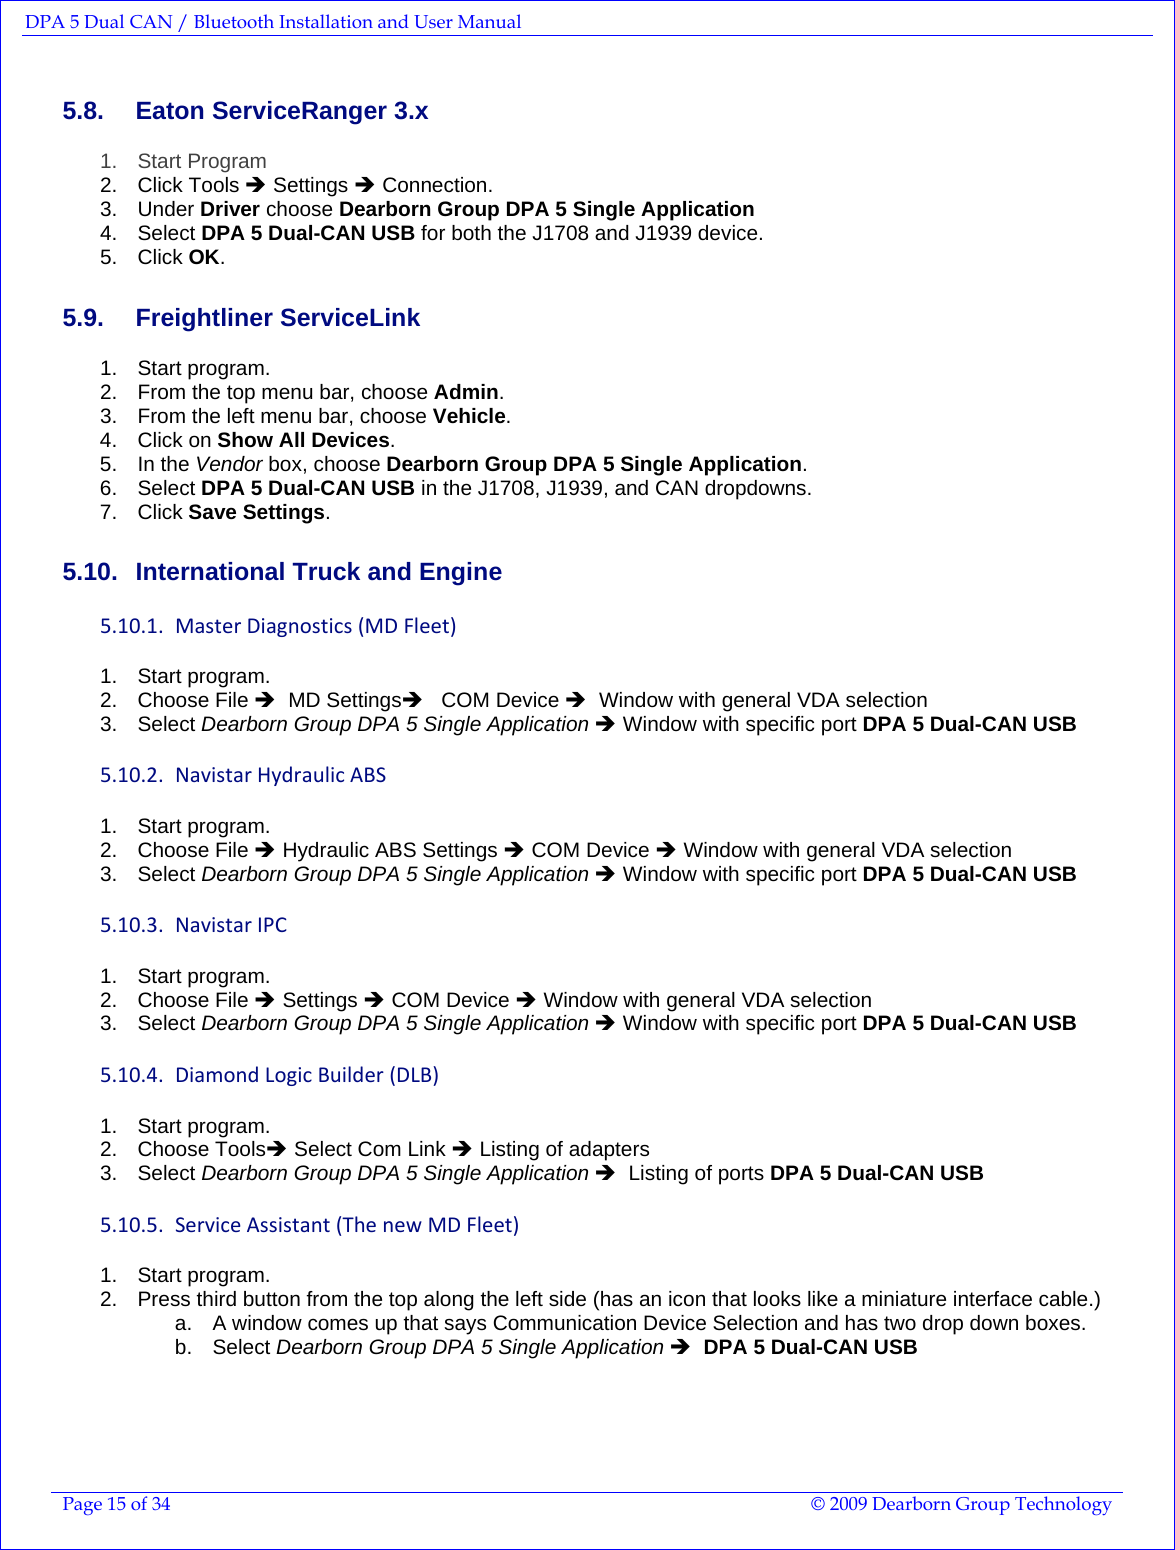
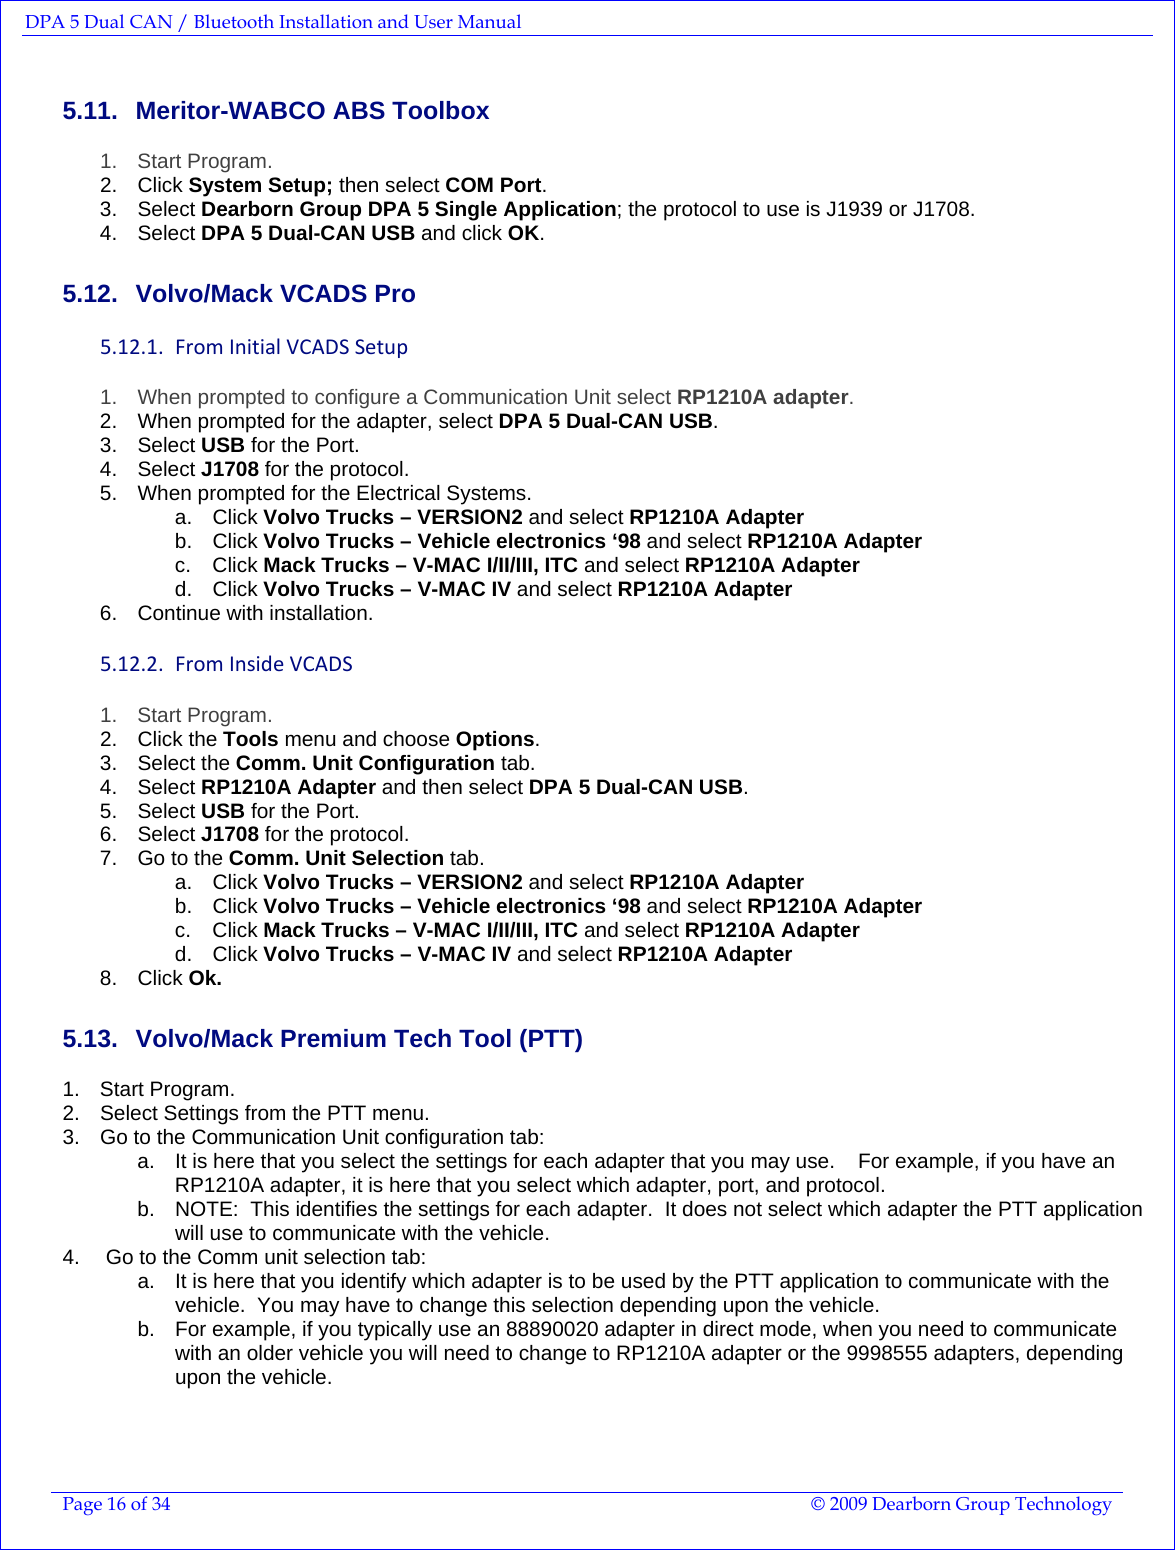
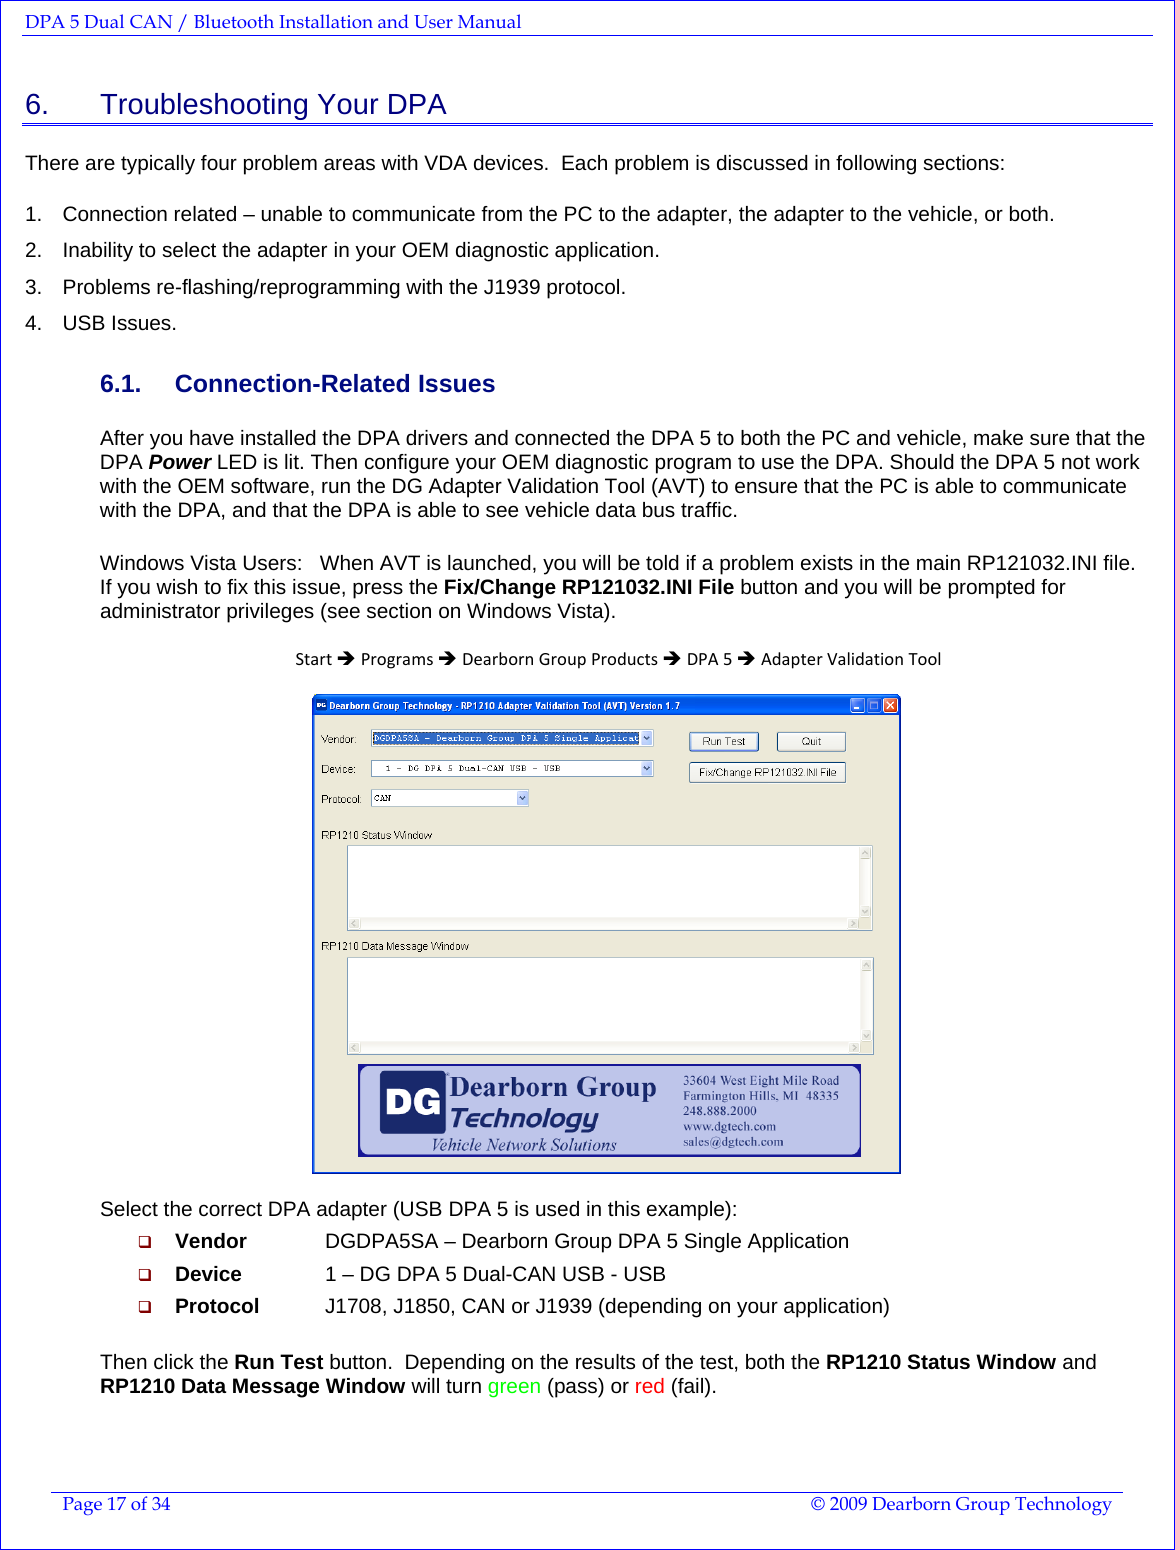
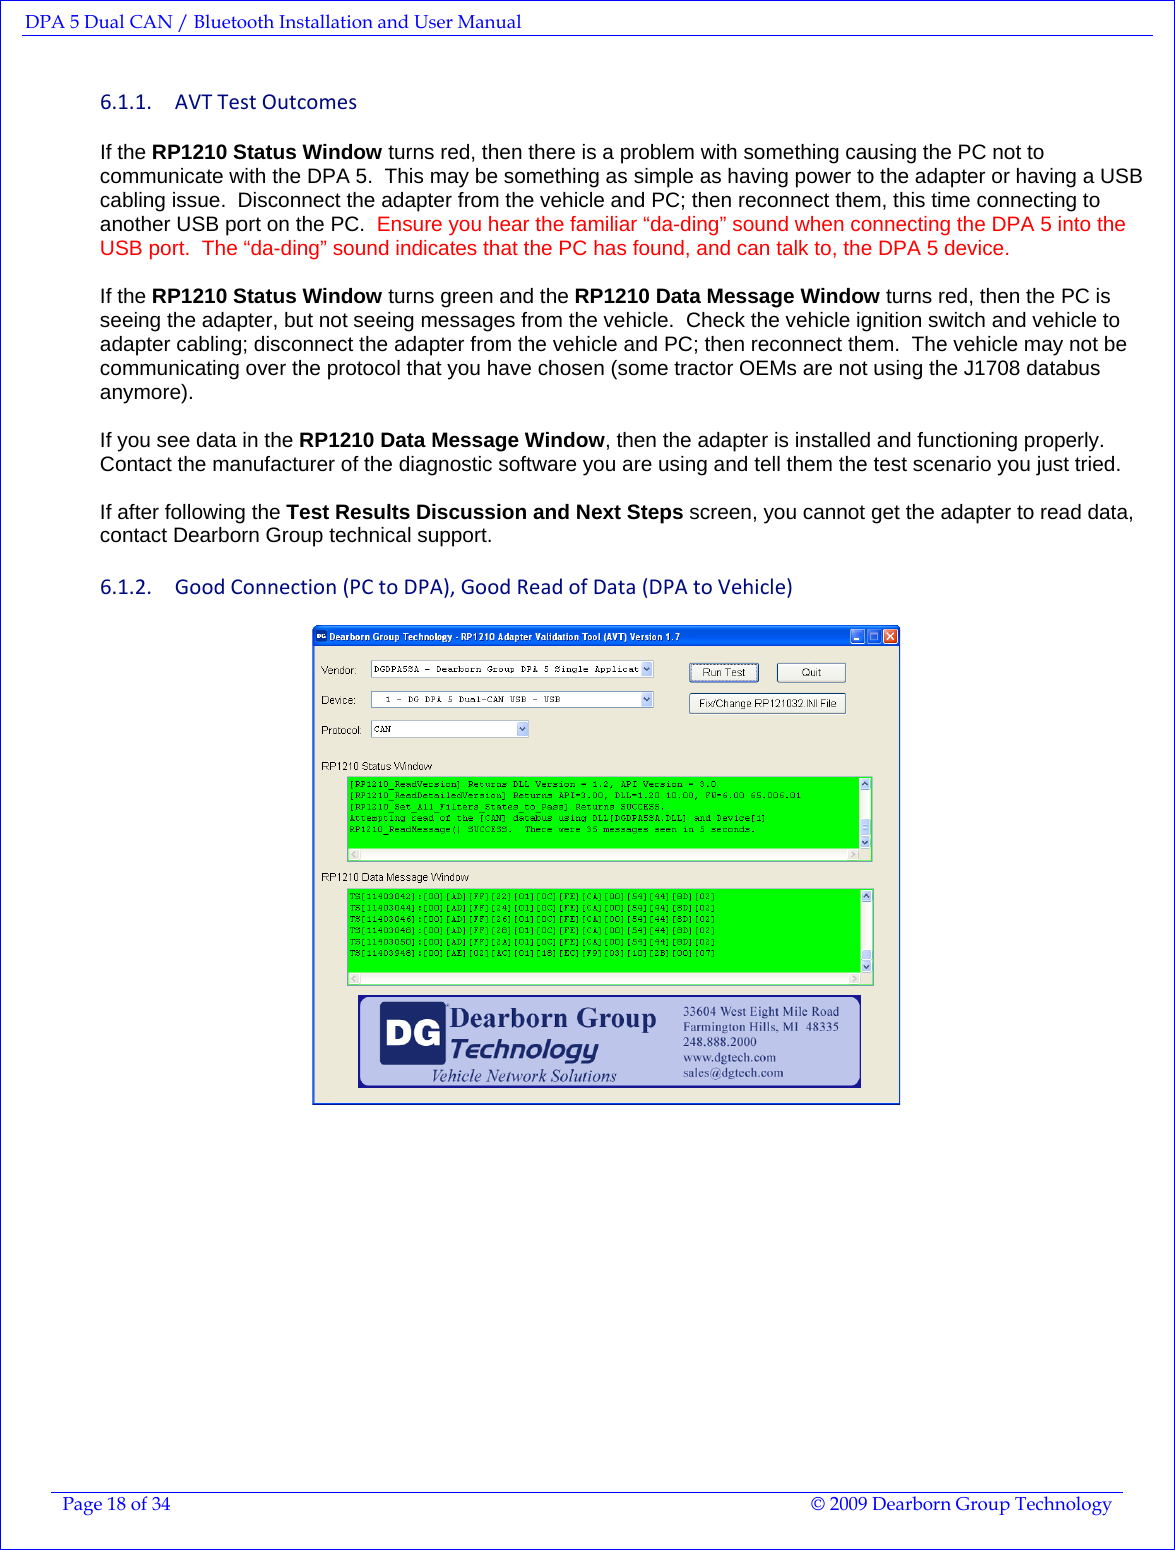
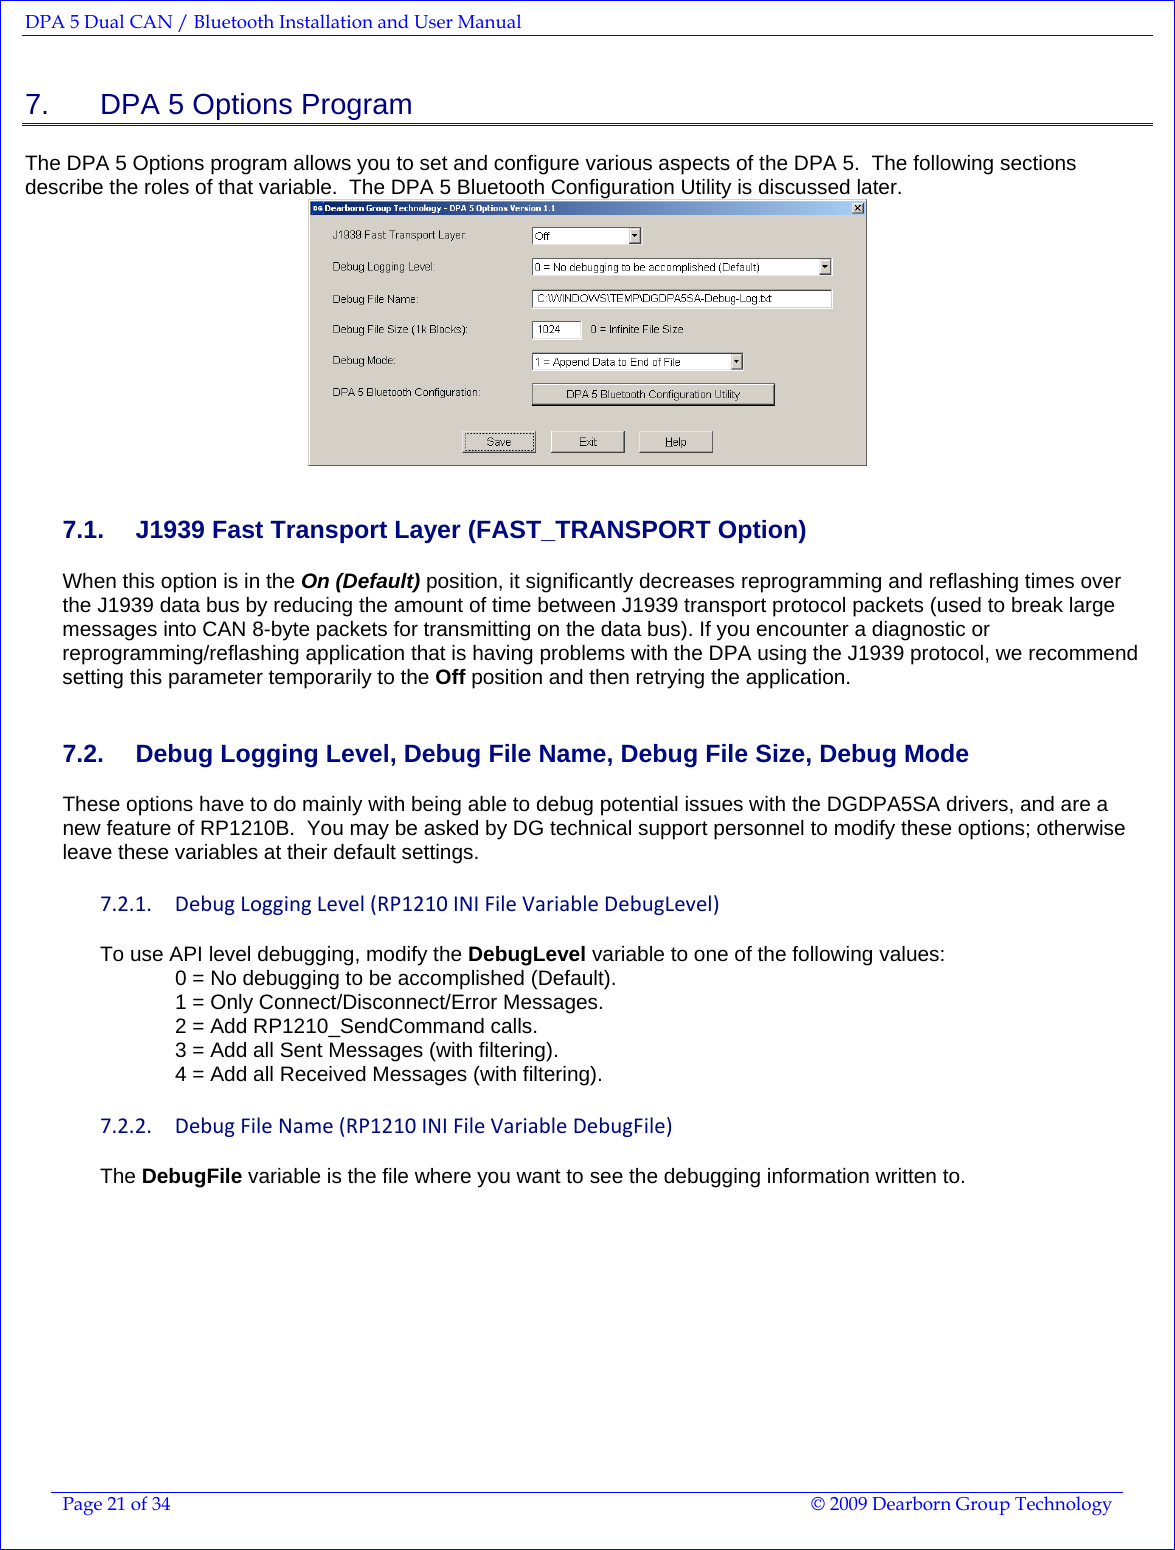
![DPA 5 Dual CAN / Bluetooth Installation and User Manual Page 13 of 34 © 2009 Dearborn Group Technology 5. Setting Up Your OEM Diagnostic Applications The DPA works with all RP1210A and RP1210B compliant applications that support J1708/J1587, CAN/J1939, J1850 VPW (GM Class II) and the ISO15765 protocols. The DPA also works with applications that were specifically written to use the DG non-RP1210-compliant native drivers for other protocols, such as GM UART and ISO9141. This section shows how to configure the most common RP1210-compliant diagnostic applications to work with the DPA 5. 5.1. Notes on Selecting an RP1210 Compliant Adapter Selecting a RP1210 adapter, commonly referred to as a Vehicle Datalink Adapter (VDA) varies widely from application to application; however, the terminology remains pretty much the same. The following table helps to introduce you to the terminology and helps you to make the correct selections the first time. You must set up every application (in their own individual way) to use the DPA! If You See These Terms Select This Vendor API DLL Manufacturer Adapter Manufacturer Dearborn Group DPA 5 Single Application Or DGDPA5SA Device Name Adapter Name DG DPA 5 Dual-CAN USB, USB Or DPA 5 #[DPA 5 Bluetooth ID] Bluetooth, Wireless Device Number DeviceID 1 Or Bluetooth Wireless DeviceID Protocol (Depends on Application) Most Commonly Encountered: 9 J1708 (J1708/J1587) 9 J1939 9 ISO15765 9 CAN 5.2. Configuring Applications to Use the DPA 5 The following examples show how to select your DPA 5 device using the USB cabling method. Bluetooth device entries are based on the DPA 5 Bluetooth ID (see Bluetooth appendix). 5.3. Allison DOC 1. Start program. 2. Click Connect to Vehicle. 3. Select the Correct Transmission Type. 4. Uncheck Smart Connect. 5. Click Connect. 6. Click Advanced Setup. 7. Select vendor of Dearborn Group DPA 5 Single Application. 8. Select protocol of J1939 or J1708. 9. Select correct device of DPA 5 Dual-CAN USB. 10. Click OK.](https://usermanual.wiki/Dearborn-Group/13EAVOX/User-Guide-1215461-Page-13.png)
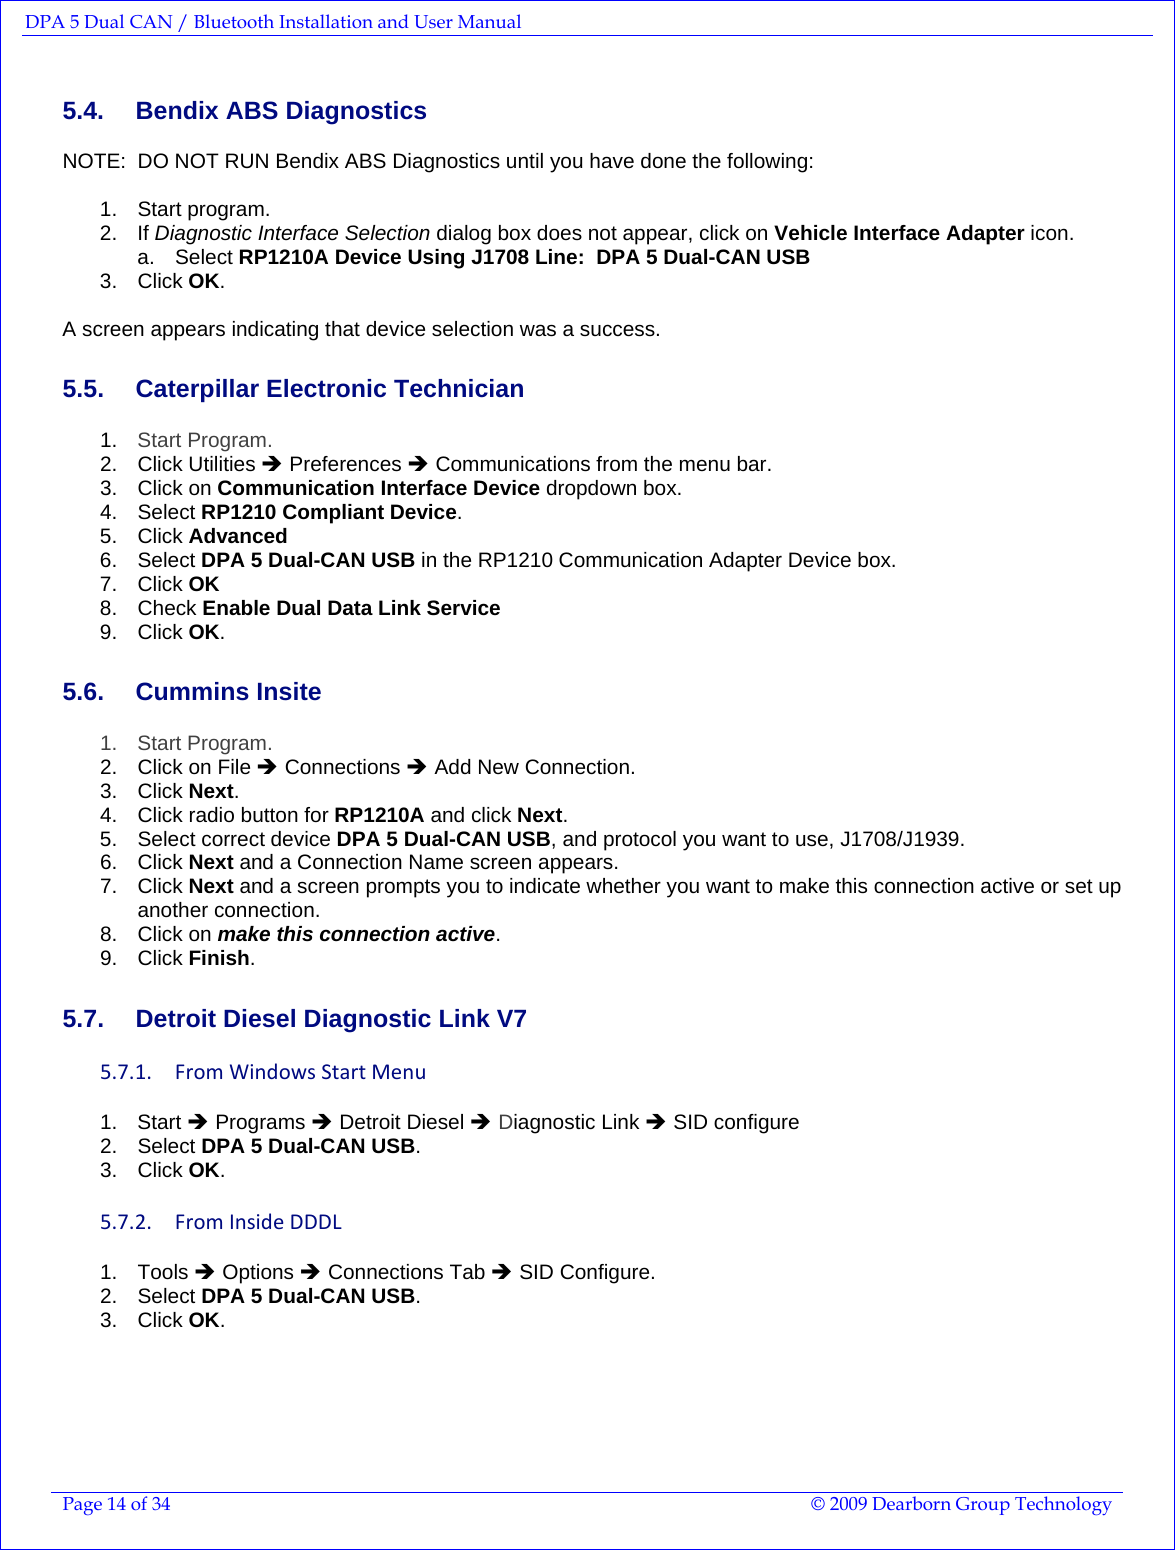
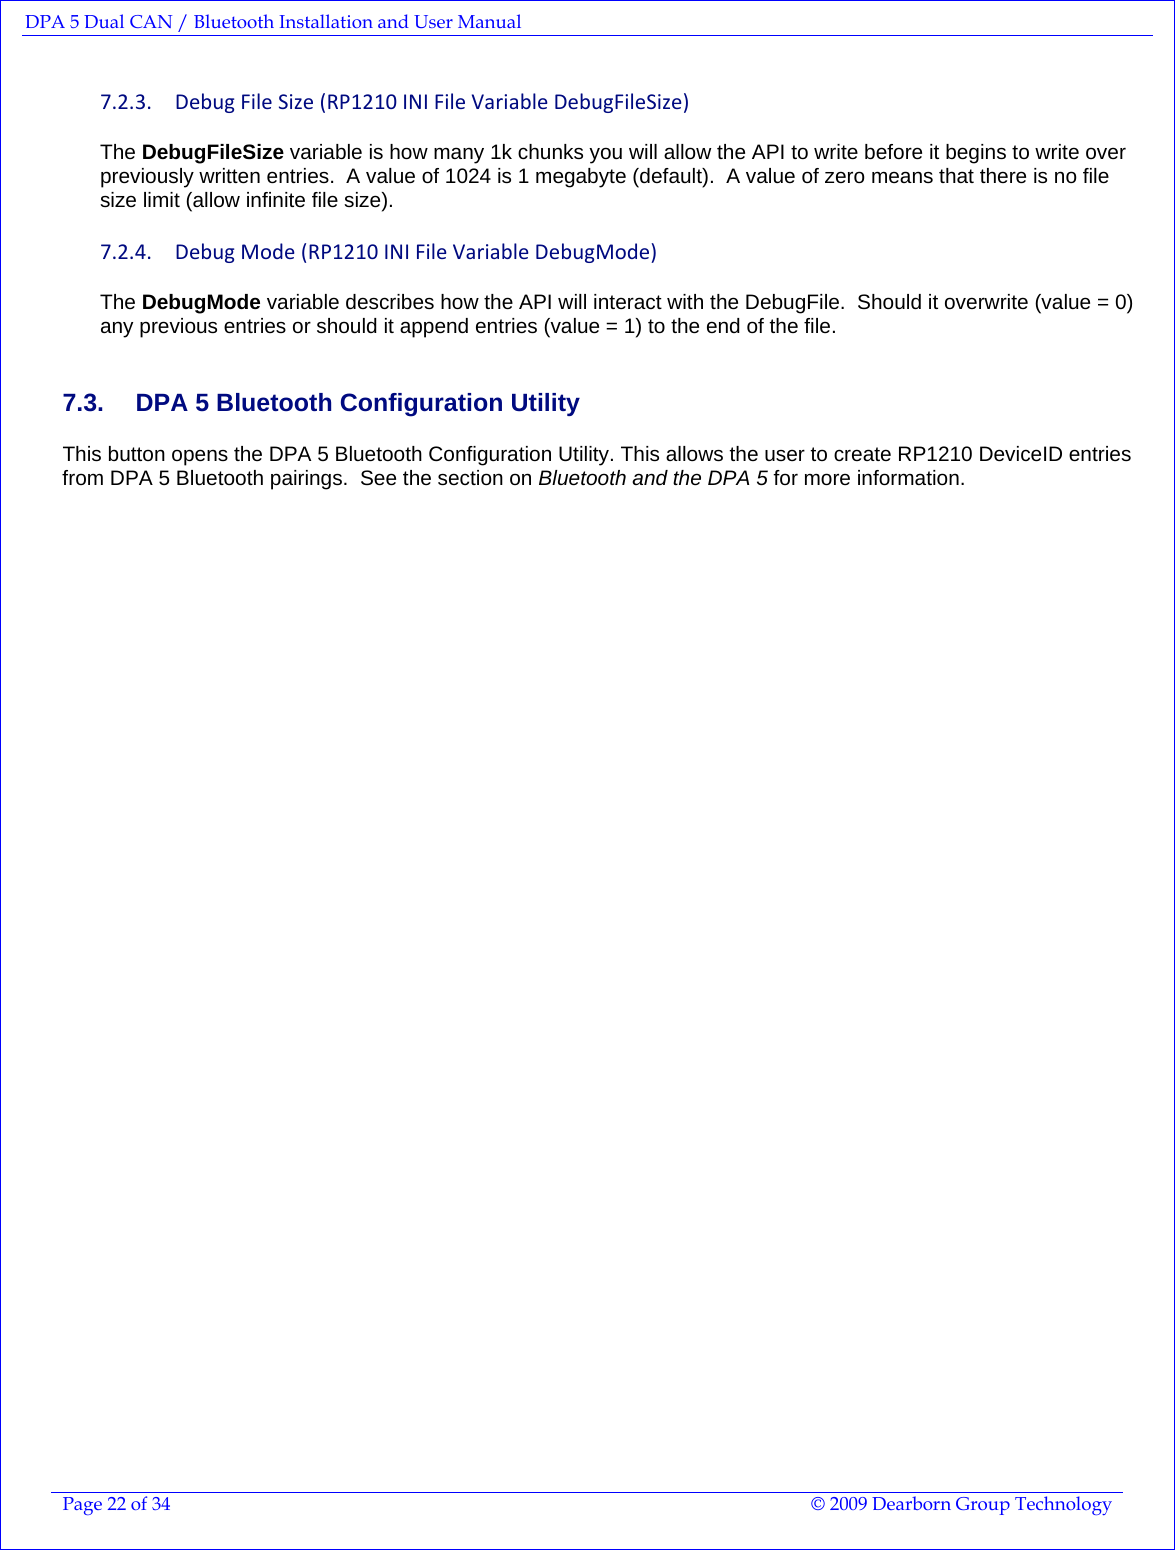
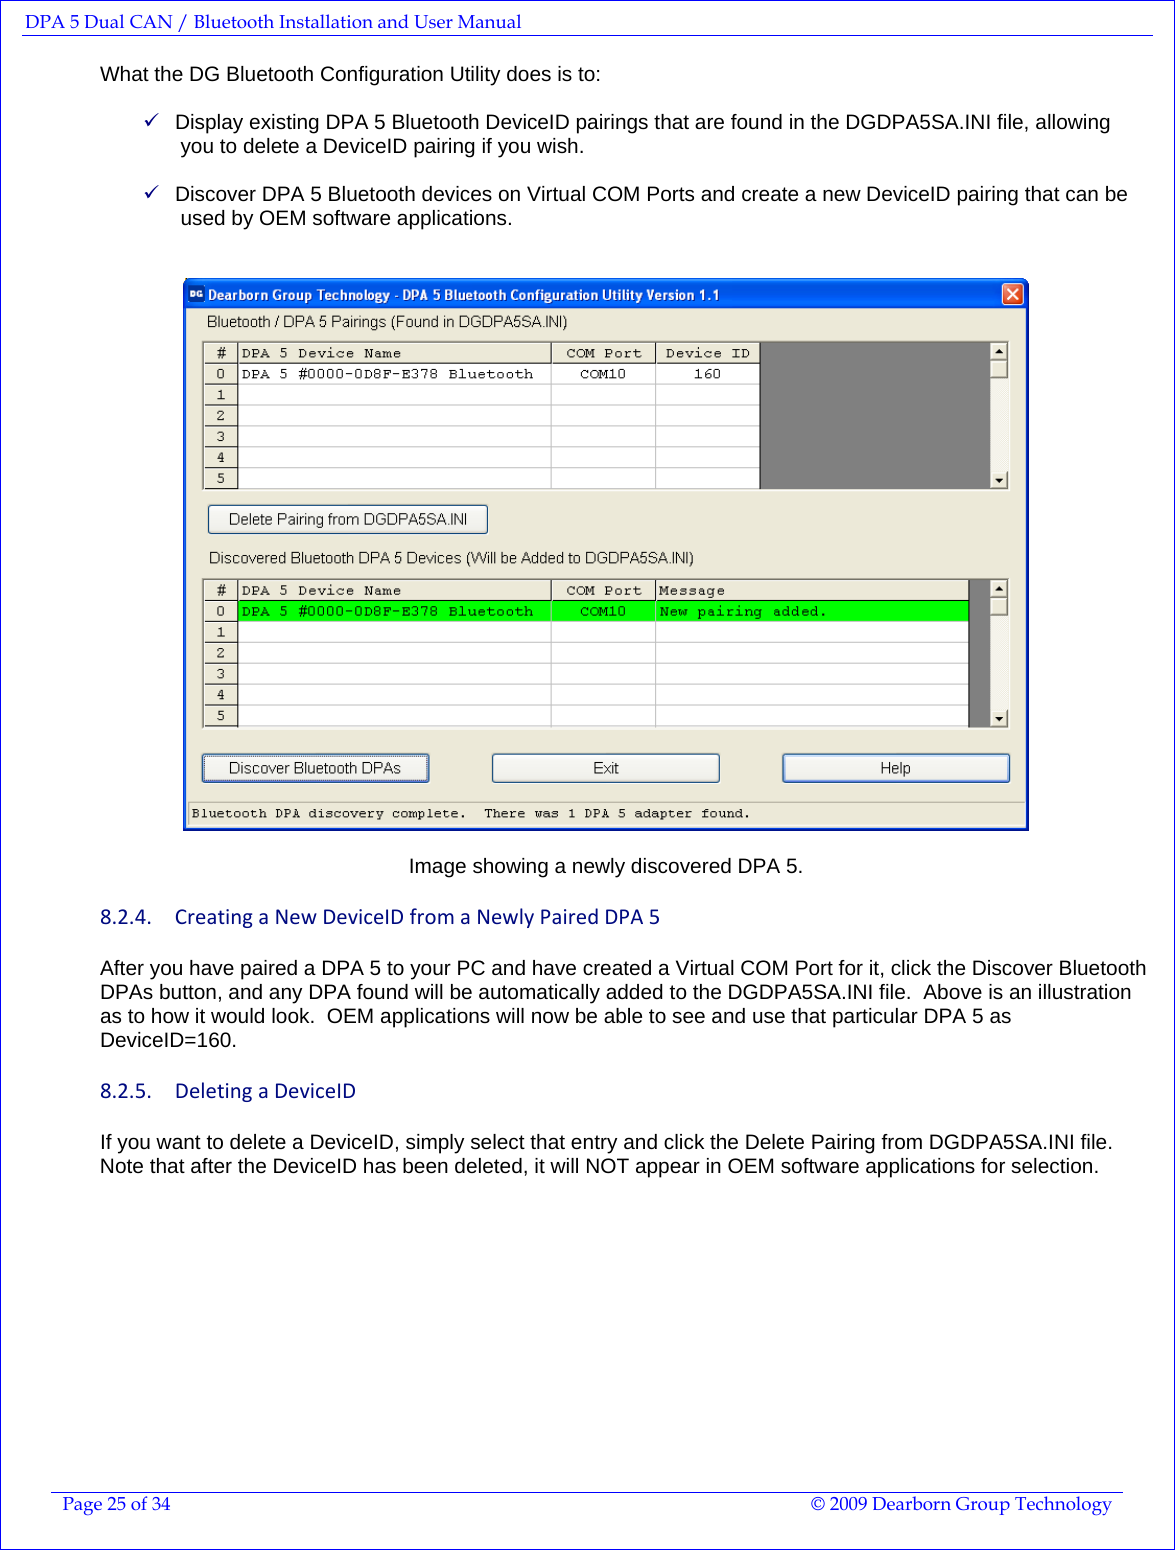
![DPA 5 Dual CAN / Bluetooth Installation and User Manual Page 24 of 34 © 2009 Dearborn Group Technology 8.2.2. PairingYourDPA5DeviceandCreatingaVirtualCOMPortCreating a Virtual COM Port and pairing your device requires two things you have to provide to your Bluetooth dongle configuration utility. Both of these appear on the back of the DPA 5. 1. DPA 5 Bluetooth ID 2. DPA 5 Bluetooth Passkey 9 Note that the DPA 5 must have power to be paired. When you use the Bluetooth dongle configuration utility to discover/pair new devices in order to create a Virtual COM Port, have your DPA 5 powered up and you will see the DPA 5 device and the DPA 5 Bluetooth ID that is written on the back of the DPA. When asked for the passkey/password/passcode to create the Virtual COM Port pairing, enter “dgtech” (do not enter the quotation marks) in all lower case letters. Once you have successfully created the Virtual COM Port, continue to the next step. 8.2.3. FromVirtualCOMPorttoRP1210DeviceID;theDPA5BluetoothConfigurationUtilityWhat is a DeviceID and Why Is it Necessary? A DeviceID is a VDA device’s entry in the VDA vendor’s RP1210 INI file. These entries are read by OEM software applications and displayed in a list to the user so they can be chosen and used. For example, the following is how AVT displays the following entry (for the DPA 5 in USB mode) from the DGDPA5SA.INI file: [DeviceInformation1] DeviceID=1 DeviceDescription=DG DPA 5 Dual-CAN USB,USB DeviceName=DG DPA 5 Dual-CAN USB DeviceParams=DG USB The DG Bluetooth Configuration Utility is used to create DeviceID entries in the DGDPA5SA.INI file with DPA 5 units that have been paired with that PC into Virtual COM Ports. The below example shows how the DPA 5 with the DPA 5 Bluetooth ID “0000-0D8F-E378” became DeviceID=160, and the DeviceParams=/B,COM10 reflected the Virtual COM Port that was assigned to that entry (COM10). The illustration on the right shows what AVT would show for this entry. [DeviceInformation160] DeviceID=160 DeviceDescription=DPA 5 #0000-0D8F-E378 Bluetooth,Wireless DeviceName=DPA 5 #0000-0D8F-E378 Bluetooth DeviceParams=/B,COM10 After you have successfully paired your DPA 5 with the Bluetooth dongle and have created the Virtual COM Port, run the DG Bluetooth Configuration Utility: 1. Start Î Programs Î Dearborn Group Products Î DPA 5 Î DPA 5 Options 2. Then press the button DG Bluetooth Configuration Utility 3. Ensure the Bluetooth dongle is connected to the PC and that the DPA 5 has power You must go through this configuration utility to create DeviceID entries, or the DPA 5 in Bluetooth mode will not work with your OEM applications.](https://usermanual.wiki/Dearborn-Group/13EAVOX/User-Guide-1215461-Page-24.png)
![DPA 5 Dual CAN / Bluetooth Installation and User Manual Page 30 of 34 © 2009 Dearborn Group Technology 12. Appendix A – DPA 5 Firmware Update If you have purchased a DPA 5 with the 1.20 driver CD, your DPA 5 will have version 65.007 firmware. If you have an older DPA 5 and have downloaded the 1.20 drivers from the internet, or have obtained a 1.20 CD, you may need to upgrade the DPA firmware. To find which version of firmware you have, use AVT after connecting the DPA to a power source. StartÎProgramsÎDearbornGroupProductsÎDPA5ÎAdapterValidationTool Select the correct DPA adapter: Vendor DGDPA5SA – Dearborn Group DPA 5 Single Application Device 1 – DG DPA 5 Dual-CAN USB - USB Protocol J1708 (any protocol works) Then click the Run Test button. When the test has finished running, go to the RP1210 Status Window and scroll down to the line that reads [RP1210_ReadDetailedVersion] and look for the entry “FW=”. The last numbers on the line indicates which version of firmware you have (note the yellow circle). If you are not at 65.007, then you need to run the DPA Flash Updater outlined in the following steps.](https://usermanual.wiki/Dearborn-Group/13EAVOX/User-Guide-1215461-Page-30.png)

![DPA 5 Dual CAN / Bluetooth Installation and User Manual Page 32 of 34 © 2009 Dearborn Group Technology 13. Appendix B – Software Developer/Integrator Notes This section is relevant only to software development engineers and systems integrators. 13.1. Bundling the DPA with Your OEM Installation – Silent Install The installation application can be ran in silent mode which removes all required user interaction. The silent installation does not prompt the user or display a screen at any point. After the install, a reboot of the PC is necessary. 13.1.1. SilentInstallCommandLineDPA5Install.exe /s /d_SILENT_=[components to install] The [components to install] can be any combination of the following: A = DPA 5 Dual-CAN USB drivers and associated files B = DPA 5 Bluetooth drivers and associated files Examples: Silently install DPA 5 drivers with Bluetooth Option: DPA5Install.exe /s /d_SILENT_=AB NOTE: Please test and ensure that the command line you provide to DPA4Install.exe is correct. Otherwise, only the baseline components will be installed, but the RP1210 API will not be functional.](https://usermanual.wiki/Dearborn-Group/13EAVOX/User-Guide-1215461-Page-32.png)