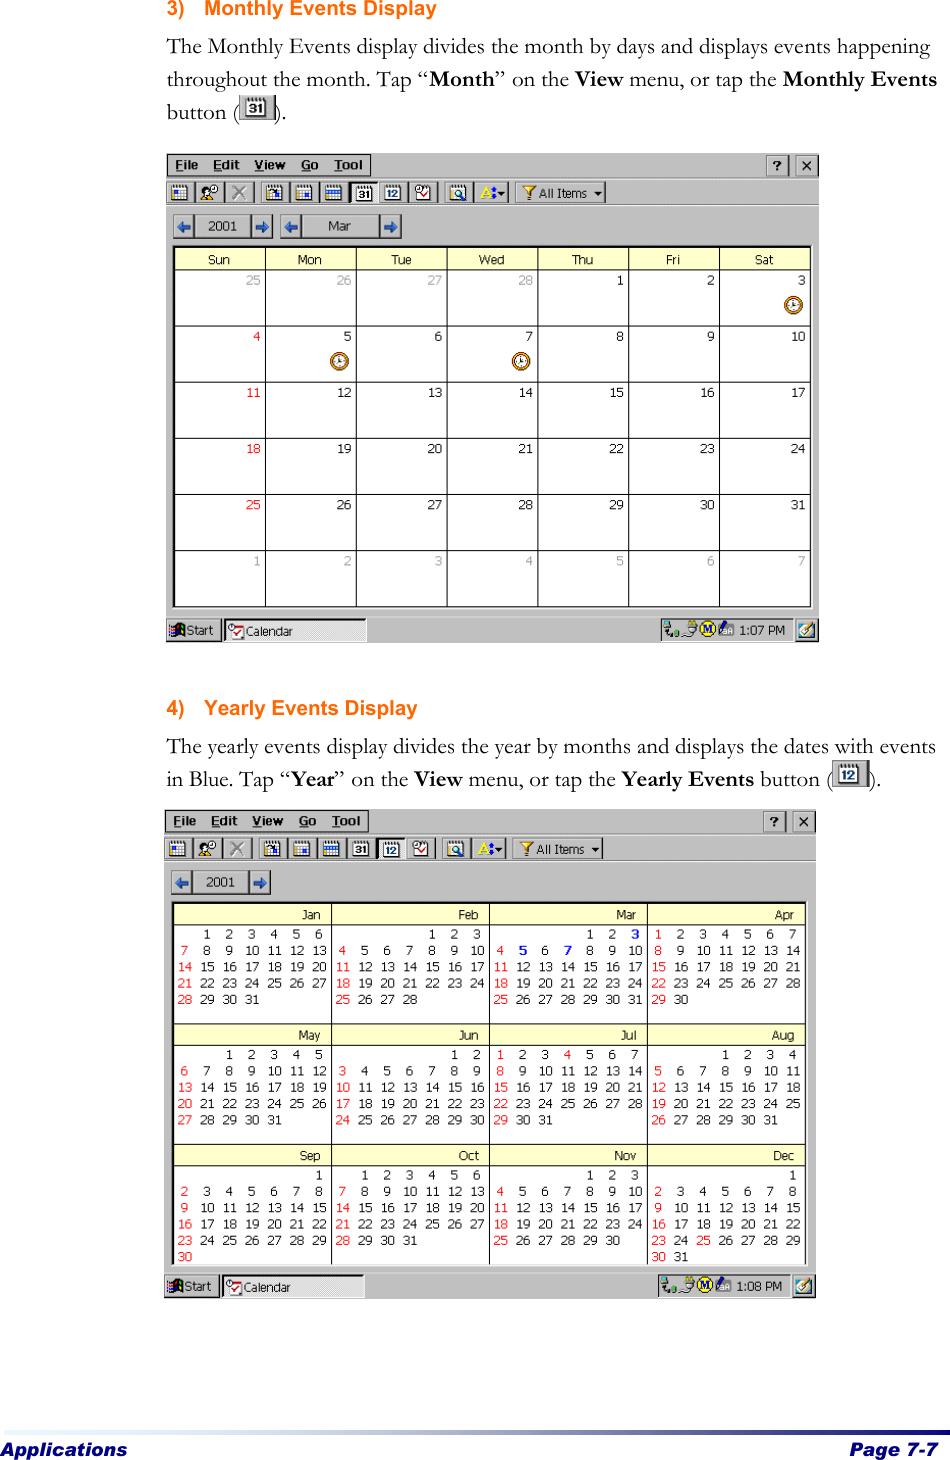
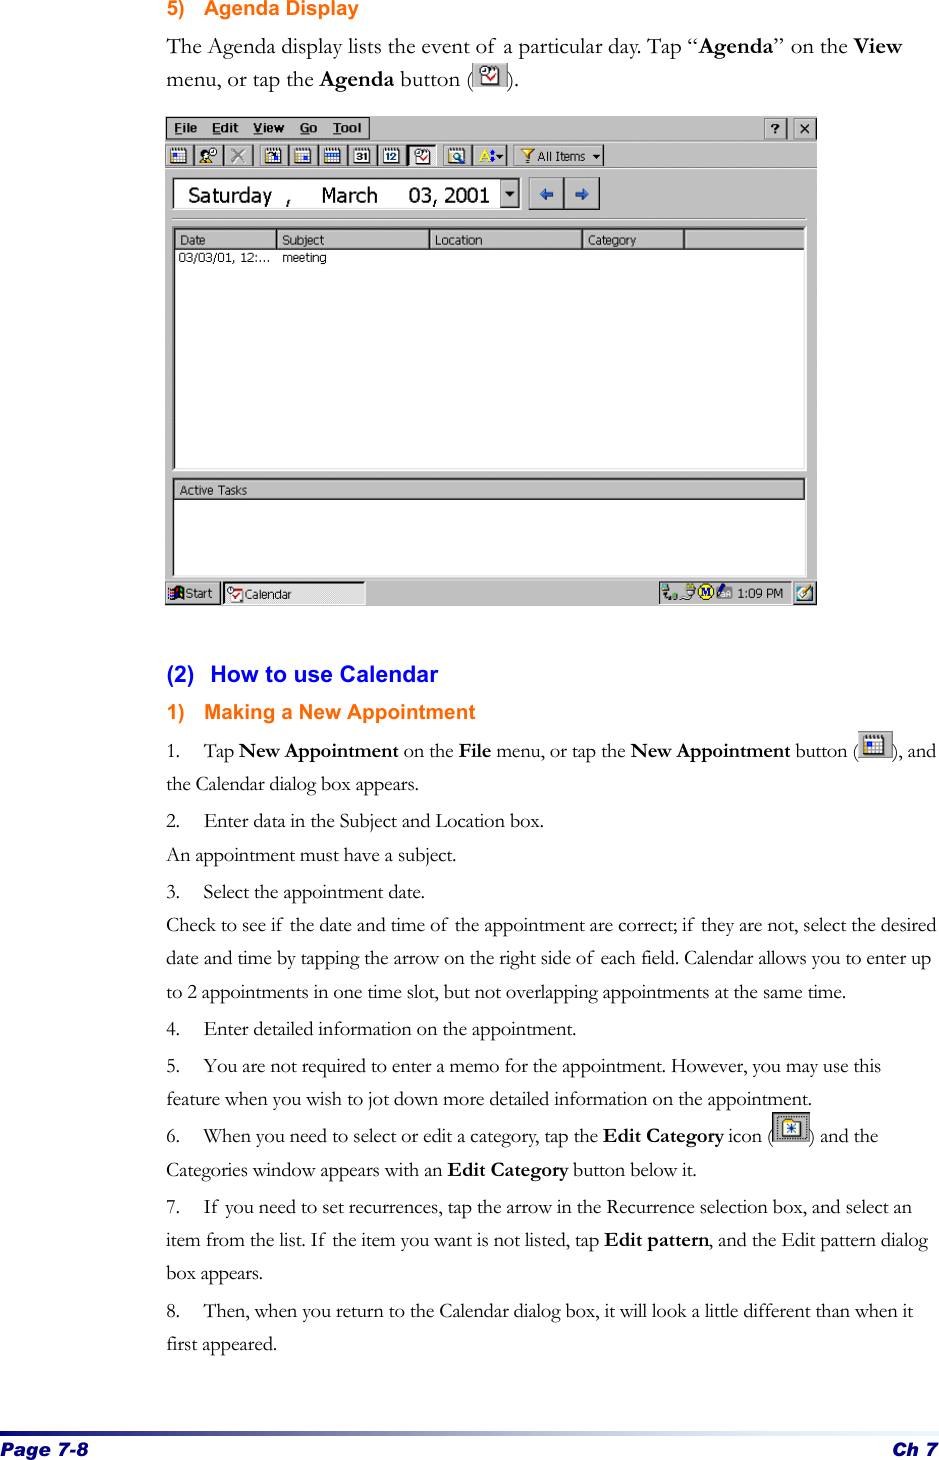
CyberBank CB-9020-US Personal Digital Assistant User Manual manual table of contents
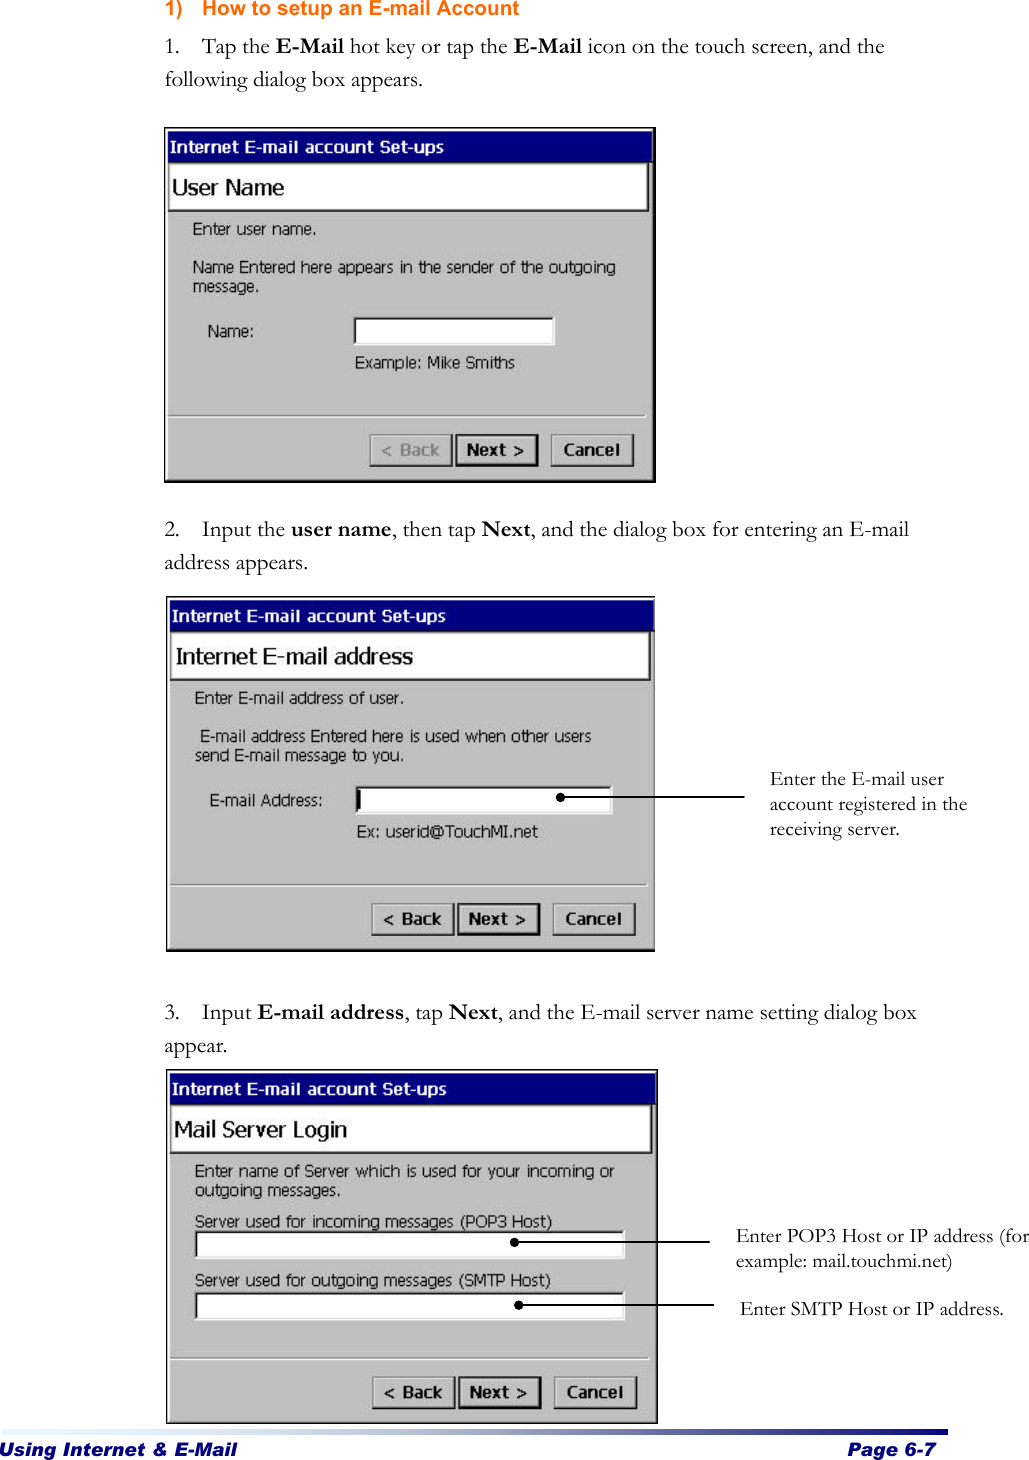
CyberBank Corp Personal Digital Assistant manual table of contents
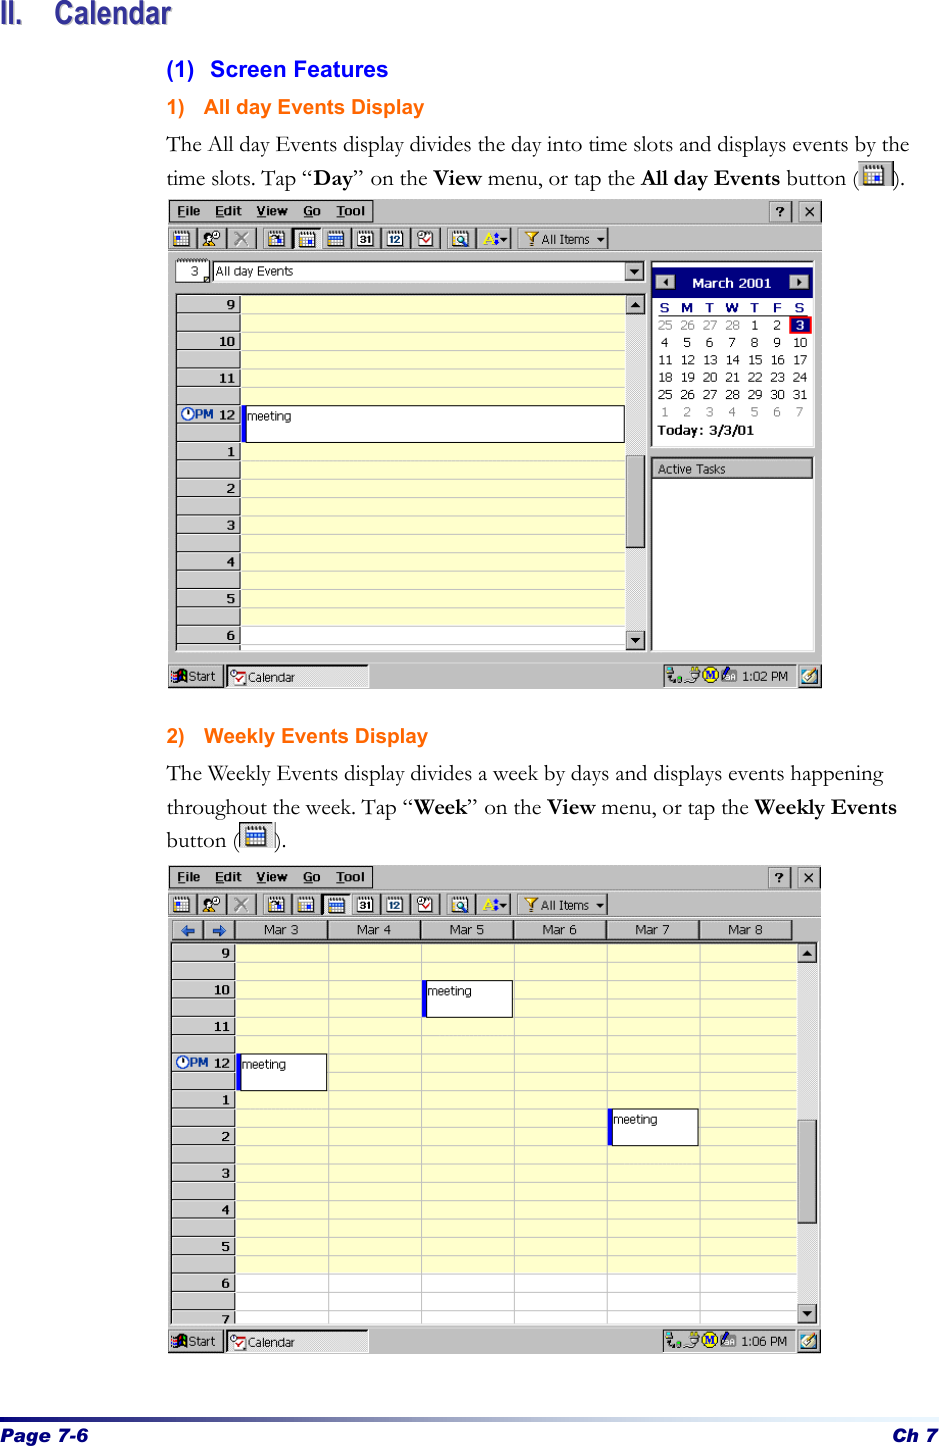
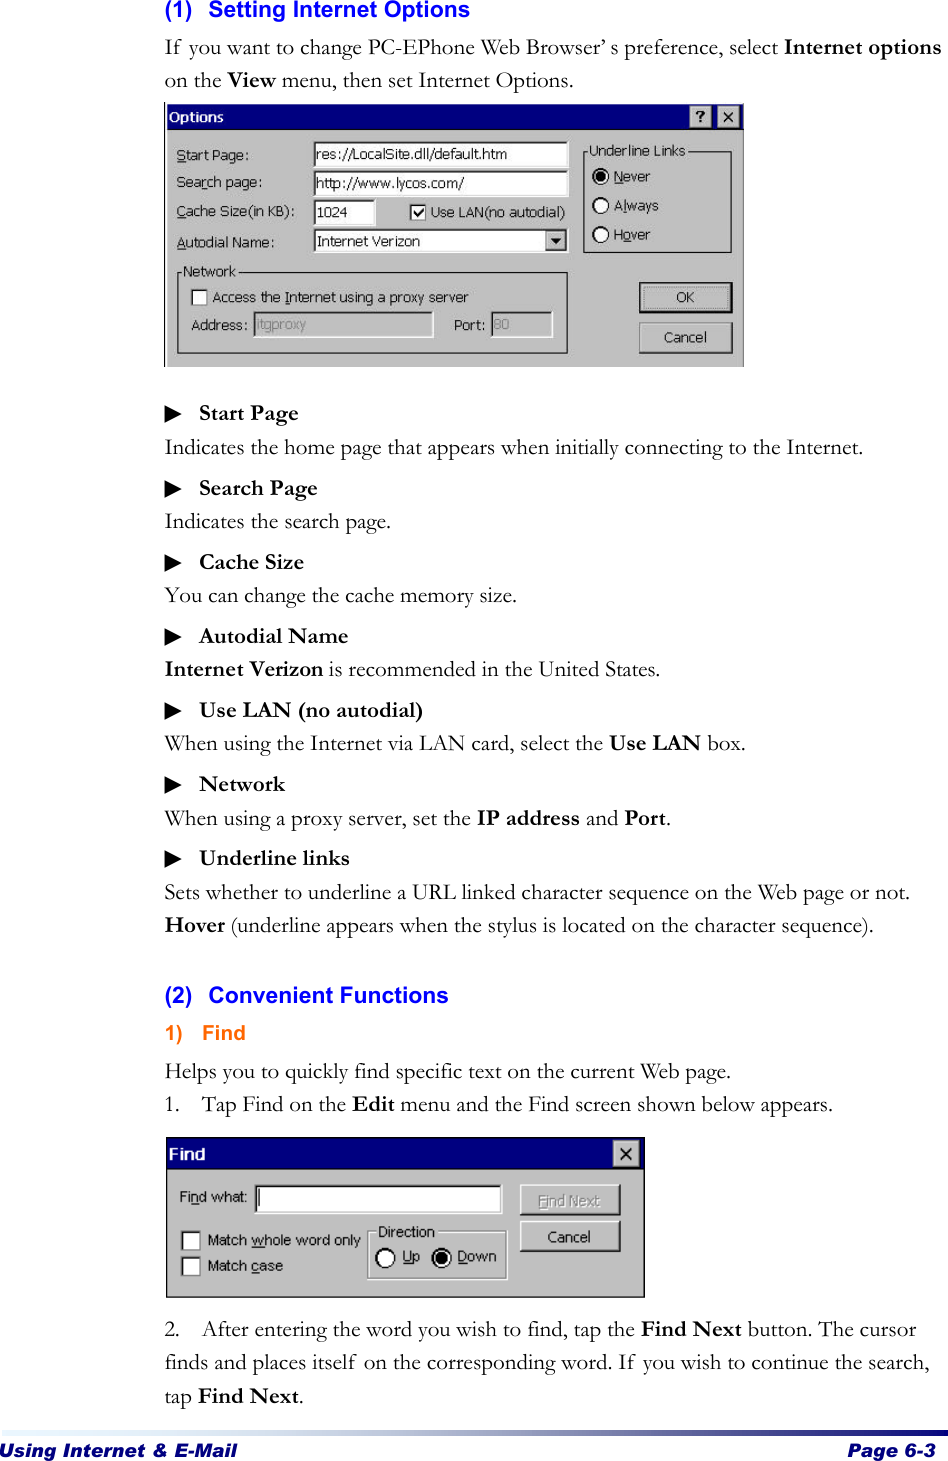
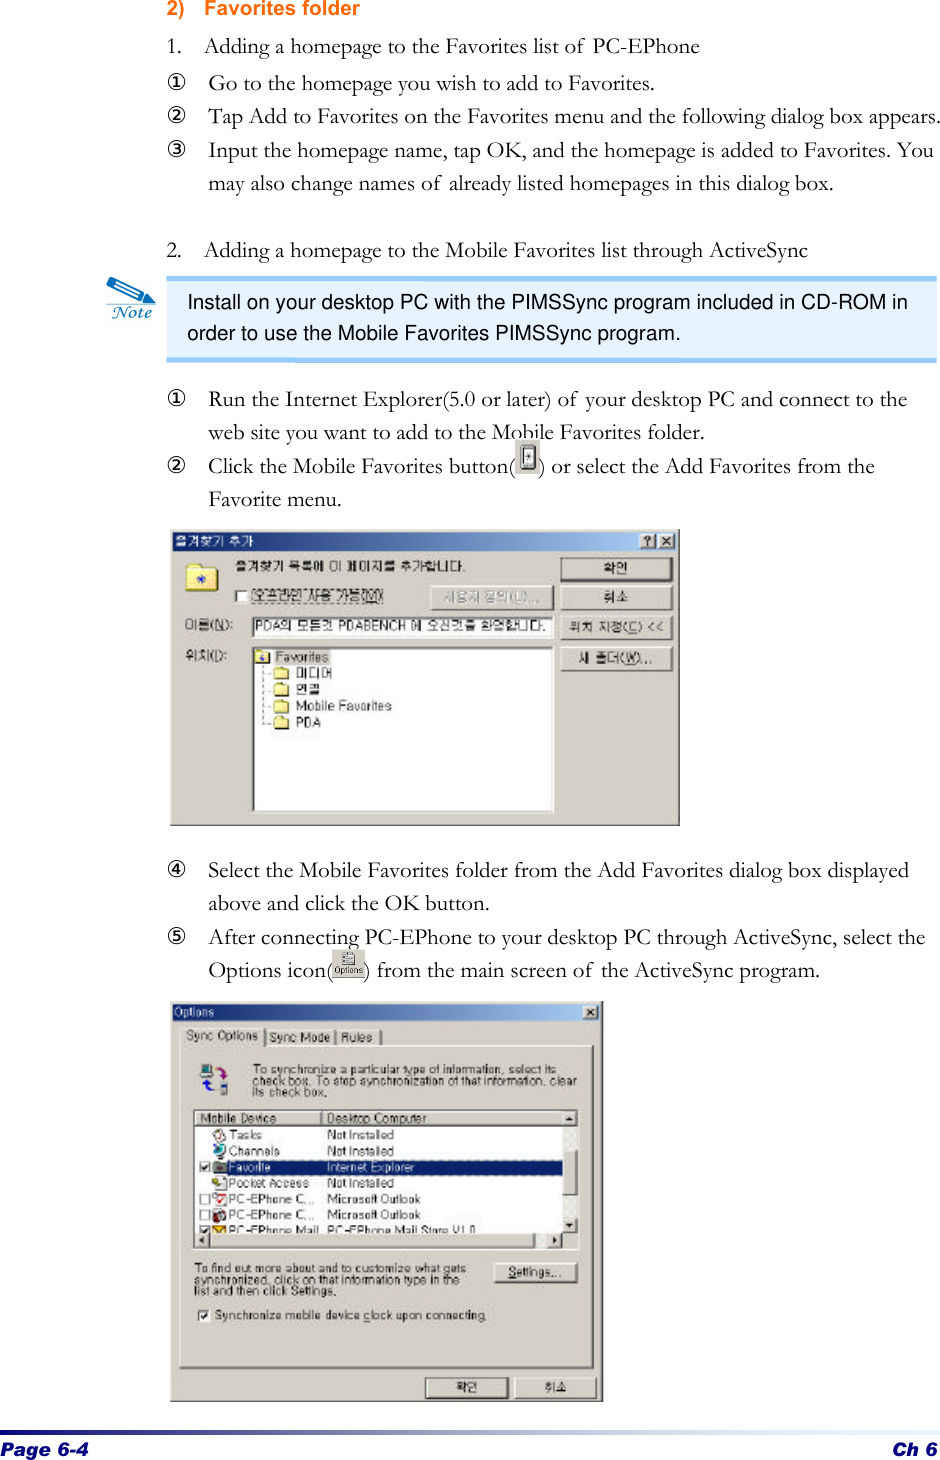
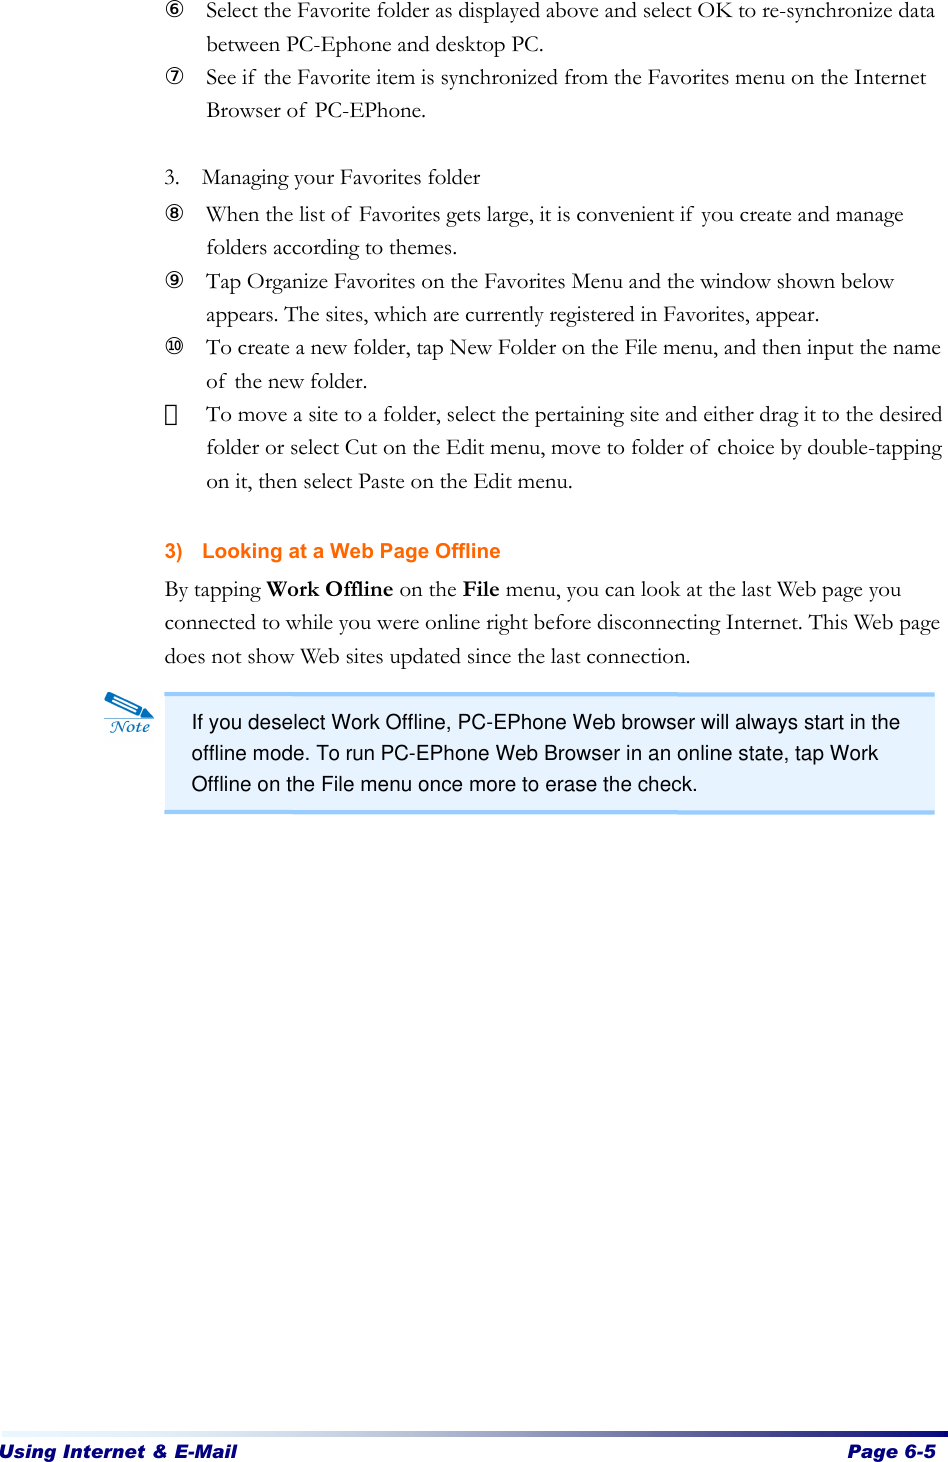
Contents
- 1. User Manual 1 of 4
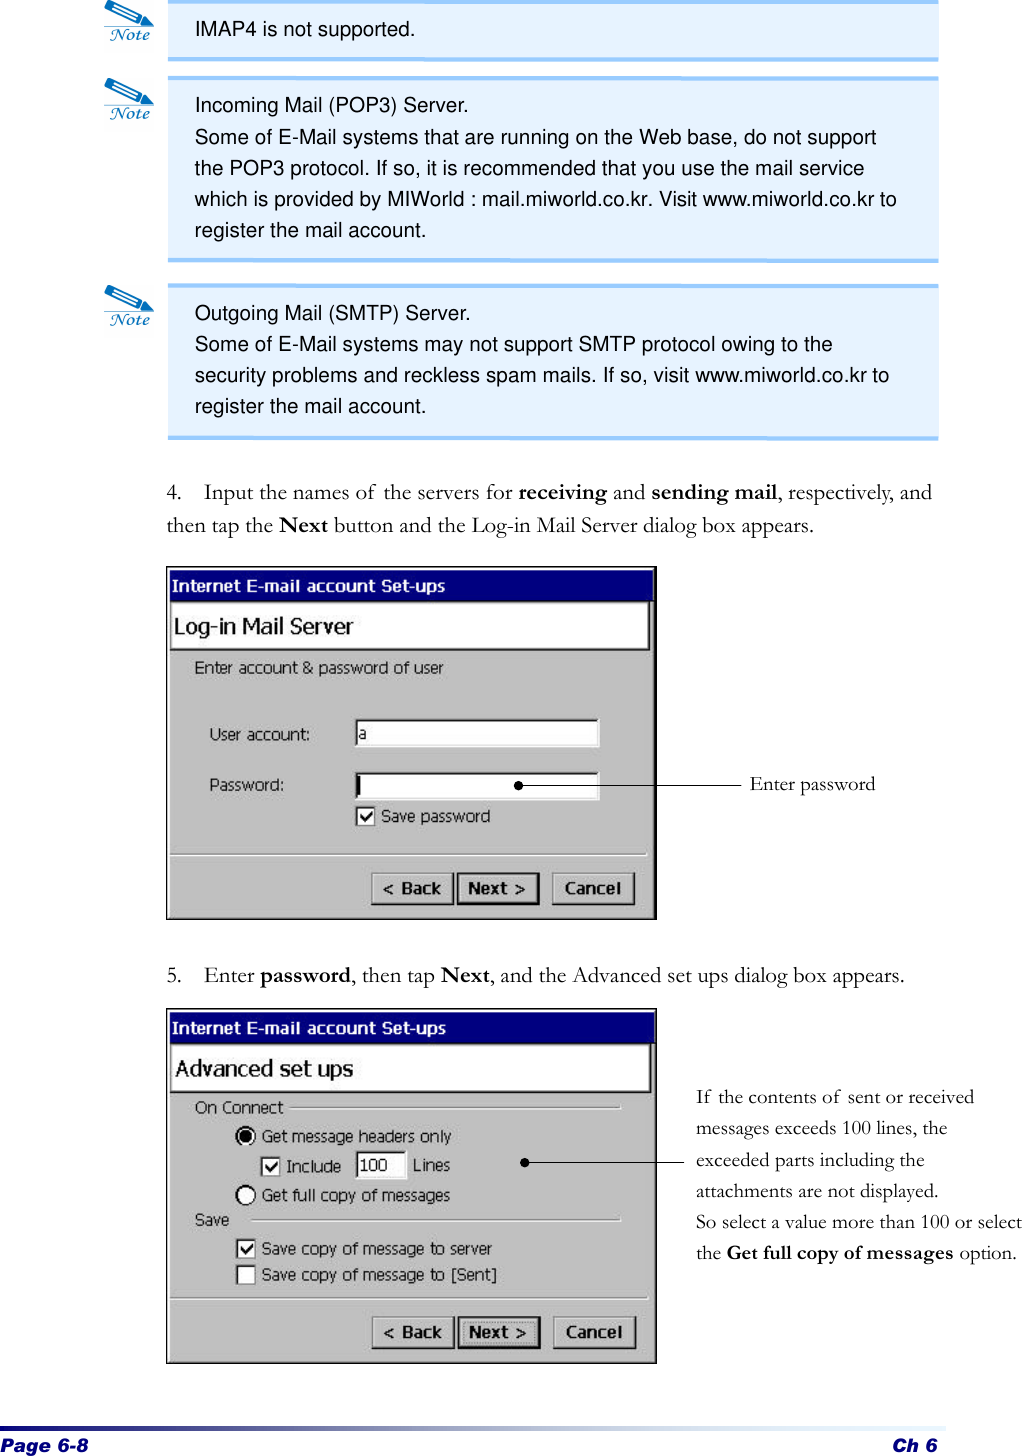
- 2. User Manual 2 of 4
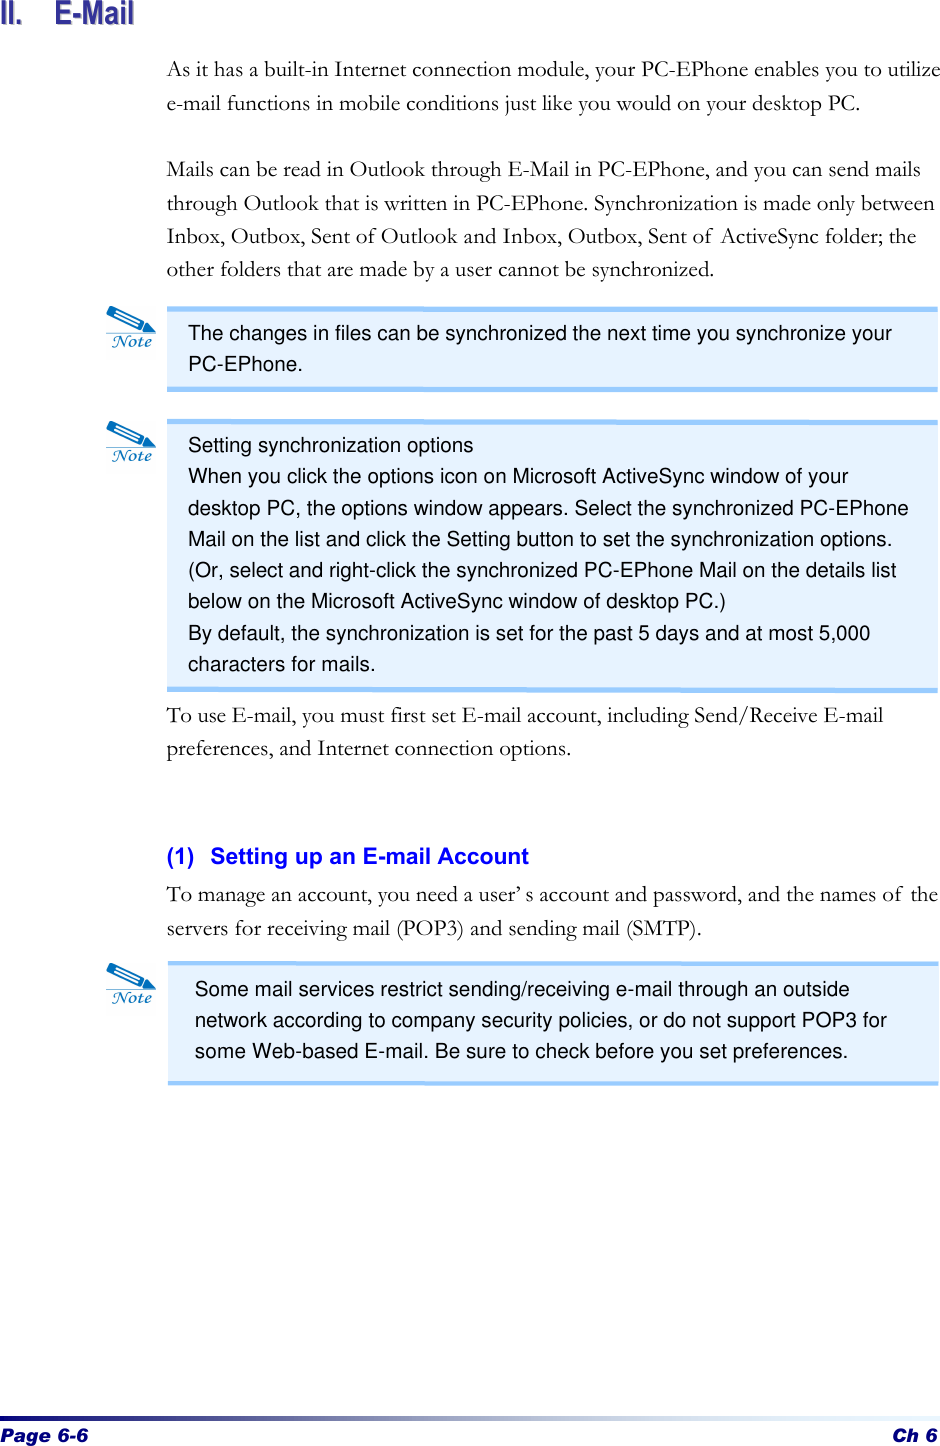
- 3. User Manual 3 of 4
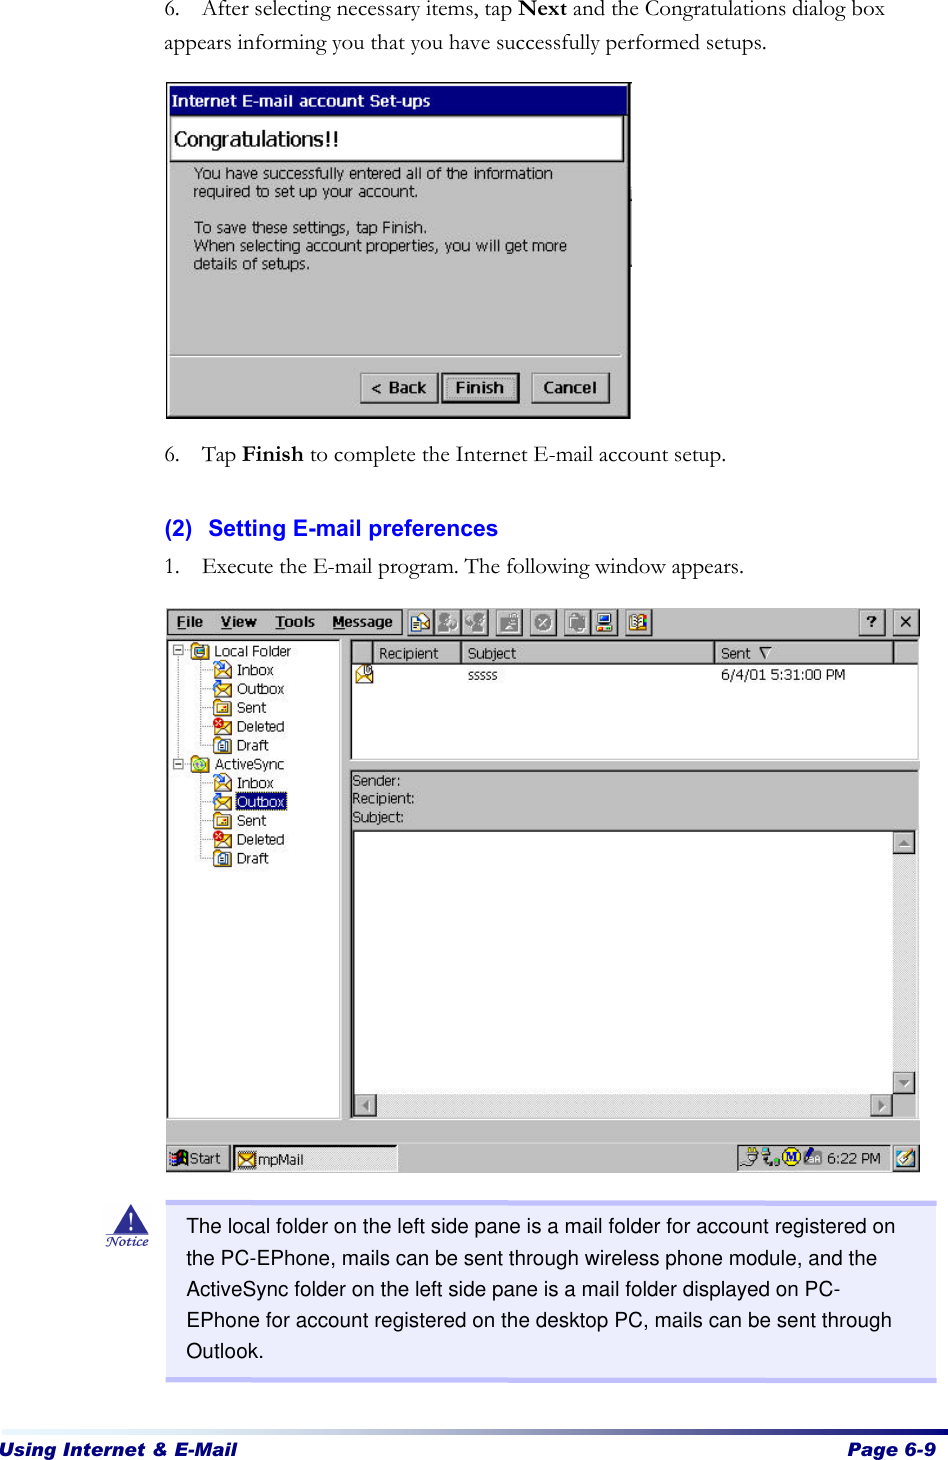
- 4. User Manual 4 of 4
User Manual 4 of 4
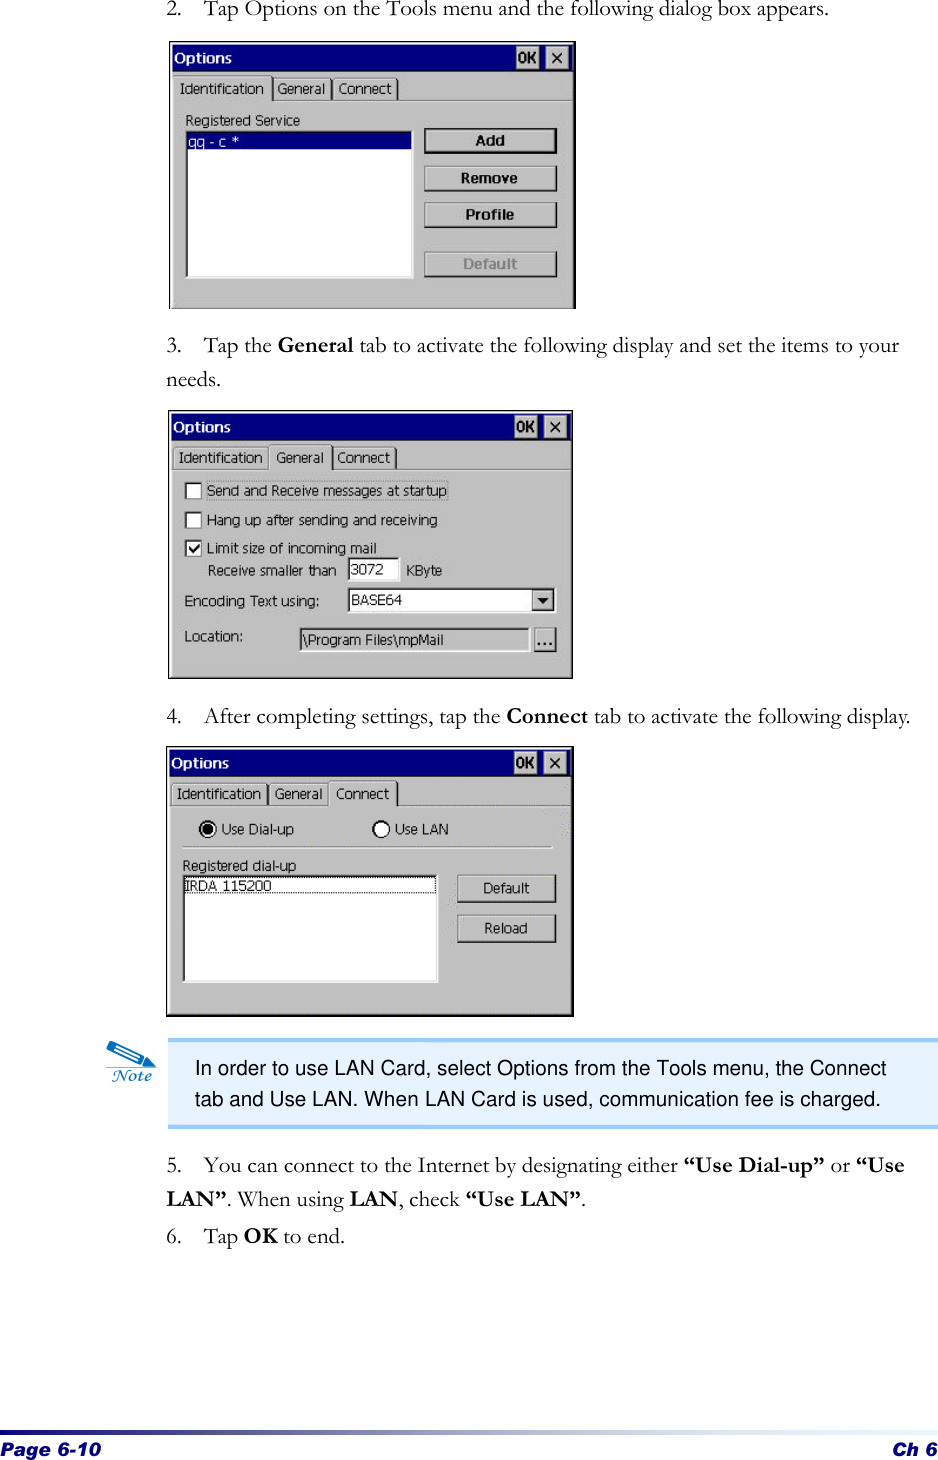

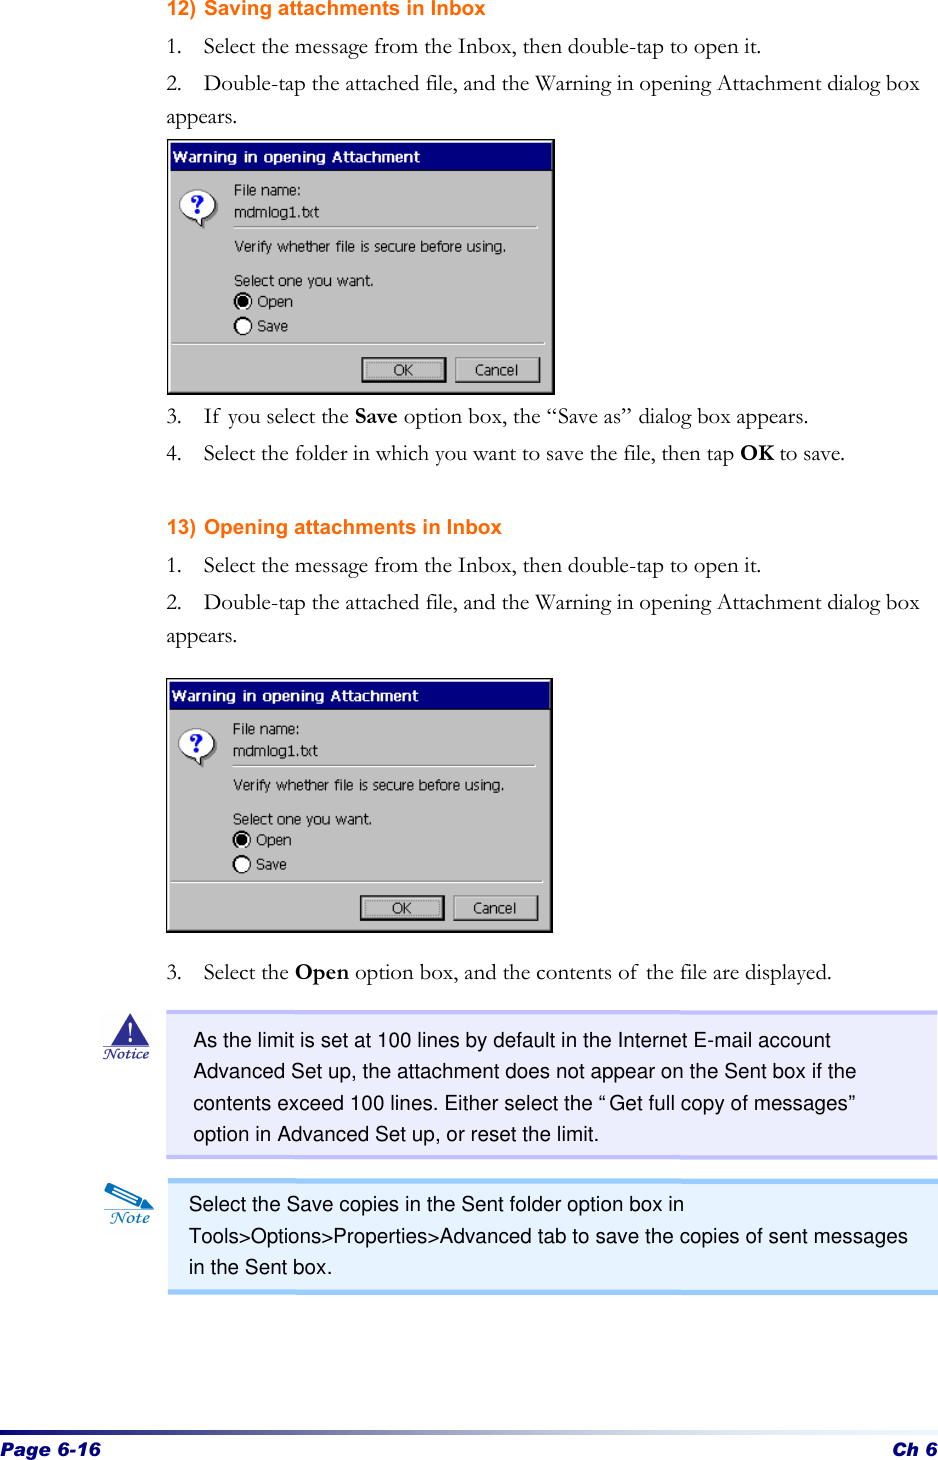
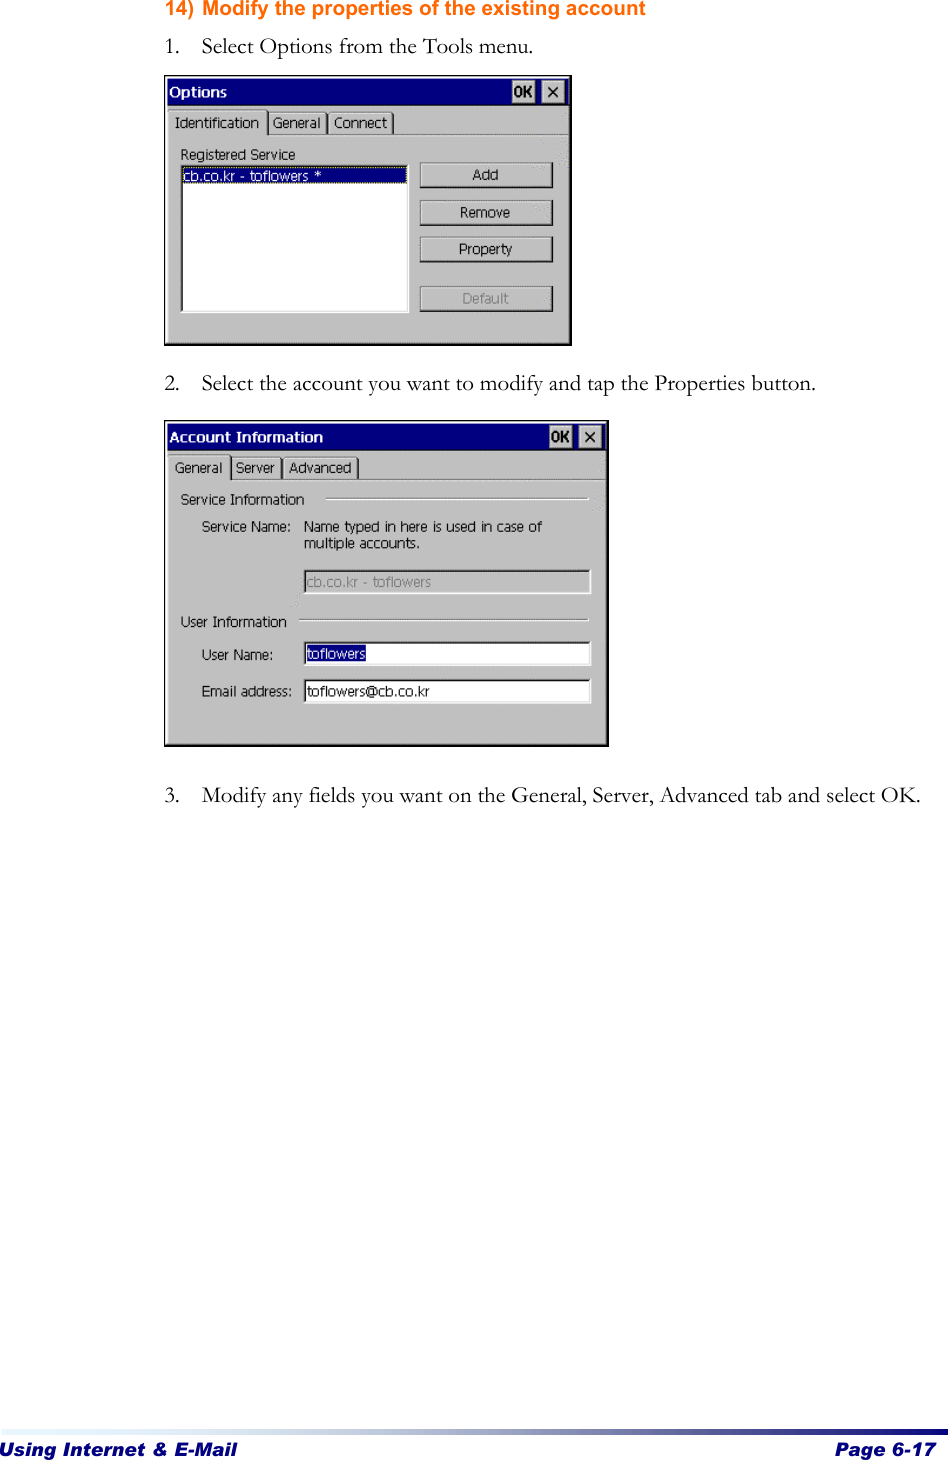
![Using Internet & E-Mail Page 6-15 8) Deleting folders 1. Select the folder you wish to delete from the list of folders on the left. 2. Select Folder, Delete on the File menu. 9) Moving messages Used to send a message saved in one folder to another. 1. Select the message you wish to move. 2. Select Move to Folder on the View menu. 3. Select the folder you wish to move the message to, and tap OK. 10) Attaching files to new messages 1. In the New Message dialog box, tap Attachments, Add on the File menu and the Open dialog box appears. 2. Select the file you wish to attach, then tap OK, and the attached file is displayed in the attachments window of the New Message dialog box. 11) Adding contents of a file to new message 1. Tap Attachments, Insert File to Body on the File menu, and the Open dialog box appears. 2. Select the file you wish to attach, then tap OK, and the contents of the file are displayed in the New Message dialog box. When you delete a folder, mail contained in that folder is transferred to the [Deleted] folder. You cannot rename or delete folders that are set by default (Inbox, Outbox, Sent, Deleted).](https://usermanual.wiki/CyberBank/CB-9020-US.User-Manual-4-of-4/User-Guide-221734-Page-14.png)