Cisco Linksys WRT55AG Dual-Band Wireless A+G Broadband Router User Manual WRT55AG ug Rev NC
Cisco-Linksys, LLC Dual-Band Wireless A+G Broadband Router WRT55AG ug Rev NC
UserManual.wiki
>
Cisco Linksys
>
WRT55AG User Manual
>
User manual part 3
Contents
1.
User manual part 1
2.
User manual part 2
3.
User manual part 3
4.
User manual part 4
5.
User Manual part 5
6.
User manual part 5
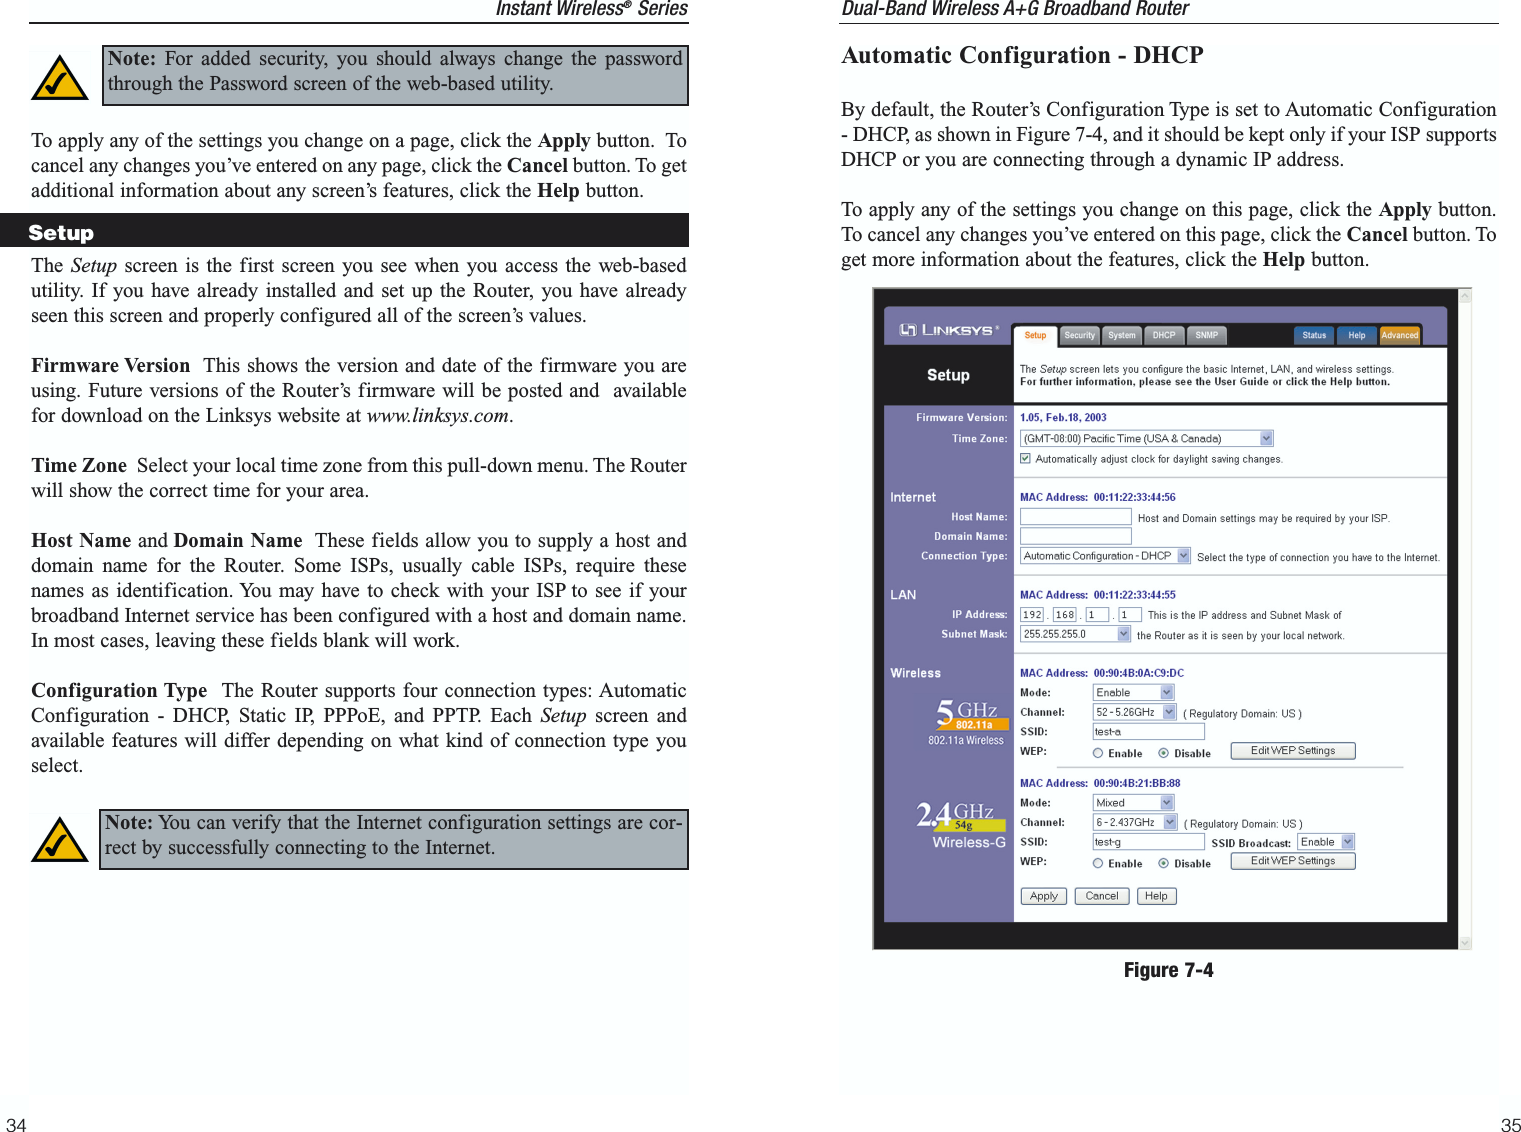
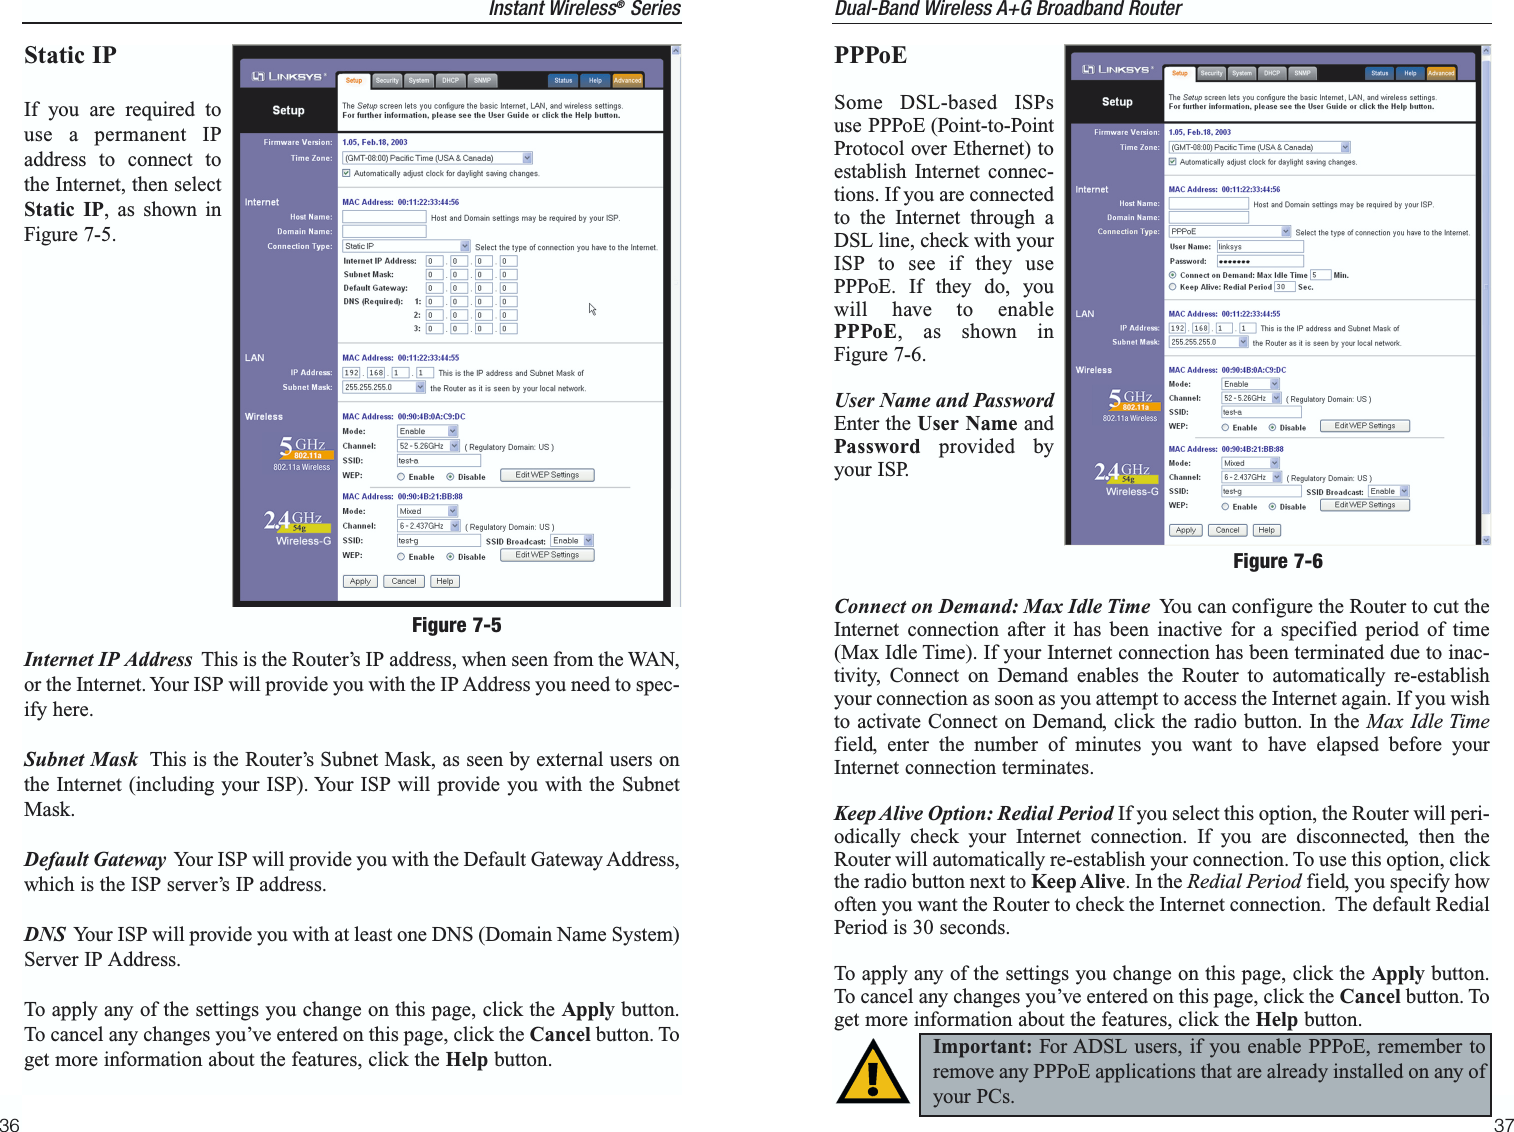
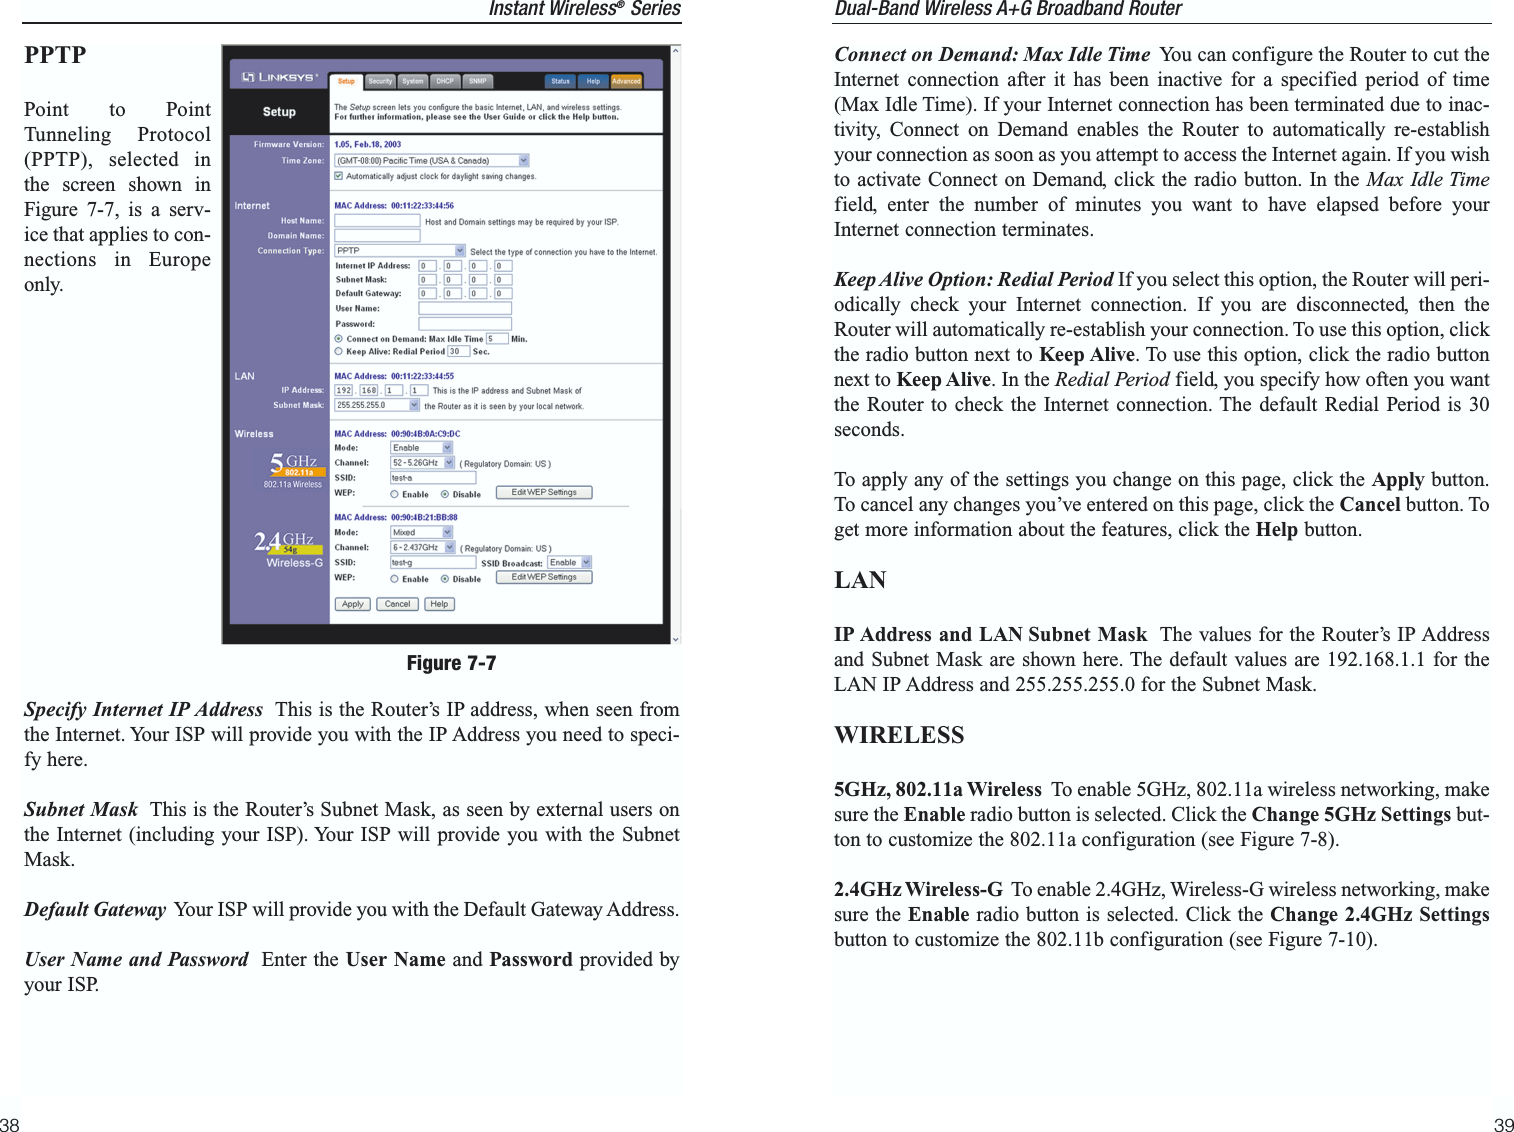
User manual part 3
Navigation menu
Upload a User Manual
Namespaces
Wiki Guide
HTML
PDF
Info
Views
User Manual
Discussion / Help
Navigation