Cellon Communications Technology PCD7519 GSM Mobile Phone User Manual T38PCD7519
Cellon Communications Technology (Shenzhen) Co.,Ltd. GSM Mobile Phone T38PCD7519
UserManual.wiki
>
Cellon Communications Technology
>
PCD7519 User Manual
>
manual
Contents
1.
manual
2.
manual_re
manual
Navigation menu
Upload a User Manual
Namespaces
Wiki Guide
HTML
PDF
Info
Views
User Manual
Discussion / Help
Navigation


![205 Calling 5.1 Making a Voice Call Note: You can only make a voice call when the network name appears on the screen. 1. Enter the phone number using the keypad. 2. Press Left Soft Key Option > Call to make a voice call. 3. Press End/Power Key to end the call. 5.1.1 Mute or Unmute a call During a call, press the Light Soft Key [Option] and select Mute on or off. If you select Mute on, the microphone will be deactivated. When you switch from one call to another, muting will be cancelled. 5.1.2 Call recording During a call, press the Left Soft Key [Option] and select Sound Recorder to record the conversation. When you end the call, the recording will stop and will automatically be saved in the AMR format. You can also press the Right Soft Key [Stop] from the recording menu to end the recording. Note: In most countries, recording telephone conversations is subject to legislation. We advise you to notify the caller if you intend to record your conversation and only do so if they agree. 5.2 Making an International Call 1. Press “+” key to enter the international prefix (character +). 2. Enter the country code.](https://usermanual.wiki/Cellon-Communications-Technology/PCD7519.manual/User-Guide-1473447-Page-22.png)
![213. Enter the area code (normally without the 0 before it) followed by the phone number. 4. Press the Dial/Answer Key to call directly. 5.3 Making an Emergency Call You can make an emergency call anytime, regardless of whether the cellular phone has been registered on the network. In idle mode, enter the emergency call number (specific number in the caller's country) then press the Dial/Answer Key. If there is no SIM card, pressing the Right Soft Key [SOS] can also bring you to the emergency call screen displaying the confirmation. Press the Left Soft Key [Yes] to directly make an emergency call. 5.4 Making a Second Call (Network Dependent) You can make a second call by putting the current call on hold: 1. During a call with the first caller, enter the second caller’s number using the keypad. 2. Press the Dial/Answer key to dial the second party’s number. The first caller will be automatically placed on hold. This is a network-dependent feature; please contact your service provider for more details. 5.5 Making a Conference Call (Network Dependent) Your phone supports multi-party calls of up to five members. When there is a call waiting while you are already on the phone, you can carry out the following operations to establish the multi-party call: 1. Press the Dial/Answer Key to answer the second call. The first call will be put on hold automatically. 2. Select Conference from Option menu. The two calls will be combined, and a conference call is](https://usermanual.wiki/Cellon-Communications-Technology/PCD7519.manual/User-Guide-1473447-Page-23.png)
![22established. During the multi-party call, you can answer a new incoming call or add a new member to the call by dialing the new member (the ongoing multi-party call will be put on hold automatically). Once the call is established, select Conference from the Option menu to add the new member to the multi-party call (you can add up to five members). This is a network-dependent feature. Please contact your service provider for more details. 5.6 Switching Calls (Network Dependent) When you have one active call and one call on hold, you can press the Left Soft Key [Options], and then select Swap to switch between the 2 calls. 5.7 Answering a Call Press the Dial/Answer Key to answer a call. 5.8 Rejecting/Ending a Call Press the End/Power Key or Right Soft key [Reject] to reject a call. Press the End/Power key or select End from the Option menu to end a call. 5.9 Answering a Second Call (Network Dependent) If you have activated call waiting, a new incoming call screen is shown to inform you when there is a second incoming call. You can: 1. Press the Dial/Answer Key, or select Answer from [Options] to answer the second call. The current call will be put on hold automatically. 2. Press the Right Soft Key [Reject] to reject the second call.](https://usermanual.wiki/Cellon-Communications-Technology/PCD7519.manual/User-Guide-1473447-Page-24.png)
![236 Function Menu 6.1 How To Use 6.1.1 Select Menu Press the Left Soft Key [Menu] to enter the main menu in idle mode. Press the Navigation Key to change menus and press the Left Soft Key [OK] to enter the selected menu. Note: The functions described below only appear when a SIM card is inserted. If you power on your phone without a SIM card, you will have limited access to menu functions when you press the Left Soft Key [Menu]. Press the Right Soft Key [SOS] to make an emergency call. The aim of this function is to allow you to dial an emergency number by keypad when you do not have a SIM card. You can exit a menu and return to idle mode by pressing the Right Soft Key [Back] or the End/Power Key. 6.2 Main Menu Your phone supports two main menu views. Press Left Soft Key [Option] to switch between List view and Grid view. Highlight one menu, press Left Soft Key Option > Move to to change the main menu order.](https://usermanual.wiki/Cellon-Communications-Technology/PCD7519.manual/User-Guide-1473447-Page-25.png)
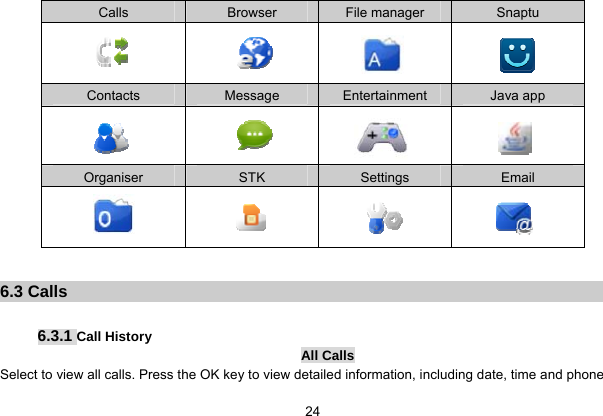
![25number. Press the Left Soft Key [Option] to access following operations: Voice call: Press to make a voice call. Copy to dialer: Copy the number to Dialer. In dialer menu, you can edit the number. After editing, you can choose to call, video call, send message, create contact or add to contact. Send message: Press to send a message to the number. Add to contacts: Press to add the number to your contacts. Delete: Press to remove the selected call from the log list. Missed Calls Select to view the missed calls. Detailed information and related operations are similar to those of All Calls. Dialled Calls Select to view the dialed calls. Detailed information and related operations are similar to those of All Calls. Answered Calls Select to view received calls. Detailed information and related operations are similar to those of All Calls. Note: You can also press the Dial/Answer Key in idle mode to the call history. Note: You can also press the Dial/Answer Key in idle mode to the call history.](https://usermanual.wiki/Cellon-Communications-Technology/PCD7519.manual/User-Guide-1473447-Page-27.png)
![266.4 Browser This phone supports a WAP Browser. You can obtain various services such as up-to date news, weather, sport, and other information- as well as other Internet services. These services are designed and maintained by WAP service providers. Open home page: Select to access the homepage directly. You can also set the homepage address in Browser > Settings > Home page menu. Open new page: Select to enter a new web address, and then press the Left Soft Key [Open] to open. Bookmarks: Select to add the web pages that you frequently visit in the Bookmark list, where you can manage and organize them. When you enter the menu, bookmark entries are displayed. To connect to the web address of a particular bookmark entry, press the Left Soft Key [Option] and then choose Open. Stored pages: Allows you to store your favorite web pages and access them directly here. History: This function allows you to check the web sites you have already visited. Resume: Allows you to resume the web page. Settings: Select to configure corresponding browser parameters. Exit browser: Select to exit the browser. 6.5 File manager This menu allows you to manage the files saved in Phone and SD card. When you highlight one of them, the related folders are displayed. Phone The system default folders of Phone are Memory, Images, Videos, Sounds, Others and Bluetooth.](https://usermanual.wiki/Cellon-Communications-Technology/PCD7519.manual/User-Guide-1473447-Page-28.png)
![27You can also add folders for your preference. To add a new folder, select Option > Manage > New folder. Press the Left Soft Key [Option] to access the following options: Delete: Select to delete the selected folder. Send via: Allows you to send via MMS, Email and Bluetooth. Rename: Select to rename the selected folder or file. Manage: Select to Move to folder, Copy to folder or New folder. List by: Select to list by date, name, type or size (largest first). Properties: Allows you to view the file details of format, size, date and protect. Storage status: Allows you to view the storage status. SD Card You should insert a T-FLASH card first, and then enter this menu to view the files and folders in the memory card. The operation is similar to the operation on the phone. If you want to modify or add files to this menu, such as audio files or video files, you should connect your cellular phone to a PC by using a USB cable. On the phone, choose “Mass Storage”, then, you can edit the File Manager menu on the PC. When the transfer is finished, please make sure that you safely remove your device by clicking . 6.6 Snaptu It’s an application for giving the users a fast, stylish experience to access social networking sites through](https://usermanual.wiki/Cellon-Communications-Technology/PCD7519.manual/User-Guide-1473447-Page-29.png)
![28mobile. For accessing these sites on your phone, you need to activate GPRS on your SIM card. For activation, please contact your service provider. 6.7 Contacts Your contacts list is saved either on the SIM card’s memory or Phone’s memory. 6.7.1 Search In standby mode, press the Left Soft key to enter the main menu, and then select Contacts. Now you can search names and numbers saved in the Contacts. Key in the full name or first character of contact person’s name and the contacts list will automatically jump to the character you’ve entered, or the matched contact will be displayed. 6.7.2 View Contacts In standby mode, press the Left Soft key to enter the main menu, and then select Contacts. Your phone supports four kinds of contacts: All Contacts, SIM Contacts, Phone Contacts and Groups. Select one contact, press Left Soft Key [Option] to access following options: Add new contact: Allows you create a new entry into the contacts list. It will be saved either in the phone memory or SIM memory. To add a new contact:](https://usermanual.wiki/Cellon-Communications-Technology/PCD7519.manual/User-Guide-1473447-Page-30.png)
![291. In the Contacts menu, choose Option > Add new contact, and then enter the contact information. 2. Press Left Soft Key [Done] to save the new contact. Note, If you want to change the storage location, please select Add new contact > Your phone memory/Your SIM memory Notes: 1. Your phone allows you to save 1000 entries of phone numbers. 2. Picture and Ringtone can be selected from both the default and file manager. Send message: Allows you to send messages to the contact person. Voice call: Press to make a voice call. Copy to dialer: Copy the contact to dialer. In dialer menu, you can edit the number. After editing, you can choose to call, video call, send message, create contact or add to contact. Send as card: Allows you to send the contact as card via SMS, MMS and Bluetooth. Delete: Press to delete the selected contact. Move to: Allows you to move the contacts among two storages. Copy to: Allows you to copy the contacts among two storages. Export to SD card: Allows you to export the contacts to SD card. This function is not available until the SD card is inserted. Import from SD card: Allows you to import contacts from SD card to phone or SIM card. This function is not available until the SD card is inserted.](https://usermanual.wiki/Cellon-Communications-Technology/PCD7519.manual/User-Guide-1473447-Page-31.png)
![32Inbox Your phone saves the text messages and multimedia messages (MMS) that have been received in the Inbox folder. You can press the Navigation Key Up or Down to select a message and then press the Ok Key to read the message. When reading a text message, you can also press the Left Soft Key [Options] to Reply, Delete, Protect, Forward, Add to contacts, Send, Call, Save as template, Details and Previous Message. Drafts Your phone saves the saved messages in the Drafts folder. Sent Your phone saves the messages sent successfully in the Sent messages folder. Outbox The Outbox allows you to view unsent messages in a list. Templates This function supports to set several Text message and MMS templates. Memory status In this menu, you can view the details of Phone/SIM memory status. Settings 1. Message settings](https://usermanual.wiki/Cellon-Communications-Technology/PCD7519.manual/User-Guide-1473447-Page-34.png)
![33 Receiving settings: Allows you to set Retrieve mode, Accepted messages, Reply for delivery, SMS auto view, Compose ->View->Compose and Auto Erase. Sending settings: Allows you to set the MMS read report, Delivery report, Validity period, auto save, MMS priority, MMS delivery time, MMS Sender Visibility, MMS creation mode, SMS message centre, SMS type and Split SMS. Quick Text: There are several default quick texts in your phone. You can also select Option > New to add new quick text. Signature: Allows you to edit a signature and insert it into your messages. Display settings: Your phone supports to set Font size, View picture inline, Auto-play video and Letter Mode. Reply setting: Allows you to reply messages in blank message or with original text. 2. Auto-delete: You can set to auto-delete the messages in Inbox and Send or not. 3. Spam control: Press Left Soft Key [Select] to Enabled/Disabled spam control. 4. Auto-move filters: Allows you to set corresponding operations to the messages that received. 6.9 Entertainment 6.9.1 Games You can enjoy the games that are built in your cellular phone. Your phone provides you with two games to play. Press Navigation Key Up/Down to select one game.](https://usermanual.wiki/Cellon-Communications-Technology/PCD7519.manual/User-Guide-1473447-Page-35.png)
![34Then press Left Soft Key [Select] to choose Start Game, Game Speed, Game Help or Best Grades. 6.9.2 Multimedia Camera Your cellular phone features a digital camera that allows you to take pictures, store them, set them as wallpaper or send via MMS or Bluetooth to another device. Please ensure that the camera lens is clean before you take pictures, as small dust particles can strongly affect the picture quality. How to ... Launch Camera From idle mode, press OK Key to enter the main menu and then select Entertainment > Multimedia > Camera Zoom Press the Navigation Key up or down▲/▼ to select Zoom and then press Navigation Key Left or Right ▶/◀ to adjust Zoom values: 0X,1X,2X,3X,4X,5X. Effect Press the Navigation Key up or down▲/▼ to select Effect and then press Navigation Key Left or Right ▶/◀ to change effect: Off, Black/white, Negative, Sepia, Green. White Balance Press the Navigation Key up or down▲/▼ to select White Balance and then press Navigation Key Left or Right ▶/◀ to set White Balance: Auto, incandescence, strong light, Cloudy, Fluorescent. Brightness Press the Navigation Key up or down▲/▼ to select Brightness and then press Navigation Key Left or Right ▶/◀ to adjust Brightness.](https://usermanual.wiki/Cellon-Communications-Technology/PCD7519.manual/User-Guide-1473447-Page-36.png)
![35Brightness level is 1 to 9. Take a picture Press the OK Key The picture will be saved to File mag. The picture will be saved in JPEG format. Exit Press the End/Power Key or the Right Soft Key. At any point in time, you can press the End/Power Key to cancel the current operation and return to idle mode. Camera Option Menu When camera mode is activated you can change a number of settings by pressing the Left Soft Key [Option] before taking a picture: Options Description Go To Pictures Enter the album according to the storage. If the storage is the phone, it will shortcut to File manager > Images > Photos. Go To Video Mode Go To Videos: Allows you to view the video list. Go to Photo Mode: Switch to photo mode. Video Camera Setup: Video Quality: Good, Better, Best Video Length: Not Limit, 60S, 30S,15S Video Size: Not Limit,295K,195K,95K Resolution: Small(176*144),Large(240*320)) Recording Sound: On/Off Switch Storage Device: Phone, SD card.](https://usermanual.wiki/Cellon-Communications-Technology/PCD7519.manual/User-Guide-1473447-Page-37.png)
![37 To play the audio files The keypad operations during music playback are as follows: Key Description The OK Key Select Menu >Entertainment > Multimedia > Media player > Now playing. Press OK key to play/pause current music. Navigation Key ◀ or ▶ Short press to select the previous song/next song. Press and hold to rewind/fast forward the track during playback. * # Adjust volume. Left Soft Key [Option] Press Left Soft Key [Option] to following options 1. Now playing list: View the playing list in All Tracks folder. 2. View music main menu: Allows you to go back music main menu. 3. Settings: Select to set Equalizer setting, Play mode, Sleeping mode and Lyrics display 4. Add to playlist: Supports to add now playing song to the playlist. 5. Hide album cover: Allows you to hide the album cover. 6. Send via: You can send the file via MMS, Email or Bluetooth. 7. Set as: Select to set current music as profile ringtone and caller ringtone. 8. Listen via Bluetooth: Allows you to listen to music via Bluetooth.](https://usermanual.wiki/Cellon-Communications-Technology/PCD7519.manual/User-Guide-1473447-Page-39.png)
![38Right Soft Key [Back] Return to previous menu. To play video files 1. In Media player menu, choose Movies and select the file you wish to play. 2. After a certain video clip is selected, press OK key to play. During the video playing, you can press Left Soft Key [Option] to the following actions: Full screen view: When playing a video, you can press Option > Full screen view to view the video in full screen. Listen via Bluetooth: Supports to listen via Bluetooth. Send via: You can send the file via MMS, Email or Bluetooth. Set as: Select to set current file as profile ringtone and caller ringtone. Settings: Select to set Equalizer setting and Play mode. Details: Allows you to view the video details of Title, Format, Resolution, Size and Date created. In Media player menu, you can organize music into categories, such as All Tracks, Artists, Albums and Playlists. If you added new albums or music tracks to your phone, you can find them in the relative folders.](https://usermanual.wiki/Cellon-Communications-Technology/PCD7519.manual/User-Guide-1473447-Page-40.png)
![421. In Organiser menu, choose Calendar. 2. Select a day in the calendar. 3. Select Option > View or press Center Soft Key [View] to view the event. You can also select Option > New to add a new event. 4. Choose a type of the event. Input the start and end time of your event, and describe the event contents in Location/detail. 5. After you finish editing the contents of your event, press Left Soft Key [Save] to save your description. 7. Choose Calendar alarm to turn on or off. 8. Choose Off/ Every day/ Every week/ Every month/ Every year in Repeat. 9. Then you can edit other information. 10. Press Done to save the event. 6.11.2 Notepad This function allows you to make note list as reminder. To create a note: 1. In Organiser menu, choose Notepad. 2. Select Options > Create new to create a new note. 3. Choose a type of note and edit the note details. 4. After you finish editing the contents of your note, press Left Soft Key [OK] to save.](https://usermanual.wiki/Cellon-Communications-Technology/PCD7519.manual/User-Guide-1473447-Page-44.png)
![43 6.11.3 Clock World time The world time function provides time information on major cities worldwide. Press Left Soft Key Option > Add to select and add a city. Your phone will automatically display the time and date information of the added cities. Press Right Soft Key [Exit] to quit. Note: If you want to change the home city, please go to Settings > Phone Setting > Time and Date > Time Zone. Clock Alarm This function allows you to set the alarm to ring at the time specified. The alarm clock works even when the phone is switched off. In Clock menu, press Navigation Key Left/Right to select Clock Alarm. Select Option > Add to set alarm. The detail alarm settings are as follows: Alarm: Press OK Key to turn the alarm on/off. Alarm time: Press OK key to edit the alarm time. Alarm name: You can type the alarm name to identify different alarms. Repeat: Choose Every day/Monday/Tuesday/Wednesday/Thursday/Friday/Saturday/Sunday.](https://usermanual.wiki/Cellon-Communications-Technology/PCD7519.manual/User-Guide-1473447-Page-45.png)
![44Alarm ringtone: Allows you to customize the alarm tone. Vibration: Press OK Key to turn the vibration on/off. Alarm snooze time: Allows you to set alarm snooze time from 1 minute to 60 minutes. Your phone supports maximum 10 alarms Stopwatch This function is designed to store the timepiece, which is to start or stop for exact timing. Countdown Your phone supports countdown function. 1. In standby mode, select Menu > Organiser > Clock. 2. Press Navigation Key Left/Right to countdown. 3. In countdown menu, press Left Soft Key [Set] to set the countdown time. 4. Press OK key to back countdown menu. Then press Start to start counting down. 6.11.4 Calculator Calculator applies simple calculator function such as addition, subtraction, multiplications and division. To start using 1. Go to Organiser and select Calculator. 2. Enter the number with keypad, and then click the “+” for addition, or click the “-” for](https://usermanual.wiki/Cellon-Communications-Technology/PCD7519.manual/User-Guide-1473447-Page-46.png)
![46This menu allows you to select a profile from Normal, Silent, Meeting, Outdoor, Offline, and Customized. Press Left Soft Key [Select] to activate the selected profile. If you want to customize Profile settings, press OK Key to the following settings: Call alert type: Select to set the alert type as Ring only, Increasing ring, Vibrate only, Vibrate then ring, Vibrate and ring, Vibrate and Increasing ring or Mute. Ring volume: Select to adjust the volume for Ring tone. Keypad tone: Select to adjust the volume for keypad. Profile name: Allows you to customize the profile name. Reset default: Allows you to reset settings to factory mode. 6.13.2 Display Wallpaper: Allows you to change wallpaper displayed on the idle screen. 1. In Settings menu, choose Display > Wallpaper. 2. Select one image in wallpaper list and set it as wallpaper. 3. Or you can choose Add more to add pictures from other folders to wallpaper list. Widgets: After you select one widget, the selected widget will be displayed in the idle screen. In standby mode, press Navigation Key Up/Down to highlight the widgets. Then press OK Key to view detail information. Note: Your phone supports maximum 4 widget slots.](https://usermanual.wiki/Cellon-Communications-Technology/PCD7519.manual/User-Guide-1473447-Page-48.png)
![49Voice call Call diverting: Allows you to set the call condition by which calls are diverted to another number. Call barring: Allows you to restrict incoming calls and outgoing calls from your phone. Call waiting: Allows you to Activate/Deactivate call waiting function. Auto redial: If it is on, your phone will make a maximum attempts to connect the call after an unsuccessful call attempt. TTY mode: Allows you to select full mode, VCO mode, HCO mode or deactivate. Voicemail This menu allows you to set your voice mailbox number and listen to your voice messages. 6.13.6 Bluetooth Bluetooth is a short-range wireless communications technology. Devices with Bluetooth capabilities can exchange information over a distance of about eight meters (26 feet) without requiring a physical connection. Settings Switch on Bluetooth 1. In standby mode, select Menu > Settings > Bluetooth. 2. In Bluetooth menu, press Navigation Key Left/Right to Highlight Settings. 3. Press Navigation Key Up/Down to select Bluetooth. 4. Press Left Soft Key [Select] or OK key to Switch on/Switch off Bluetooth. 5. When the Bluetooth is switch on, your phone can detect other Bluetooth-enabled devices. My phone’s visibility](https://usermanual.wiki/Cellon-Communications-Technology/PCD7519.manual/User-Guide-1473447-Page-51.png)
![53Security (SIM) This feature supports to Lock PIN, Change PIN code and Change PIN2 code. 6.13.10 Reset By pressing the Left Soft Key [OK], you will be required to enter the phone lock password to restore the phone to its original factory settings. After entering and confirming the correct phone lock password, most of the settings in your cellular phone will be restored to factory settings. 6.14 Email Before receiving and sending emails, you must create an Email account first. To create an account 1. Select Menu > Email to enter Mail Box interface. 2. Press Navigation Key Up/Down to highlight Account. 3. Press OK key to confirm. 4. Add a new email account by entering the details of Name, Mailbox type, Account, Password, Server, Server type, Receiver Server, Receiver server port, Sender Server and Sender server port. Then follow the steps which prompt you to go ahead. 5. After you’ve finished, press Left Soft Key [Save] to save the new account.](https://usermanual.wiki/Cellon-Communications-Technology/PCD7519.manual/User-Guide-1473447-Page-55.png)
![54To write an email 1. In idle mode, press the Left Soft key to access the main menu, and then select Email. 2. In Mail Box menu, enter the type, account and password details that you have set before. 3. Press Left Soft Key [Login] to log in to the email account. 4. After login, press Left Soft Key Menu > New mail to write an email. 5. Add the Email address in the fields of To, Cc, and Bcc of where you would like the message sent. 6. Scroll to the subject field, enter the subject by pressing OK key to Edit interface. 7. Scroll to Attachment to add an attachment and 8. When you have finished, select Send. A popup screen appears “Send this mail?” 9. Press Left Soft Key [OK] to confirm and send the mail.](https://usermanual.wiki/Cellon-Communications-Technology/PCD7519.manual/User-Guide-1473447-Page-56.png)