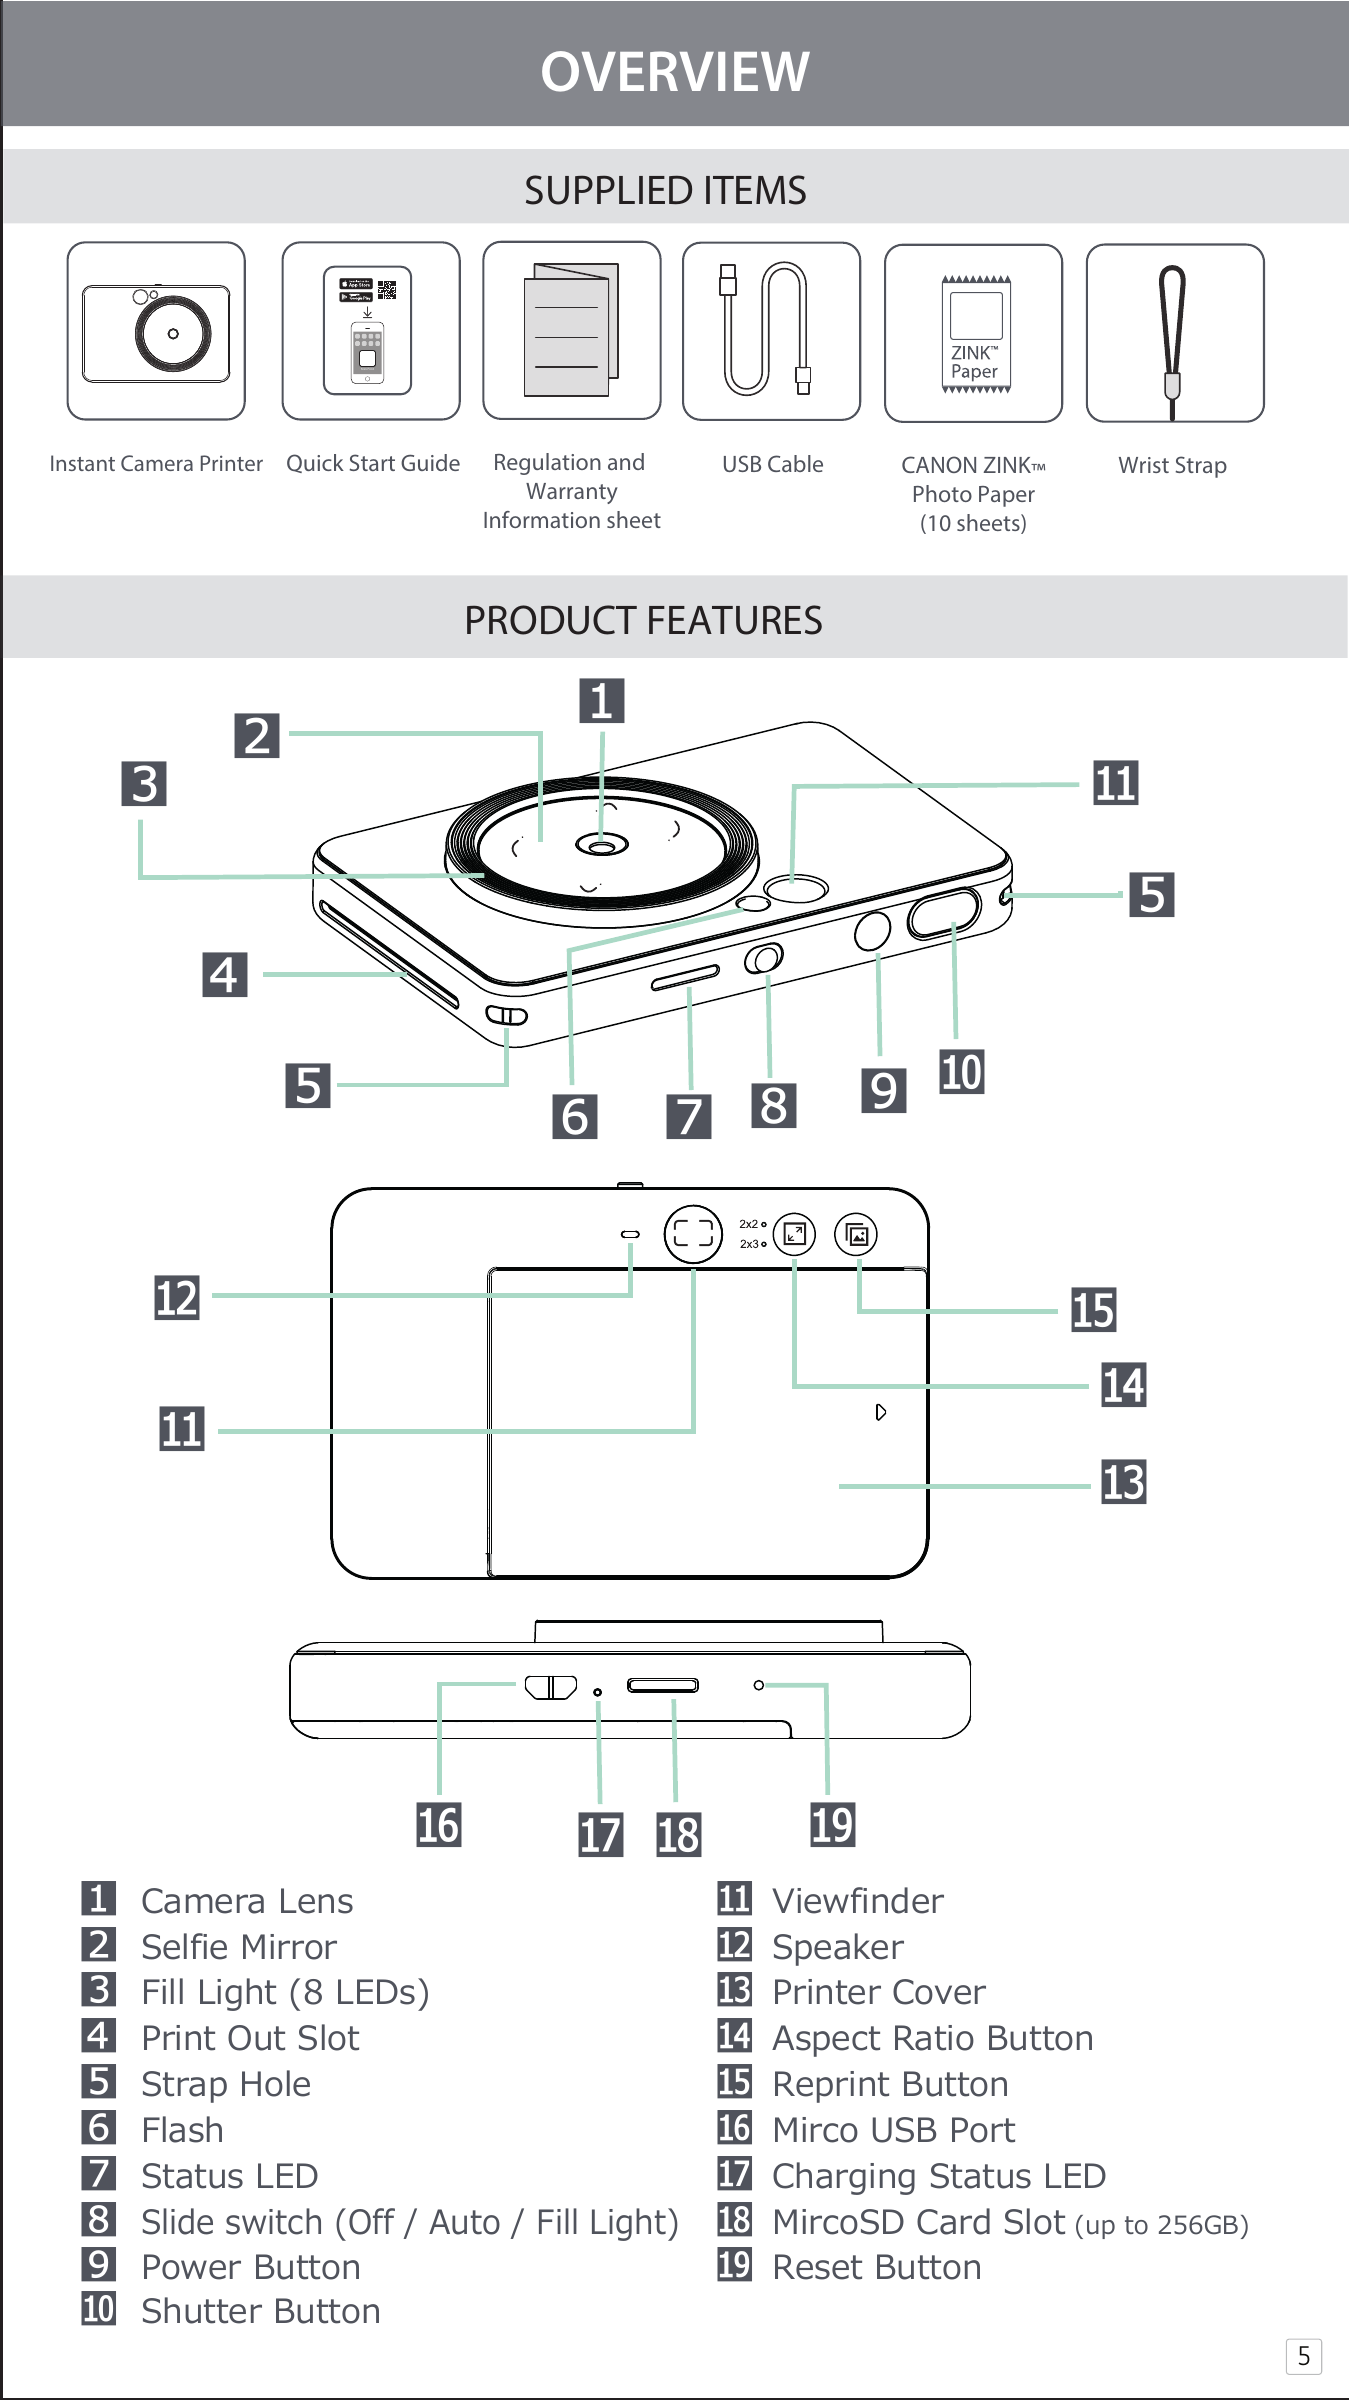
Canon Electronic Business Machines PP2001 Instant Camera Printer User Manual ZV 123 English CLIQ
Canon Electronic Business Machines (H.K.) Co., Ltd. Instant Camera Printer ZV 123 English CLIQ
Contents
- 1. Users Manual (Statement) rev.pdf
- 2. Users Manual rev.pdf
Users Manual rev.pdf
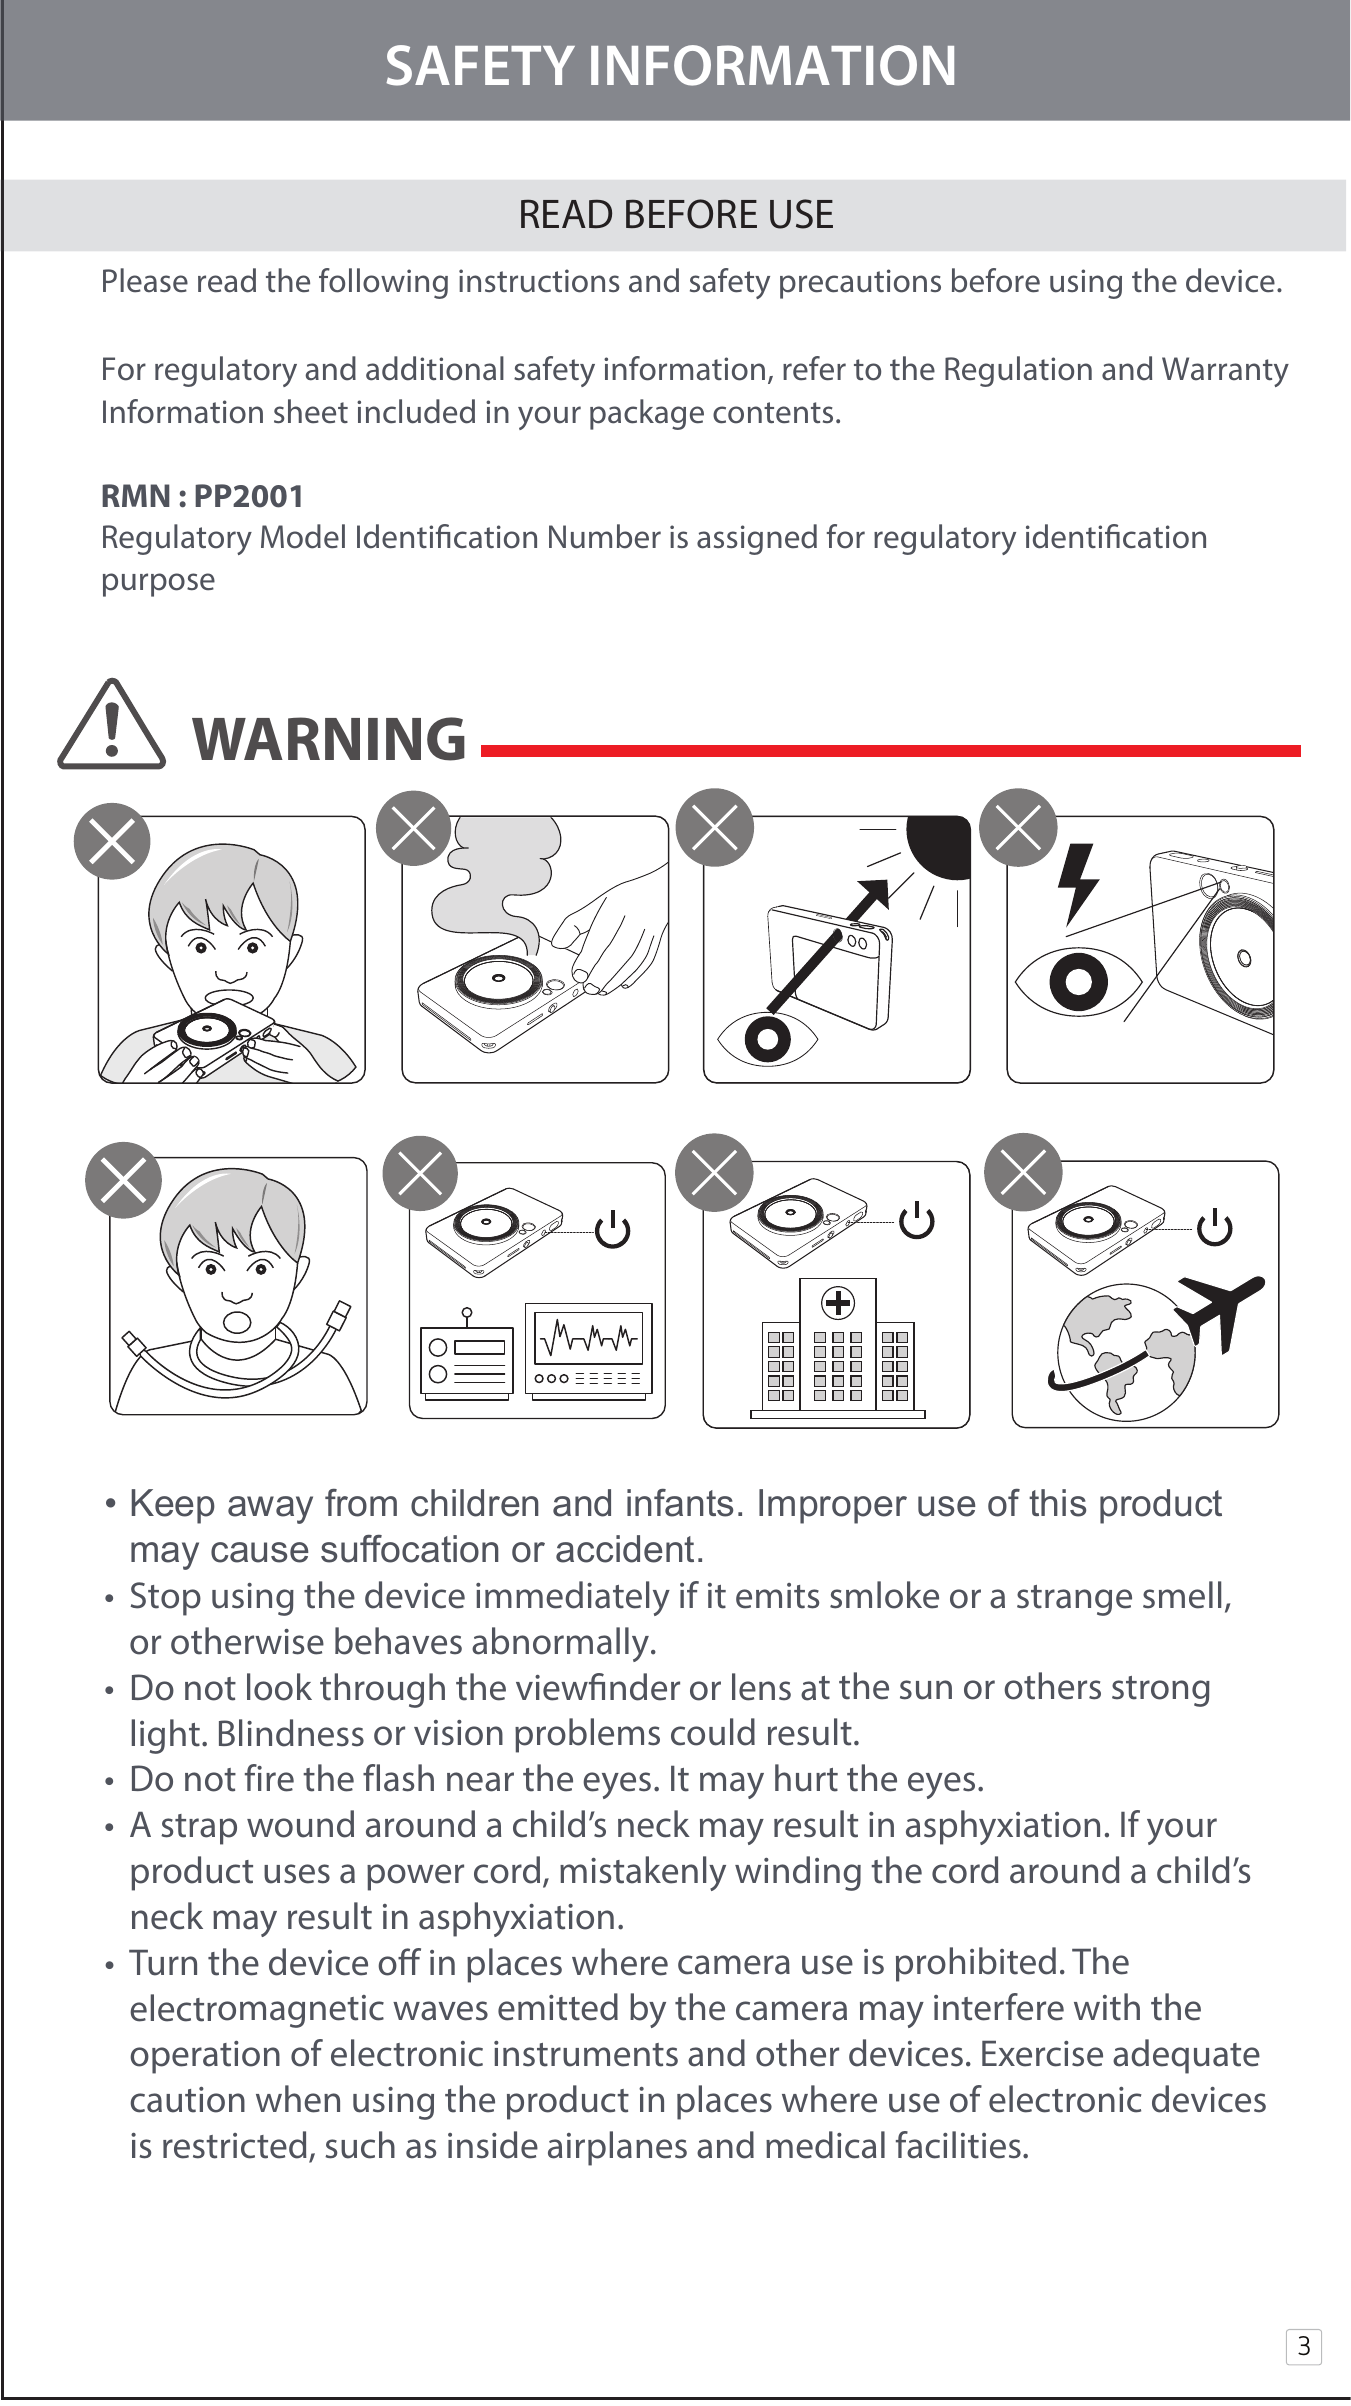
![• When operating in extreme weather, the printer might not print. Let the printer temperature adjust to recommended operating temperature of 59º to 90ºF (15º to 32ºC), before attempting to print again.• When charging, please charge the printer at the recommended temperature of 59º to 90ºF (15º to 32ºC).• Use a soft dry cloth to clean the device. Do not clean with a damp cloth or volatile liquids such as paint thinner.• Keep the top cover closed to avoid dust and other particles from entering the inside of the device.• If the device is not functioning properly, please contact the dealer you purchased this product from or Canon Service & Support at www.usa.canon.com/support• Never expose the battery to high temperature, direct heat, or dispose by incineration.• Electromagnetic inter ference or electrostatic discharge may cause the device to malfunction or the memory to be lost or altered. Should this occur, use the tip similar sharp object to press the [RESET ] button at the bottom of the device.4CAUTION](https://usermanual.wiki/Canon-Electronic-Business-Machines/PP2001.Users-Manual-rev-pdf/User-Guide-4200833-Page-4.png)

![11SELFIESELFIE TIMER ON APPUser can remote control the device through APP such as taking photos. Press [ ] on APP to enter Remote Control Page. Press Shutter Button to start countdown (3 seconds / 5 seconds / 10 seconds). The Timer LED light around Selife Mirror alert you the timer is enabled. The Timer will automatically disable after each photo is taken. * User can adjust timer via APP. 30 - ∞cm Focusing distance at 50cm Focusing distance at 50cm (Square Shape)](https://usermanual.wiki/Canon-Electronic-Business-Machines/PP2001.Users-Manual-rev-pdf/User-Guide-4200833-Page-11.png)
![12FLASH FUNCTIONSWhen the device is powered on with Auto-Flash selected, the camera will automatically trigger the ash if it is necessary for the light conditions.• There are 8 LEDs Fill Light built in the device around the lens to provide a soft light support when taking photo. PRINTING • The device can print the photo immediately after taking photo by shutter button. The photo will automatically print 2 x 3 (default)• The device can hold up to 3 images at a time to print. • The device can also get the photo data from smartphone via APP to print out the selected photo.• Press reprint button [ ] on the back right to reprint the latest captured photo. FLASH / FILL Aspect Ration Setting FILL Light IndicationSlide switch Position During [Shutter Button] Half-pressed OFF ANY NONE AUTO ANY NONE All 8 LEDs will light up FILL 3 x 2 4 LEDs will light up FILL 2 x 2](https://usermanual.wiki/Canon-Electronic-Business-Machines/PP2001.Users-Manual-rev-pdf/User-Guide-4200833-Page-12.png)