Brother BCLD10 Digital Cordless Handset User Manual BH7 cordless FCC 0707
Brother Industries, Ltd. Digital Cordless Handset BH7 cordless FCC 0707
UserManual.wiki
>
Brother
>
BCLD10 User Manual
Users Manual
Navigation menu
Upload a User Manual
Namespaces
Wiki Guide
HTML
PDF
Info
Views
User Manual
Discussion / Help
Navigation
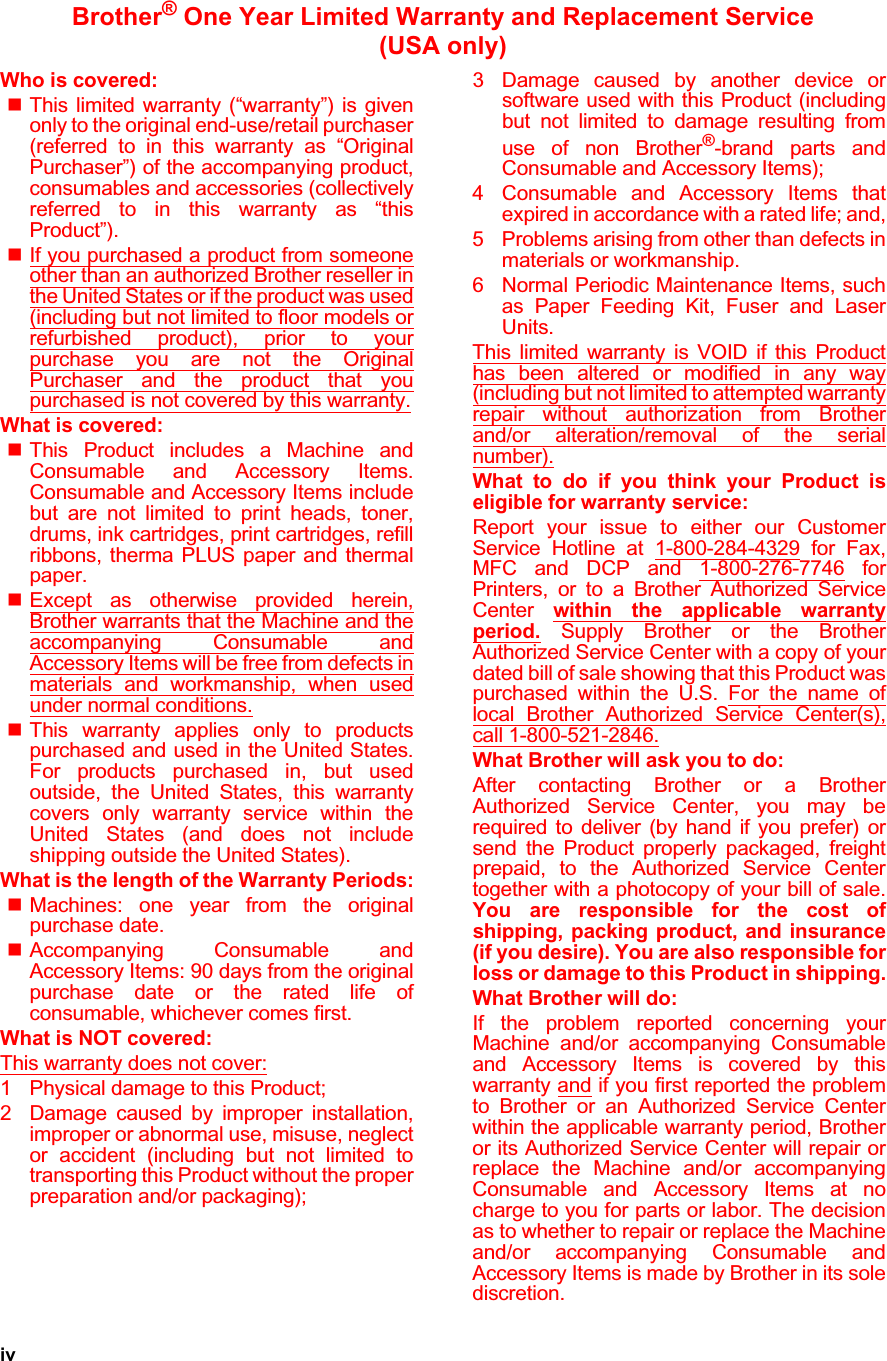

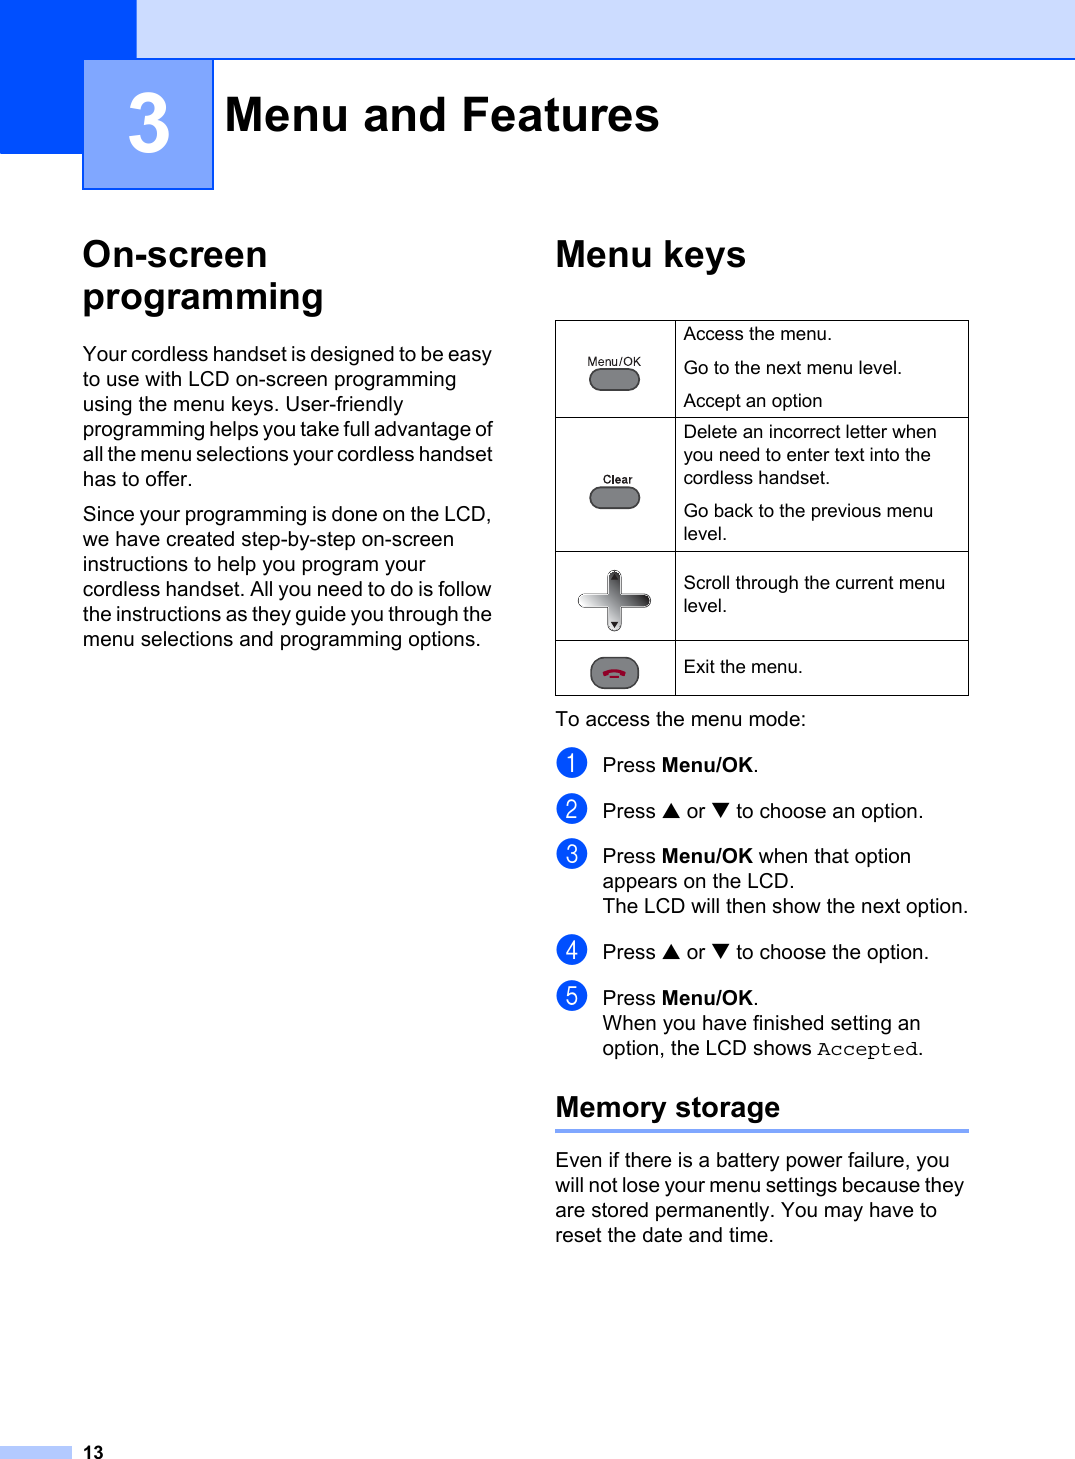
![Chapter 315Entering Text 3When you are storing a name or a number in the Tel-Index memory, you may need to enter text into the cordless handset. Most dial pad keys have three or four letters printed on keys. The keys for 0,# and l do not have printed letters because they are used for special characters.By pressing the proper dial pad key repeatedly, you can access the character you want.Putting spacesTo enter a space in a telephone number, press c once between numbers. To enter a space in a name, press c twice between characters.Making correctionsIf you entered an incorrect letter and want to change it, press d to move the cursor under the incorrect character. Then press Clear.Re-enter the correct character. You can also back up and insert letters.Repeating lettersIf you need to enter a letter that is on the same key as the letter before, press c to move the cursor to the right before you press the key again.Special characters and symbolsPress l,# or 0, repeatedly until you see the special character or symbol you want.Press Keyone timetwotimesthree timesfourtimes2ABC23DEF34GH I 45JKL56MNO67PQRS8TUV89WXY ZPress lfor (space) ! " # $ % & ' ( ) l+ , - . / mPress #for : ; < = > ? @ [ ] ^ _Press 0for É À È Ê Î Ç Ë Ö 0](https://usermanual.wiki/Brother/BCLD10/User-Guide-679410-Page-25.png)