Brother 8CAA20 Spread Spectrum Transmitter User Manual FAX 2480C 2580C UG US
Brother Industries, Ltd. Spread Spectrum Transmitter FAX 2480C 2580C UG US
UserManual.wiki
>
Brother
>
8CAA20 User Manual
>
User Manual 2
Contents
1.
User Manual 1
2.
User Manual 2
User Manual 2
Navigation menu
Upload a User Manual
Namespaces
Wiki Guide
HTML
PDF
Info
Views
User Manual
Discussion / Help
Navigation
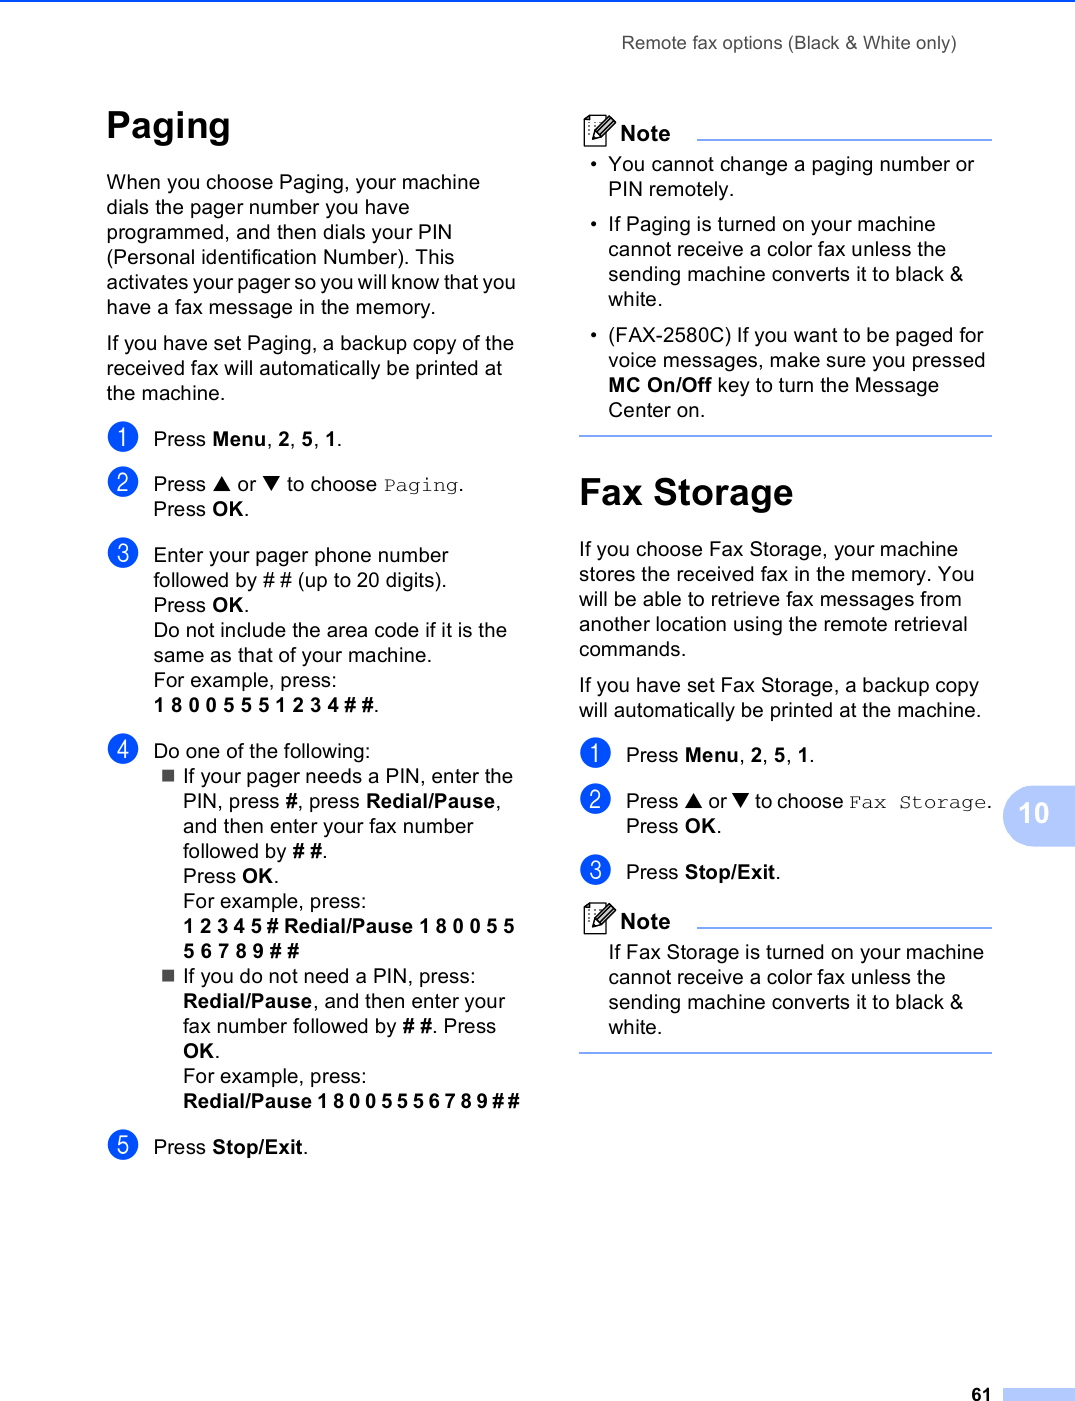
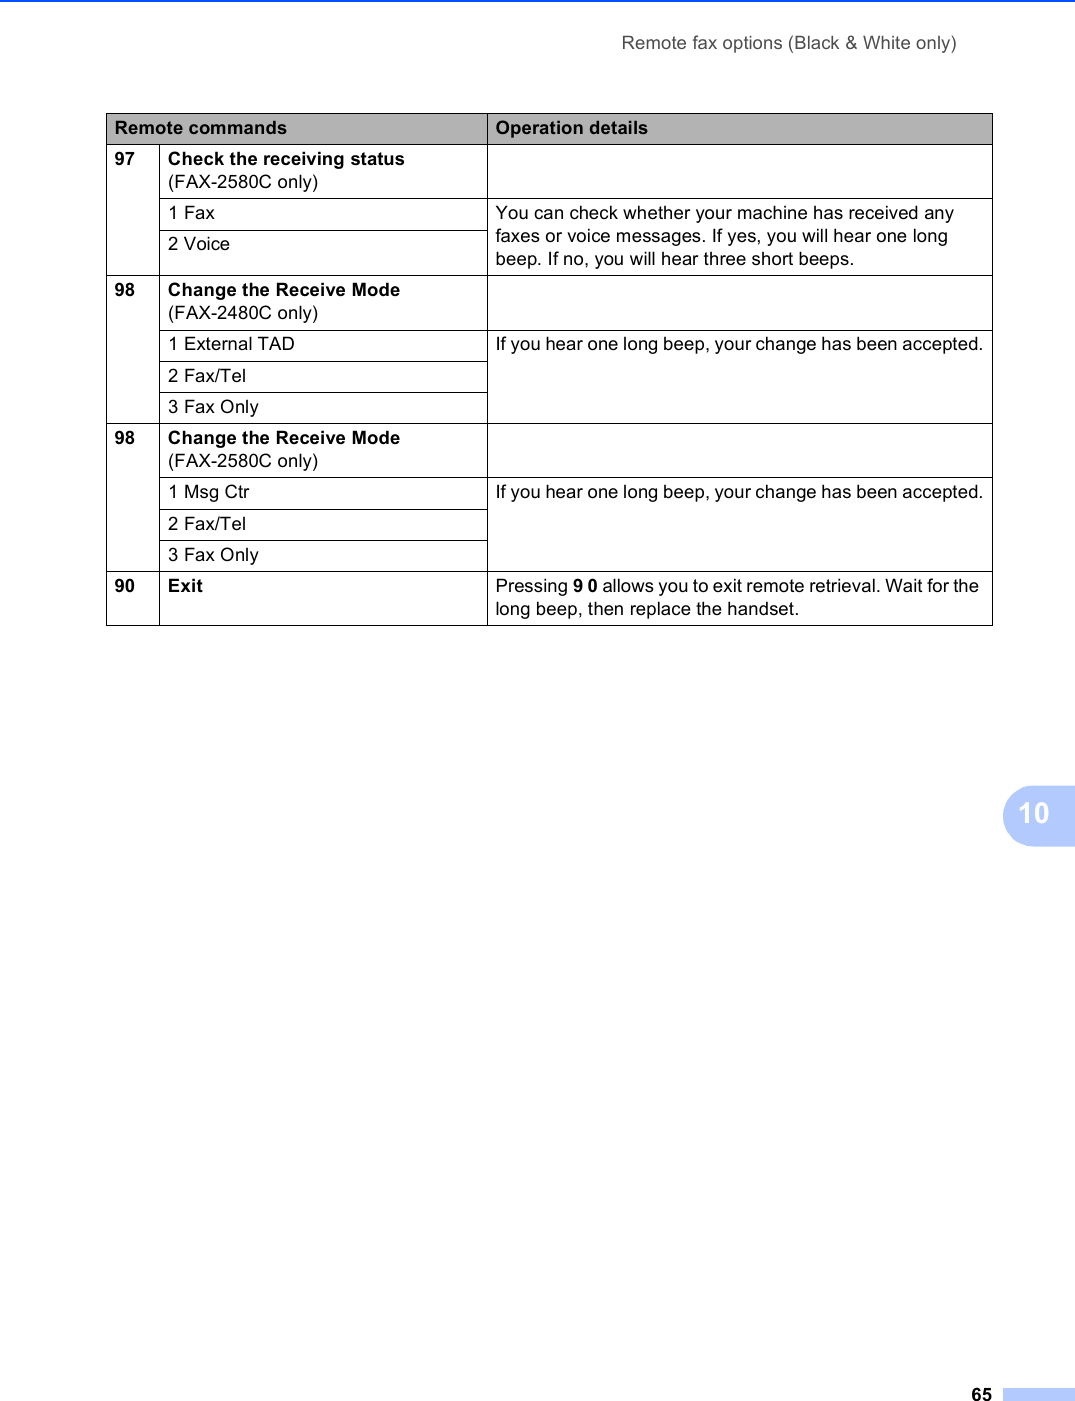
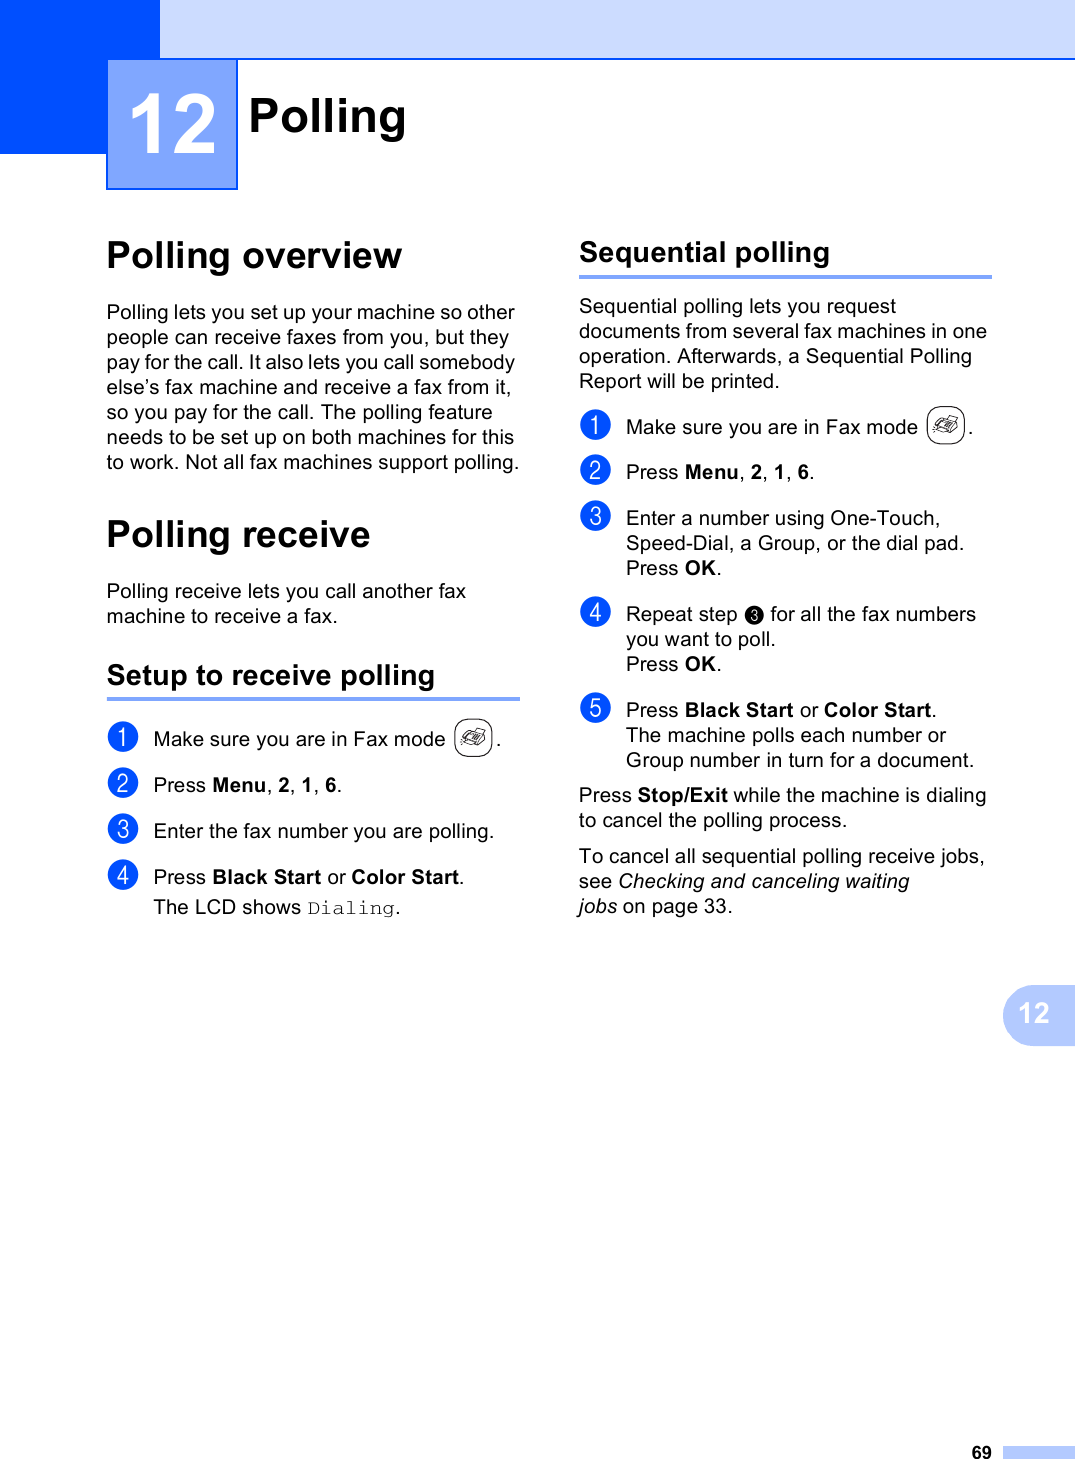
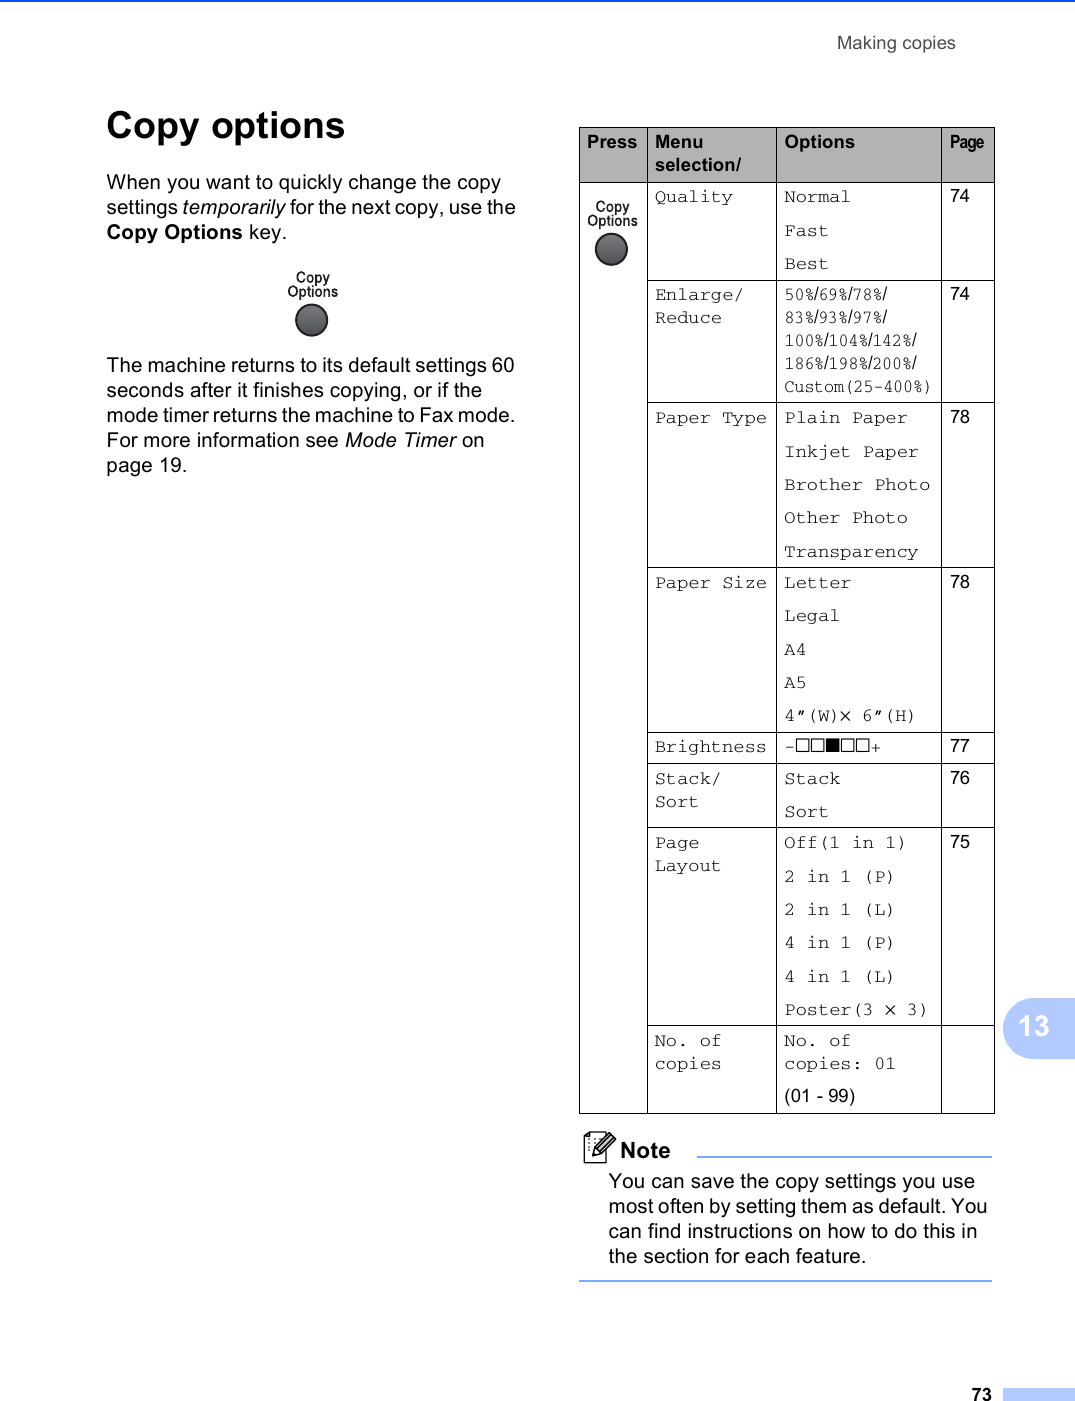


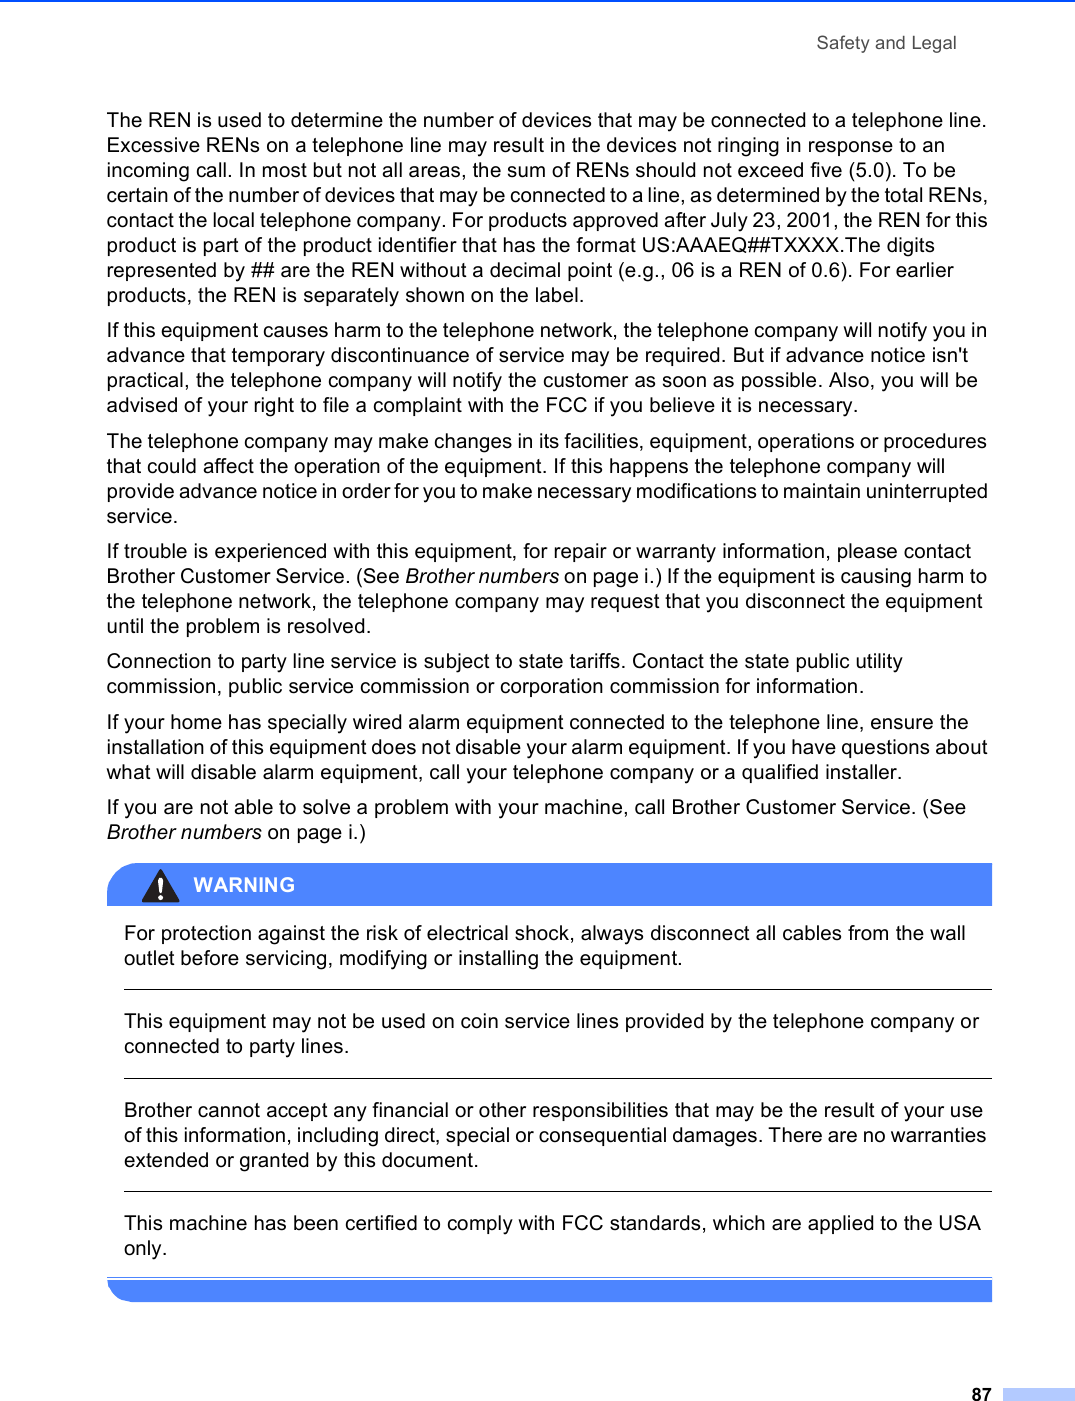

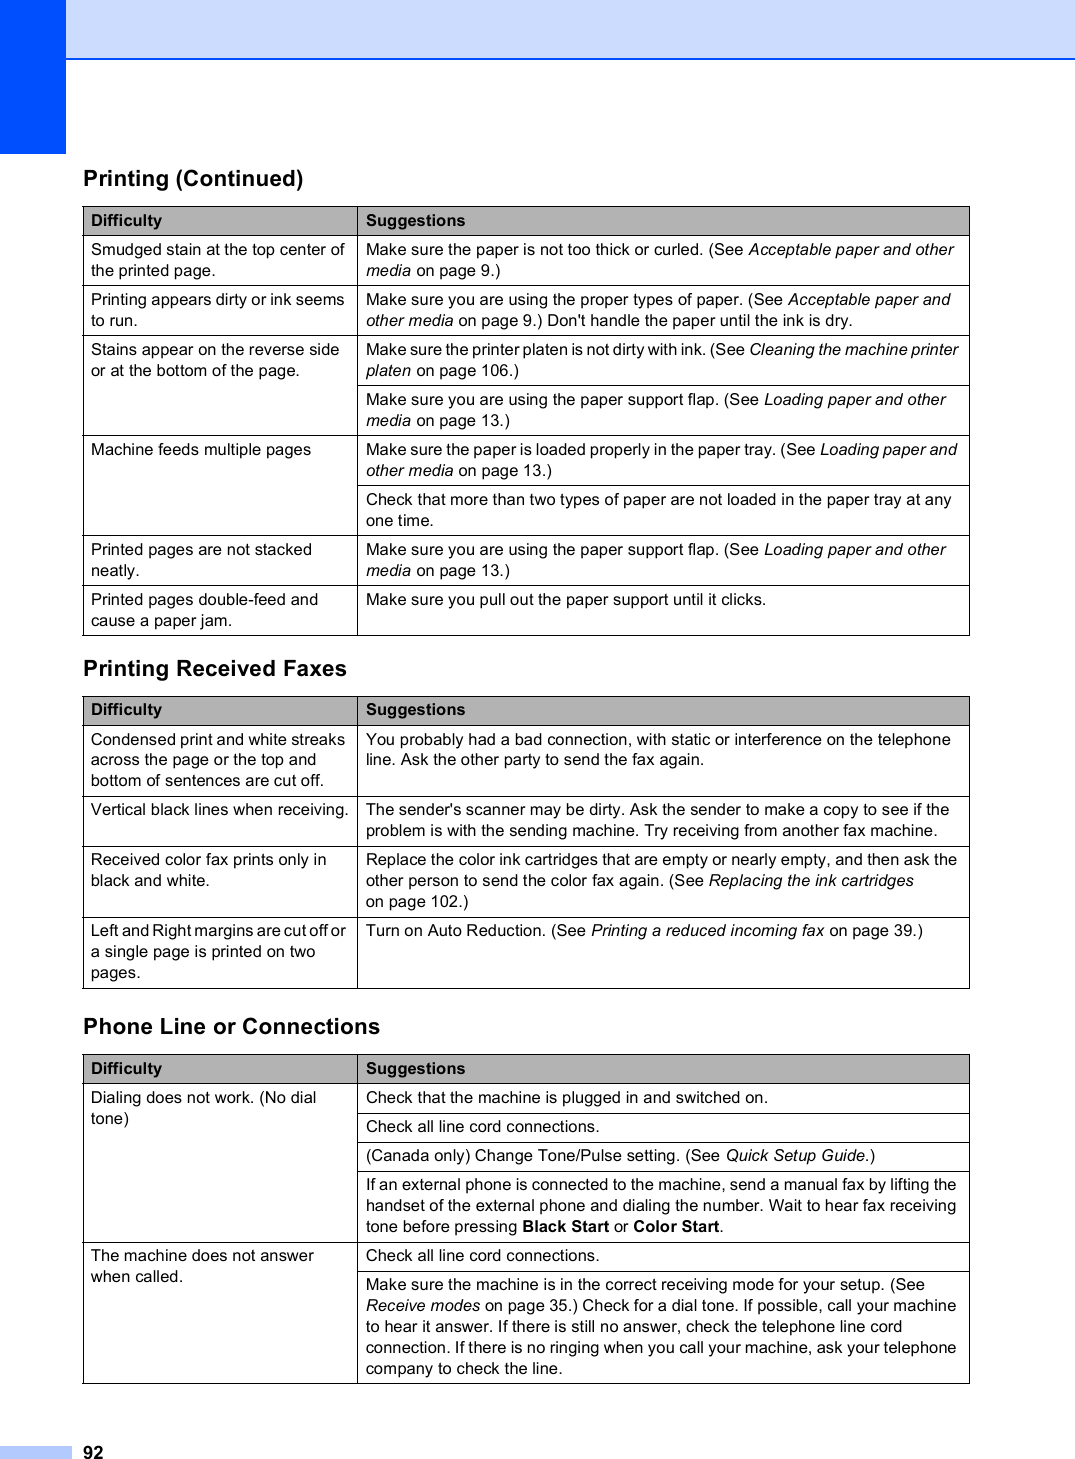

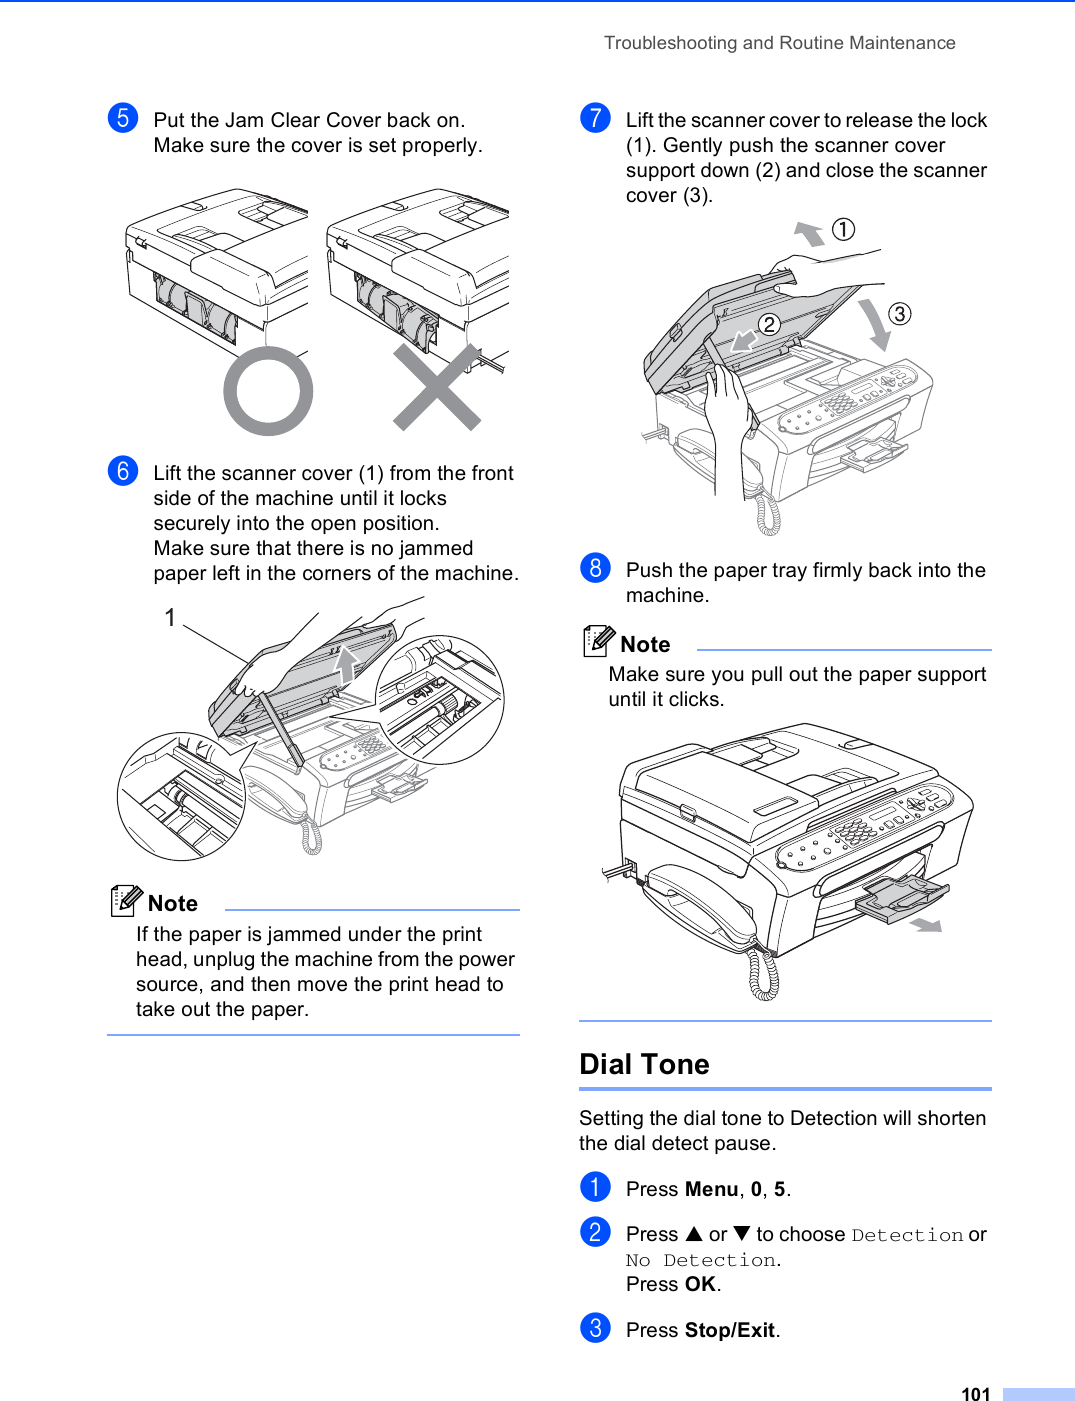
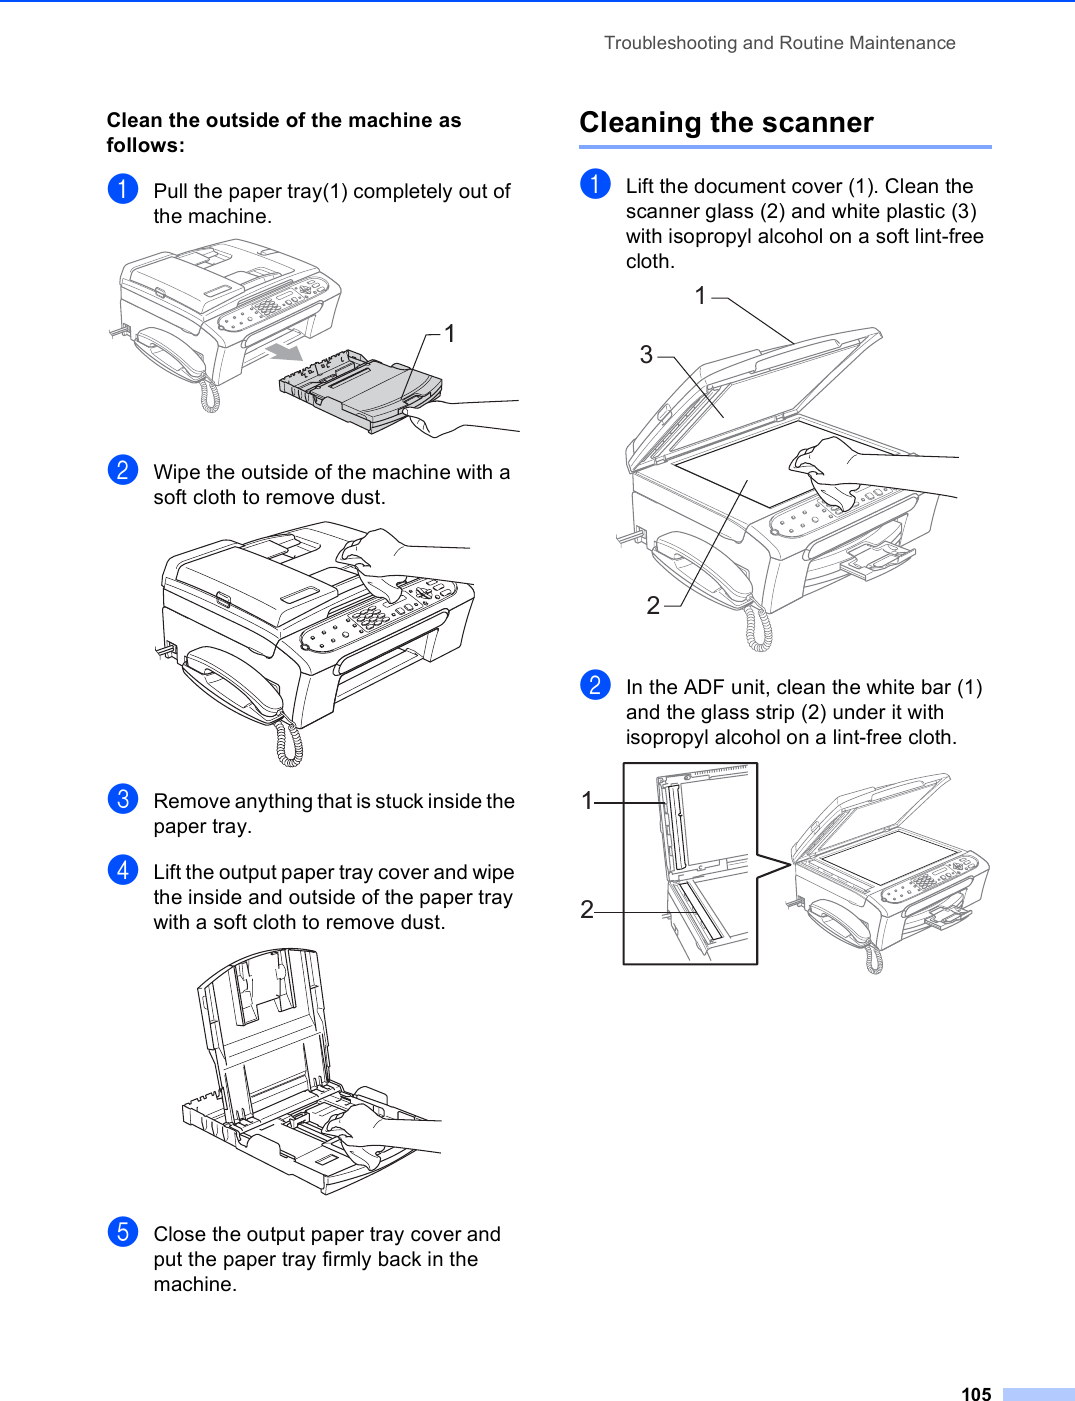
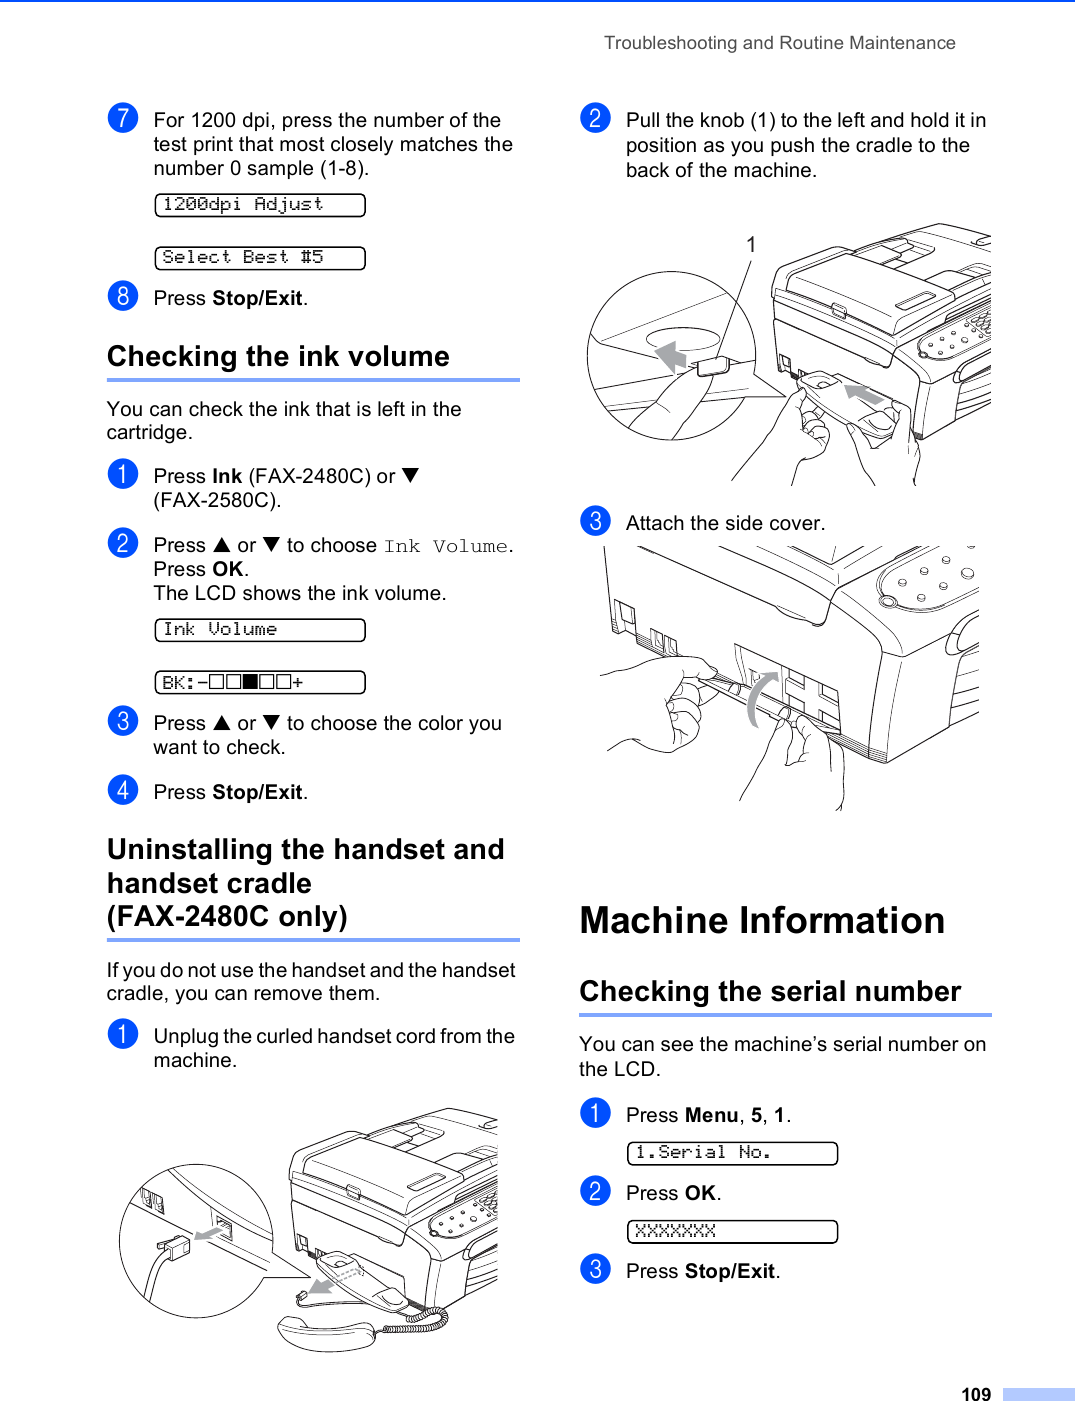
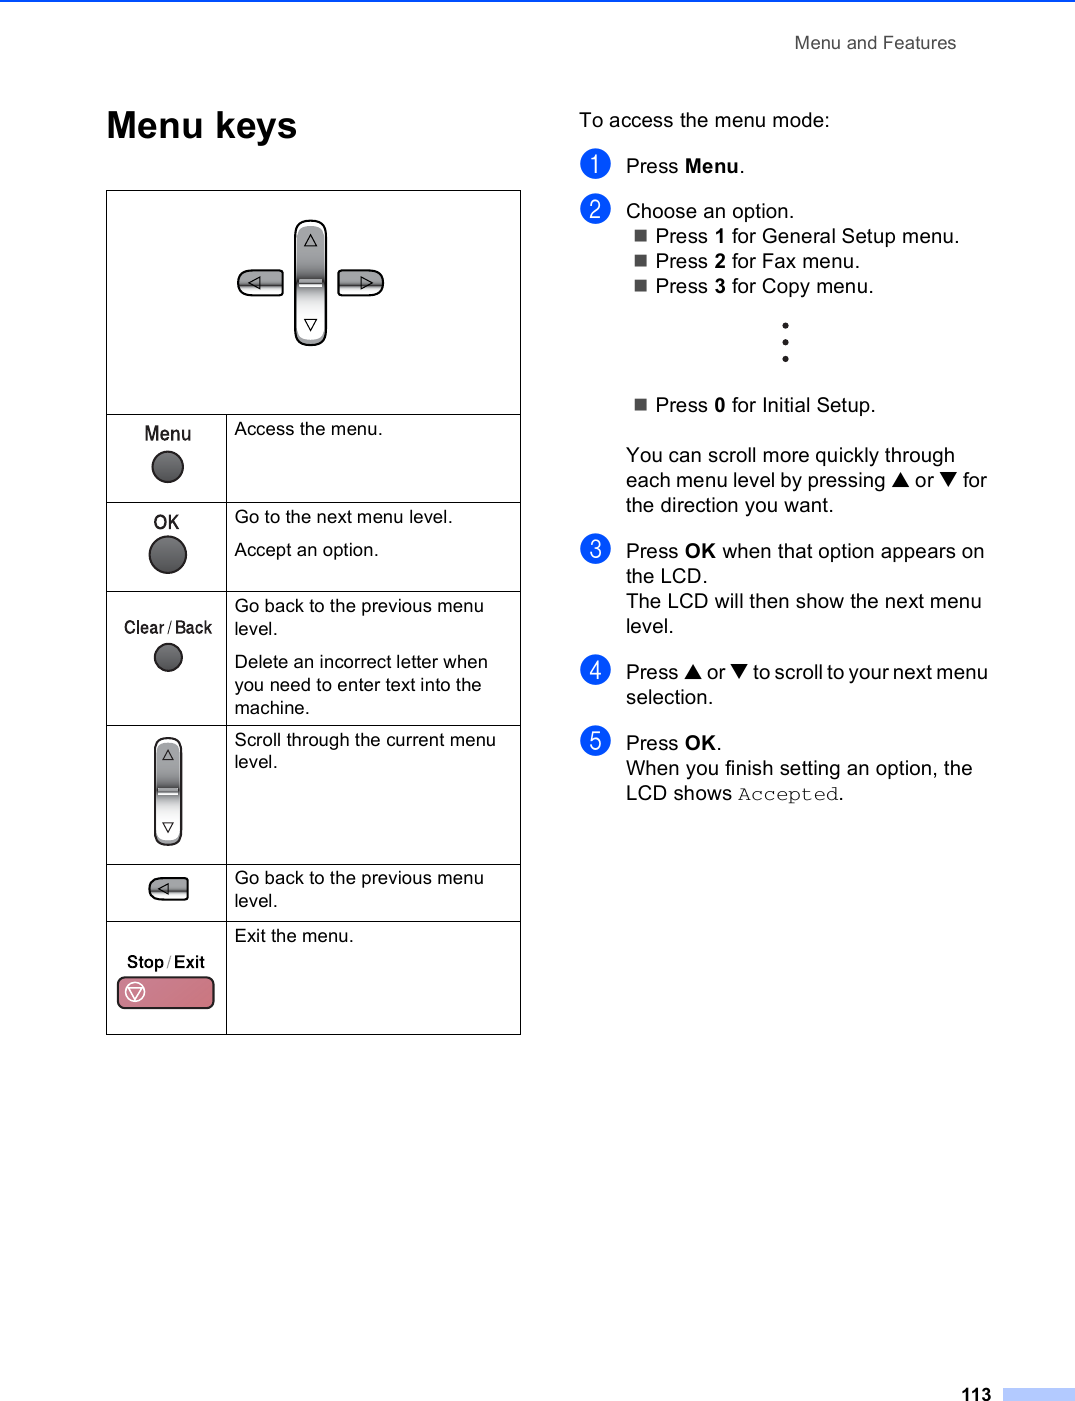

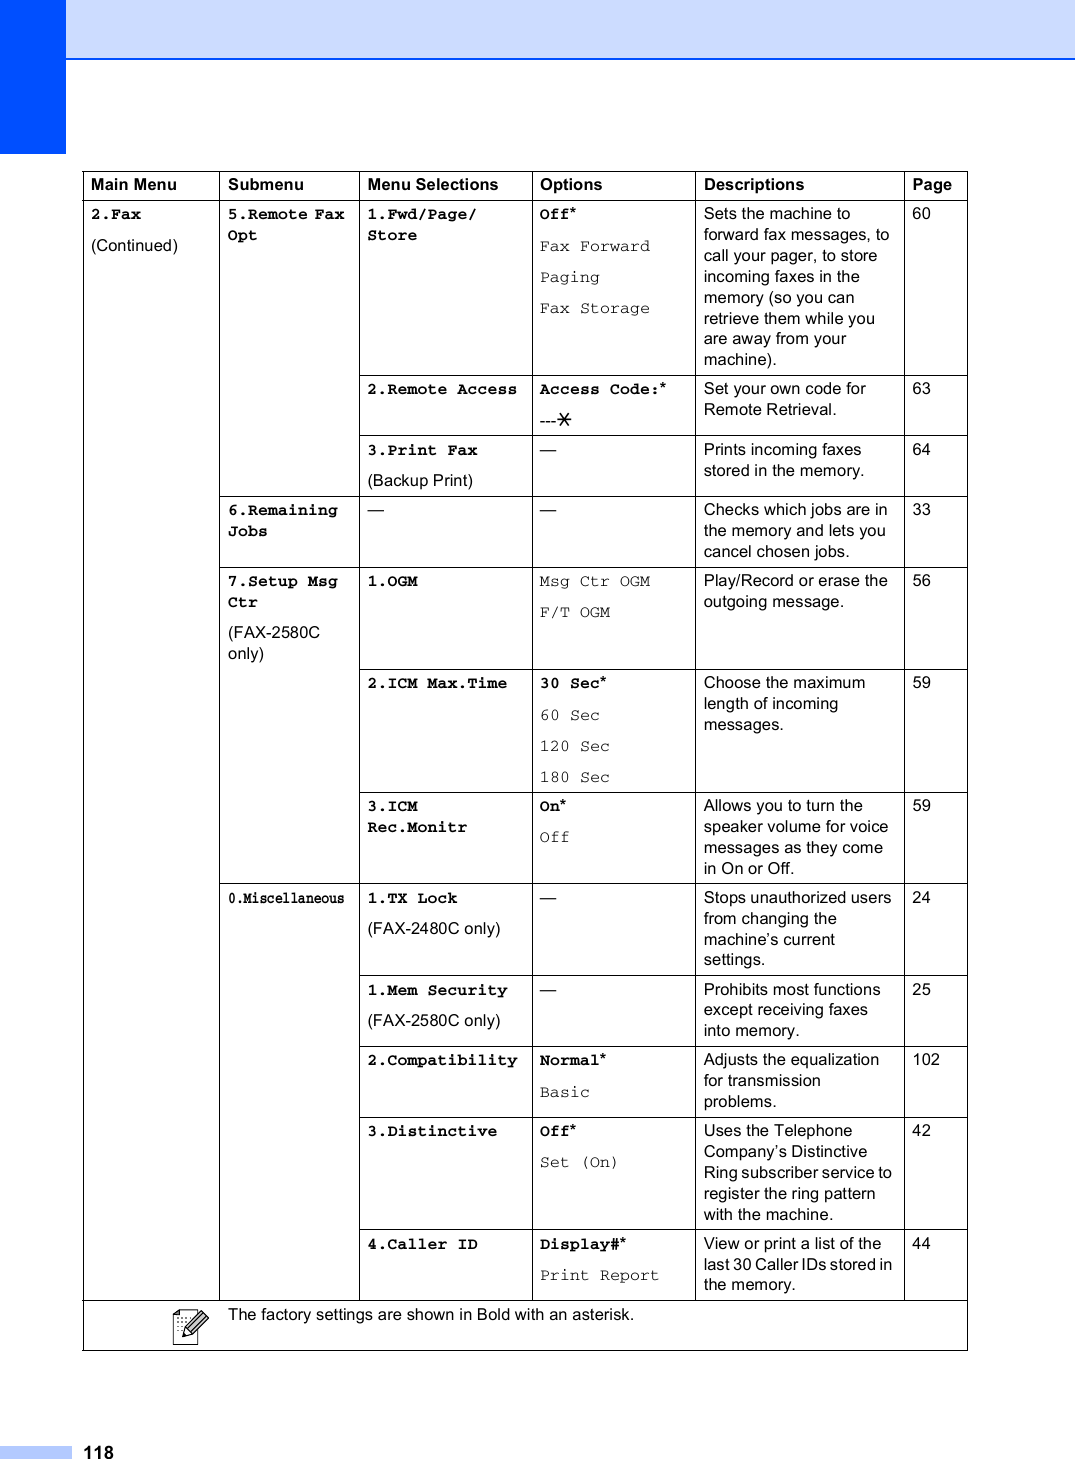

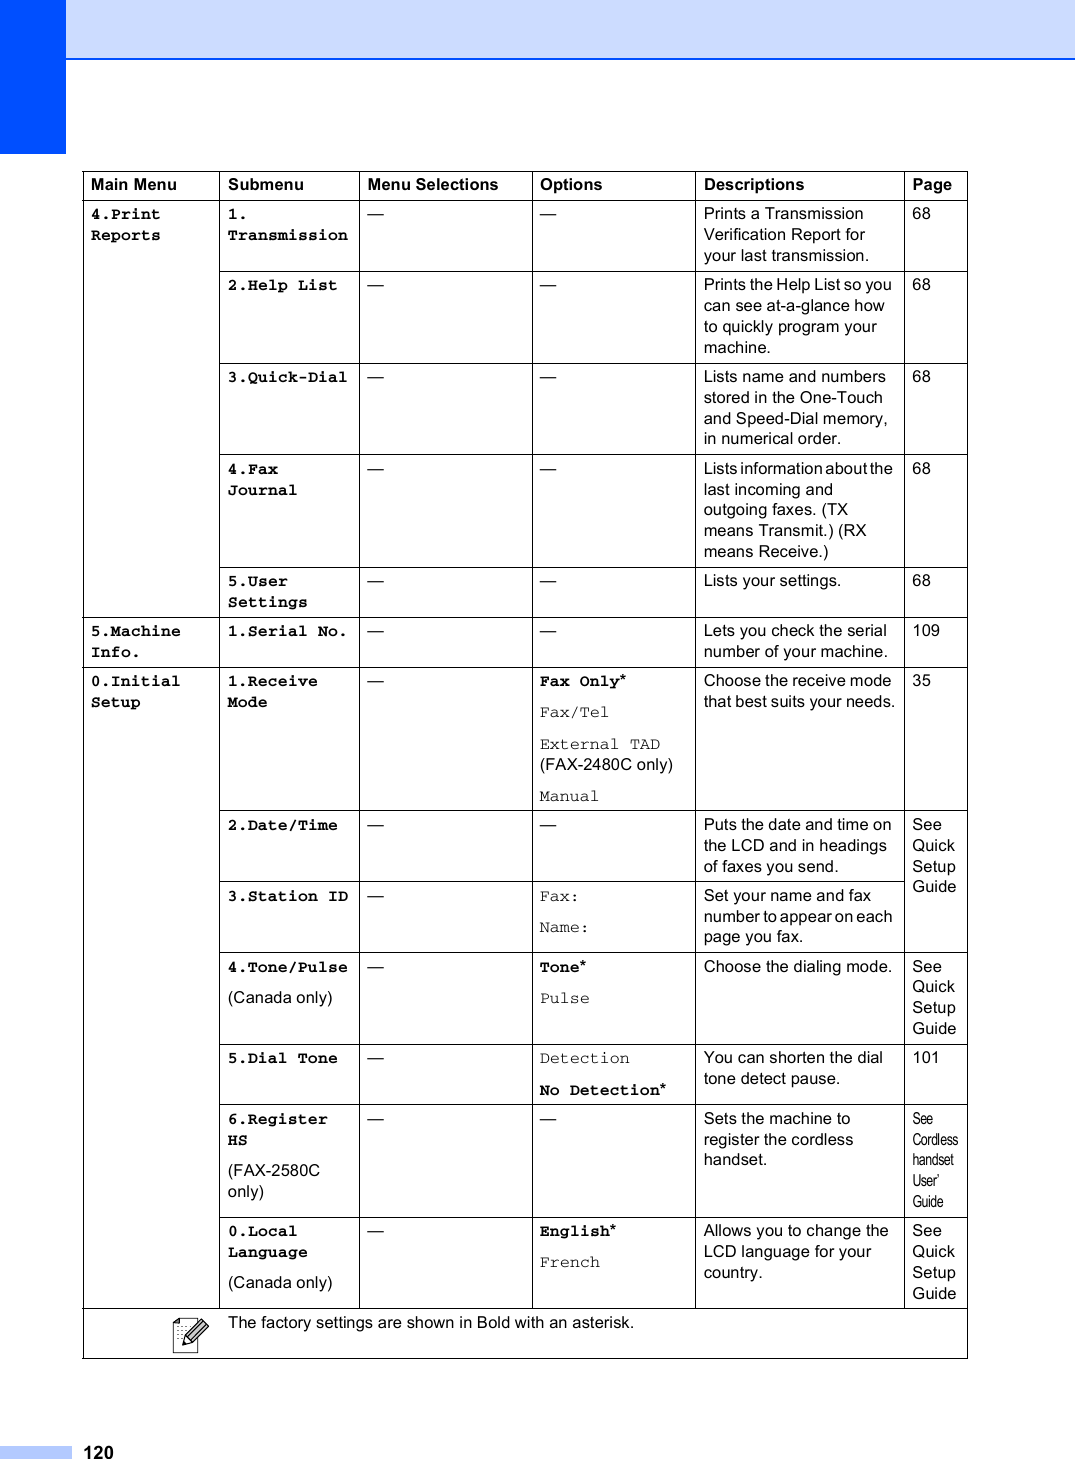
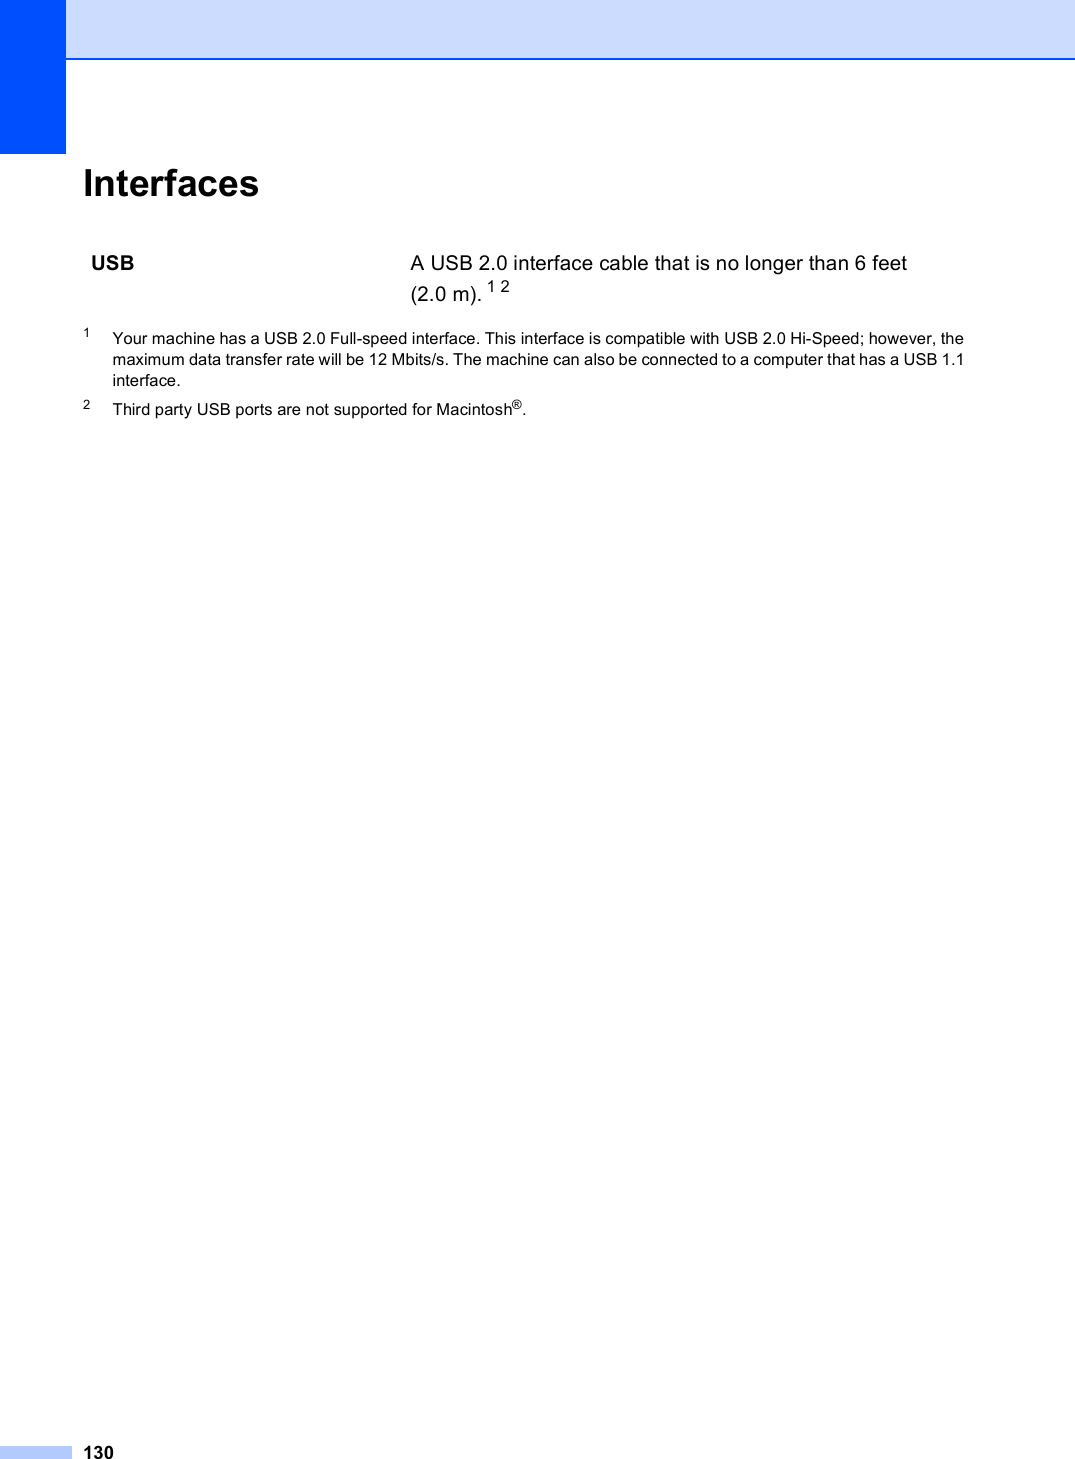
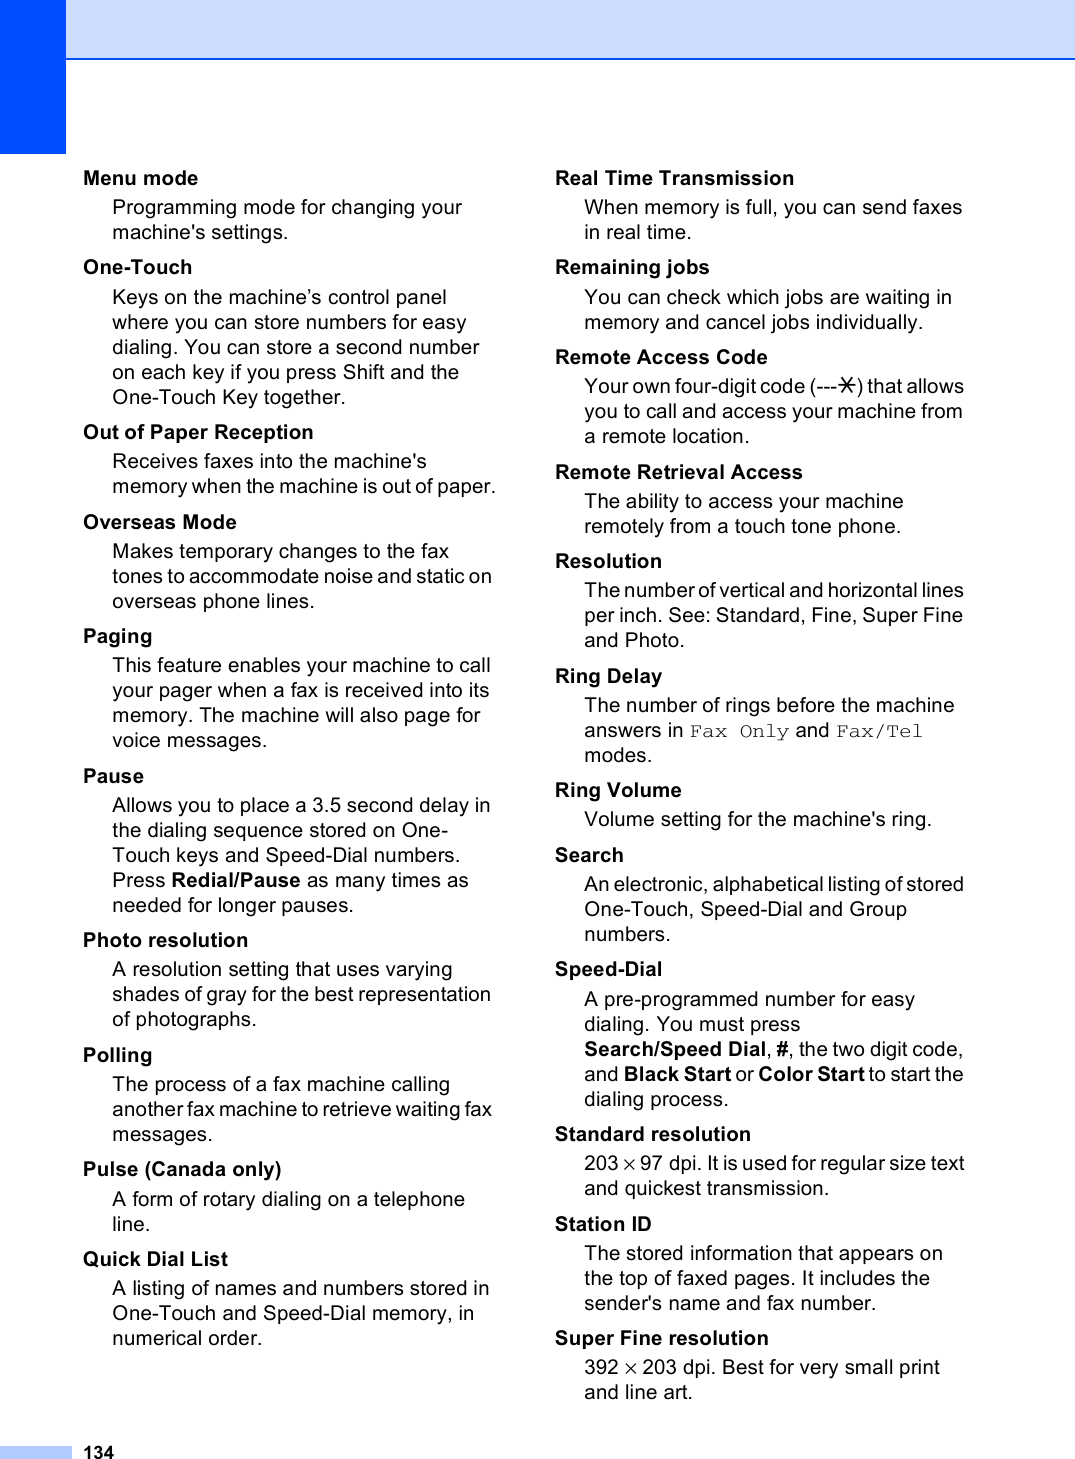
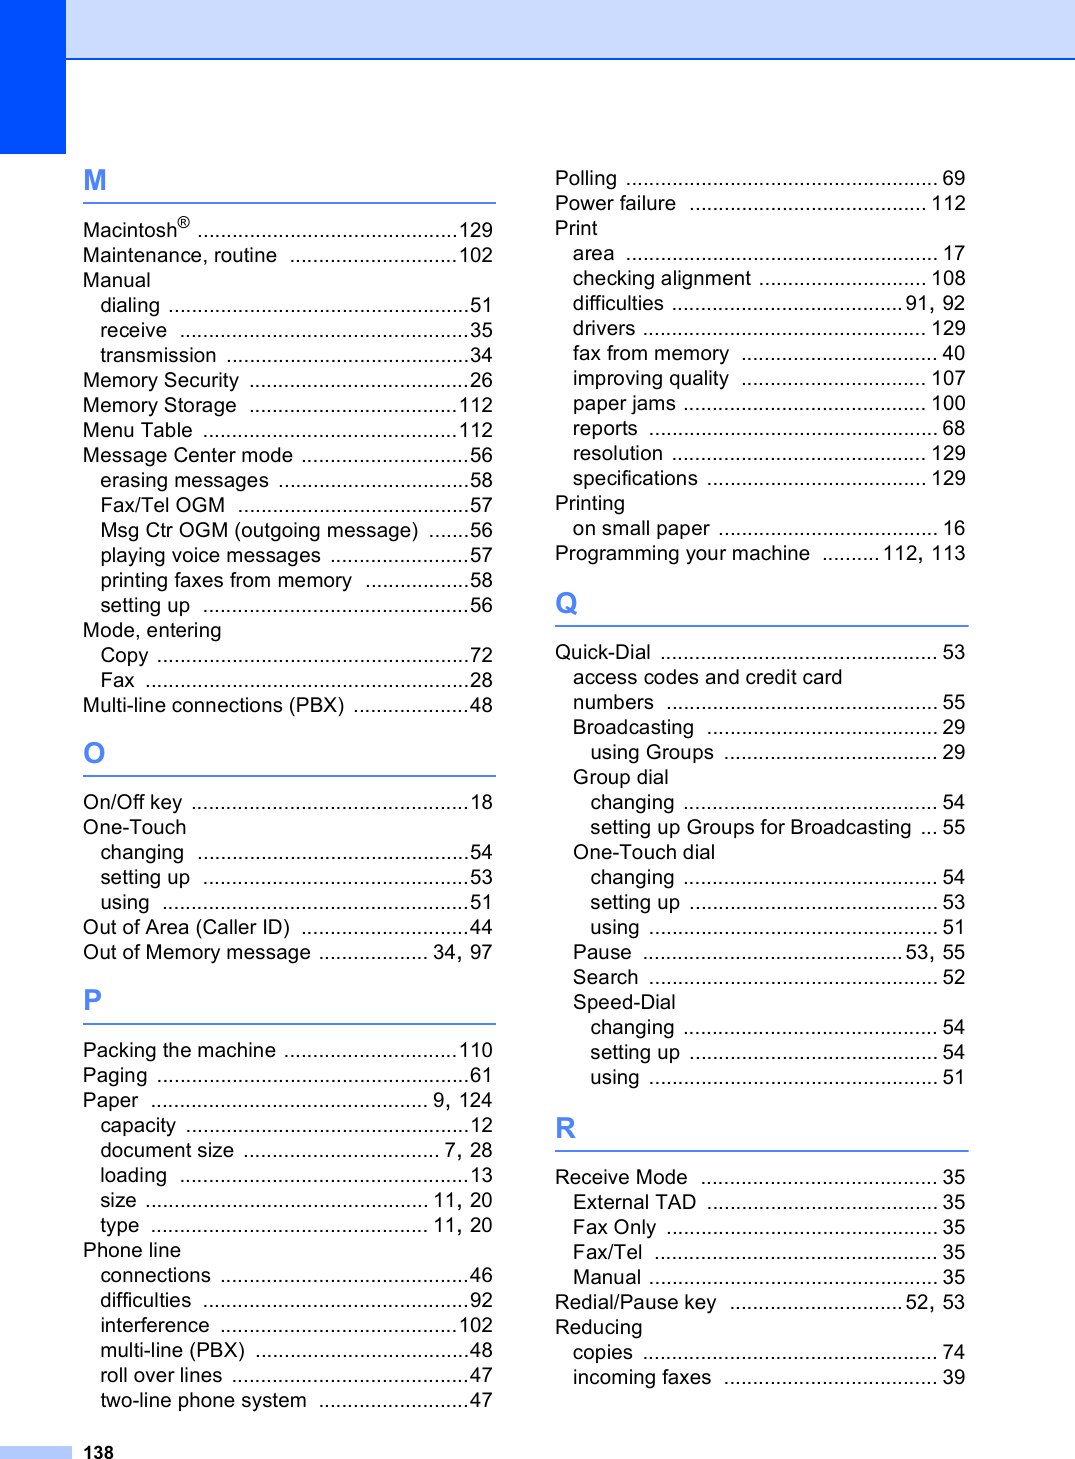
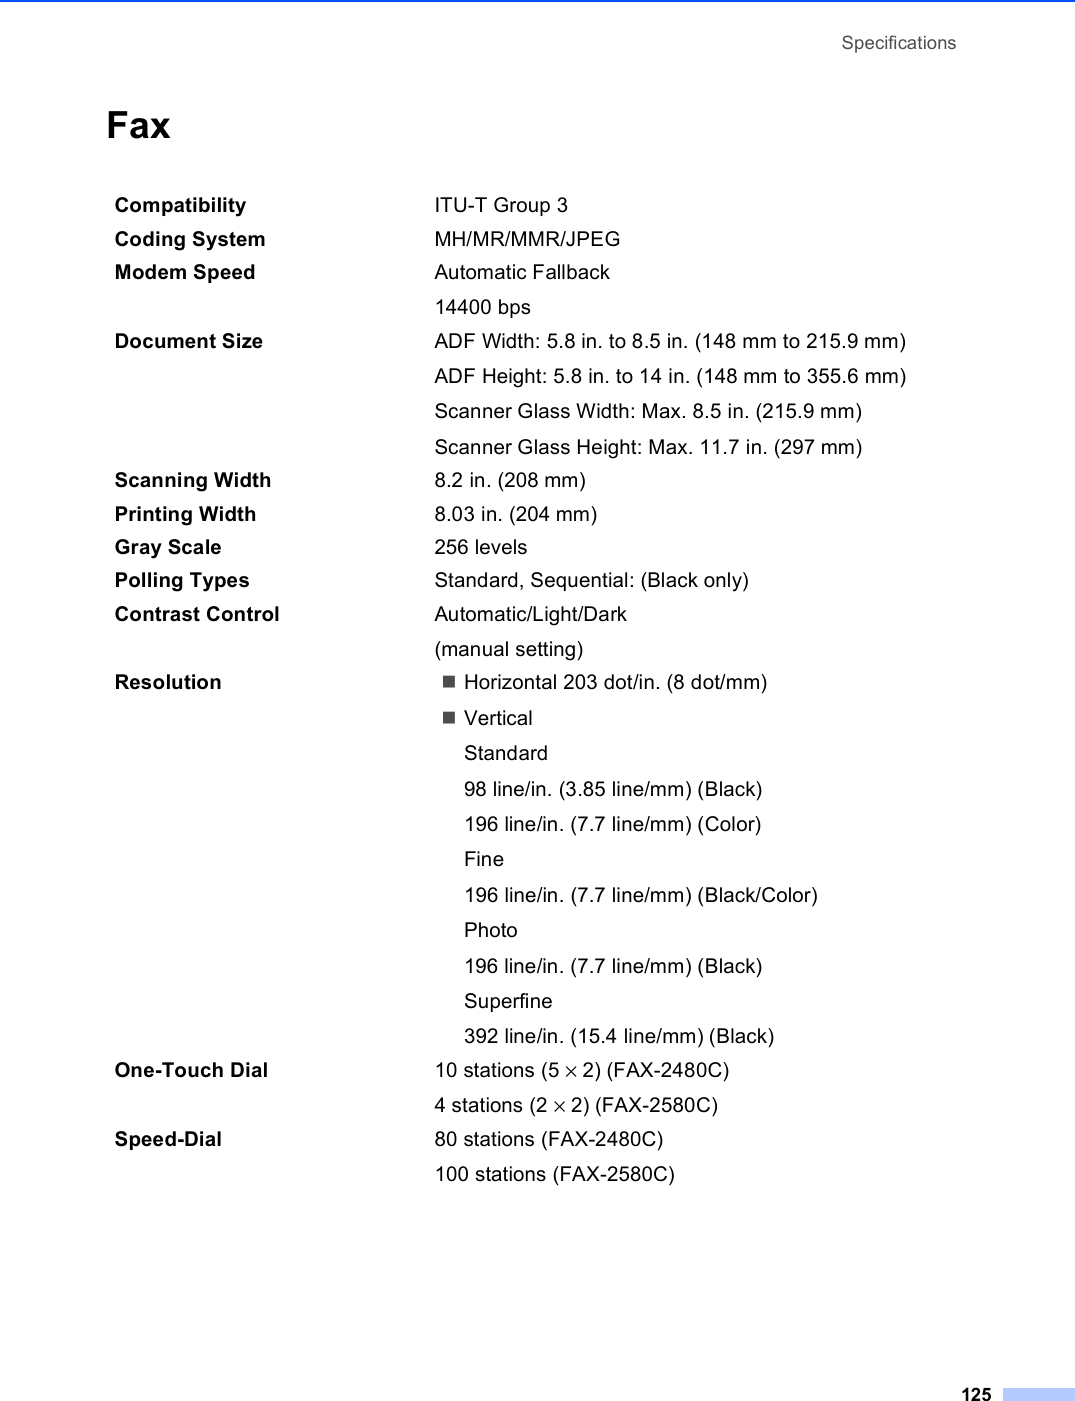
![Menu and Features121Entering Text CWhen you are setting certain menu selections, such as the Station ID, you may need to enter text into the machine. Most dial pad keys have three or four letters printed on keys. The keys for 0, # and l do not have printed letters because they are used for special characters.By pressing the proper dial pad key repeatedly, you can access the character you want.Putting spacesTo enter a space in a fax number, press c once between numbers. To enter a space in a name, press c twice between characters.Making correctionsIf you entered an incorrect letter and want to change it, press d to move the cursor under the incorrect character. Then press Clear/Back. Re-enter the correct character. You can also back up and insert letters.Repeating lettersIf you need to enter a letter that is on the same key as the letter before, press c to move the cursor to the right before you press the key again.Special characters and symbols Press l, # or 0, and then press d or c to move the cursor under the special character or symbol you want. Then press OK to choose it.Press Keyone timetwo timesthree timesfour times2ABC23DEF34GH I 45JKL56MNO67PQRS8TUV89WX Y ZPress lfor (space) ! " # $ % & ' ( ) l + , - . / mPress #for : ; < = > ? @ [ ] ^ _Press 0for É À È Ê Î Ç Ë Ö 0](https://usermanual.wiki/Brother/8CAA20.User-Manual-2/User-Guide-692711-Page-62.png)
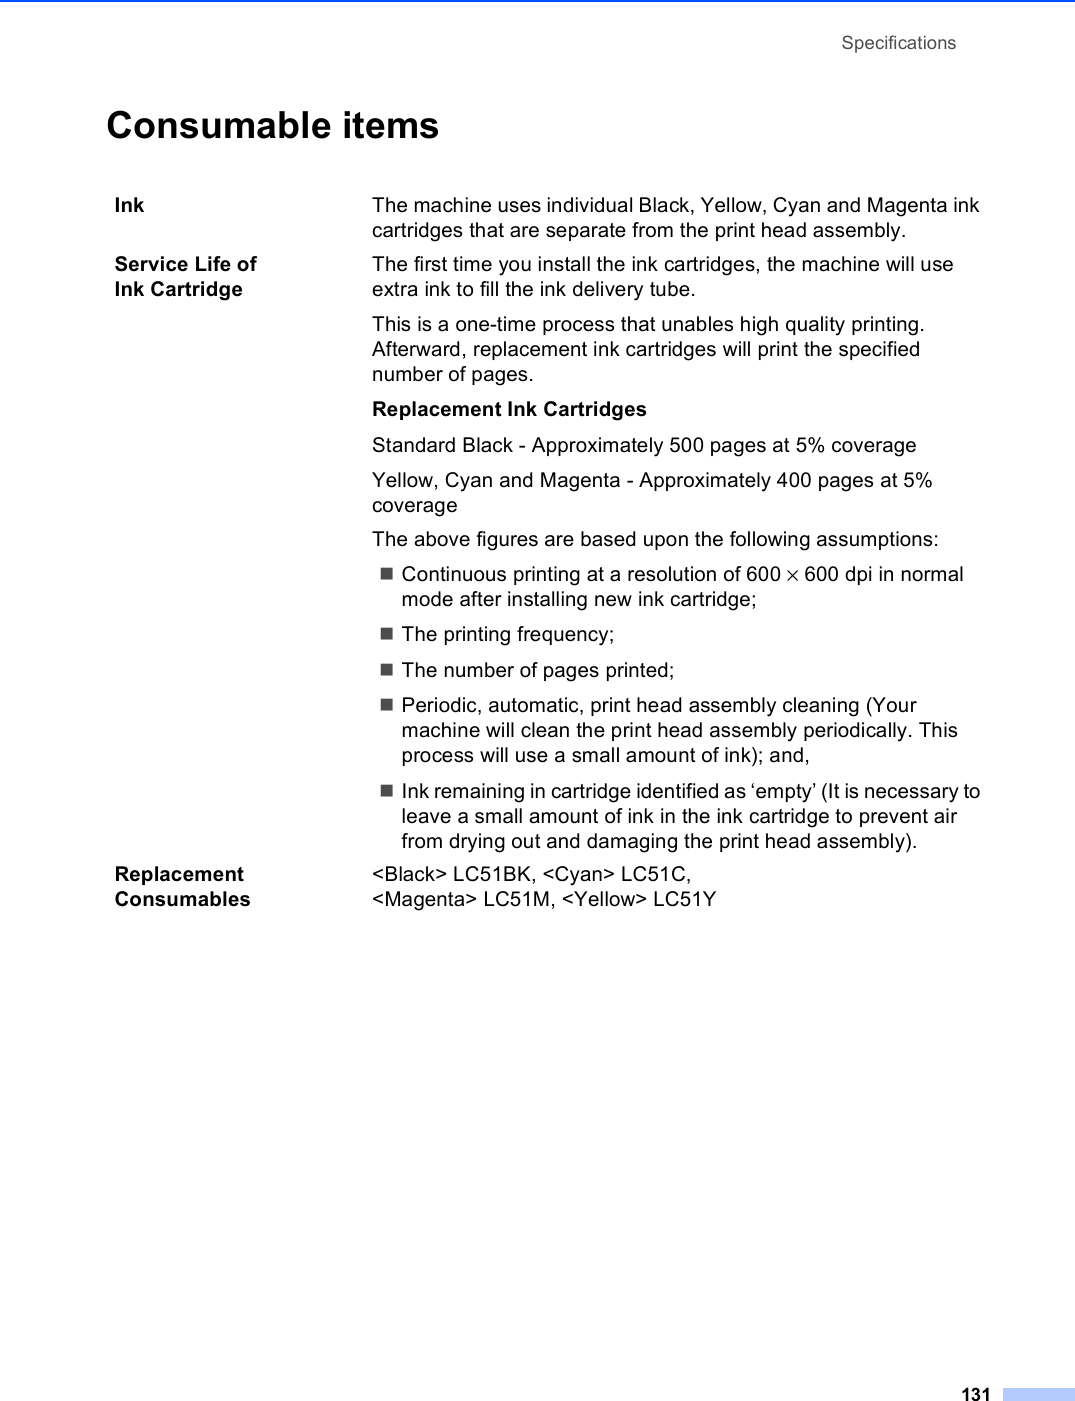
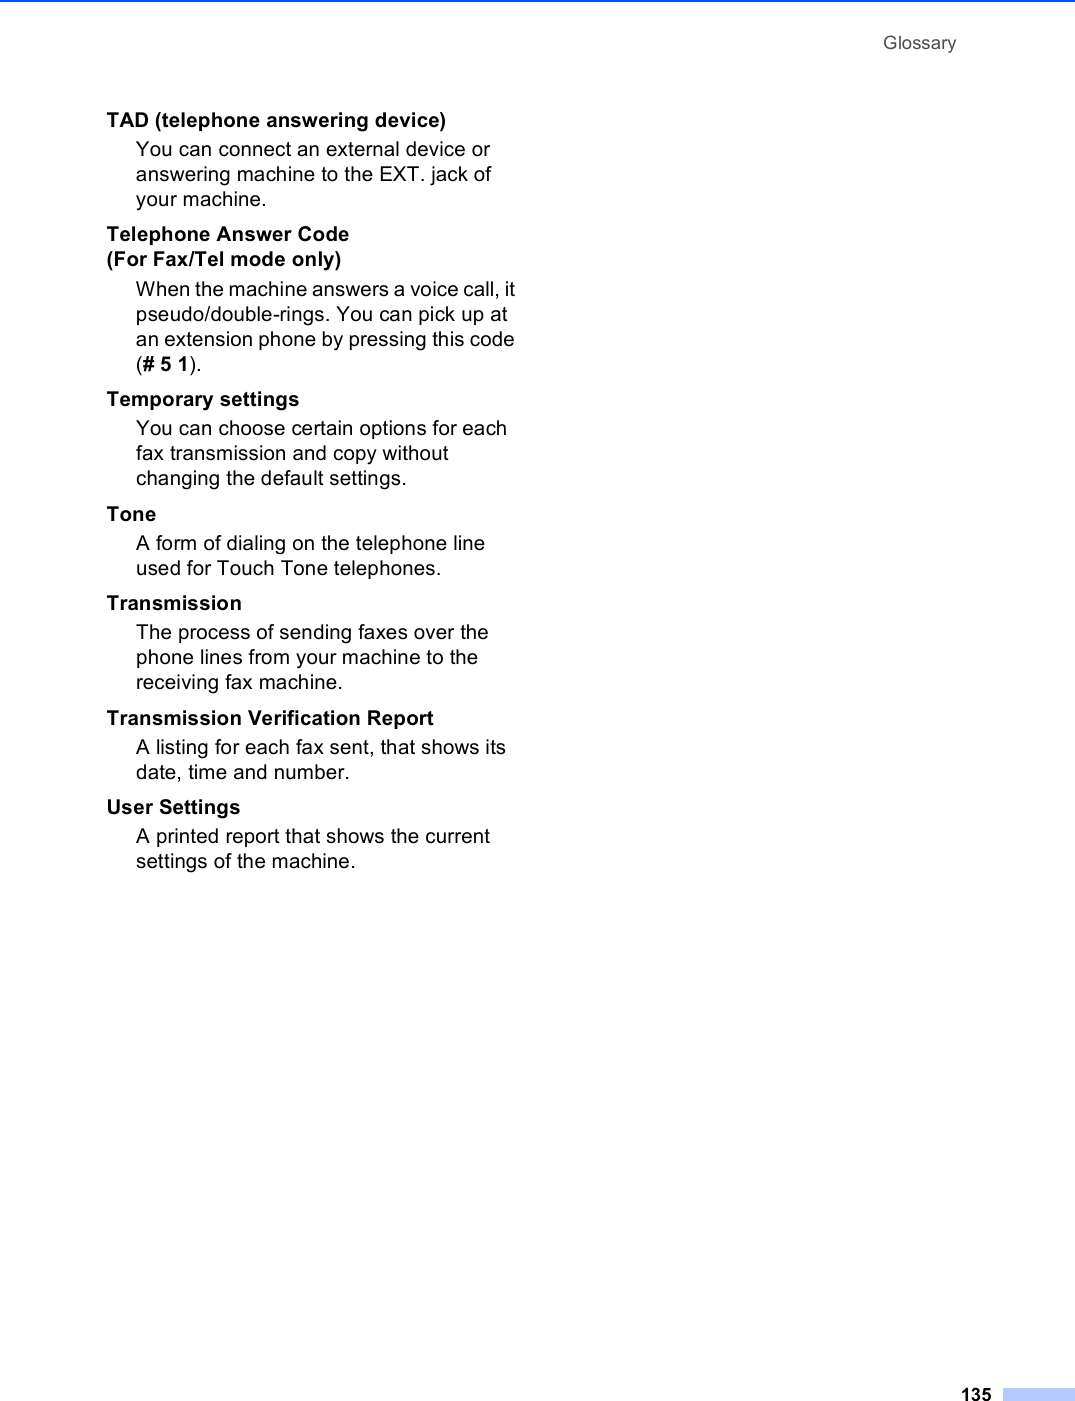
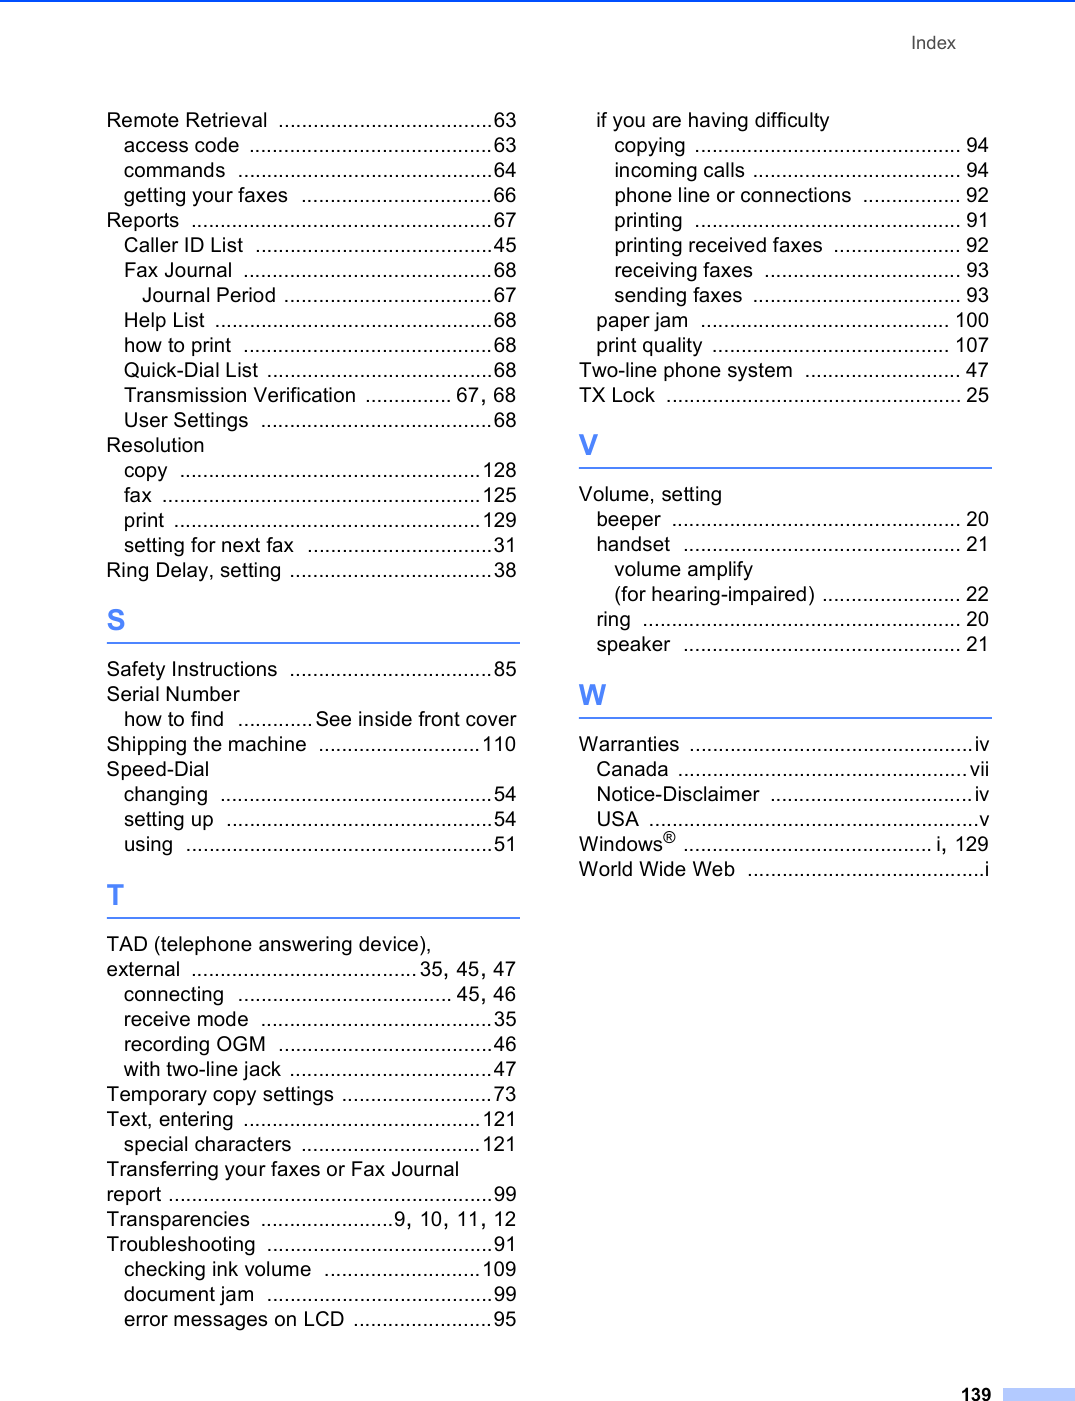
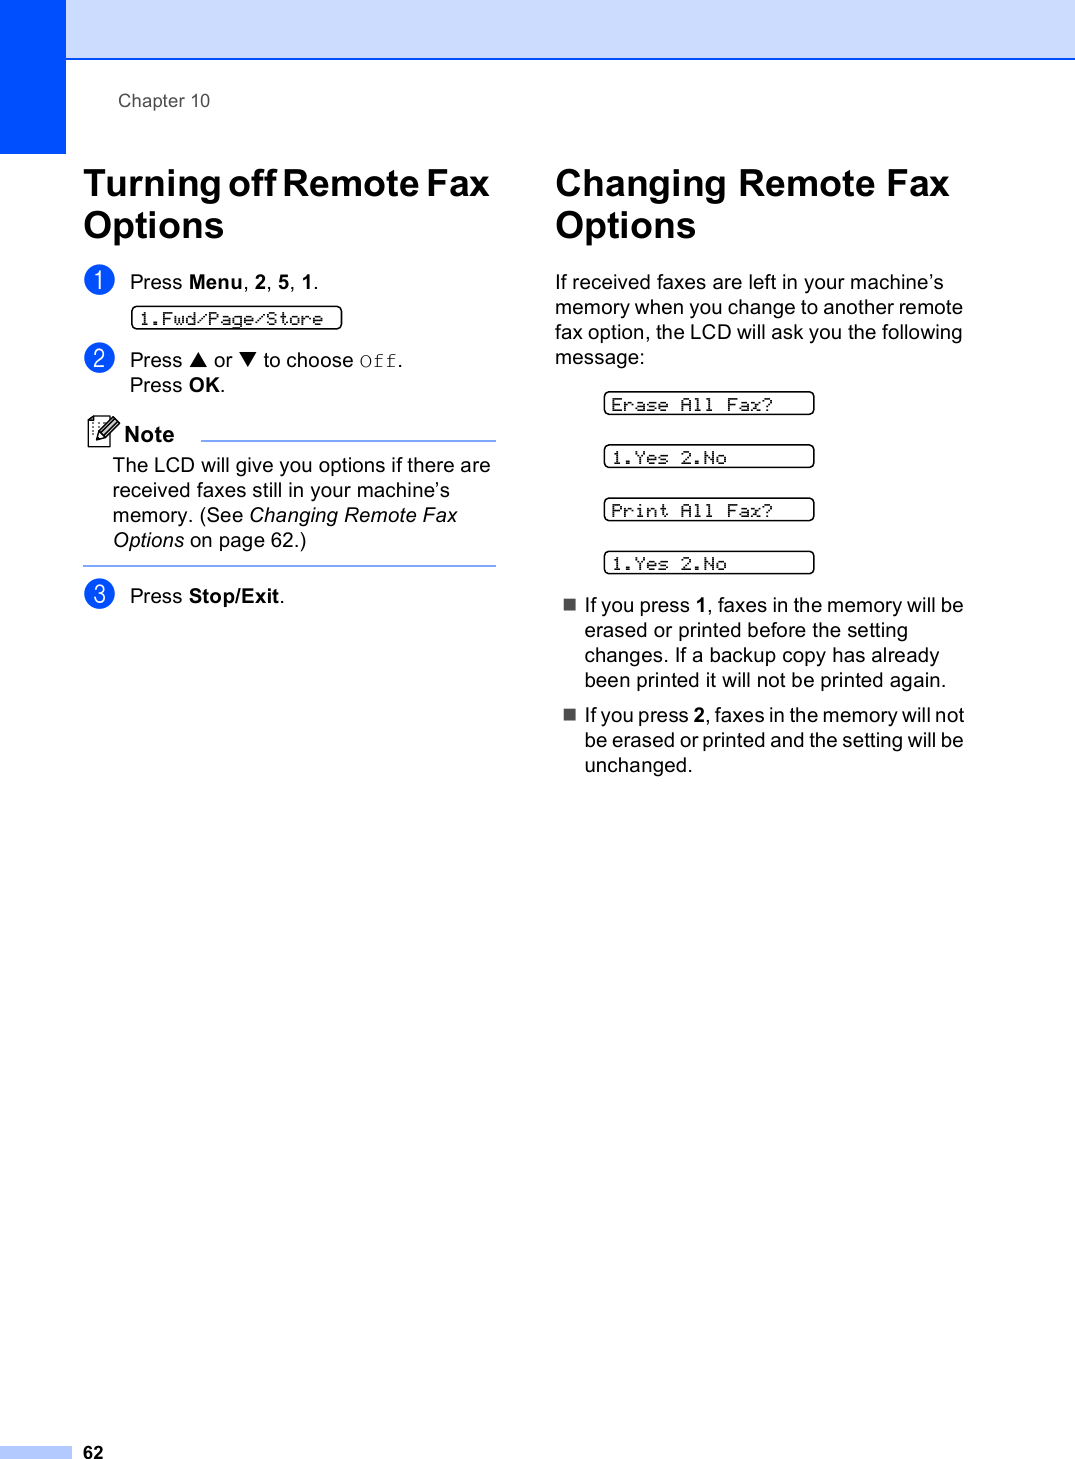
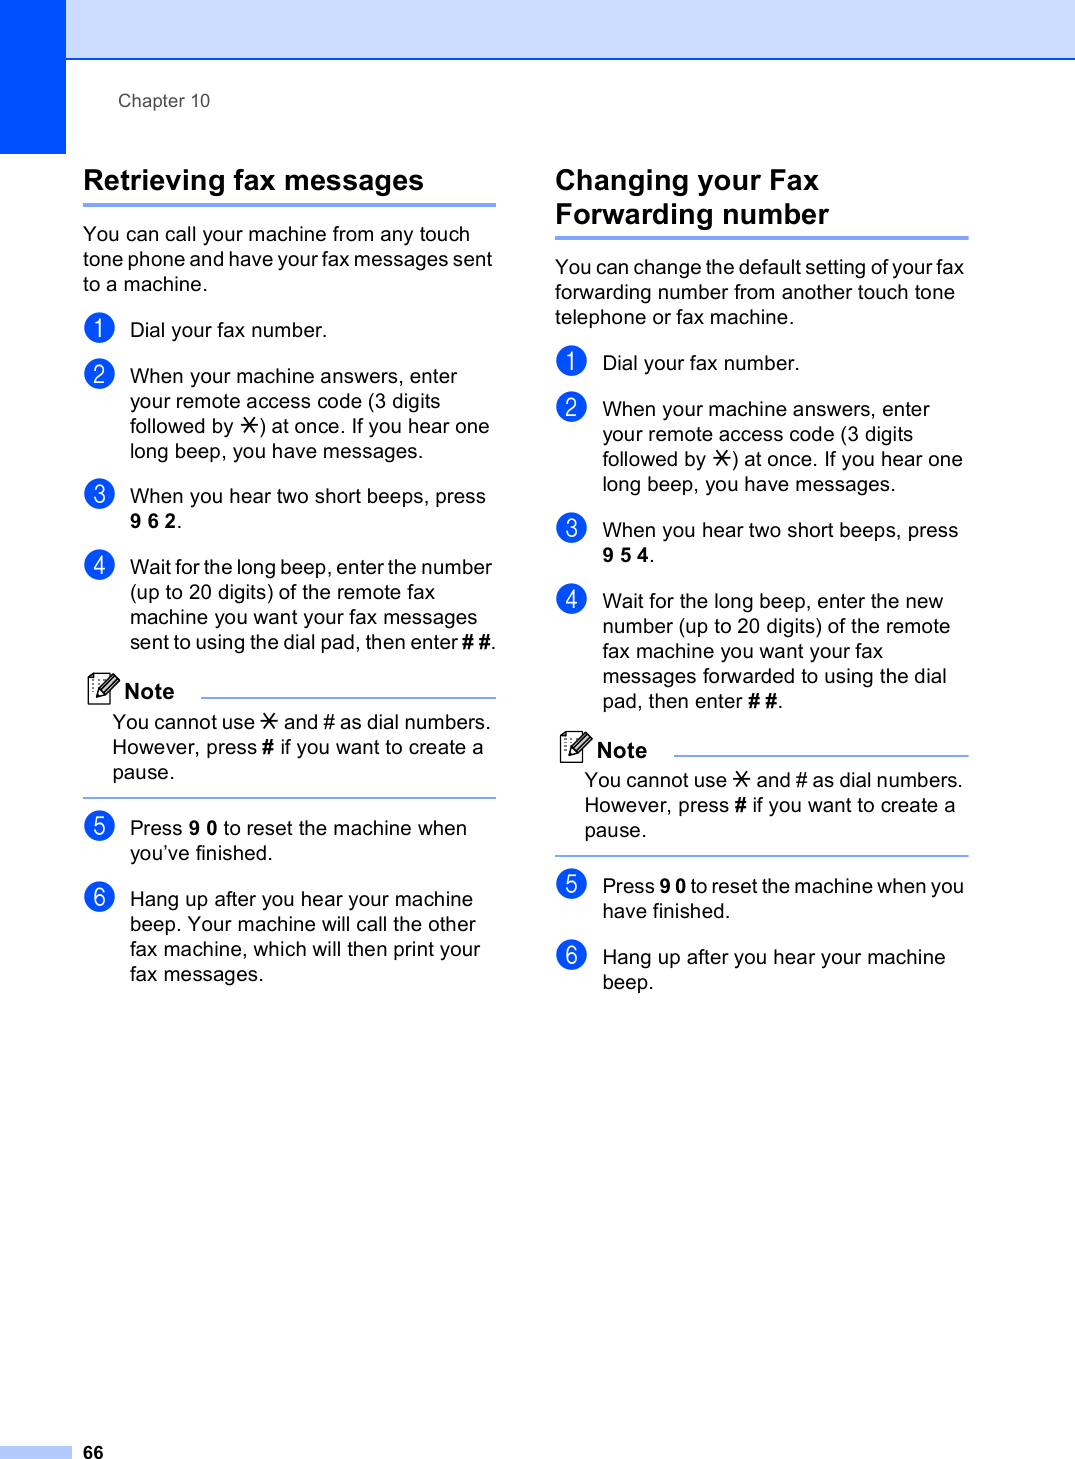
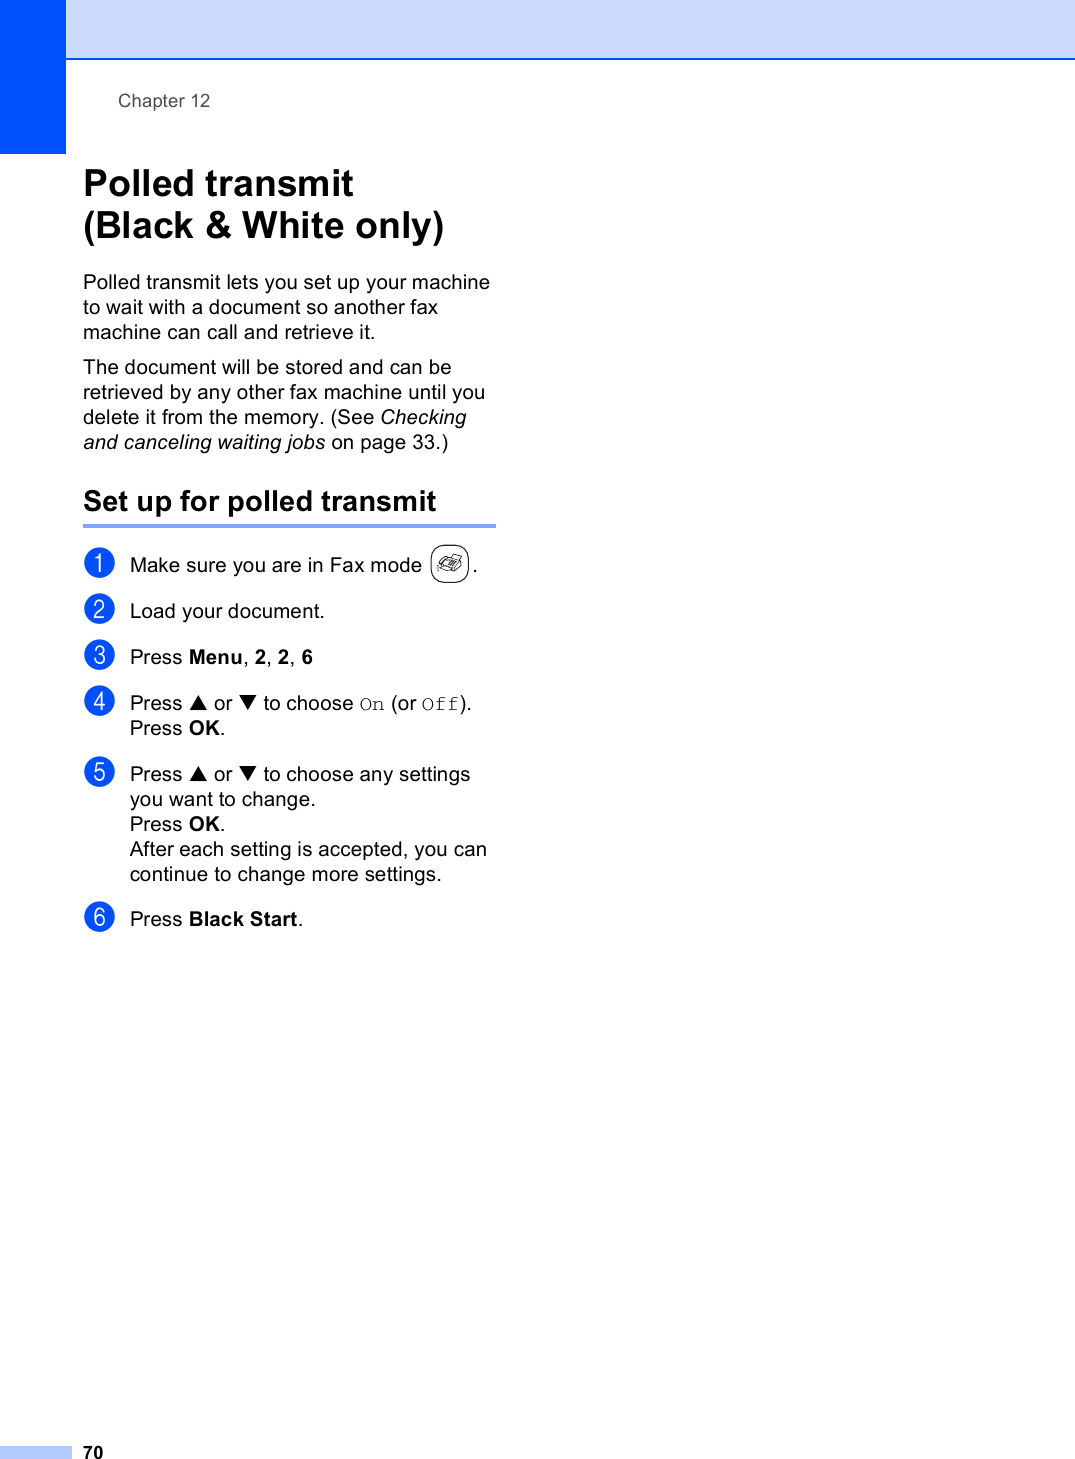
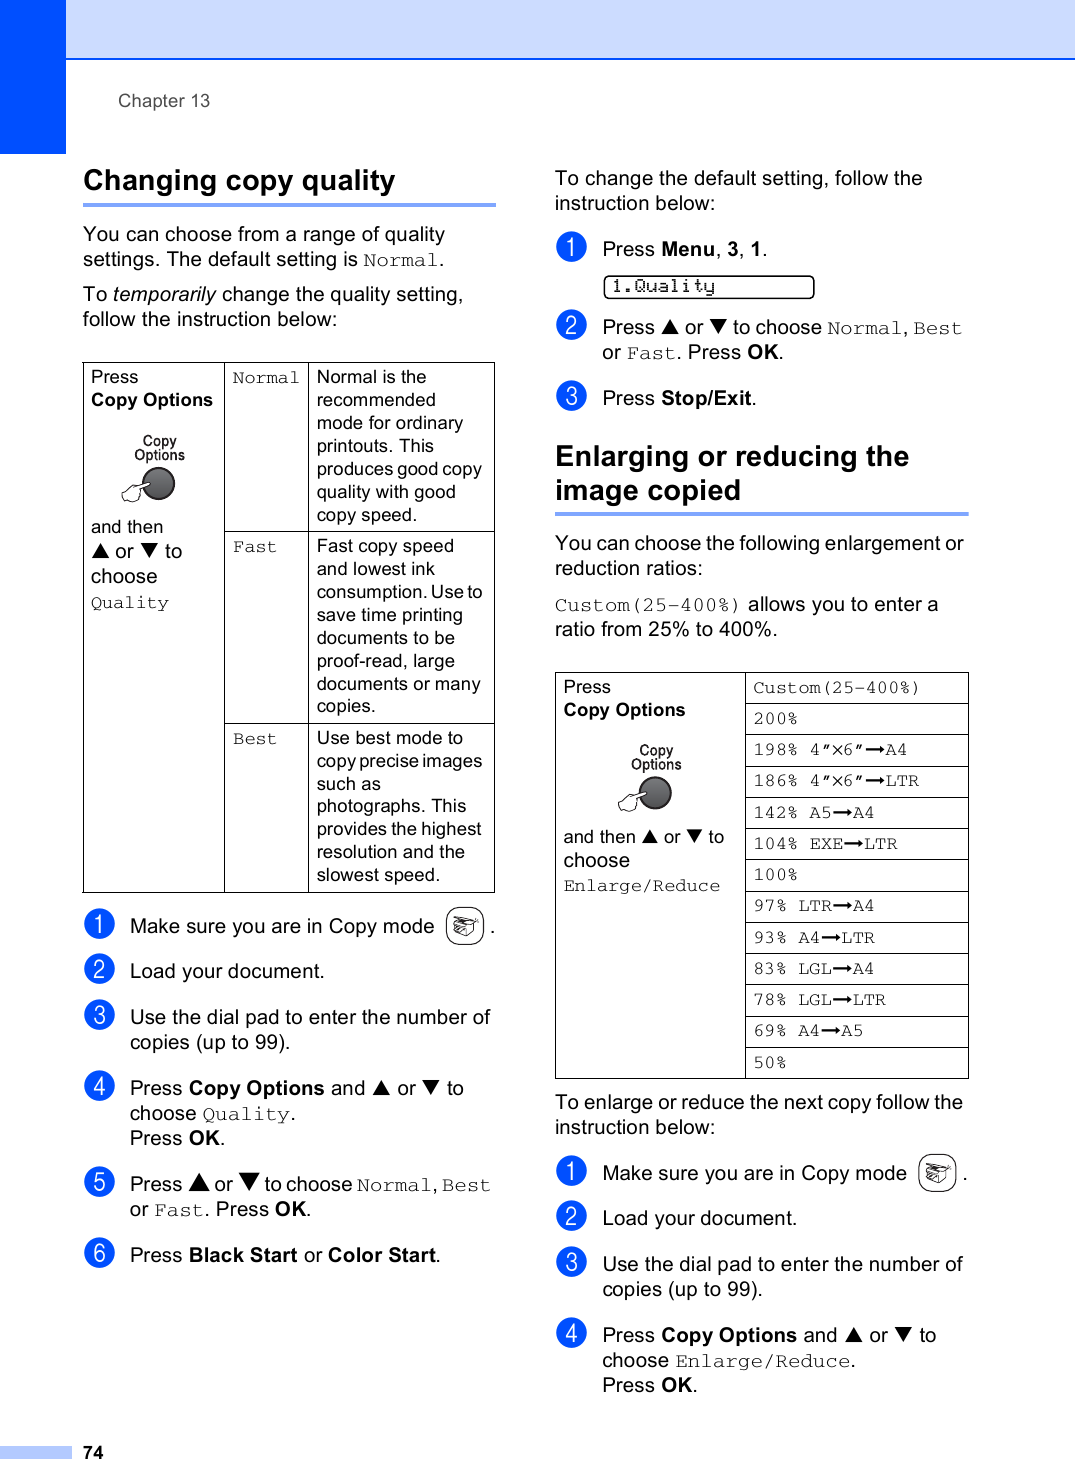
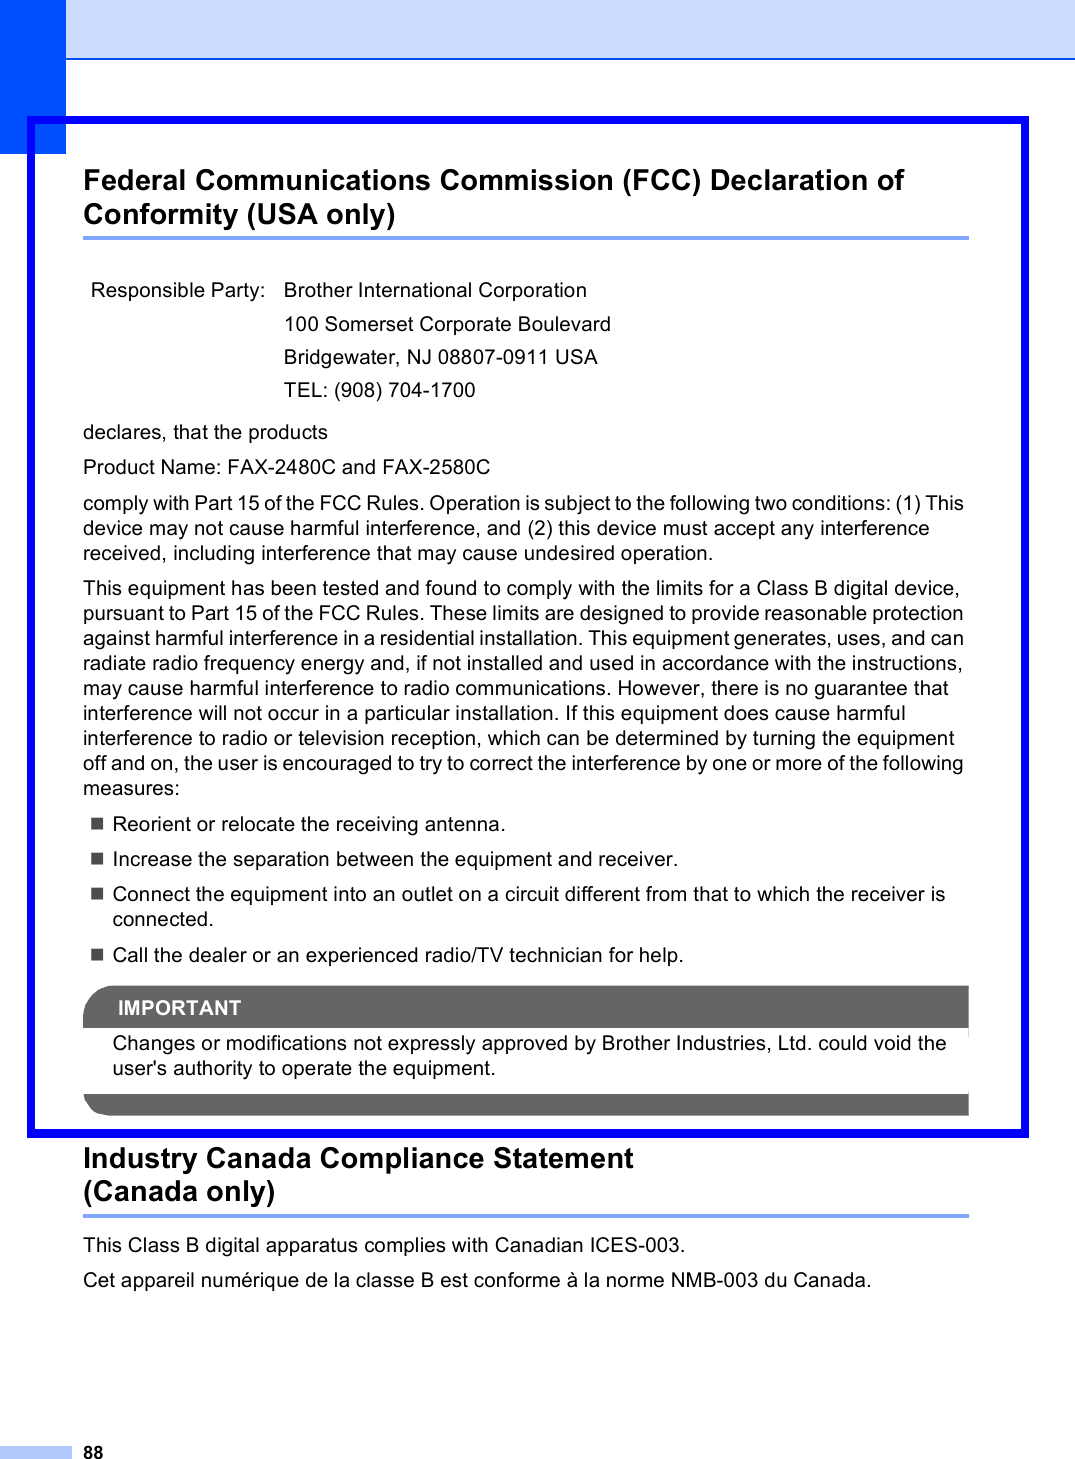
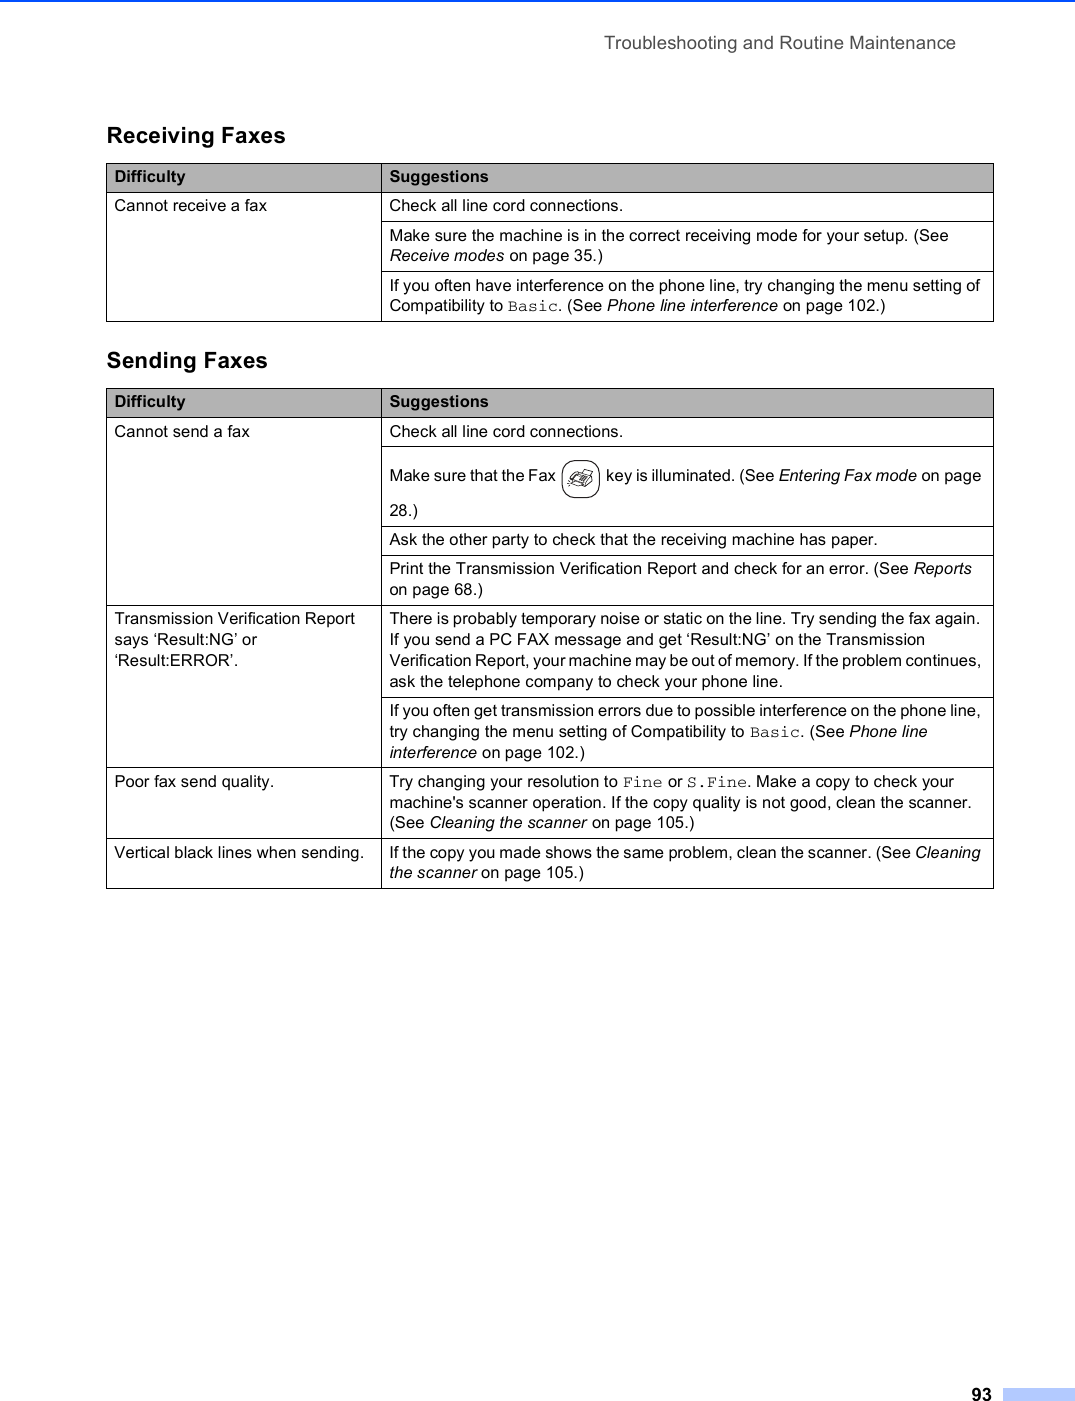
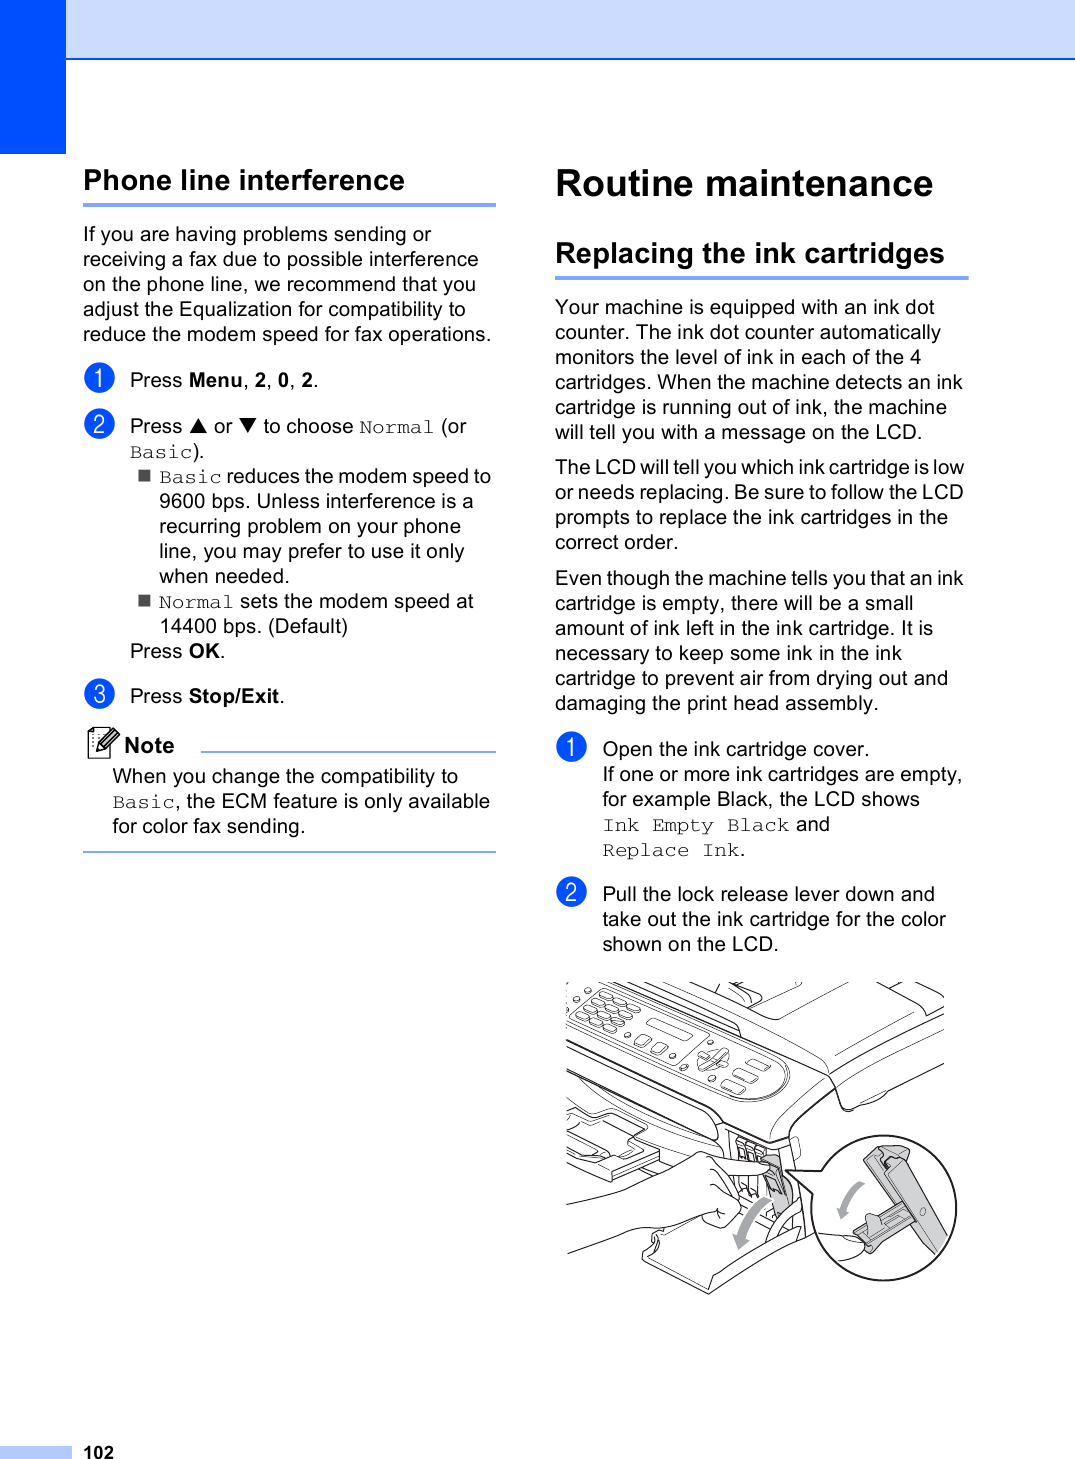
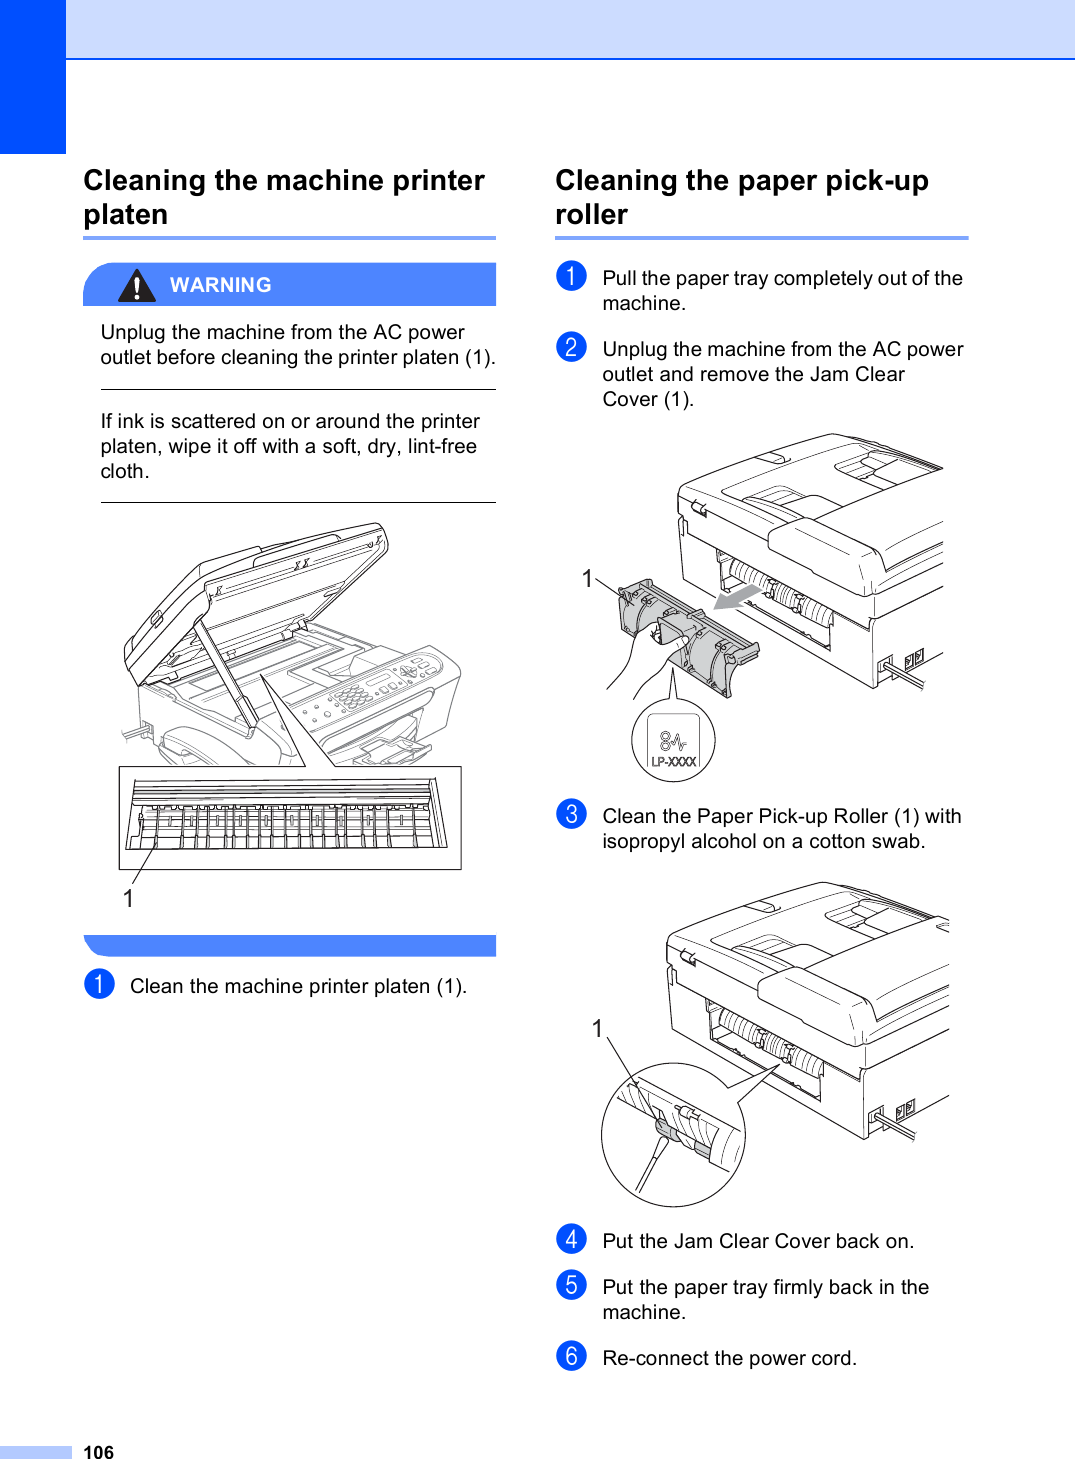
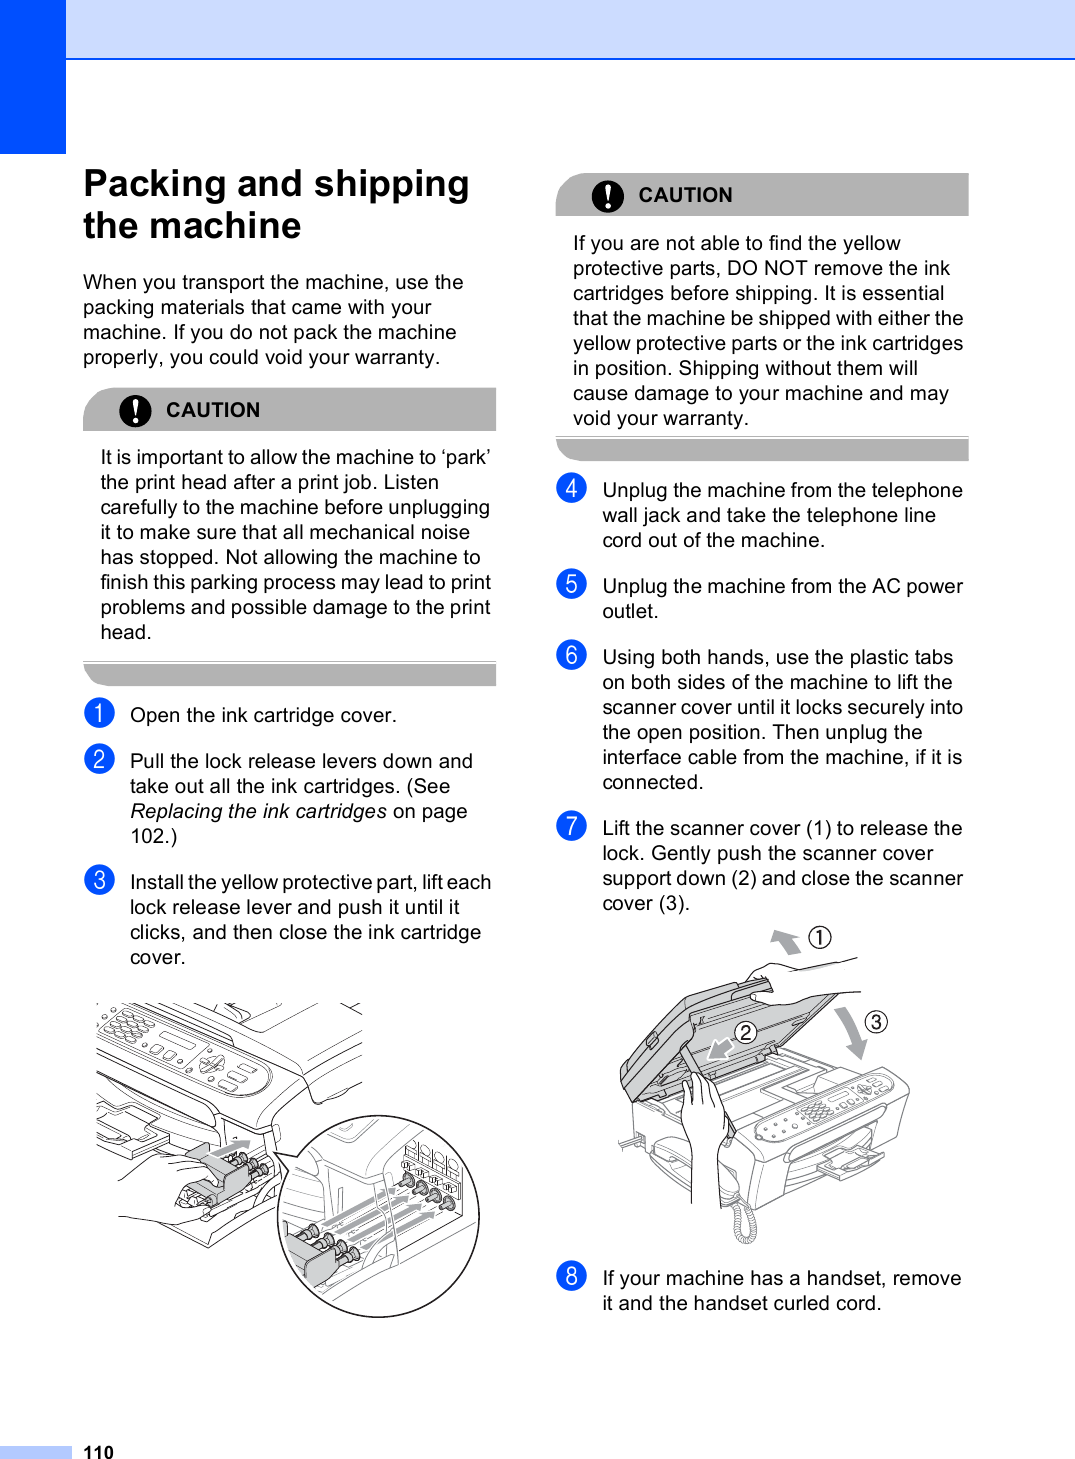
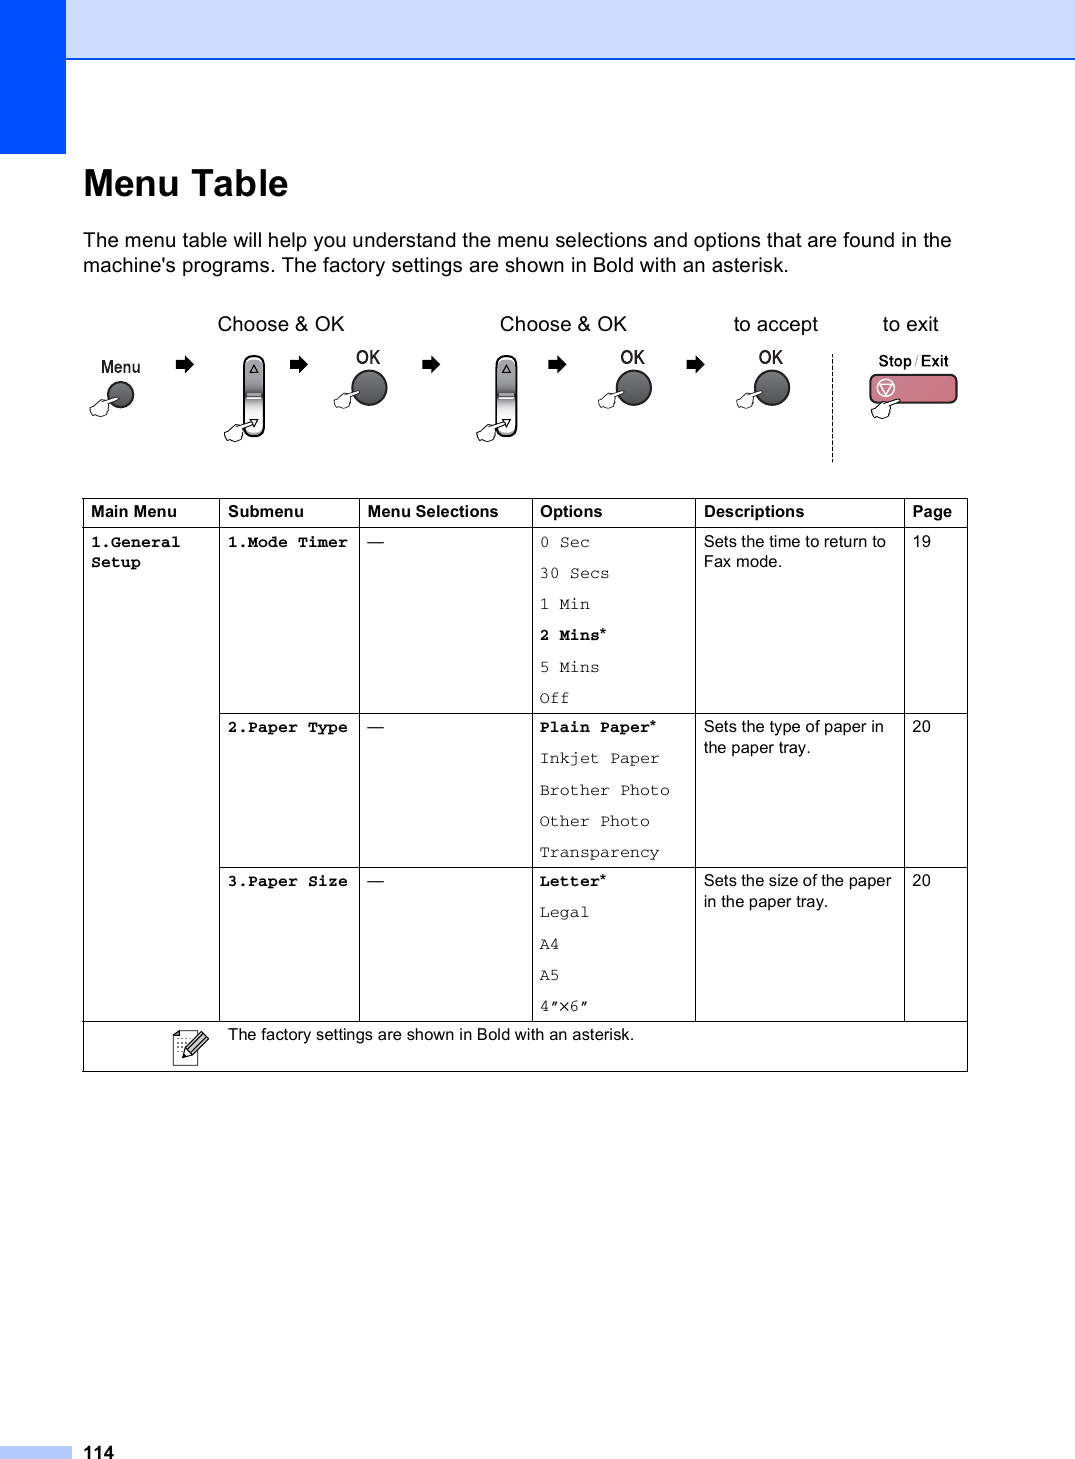
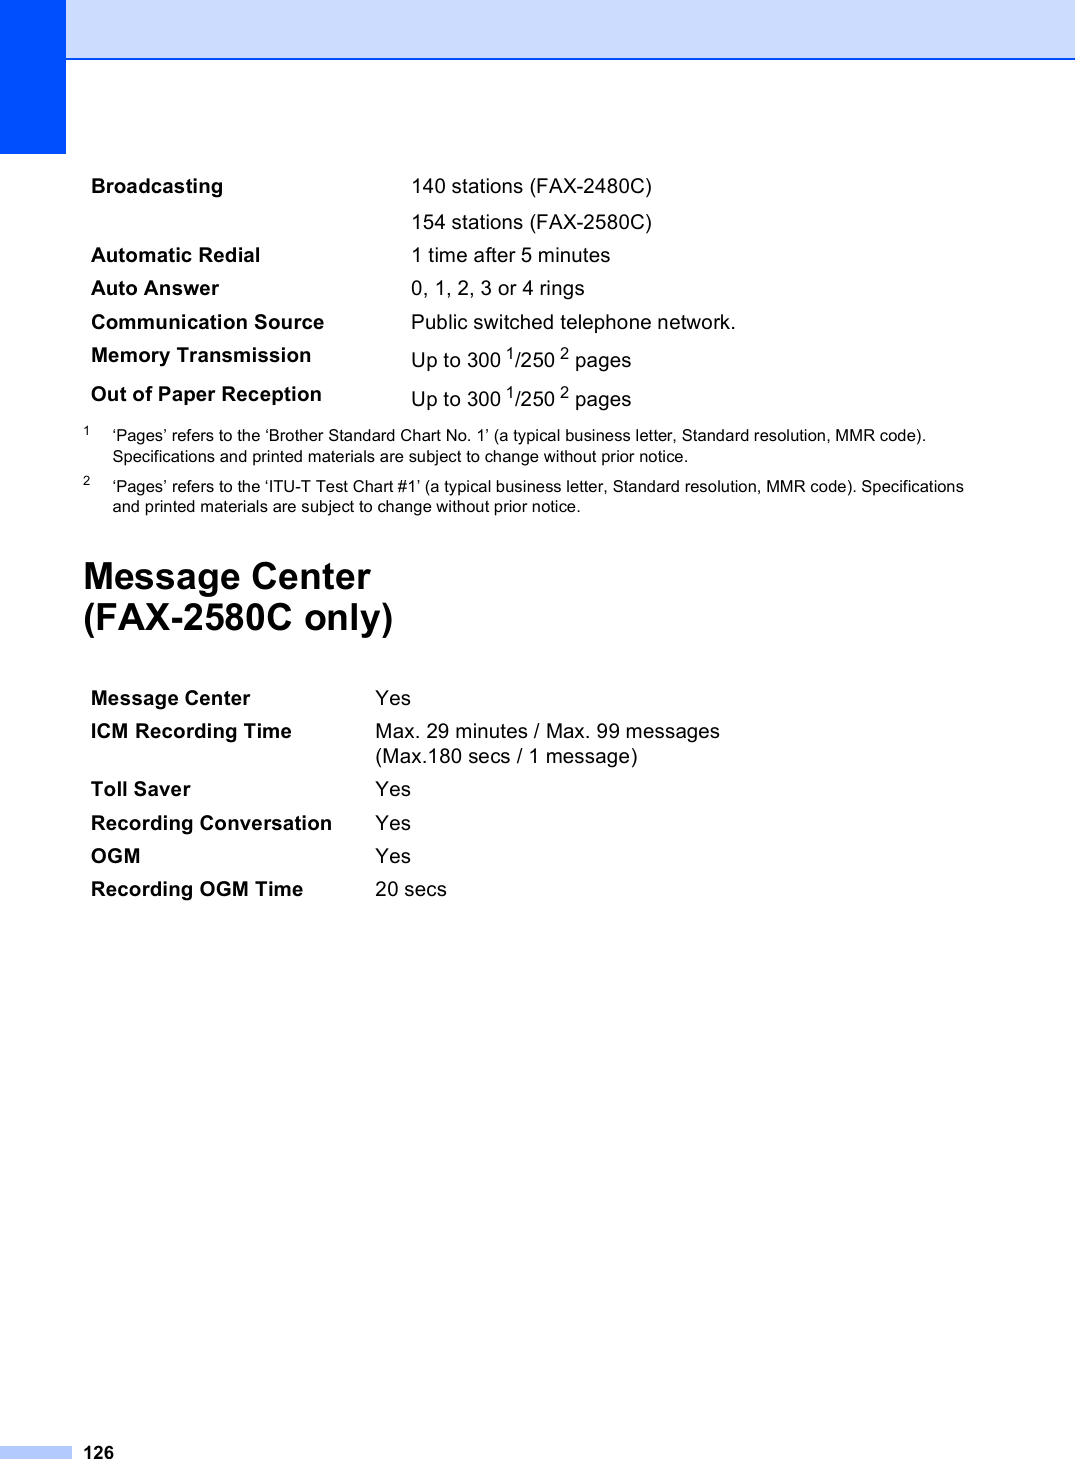
![122DGeneral DSpecifications DMemory Capacity 16 MB Memory Backup Approx. 24 hours (FAX-2580C only) ADF (automatic document feeder) Up to 10 pagesTemperature: 68°F - 86°F (20°C - 30°C)Humidity: 50% - 70%Paper: [20 lb (80 g/m2)] A4 or Letter sizePaper Tray 100 Sheets [20 lb (80 g/m2)]Printer Type Ink JetPrint Method Black:Color:Piezo with 94 × 1 nozzlesPiezo with 94 × 3 nozzlesLCD (liquid crystal display) 16 characters × 1 linePower Source AC 120V 50/60HzPower Consumption (FAX-2480C)Off Mode:Standby:Operating:(FAX-2580C)Off Mode:Standby:Operating:Average 4 WAverage 6 WAverage 29 WAverage TBD WAverage TBD WAverage TBD W](https://usermanual.wiki/Brother/8CAA20.User-Manual-2/User-Guide-692711-Page-63.png)
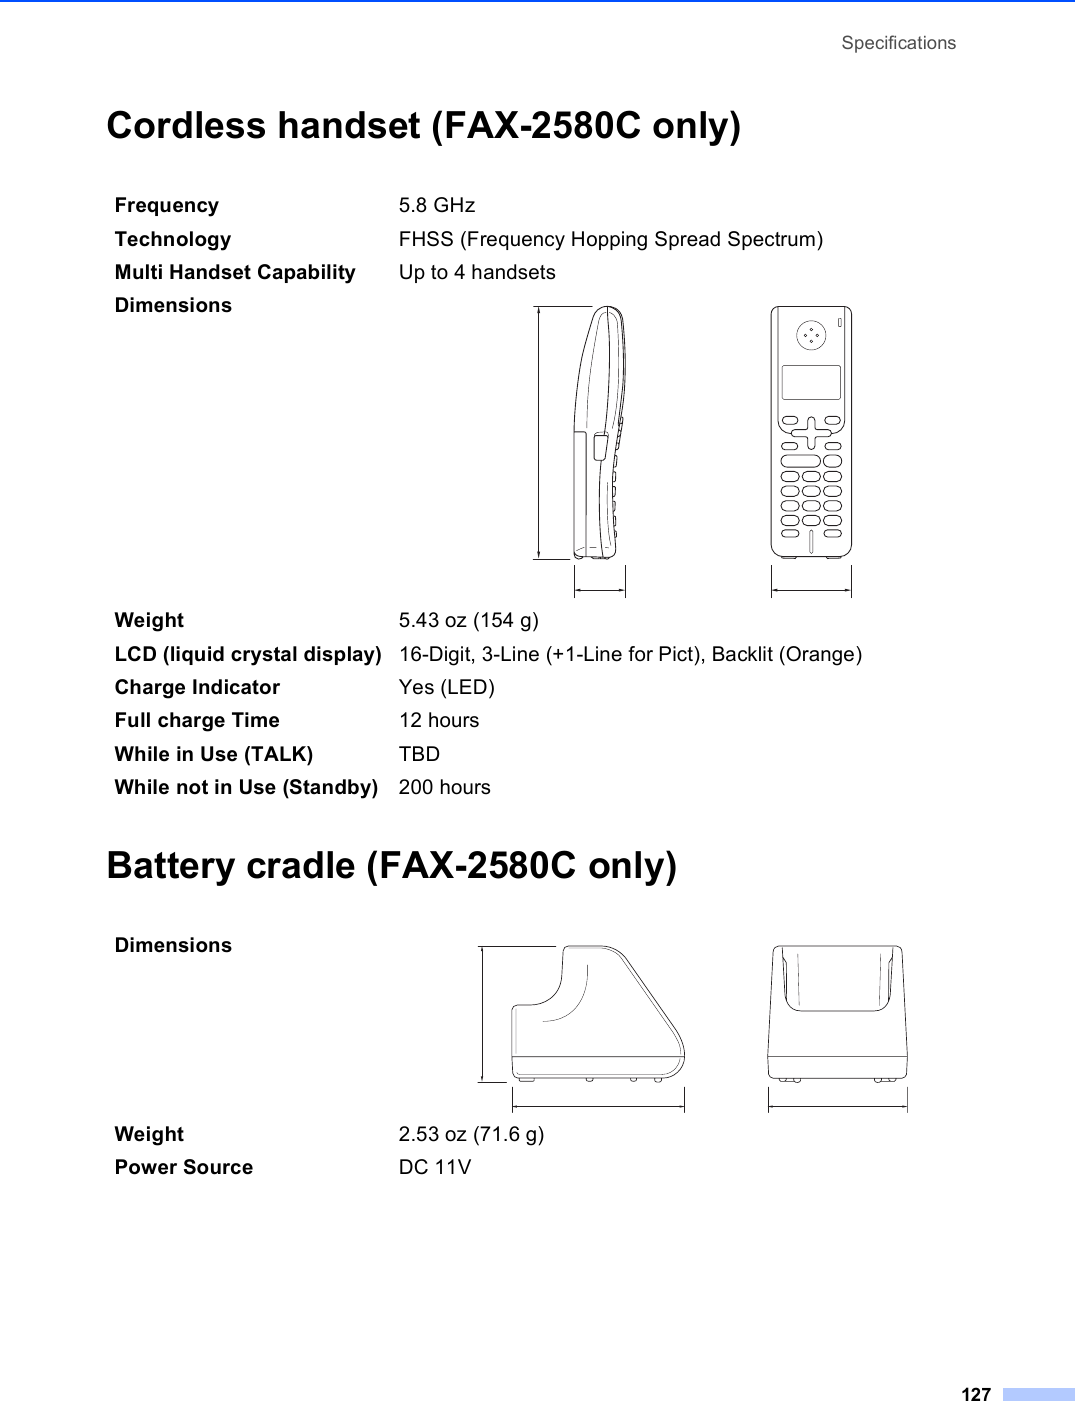
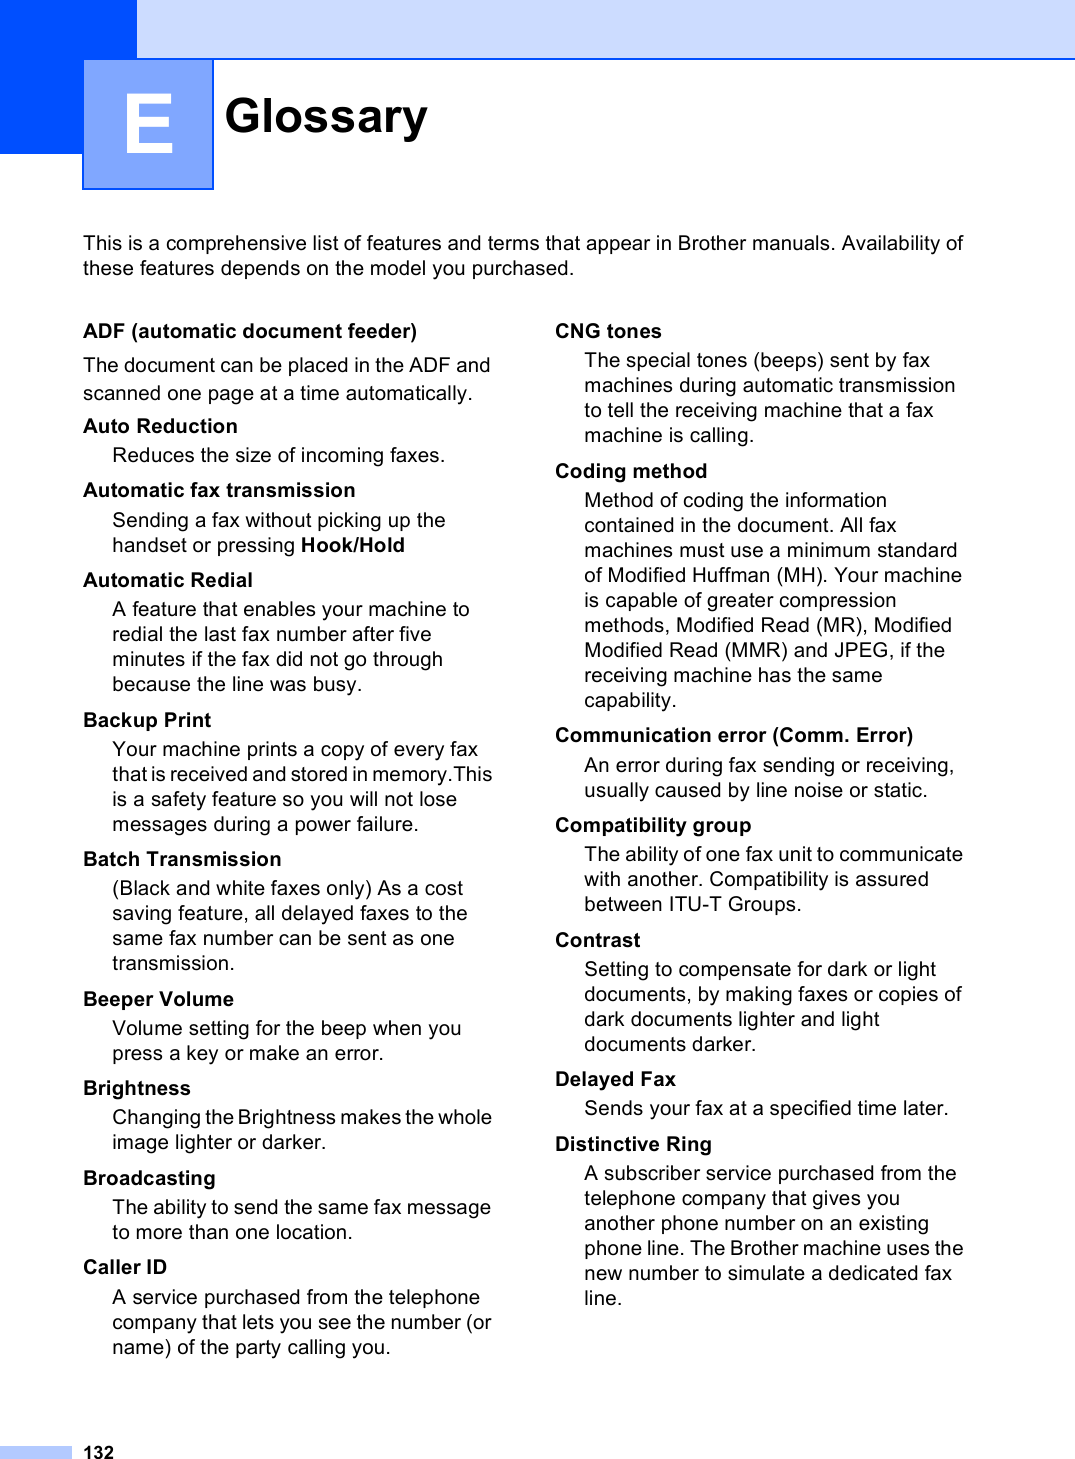
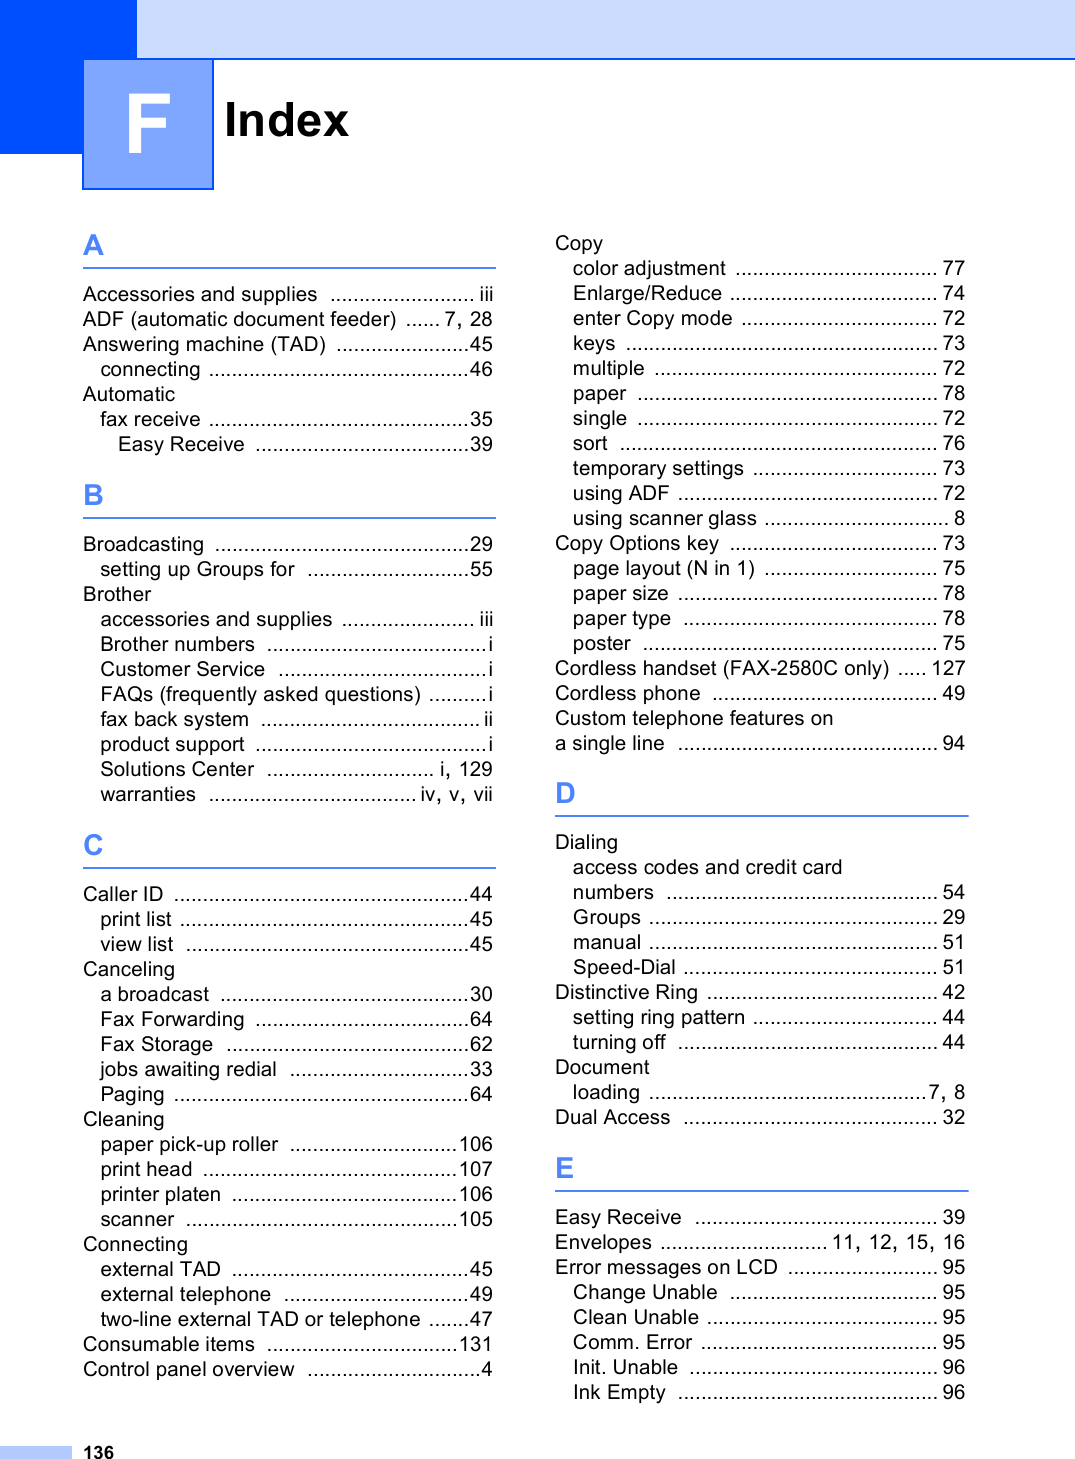
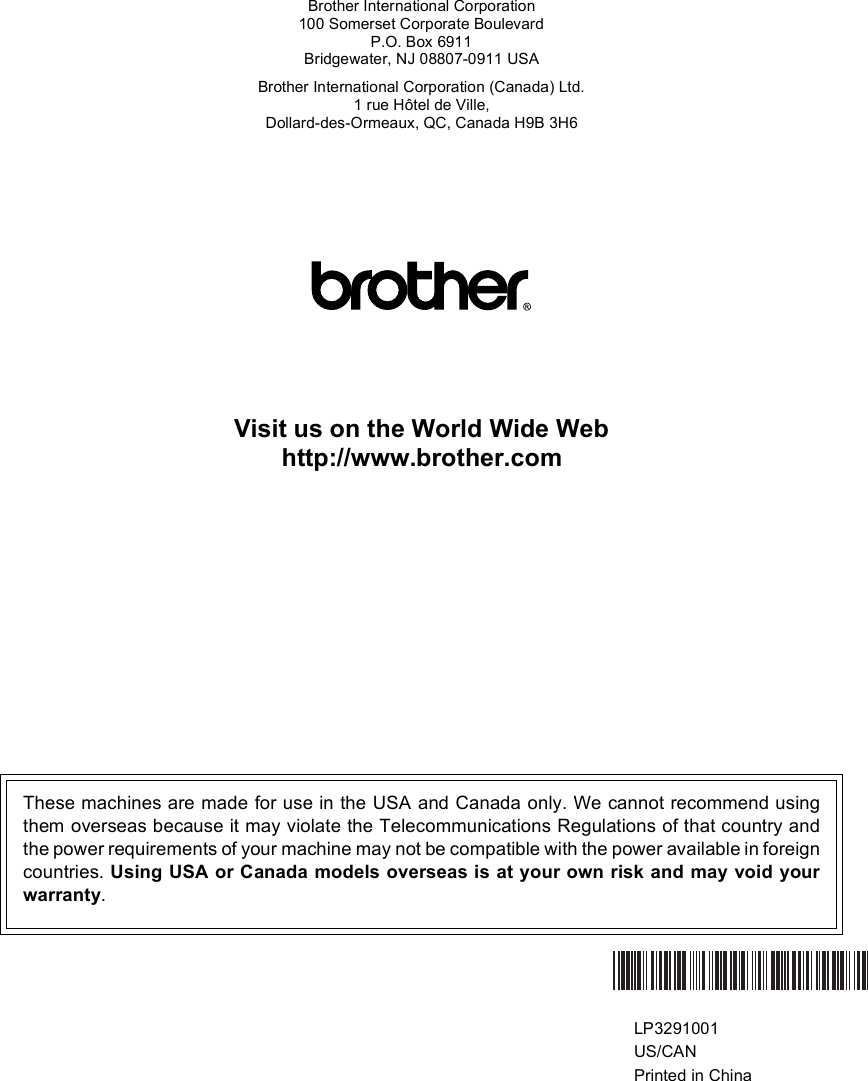
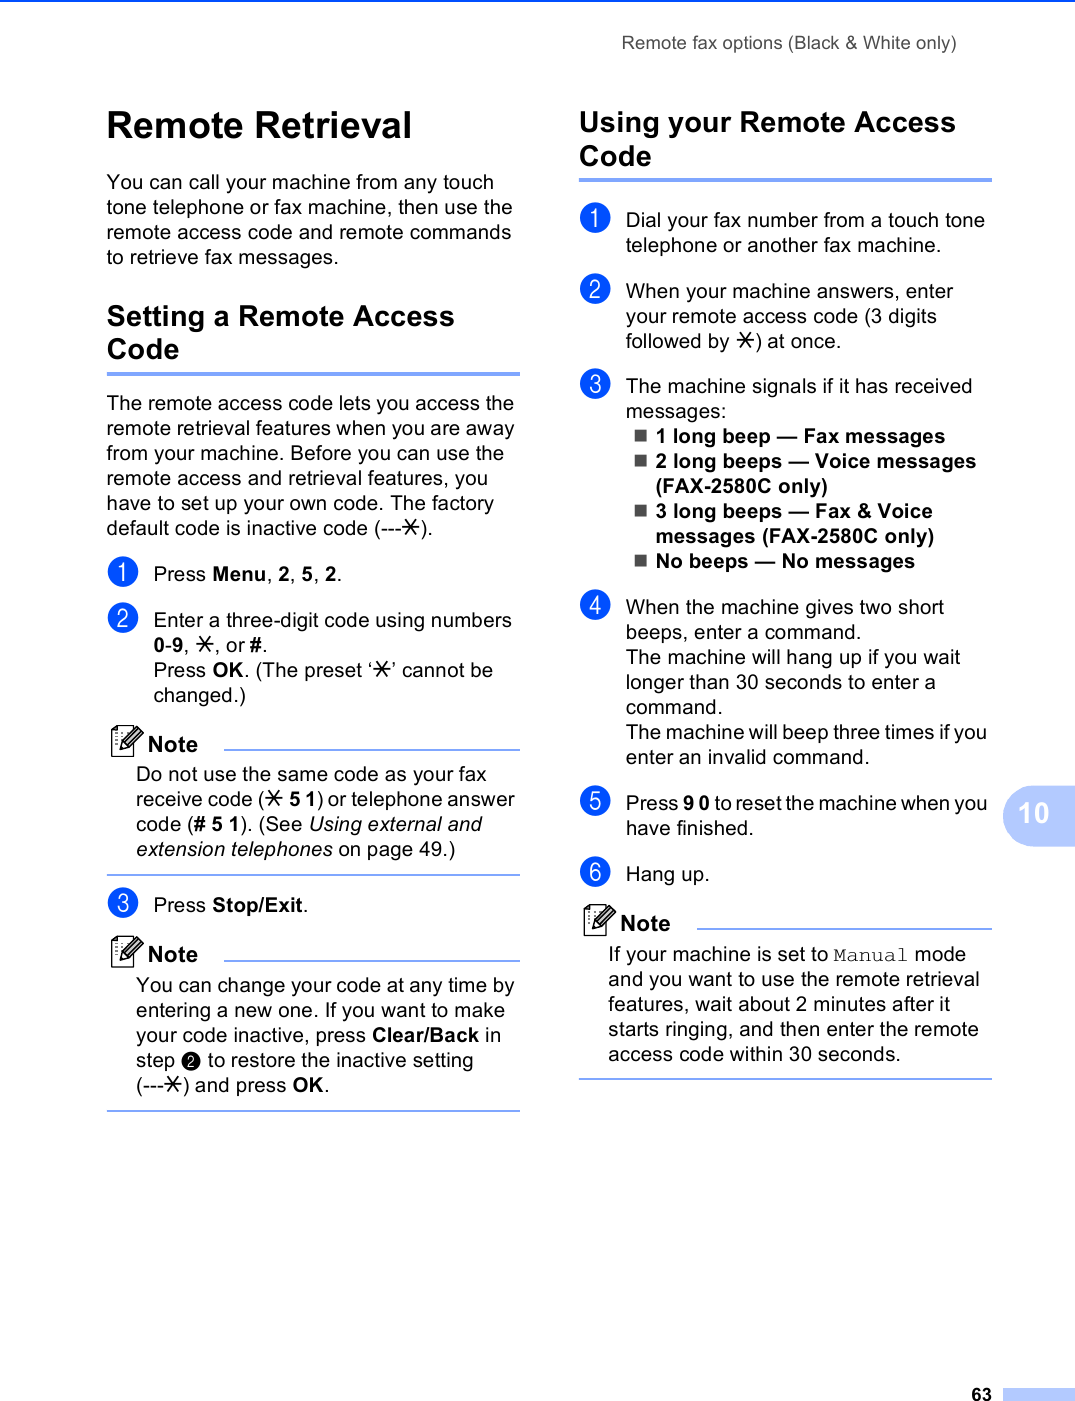
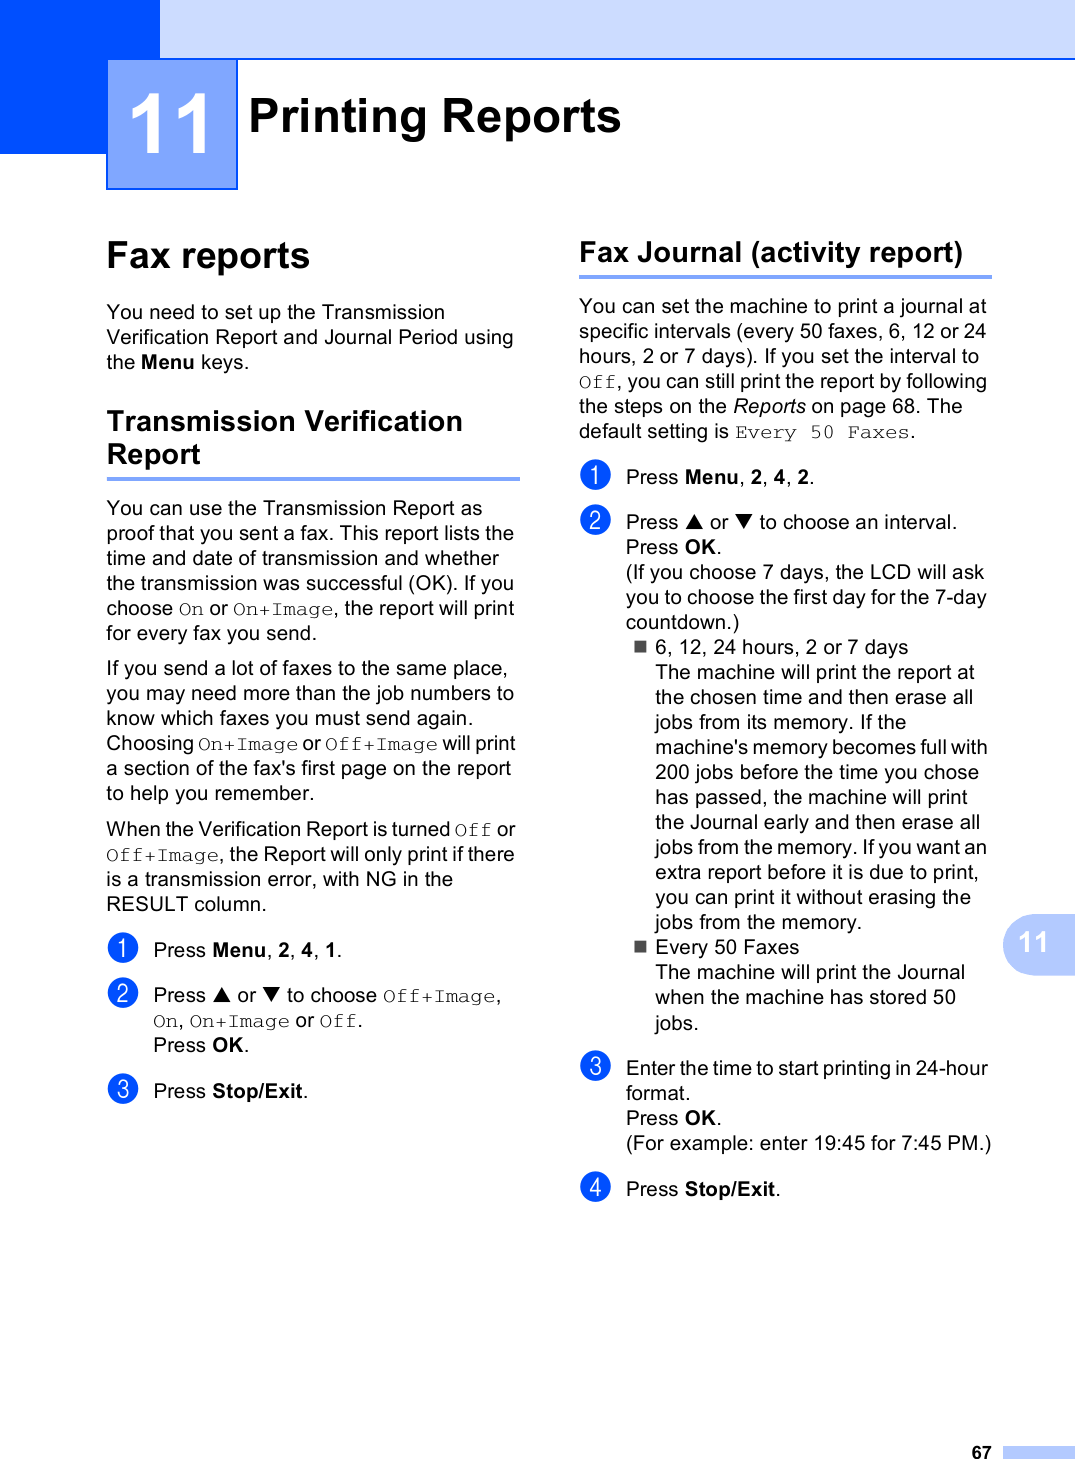
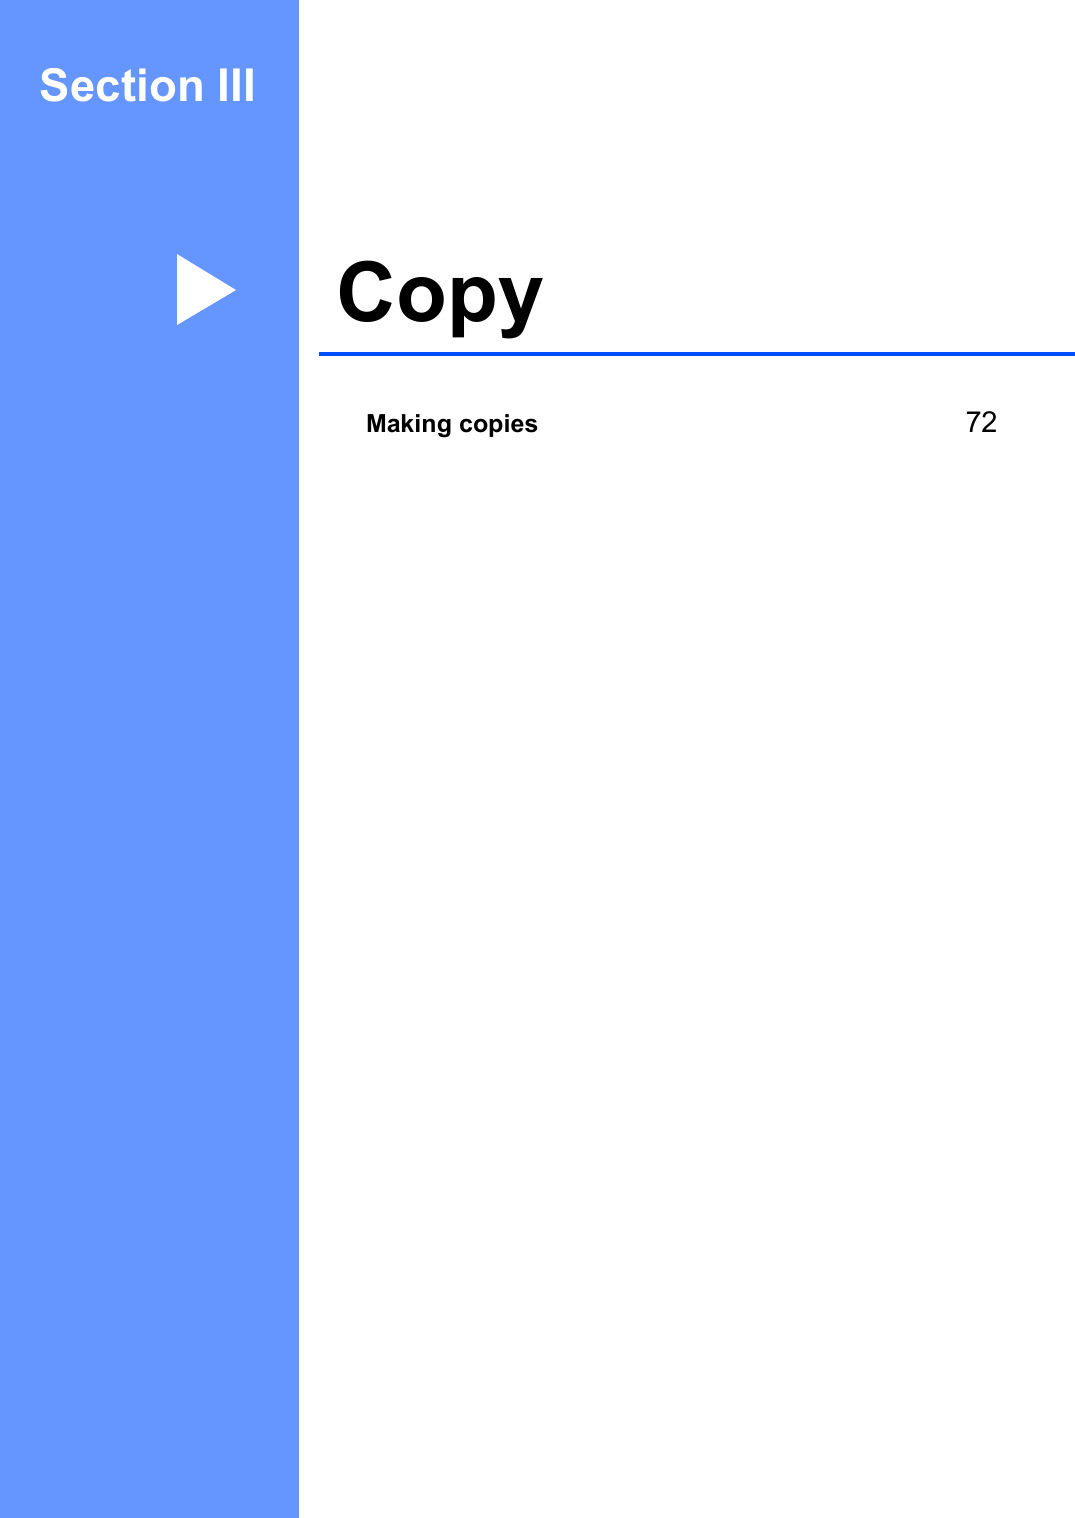
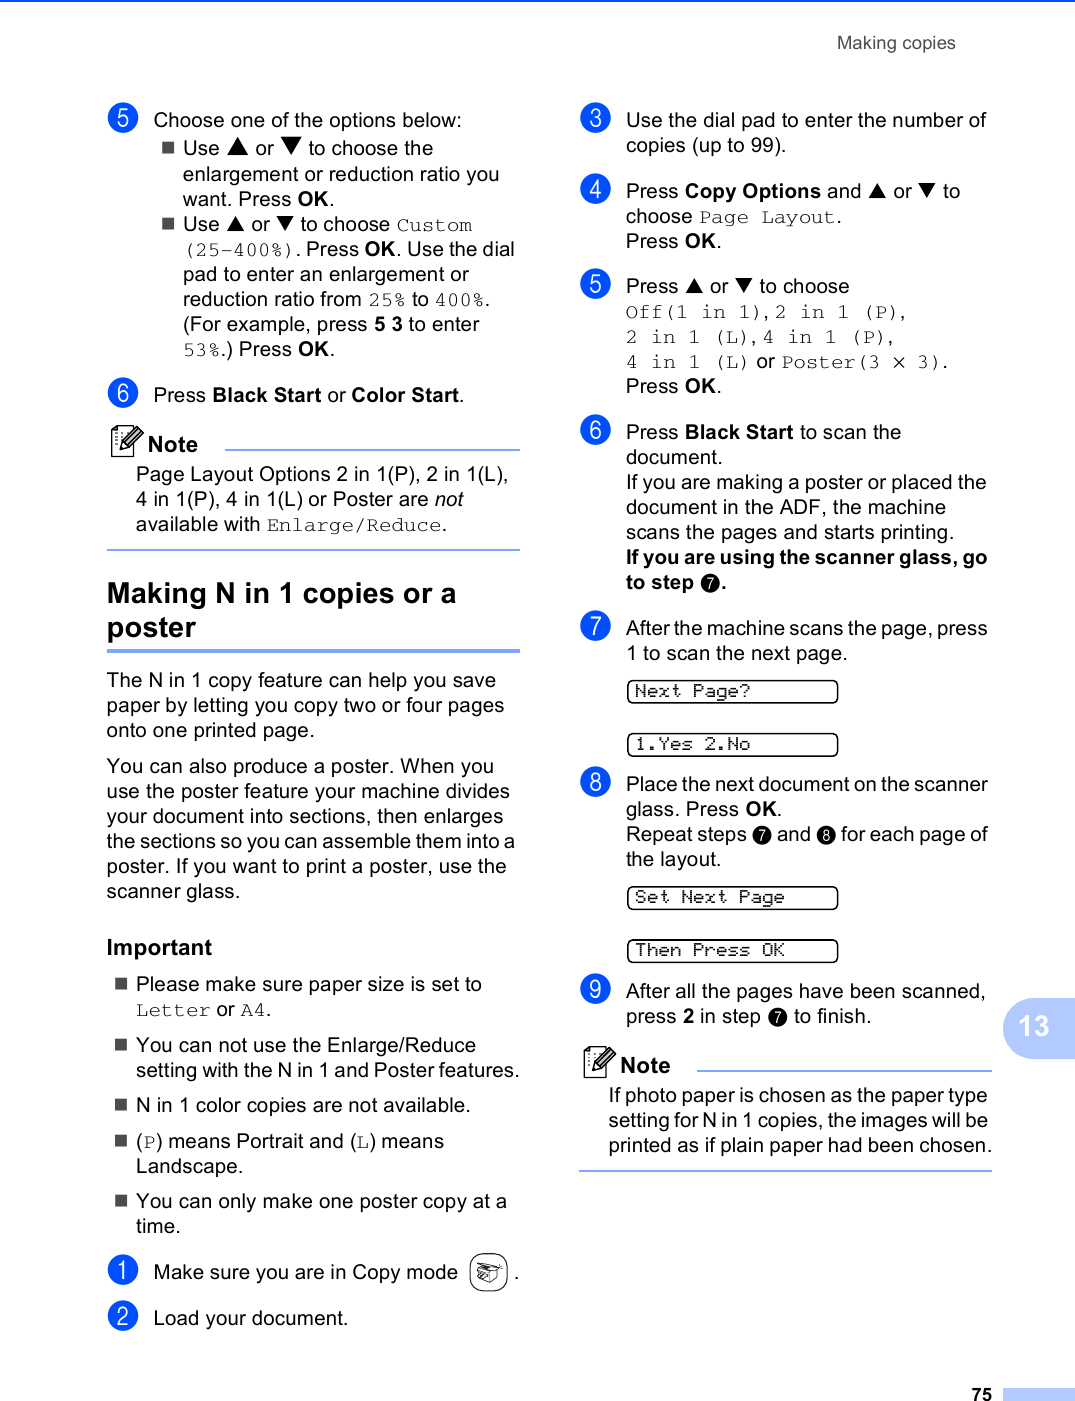
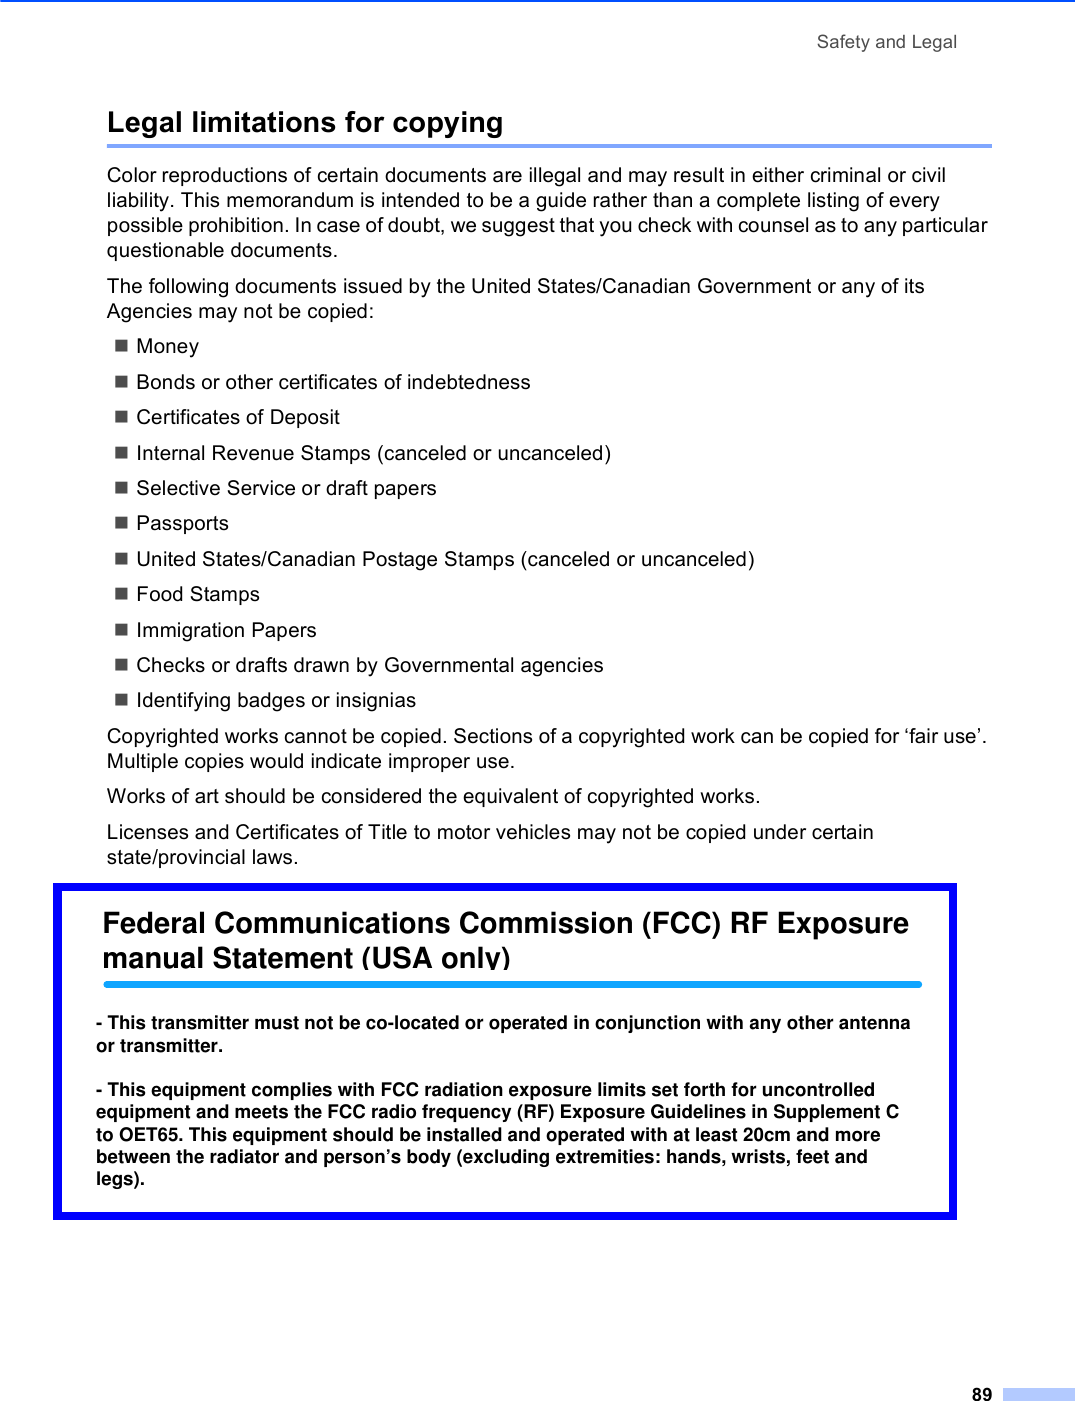
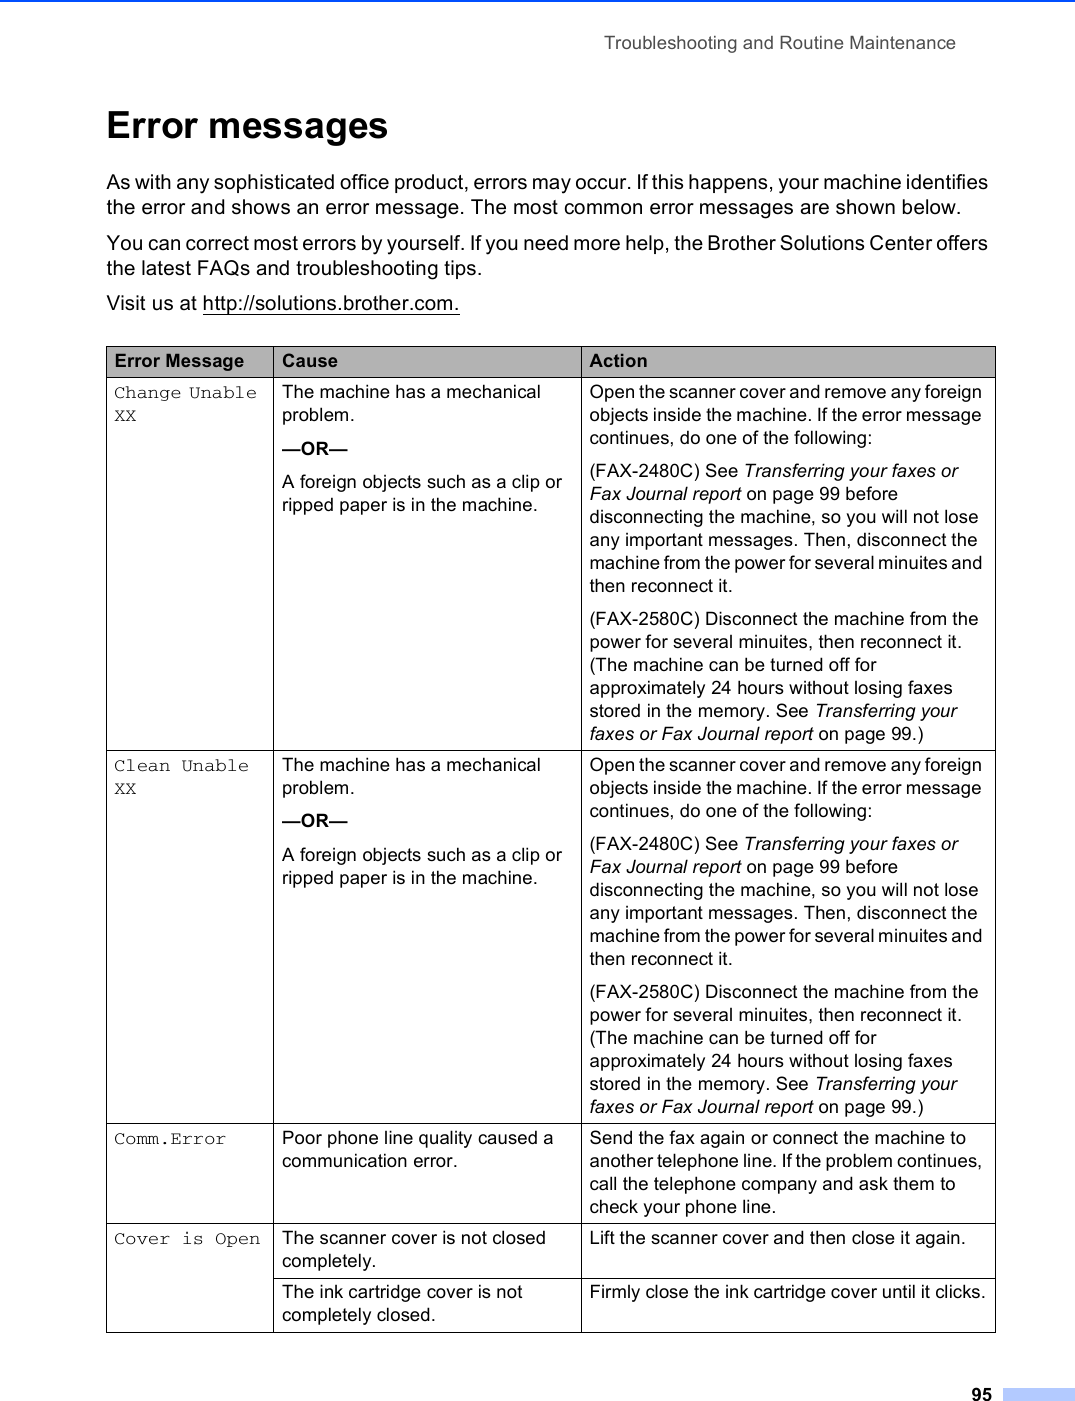
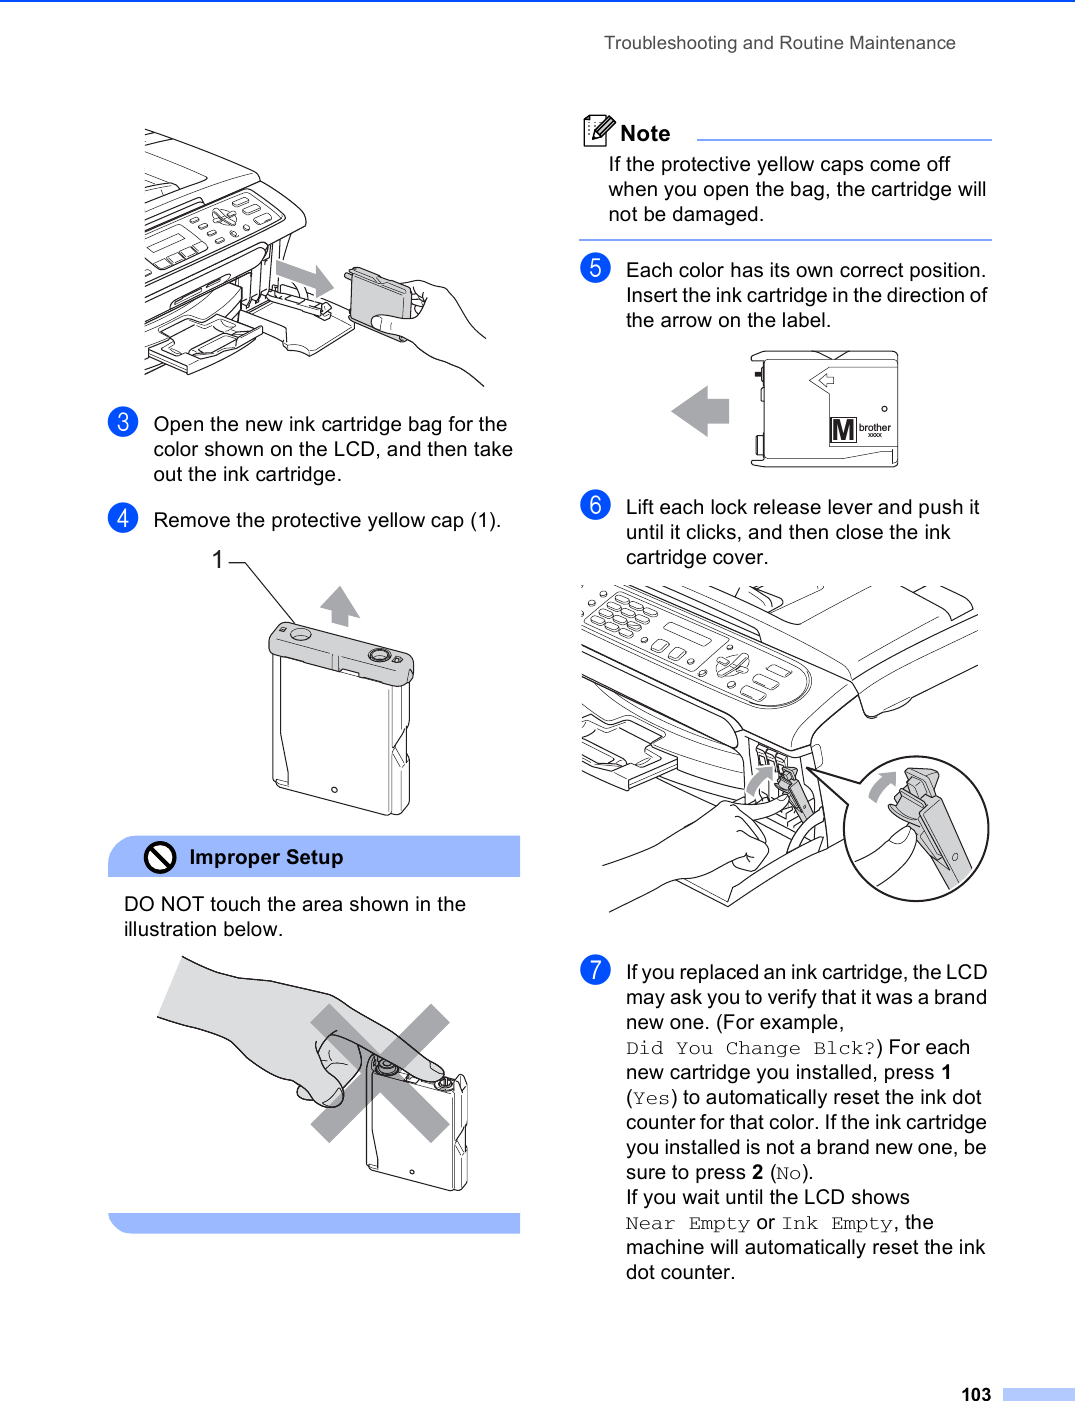
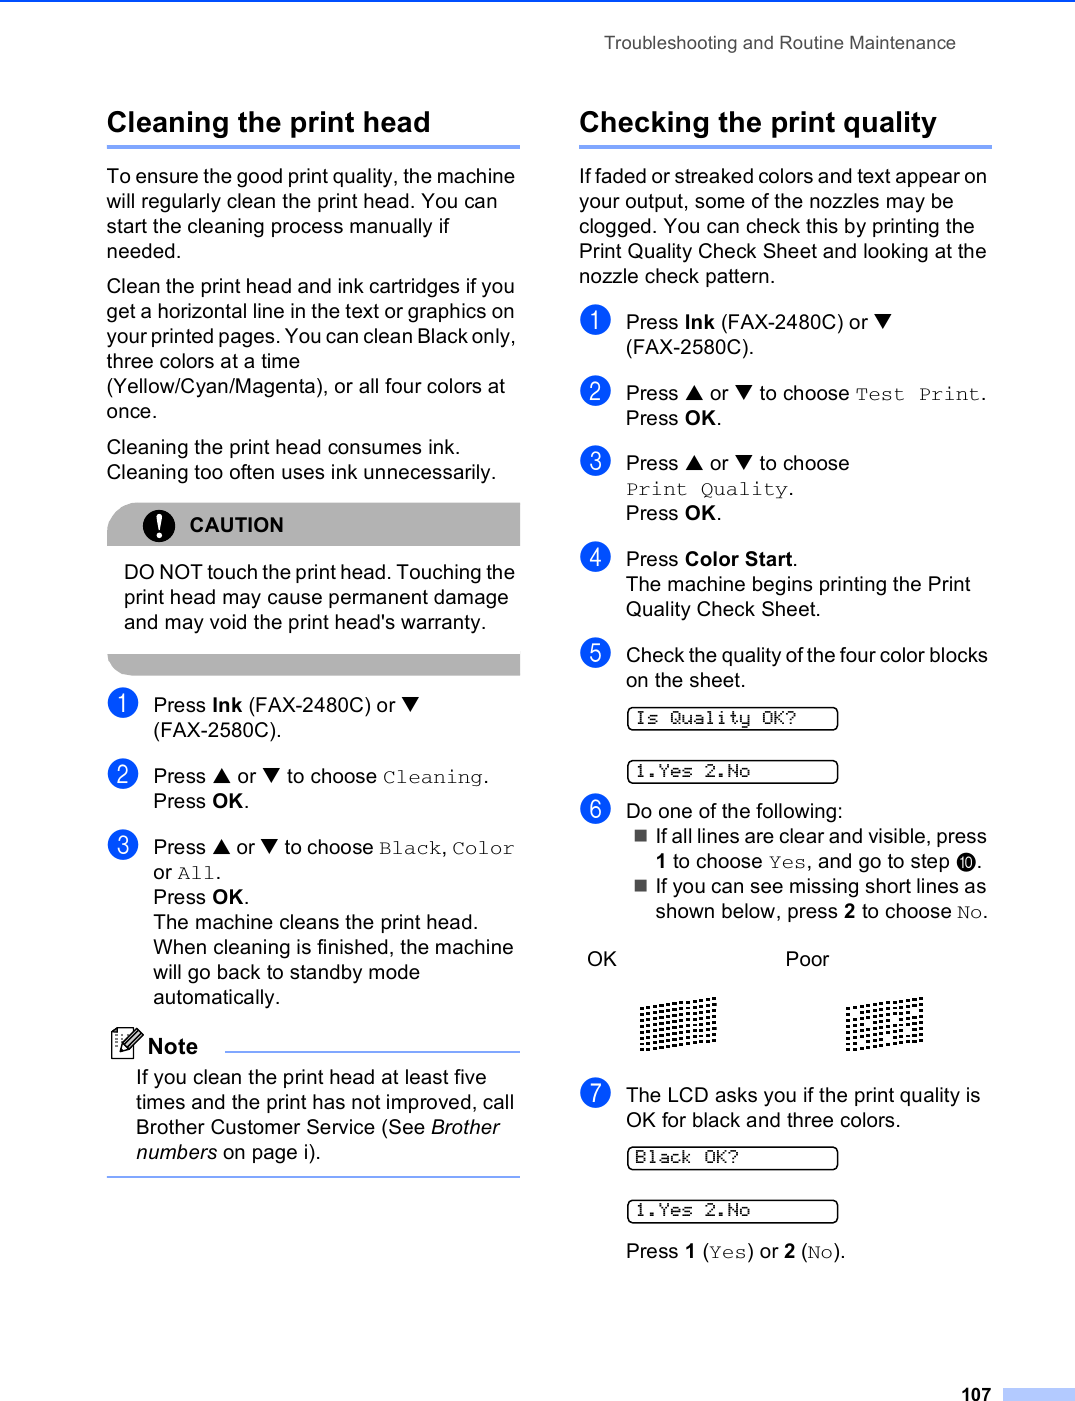
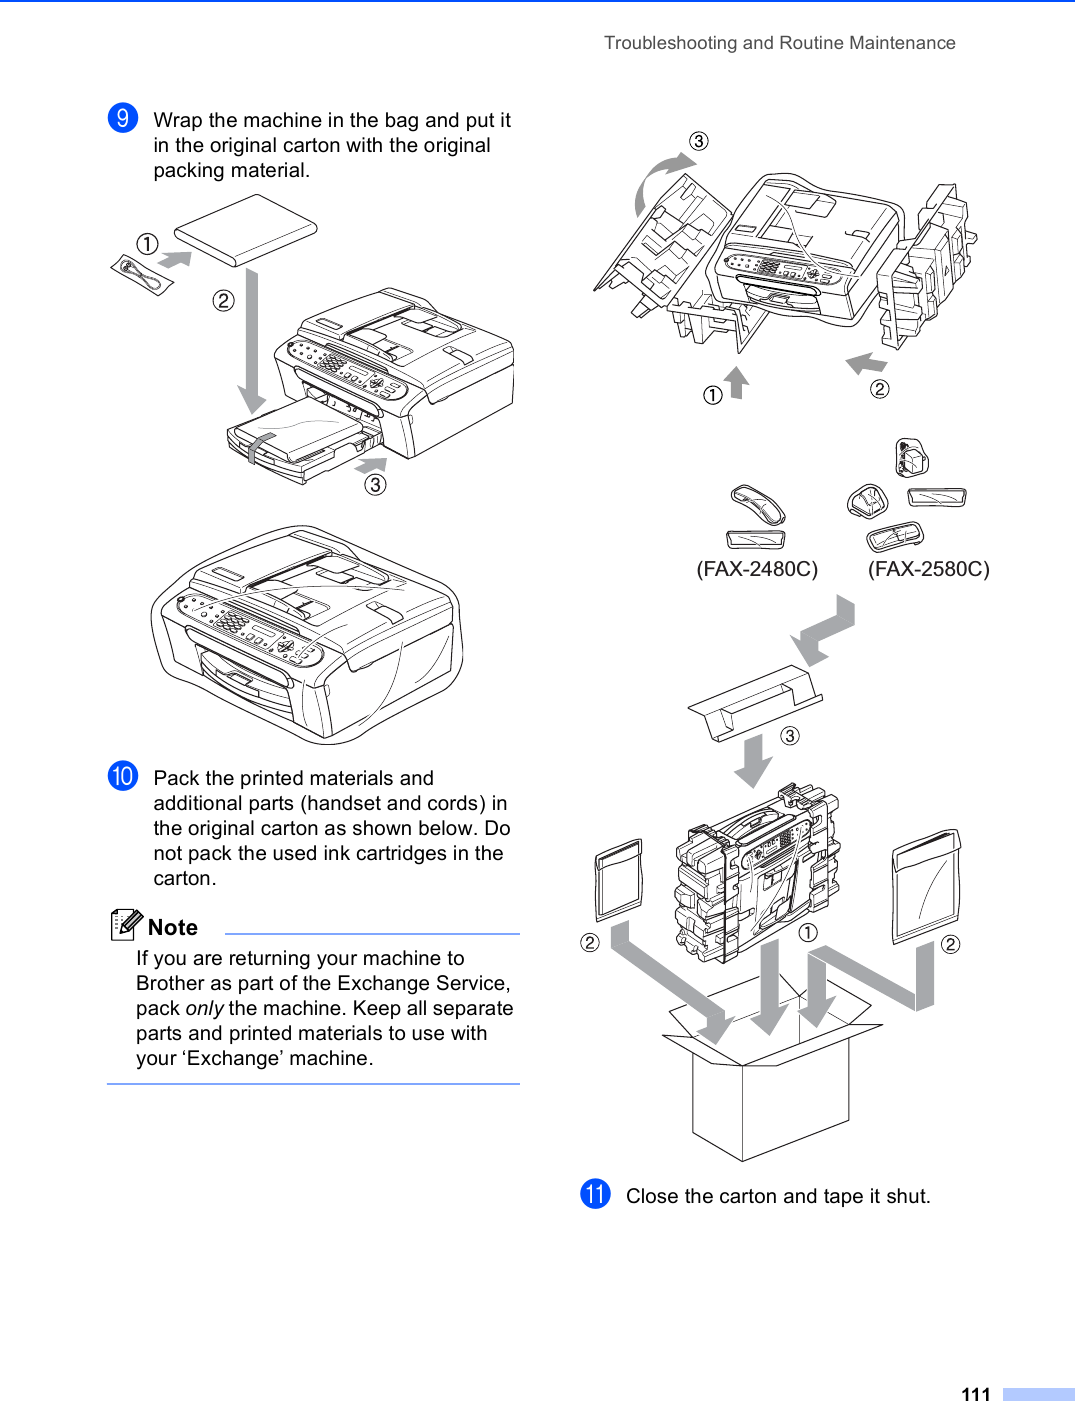
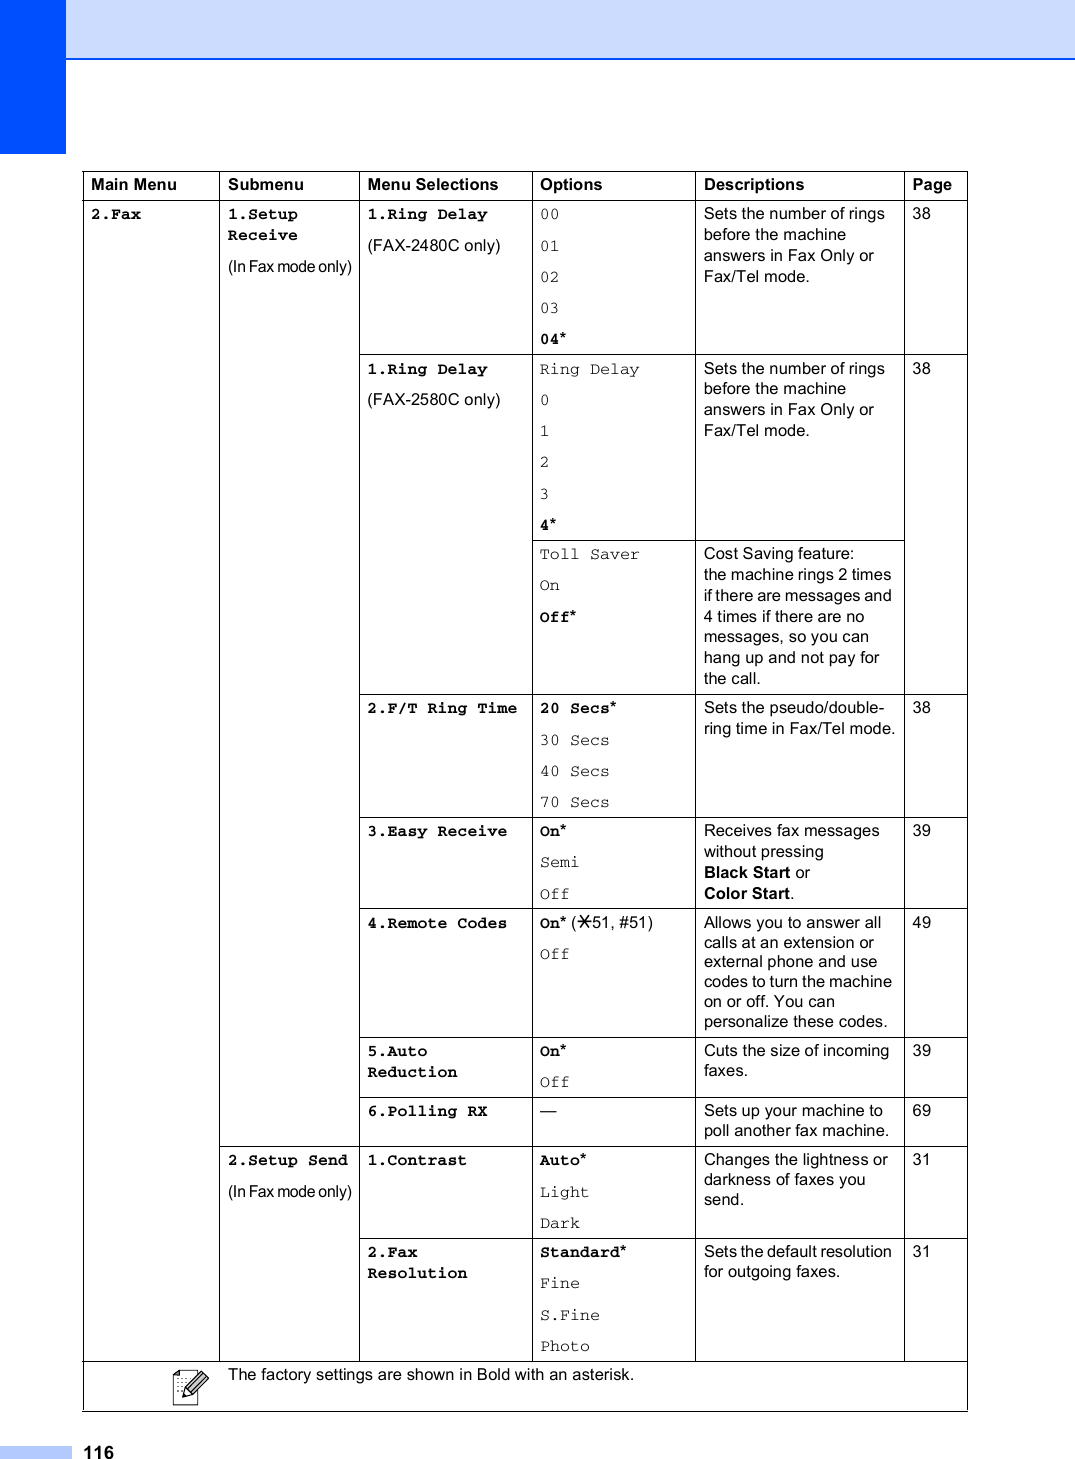
![Specifications129Printer DNoteYou can download the free Brother printer driver from the Brother SolutionsCenter. Visit us at: http://solutions.brother.com 1Output image quality varies based on many factors including, but not limited to input image resolution and quality and print media.2Based on Brother standard pattern.Letter size in draft mode.3When you set the Borderless feature to On.4See Paper type and size for each operation on page 11.Printer Driver Windows® 98/98SE/Me/2000 Professional/XP/Windows® XP Professional x64 Edition driver supporting Brother Native Compression mode and bi-directional capabilityBrother Ink Driver For Mac OS® X 10.2.4 or greaterResolution Up to 1200 × 6000 dpi 11200 × 2400 dpi1200 × 1200 dpi600 × 600 dpi600 × 300 dpi600 × 150 dpiPrint Speed Up to 25 pages/minute (Black) 2Up to 20 pages/minute (Color) 2Printing Width 8.03 in. [8.5 in. (borderless)3] Disk-Based Fonts 35 TrueTypeBorderless Letter, A4, A6, Photo 4" × 6", Index Card, Photo 2L 5" × 7", Post Card 4](https://usermanual.wiki/Brother/8CAA20.User-Manual-2/User-Guide-692711-Page-70.png)