Brightstar AVVIO505 GSM MOBILE PHONE-USB PORTION User Manual
Brightstar Corporation GSM MOBILE PHONE-USB PORTION Users Manual
UserManual.wiki
>
Brightstar
>
AVVIO505 User Manual
Users Manual
Navigation menu
Upload a User Manual
Namespaces
Wiki Guide
HTML
PDF
Info
Views
User Manual
Discussion / Help
Navigation
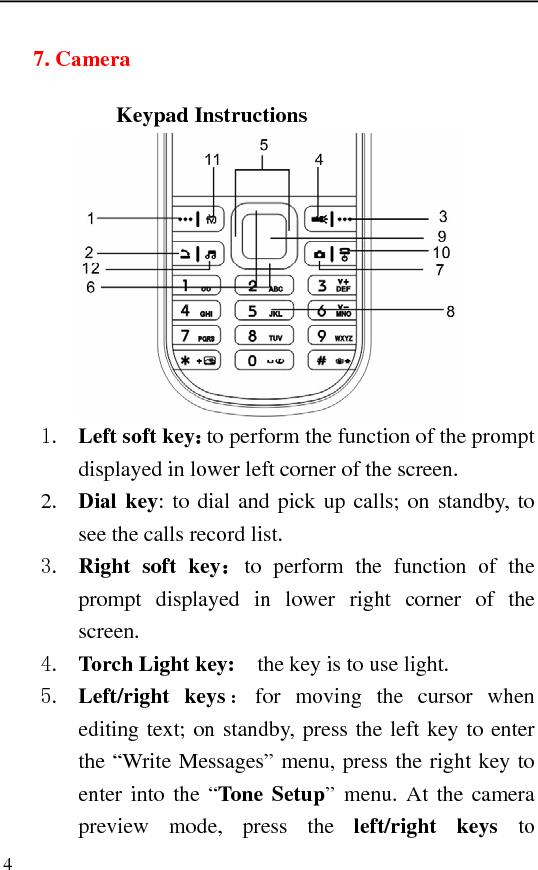
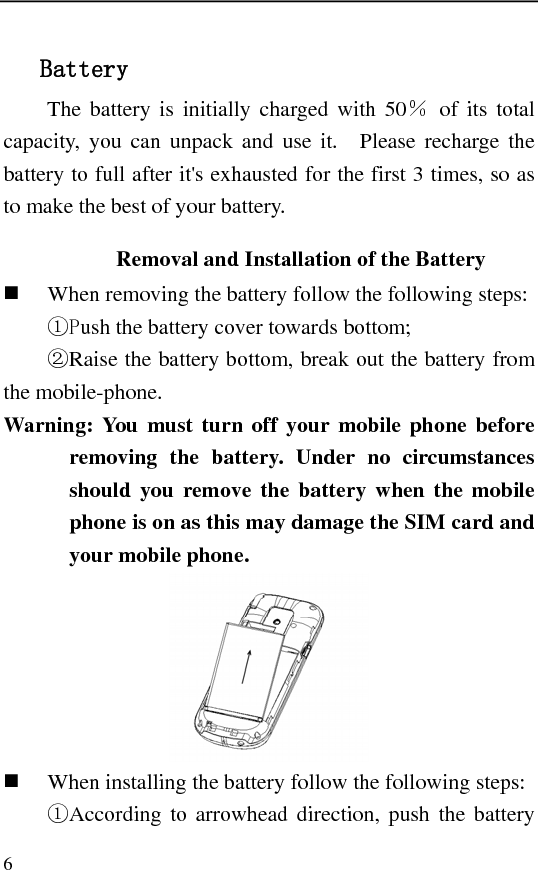
![5 circularly switch with EV; in the [File Manager] \[Memory Card] submenu, press the left key to return the upper menu, press the right key to open the file. 6. Up/down keys :scroll to view names, phone numbers, SMS, MMS etc, moves the cursor up and down when editing text; on standby, press the up key to enter the “Video Recorder” menu, press the down key to enter into the “Alarm” menu. At the camera preview mode, press the up/down keys to adjust Zoom. 7. Camera key:.taking pictures 8. Number key: to import numbers;When playing music,use 6 to decrease volume,use 3 to increase volume. 9. OK key: to enter the menu or execute the function which hightlighted. 10. Hang-up key: to end a call or reject incoming calls; under most circumstances pressing this key will put the mobile phone into standby mode. 11. TV keys: to play TV. 12. Mp3 keys: to play music](https://usermanual.wiki/Brightstar/AVVIO505/User-Guide-1226500-Page-5.png)