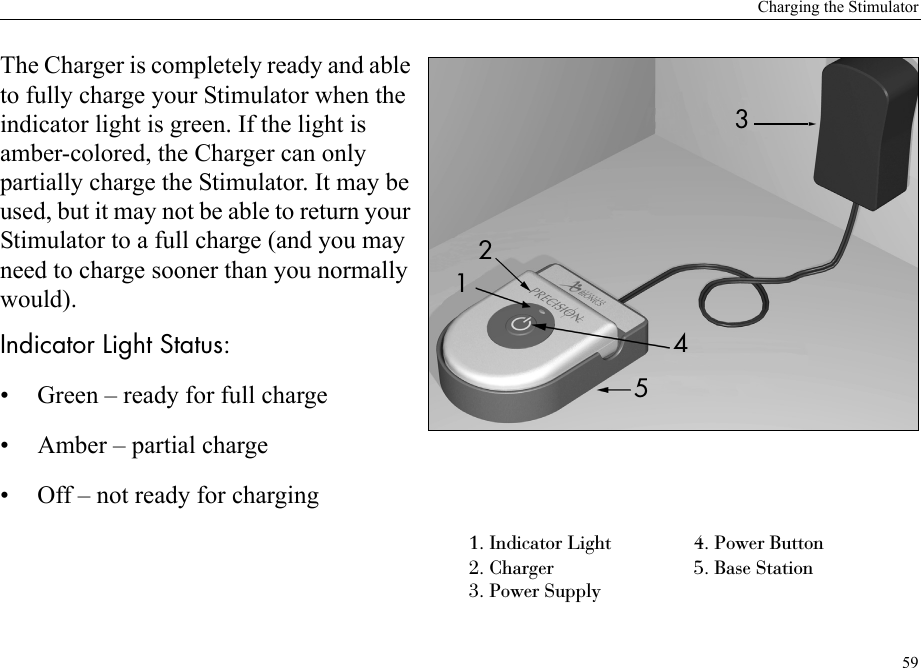
Boston Scientific Neuromodulation PSC5210W Precision SCS Remote Control User Manual II PSH RC3 CHGR2 US
Boston Scientific Neuromodulation Corporation Precision SCS Remote Control II PSH RC3 CHGR2 US
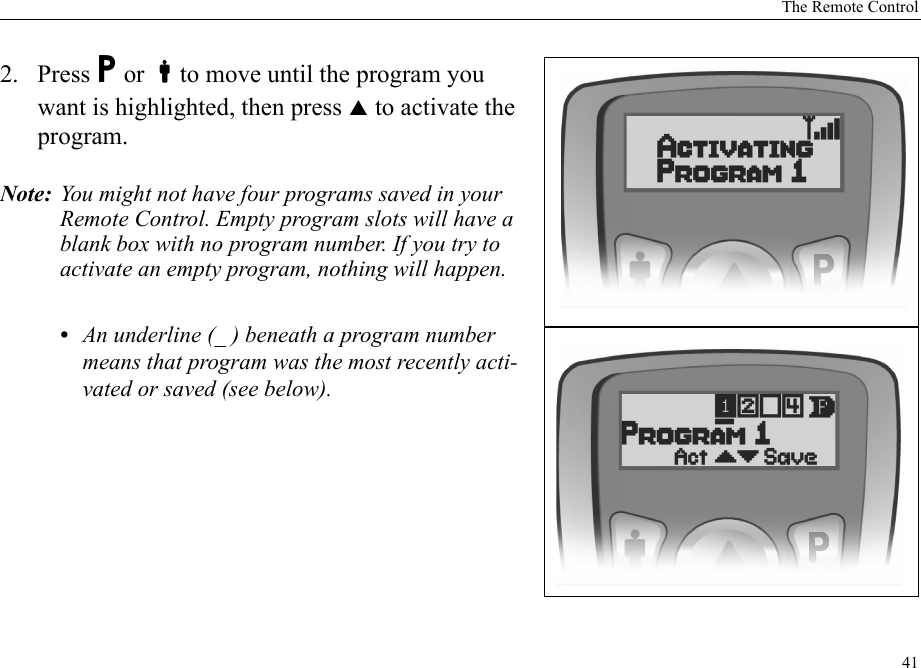
UserManual.wiki
>
Boston Scientific Neuromodulation
>
PSC5210W User Manual
>
Patient System Handbook
Contents
1.
Patient Handbook
2.
Patient Trial guide
3.
Physician Implant Manual
4.
Physician trial kit insert
5.
Lead manual
6.
Remote control package insert
7.
Patient System Handbook
8.
Patient Trial Handbook
Patient System Handbook
Navigation menu
Upload a User Manual
Namespaces
Wiki Guide
HTML
PDF
Info
Views
User Manual
Discussion / Help
Navigation


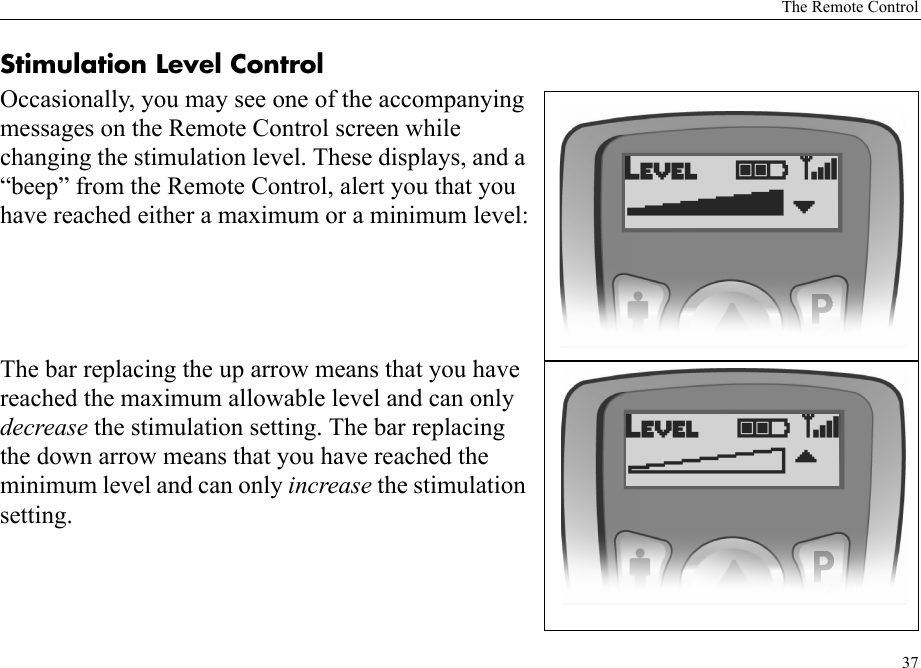
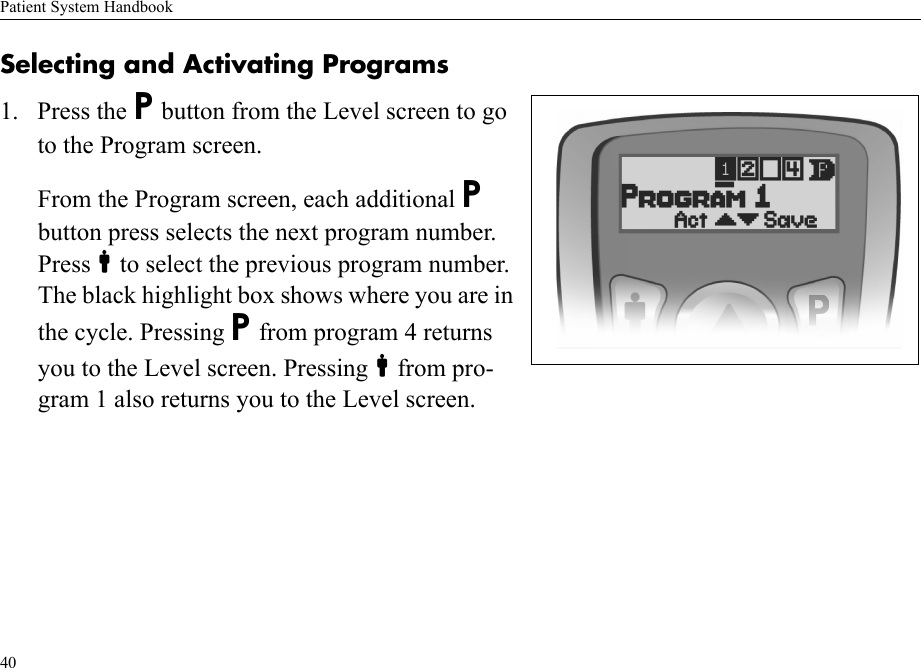
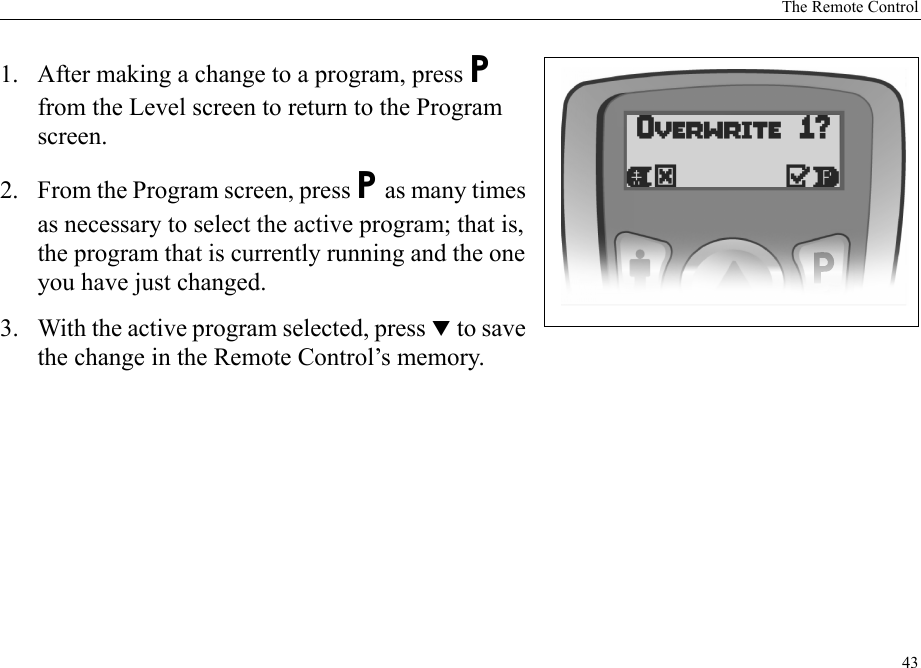
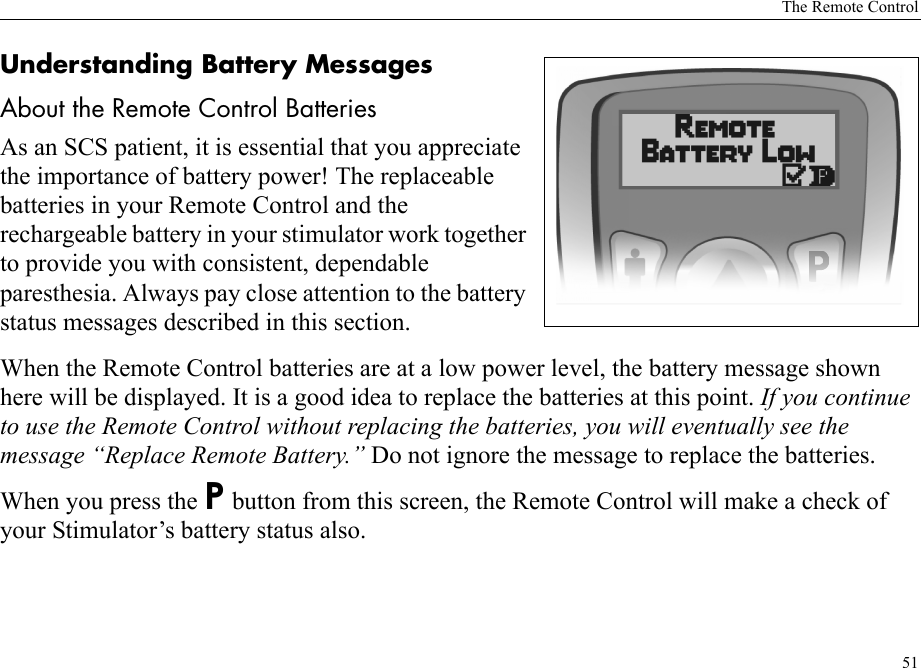
![Patient System Handbook44The Remote Control will first ask you to confirm that you want to “overwrite” the program; press the appropriate button.If you confirm the change by pressing P, the program will be updated and saved. If you decide not to make a permanent change, pressing Cwill return you to the Program screen.You may also save a program change as a completely new program if an empty program slot [] is available: Simply select the empty slot using P and press T. After saving the new program, the Remote Control will return to the Level screen.](https://usermanual.wiki/Boston-Scientific-Neuromodulation/PSC5210W.Patient-System-Handbook/User-Guide-857153-Page-50.png)

![Patient System Handbook501. From the Level screen, press and hold P to reach the Restore screen. Program 1 will be highlighted.Note: The highlighted program is the current selection; an underline (_ ) indicates the last program restored; a [] indicates an empty program slot.2. If necessary, press P to cycle through the program numbers to select the program you want to restore. When the desired program is highlighted, press S. The Remote Control will briefly flash a message confirming the restoration.](https://usermanual.wiki/Boston-Scientific-Neuromodulation/PSC5210W.Patient-System-Handbook/User-Guide-857153-Page-56.png)