Binatone Electronics VEVA1210 1.9ghz CORDLESS PHONE User Manual ht420 d p65
Binatone Electronics International Ltd. 1.9ghz CORDLESS PHONE ht420 d p65
UserManual.wiki
>
Binatone Electronics
>
VEVA1210 User Manual
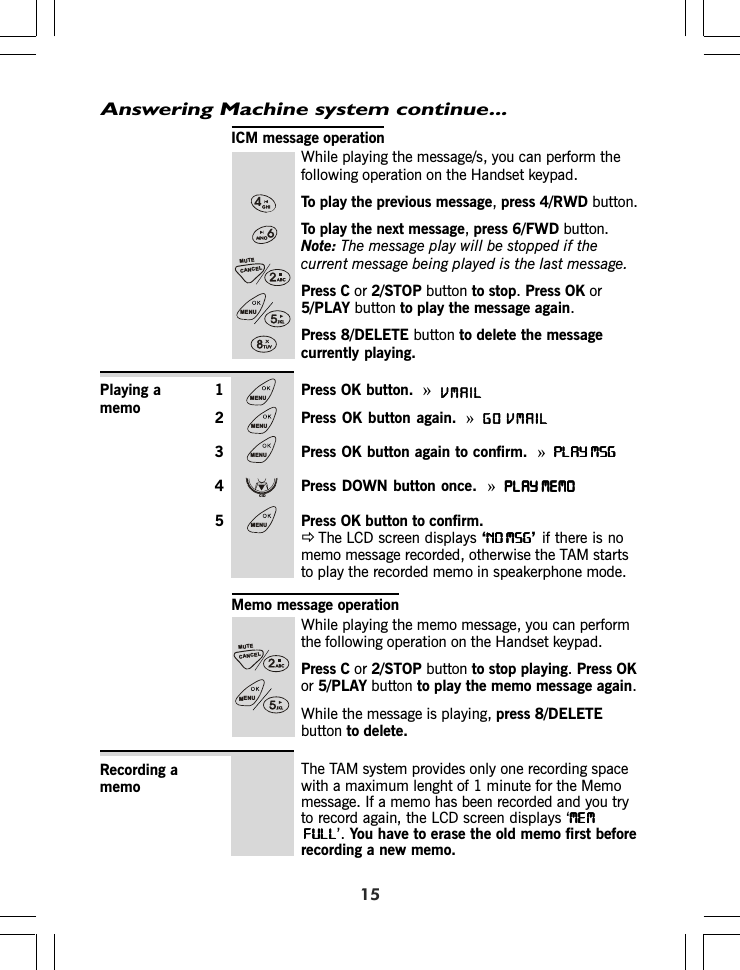
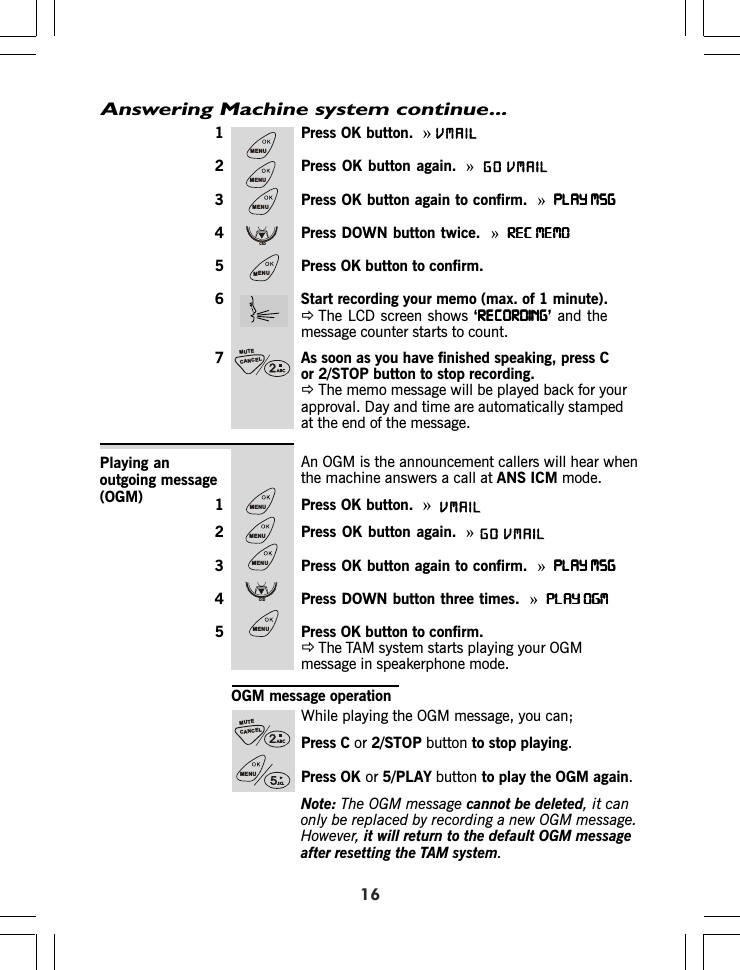
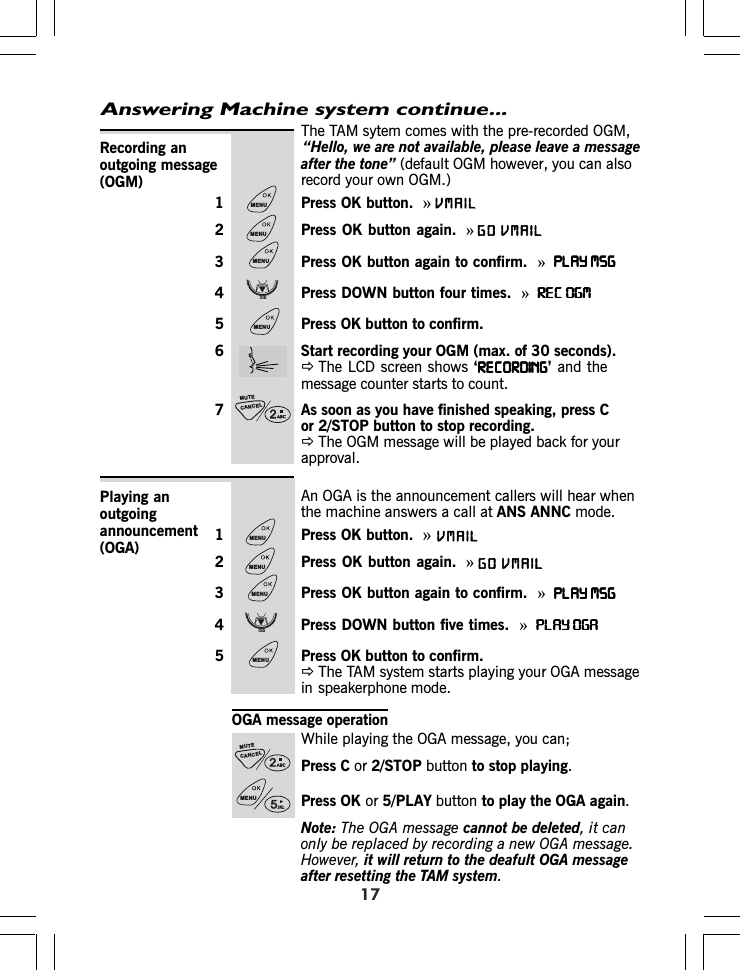
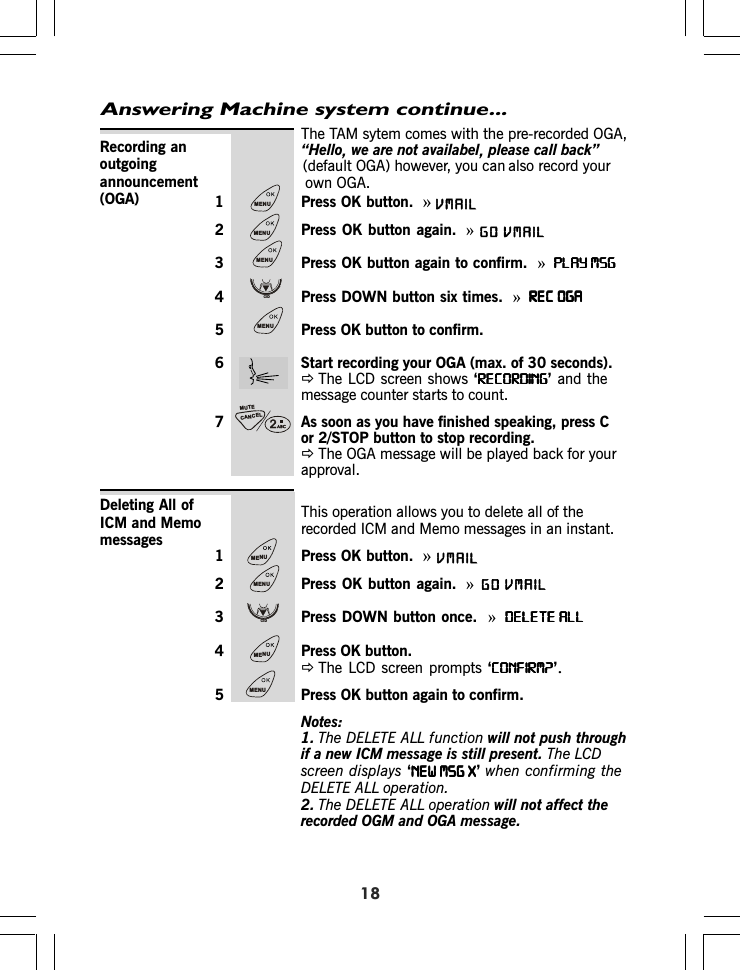
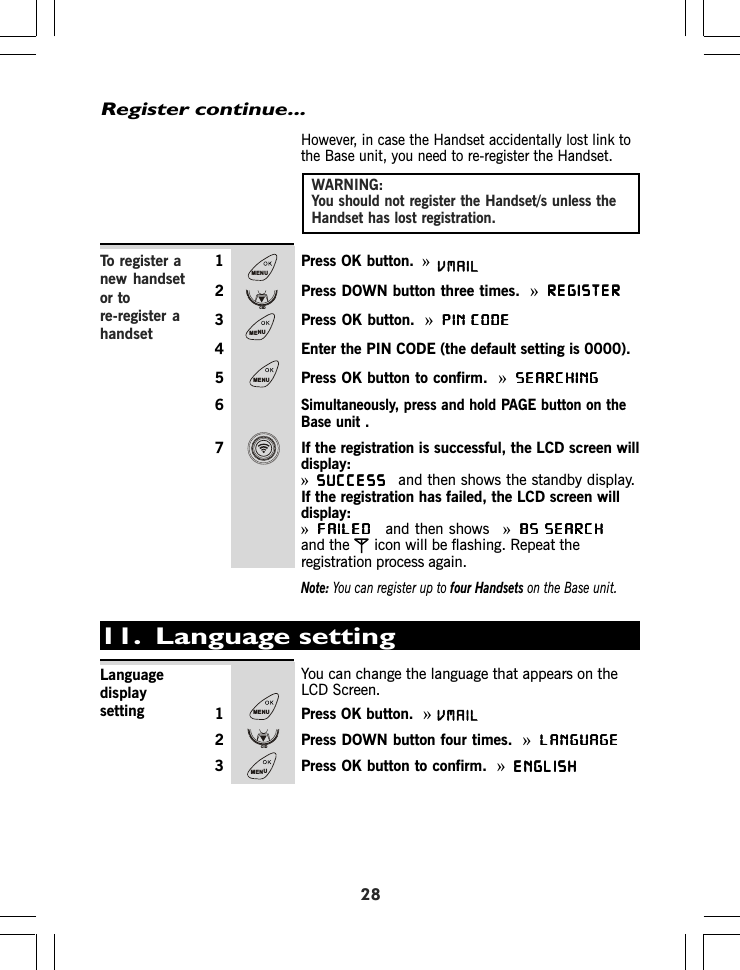
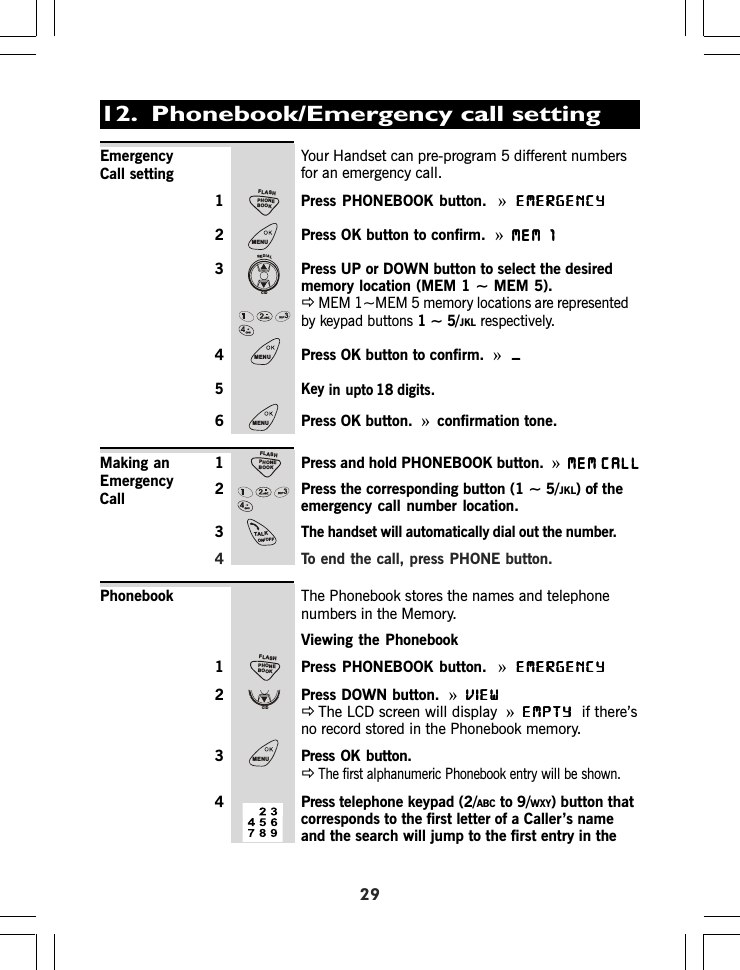
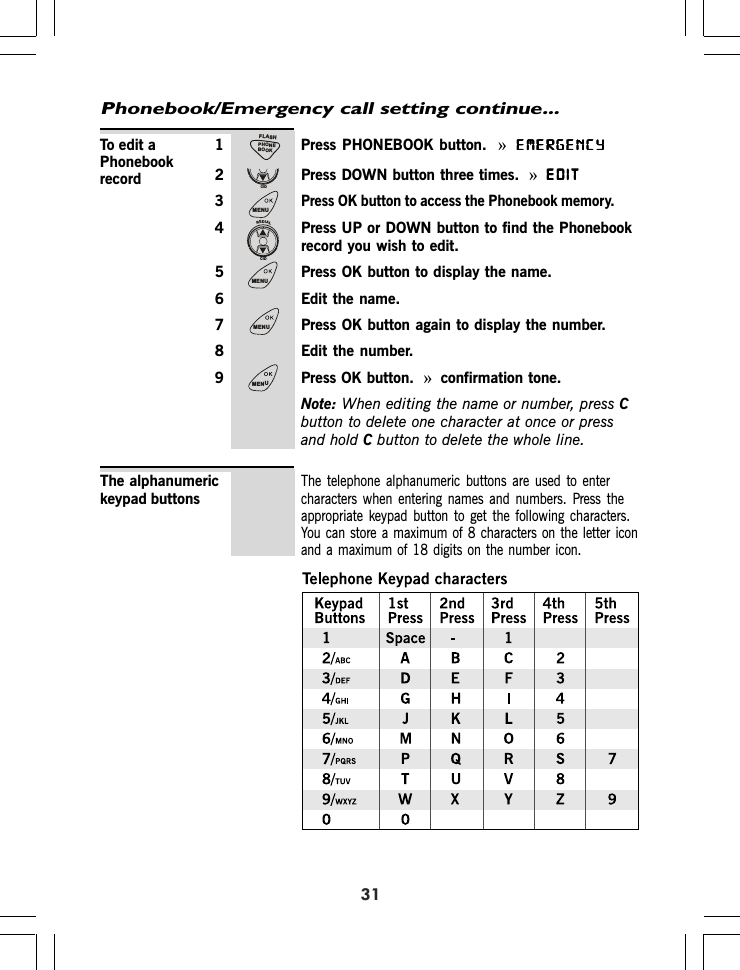
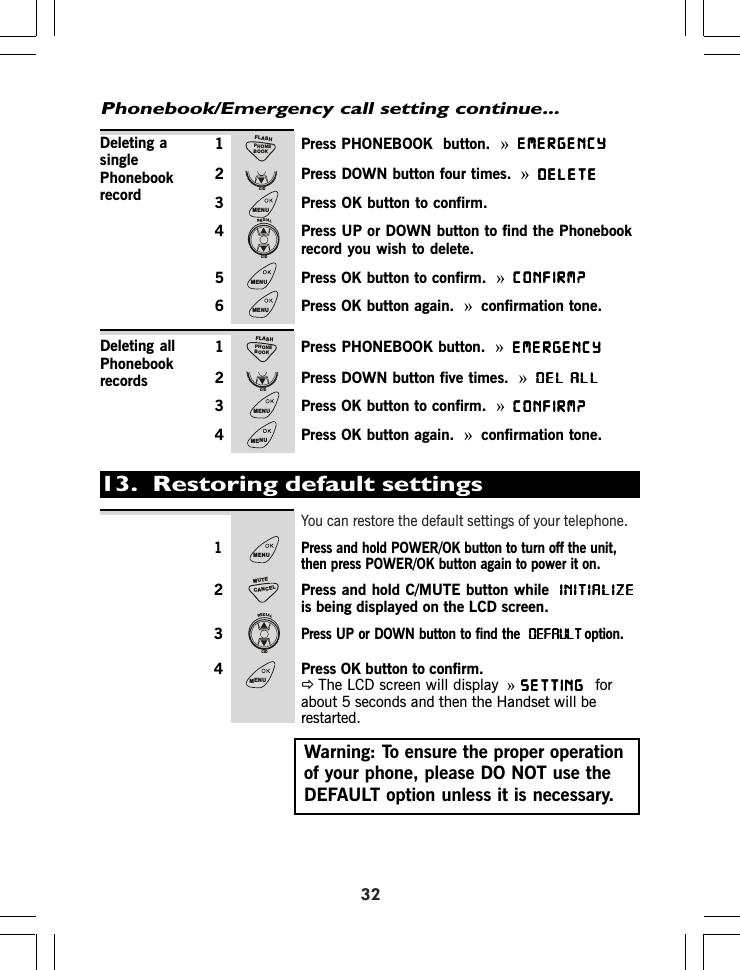
USERS MANUAL
Navigation menu
Upload a User Manual
Namespaces
Wiki Guide
HTML
PDF
Info
Views
User Manual
Discussion / Help
Navigation

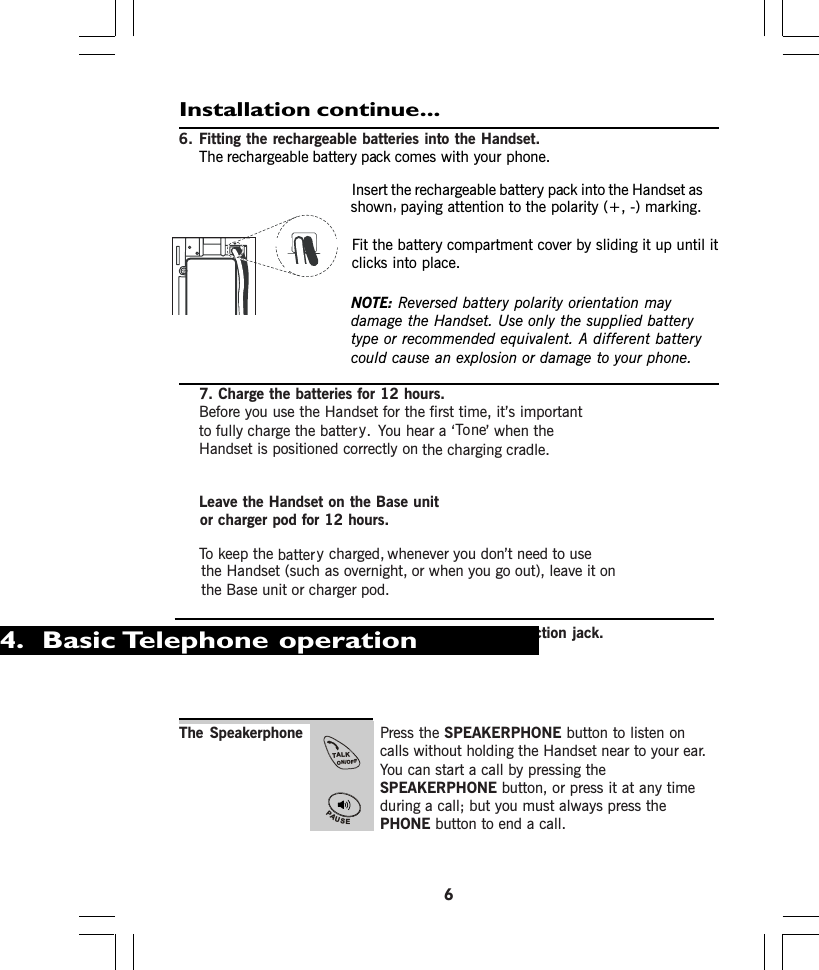
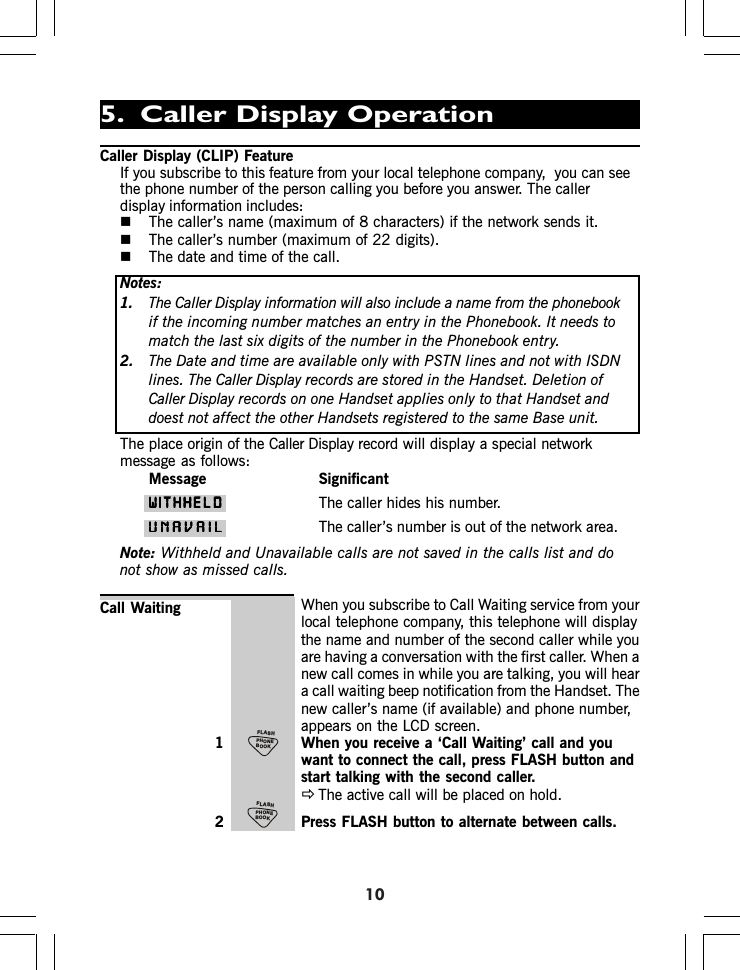
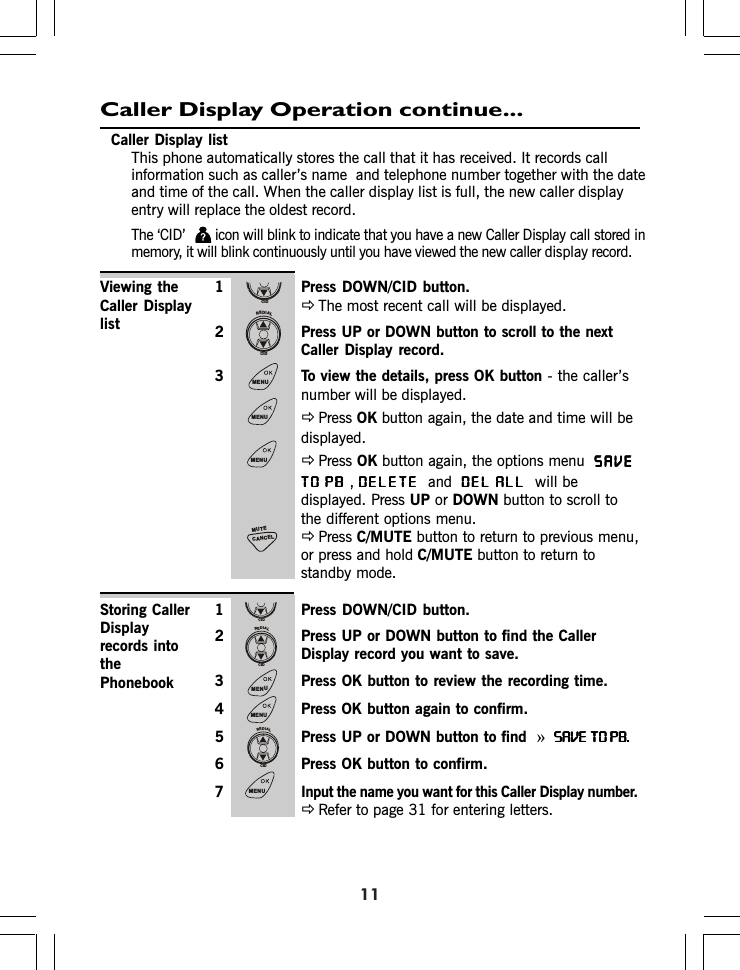
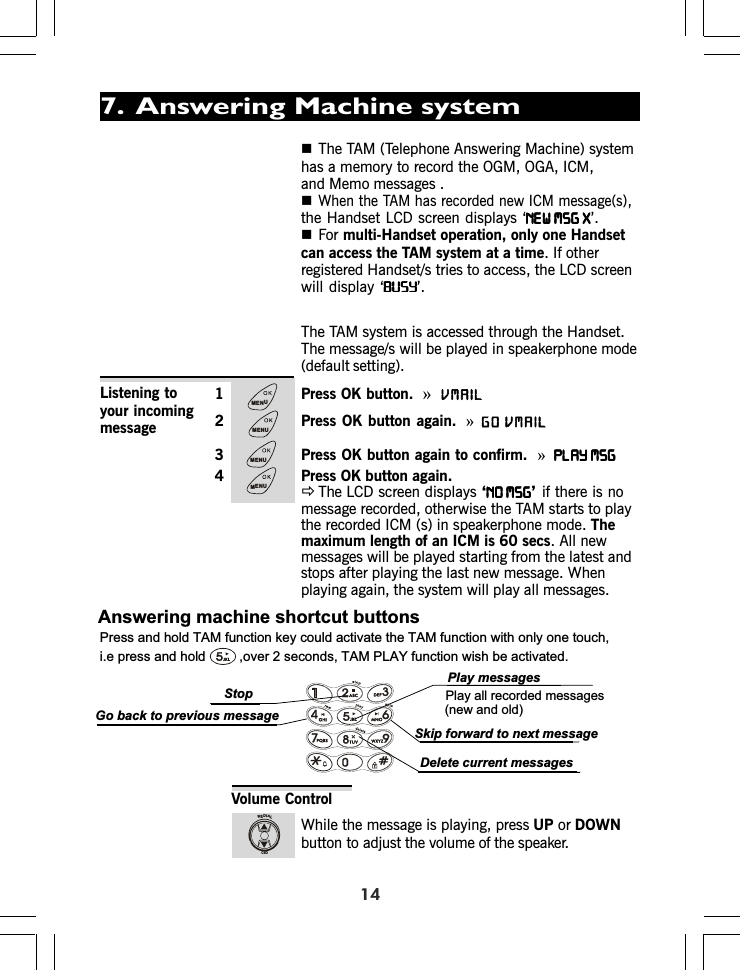
![This equipment is approved for connection to the Public Switched Telephone Network and complies with Part 15 and 68 of the FCC rules and the requirements adopted by the ACTA. Notification to Local Telephone Company On the bottom of this equipment is a label that contains, among other information, BINW400BVEVA1210 and Ringer Equivalence Number (REN) for the equipment. If requested, this number must be provided to the telephone company. The REN is used to determine the number of devices that may be connected to a telephone line. Excessive RENs on a telephone line may result in the devices not ringing in response to an incoming call. In most but not all areas, the sum of RENs should not exceed five (5.0). To be certain of the number of devices that may be connected to a line, as determined by the total RENs, contact the local telephone company. [For products approved after July 23, 2001, the REN for this product is part of the product identifier that has the format US:AAAEQ##TXXXX. The digits represented by ## are the REN without a decimal point (e.g., 03 is a REN of 0.3). For earlier products, the REN is separately shown on the label.] A plug and jack used to connect this equipment to the premises wiring and telephone network must comply with the applicable FCC Part 68 rules and requirements adopted by the ACTA. A compliant telephone cord and modular plug is provided with this product. It is designed to be connected to a compatible modular jack that is also compliant. See installation instructions for details. NOTICE:x If your home has specially wired alarm equipment connected to the telephone line, ensure the installation of this product does not disable your alarm equipment. If you have questions about what will disable alarm equipment, consult your telephone company or a qualified installer. Equipment Approval Information](https://usermanual.wiki/Binatone-Electronics/VEVA1210/User-Guide-929175-Page-4.png)