Binatone Electronics BLINK11 Wifi Video Baby monitor Camera User Manual
Binatone Electronics International Ltd. Wifi Video Baby monitor Camera
UserManual.wiki
>
Binatone Electronics
>
BLINK11 User Manual
User Manual
Navigation menu
Upload a User Manual
Namespaces
Wiki Guide
HTML
PDF
Info
Views
User Manual
Discussion / Help
Navigation


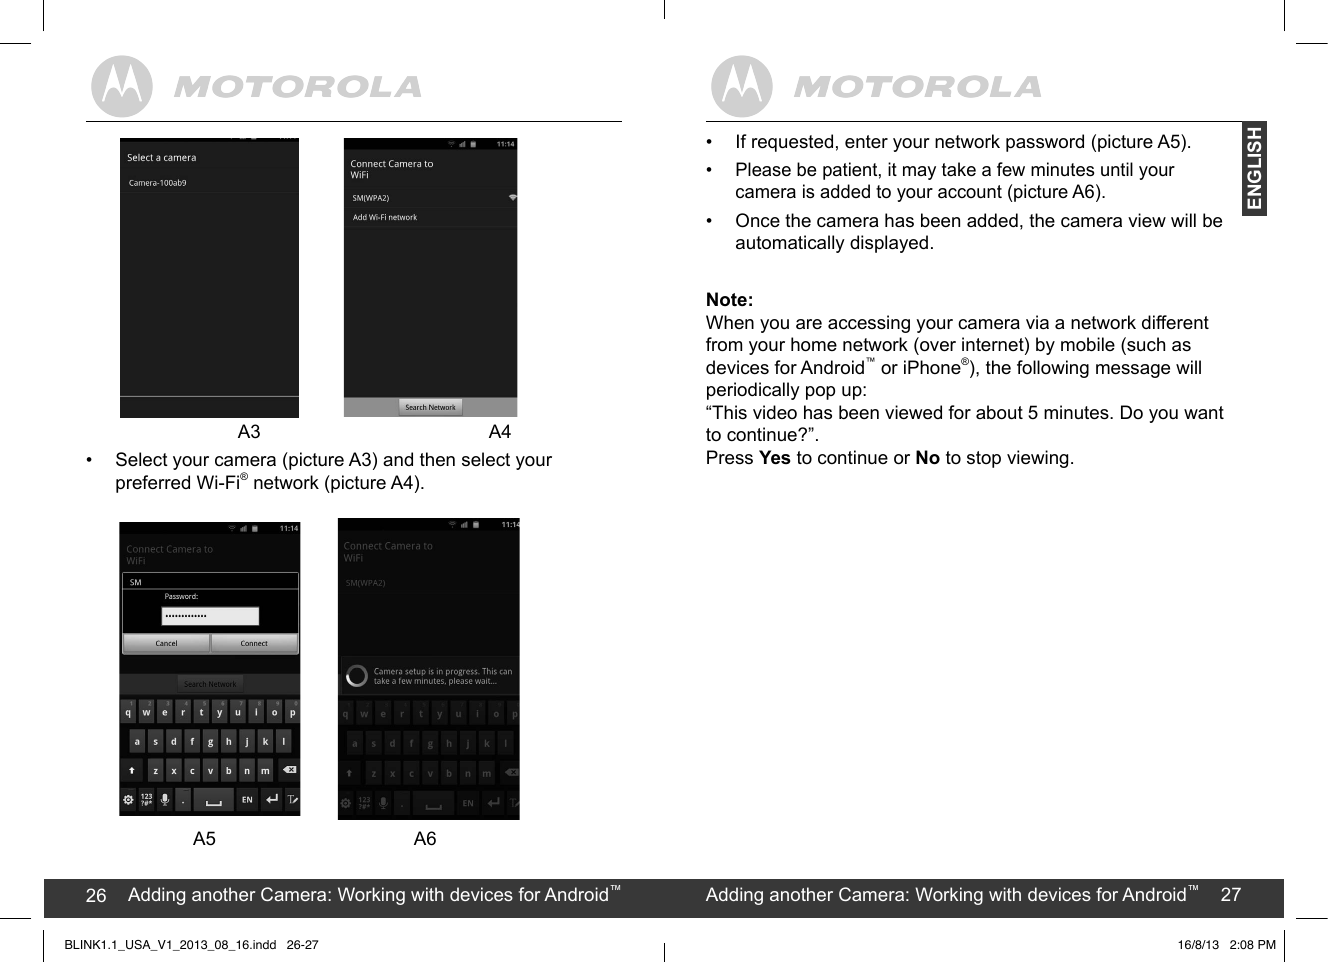
![created by: Pro. Q.C. Systems Design Limited89Getting started8Getting started: Working with devices for Android™9ENGLISH3. Getting started - Connecting DevicesHow does it work?• The Monitor Everywhere Server keeps track of the cameras.• When a user wants to access the camera, the server authenticates the user and permits the user access to the camera.3.1 SetupConnect the Camera to the power adapter and plug it into a power socket. Wait until the camera LED changes to fast blinking, which means that camera is in reset/setup state and camera is ready for ‘Camera Setup’ registration. The Camera must be within range of the Wi-Fi® router with which you want it to link. Status of LED Indication:- Reset / Setup state: fast blinking- Unconnect state: slow blinking- Connect state: always onView your camera fromany device remotelyAccess your camera locallyBLINK1.1_USA_V1_2013_08_16.indd 8-93.2 User Account and Camera Setup: Working with PC or notebook•••In general, there are three alternative ways to create user account and camera setup:With PC orWith devices for Android™ orWith iPhone®/iPad®16/8/13 2:08 PM••••••••Attention for “Camera Setup mode via micro-USBport’:Turn on your PC.Connect the one end of USB cable (shipped with package) to the micro-USB port on camera and the other end to the USB port on PC.Plug an adaptor to the camera and the other end of adaptor to the power outlet.Switch the power switch on camera from OFF to ON.Wait for 1 minute until camera emits two short beeps and PC has detected the camera.Run your web browser.Type in the following link into address box. http://setup.monitoreverywhere.com/ConfServer/ConfApp/application.html••••‘BLINK1.1’ Setup page is displayed on the web browserSelect your choice whether is ‘Windows Setup’ or ‘Mac Setup’. Then, you will be asked to run <Setup Blink> application. Click <Run>.Then, [log in] screen pops up.•Enter username and password if you have account .OR](https://usermanual.wiki/Binatone-Electronics/BLINK11/User-Guide-2068237-Page-5.png)