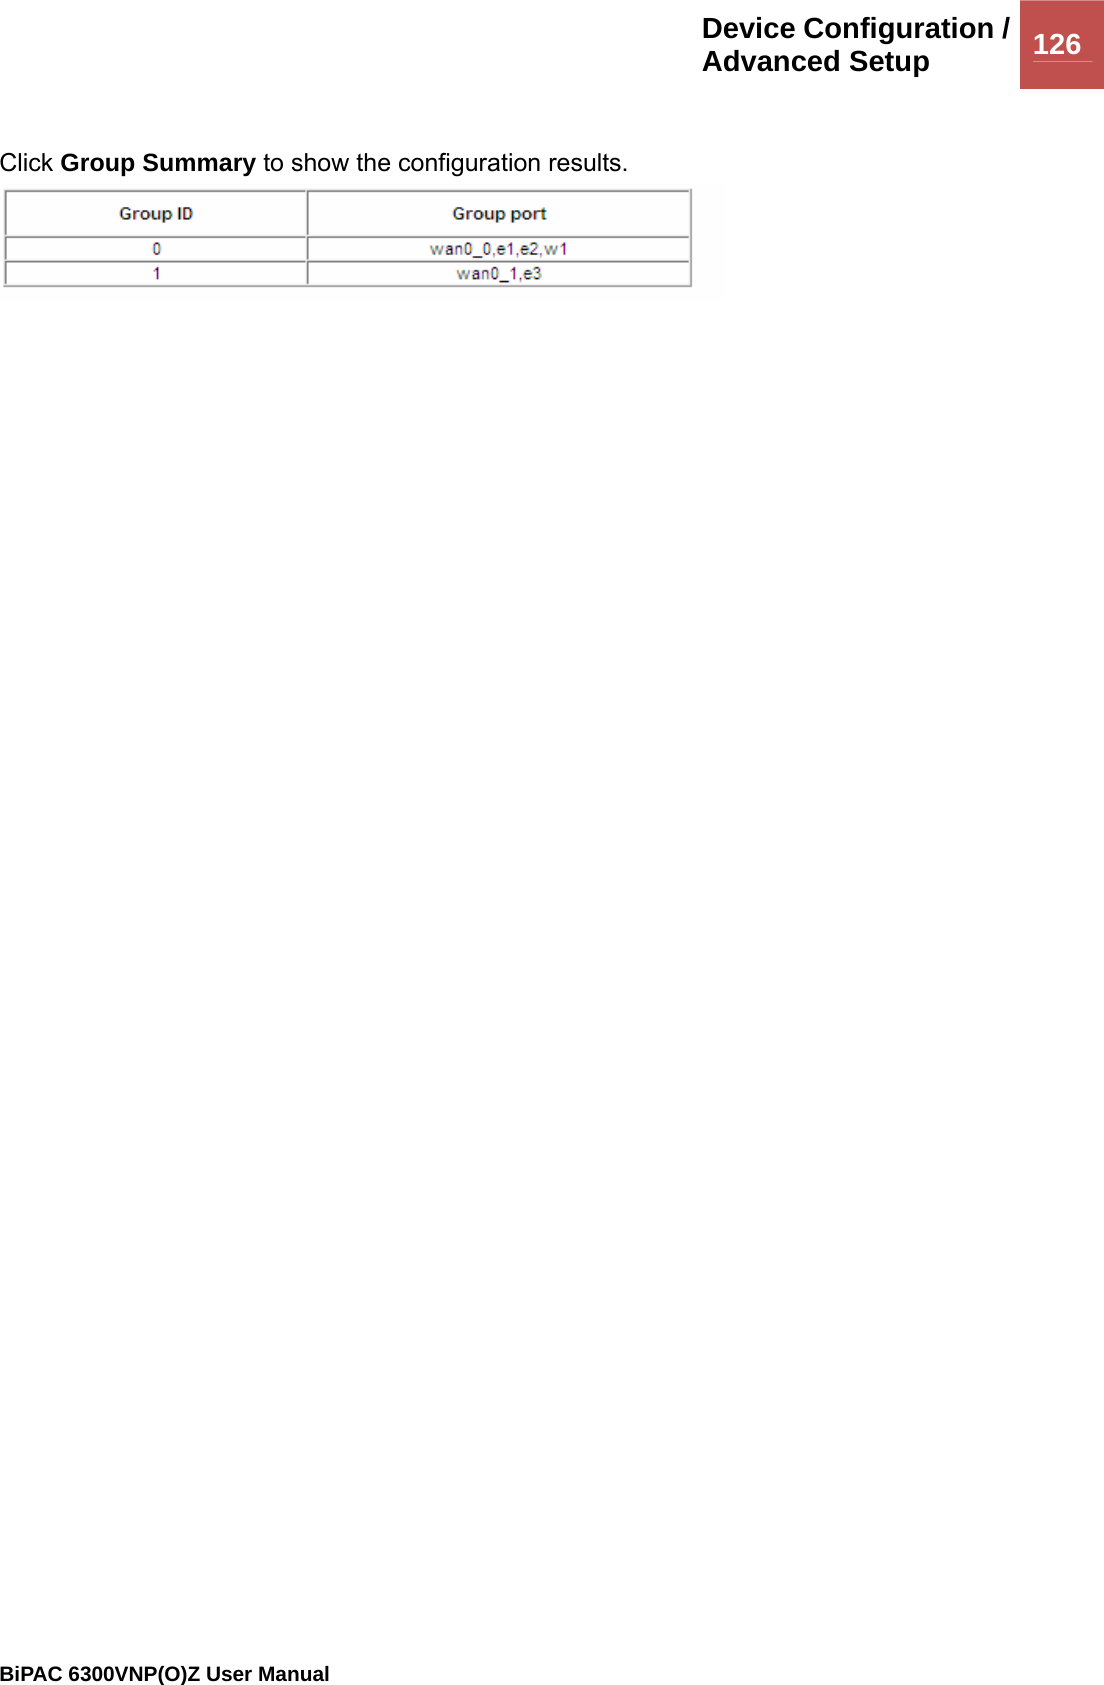
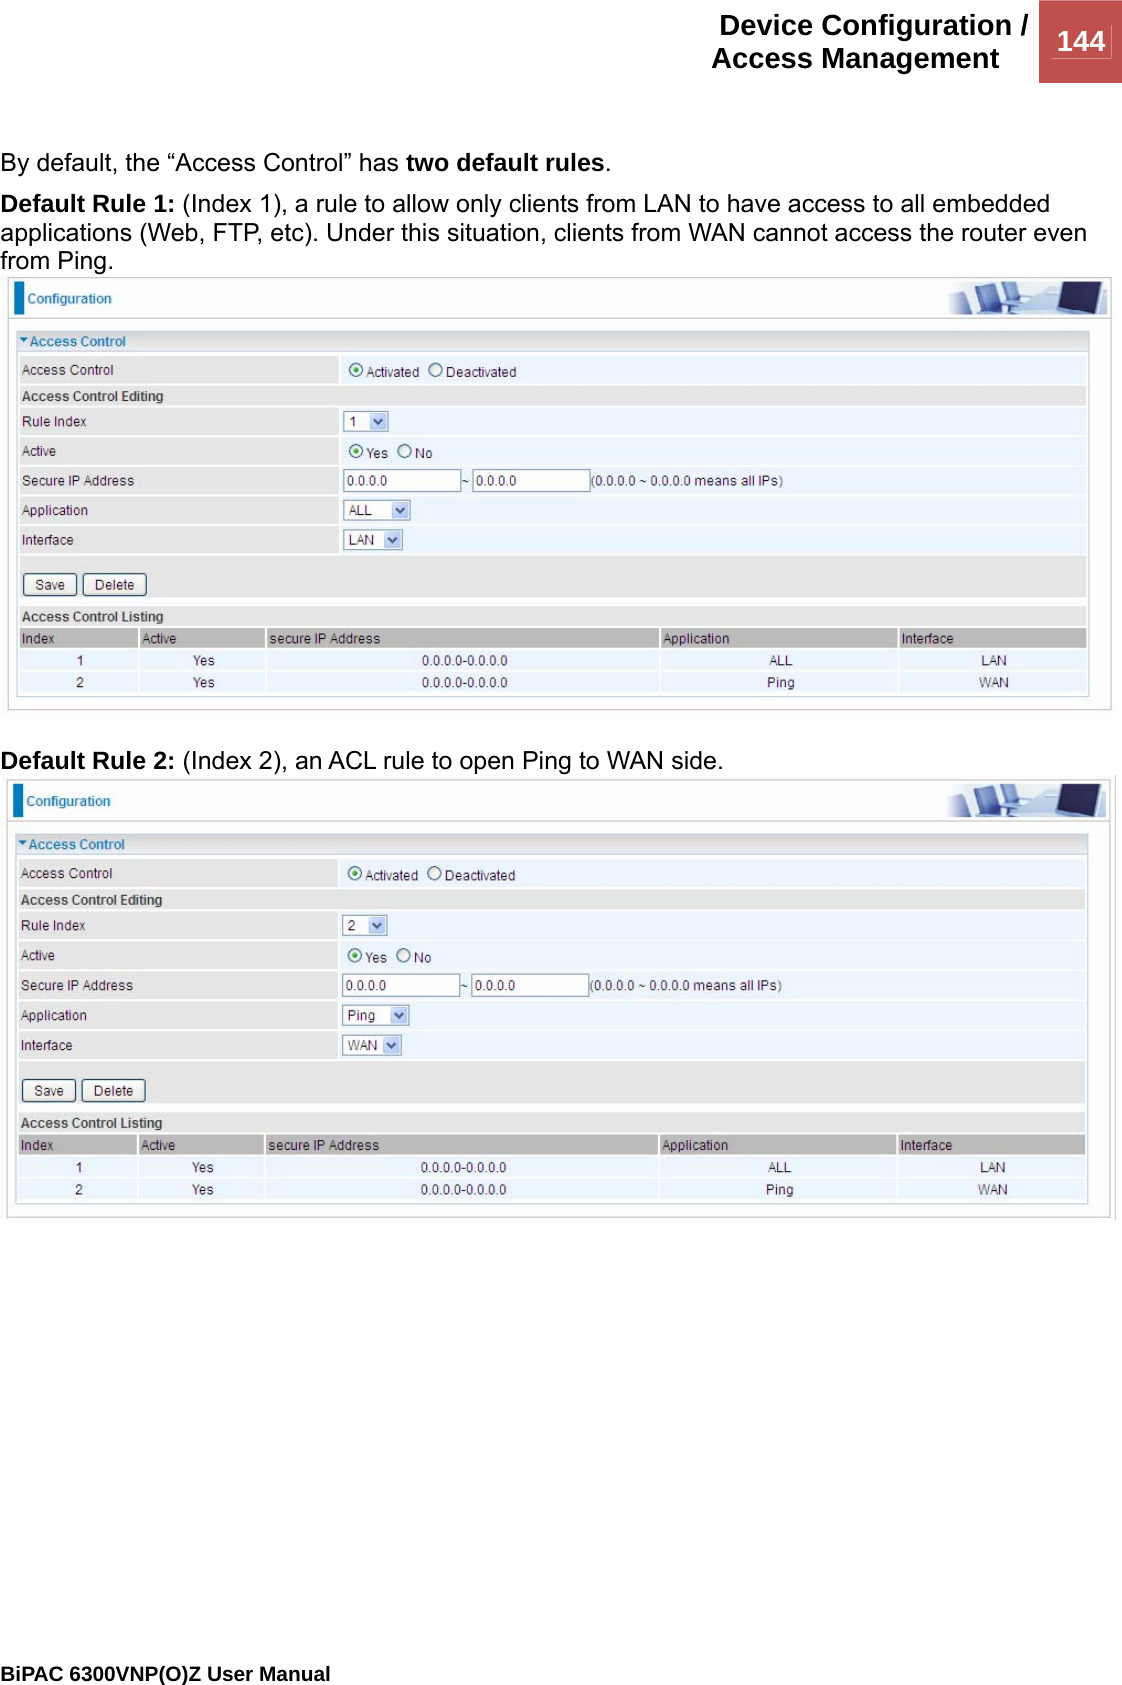
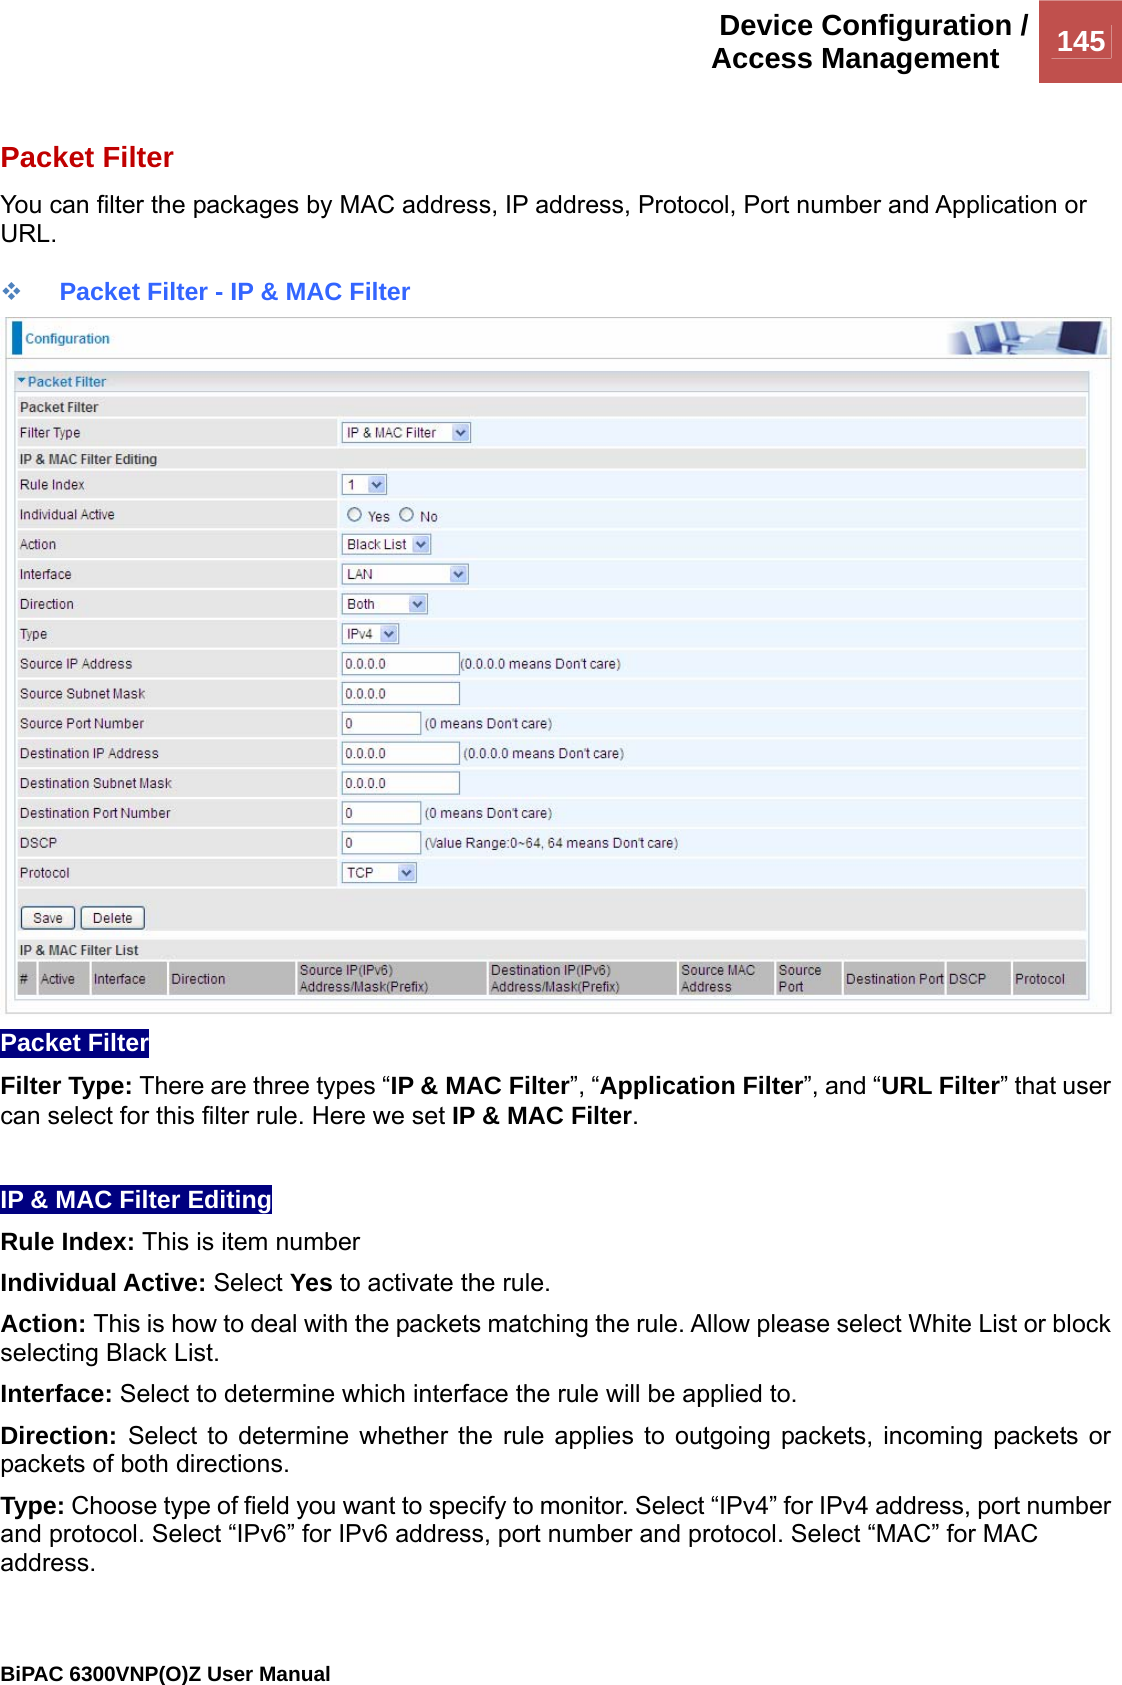
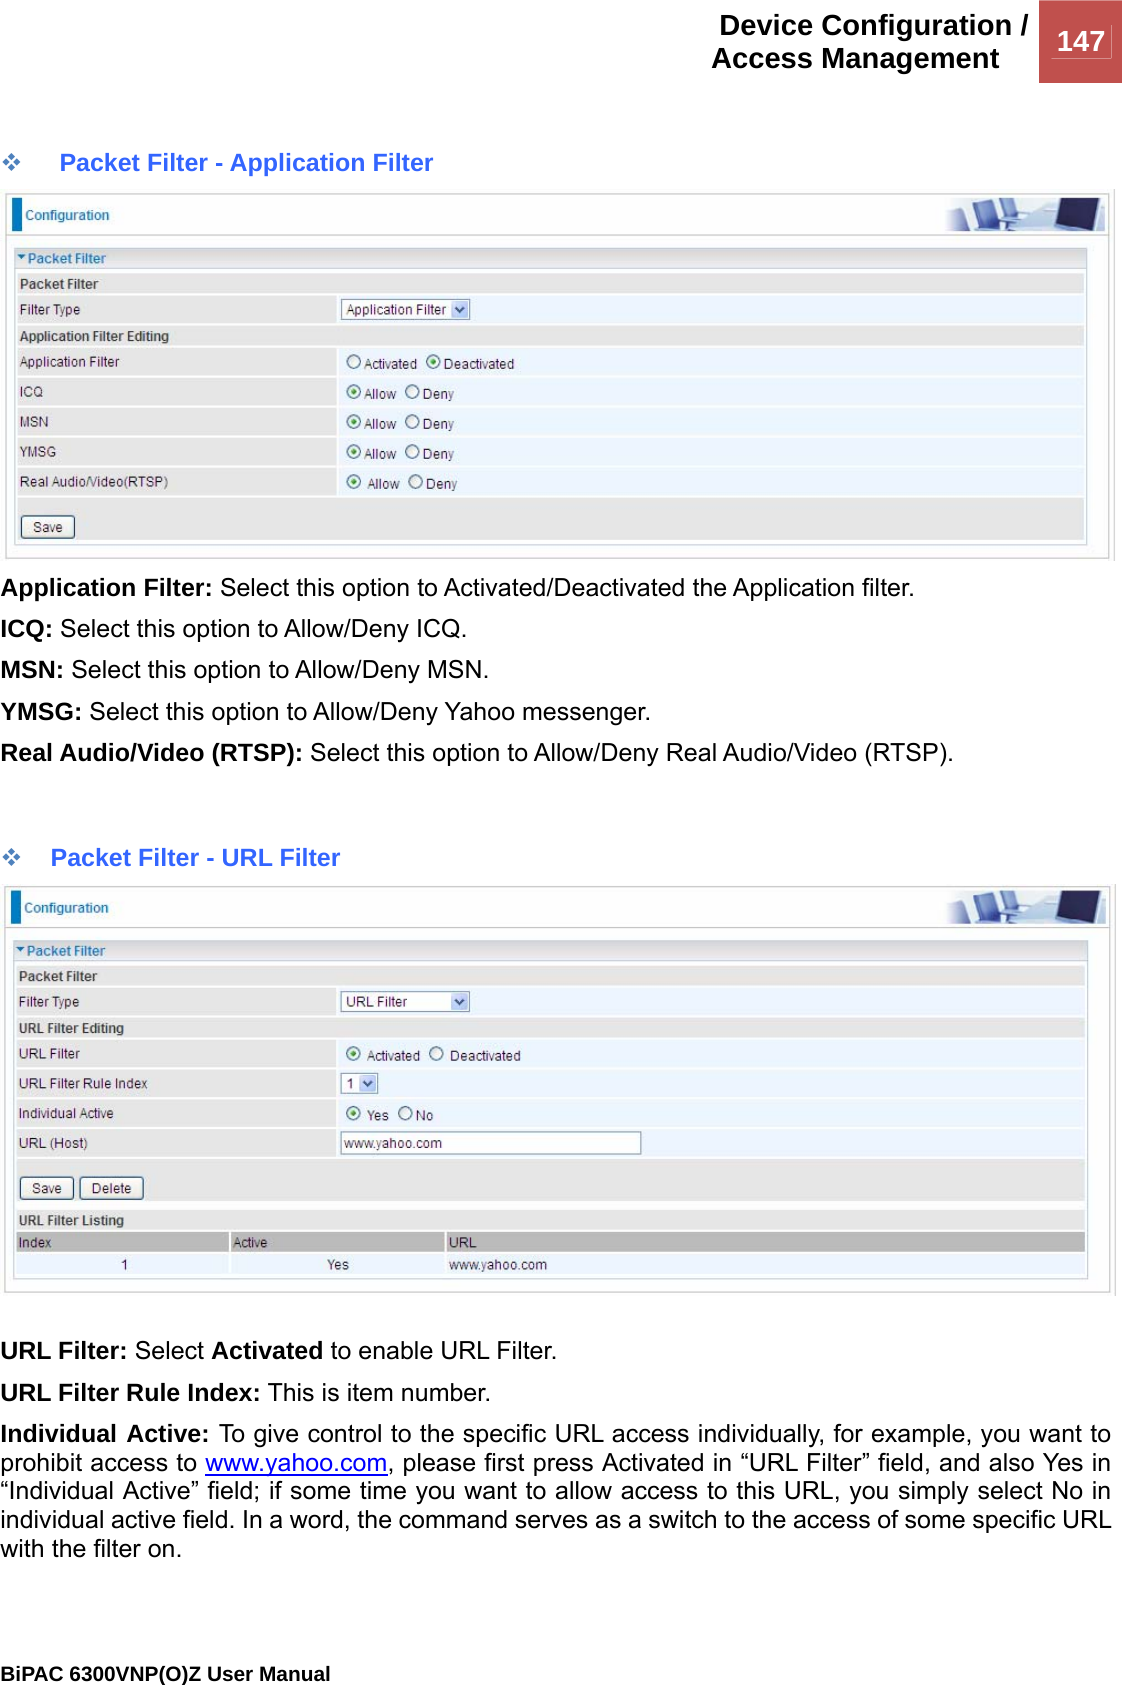
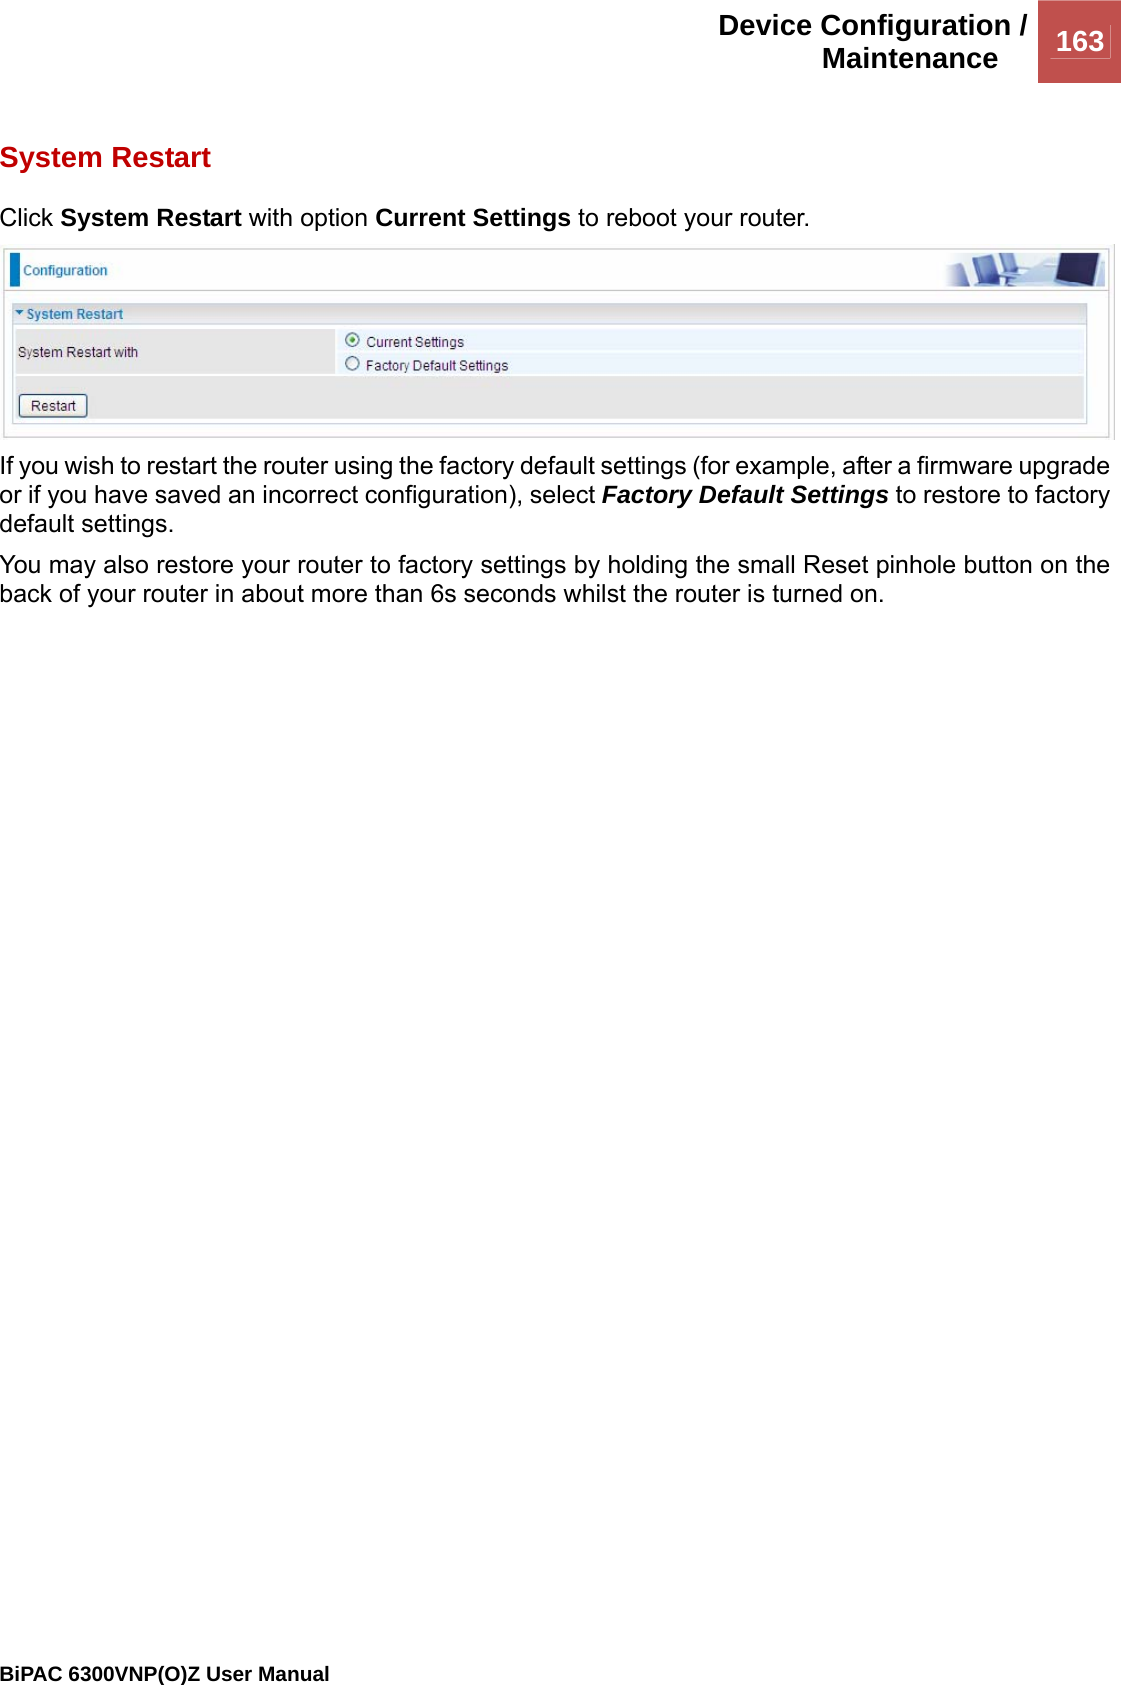
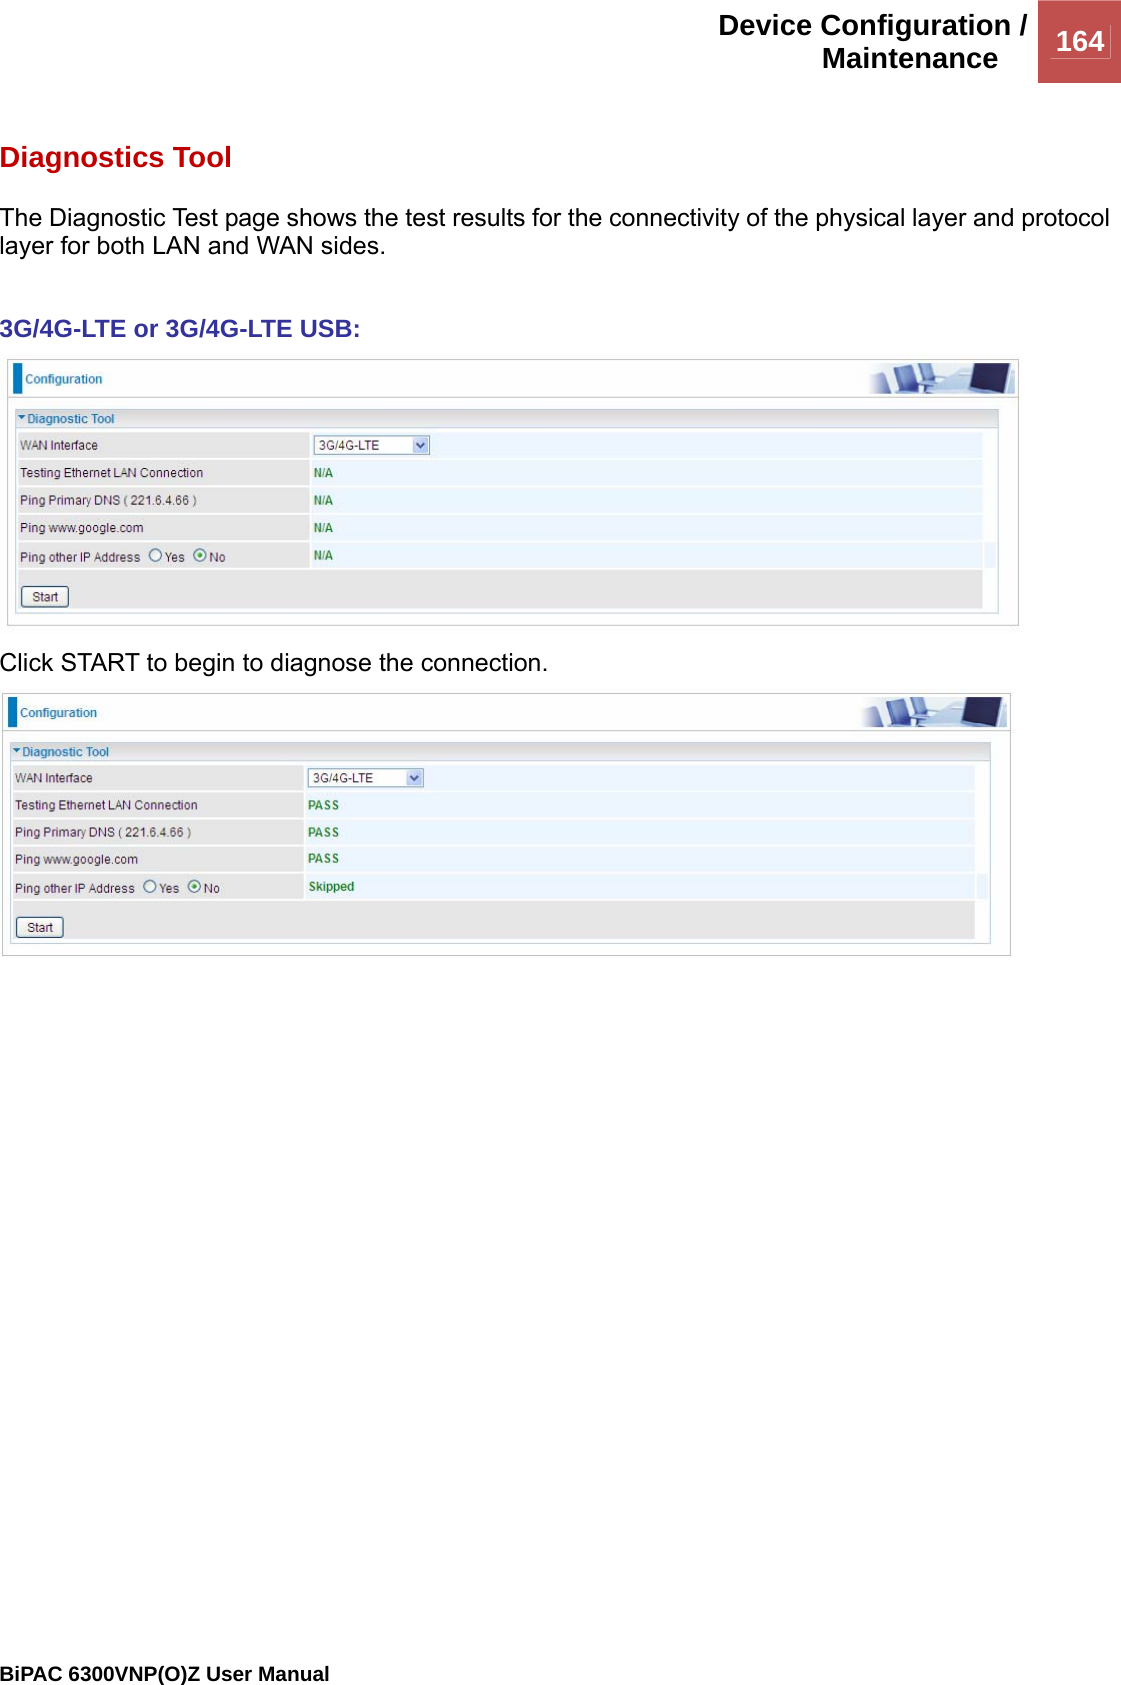
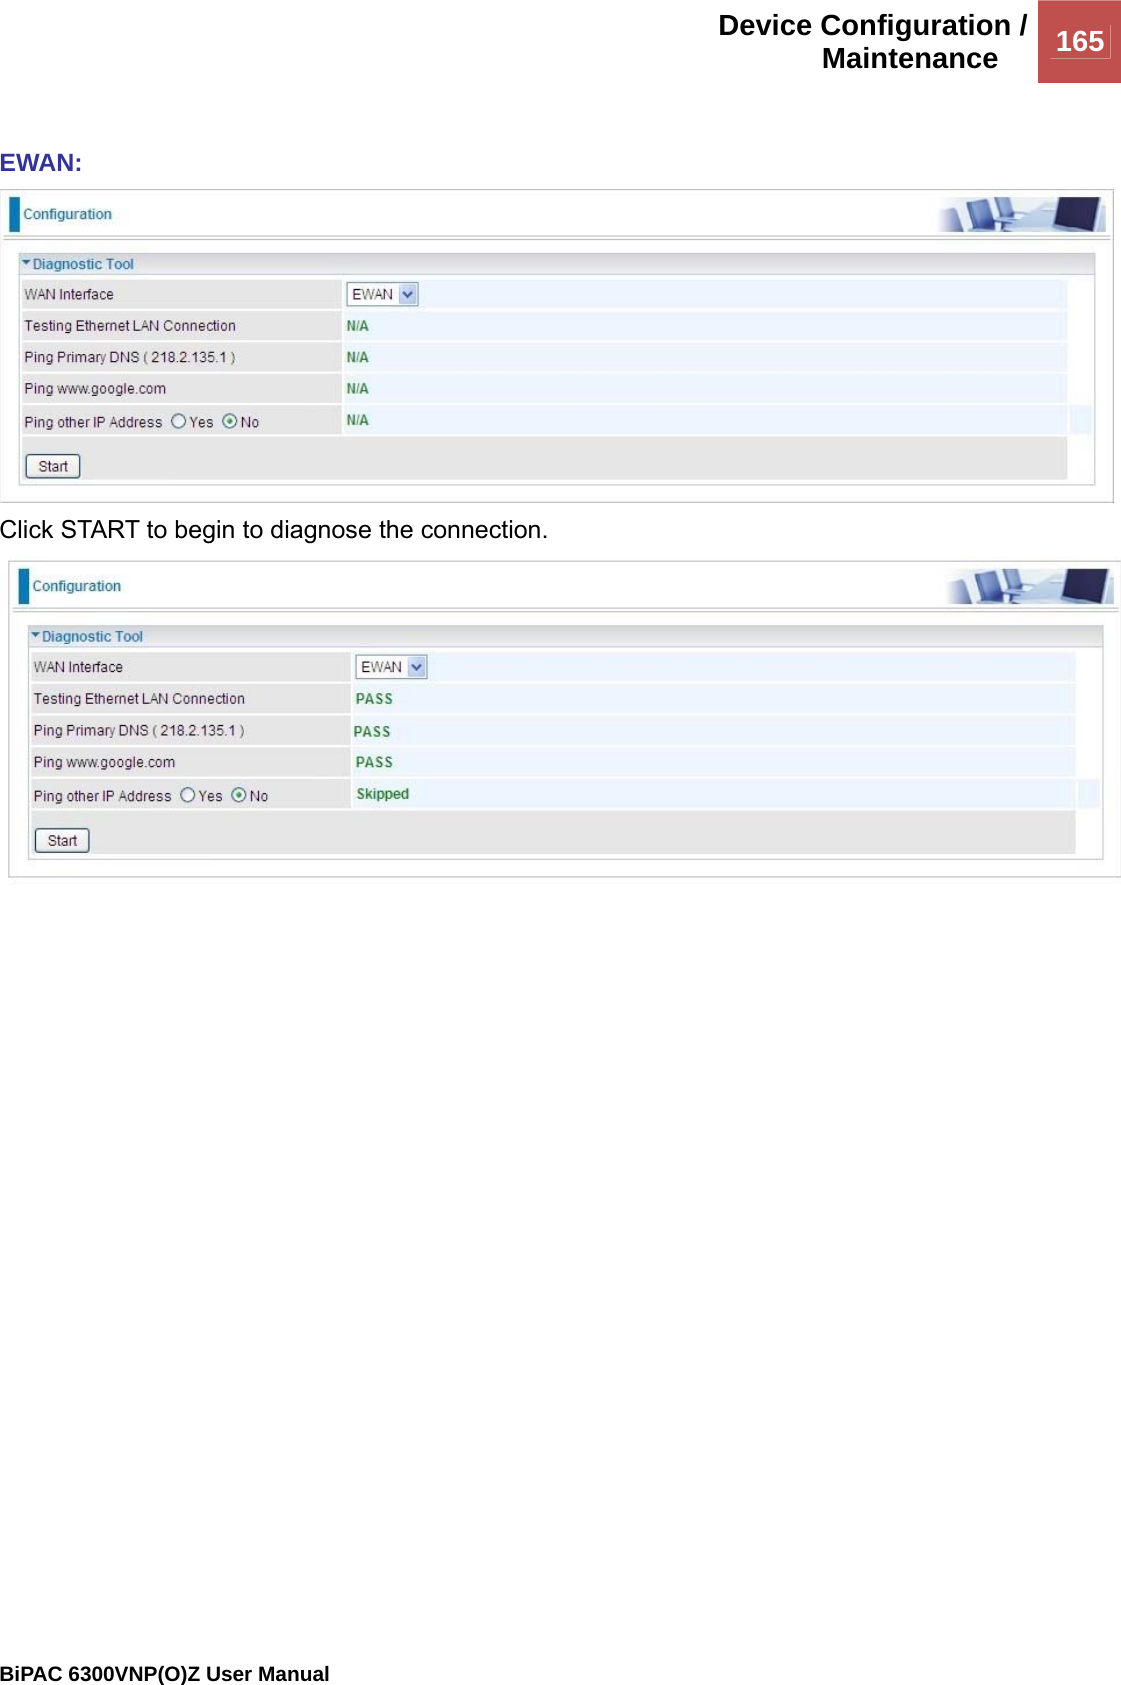
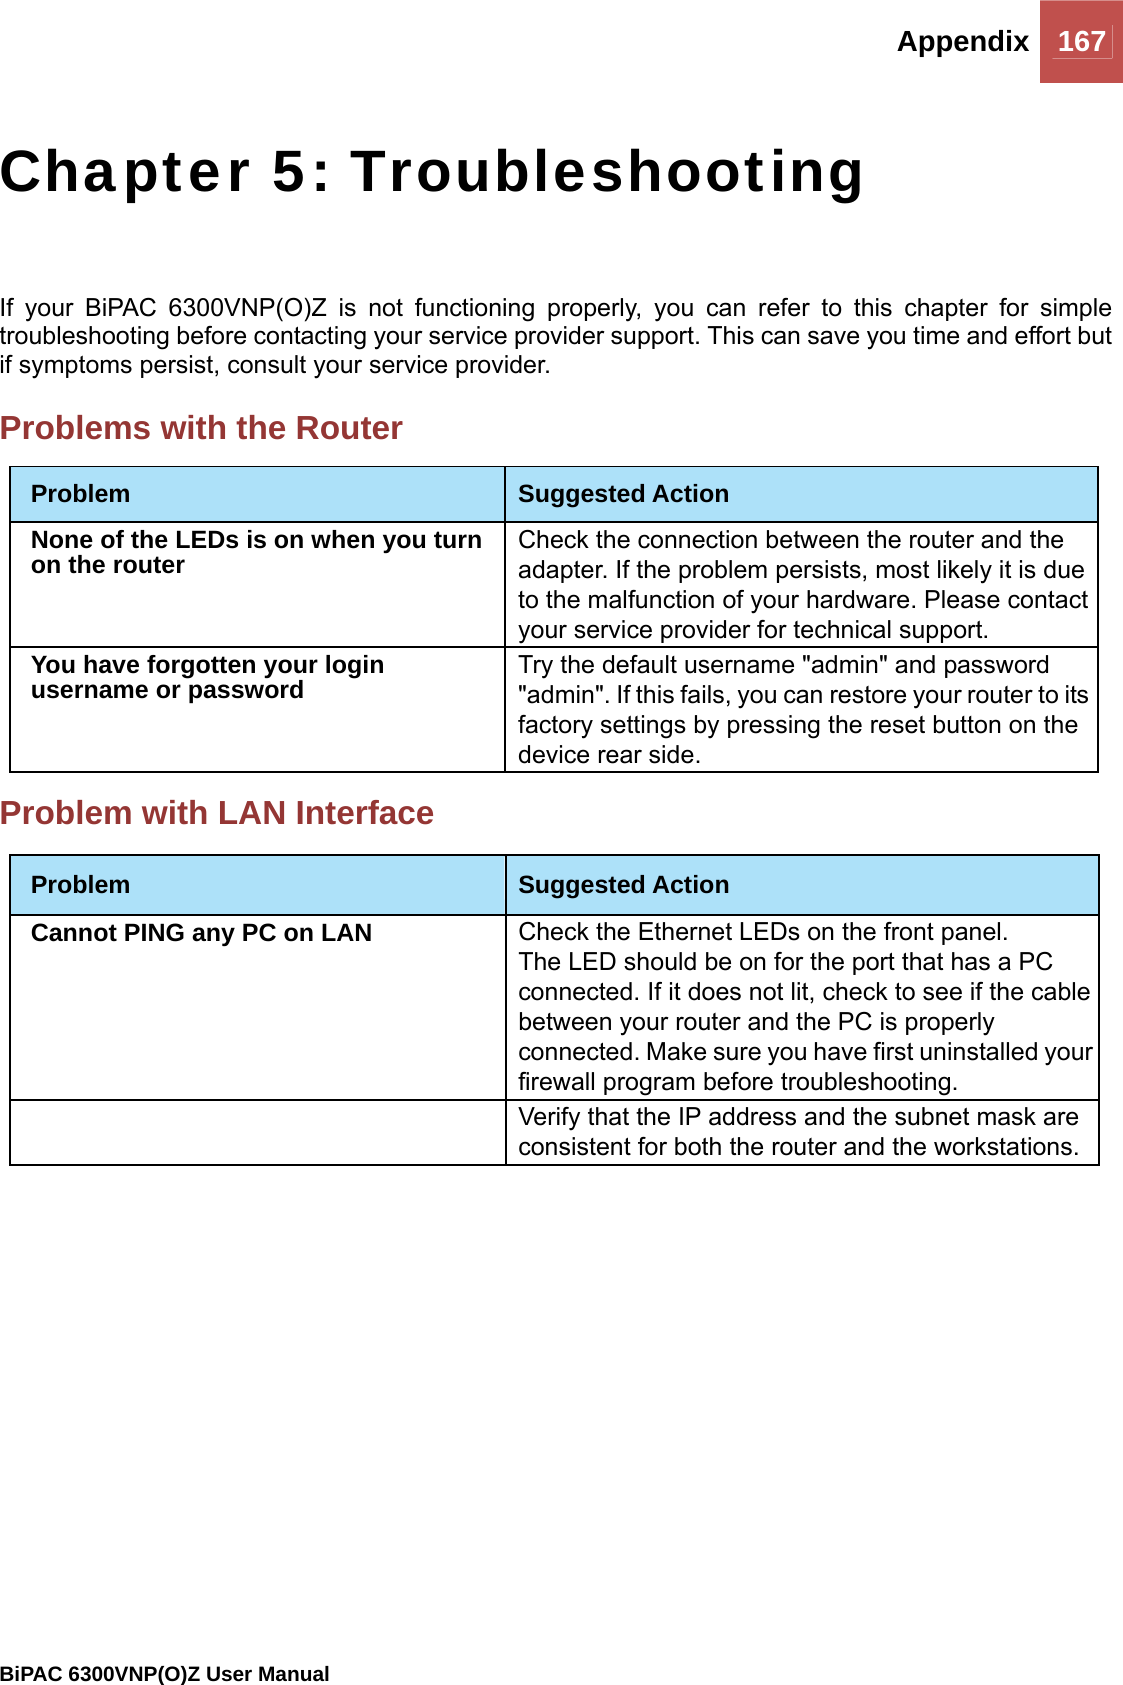
Billion Electric BIL-6300VNOZ 4G/LTE VoIP Wireless-N VPN Broadband Router User Manual Basic Installation
Billion Electric Co., Ltd. 4G/LTE VoIP Wireless-N VPN Broadband Router Basic Installation
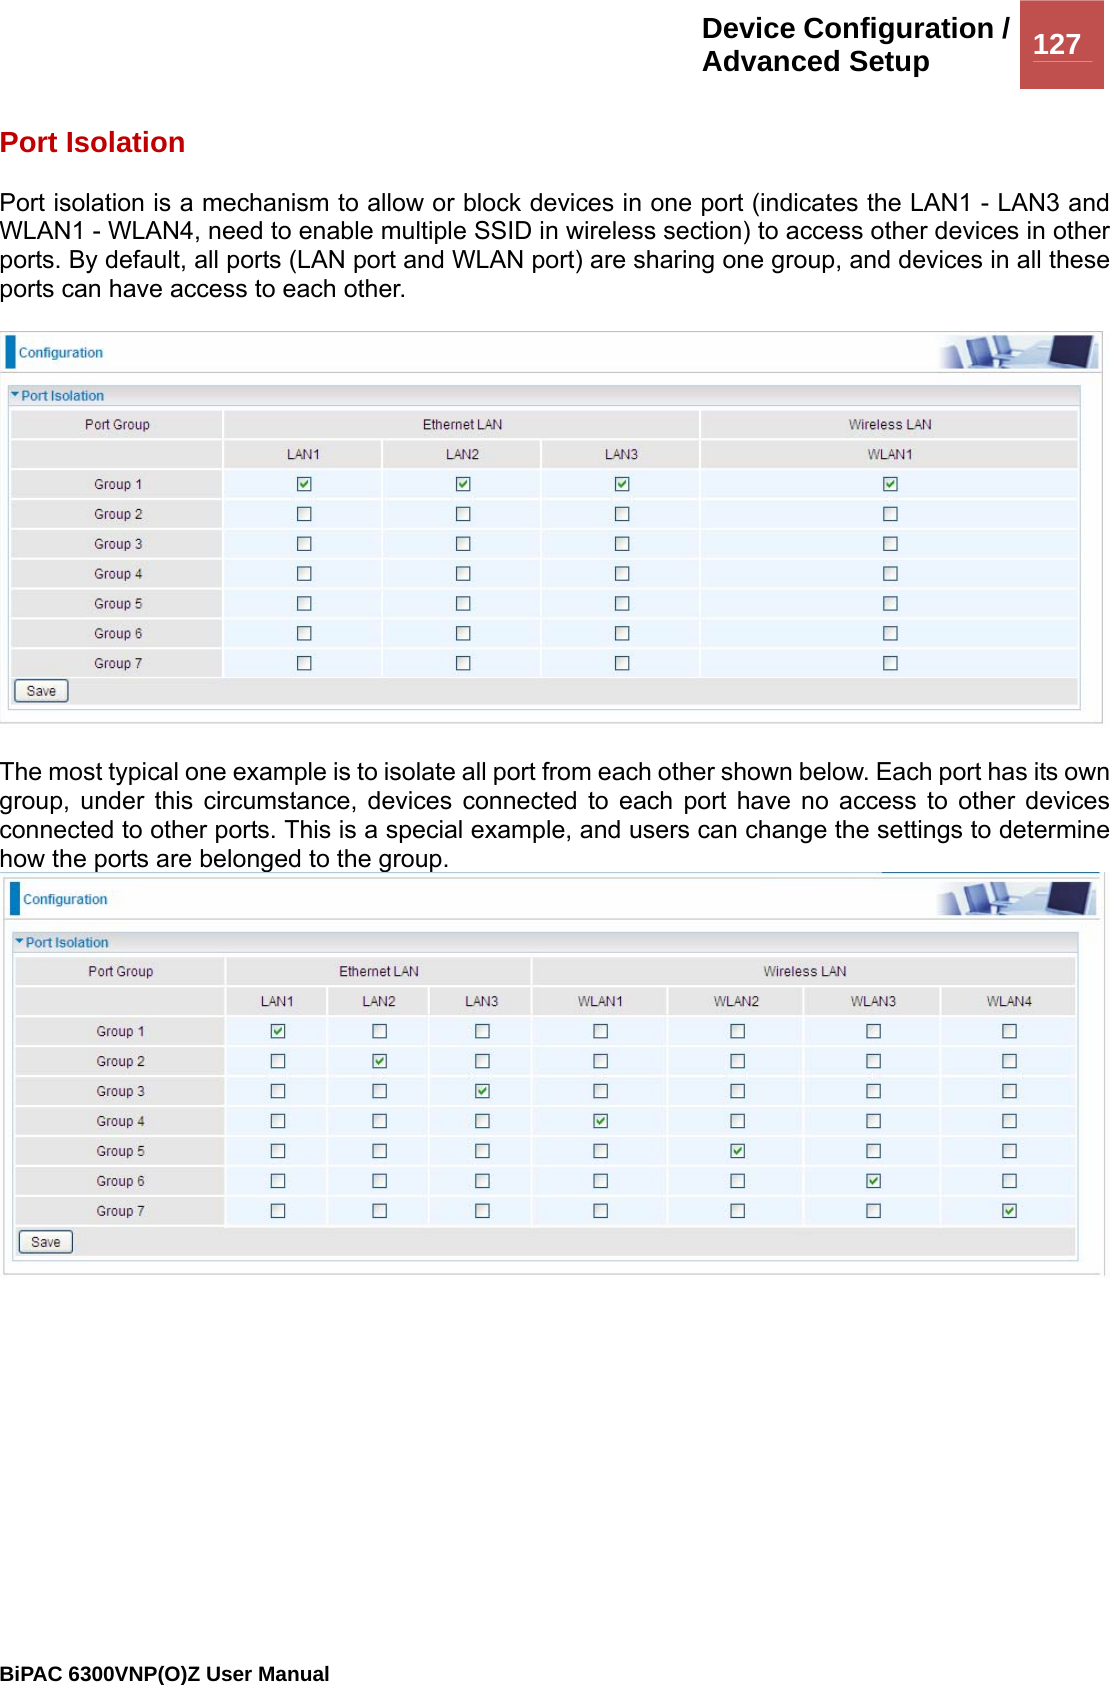
Contents
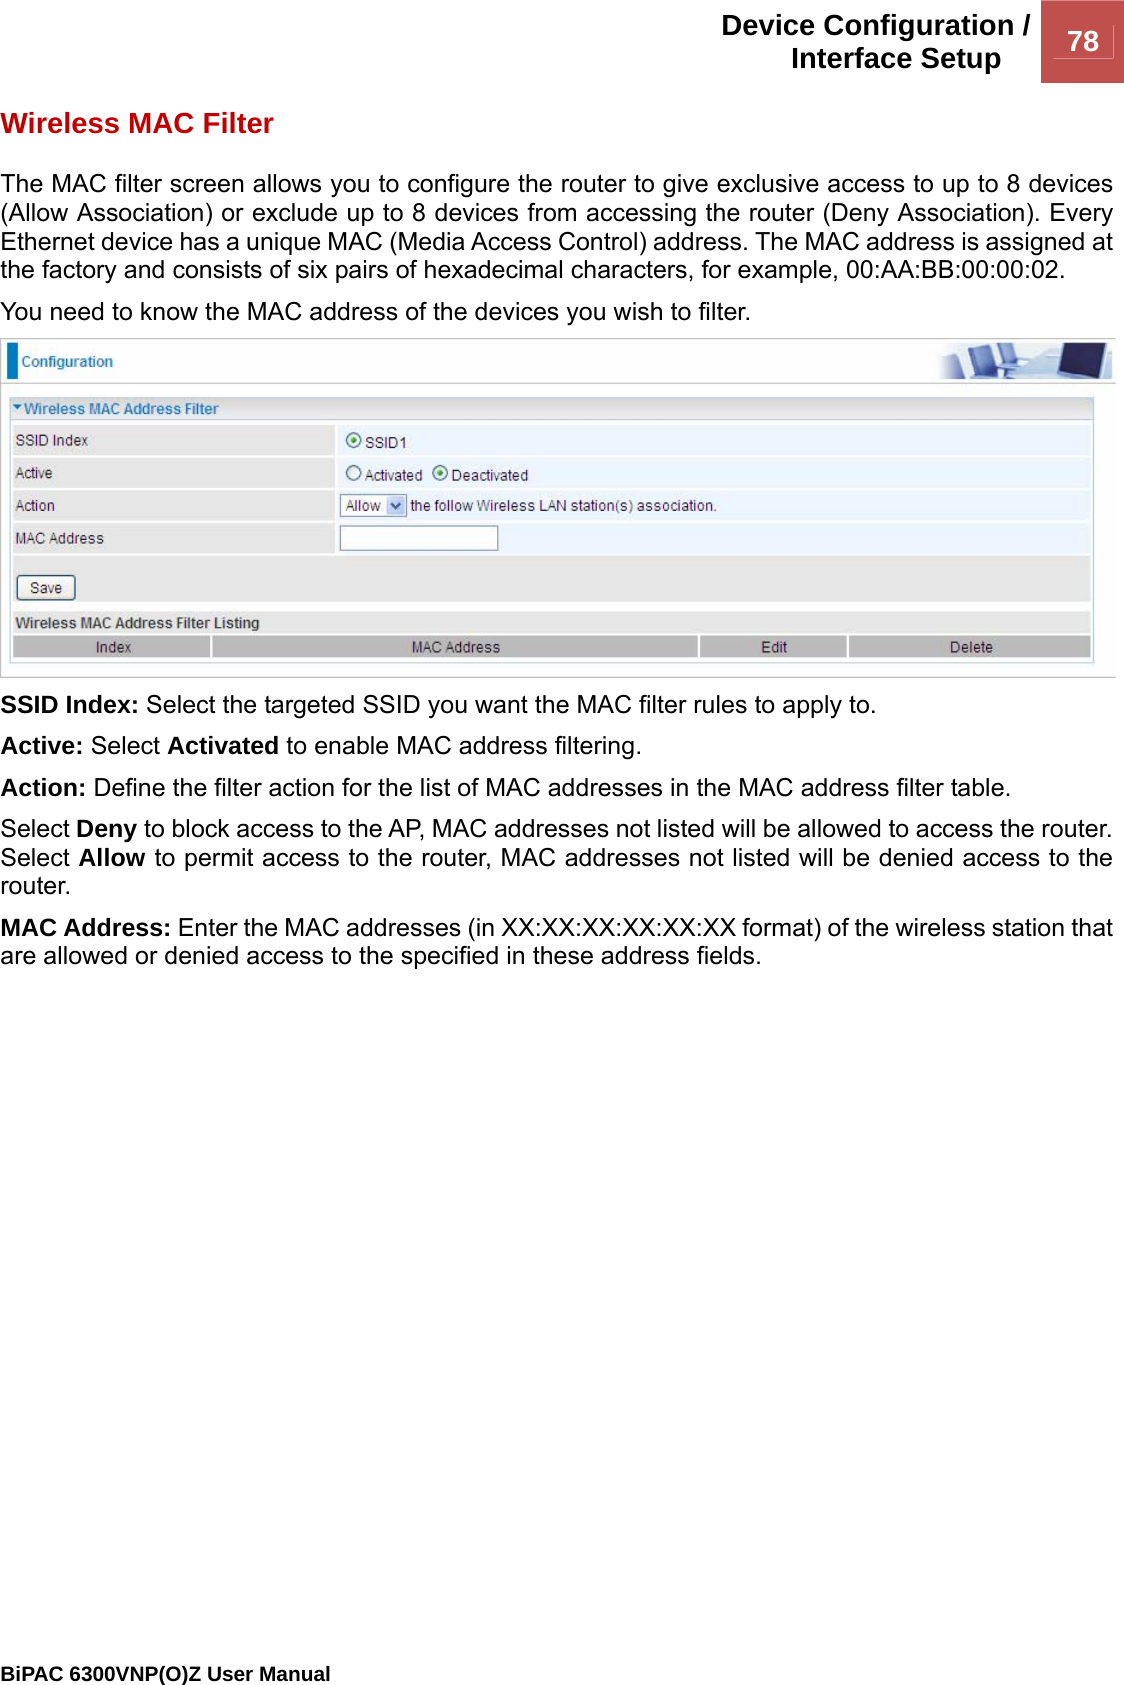
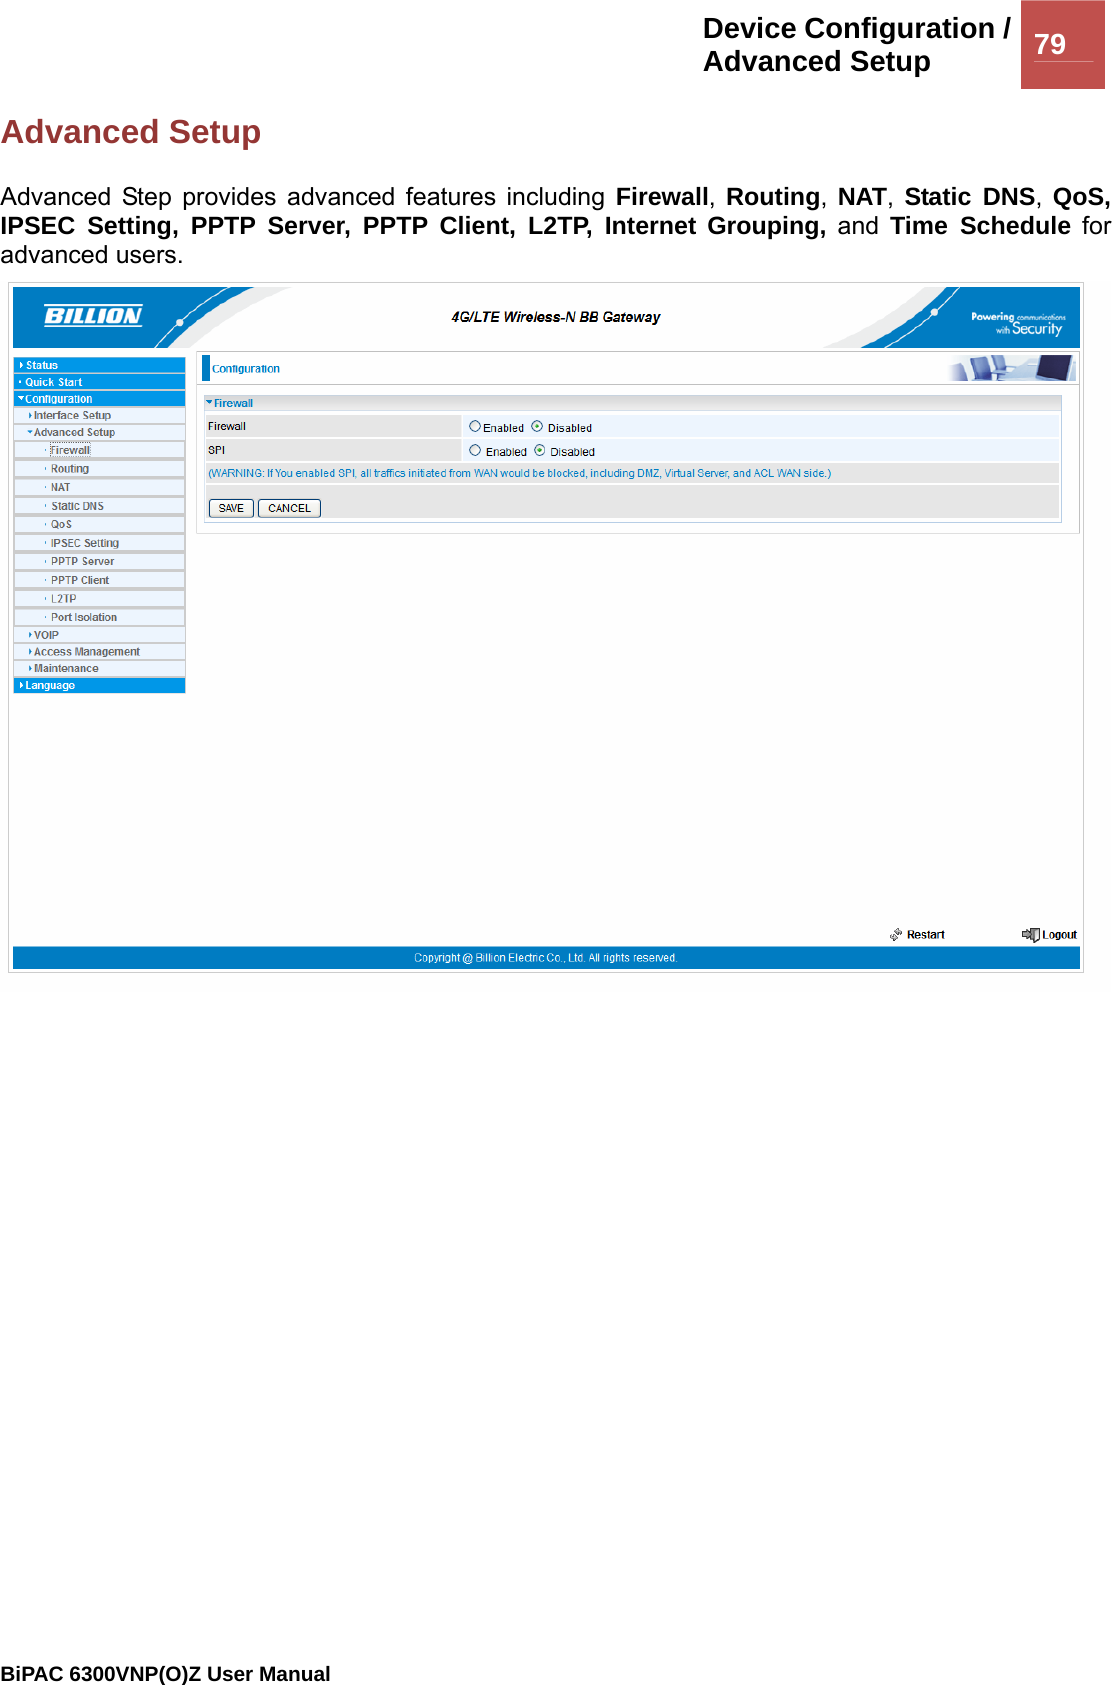
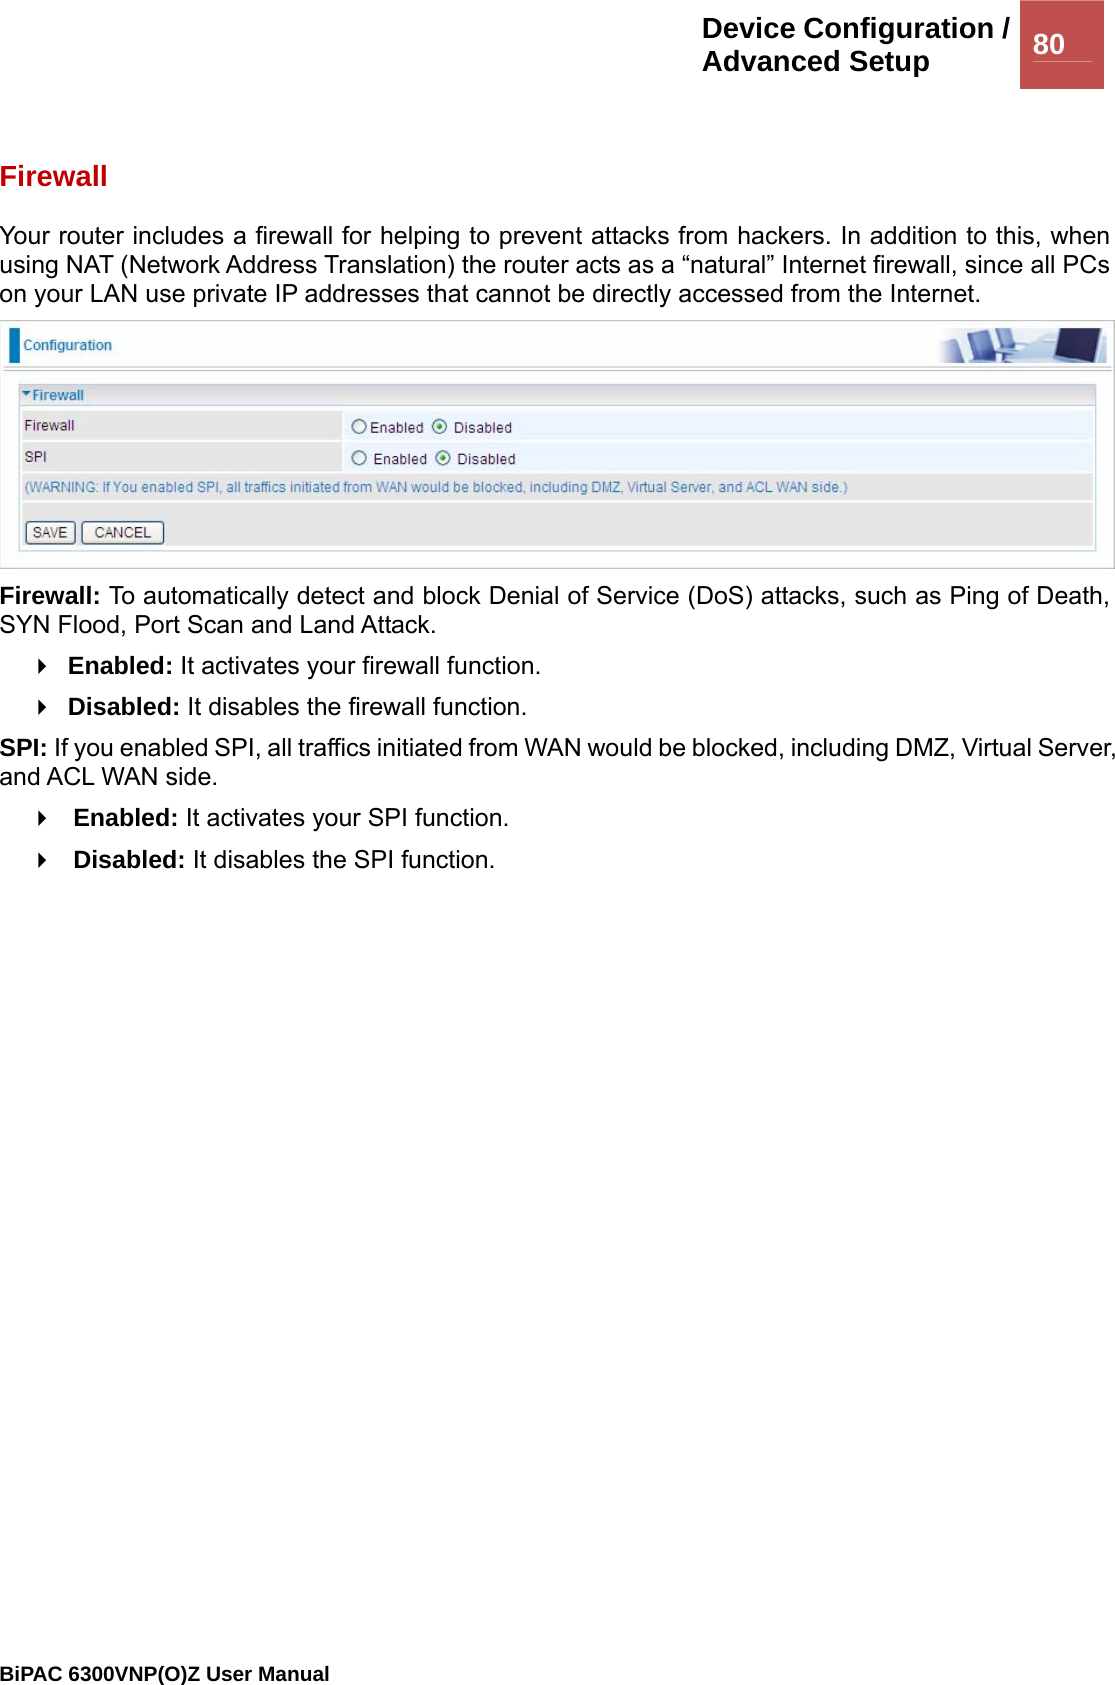
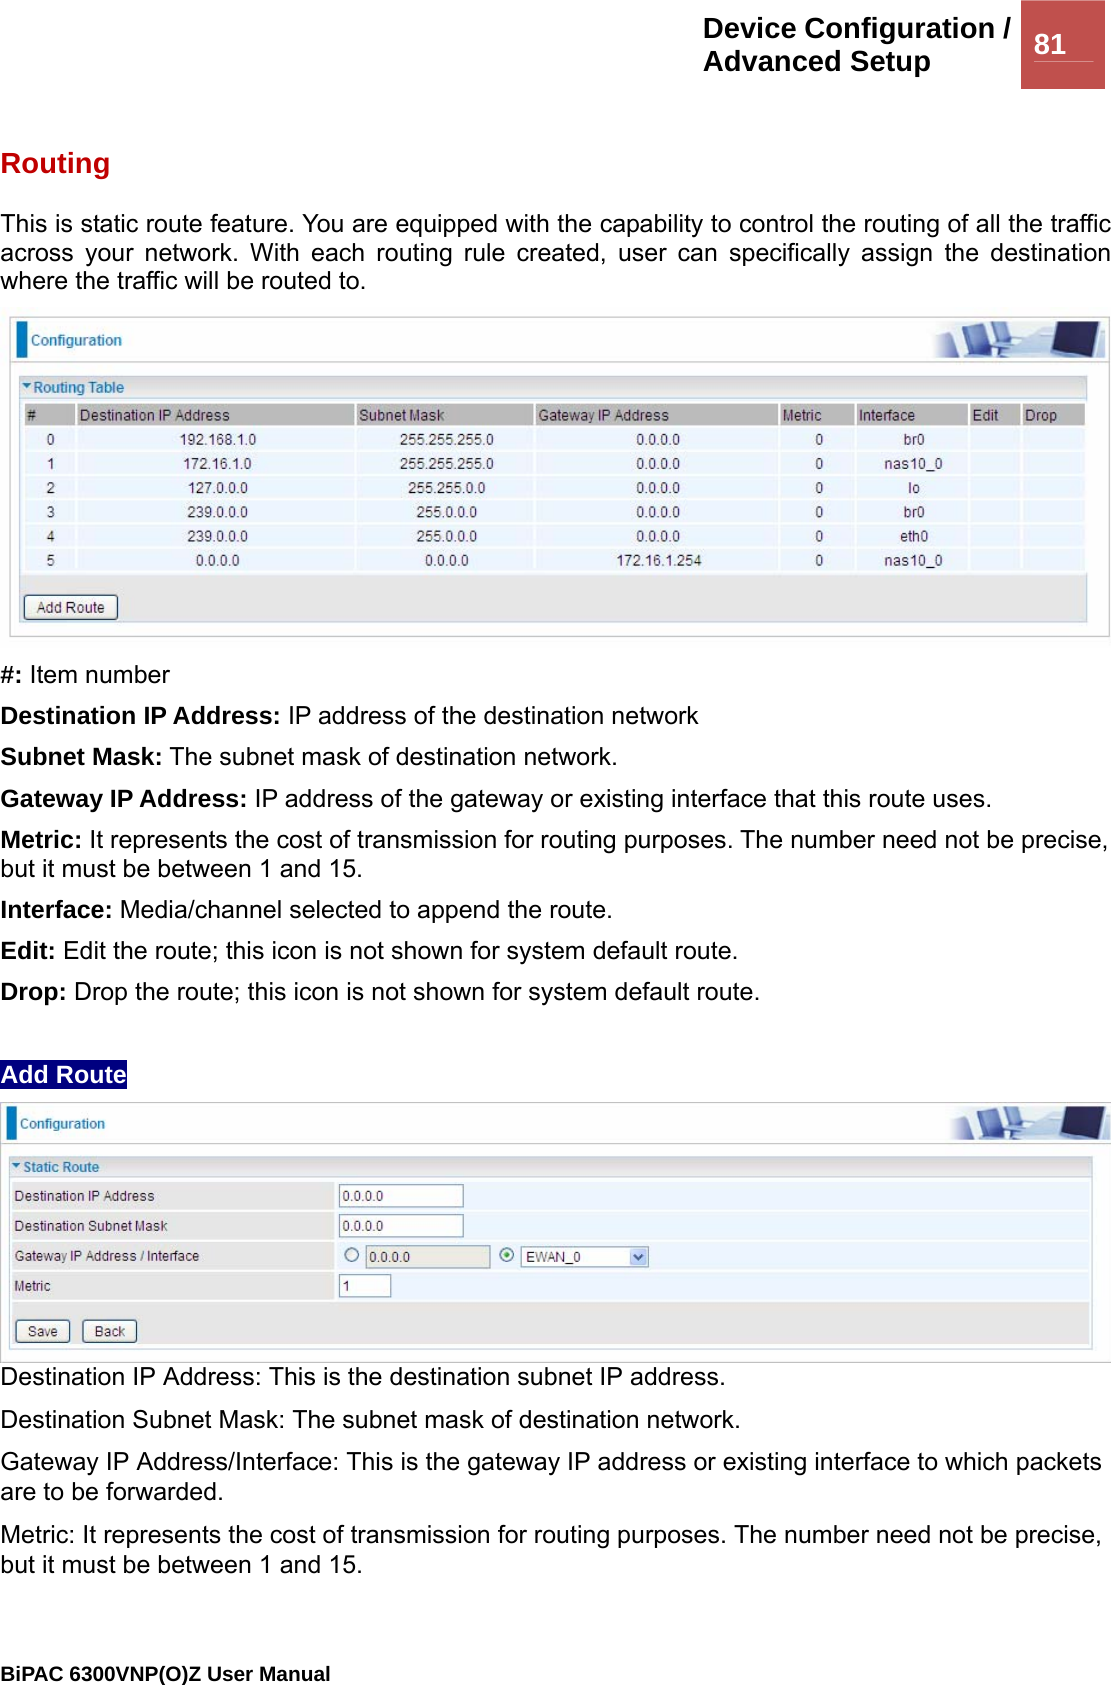
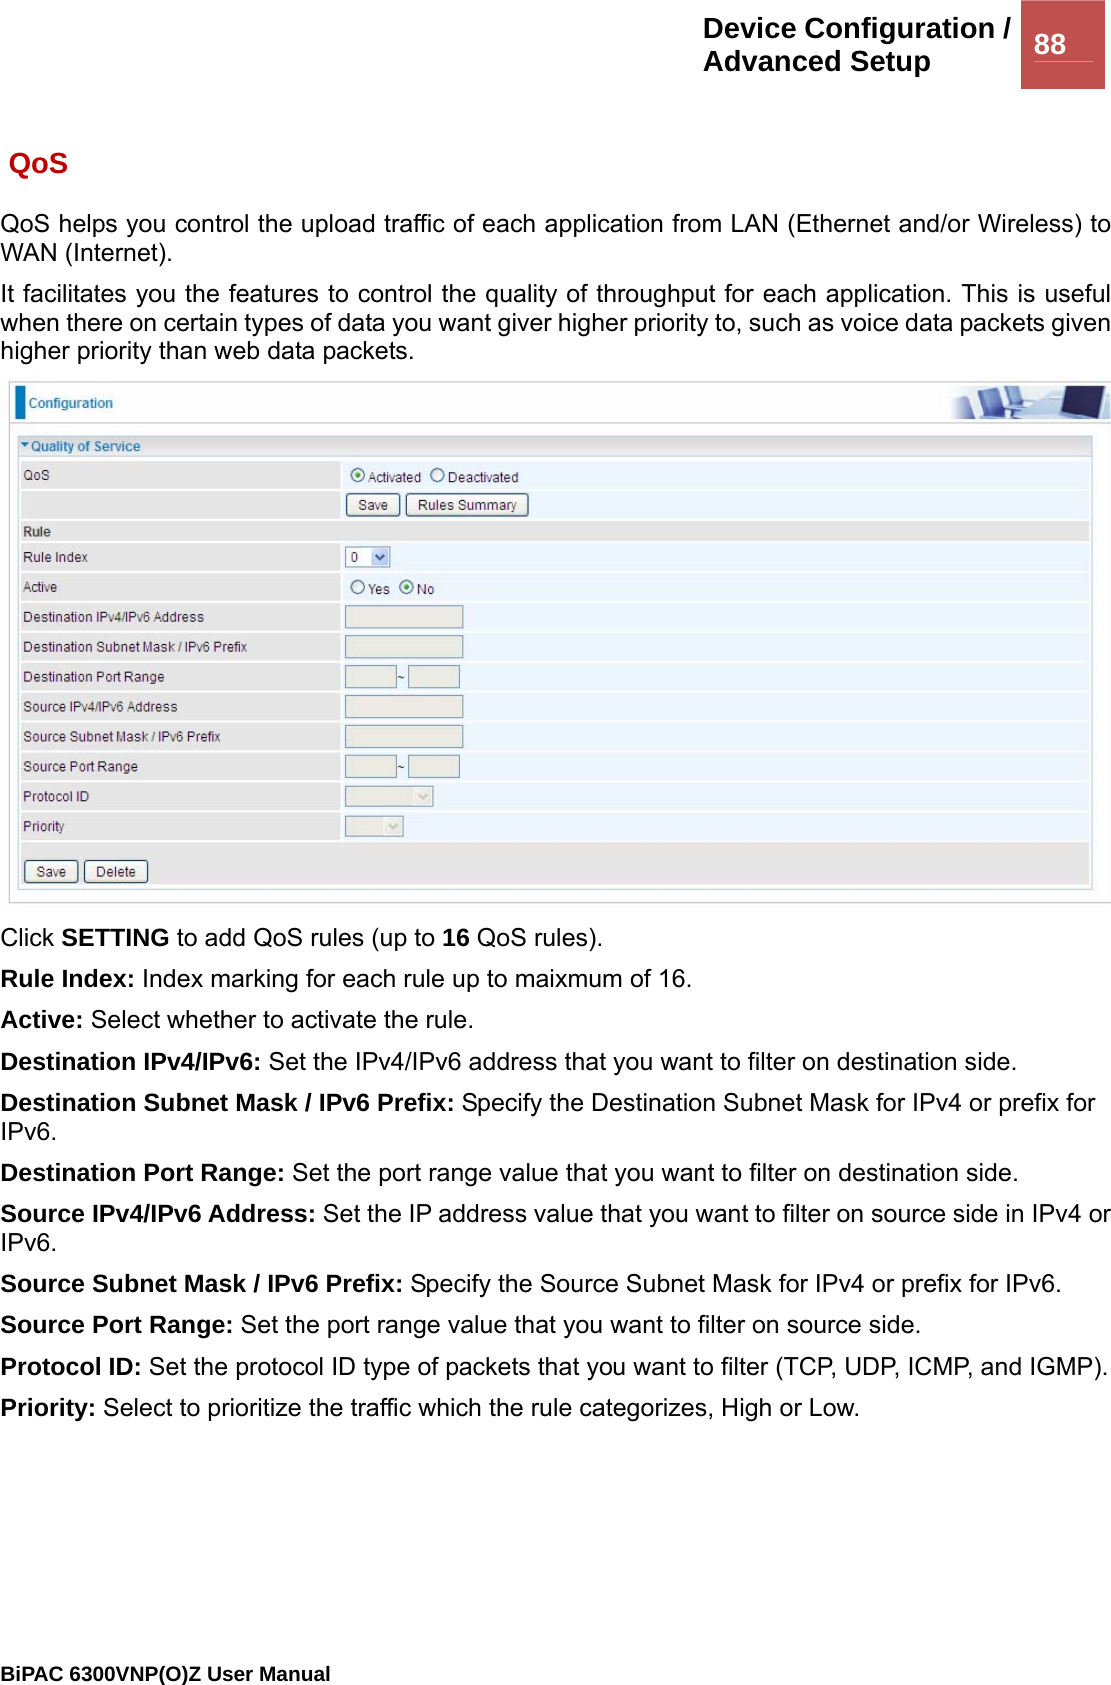
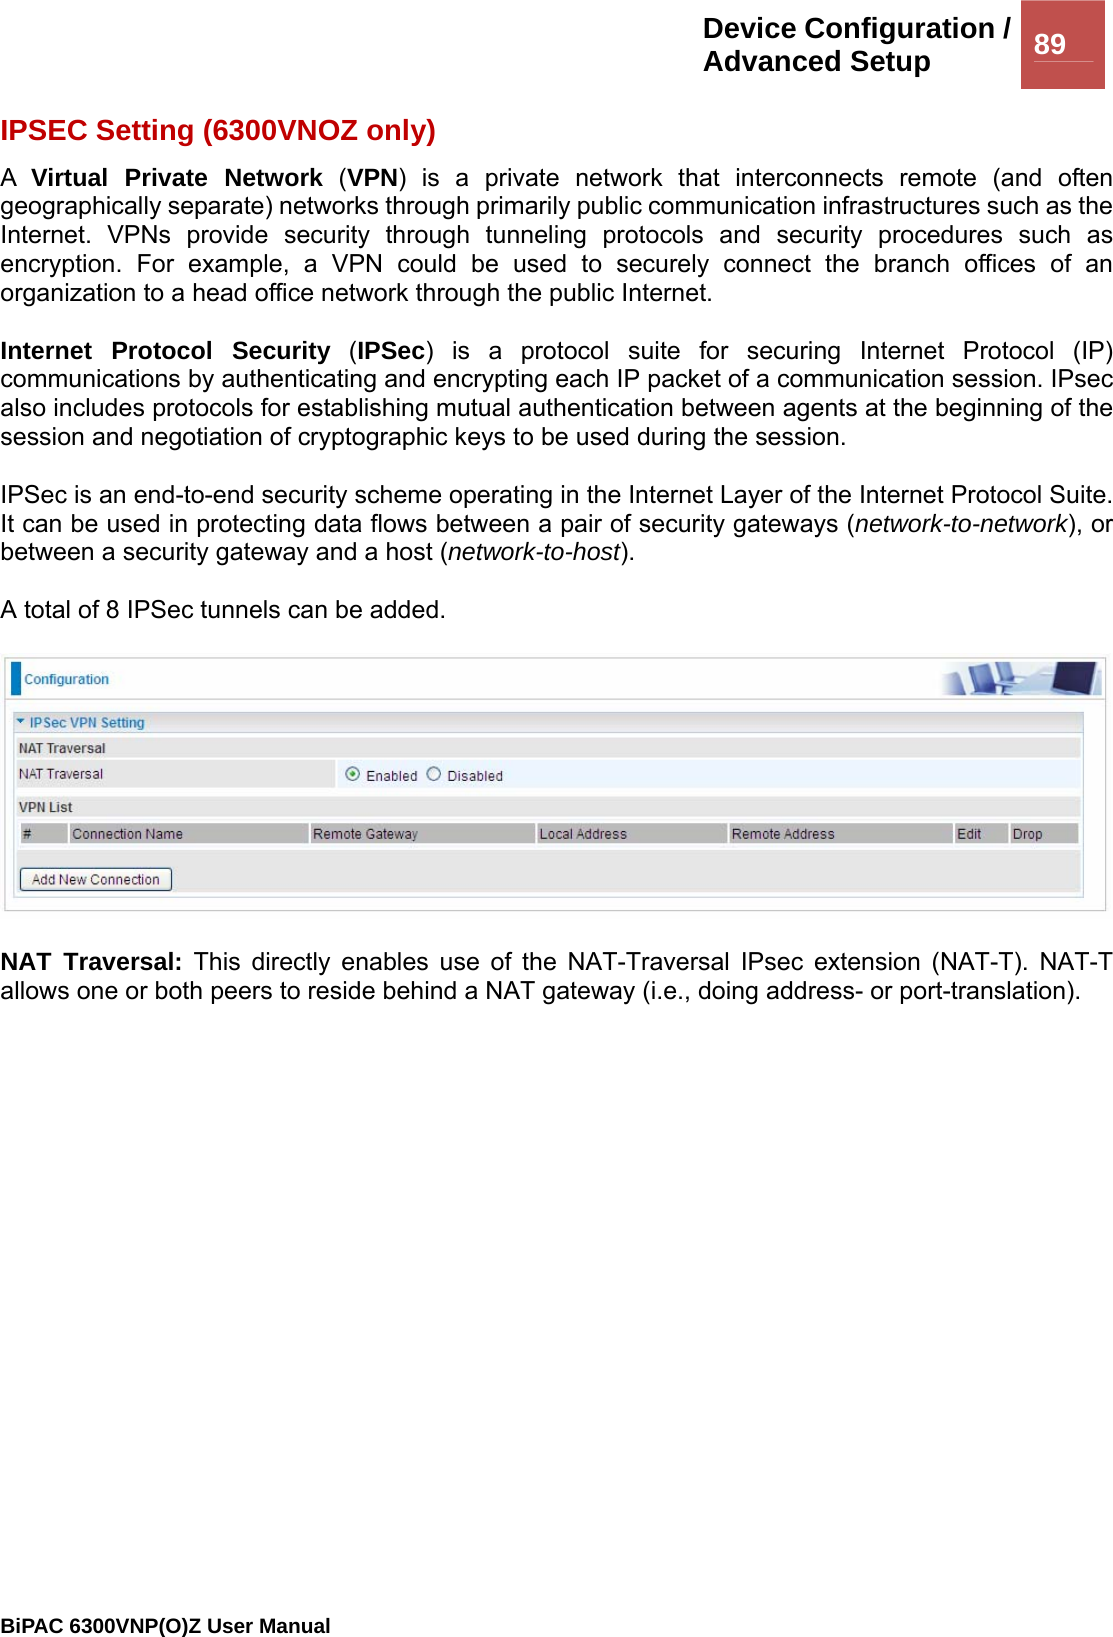
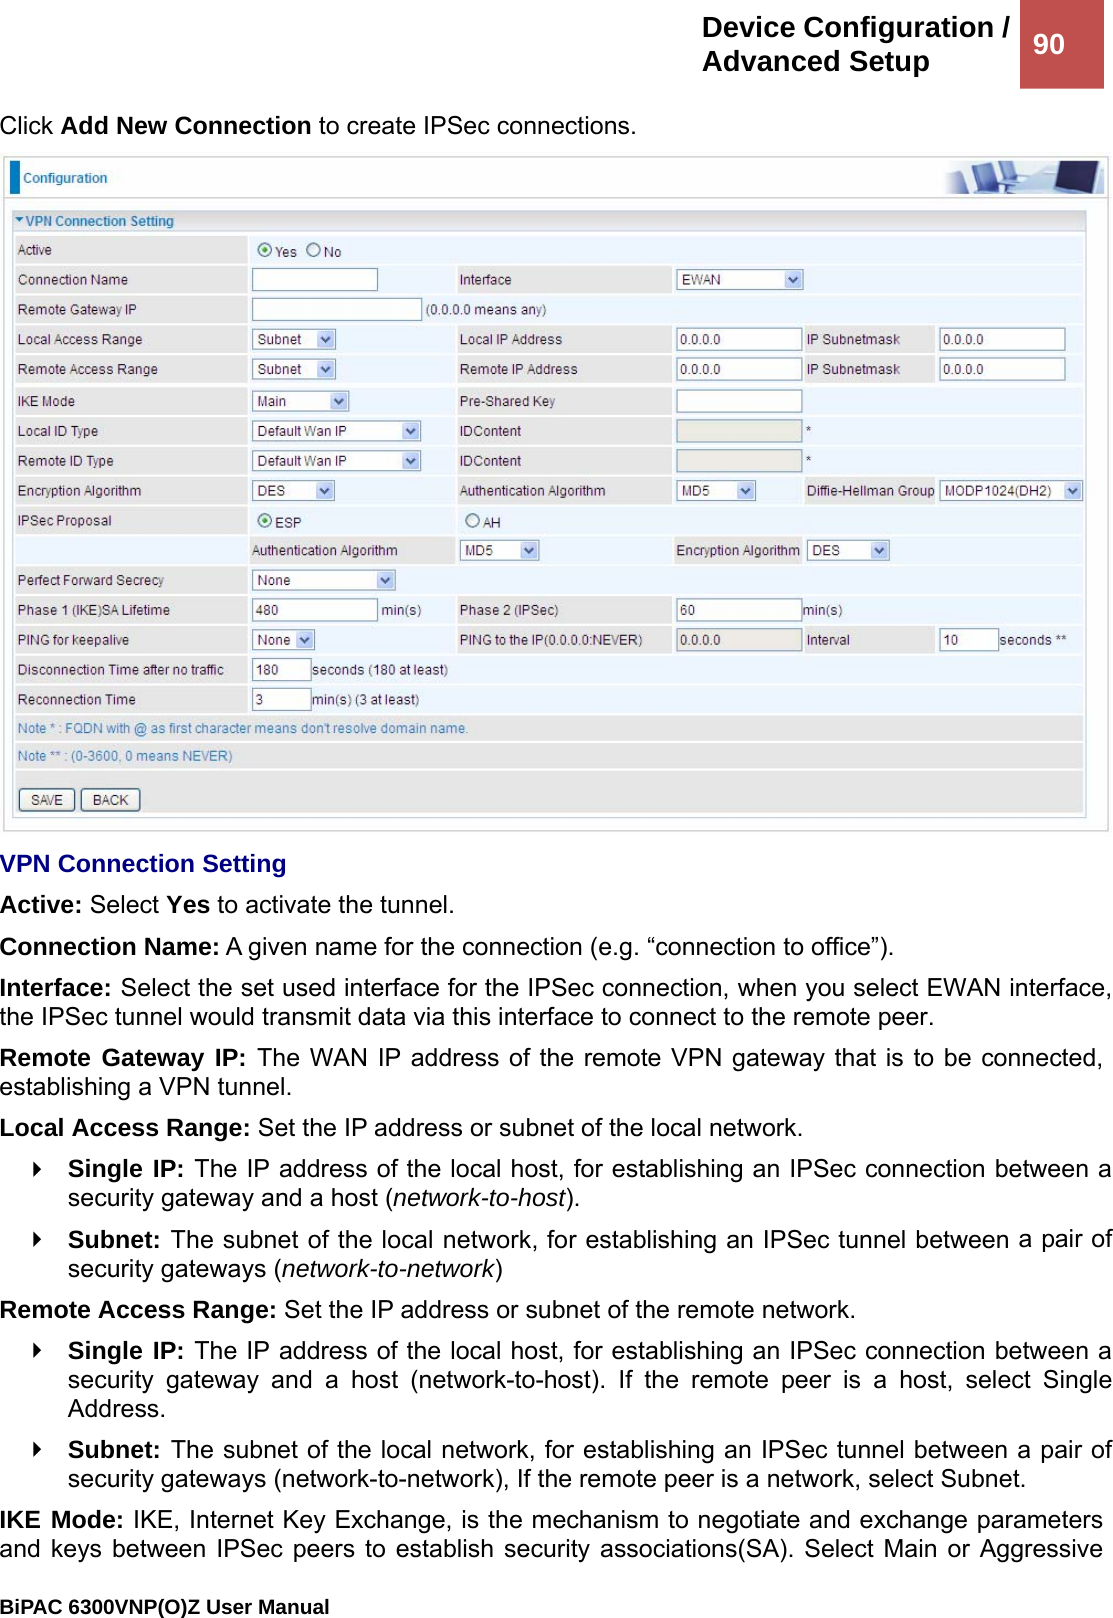
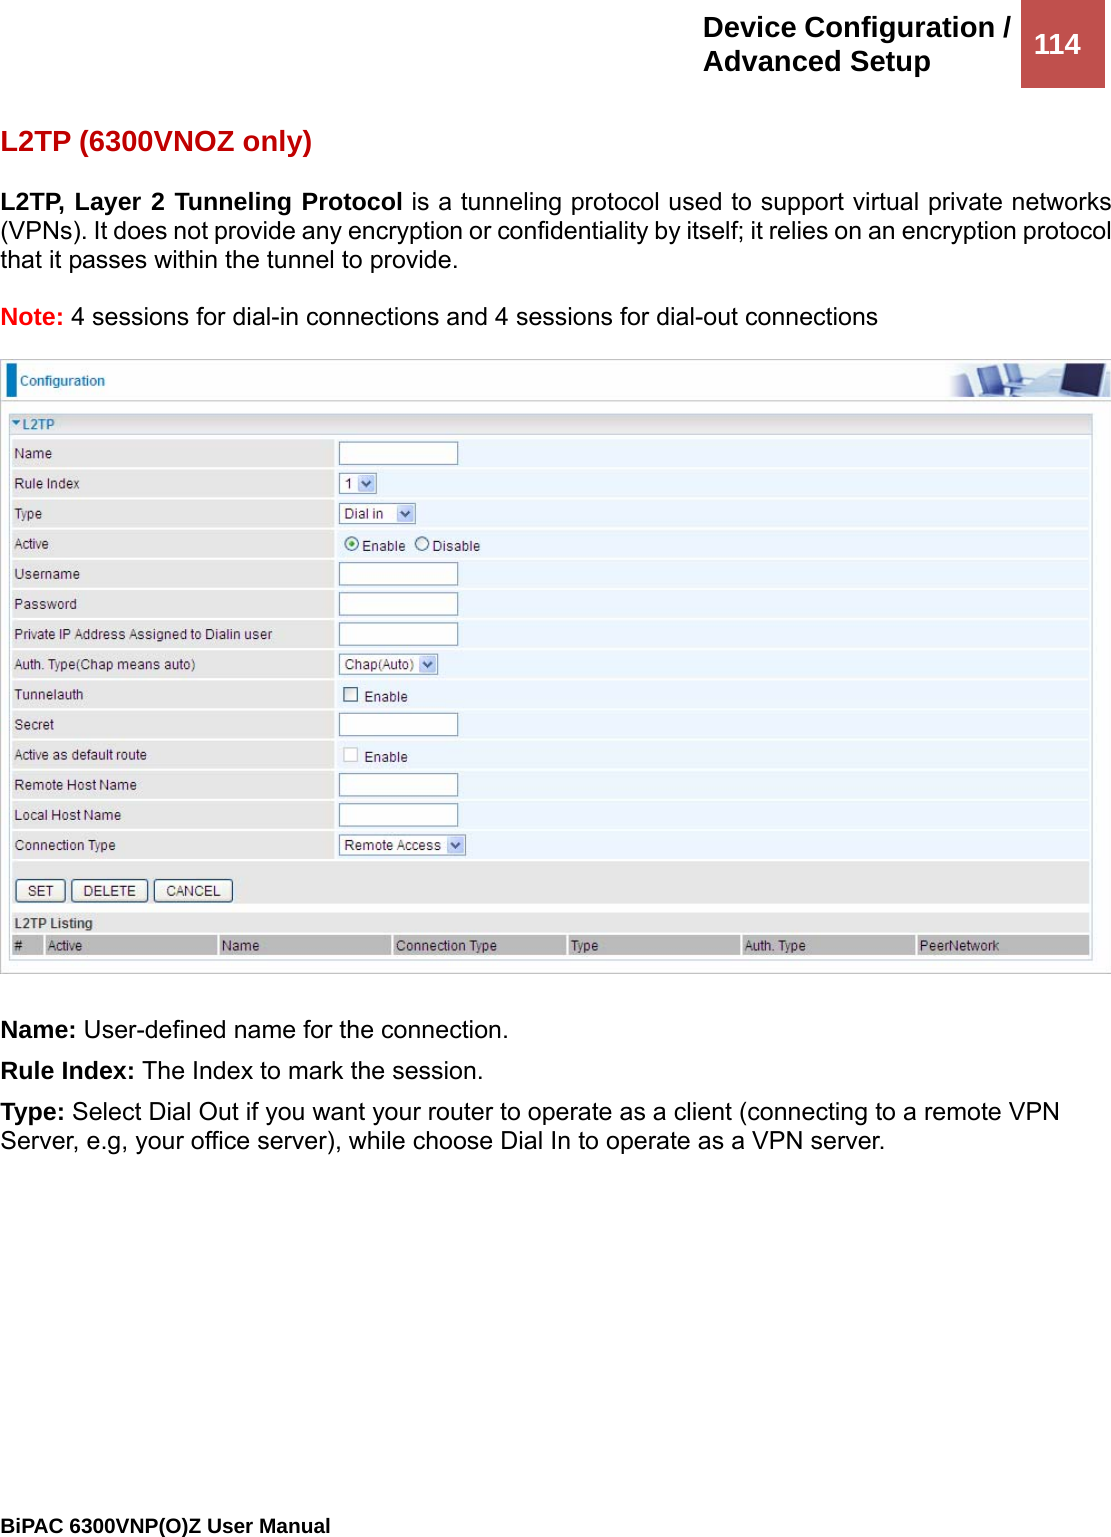
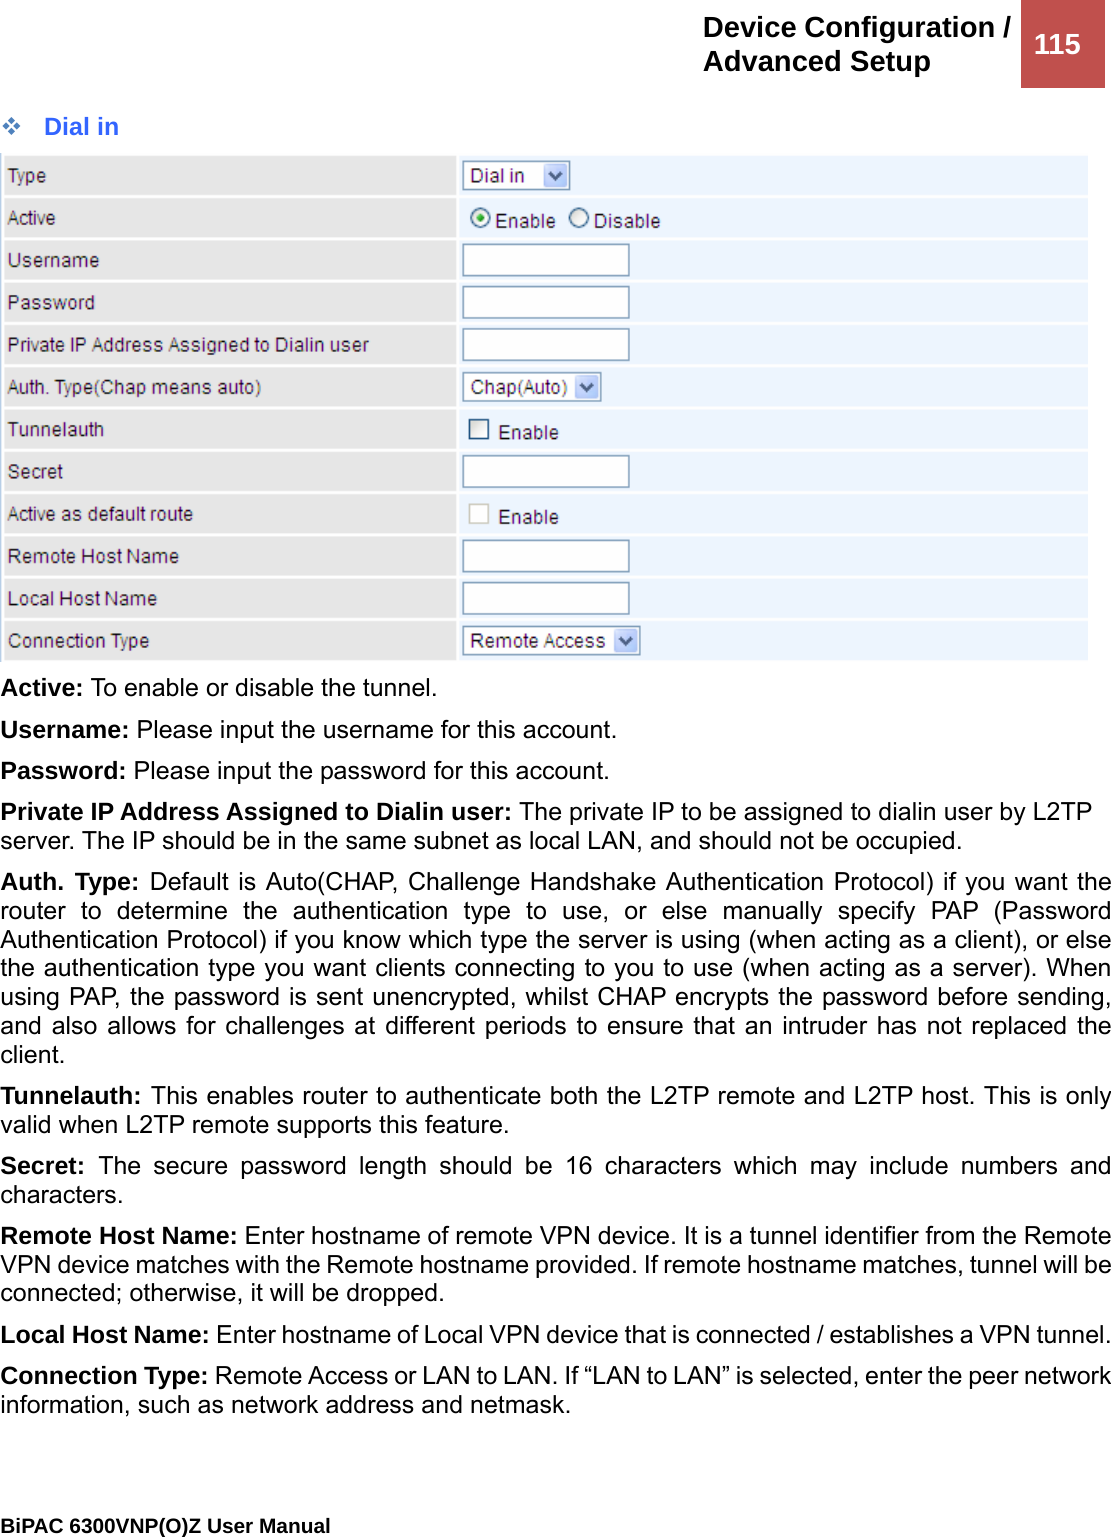
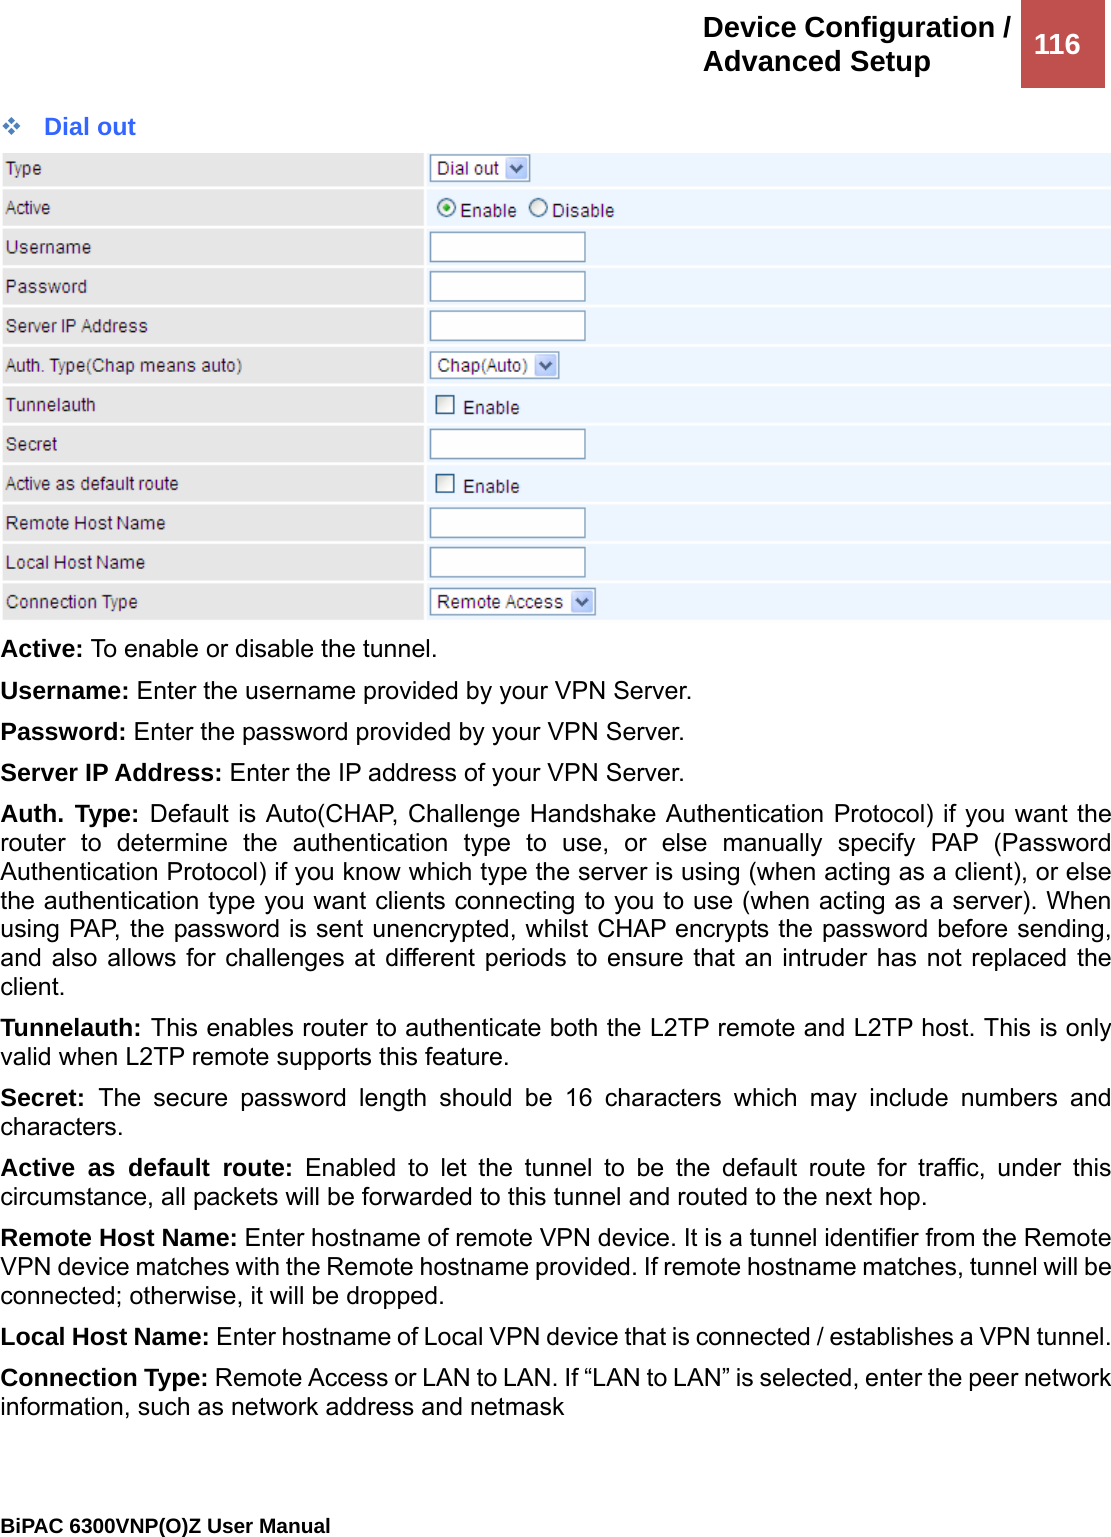
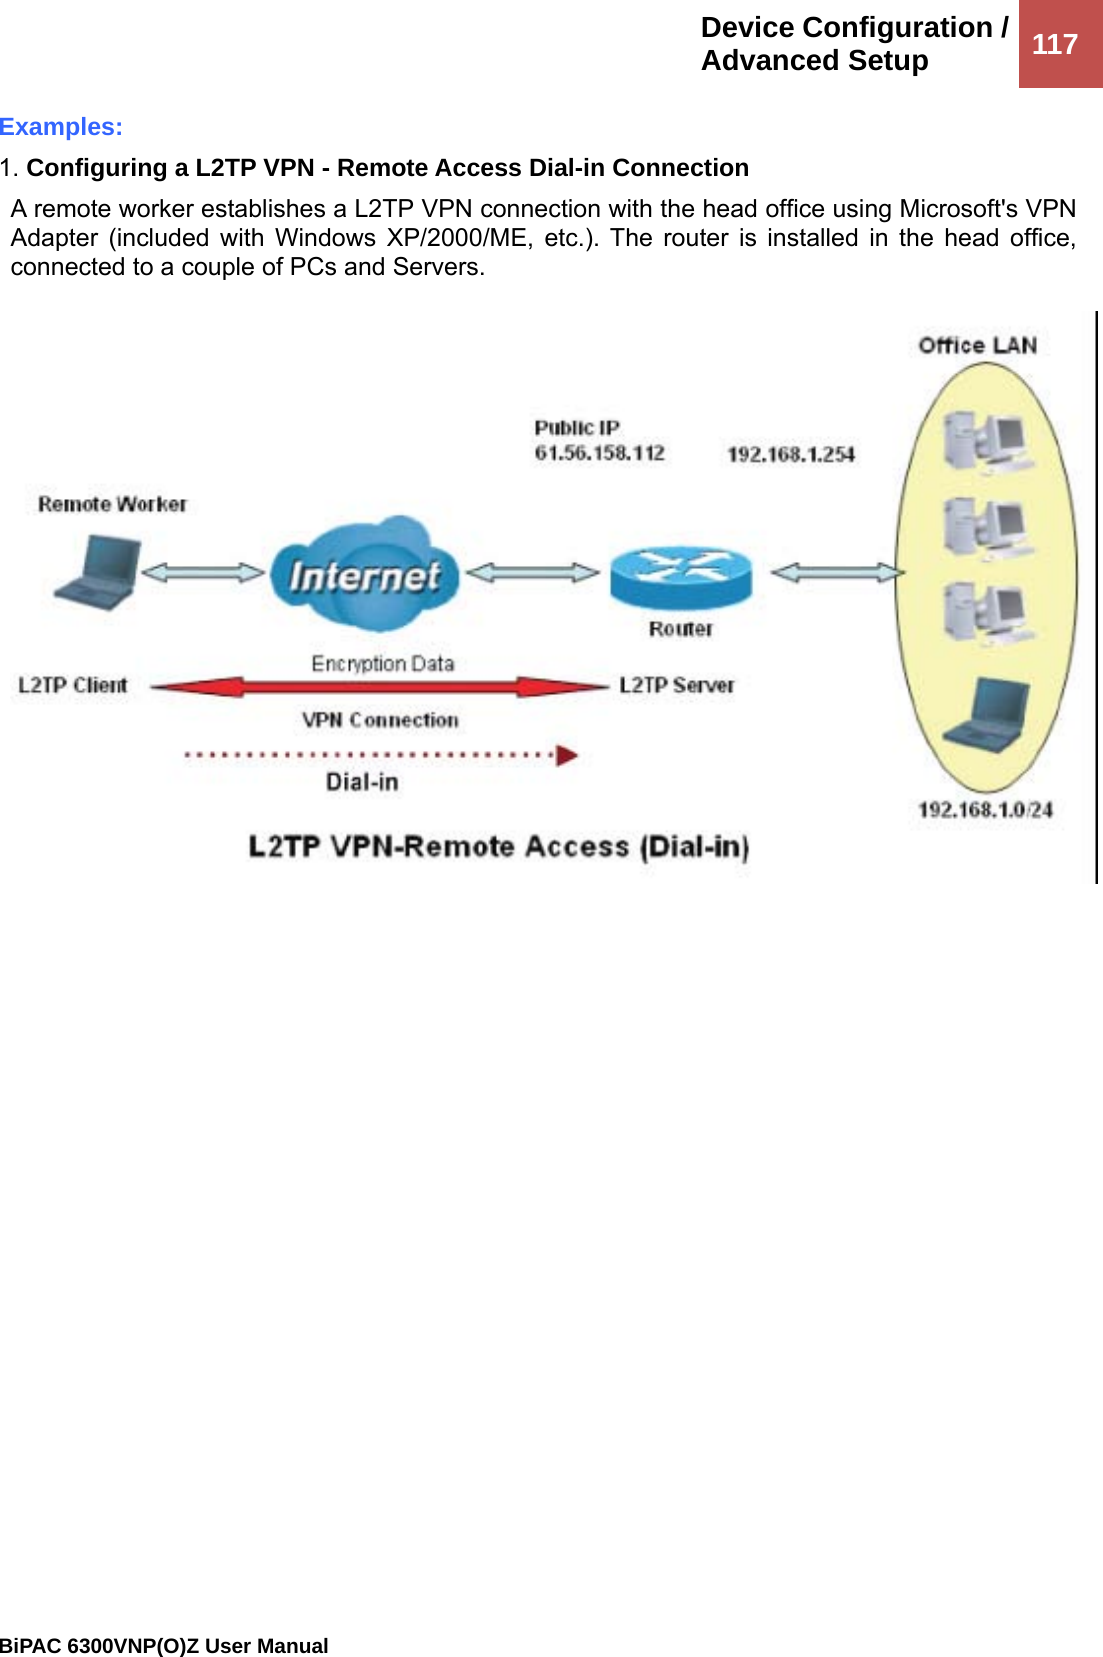
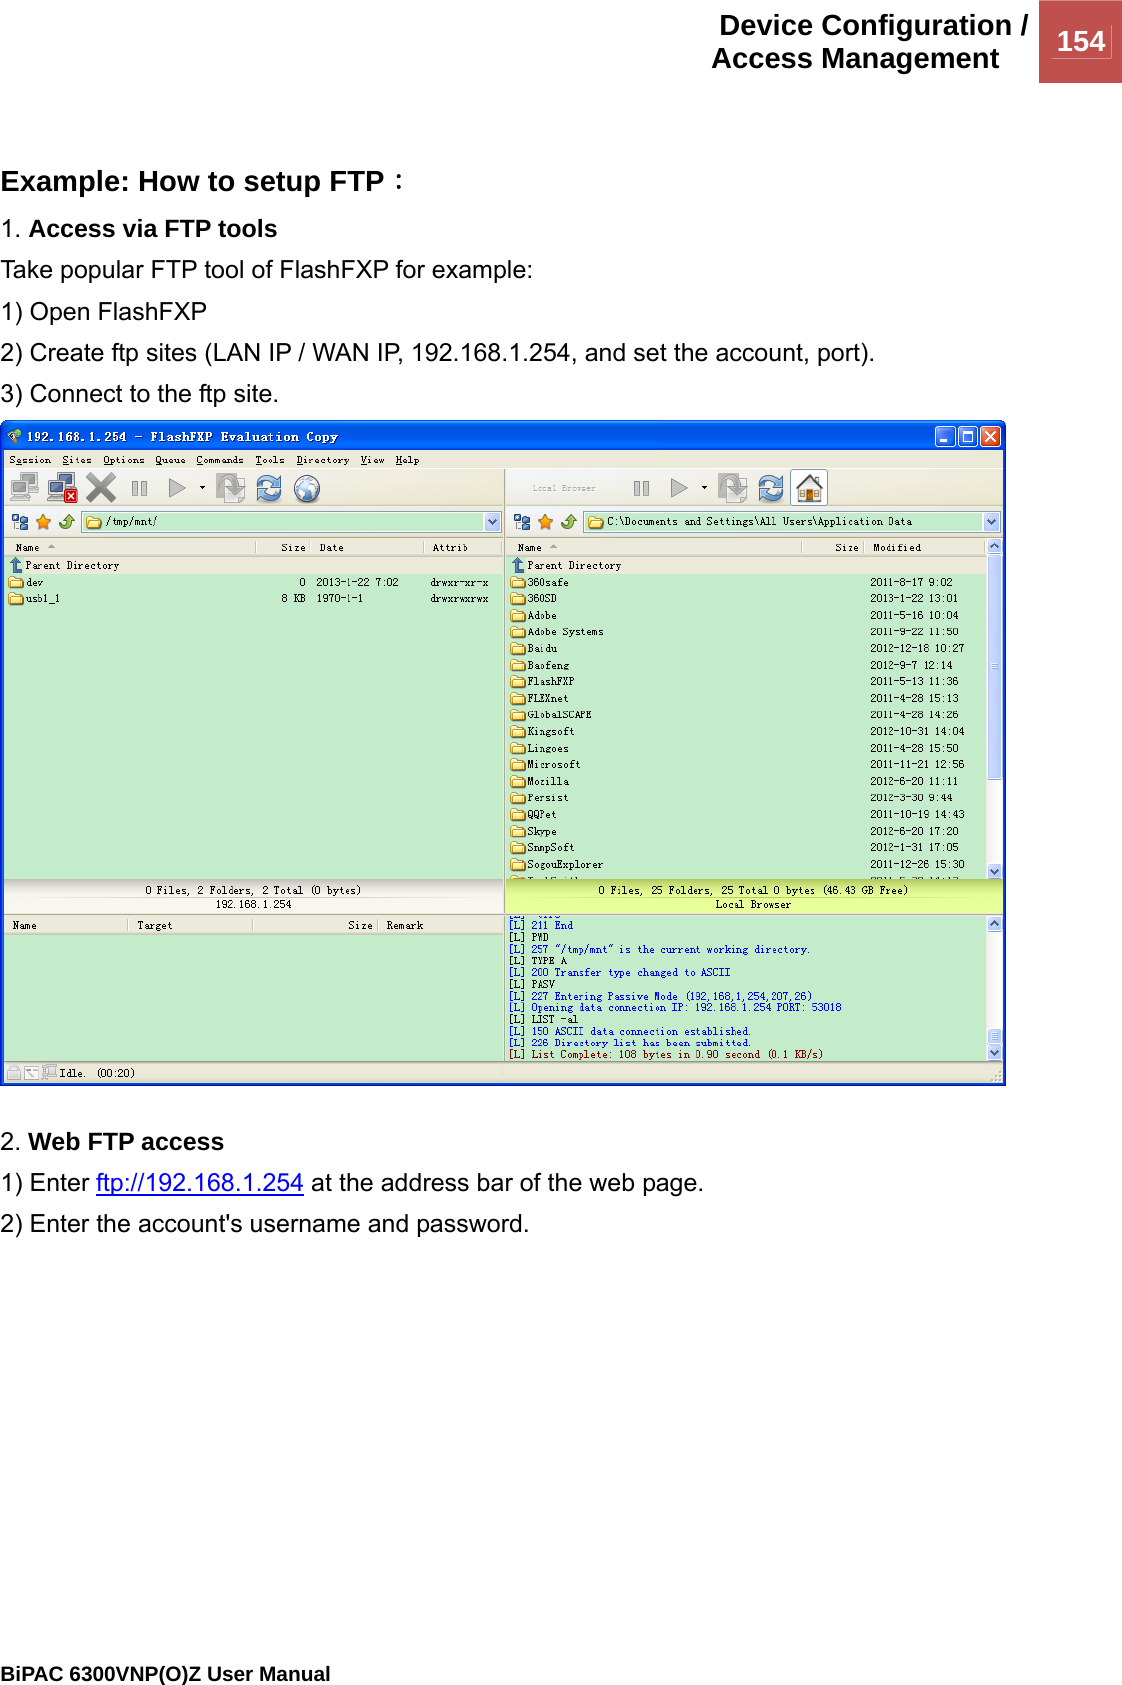
- 1. User manual
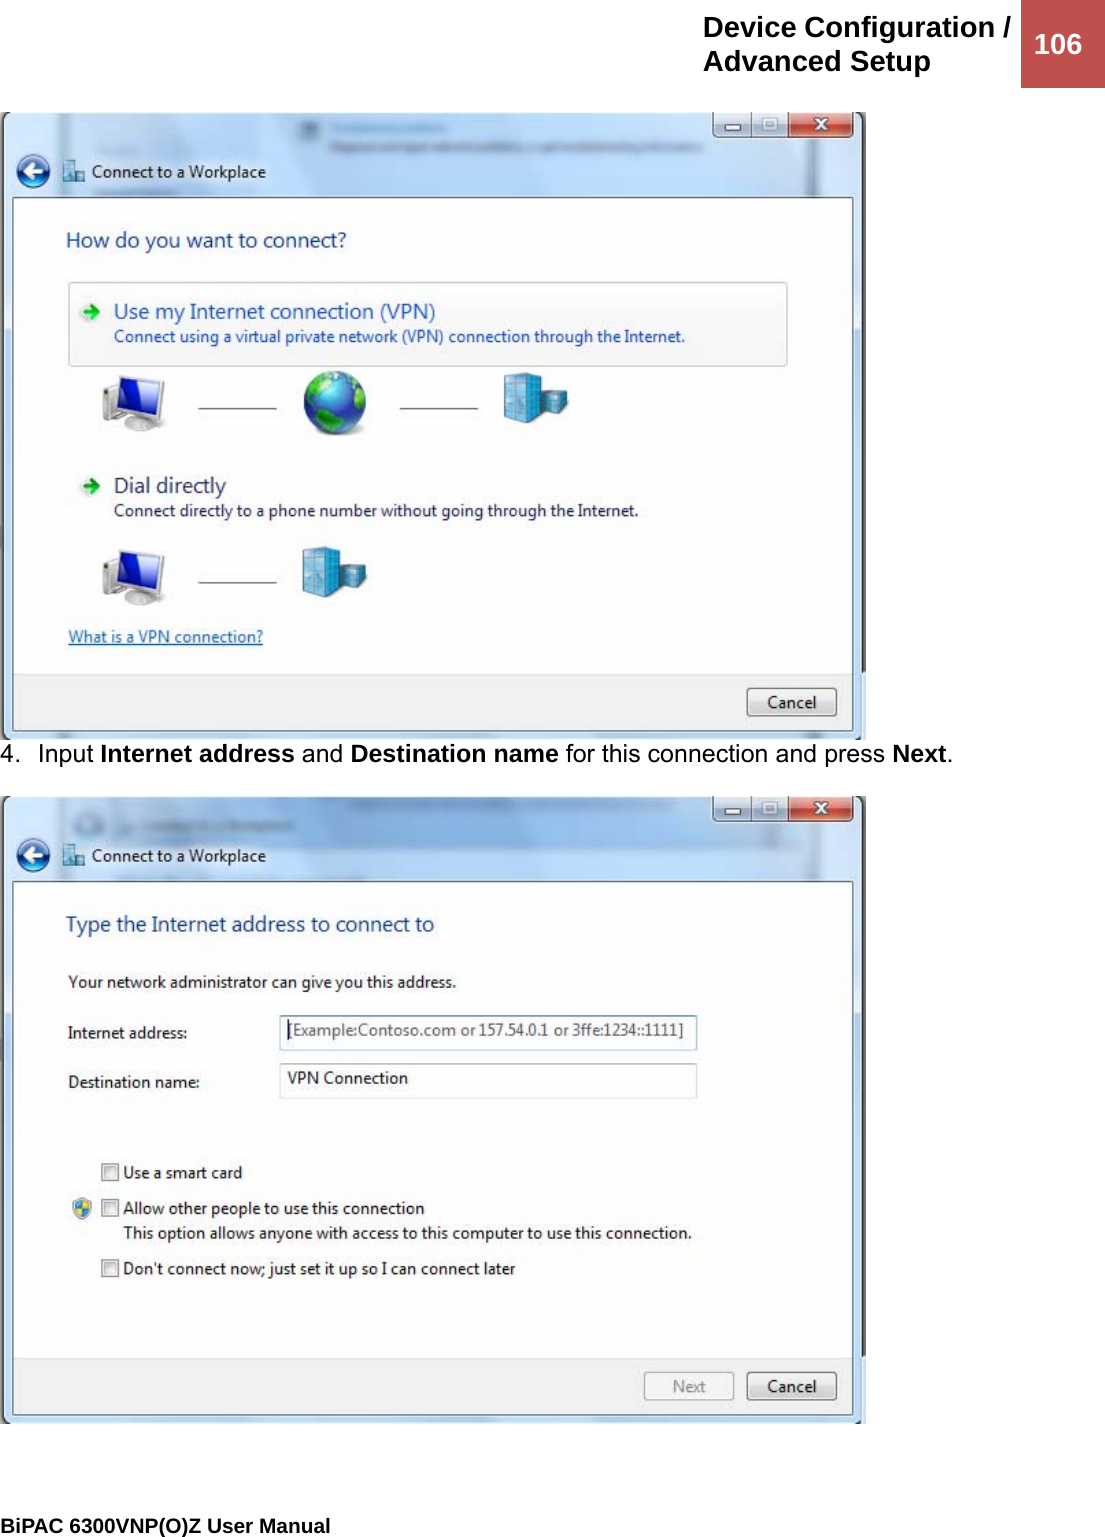
- 2. Users manual-1
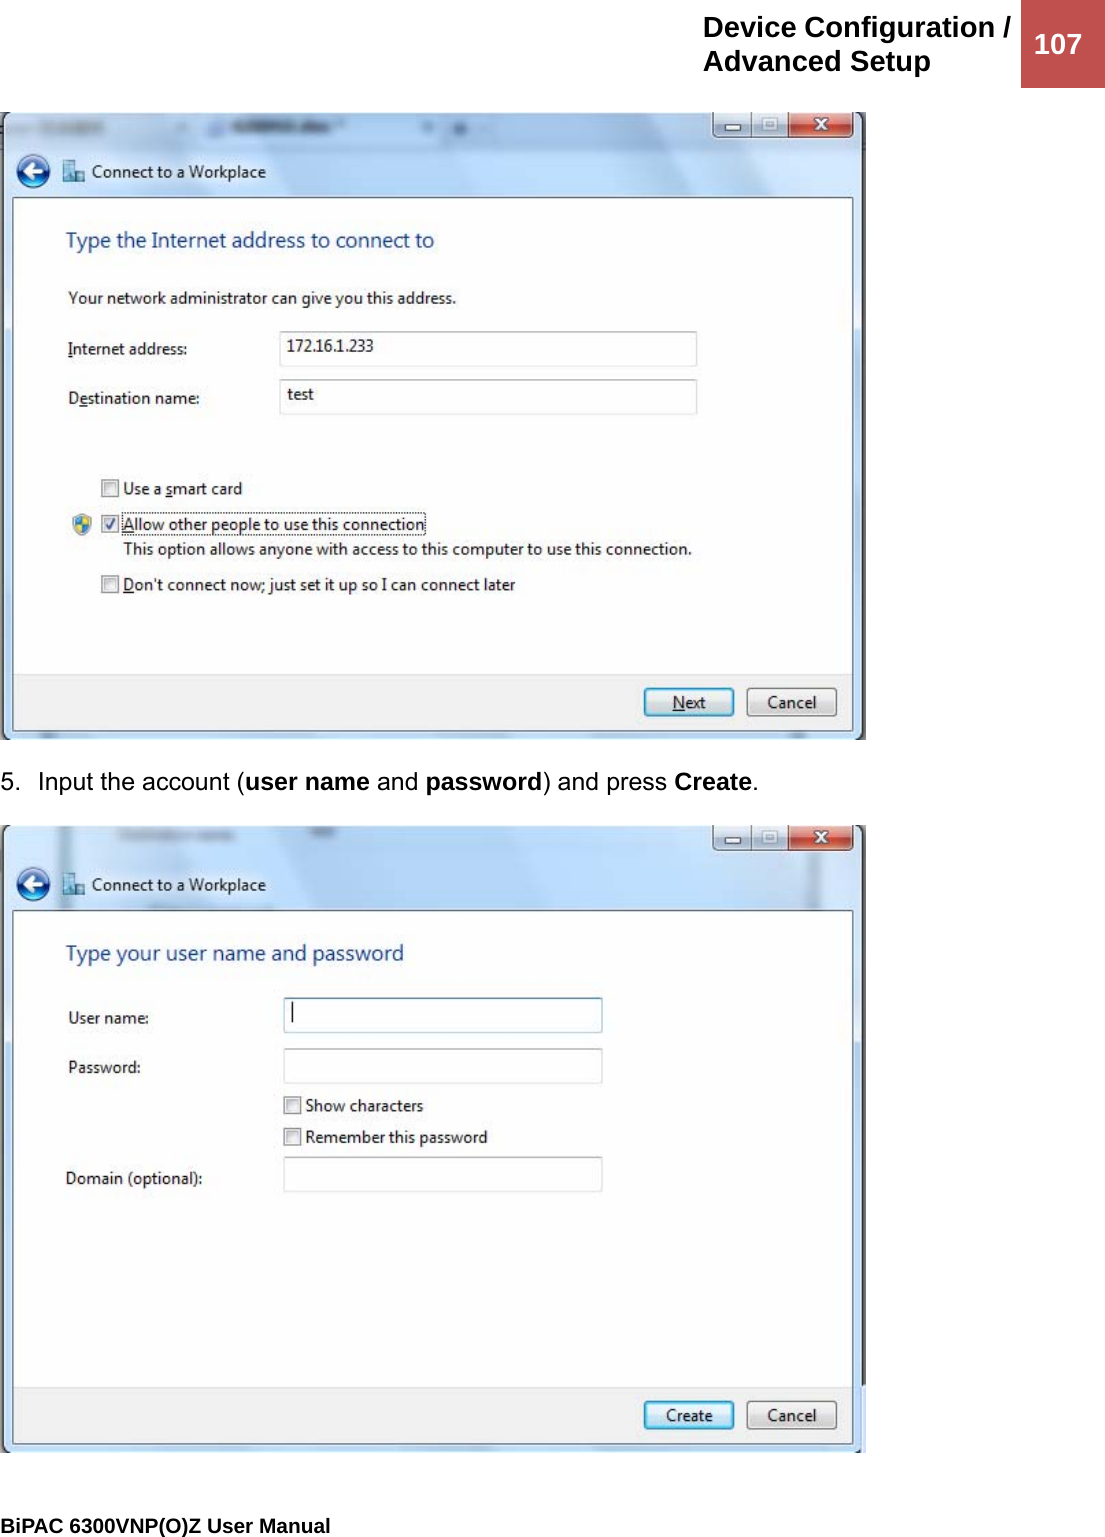
- 3. Users manual-2
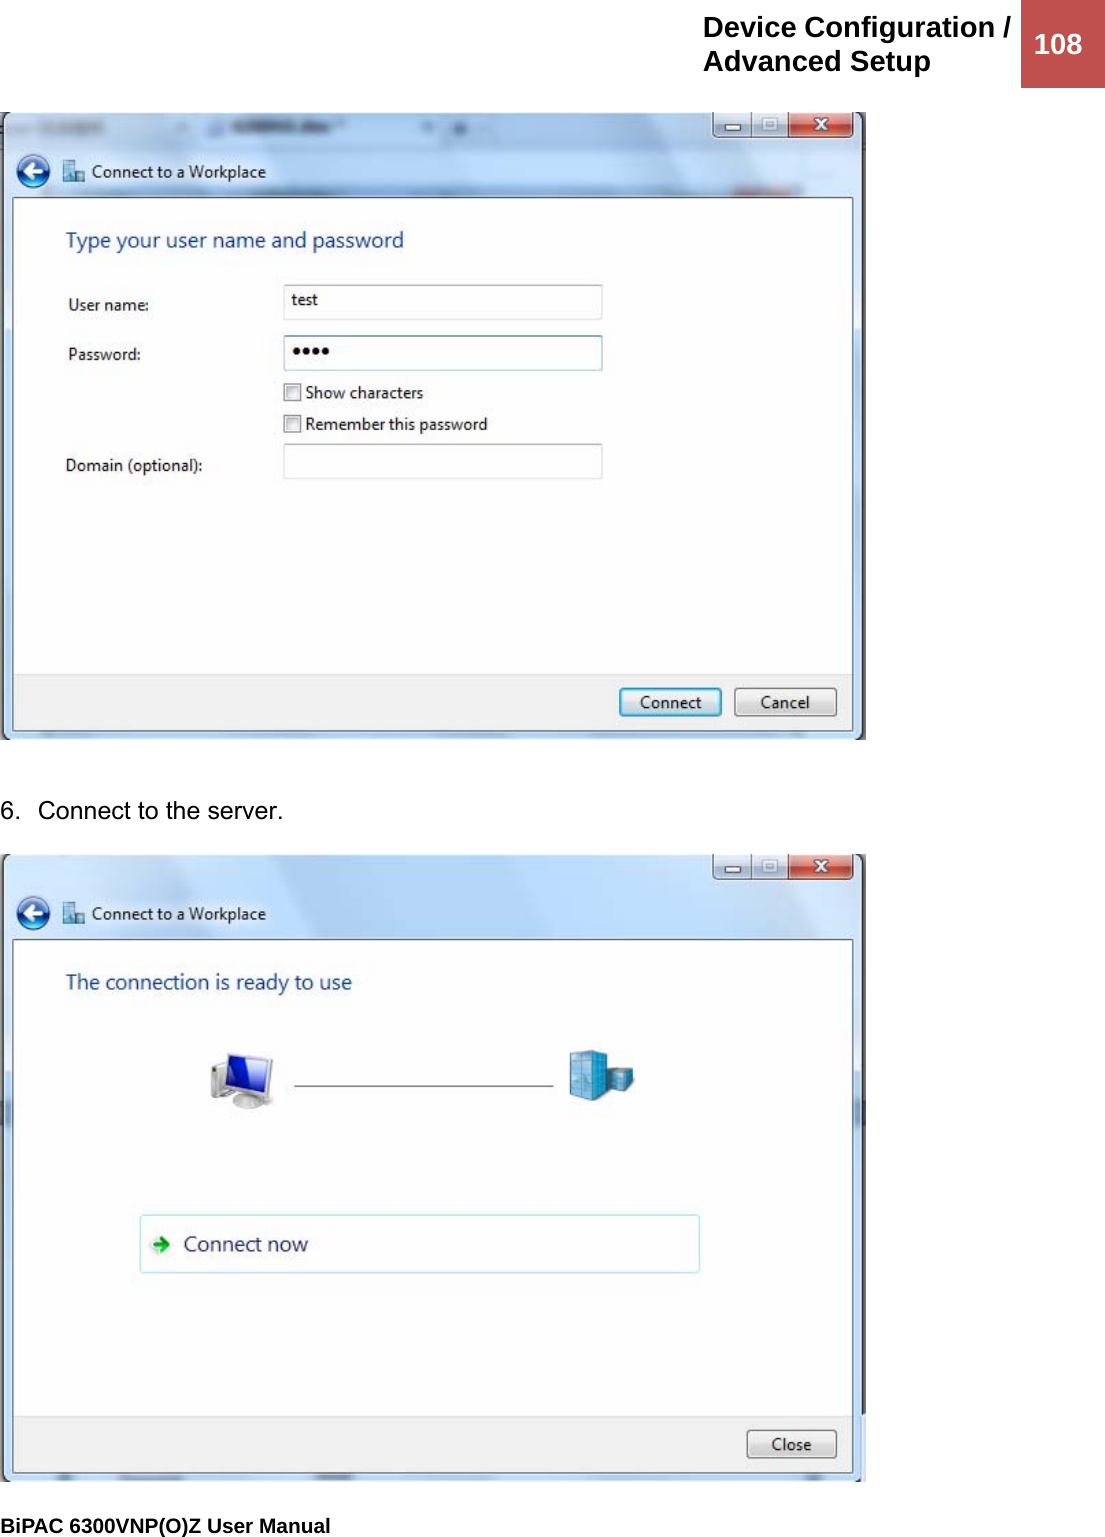
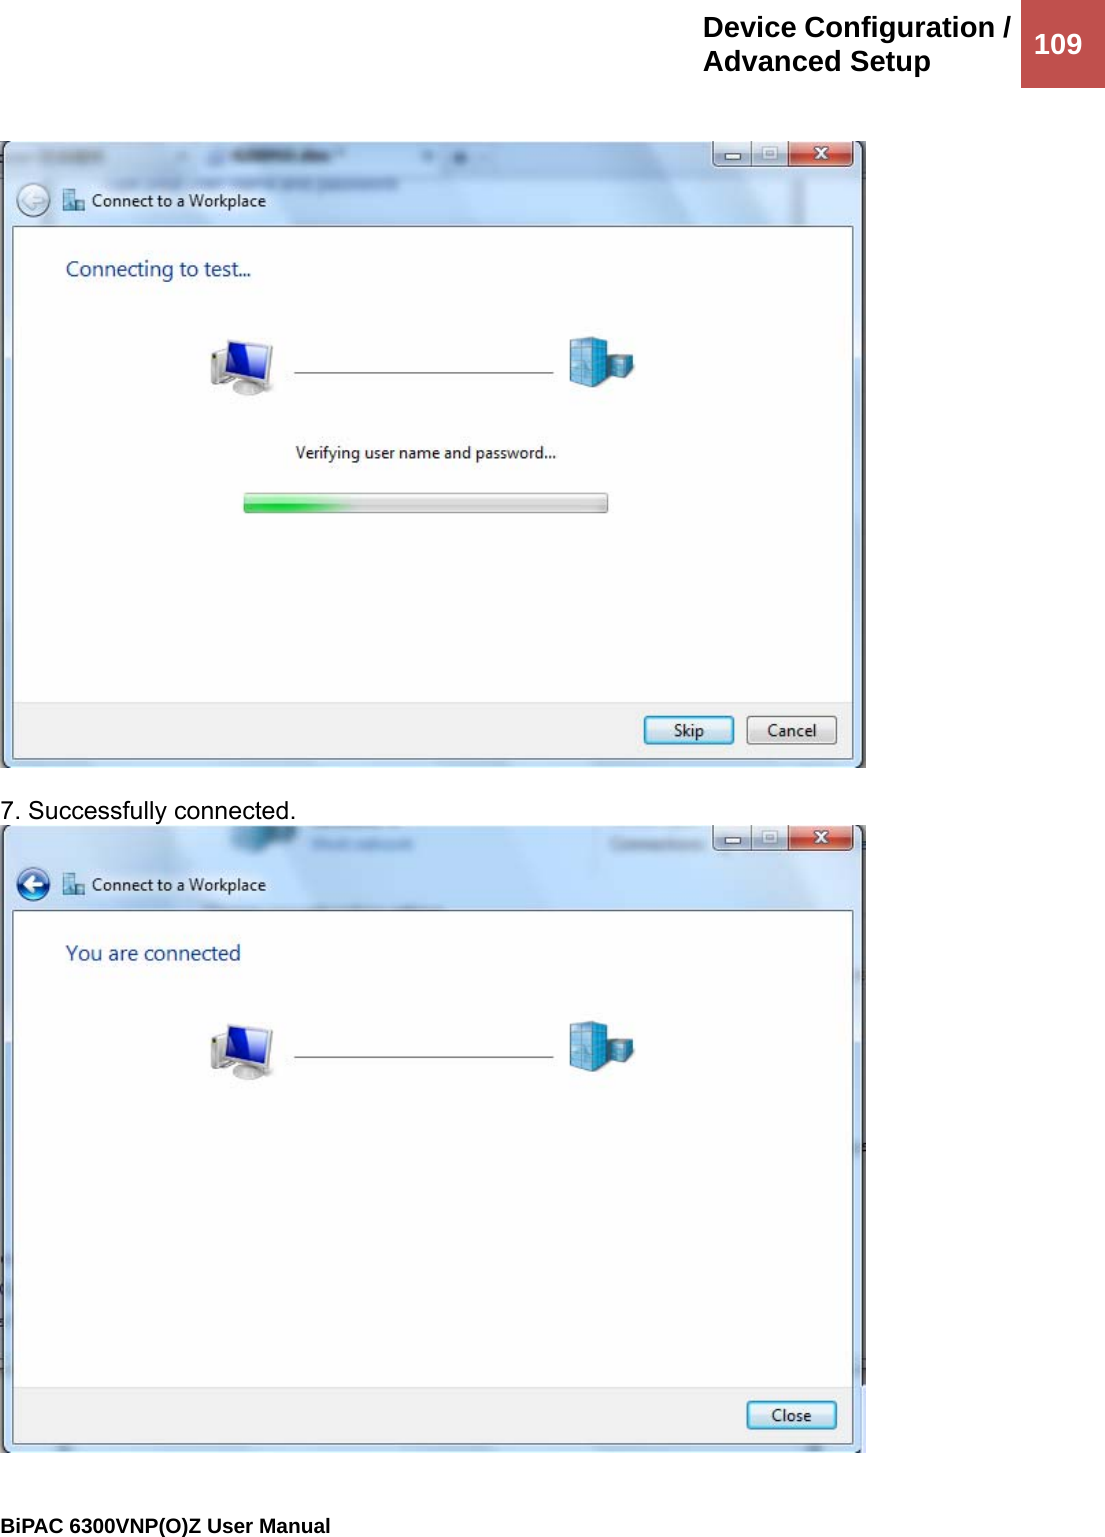
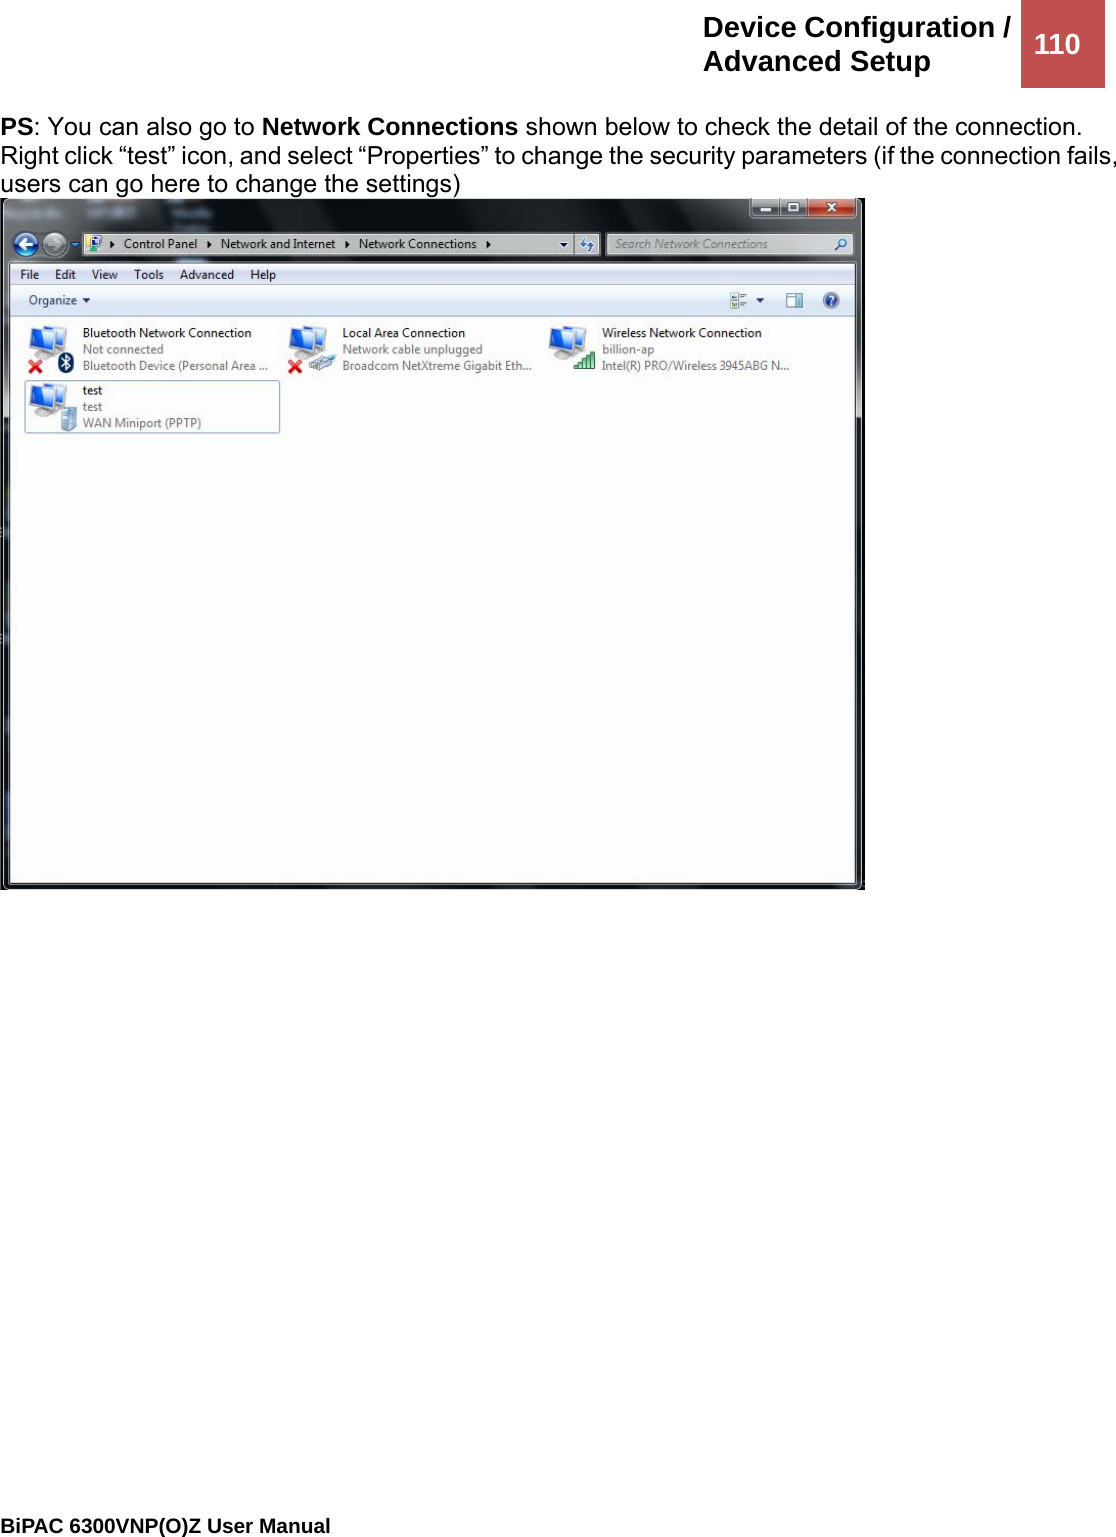
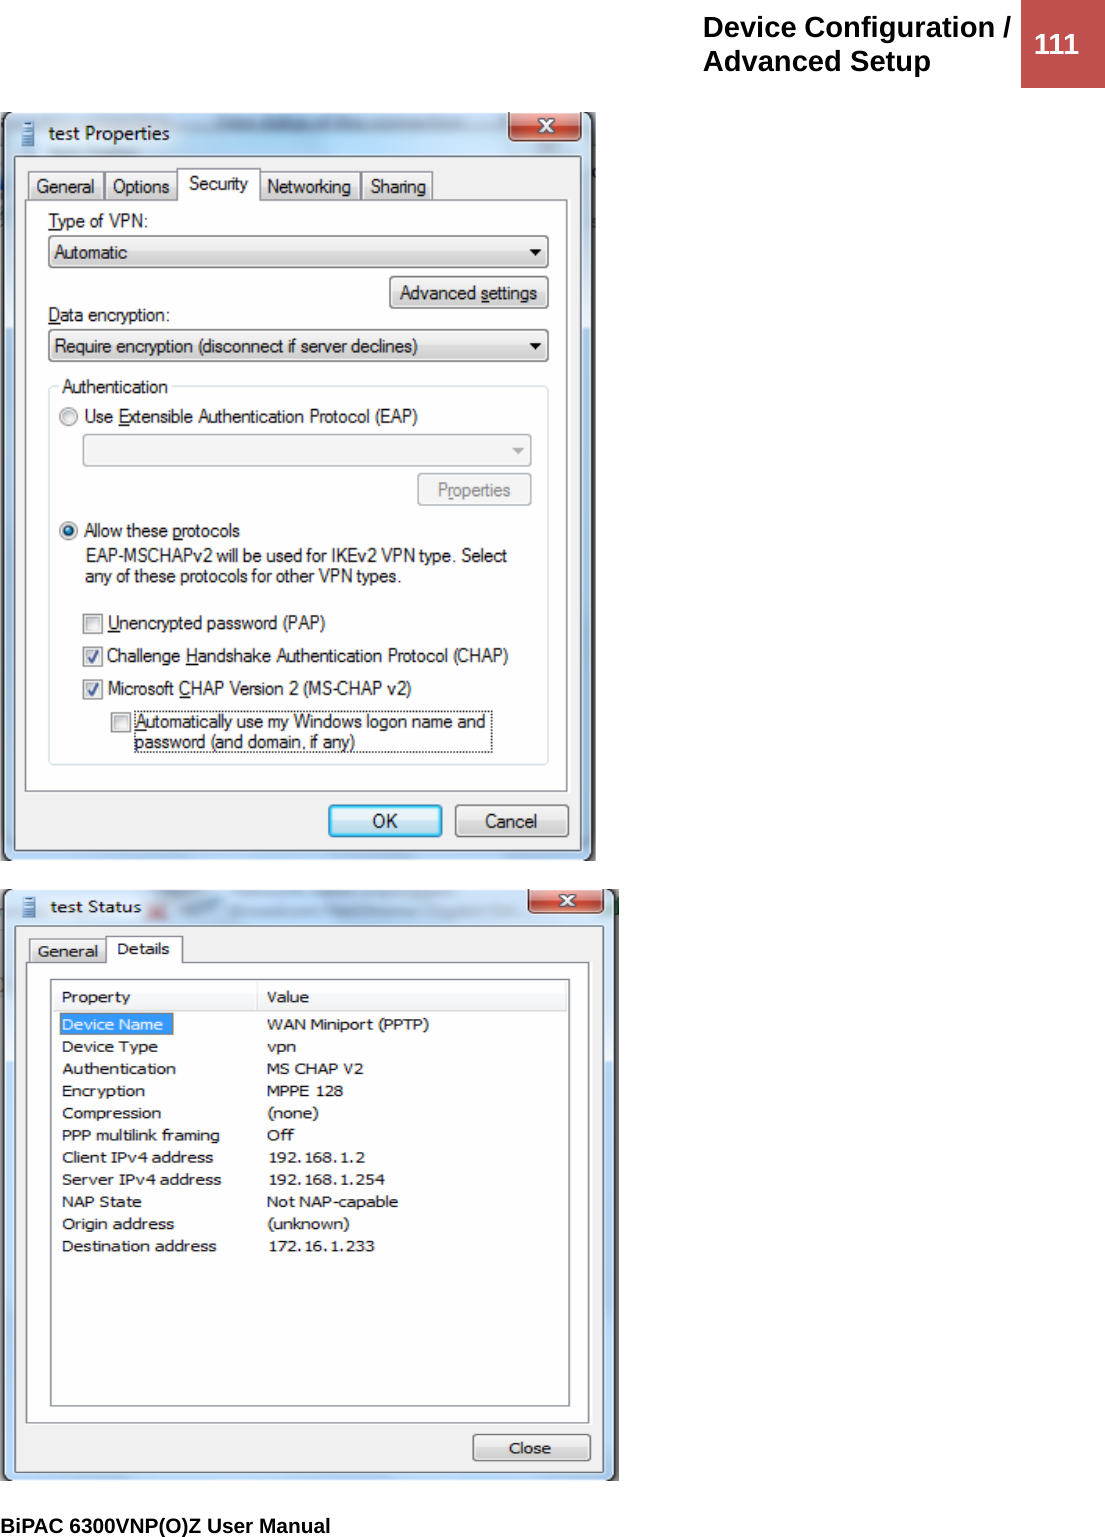
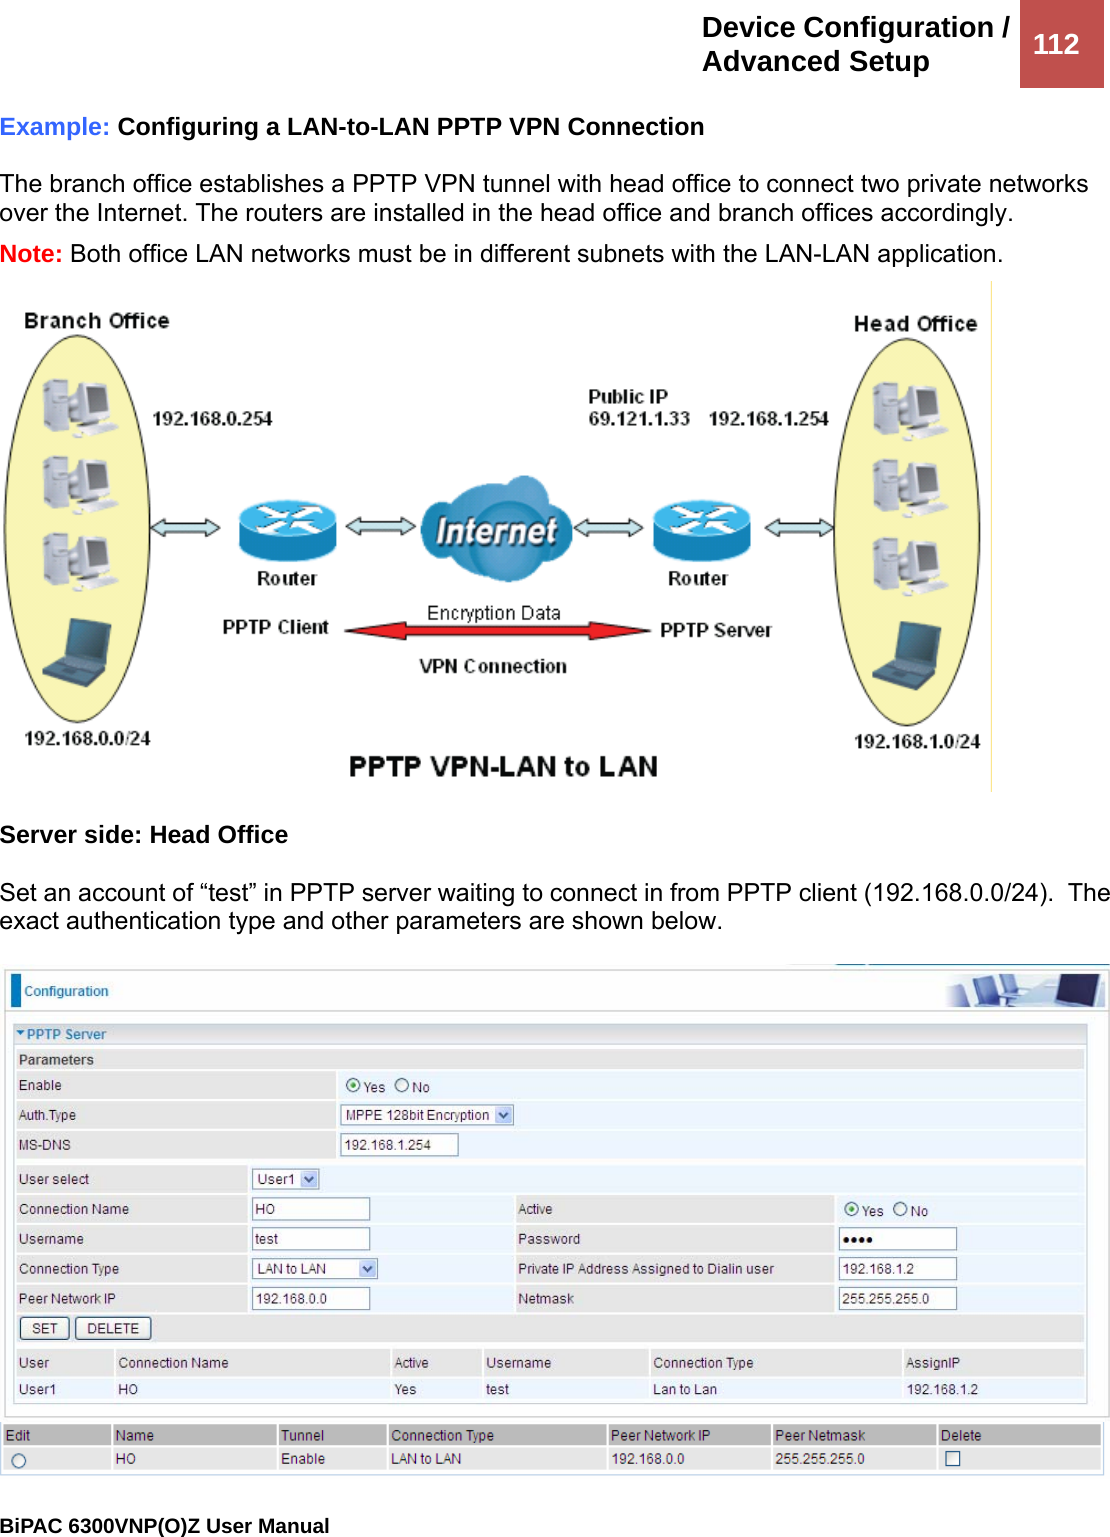
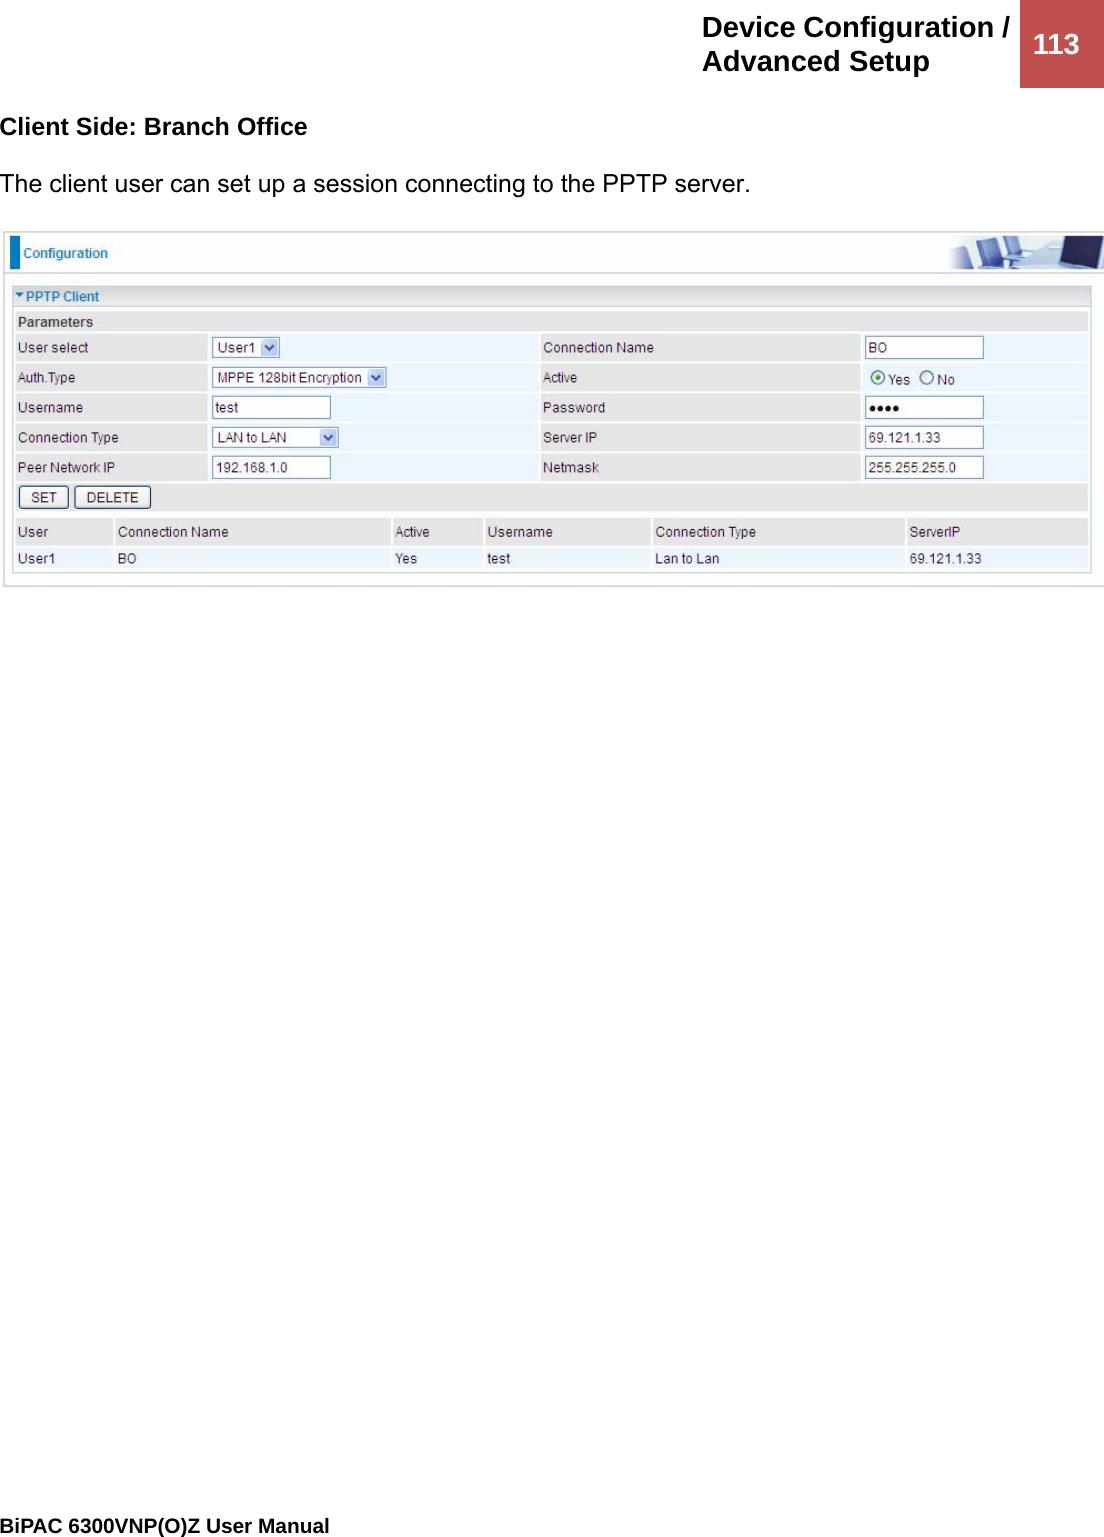
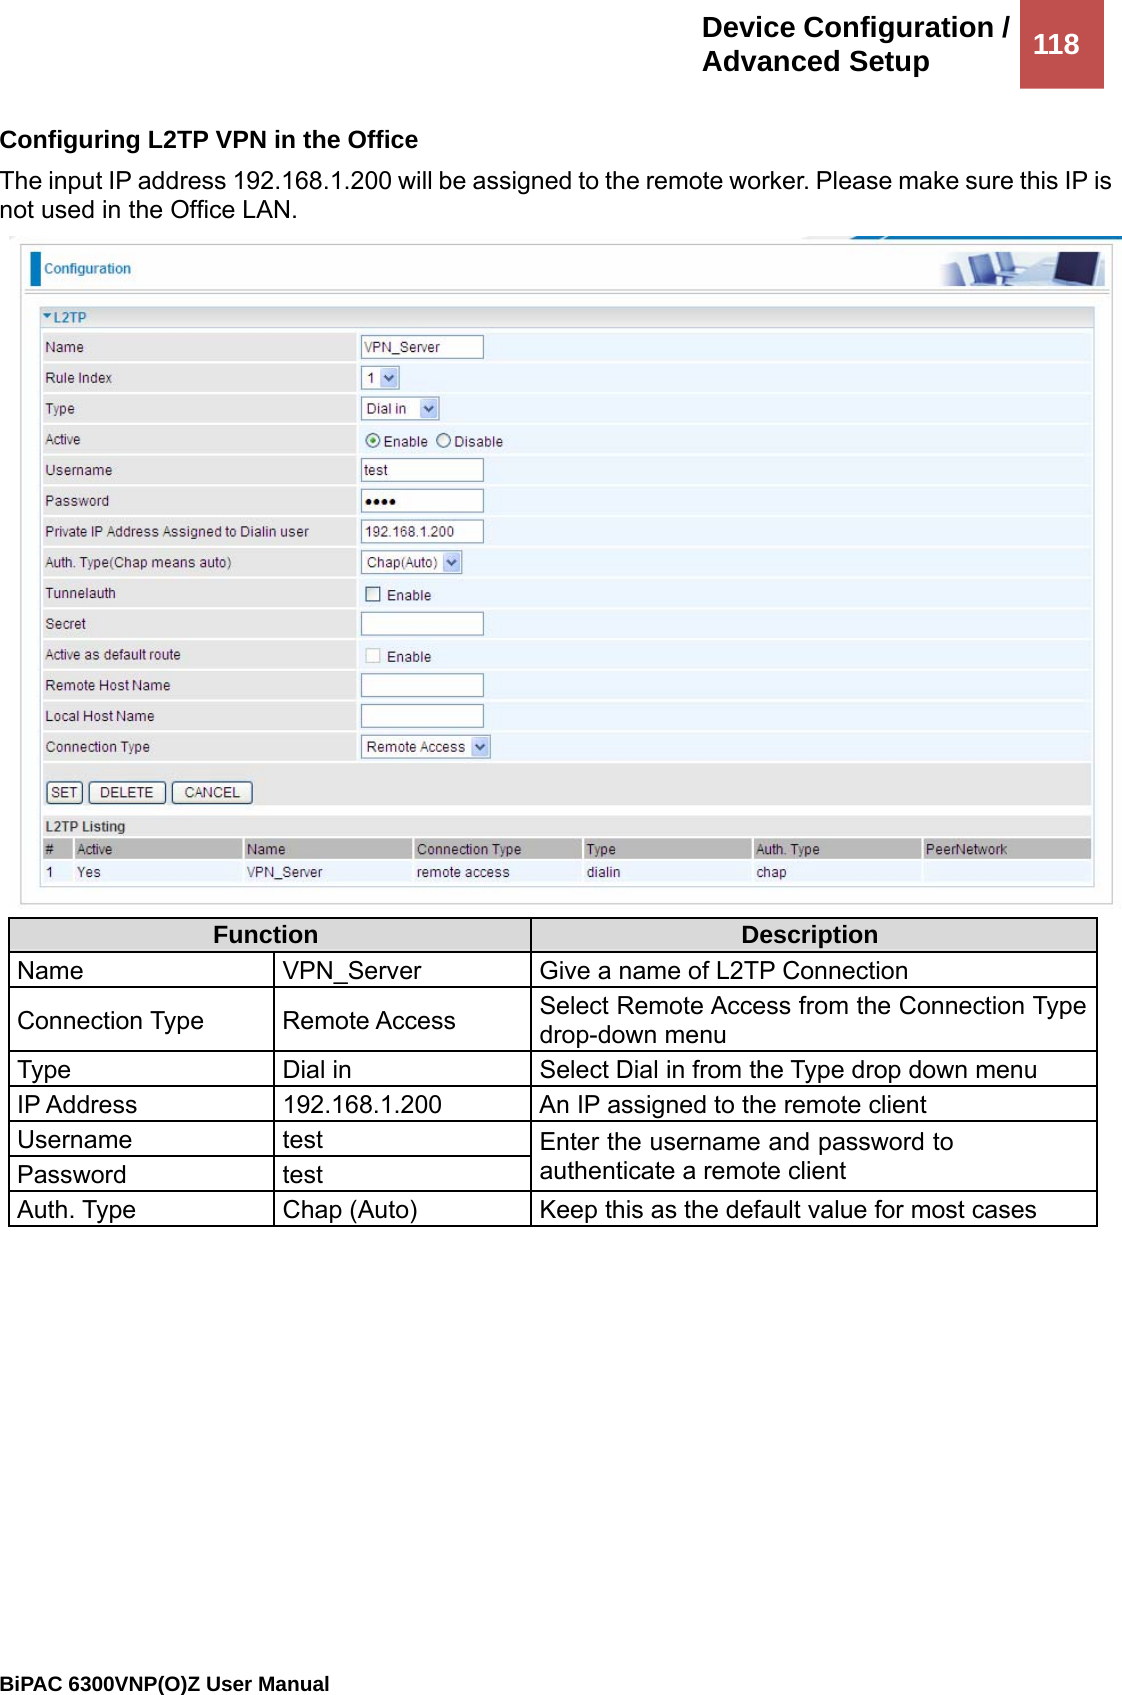
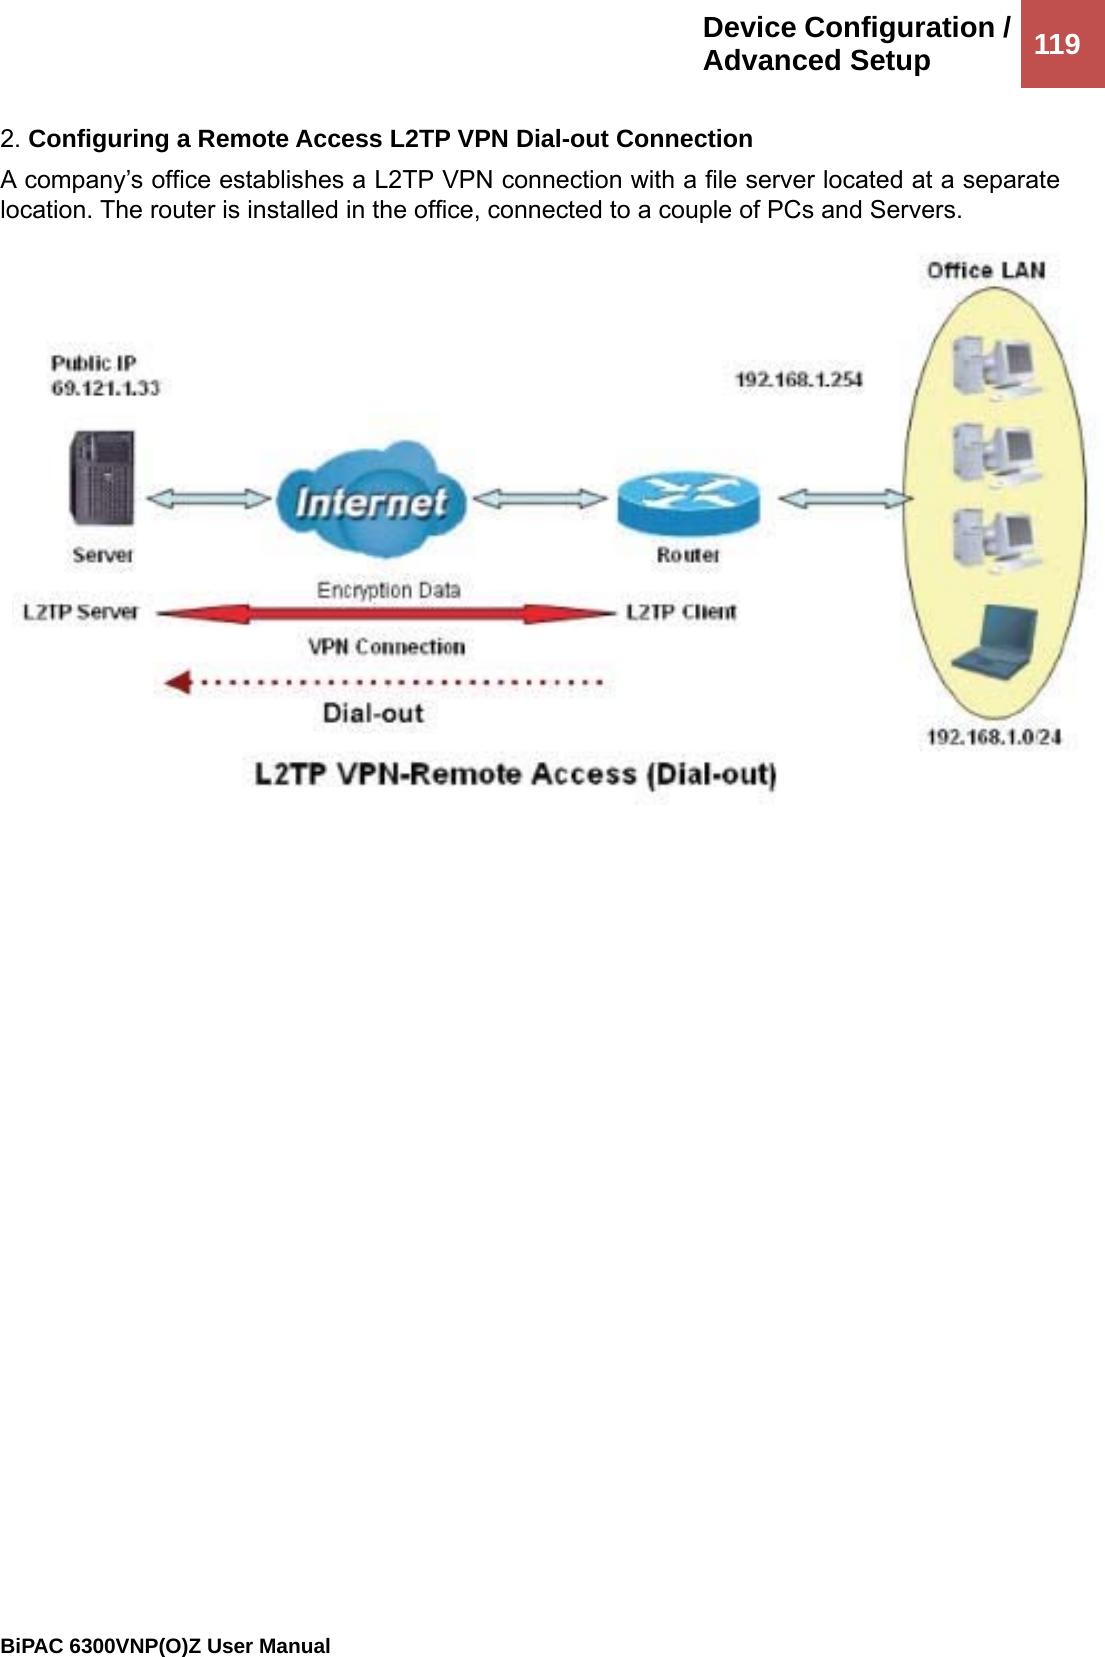
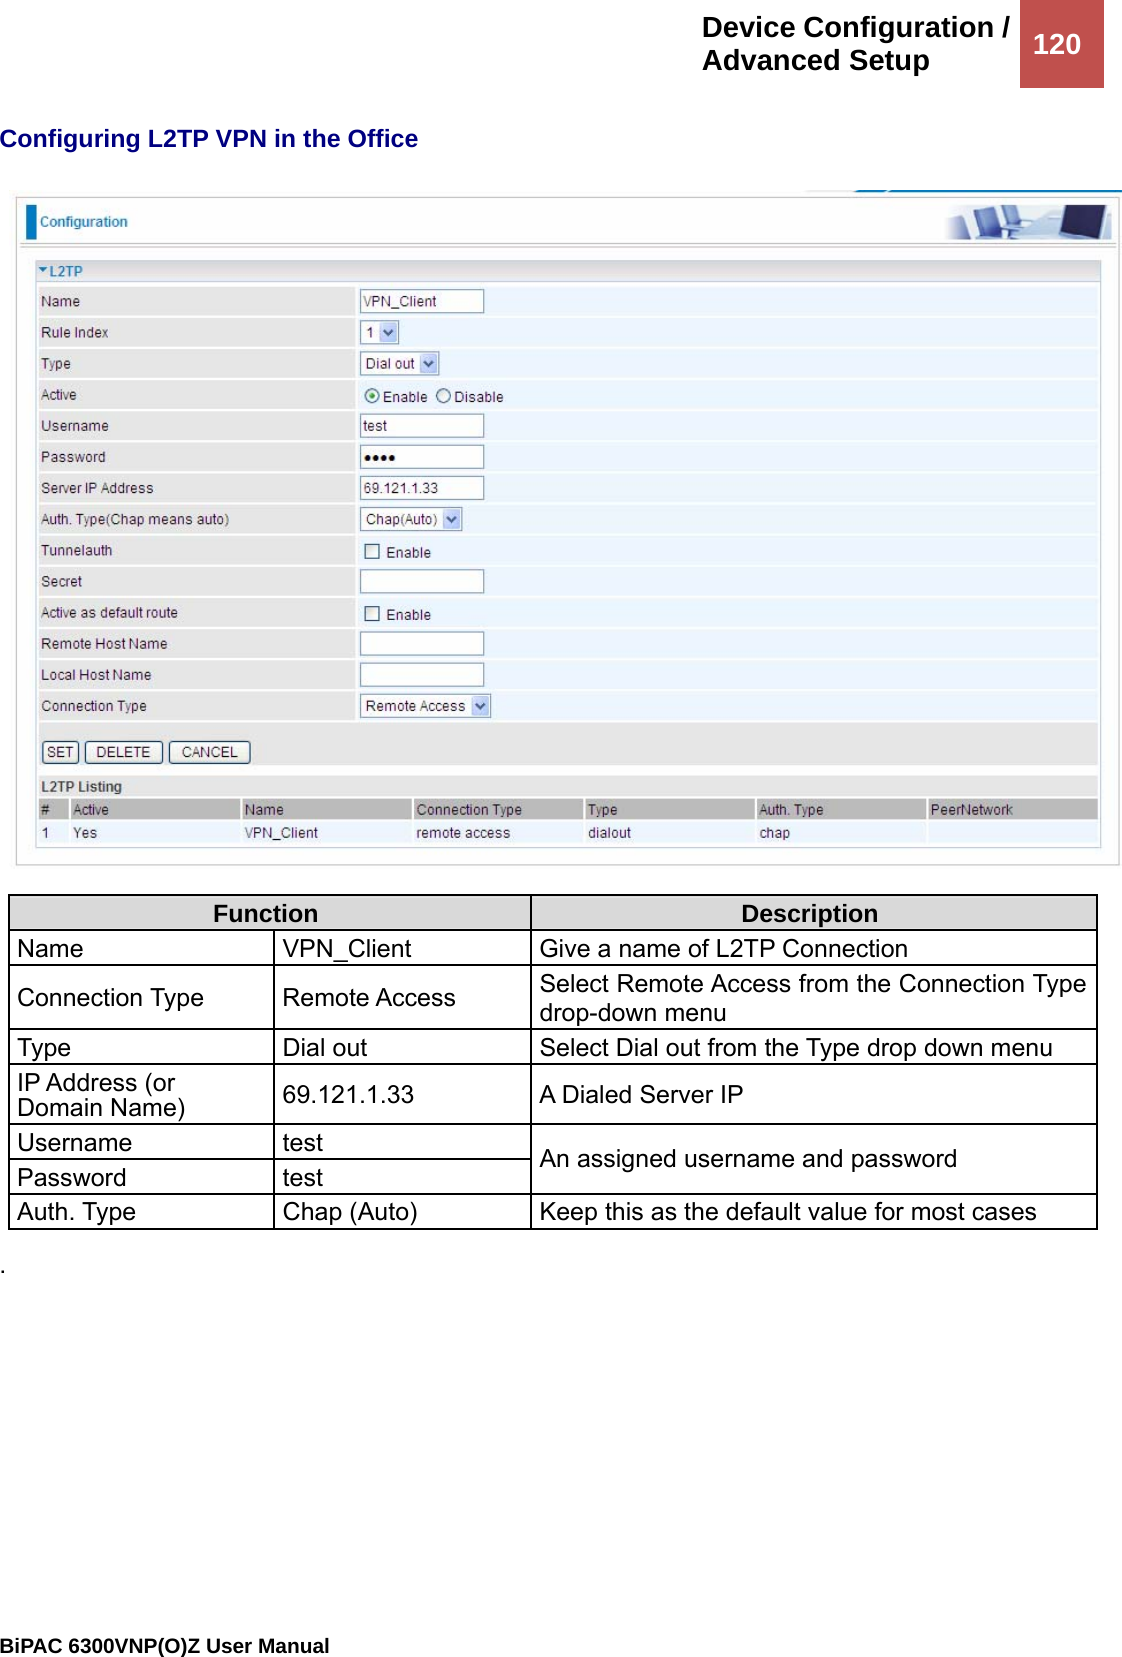
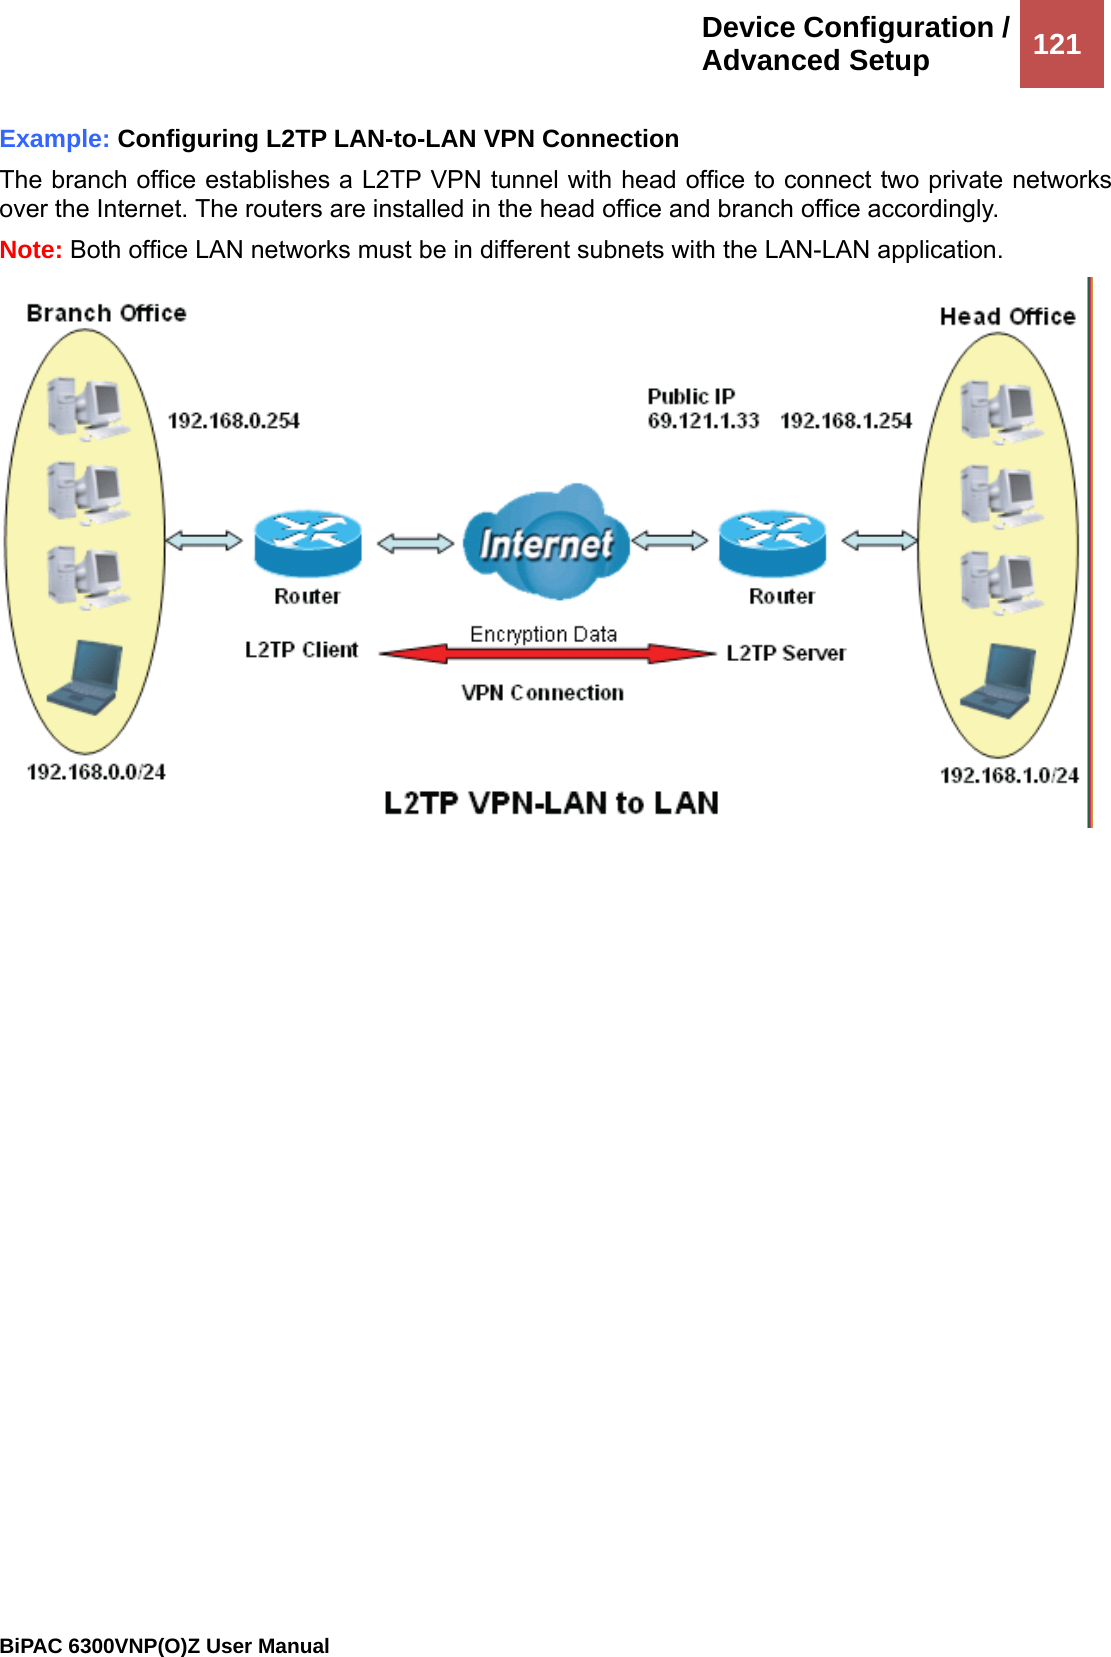
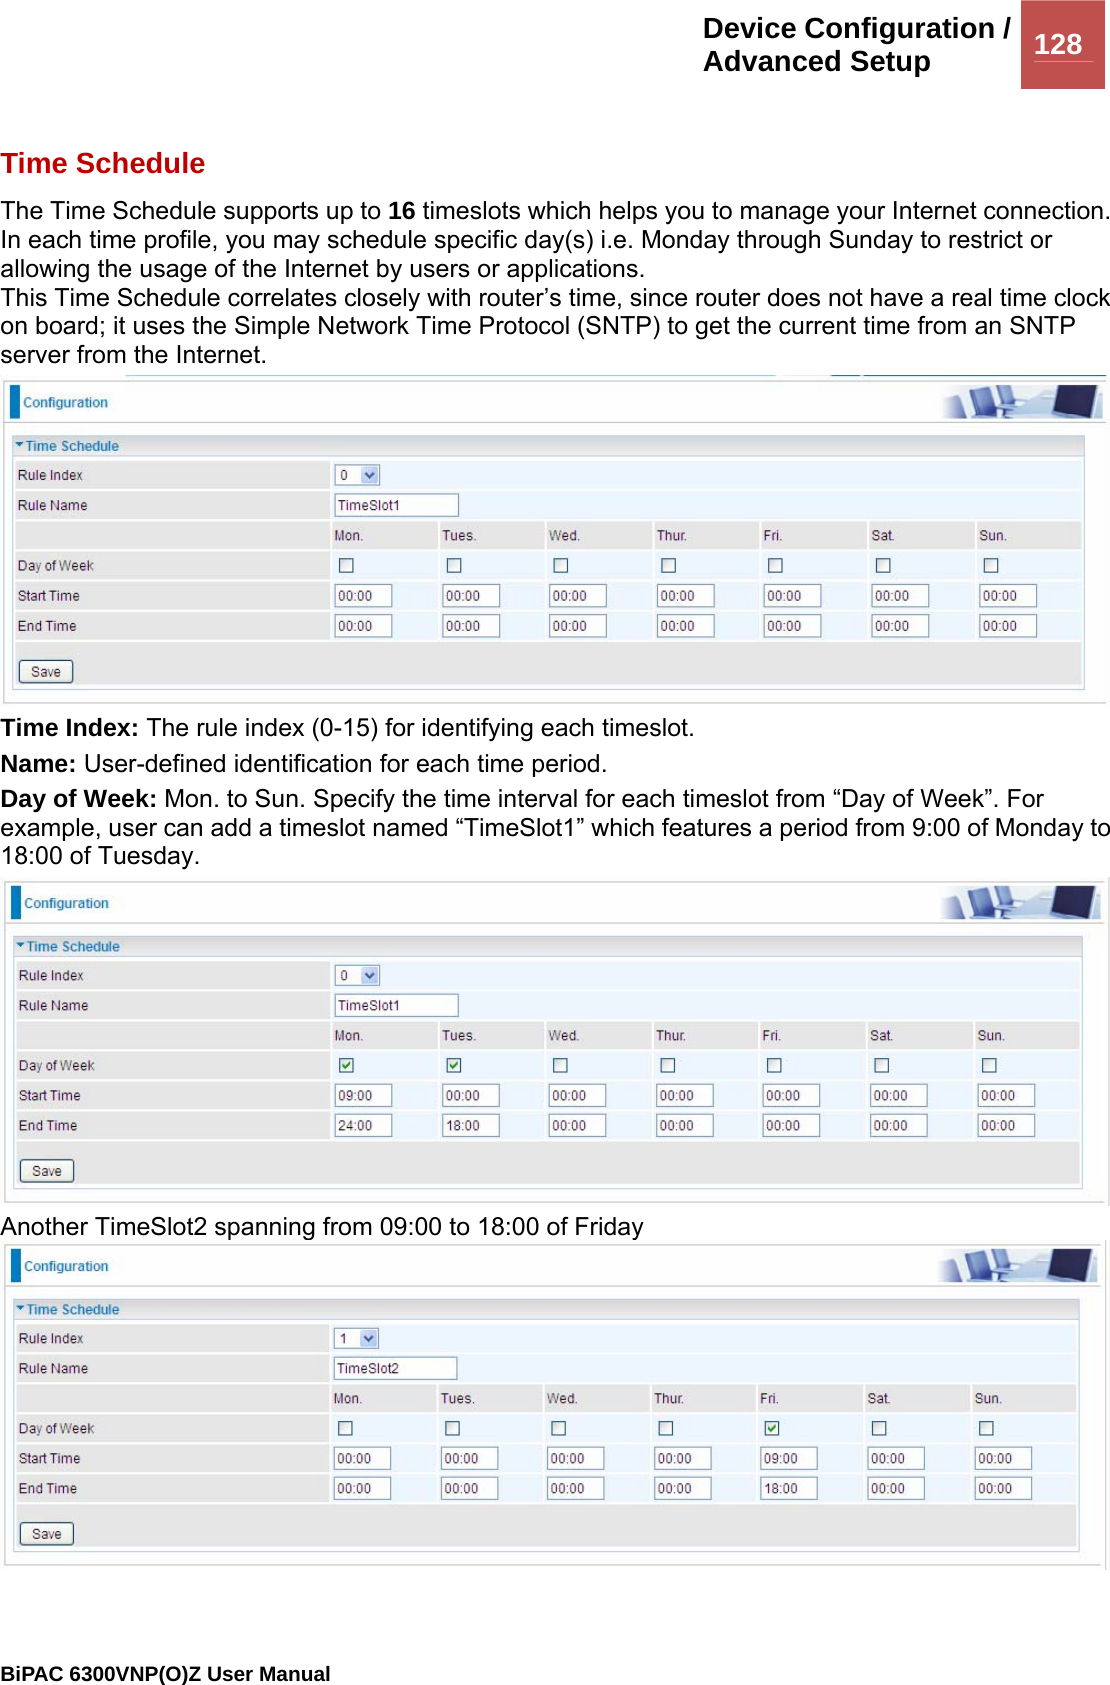
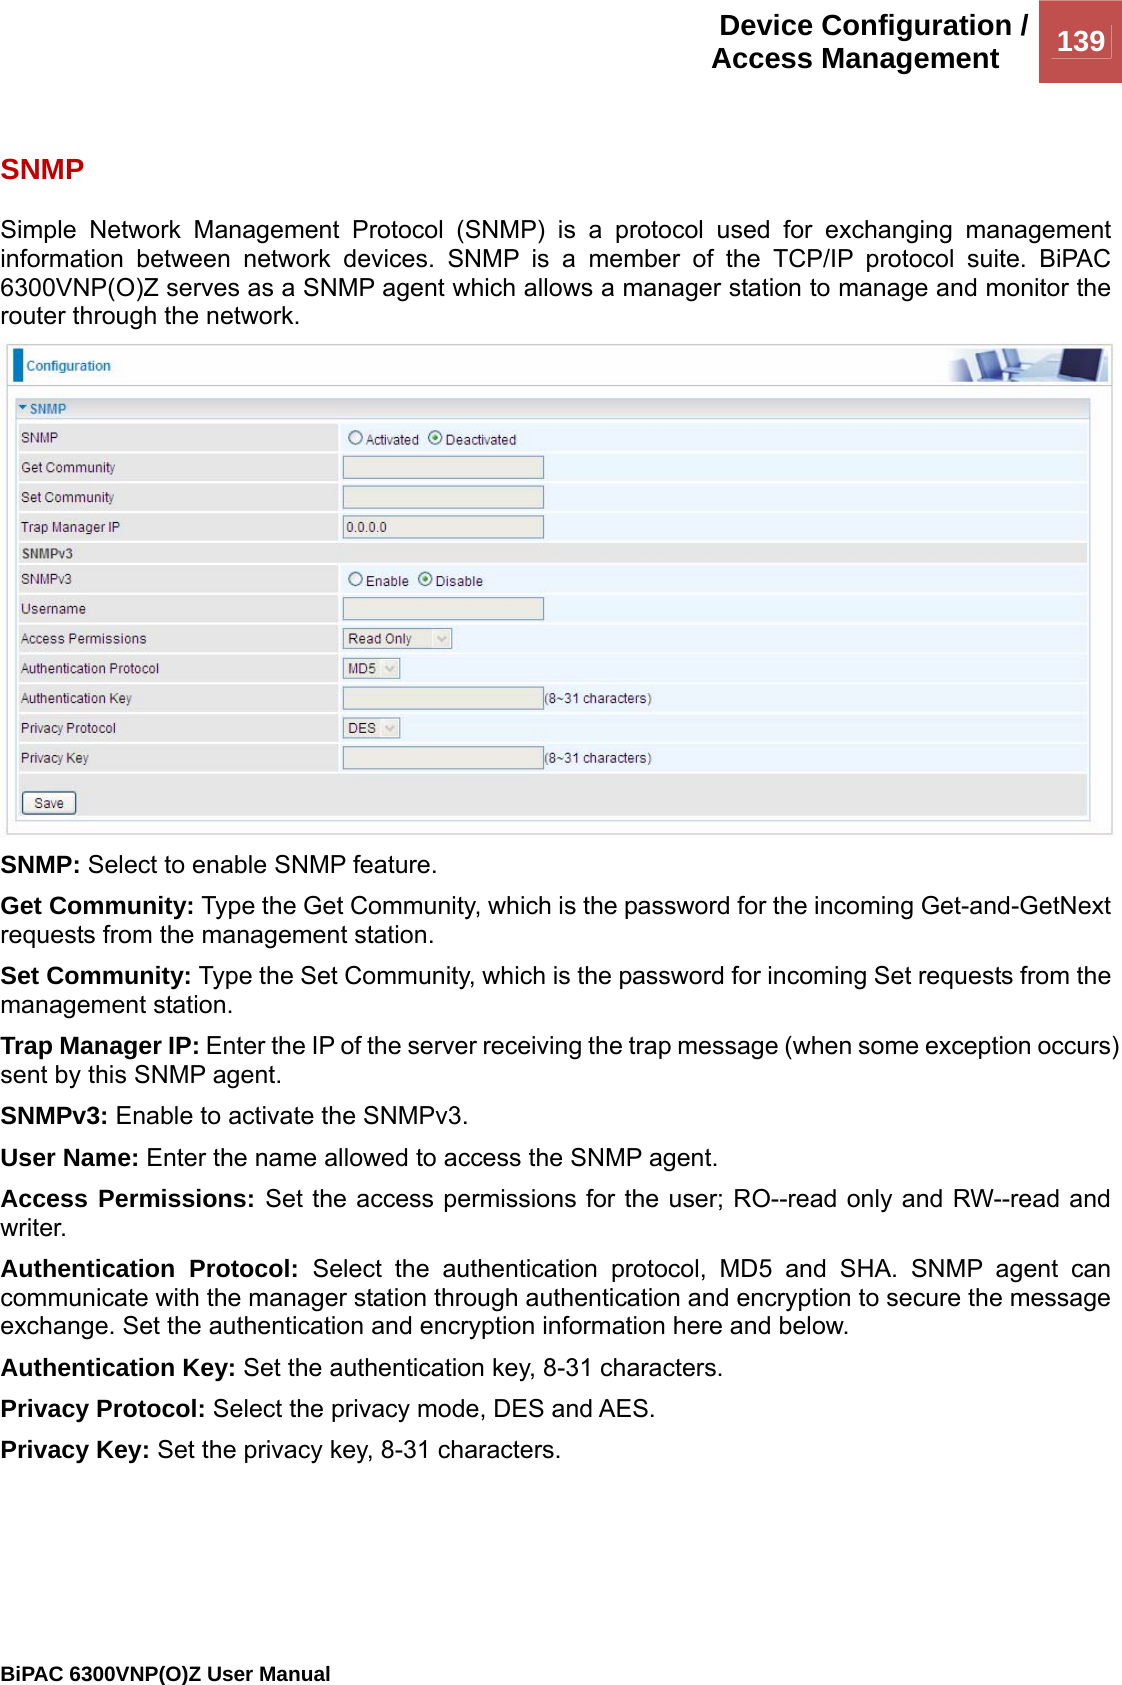
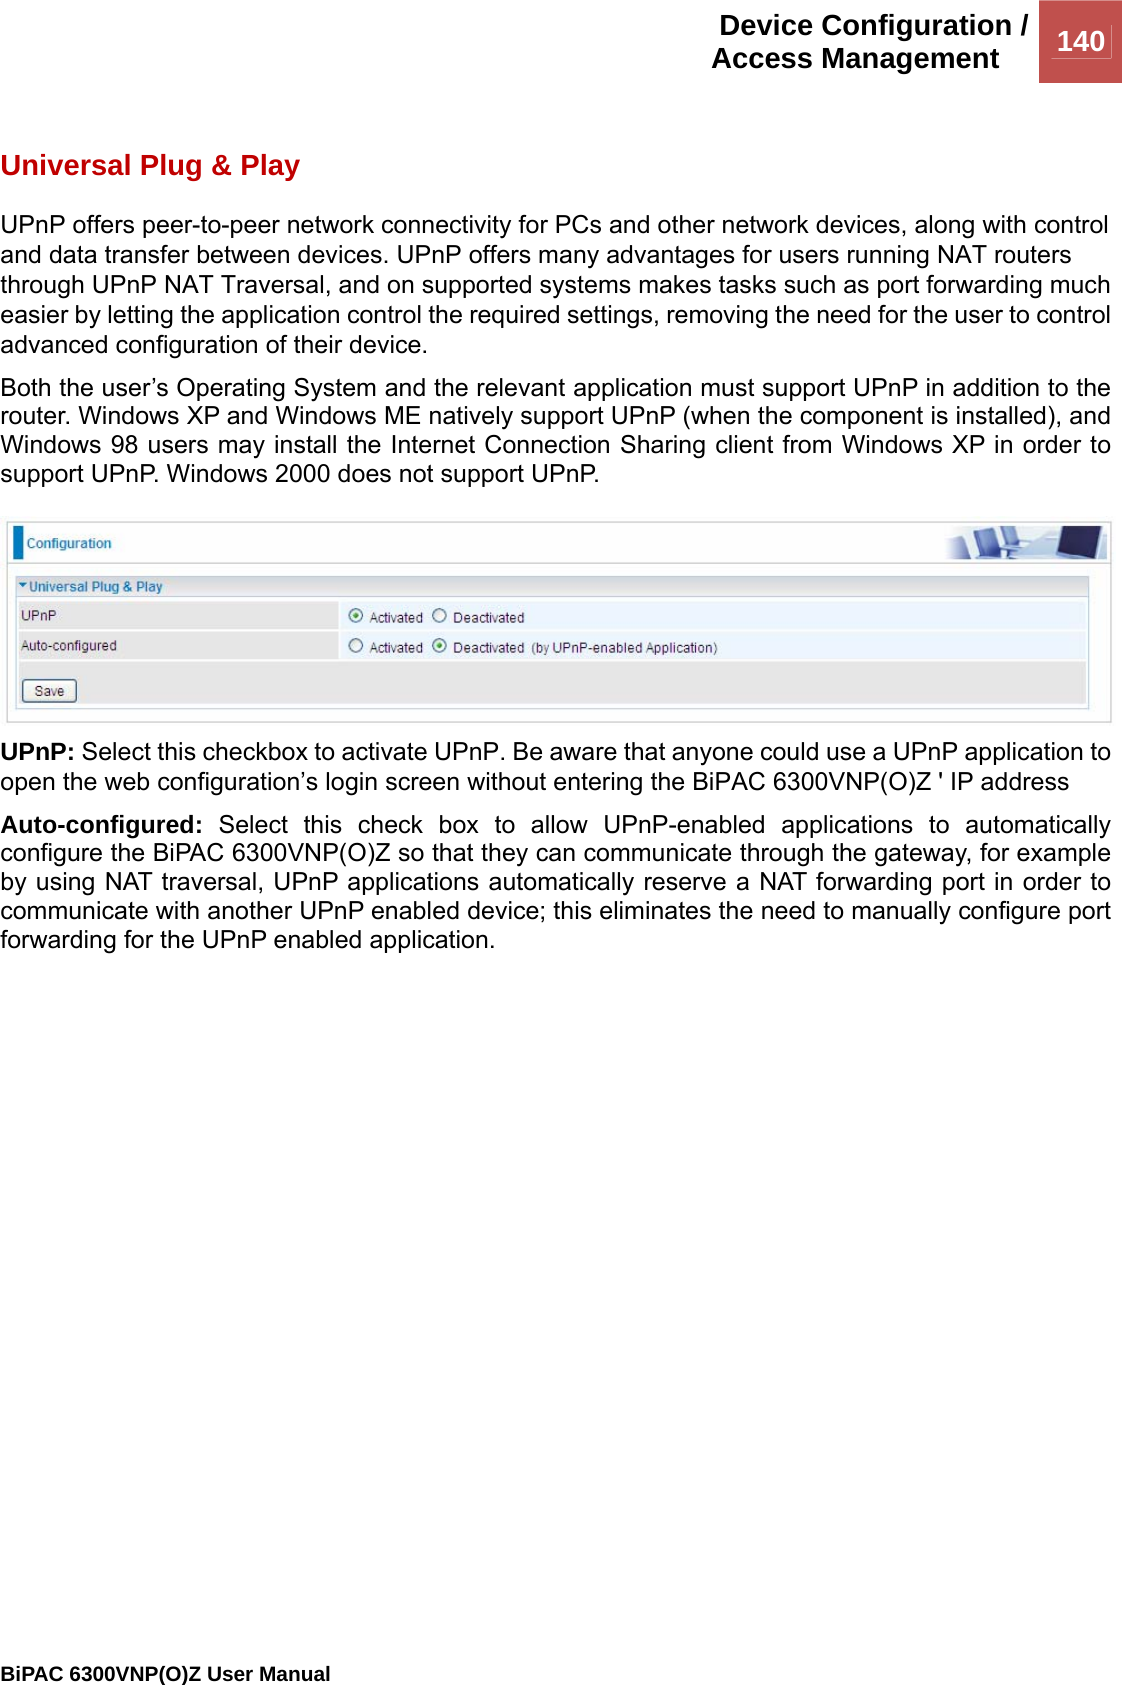
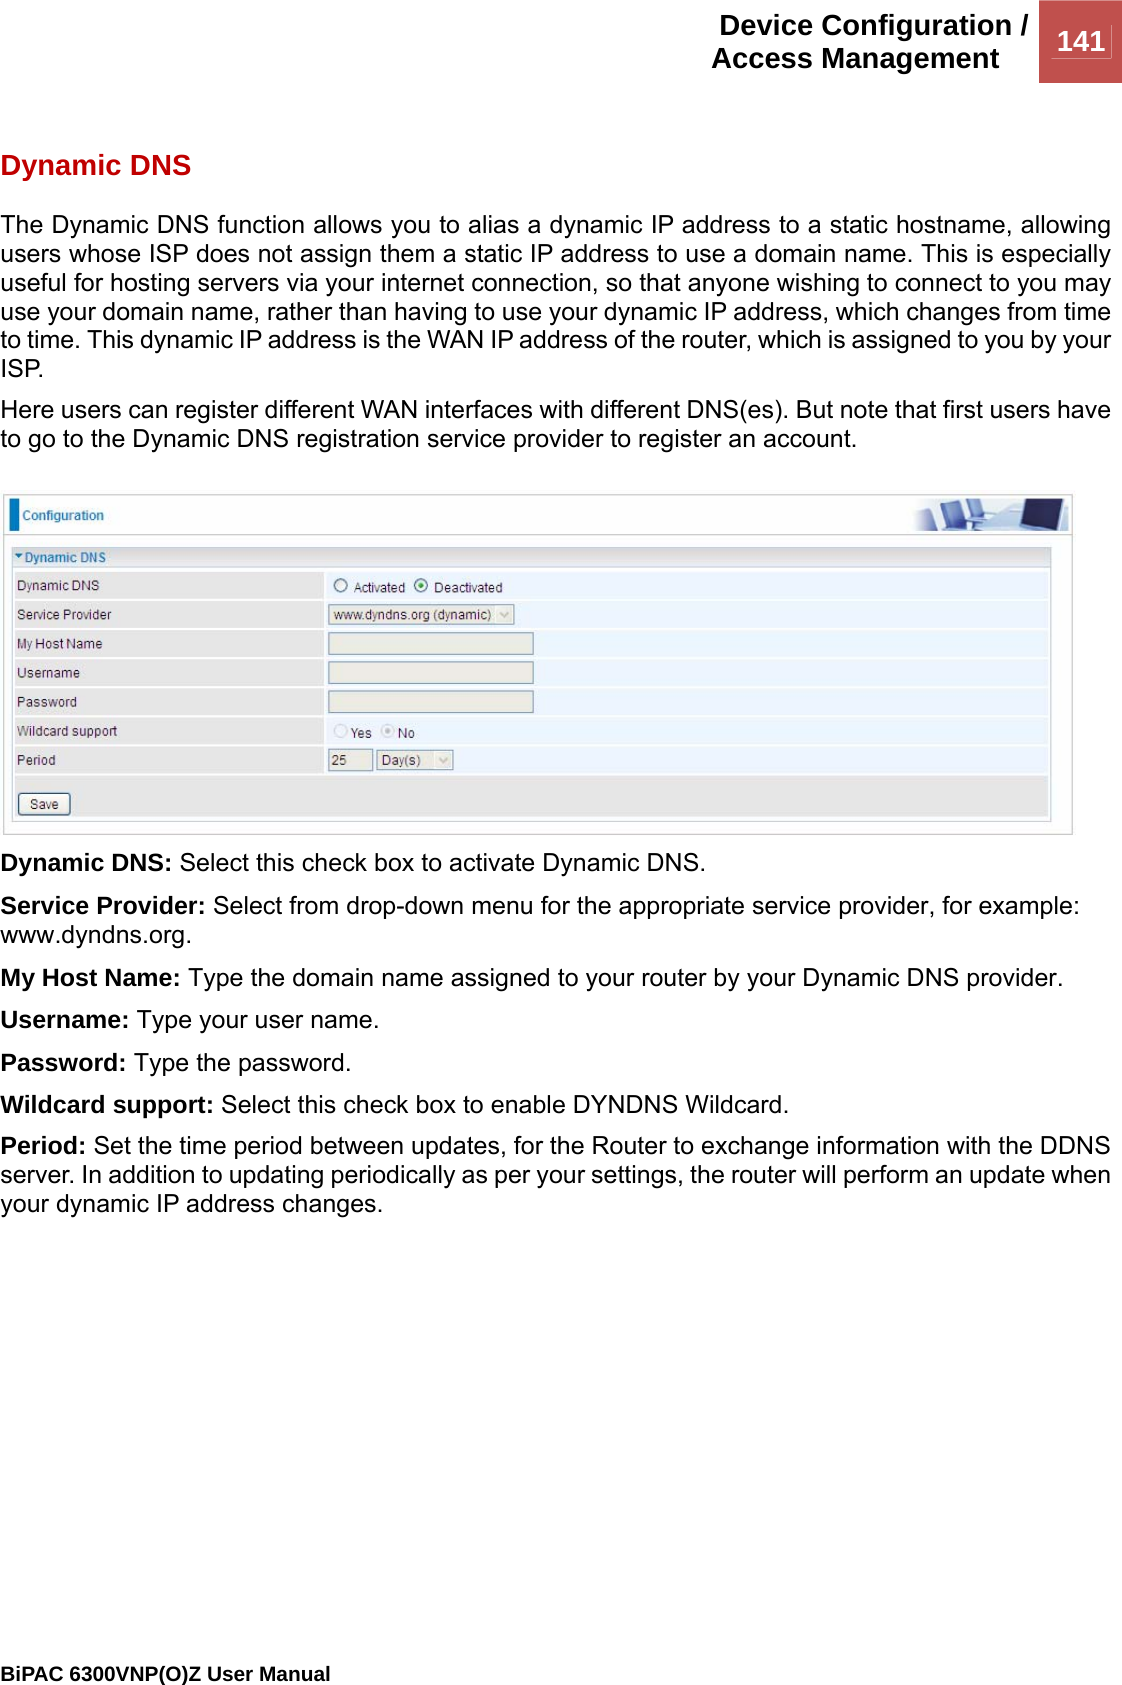
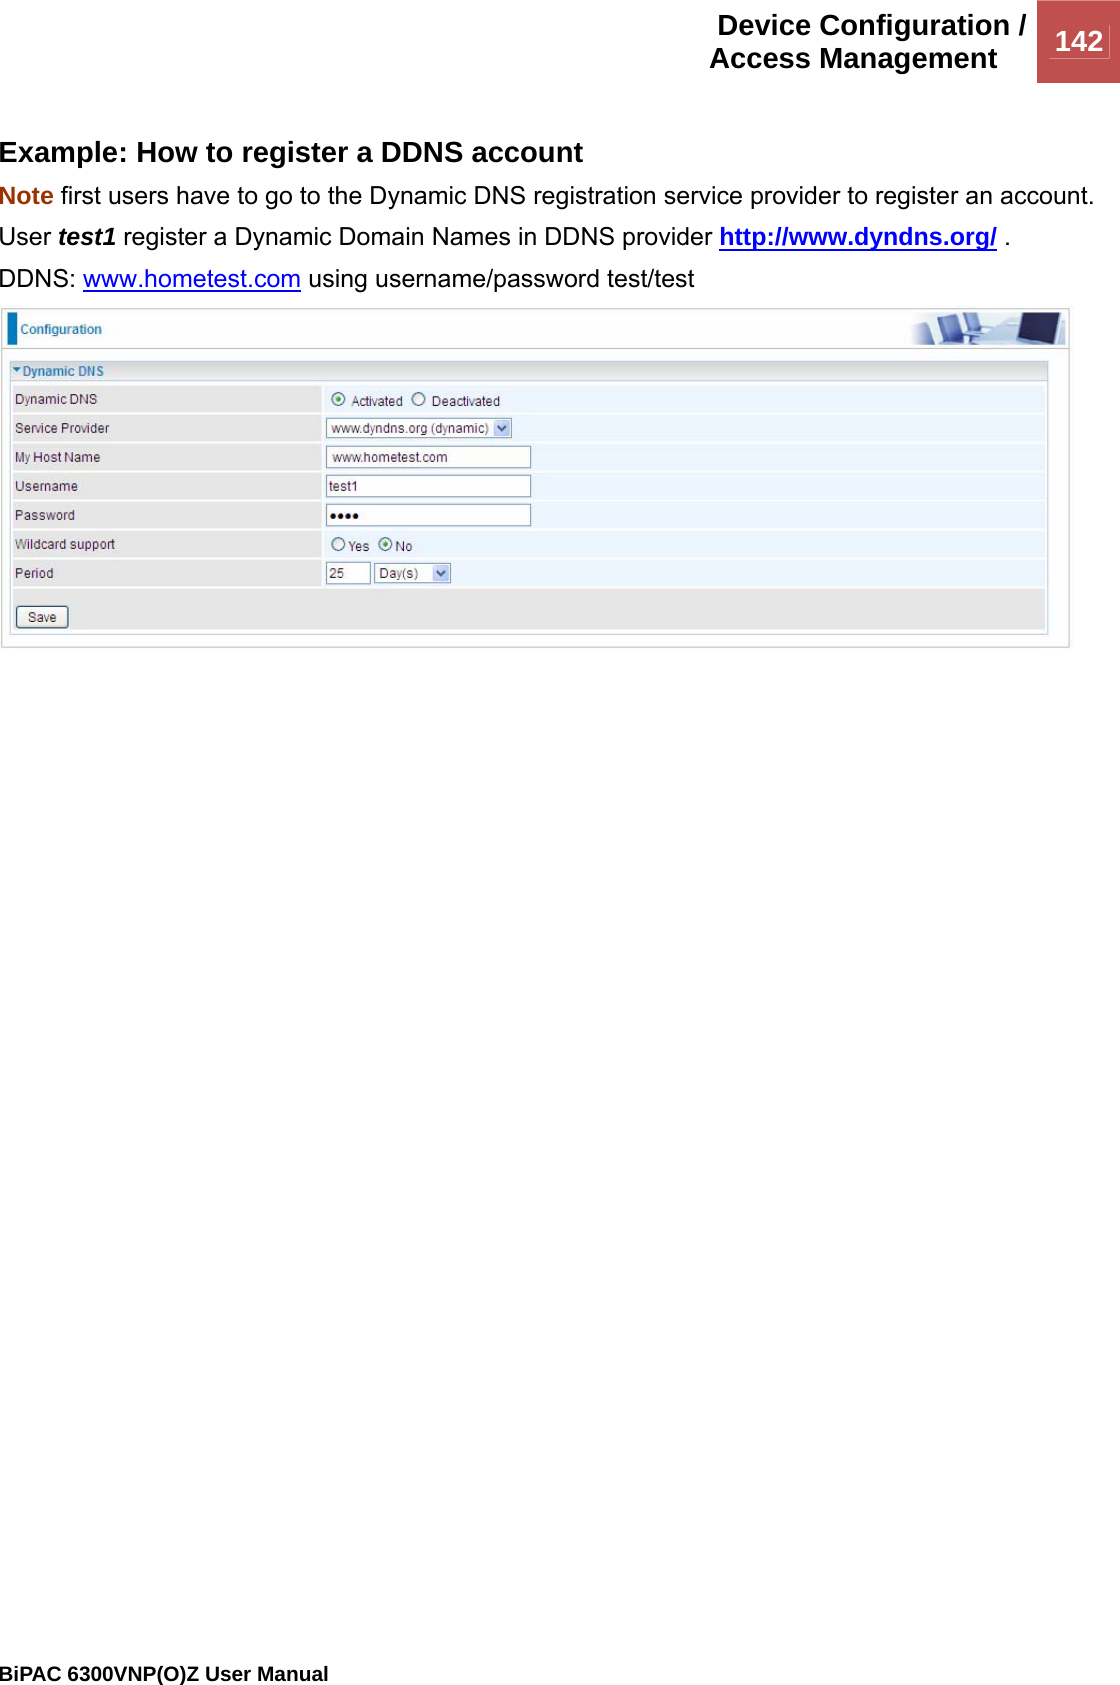
Users manual-2