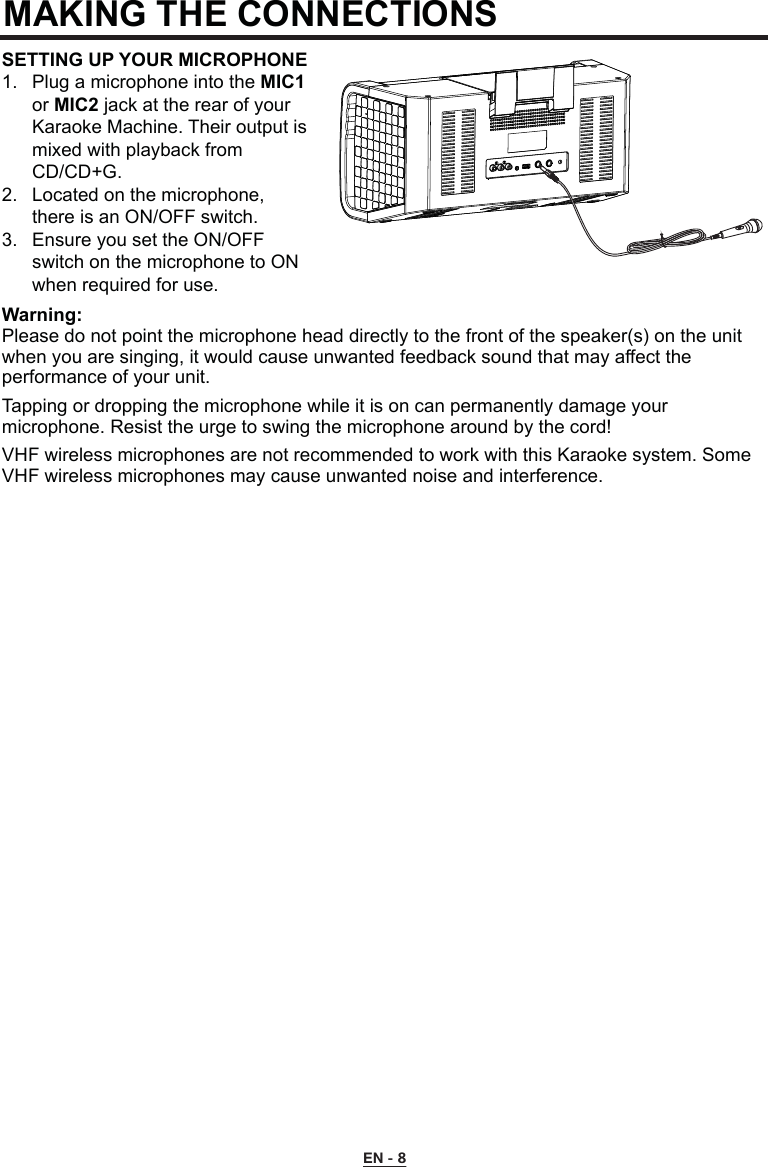
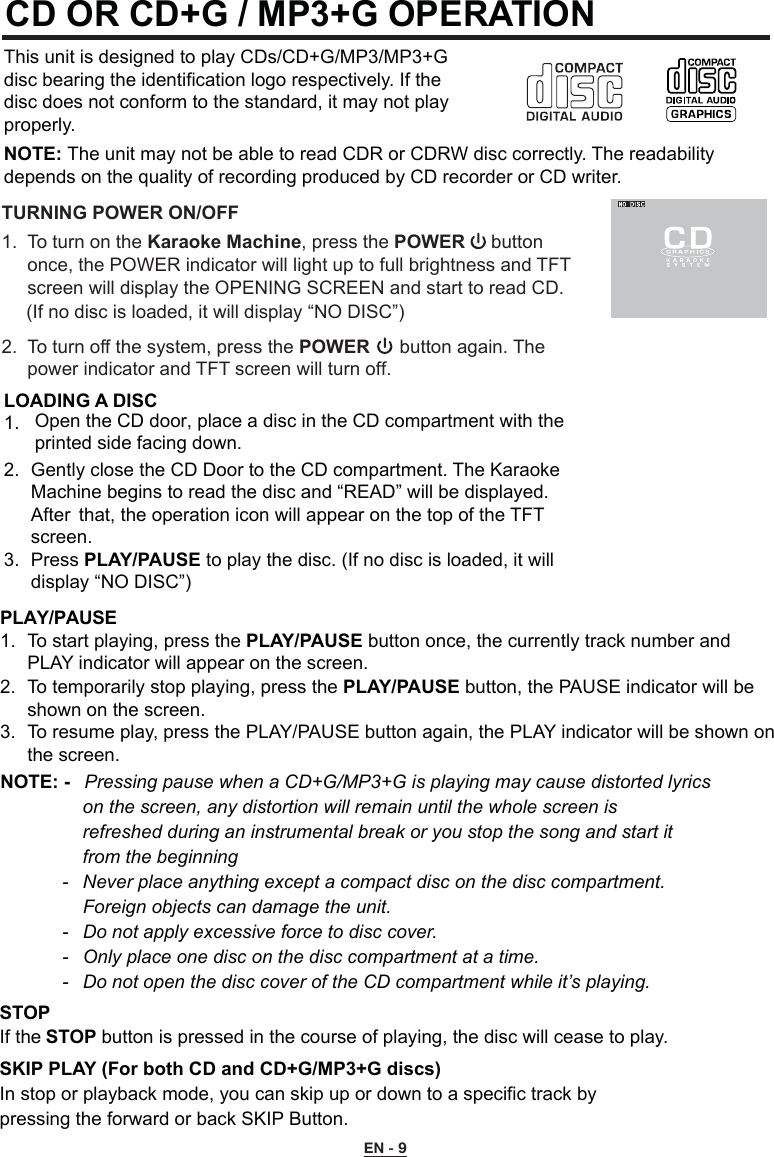
Arts Digital Technology KS780BT Bluetooth Professional Karaoke System User Manual KS780 BT IM English EU Version 20160912 Preview

Arts Digital Technology (HK) Limited Bluetooth Professional Karaoke System KS780 BT IM English EU Version 20160912 Preview

User Manual rev.1.pdf

INSTRUCTION MANUALThank you for purchasing this Karaoke System. Please read this instruction manual carefully beforeusing this product to ensure proper use. Keep this manual in a safe place for future reference.KS780-BTBluetooth Professional Karaoke System
BEFORE WE BEGINWHAT’S IN THE BOXIMPORTANT SAFETY INSTRUCTIONEN - 1ATTENTIONThe exclamation point within an equilateral triangle is intended to alert the user to the presence of important operating and maintenance (servicing) instructions in the literature accompanying the appliance.This compact disc player is classified as a CLASS 1 LASER PRODUCT.The CLASS 1 LASER PRODUCT label is located inside the CD compartment.CLASS 1LASER PRODUCTThe CAUTION marking is located at the bottom of the unit.Below markings are located inside CD compartment.DANGEROUS VOLTAGEThe lightning flash with arrowhead symbol, within an equilateral triangle, is intended to alert the user to the presence of uninsulated dangerous voltage within the product’s enclosure that may be of sufficient magnitude to constitute a risk of electric shock to persons.DANGER:Invisible and hazardous laser radiation when open and interlock failed or defeated.Avoid direct exposure to beam.CAUTIONRISK OF ELECTRIC SHOCK DO NOT OPENWARNING: TO REDUCE THE RISK OF ELECTRIC SHOCK, DO NOT REMOVE COVER (OR BACK). NO USER-SERVICEABLE PARTS INSIDE. REFER SERVICING TO QUALIFIED SERVICE PERSONNEL.LASER SAFETY: This unit employs a laser.Only qualified service personnel should attempt to service this device due to possible eye injury.CAUTION: USE OF CONTROLS, ADJUSTMENTS OR PERFORMANCE, PROCEDURE HEREIN MAY RESULT IN HAZARDOUS RADIATION EXPOSURE.KARAOKE MACHINE TABLETCRADLE PRE-RECORDED KARAOKE CD+G DISC AV CABLEAC POWER ADAPTOR DYNAMIC MICROPHONE INSTRUCTIONMANUALThank you for purchasing the KS780-BT Karaoke Machine. This is your assurance of quality, performance and value. This product was manufactured using the highest quality components and standards of workmanship. Our engineers have included many useful and convenient features in this product. Please be sure to read this instruction manual completely to make sure you are getting the maximum benefit from each feature.• This unit is designed to operate on an AC 100-240V~50/60Hz supply only. Connecting it to other power sources   may damage it. Ensure that the supply corresponds to the information on the rating label on the bottom of the unit.• Under the environment with electrostatic discharge the sample may malfunction and need user reset to recover   sometimes.
EN - 2Warning: Changes or modifications to this unit not expressly approved by the party responsible for This device complies with Part 15 ofthe FCC Rules. Operation is subjectto the following two conditions: (1)this device may not cause harmfulinterference, and (2) this device mustaccept any interference recieved,including interference that may causeundesired operation.compliance could void the user’s authority to operate the equipment.To comply with FCC’s RF radiation exposure limits for general population/uncontrolled exposure, this device must be installed to provide a separation distance of at least 20cm from all persons.FCC RADIATION EXPOSURESTATEMENTFCC ID : OWT-KS780BTThis device must not be co-located or operating in conjunction with any other antenna or transmitter.This equipment has been tested and found to comply with the limits for a Class B digital device, pursuant to part 15 of the FCC Rules. These limits are designed to provide reasonable protection against harmful interference in a residential installation. This equipment generates, uses and can radiate radio frequency energy and, if notinstalled and used in accordance with the instructions, may cause harmful interference to radio communications. However, there is no guarantee that interference will not occur in a particular installation. If this equipment does cause harmful interference to radio or television reception, which can be determined by turning the equipment off and on, the user is encouraged to try to correct the interference by one or more of the following measures:• Reorient or relocate the receiving antenna.• Increase the separation between the   equipment and receiver.• Connect the equipment into an outlet on a   circuit different from that to which the receiver   is connected.• Consult the dealer or an experienced radio/TV   technician for help.FCC AND CANADIAN ICESThis device must not be collocated or operating in conjunction with any other antenna or transmitter.
IMPORTANT SAFETY INSTRUCTIONPOWER CONNECTION & OPERATIONEN - 3      1. Ensure a minimum distance of 5 cm around the apparatus for sufficient ventilation.2. The ventilation should not be impeded by covering the ventilation openings with items,     such as newspapers, tablecloth, curtains, etc.3. No naked flame sources, such as lighted candles, should be placed on the apparatus.4. It shall not be exposed to dripping or splashing and that no objects filled with liquids, such     as vases, shall be placed on the apparatus.5. Do not place the product in closed bookcases or racks without proper ventilation.6. Where the mains plug or an appliance coupler is used as the disconnect device, the     disconnect device shall remain readily operable.1. The apparatus shall not be exposed to dripping or splashing and that no objects filled with     liquids, such as vases, shall be placed on apparatus.2. The AC/DC adaptor and apparatus shall not be exposed to dripping or splashing and that     no objects filled with liquids, such as vases, shall be placed on the AC/DC adaptor and     apparatus.3. The AC/DC adaptor is used as disconnect device.    The AC/DC adaptor of apparatus should not be obstructed OR should be easily accessed     during intended used. To be completely disconnect the power input, the AC/DC adaptor of     apparatus shall be disconnected from the mains.4. An appliance with a protective earth terminal should be connected to a mains outlet with     a protective earth connection.Plug the supplied power adaptor small end into DC jack located on the rear panel, plug the adaptor into the standard AC wall socket.CAUTION: The unit is designed to operate from a mains supply of AC 100-240V~50/60Hz. If the adaptor does not fit properly, turn it over and try again. Do not force it.NOTES: When the unit is not operated by the AC power or unused for long periods of time. Please remove the power adaptor from the wall outlet and unplug from the main unit.Over time your hearing will adapt to continuous loud sounds and will give the impression that the volume has in fact been reduced. What seems normal to you may in fact be harmful. To guard against this before your hearing adapts, set the volume to a low level.Slowly increase the level until you can hear comfortably and clearly and without distortion. Damage to your hearing is accumulative and is irreversible. Any ringing or discomfort in the ears indicates that the volume is too loud. Once you have established a comfortable listening level, do not increase the sound level.Turn the VOLUME Control knob to increase / decrease the volume.ESTABLISH A SAFE SOUND LEVELADJUSTING THE VOLUMECONNECTING AC POWERSAFETY CONSIDERATIONSWARNINGS
EN - 4CONTROL LOCATIONTOP VIEWFRONT VIEWBACK VIEWCD DOORON/ OFF BUTTONPOWERINDICATORMIC VOLUMETFT SCREENMASTER VOLUMEDISCO LIGHTVIDEOJACKFUNCTION BUTTONSCREEN ON / OFFBUTTON PROGRAM / REPEATBUTTONSKIP FORWARD / BACKWARD BUTTONCRADLEPLAY / PAUSE /PAIR BUTTONRECORD BUTTONECHO CONTROLLINE IN JACKSTOP / LIGHT ON / OFF BUTTONKEY / PAGE +/-BUTTONBALANCE CONTROLAVC CONTROLSPEAKERSAUDIO OUT (R) JACKAUDIO OUT (L) JACKUSB SOCKETMIC 2MIC 1DC JACK
EN - 5TFT DISPLAY ICONCDG  TRK 10/10           PROG   00:16:04PLAYING TIMEREPEAT MODE PROGRAM MODEPLAY / PAUSE / STOP  INDICATORPLAYING MODEPAUSE MODESTOP MODEPLAYING TRACK NUMBER AND TOTAL TRACK NUMBERCDG=CD+G DISC PLAYINGPLAYING CD/ CDR/ USB Snap the tablet cradle via two mounting holes at the back of the unit till the cradle is locked in place on both ends securely.  Put yout tablet in landscape position (Do not encourage to put in portrait position)TABLET OPERATIONTablet cradle
MAKING THE CONNECTIONSCONNECTING TO YOUR TV OR VCR / HOME THEATERYour Karaoke machine is designed to connect to your TV the same way you would connect most video cameras, VCR / Home theater or video games consoles. We have provided RCA cables to connect your unit to a TV, VCR / Home theater, video device or an external audio / sound system. The RCA cables have three connections at each end (white and red are for left and right audio connections and the yellow is for video connections).VIDEO CONNECTIONPlease follow the steps below to display CD+G lyrics on the TV screen:1. Locate the multi-colored RCA cables2. Connect video cable (yellow) to the Video Out of the back of the Karaoke Machine3. Connect the other end of the video cable (yellow) to the video input on your TV or VCR /    Home theater.SELECTING YOUR KARAOKE MACHINE AS YOUR SOURCE/INPUTSelecting your Karaoke Machine as a source / input on your TV is very similar to connecting a VCR/DVD or Satellite system.We’ve listed below the most common ways of selecting the source from your TV or VCR / Home Theater:1.  In the set up menu of the TV or VCR / Home theater there may be an option for “Input      Select” where you can choose between “Cable/Ant., Video 1, Video 2, etc” as the input     source.2.  Look for a TV channel between the highest and lowest on your TV or VCR / Home      theater (i.e AUX, EXT, LINE 1 or LINE IN)3.  Your remote control for your TV or VCR / Home Theater may have source input      selections as well as detailed below: “Video, Video 1, Game, AUX, EXT or LINE-IN.”      Choosing one of those sources in most cases should display the lyrics from your     Karaoke Machine as well.EN - 6
MAKING THE CONNECTIONS AUDIO CONNECTION Please follow the steps below to connect audio signal from the unit to your TV, VCR/Home Theater or home audio system.RCA connection1.  Locate the multi-colored RCA cables (White and Red) 2.  Connect audio cables to the Audio Out of the back of your Karaoke Machine.3.  Connect the other end of the audio cables to the Audio/Auxiliary input on your TV or      VCR/Home Theater or home audio system.EN - 7SETTING UP LINE IN CONNECTIONThe Line-in mode allows you to connect external music player or external sound source to your Karaoke Machine speakers1.  Plug a 3.5mm audio cable (not included) into your external music player and connect the    other end (3.5mm jack) into the LINE IN jack on the front of your Karaoke Machine.2.  Make sure your external music is turned on.3.  Start music playback on your external music player.4.  Adjust MASTER VOLUME to control the sound level of music playback from the speakers    on the Karaoke machine.NOTE:If the unit is in CDG / USB / Bluetooth mode, when you connect an external audio device to the LINE IN jack by an LINE-IN cable, this unit will automatically be switched to LINE IN mode. If you remove the LINE-IN cable from the LINE IN jack, the unit will resume to the previous mode.
MAKING THE CONNECTIONS EN - 8SETTING UP YOUR MICROPHONE1.  Plug a microphone into the MIC1   or MIC2 jack at the rear of your     Karaoke Machine. Their output is    mixed with playback from      CD/CD+G.2.  Located on the microphone,      there is an ON/OFF switch.3.  Ensure you set the ON/OFF      switch on the microphone to ON    when required for use.Warning:Please do not point the microphone head directly to the front of the speaker(s) on the unit when you are singing, it would cause unwanted feedback sound that may affect the performance of your unit.Tapping or dropping the microphone while it is on can permanently damage your microphone. Resist the urge to swing the microphone around by the cord!VHF wireless microphones are not recommended to work with this Karaoke system. Some VHF wireless microphones may cause unwanted noise and interference.
CD OR CD+G / MP3+G OPERATIONThis unit is designed to play CDs/CD+G/MP3/MP3+G disc bearing the identification logo respectively. If the disc does not conform to the standard, it may not play properly.NOTE: The unit may not be able to read CDR or CDRW disc correctly. The readability depends on the quality of recording produced by CD recorder or CD writer.LOADING A DISC1. 2.  Gently close the CD Door to the CD compartment. The Karaoke    Machine begins to read the disc and “READ” will be displayed.    After  that, the operation icon will appear on the top of the TFT    screen.3.  Press PLAY/PAUSE to play the disc. (If no disc is loaded, it will    display “NO DISC”)STOP If the STOP button is pressed in the course of playing, the disc will cease to play.SKIP PLAY (For both CD and CD+G/MP3+G discs)In stop or playback mode, you can skip up or down to a specific track by     pressing the forward or back SKIP Button.PLAY/PAUSE 1.  To start playing, press the PLAY/PAUSE button once, the currently track number and      PLAY indicator will appear on the screen. 2.  To temporarily stop playing, press the PLAY/PAUSE button, the PAUSE indicator will be    shown on the screen. 3.  To resume play, press the PLAY/PAUSE button again, the PLAY indicator will be shown on    the screen.NOTE: -   Pressing pause when a CD+G/MP3+G is playing may cause distorted lyrics      on the screen, any distortion will remain until the whole screen is        refreshed during an instrumental break or you stop the song and start it      from the beginning  -   Never place anything except a compact disc on the disc compartment.       Foreign objects can damage the unit.  -  Do not apply excessive force to disc cover.  -  Only place one disc on the disc compartment at a time.  -  Do not open the disc cover of the CD compartment while it’s playing.EN - 9TURNING POWER ON/OFF1.  To turn on the Karaoke Machine, press the POWER     button     once, the POWER indicator will light up to full brightness and TFT 2.  To turn off the system, press the POWER  button again. The  power indicator and TFT screen will turn off.screen will display the OPENING SCREEN and start to read CD. (If no disc is loaded, it will display “NO DISC”)    Open the CD door, place a disc in the CD compartment with the printed side facing down.
CD OR CD+G / MP3+G OPERATION SEARCH (For CD disc /MP3 disc only)When playing  a  CD disc or MP3  disc,  you  can  press and  hold the SKIP buttons  (     or    )  to locate  a  specific point on a track.  The  system will search at high speed in the forward or  reverse  direction.  By releasing  the button, normal play will be resumed.REPEAT PLAY (For both CD and CD+G/MP3+G discs)1.  During playback, press PROGRAM/REPEAT button once, the REP ONE      indicator will appear on the TFT screen, it can keep repeat the current track.2.  To repeat the Directory/Folder, press PROGRAM/REPEAT  button twice, the      REP FOLDER indicator will appear on the TFT screen.3.  To repeat all tracks in disc, press PROGRAM/REPEAT  button again,  the REP ALL indicator will appear on the TFT screen.4.  To clear the REPEAT function, press PROGRAM/REPEAT button again,   the NO REP indicator will appear on the TFT screen.PROGRAMMING CD PLAYBACKThis unit can  be programmed to play  up  to 20 tracks/files  in  CD mode. Load the music CD/CD+G or MP3/MP3+G disc onto the CD compartment (without pressing the PLAY/PAUSE button).1)  Press PROGRAM/REPEAT  button once in stop mode. “PRG SET 01:XX” will be           shown on the screen.2)  Press the SKIP buttons to select the desired track to be programmed.3)  Press PROGRAM/REPEAT button again to save the selected track/files.4)  Repeat steps 2–3 to program up to 20 tracks/files.5)  Press the PLAY/PAUSE  button to play the programmed tracks after         is completed. The “PROG” indicator will appear on screen during the     programmed playback. 6)  To clear program and resume normal playback, press the STOP button twice      during playback, or open the CD door to clear the programmed tracks.REMARK:   The unit can store up to 20 tracks/files in the programmable memories. During the programmed playback, user can still select the “repeat one/repeat all” function.PAGE+ / PAGE-During the STOP mode, press PAGE+/PAGE- to advance song selection by 10    tracks or to go to the next page of song list.KEY+ / KEY-Your system includes a digital key controller to adjust the audio tone (pitch) of the  music. Key control should be done in the PLAY MODE only. Press the KEY+ button to raise the key of the music, and press the KEY- button to lower the key. (max. 6 times)    programmingEN - 10
CD OR CD+G / MP3+G OPERATION  ECHOAdjust the ECHO control to enhance your voice for a concert hall effect.BALANCE Adjust the BALANCE  control between the pre-recorded singer’s voice and the    music when using a multiplex karaoke disc. AUTO VOICE CONTROL  AUTO VOICE CONTROL can be activated and adjusted by the AVC control knob.    The vocals on the Multiplex recording will be muted when the singer starts to sing    through the microphone. When the singer stops singing, the vocals will resume to    normal.MASTER VOLUME  Rotate to the MASTER VOLUME control to obtain the desired sound level.MIC VOLUME    Adjust the MIC VOLUME control to a desired level and obtain the best      performance.SCREEN ON/OFF  Press the SCREEN ON/OFF button to turn the TFT screen ON/OFF.SELECTING THE AUDIO SOURCE  Press FUNCTION button to toggle between CD, USB, Bluetooth modes. Note: Selecting the audio source should be done in the stop mode only.RECORDING AUDIOYou can record CD+G video and audio together with the singer’s voice to a USB  flash drive. The recording will be in MP3 format. The stored file name after recording  will be “TRKXX.MP3”.•  Plug a USB flash drive to USB socket.•  Start the desired track to play on CD/CD+G disc by pressing the   SKIP       or SKIP        button.•  Press RECORD button to record the CD/CD+G playback together with your voice.       (The percentage of completion will be  displayed.)•  Press RECORD button again to stop recording.•  To playback the recording, it is the same as    playing back the MP3 or MP3+G   USB flash drive, please follow instructions in    USB OPERATION.NOTE:  This Karaoke system can only record tracks on CD / CD+G disc.EN - 11file on the  LIGHT EFFECTPress LIGHT ON/OFF button once to switch on LED light effect. Press the button again to switch off.
PAGE+ / PAGE-During the STOP mode, press PAGE+/PAGE- to advance song selection by 10    tracks or to go to the next page of song list.EN - 12REPEAT PLAY 1.  During playback, press PROGRAM/REPEAT button once,the REP ONE indicator  will appear on the TFT screen, it can keep repeat the current track.2.  To repeat the Directory/Folder, press PROGRAM/REPEAT  button twice,  the REP FOLDER indicator will appear on the TFT screen.3.  To repeat all tracks in disc, press PROGRAM/REPEAT  button again,  the REP ALL indicator will appear on the TFT screen.4.  To clear the REPEAT function, press PROGRAM/REPEAT  button again,  the NO REP indicator will appear on the TFT screen.USB OPERATIONINSERTING USB FLASH DRIVE1.  Insert a USB flash driver into the USB socket on the back of your karaoke system.2.  Make sure that USB is selected as the audio source.  See "SELECTING THE AUDIO SOURCE”3.  Press PLAY/PAUSE to start playback.PLAY/PAUSE 1.  To start playing, press the PLAY/PAUSE button once, the currently track number and      PLAY indicator will appear on the screen. (“USB” will be shown on the screen).2.  To temporarily stop playing, press the PLAY/PAUSE button, the PAUSE indicator will be    shown on the screen. 3.  To resume play, press the PLAY/PAUSE button again, the PLAY indicator will be shown    on the screen.STOP If the STOP button is pressed in the course of playing, the MP3+G playback will cease to play.SKIP PLAY In stop or playback mode, you can skip up or down to a specific track by pressing the  forward or back SKIP Button.NOTE:  -  Pressing  pause  when  playing  on  the  MP3+G,  it  may  cause  distorted  lyrics  on the screen, any distortion will remain until the whole screen is refreshed during an instrumental break or you stop the song and start it from the beginningSEARCH (For MP3 file only)When playing a MP3 file on the USB, you can press and hold the SKIP buttons (     SKIP     ) to locate a specific point on a track. The system will search at high speed inthe forward or reverse direction. By releasing the button, normal play will be resumed.
USB OPERATION PROGRAMMING USB PLAYBACKThis unit can be programmed to play up to 20 tracks/files in USB mode. Plug the USB flash drive and select USB mode. (without pressing the PLAY/PAUSE button).1)  Press PROGRAM/REPEAT button once in stop mode. “PRG SET 01:XXX” will be shown      on the screen.2)  Press the SKIP buttons to select the desired track to be programmed.3)  Press PROGRAM/REPEAT button again to save the selected track/files.4)  Repeat steps 2–3 to program up to 20 tracks/file.5)  Press the PLAY/PAUSE button to play the programmed tracks after programming is     completed. The “PROG” indicator will appear on screen during the programmed6)  To clear program and resume normal playback, press the STOP button twice during      playback to clear the programmed tracks.REMARK:  The unit can store up to 20 tracks/files in the programmable memories. During the programmed playback, user can still select the “repeat one/repeat all” function.EN - 13playback. 2.  The Bluetooth indicator will flash quickly. 3.  Using the native controls on your Bluetooth Device, select the " KS780BT" in your Bluetooth     setting to pair.      4.  When successfully paired, the Bluetooth indicator will stop flashing.     5.  To unpair, press & hold the PAIR button. To pair the same device again, press & hold the     PAIR button again.BLUETOOTH SETUP1.  Follow the instructions for Pairing a Bluetooth Device.2.  Use the native controls on the connected Bluetooth Device to select a track.3.  To play, pause or skip the selected track, use the native controls on the connected Bluetooth     Device or press the   button of unit.4.  Audio playback from the connected Bluetooth device can now be heard through the speaker.PLAYING MUSIC VIA BLUETOOTHPairing is the term used when two Bluetooth devices are connected wirelessly.BLUETOOH OPERATION 1 Press   FUNCTION button to toggle to Bluetooth mode.PAIR
EN - 14CARE AND MAINTENANCE*Carrying for Compact Discs1. Treat the disc carefully. Handle the disc only by its edges. Never allow your fingers to come      in contact with the shiny, unprinted side of the disc.2. Do not attach adhesive tape, stickers, etc. to the disc label.3. Clean the discs periodically with a soft, lint-free, dry cloth. Never use detergents or abrasive     cleaners to clean the disc. If necessary, use a CD cleaning kit. If a disc skips or gets stuck     on a section of the disc, it is probably dirty or damaged (scratched). When cleaning the disc,     wipe in straight lines from the center of the disc to the outer edge of the disc. Never wipe in     circular motions. 4. This unit is designed to play discs bearing the identification logo as shown here or MP3     format Disc. Other discs may not conform to the CD standard and may not play properly.5. Discs should be stored in their cases after each use to avoid damage.6. Do not expose discs to direct sunlight, high humidity, high temperatures, or dust, etc.     Prolonged exposure or extreme temperatures can warp the disc.7. Do not stick or write anything on either side of the disc. Sharp writing instruments or the     ink may damage the surface. *Care of the Cabinet1. To prevent fire or shock hazard, disconnect your unit from the AC power source when     cleaning.2. The finish on your unit may be cleaned with a dust cloth and cared for as other furniture.      Use caution when cleaning and wiping the plastic parts.3. Mild soap and a damp cloth may be used on the front panel.*To Clean the LensIf the lens get dirty, your player may skip or may not play a CD1. Open the CD door.2. Use a camera lens blower/brush to blow on the lens once or twice, brush the dust or     particles off the lens then blow again.3. To remove fingerprints, use a dry cotton swab to wipe from the middle to outer edge of     the lens.
TROUBLE SHOOTING No power when POWERis on. AC adaptor is not plugged into a wall outlet or the connector is not plugged into the power supply jackon the back of the unit. Plug the AC adaptor into a wall outlet and plug the connector into the supply jack on the unit.  The AC outlet may not havepower. Check the outlet with a working lamp or other electrical appliance.  TV system is set to minimum TV system is powered Off RCA cords are not connected securely. Turn up the volume on the TV systemPower the TV system on. Ensure white and red RCA cords are securely inserted into into the karaoke system and the TV system.CD Player does not worknormally Disc is inserted upside down Disc is dirty Disc is scratched Disc is warped A non standard disc is inserted Moisture has formed inside the CD deck  Karaoke system needs to be reset Insert the disc correctly Wipe clean with a soft cloth Use a new disc Use a new disc Only use discs bearing correct identification logoWait about 20 - 30 mins to let it dry out. Disconnect the machine from the power source for 30 seconds then reconnect No sound - If audio is goingthrough TV or VCR. Source Selection on TV or VCR is not correct.  RCA cords are not connected securely Follow directions “Making the connections”Ensure white and red RCAcords are securely inserted into both the karaoke system and the home stereo system.PROBLEM POSSIBLE CAUSE SOLUTION EN - 15No power when plugged in.No sound from TV.
TROUBLE SHOOTING PROBLEM POSSIBLE CAUSE SOLUTION No song lyrics appear onthe TV screen Video cable is not connected properly to the TV Source selector on TV is not set to VIDEO TV does not have video line input A CDG is loaded but the CD+G icon is not lit Mic volume control is set tominimumConnect the video cable to the karaoke system’s VIDEO OUT and to the TV VIDEO IN. Using your TV remote to select VIDEO input or select the proper VIDEO input on the TV itself. Connect from VIDEO OUT of the system to the VIDEO IN on your VCR/Home theater. Refer to “Making the Connections. Checkthe disc to be sure it is a CD+G  Check the disc to be sure it is clean. Mic is offAdjust mic volume to max, and then re-adjust to a comfortable level No Video is displayed on the TFT Screen. No sound from mic Set Screen button to turn ON.Ensure you are playing a CD+Graphics or CD+G Karaoke disc.The TFT Screen is turned OFF.The disc being played is a regular music CD,in which case no image will be displayed.  Turn on mic with the ON/OFF switch located on the microphoneEN - 16No sound when playing audio via Bluetooth.Your Bluetooth device hasn’t been paired properly. Pairing your Bluetooth device according to the “Bluetooth setup” section.The volume control of yourBluetooth device is set toolow. The volume control of yourBluetooth device is set toolow. Increase the volume of your Bluetooth device.Increase the volume of the unit by VOLUME control.
SPECIFICATIONSpecifications are typical, individual units might vary. They are subject to continuous improvement without notice and without incurring any obligation.Audio SectionOutput powerOutput impedanceCD OR CD+G playerFrequency responseSignal - to - noise ratioNumber of programsMicrophone3 watt + 3 watt RMS3 Ohms100 Hz - 20 kHz50 dB20 STEPS RANDOM ACCESS PROGRAMMING-73 dB 600 OHMS IMPEDANCE WITHØ 6.3mm DYNAMIC MICROPHONEEN - 17DC voltageCaution Please refer for further information to the user manualRECYCLINGThis product bears the selective sorting symbol for Waste electrical and electronic equipment (WEEE). This means that this product must be handled pursuant to European directive 2012/19/EU in order to be recycled or dismantled to minimize its impact on the environment.User has the choice to give his product to a competent recycling organization or to the retailer when he buys an new electrical or electronic equipment.Polarity of d.c. power connector
THE KARAOKE MACHINE (GLOSSARY OF TERMS)Following are some brief descriptions of karaoke terms you may need:Echo:By adding some minor feedback to your voice the Echo feature adds depth and resonance to a singer's voice. Echo affects only your voice and not the music. It will make you sound like you are singing in a big concert hall.Multiplex:This karaoke system is capable of playing Multiplex CD+G Karaoke discs. Multiplex Karaoke discs feature two mono versions of the same recording on left and right channels. The right channel features a mono version of the song with the lead vocals pre-recorded. The left channel features the same song, without the lead vocals recorded.Auto Voice Control (A.V.C.):This is short for “Automatic Vocal Control”. When the AVC knob on the front panel of the player is turned clockwise, the AVC function is activated. AVC is used to eliminate the singer's vocals from specially made Multiplex CD+G karaoke discs. Once the AVC is activated, as you sing into the microphone, the pre-recorded vocals are eliminated and replaced with your singing voice. Set the AVC to a lower setting, and you'll be able to hear the pre-recorded vocals in low volume as well as your own singing voice. Set the AVC to maximum and as you sing into the microphone, the pre-recorded lead vocals will be completely eliminated, and only your own singing voice will be heard.NOTE: The AVC controls is only functional with specific Multiplex CD+G Karaoke Discs. AVC will not eliminate the vocals from standard music CDs, and will not function when playing standard Karaoke CD+G discs, such as the disc included with this system.CD+G:This is short for Compact Disc plus Graphics. This is a regular audio CD with the lyrics stored in a data track. While your karaoke player will play regular audio CDs they will not have the background data track that will allow the lyrics to be displayed.EN - 18
END OF LIFE DISPOSAL  Warning! This logo set on the product means that the recycling of this apparatuscomes within the framework of the Directive 2002/96/CE of January 27, 2003concerning the Waste of Electrical and Electronic Equipment (WEEE).This symbol means that used electrical and electronic products should not be mixedwith general household wste. There is a separate collection system for theseproducts.- The presence of dangerous substances in the electrical and electronic equipments can have   potential consequences on the environment and human health in the cycle of reprocessing this   product.- Therefore, at the end of its lifetime, this product shall not be disposed with other non-recycled   waste. Used electrical and electronic equipment must be treated separately and in accordance   with legislation that requires proper treatment, recovery and recycling of used electrical and   electronic equipment.- Local authorities and resellers have set special procedures for the purpose of collecting and   recycling this product (please contact your local authority for further details). You have the   obligation to use the selective waste collection systems put in place by your local authority.- If your used electrical or electronic equipment has batteries or accumulators, please dispose of   these separately beforehand according to local requirements.- By disposing.of this product correctly you will help ensure that the waste undergoes the   necessary treatment, recovery and recycling and thus prevent potential negative effects on the   environment and human health which could otherwise arise due to inappropriate waste handling.If you want to dispose of this equipment, please do not use the ordinary dust bin!This appliance complies with the following EEC directives: 2006 / 95 / EEC /Low voltage directives / EMC directiveEN - 19

Navigation menu