Arts Digital Technology CEU5000BT Bluetooth Hi Fi Music System with Light Effects User Manual CEU5000 BT IM English 20150626 Outline Preview

Arts Digital Technology (HK) Limited Bluetooth Hi Fi Music System with Light Effects CEU5000 BT IM English 20150626 Outline Preview
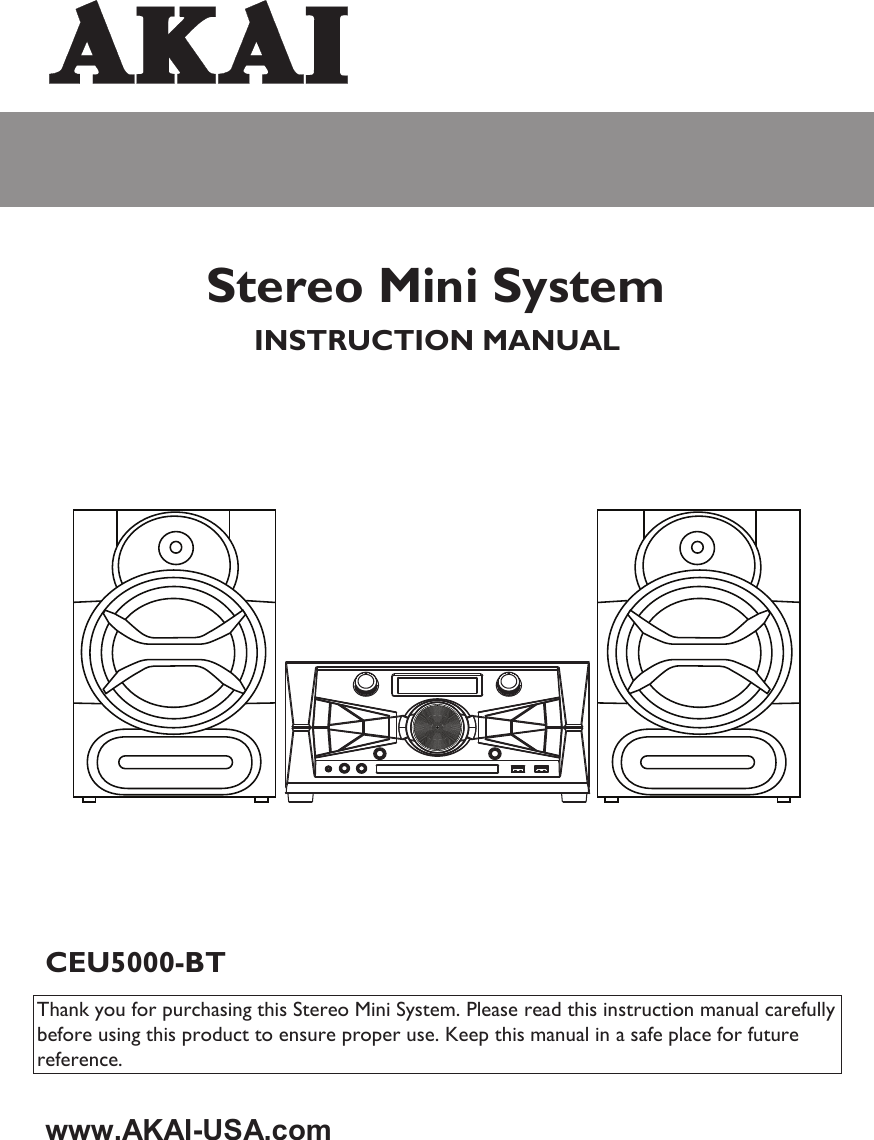
User Manual

      Stereo Mini System  INSTRUCTION MANUAL   CEU5000-BT  Thank you for purchasing this Stereo Mini System. Please read this instruction manual carefully before using this product to ensure proper use. Keep this manual in a safe place for future reference.   www.AKAI-USA.com
C A UTION:TO P R EVEN T   T HE   R I SK  O F ELECTRIC SHOCK, DO NOT REMO V E COVER OR BACK. NO USER-SERVICEABLE PARTS INSIDE. REFER SERVICING T O QUALIFIED PERSONNEL.CAUTIONRISK OF ELECTRIC SHOCK DO NOT OPENWARNING: TO REDUCE THE RISK OF FIRE OR SHOCK HAZARD, DO NOT EXPOSE THIS PRODUCT TO RAIN OR MOISTURE.This symbol is intended to alert you to the presence of uninsulated dangerous voltage within the product’s enclosure that might be of sufficient magnitude to constitute a risk of electric shock.  Do not open the product’s case.This symbol is intended to inform you t h at important  operating and maintenance instructions are included in the literature accompanying this product.DRIPPING WARNINGThe product shall not be exposed to dripping or splashing and that no objects filled with liquids, such as vases, shall be placed on the product.VENTILATION WARNINGThe normal ventilation of the product shall not be impeded for intended use.Warning: Changes or modifications to this unit not expressly approved by the party responsible for This device complies with Part 15 ofthe FCC Rules. Operation is subjectto the following two conditions: (1)this device may not cause harmfulinterference, and (2) this device mustaccept any interference recieved,including interference that may causeundesired operation.compliance could void the user’s authority to operate the equipment.Class ll equipment symbolThis symbol indicates that the power adaptor has a double insulation system.This equipment complies with FCC’s  RFradiation exposure limits set forth for anuncontrolled environment. The antenna(s) used forthis transmitter must be installed and operated toprovide a separation distance of at least 20 cm fromall persons and must not be collocated or operatingin conjunction with any other antenna or transmitter.Installer must ensure that 20 cm separationdistance will be maintained between the deviceand user.FCC RADIATION EXPOSURESTATEMENTDECLARATION DE LA FCC RELATIVE A L'EXPOSITION AU RAYONNEMENTCet appareil est conforme aux limites d'exposition au rayonnement RF stipulées par la FCC pour une utilisation dans un environnement non contrôlé.Les antenne utilisées pour cet émetteur doivent être installées et doivent fonctionner à au moins 20 cm de distance des utilisateurs et ne doivent pas être placées près d’ autres antennes ou émetteurs ou fonctionner avec ceux-ci. Les installateurs doivent s'assurer qu’une distance de 20 cm sépare l’appareil des utilisateurs.FCC ID: OWT-CEU5000BTEN - 1
NOTE: This digital apparatus does not exceed the Class B limits for radio noise emissions from digital apparatus as set out in the radio interference regulations of Industry Canada.Le présent appareil numérique n’émet pas de bruits radioélectriques dépassant les limites applicables aux appareils numériques de Classe B prescrites dans le règlement sur le brouillage radioélectrique édicté par Industrie Canada.NOTE: This equipment has been tested and found to comply with the limits for a Class B digital device, pursuant to part 15 of the FCC Rules. These limits are designed to provide reasonable protection against harmful interference in a residential installation. This equipment generates, uses and can radiate radio frequency energy and, if not installed and used in accordance with the instructions, may cause harmful interference to radio communications. However, there is no guarantee that interference will not occur in a particular installation. If this equipment does cause harmful interference to radio or television (which can be determined by turning the equipment off), the user is encouraged to try to correct the interference by one or more of the following measures:Reorient or relocate the receiving antenna.Increase the separation between the equipment and receiver.Connect the equipment into an outlet on a circuit different from that to which the receiver is connected.Consult the dealer or an experienced / TV technician for help. EN - 21.   Read these Instructions.  2.   Keep these Instructions.  3.   Heed all Warnings.  4.   Follow all instructions.  5.   Do not use this apparatus near water. 6.   Clean only with a dry cloth.  7.   Do not block any of the ventilation openings. Install in accordance with the manufacturers instructions. 8.   Do  not  install  near  any  heat  sources  such  as  radiators,  heat  registers,  stoves,  or  other apparatus (including amplifiers) that produce heat. 9.   Do not defeat  the  safety purpose  of  the polarized or  grounding - type  plug.  A polarized plug has two blades with one wider than the other. A grounding type plug has two blades and  a  third grounding  prong. The  wide  blade  or  the  third  prong    are  provided  for  your safety.  When  the  provided  plug  does not  fit into  your  outlet,  consult  an  electrician  for replacement of the obsolete outlet. 10. Protect  the  power  cord  from  being  walked  on  or  pinched  particularly  at  plugs, convenience receptacles, and the point where they exit from the apparatus. 11. Only use attachments/accessories specified by the manufacturer. 12. Use only with a cart, stand, tripod, bracket, or table specified by the manufacturer, or sold with  theapparatus.  When  a  cart  is  used,  use  caution  when  moving  the  cart/apparatus combination to avoid injury from tip-over. Portable Cart Warning13.  Unplug this apparatus during lightning storms or when unused for long periods of time. 14.  Refer  all  servicing  to  qualified  service personnel.  Servicing  is  required  when  the apparatus  has  beendamaged in  any  way,  such  as  power-supply  cord  or  plug  is damaged, liquid has been spilled or objects have fallen into the apparatus, the apparatus has been exposed to rain or moisture , does not operate normally, or has been dropped.
To reduce the risk of fire or electric shock, do not expose this apparatus to rain or moisture.Avertissement: pour réduire le risque d’incendie ou de choc électrique, ne pas exposer cet appareil sous la pluie et l’humidité.The apparatus shall not be exposed to dripping or splashing and that no objects filled with liquids, such as vases, shall be placed on apparatus.L’appareil ne doit pas être exposé aux écoulements ou aux éclaboussures et aucun objet ne contenant de liquide, tel qu’un vase, ne doit être placé sur l’objet.The MAINS plug / power adaptor is used as the disconnect device, it should remain readily operable during intended use.In order to disconnect the apparatus from the mains completely, the main plug / power adaptor should be disconnected from the mains socket outlet completely.La prise du secteur ne doit pas être obstruée ou doit être facilement accessible pendant son utilisation. Pour être complètement déconnecté de l’alimentation d’entrée, la prise doit être débranchée du secteur.WARNINGS:Battery shall not be exposed to excessive heat such as sunshine, fire or the like.Les piles ne doivent pas être exposées à de forte chaleur, tel qu’à la lumière du soleil, au feu ou autres choses de semblable. EN - 3
ContentsCEU5000-BT (Main Unit)1.CEU5000-BT (Speaker x 2)2.Remote Controller3.FM Antenna4.If you are missing any parts above, please contact ADT Digital LLC.Tel: 561 922 6886Fax: 561 922 6159Instruction Manual6.Warranty Card7.AM Antenna5.ADT  Digital  LLC        EN - 4
 CONTROL LOCATION   FRONT PANEL 2.   VFD DISPLAY3.   NFC FUNCTION4.   VOLUME5.   TONE CONTROL6.   BALANCE L/R7.   USB SELECT8.   BLUETOOTH9.   POWER SWITCH10. TUNER11. AUX BUTTON12. CD REC13. CD-USB14. RECORD STOP15. PREVIOUS16. NEXT17. FOLDER+/T-UP18. EQ19. PLAY/PAUSE20. FOLDER-/T-DN21. SCAN22. STOP23. USB 224. USB 125. OPEN/CLOSE26. DISC TRAY27. REMOTE SENSOR28. MIC VOL29. MIC JACK 230. MIC JACK 131. AUX IN JACK        73 5 4 2 631 30 29 28 27 26 25 24 238910111213142021181922151617EN - 5
CONTROL LOCATION  32. FM ANTENNA33. AM ANTENNA34. SPEAKER LIGHT OUTPUT35. AC CORD INPUT36. VIDEO OUTPUT37. SPEAKER TERMINAL BACK PANEL34 32 3335 36 37EN - 6
 1011129876543211314151617181920212223242526271.   POWER2.   SLEEP3.   FOLDER+4.   FOLDER –5.   ID3 ON6.   TIMER7.   PROG8.   REPEAT9.   OPEN/ CLOSE10.  MEM. DN/ BACK11.  NUMERIC KEYS12.  CLOCK13.  MUTE14.  FAST FORWARD15.  FAST BACKWARD16.  RECORD/ STOP17.  RECORD18.  USB19.  BLUETOOTH20.  FUNCTION21.  EQ22.  PLAY/ PAUSE23.  MEM. UP/ NEXT24.  STOP25.  VOL UP/ DOWN26.  0/ 1027.  10+EN - 7CONTROL LOCATION
EN - 8POWER CONNECTIONPOWER SWITCH CLOCK SETTINGTIMERPress POWER button on unit or remote control to turn on the unit, press again to power off the unit.1.  Press and hold “CLOCK” button,12 or 24 hour will be shown on display.     Press “            ” buttons to select either one. Press “CLOCK” again to      confirm.2.  Press and hold “CLOCK” button, the hour of the clock is blinking.3.  Press “    ” to set hour.4.  Press “CLOCK” again to set minute, the minute of the clock is blinking5.  Press“   ” to set minute.6.  Press “CLOCK” again to confirm. The clock is ready now.1.   Press “TIMER” button, “ON TIME” will show on screen and hour of the clock is blinking2.   Press “    ” to set hour for timer on.3.   Press “TIMER” again to set minute, the minute of the clock is blinking4.   Press “    ” to set minute for timer on.5.   Press “TIMER” button again until “OFF TIME” shown on screen and  hour of the clock is       blinking.6.   Press “       ” to set hour for timer off.7.   Press “TIMER” again to set minute, the minute of the clock is blinking.8.   Press “    ” to set minute for timer off.9.   Press “TIMER” again to set “Playing CD” or “FM” when the unit switches on. 10. Press “             ” to confirm.11. Press “TIMER” again to set the volume of the unit when it’s on. 12. Press “             ” to adjust the volume.13. Press “TIMER” again “    ” shown on screen and the unit is ready switch on and off       automatically as you want.Use buttons on the remote controlSET THE TIME ONSET THE TIME OFFConnecting AC PowerPlug the AC power cord into a standard AC socket. The unit is designed to operate from a main supply of AC120V~ 60Hz.CAUTION: The supplied AC power cord has a polarized plug that fits into the wall outlet only one way. If the plug does not fit properly, turn it over and try again. Do not force it.NOTE: When the unit is intended for being unused for a long period of the time. Please turn off the unit and unplug the power cord from the AC wall outlet.
  VOLUME CONTROLPRESET EQUALIZER/ TREBLE/ BASSAdjust the volume, press “+” to increase or “-“ to decrease the volume on remote control or rotate the “VOLUME” knob on main unit.To prevent possible hearing damage, do not listen at high volume level for long periods of time.You can choose 7 different preset EQ while you are listening music. Each time the EQ button is pressed, it will change in the following sequence.FLAT – JAZZ – ROCK – CLASSIC – POP – DANCE - LATINYou can rotate the “TONE” button to have different treble and bass levels. To change the BASS level, rotate the “TONE” button. To change the Treble level, press & hold EQ button for about 1 second, then rotate the “TONE” button.AUX-INConnect an external device (e.g.mp3 player) with a 3.5mm jack to main unit. Press” AUX IN” and play the device. Adjust VOLUME knob to control the sound level of music playback fromthe speakers on the unit.MUTE (ON REMOTE CONTROL)Press “MUTE"button to mute the sound, press again or turn the volume knob to restore the sound level previously set.        EN - 9
  LISTEN TO RADIO1.  Press “TUNER” on unit or “FUNCTION” on remote control to “AM” or “FM”. 2.  To launch auto-searching, press and hold the T-UP / T-DN button several seconds and then      release. When a station is found the unit will stop auto-searching and start broadcasting.3.  Press the T-UP or T-DN buttons to tune the radio station manually.4.  Adjust VOLUNME CONTROL and PRESET EQUALIZER to a comfortable listening level.   1.   Press “TUNER” button on unit or “FUNCTION” on remote control to “AM”or “FM”.2.   Press “T-UP” or “T-DN” until the frequency starts to change, then release it.3.   The tuner will automatically search for a broadcasting station and stops when one is found.4.   This station is saved.5.   Repeat step 2 to 4 until all desire stations are saved.6.   You can assign another memory number to a stored station. 7.   Go to the stored station you wanted to change its memory number.8.   Press “PROG” button on the remote control.9.   The display will show its original memory number and the frequency. 10. The original memory number will flash. Press a new memory number you want and press       “PROG” button to confirm. PRESET RADIO STATIONS AM:  If AM reception is weak, rotation or repositioning of the antenna will usually improve the reception. ADJUSTING AN ANTENNANote: for memory number more than 10, pressing 10+ once will have 10 increments. Press 10+ again it will become 20 and so forth. With correct second digit, press 0 – 9 to input the first digit. You can preset up to 30 FM and AM stations The following CD/MP3 control keys are used to control the CD/MP3 player.PLAY/PAUSE  : Press this key to start playing CD, Pressing this key again to pause. Press this key once again to resume.STOP      : Press this key to stop playing CD.SKIP          : Press this key to skip to next track.                  : Press this key to skip to previous track.SEARCH             : Press this key once it will fast-forward or fast-backward a CD 2 times faster.                               Press again to 4 times, then 8 times and 10 times, which is the fastest. Press                              “PLAY/ PAUSE” button to resume normal play.REPEAT  : Press this key once it will repeat current track. Repeat icon will flash.                   Press again it will repeat the whole disc. Repeat icon will stay on.PROGRAM : Store track number to be played into the memory. Maximum capacity is 16. CD OPERATIONFM :  Untie the antenna wire and extend it to its full length for better reception.EN - 10
 NORMAL PLAY1.  Set “FUNCTION” to “DISC” on remote control or press “CD” on the unit.2.  Open the CD tray by pressing “OPEN/ CLOSE” button “    ”, place a CD on the tray and press      the same button to close the CD door. Press “PLAY/PAUSE” button to start playing.3.  Adjust VOLUME CONTROL and EQ to a comfortable listening level.4.  Skip Function     a) Press skip forward button  to skip to the next track.     b) Press skip back button       to backward to the beginning of the current track and then press      again to move to the previous track.     Press skip backward button to skip back to previous track.5. To stop playing, press “STOP” button. You can jump to any folder in CDR, MP3 disc or USB by pressing “FOLDER +” or “ FOLDER – ” and play for it. Display on unit shows the sequence number of the folder only. To check the foldername, connect to TV with a video output. PLAYING IN DIFFERENT FOLDERSYour unit has a program memory to store the playing tracks up to 16 steps:1.  Place a disc in the CD tray then close it.2.  Press “PROG” button on the remote control. The “MEM” indicator will belighted up. The unit      will be stopped or paused. Display shows the program number (P01) before “000” (number      of program track).3.  Input your desired track number by pressing numeric keys and press “PROG” to confirm.4.  Program will go to “P02” (next program), enter the next tracks and so forth until all tracks are      programmed.5.  Press “PLAY/PAUSE” key to start program play.6.  Press “STOP” to stop playing. Press “STOP” again will clear the program and “MEM” indicator      will be turned off.PROGRAM PLAYYou can set the repeat play mode by pressing “REPEAT” button on remote control. When you first press “REPEAT”, the “REPEAT” indicator on VFD will keep blinking, so the current tracks will be played over and over until cancelled. Press “REPEAT” key once again, the “REPEAT” indicator will be steady on, all the track on the disc will be played over and over until cancelled. Press “REPEAT” again, “REPEAT” indicator goes off. Unit plays normally.      Repeat and program play can available in the same folder.SETTING FOR REPEAT PLAYEN - 11
 EN - 12NOTES ON HANDLING COMPACT DISCSTo keep the disc clean, handle the disc by its edge. Do not touch the disc surface.Do not stick paper nor write anything on the surface. After playing, store the disc in its case.USB PLAY OPERATIONThere are 2 USB inputs in the front panel on the unit “USB1” and “USB2”. You can connect USB driver through either USB1 or USB2 interface. Play the USB, first press “CD-USB” button then select USB 1 or 2 by pressing “USB/SELECT” button. The operation is the samewith the CD operation described above. For playing CD again, press “CD-USB” button on unit or “FUNCTION” on remote control to switch to DISC mode.BLUETOOTH OPERATION with NFC1. Make sure that the Bluetooth device is turned on and has music ready to play.2. On the device, turn Bluetooth on and start scanning for available Bluetooth devices.3. Switch the unit to Bluetooth by pressing “BLUETOOTH” on the unit or on the remote     control. The display will show Bluetooth mark and “BLUE” will blink until Bluetooth device    is paired.4. For the first time pairing, the Bluetooth device will find the unit named“ KS5500-BT”.5. The pairing should be now complete. The blinking display “BLUE” will light on.6. Start playing music on the Bluetooth device and the audio will be transmitted wirelessly    through the unit.7. The                   and the master volume buttons on the remote control can be used to     control playback on the connected Bluetooth device also.If your device supports NFC, simply place the device close to the mark “NFC" on the unit. Pairing will match automatically.NOTE:Bluetooth range can be affected by interference and obstacles which may also cause the wireless audio connection to break up. For best results, avoid interference and obstacles.Connect wirelessly to the unit using Bluetooth technology and play music through this unit.
 EN - 13This feature allows you, for example, record a song from a CDA file or a MP3 file to a USB device.1.  Connect the device (such as a Pen Drive) to the USB socket 1 or 2 on the front panel.2.  Place the CD into the slot with the subject to be recorded.3.  Play the CD track. Display will show USB 1 – 2. Press “ 1” or “2” to select either USB for      record.4.  Click the “RECORD” button from the remote control or ‘REC’ on the unit atany time during      CD playback.5.  CDA file will record only during the disc is playing. MP3 file will copy in about 15 seconds      to the device for the current track.6.  To "copy" another subject, repeat steps 2-5.7.  You can stop a recording CDA by press the “REC STOP” button.       “REC” on VFD will light on during copying a CDA track.        “RIP” on VFD will light on during ripping a MP3 track,         You can connect the video output to a monitor for an easier operation.CDG discThe unit support CDG playing.Connect the video output to TV or a monitor. During playing a CDG disc, you can connect a microphone to sing alone with the track. You can record this playing track with your voice in the USB. See COPY FUNCTION.You can use a USB with memory 128MB,, 56MB, 512MB, 1GB, 2GB, 4GB,8GB, 16GB, 32GB and 64GB for ripping CDA or MP3 files.COPY FUNCTION (ONLY FOR ITEMS RECORDED ON THE CD)TURN THE LIGHT ON/OFF Press and hold the “play/pause” button on front panel for one second to turn on/ off of the front panel LED.
  TROUBLE SHOOTING GUIDEIf you have followed the instructions and are having difficulty operating the unit, locate the PROBLEM in the left column below. Check the corresponding POSSIBLE CAUSE column to locate and remedy the problem. Specifications are typical, individual units might vary. They are subject to continuous improvement without notice and without incurring any obligation.SPECIFICATIONPower RequirementRemote ControlPower Consumption AC 280WattsWeightDimensionsApprox.: N.W.: 9.8 kgs / 21.56 lbs               G.W.: 12.4 kgs /  27.28 lbsMain Unit350(W) x 212(H) x 257(D) mm/ 13.8”(W) x 8.3”(H) x 10.1”(D)  Speaker x 2 (Each Box)241(W) x 375(H) x 240(D) mm/ 9.5”(W) x 14.8”(H) x 9.4”(D)  AC 120V~60HzDC 3V AAA x 2 pcsPROBLEM POSSIBLE CAUSE REMEDYNo sound in general Volume no adjusted.  Adjust the volume knob.The unit does reset to operation of any buttonUnder the influence of electrostaticphenomenon, the product may malfunction and require user to disconnect.Turn off the unit, disconnect the mains plug, and reconnect after a few seconds. Radio poor reception Weak radio aerial signal.Interference caused by the vicinity of electrical equipment like TVs, video recorders, computer, thermostats, fluorescent lamps (TL) engines etc.Aim the aerial for best reception: Fully extend the telescopic antenna. Keep the unit away from electrical equipment.Cannot read CD The disc is dirtyThe disc is upside down. The CD player is in PausemodeClean or replace the discNo sound in USB modeVolume at minimum.External device not connected properly.Adjust the volume knob.Clear contact pins and connects again.Turn it over so that the label is face up. Release the Pause Mode by Press the Play/ Pause button.EN - 14

Navigation menu