Altai Technologies WA3311NAC-E Altai A3-Ei Dual-band 3X3 802.11ac WiFi AP User Manual Lightning Protection
Altai Technologies Limited Altai A3-Ei Dual-band 3X3 802.11ac WiFi AP Lightning Protection
Contents
- 1. Users Manual - Installation
- 2. Users Manual - Configuration
Users Manual - Installation


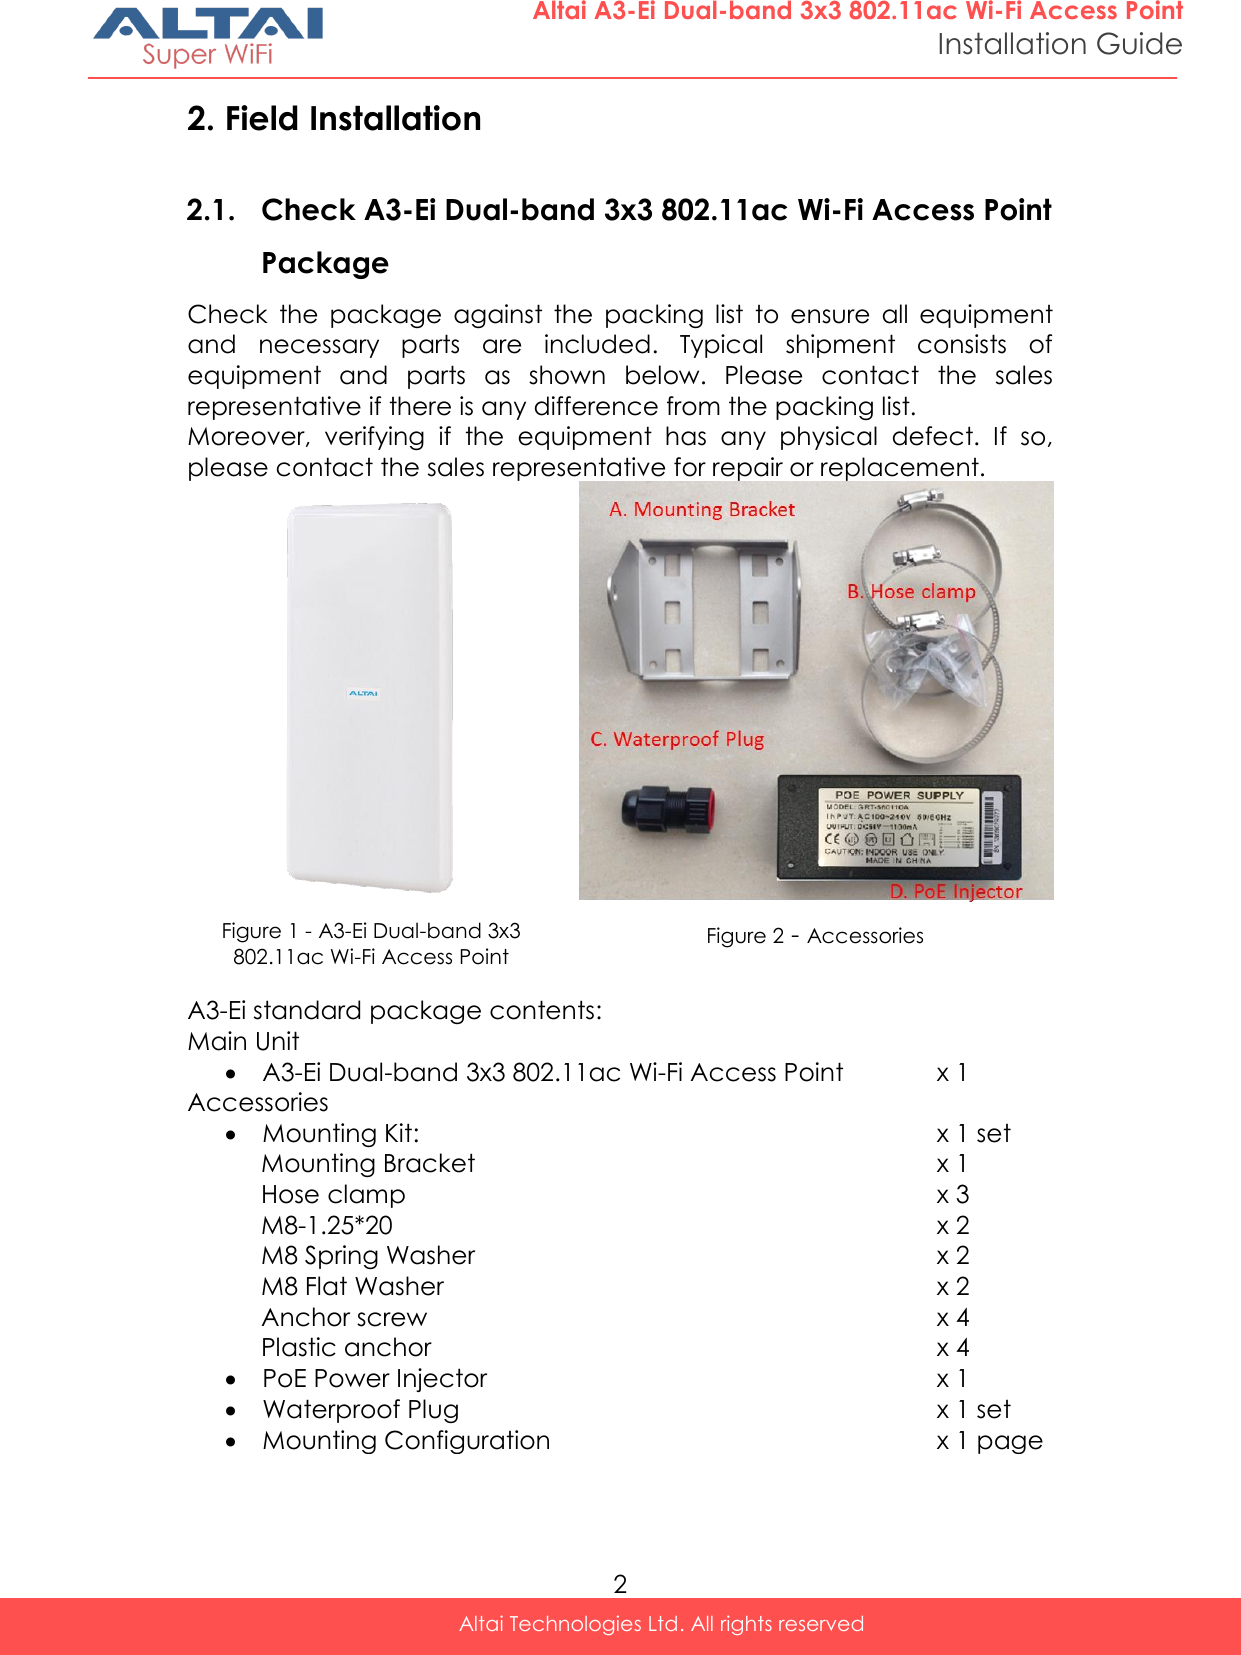
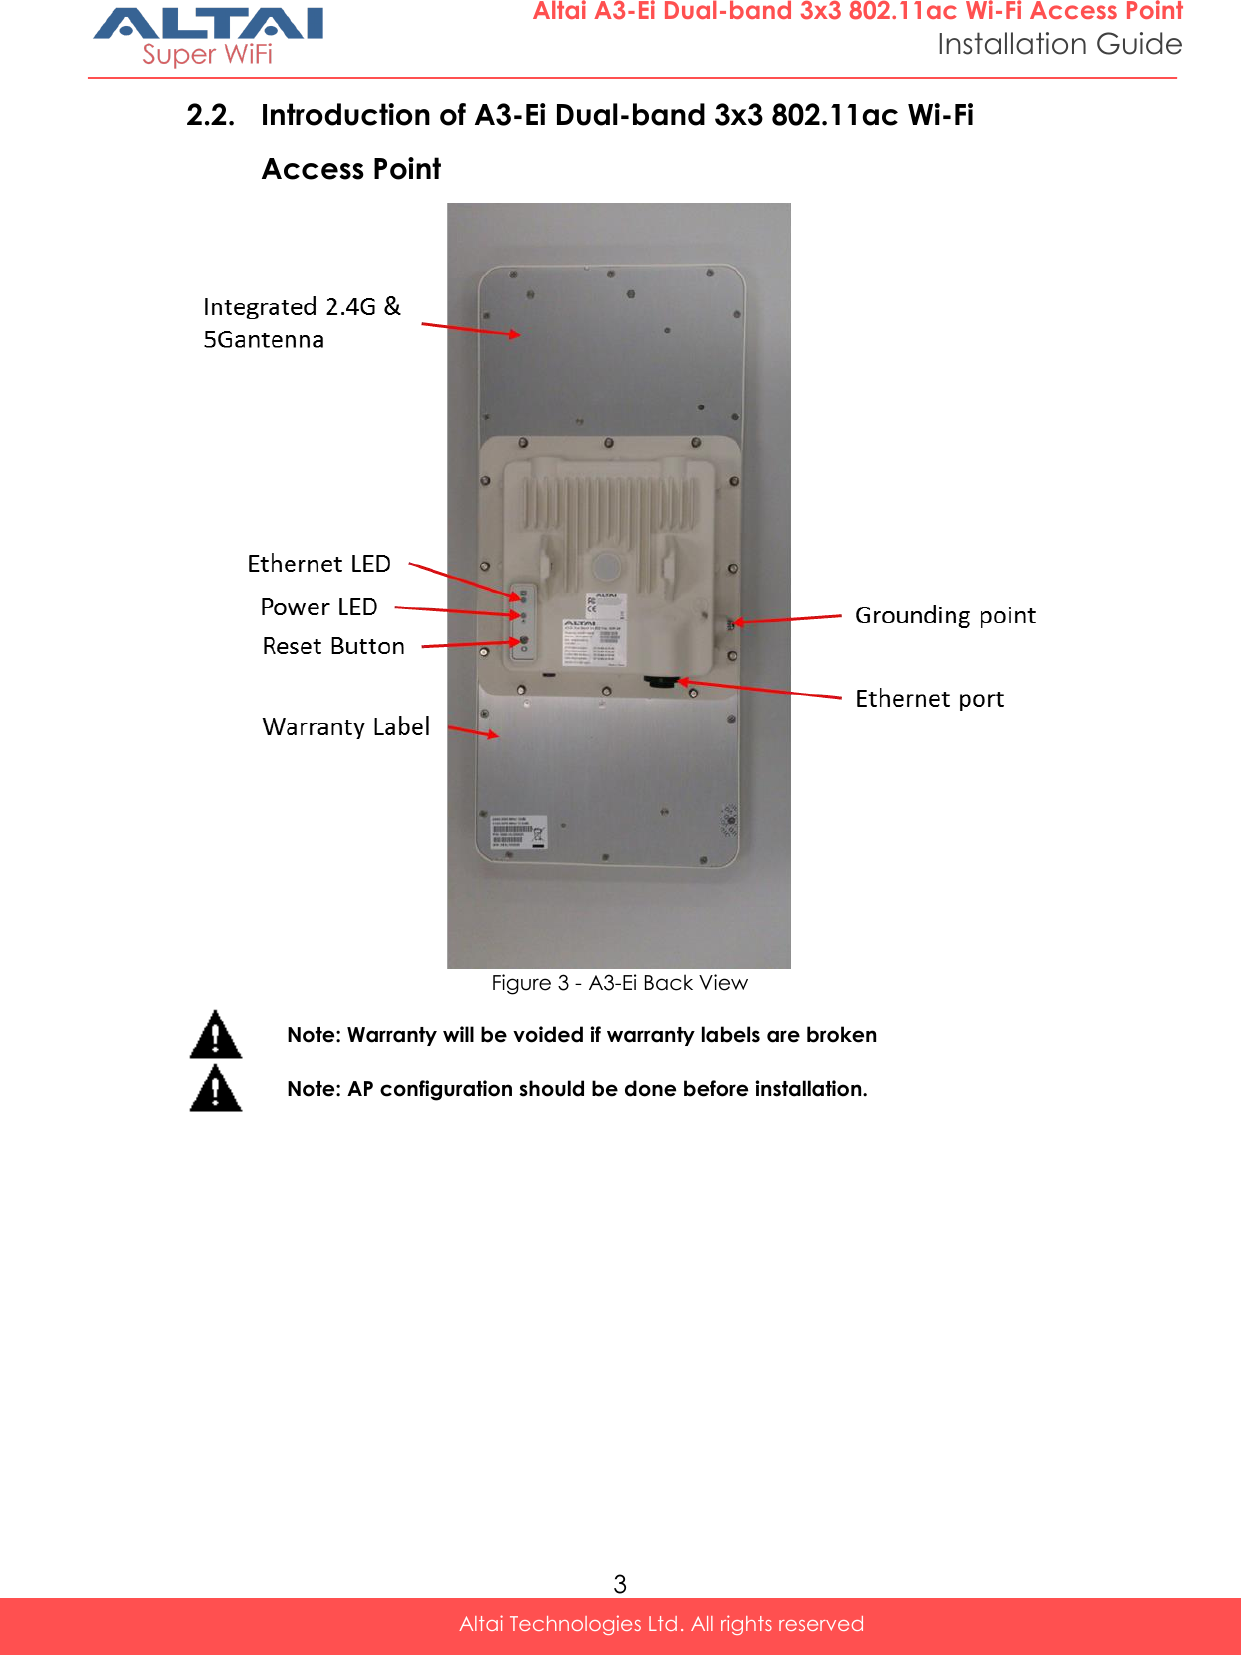
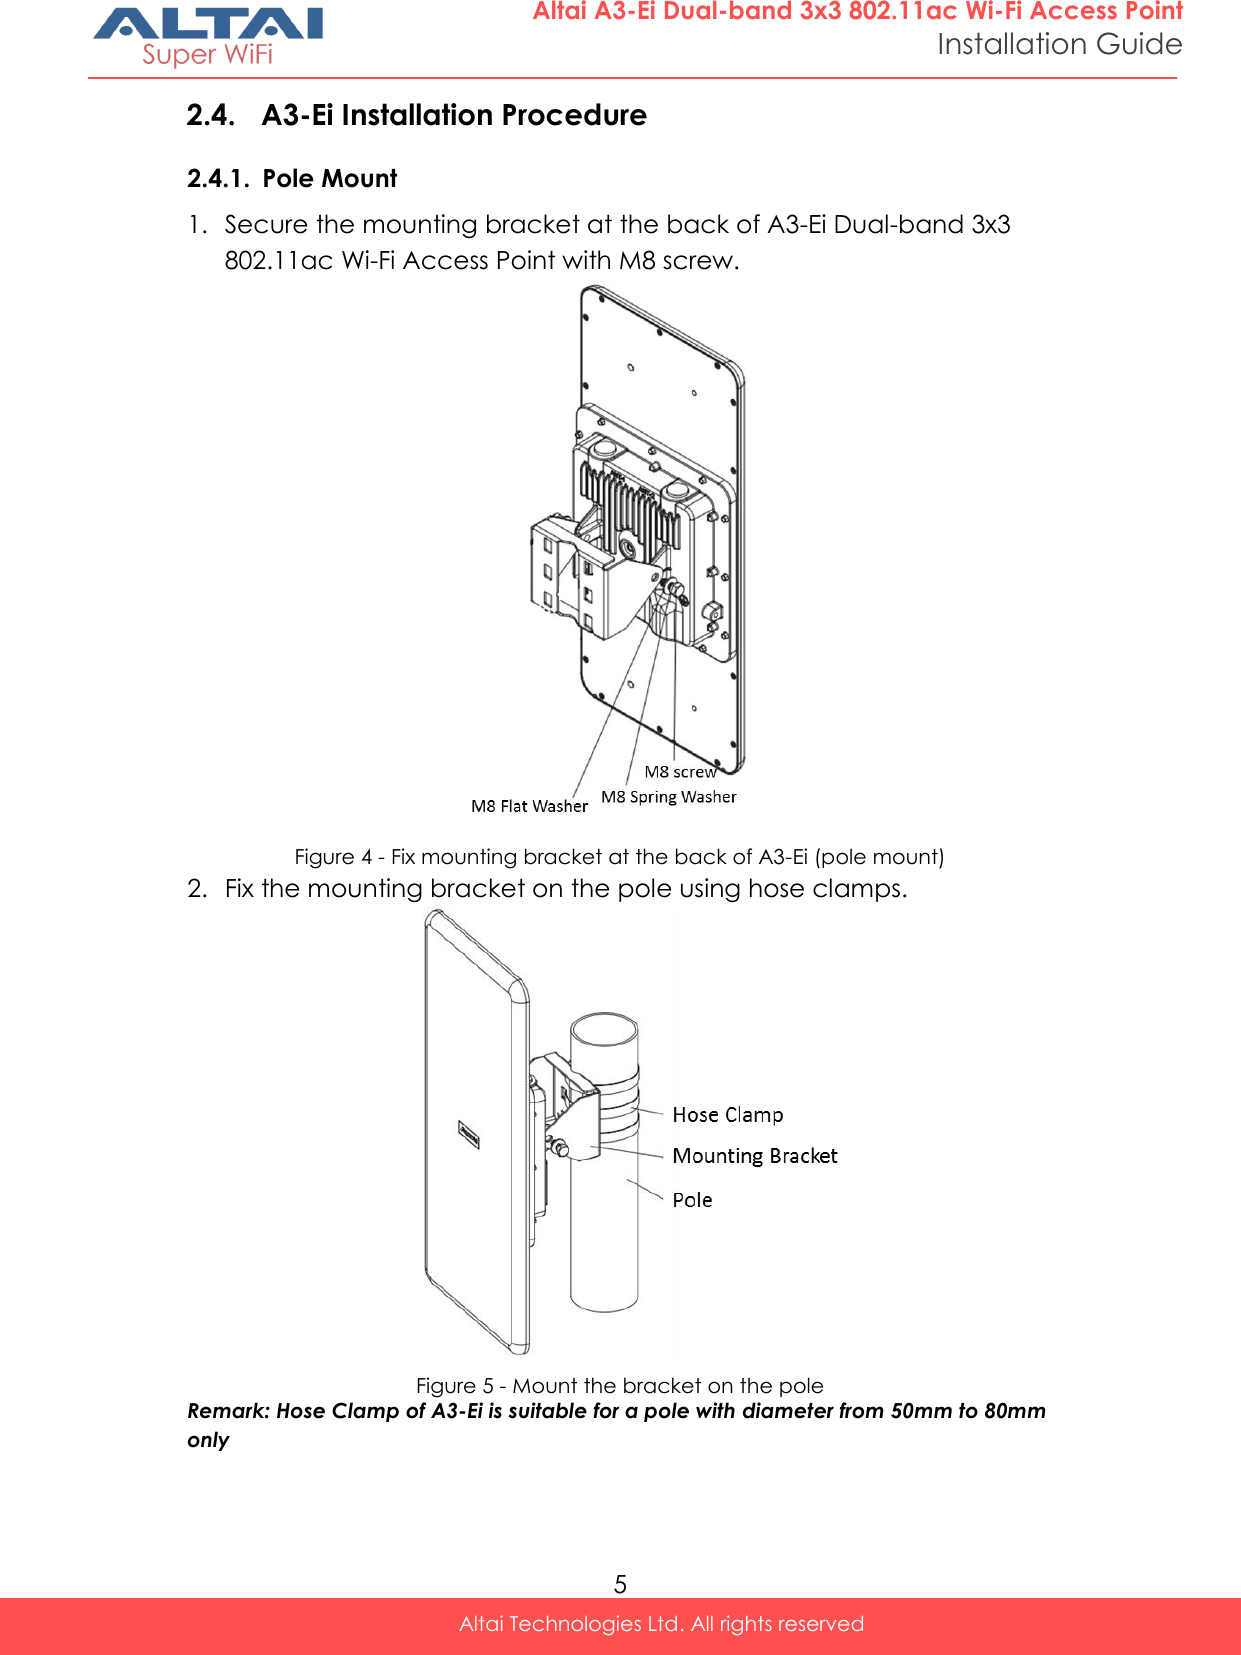
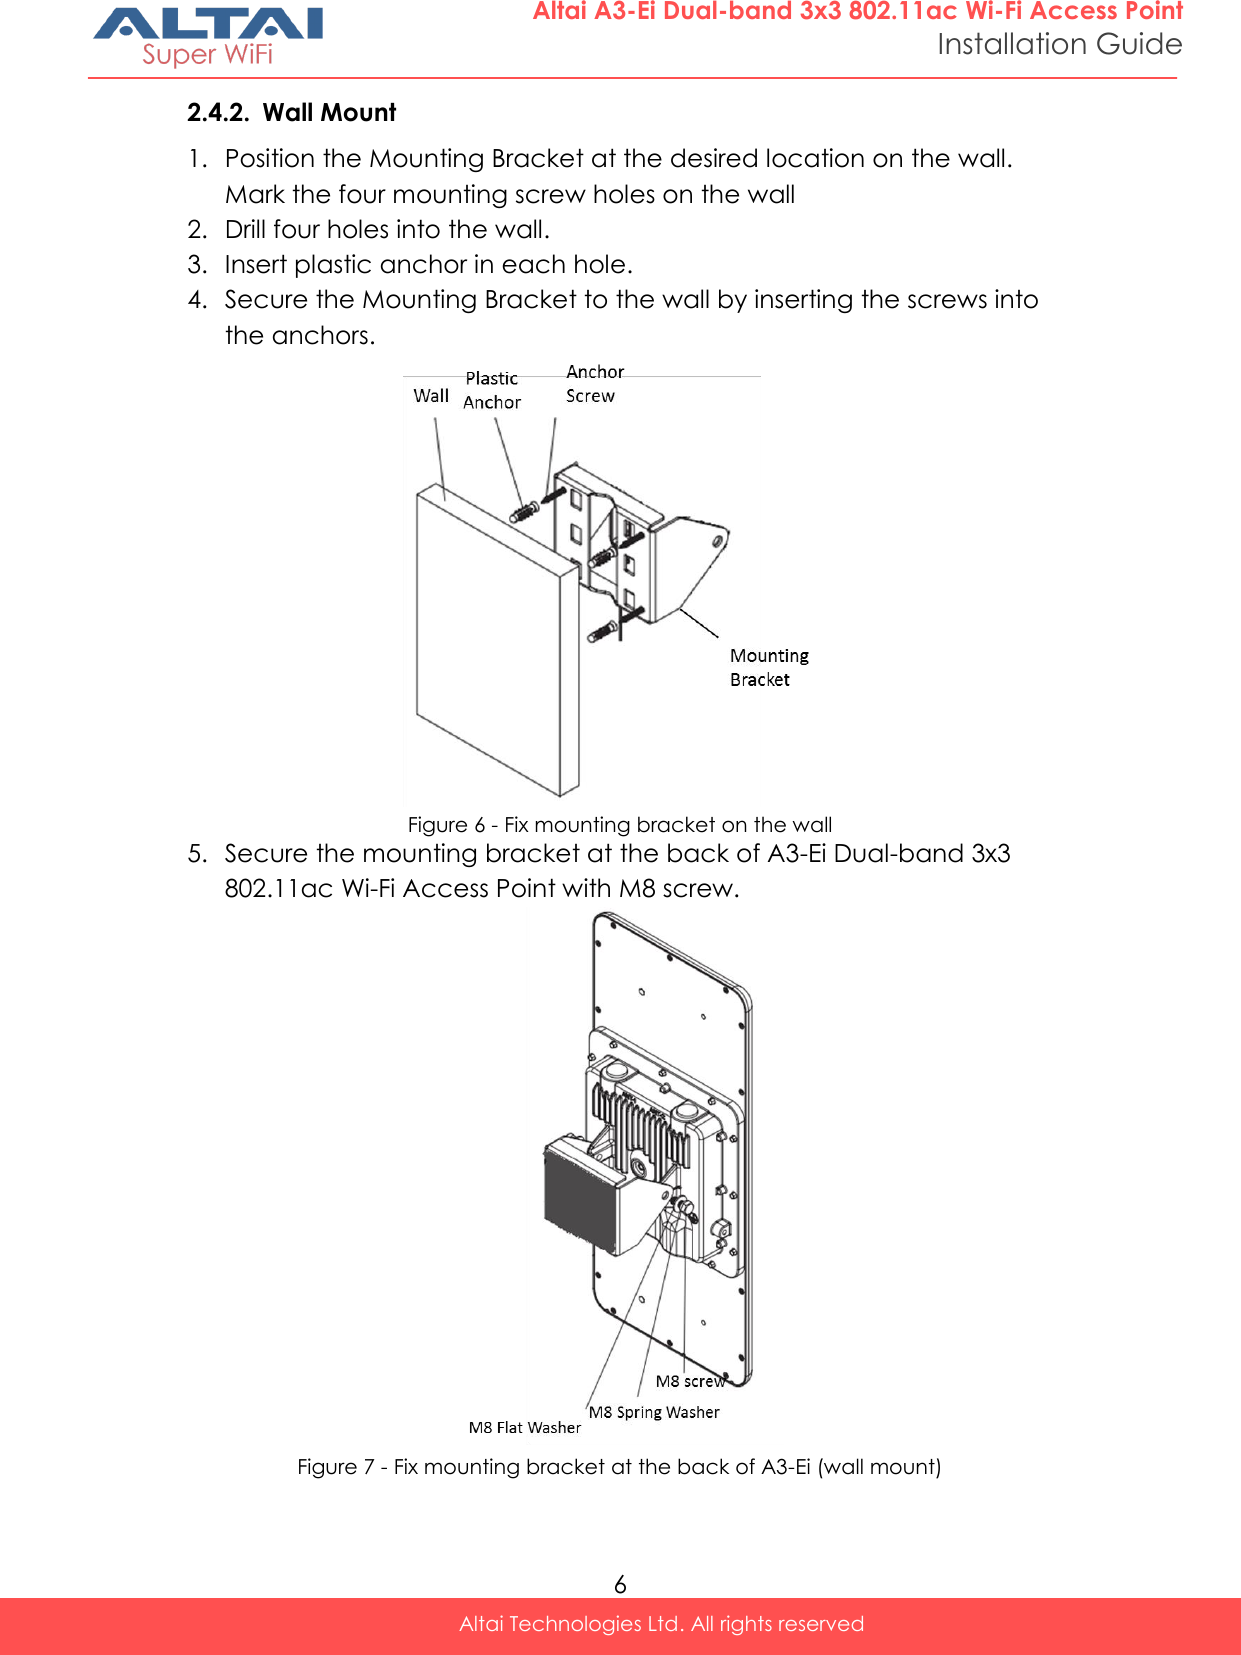
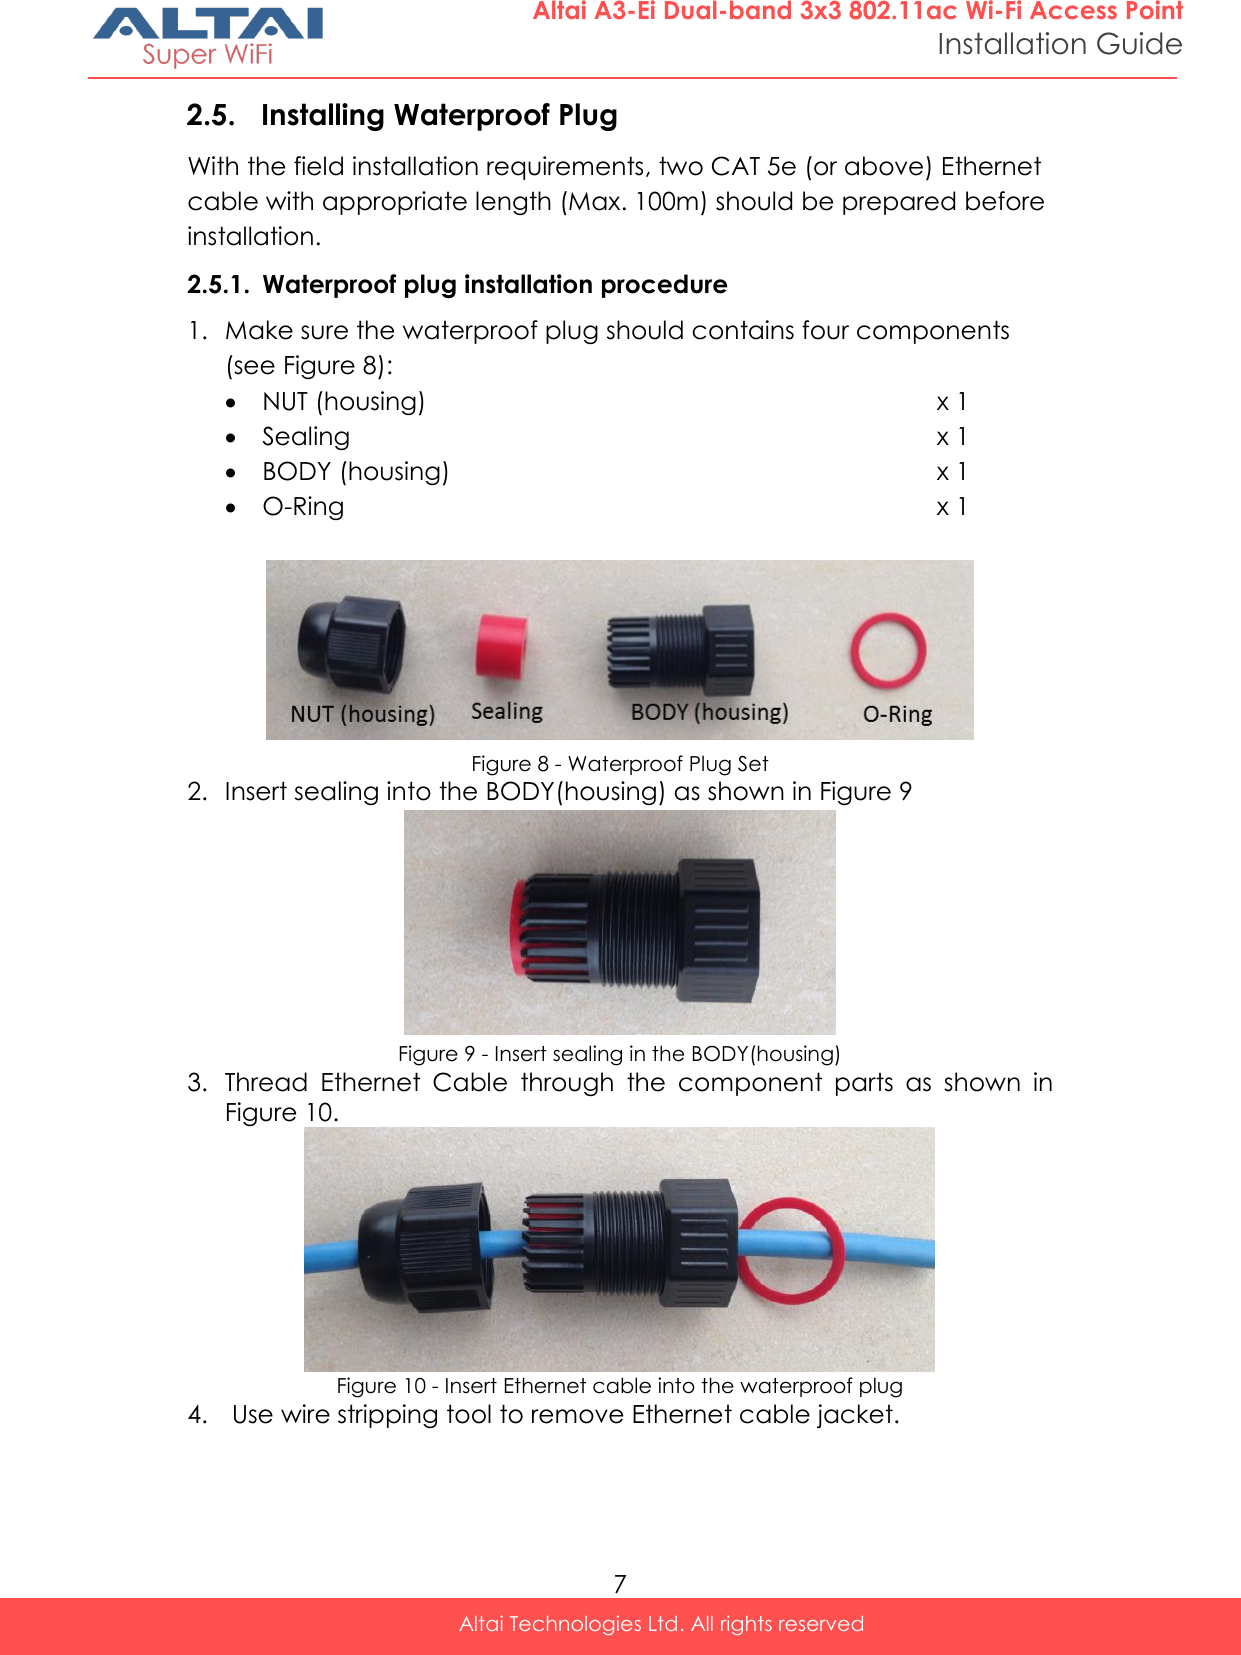
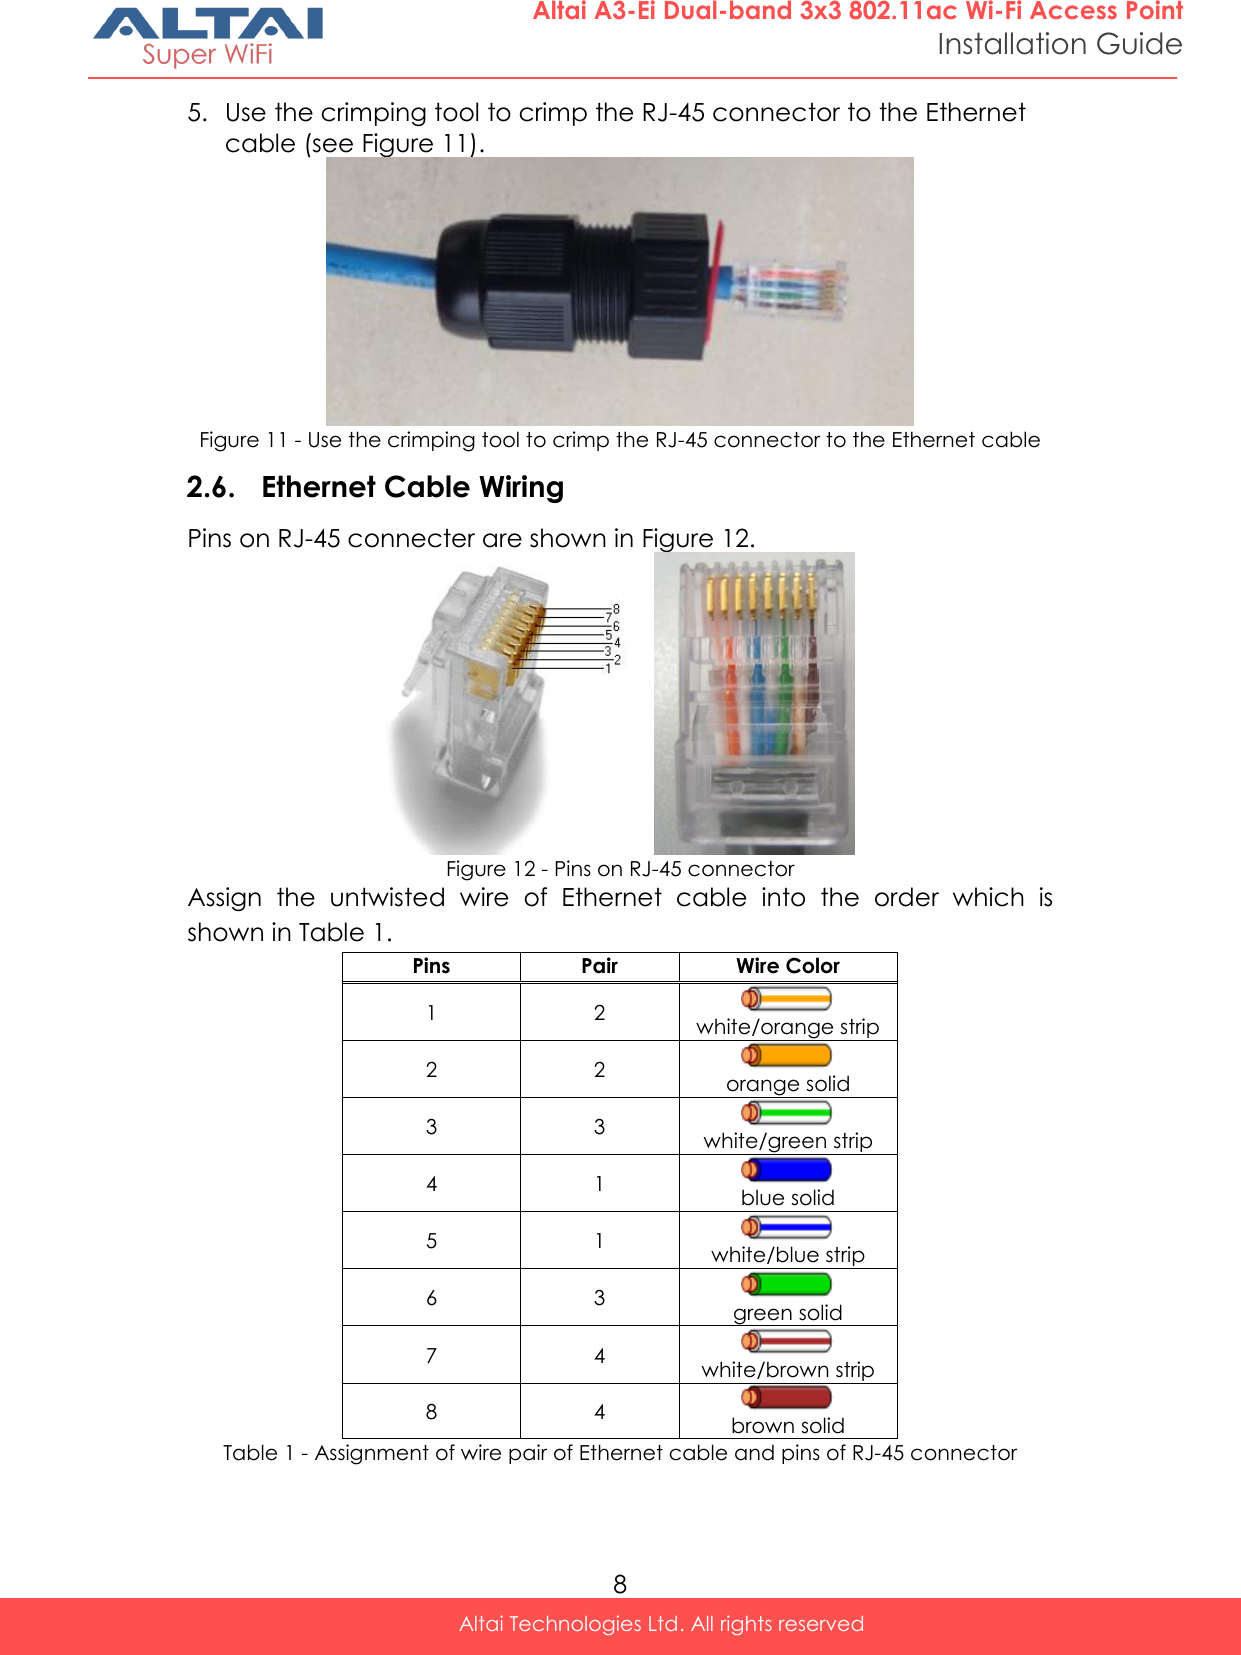
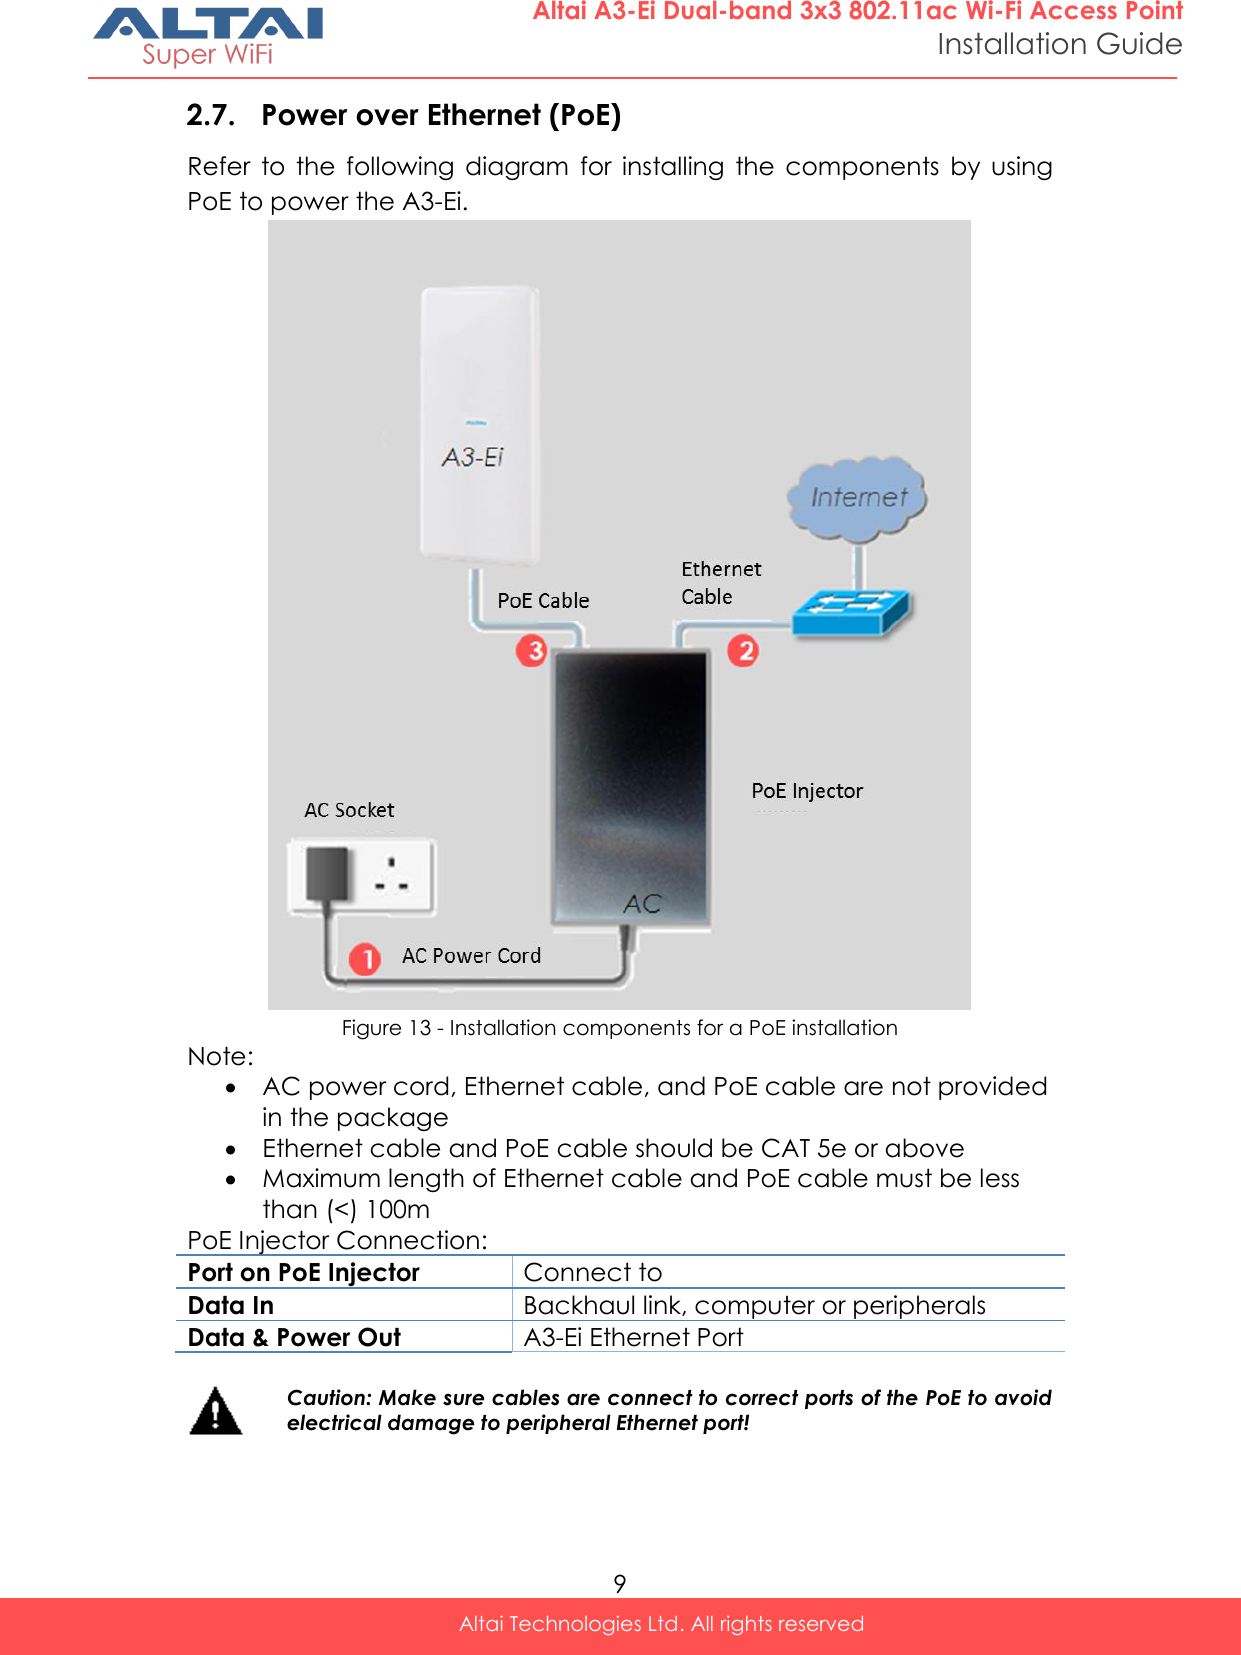
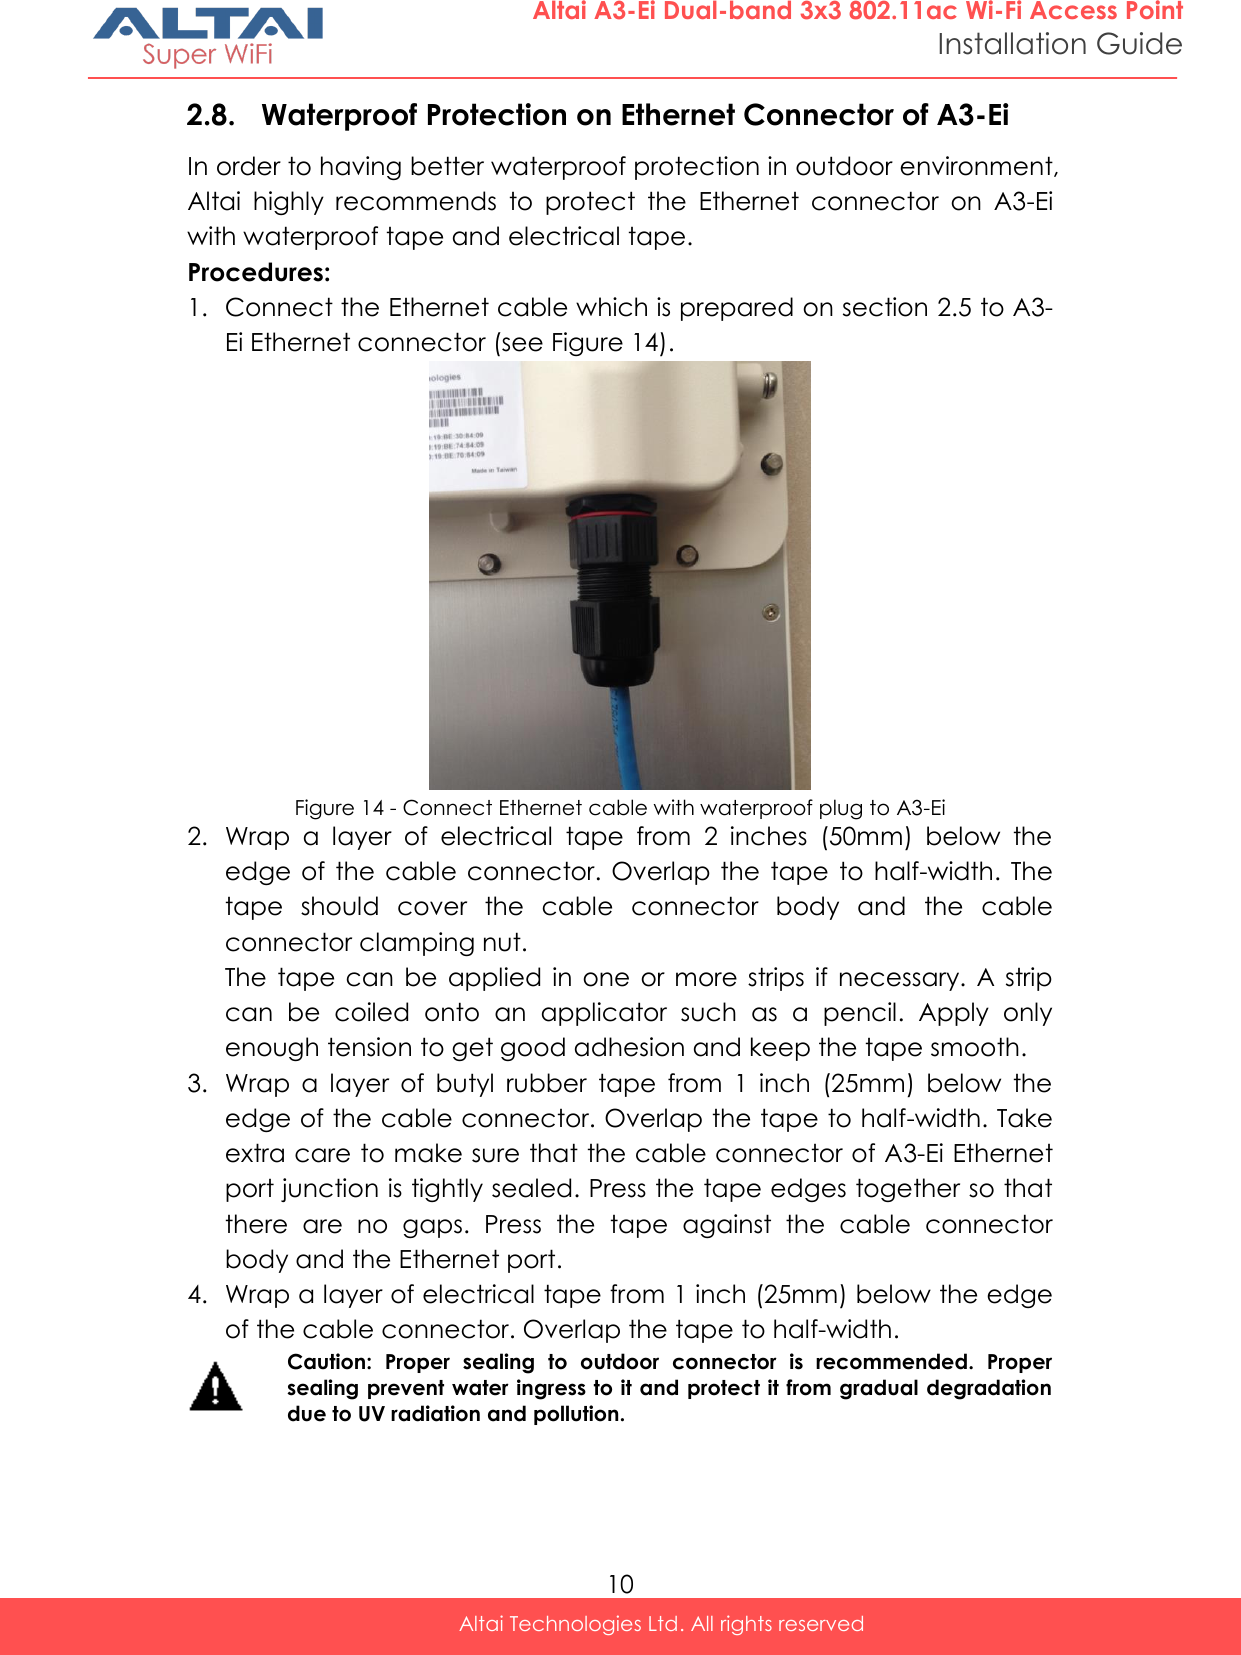
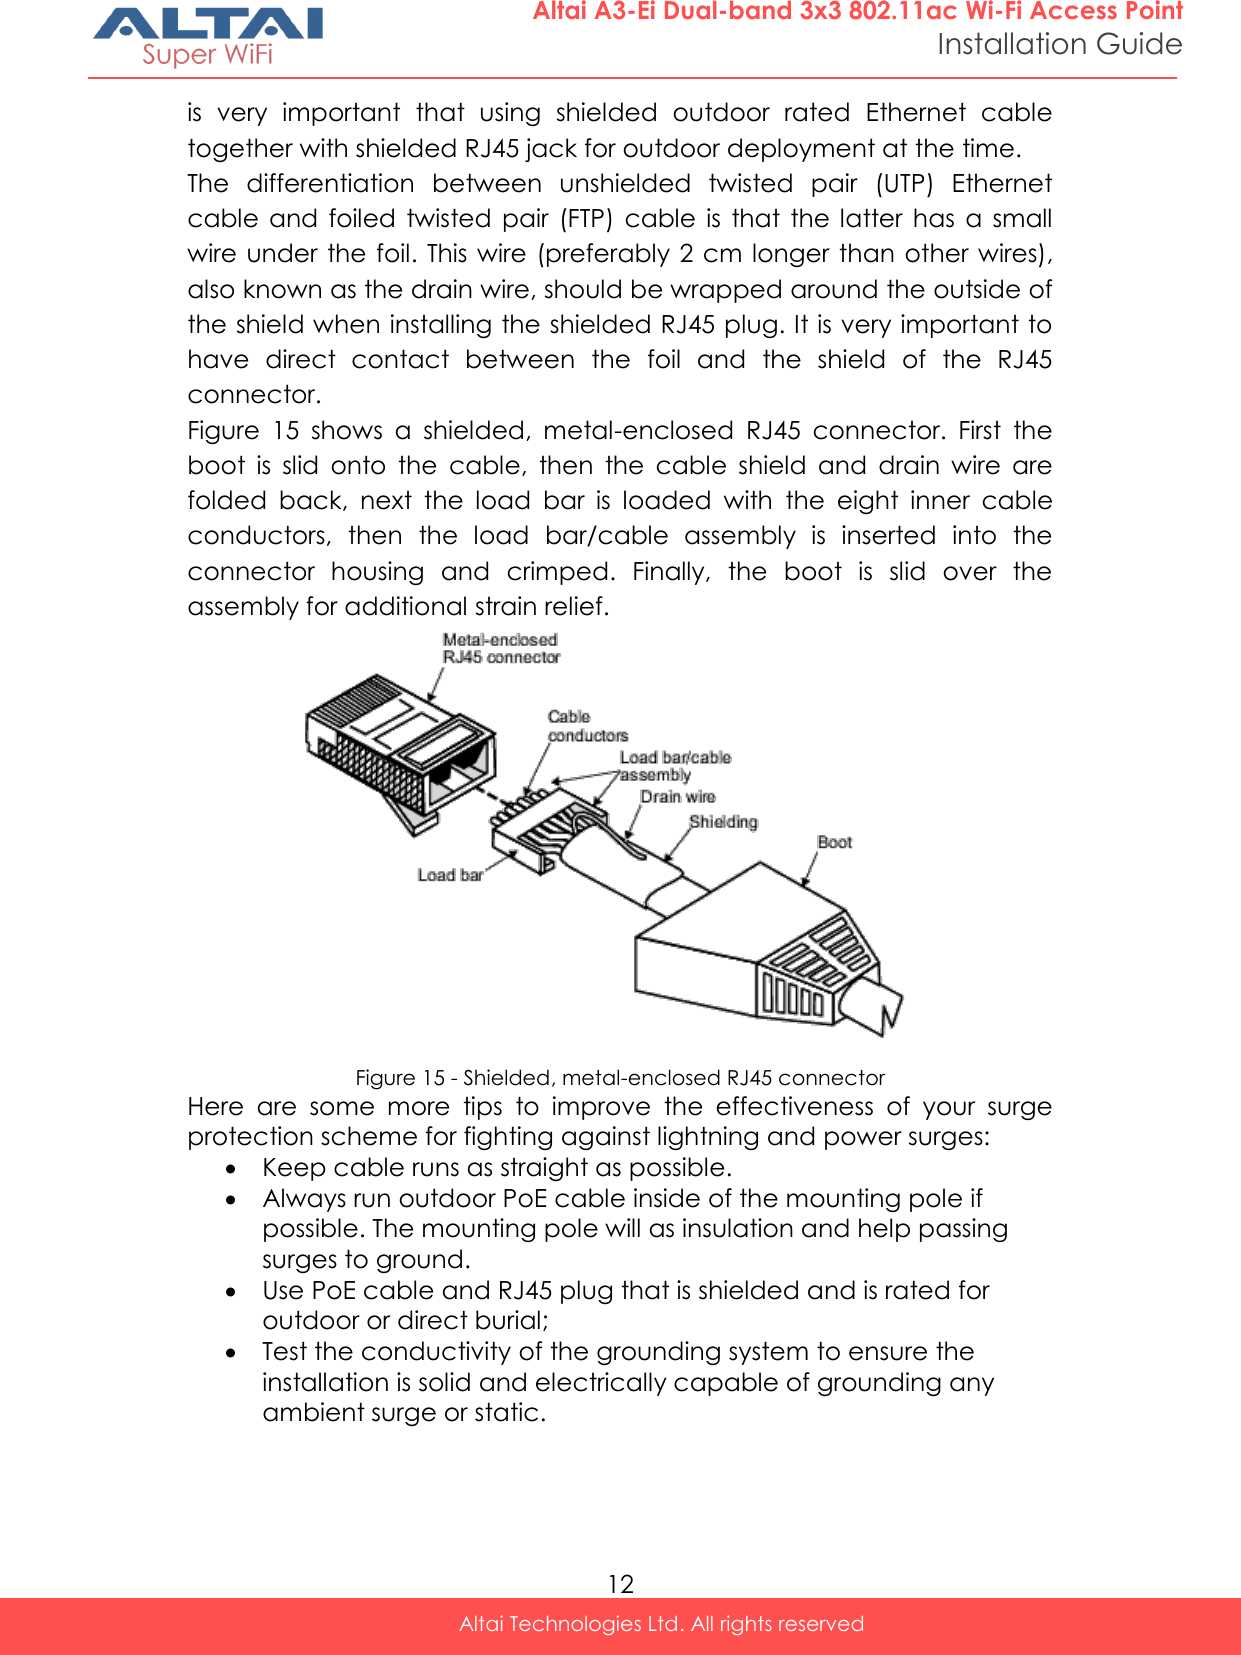
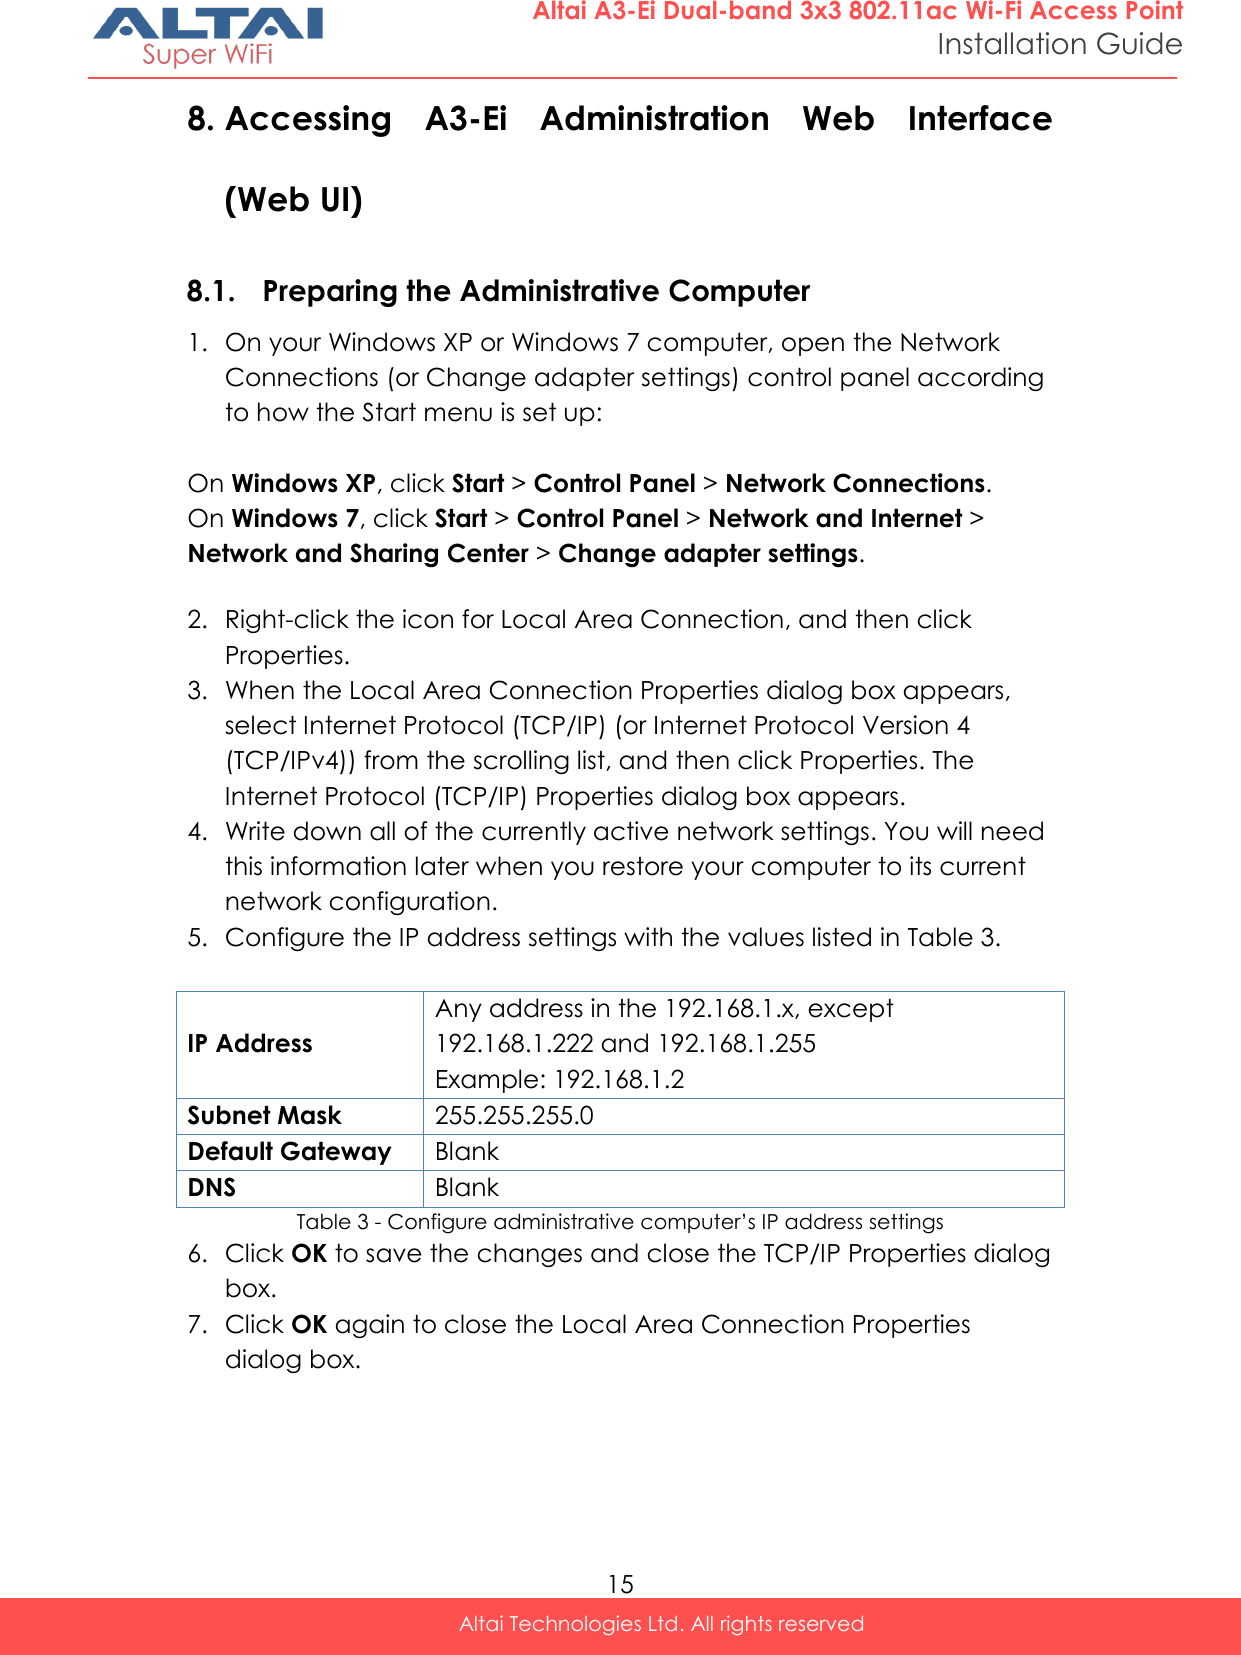
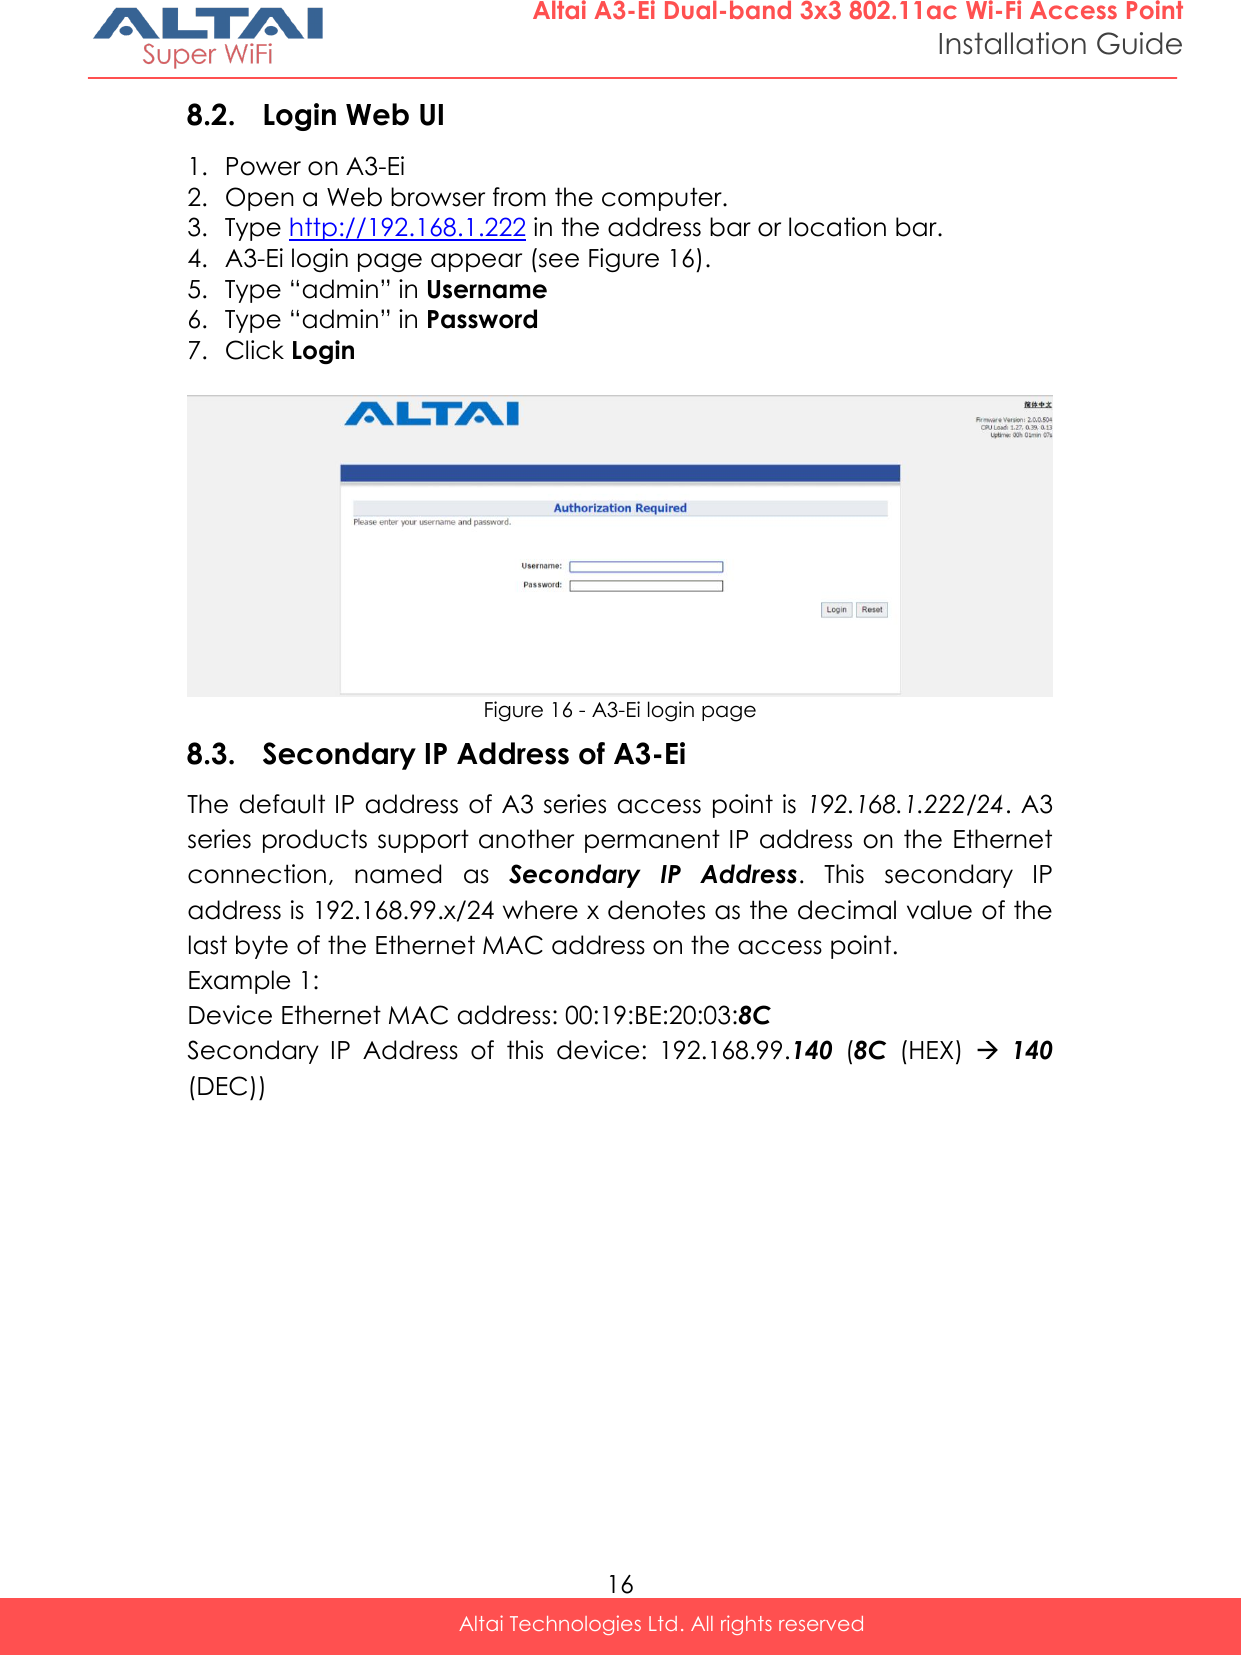
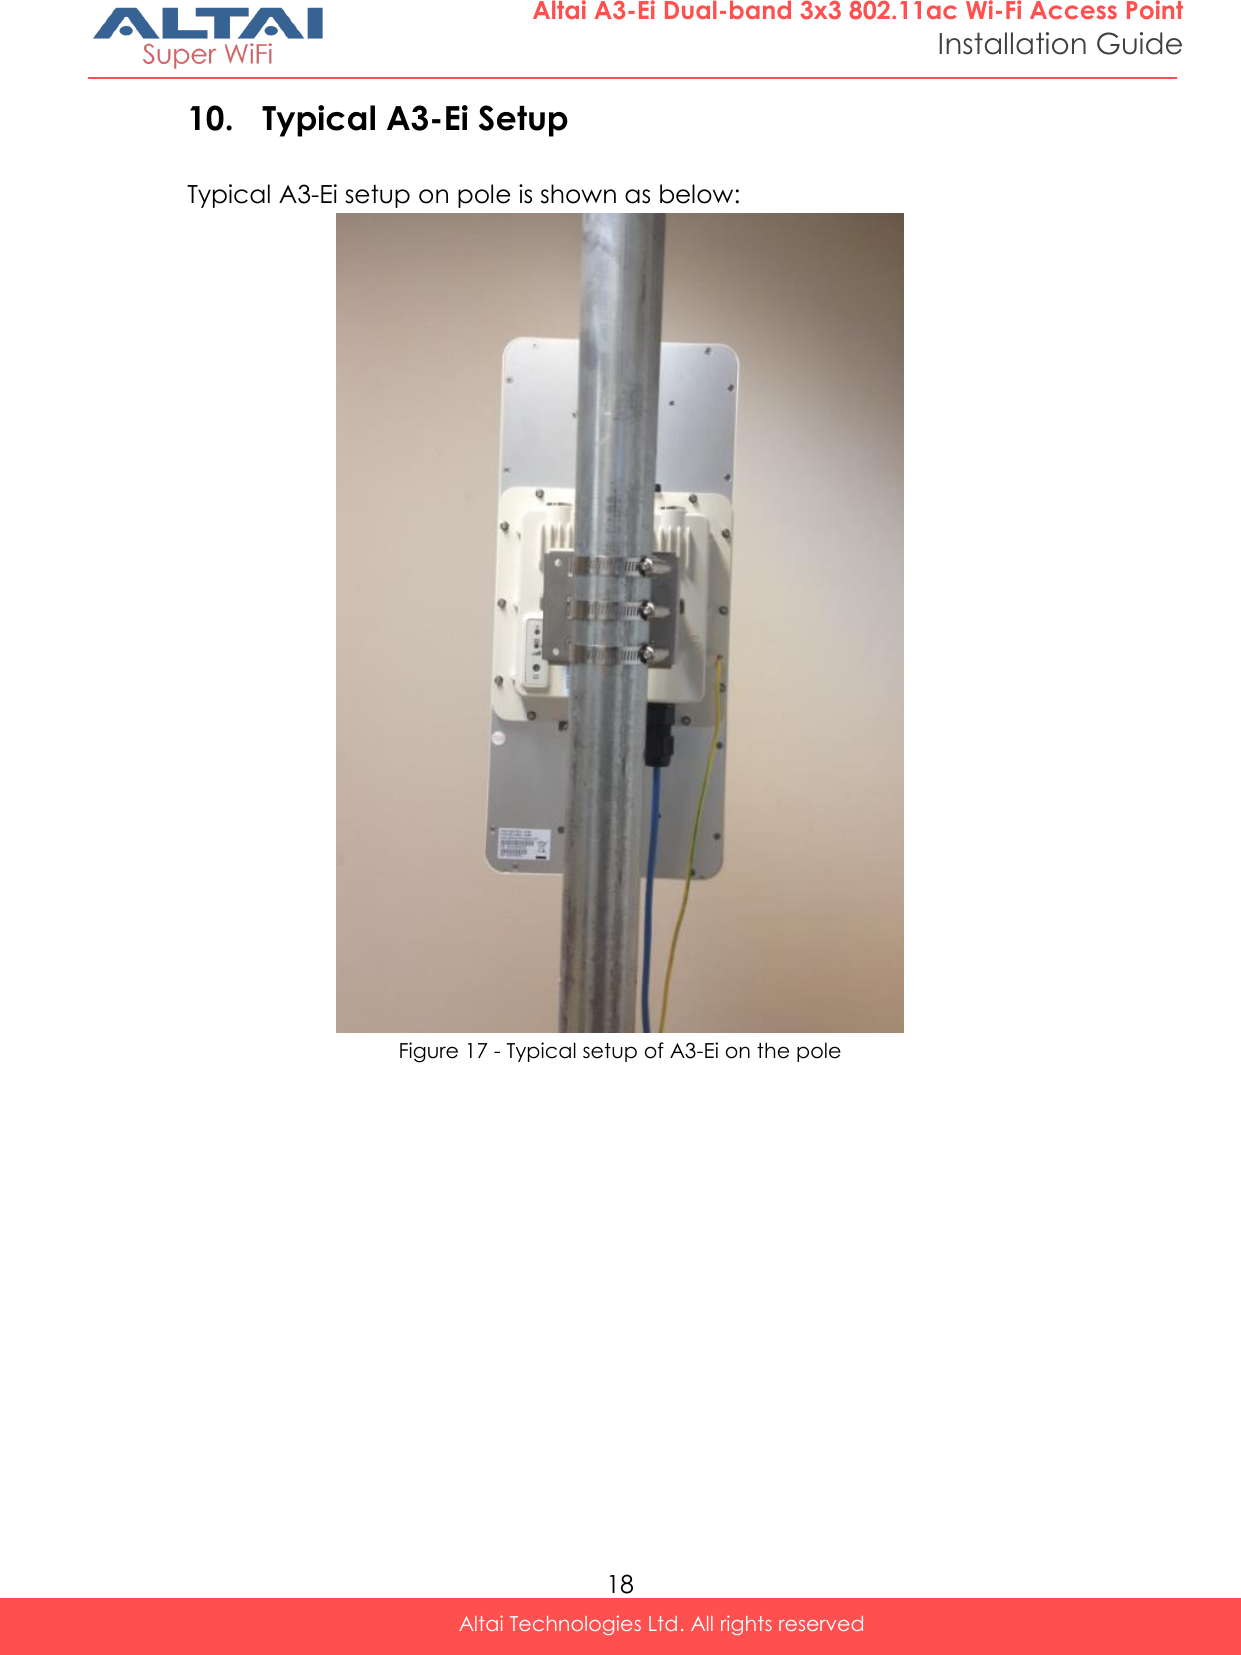
![1 Altai Technologies Ltd. All rights reserved Altai A3-Ei Dual-band 3x3 802.11ac Wi-Fi Access Point Installation Guide 1. Introduction This document is written to provide the necessary information for installing Altai A3-Ei Dual-band 3x3 802.11ac Wi-Fi Access Point (A3-Ei) on field location. This document is applicable for hardware platform with the following models: Product name: A3-Ei Dual-band 3x3 802.11ac Wi-Fi Access Point Model number: WA3311NAC-E It is assumed that site survey has been performed. Appropriate antenna pole and AP locations have been selected. It is highly recommended that cable lengths of various cables are confirmed. Good site installation plan should consist of site map, drawing illustrating AP and poles locations, antenna bearing/down-tilt, antenna height, and network topology. User may refer the following documents during A3-Ei installation and configuration on necessary. [1] A3 Series Dual-band 3x3 802.11ac Wi-Fi Access Point Configuration Guide [2] A3-Ei Dual-band 3x3 802.11ac Wi-Fi Access Point Data Sheet](https://usermanual.wiki/Altai-Technologies/WA3311NAC-E.Users-Manual-Installation/User-Guide-2878037-Page-7.png)