Alcatel Canada 24T28A01D22C 7390 24 GHz Co-Pol RBS User Manual BS Manual pages 56 to 60

Alcatel Canada Inc 7390 24 GHz Co-Pol RBS BS Manual pages 56 to 60

BS Manual pages 56 to 60

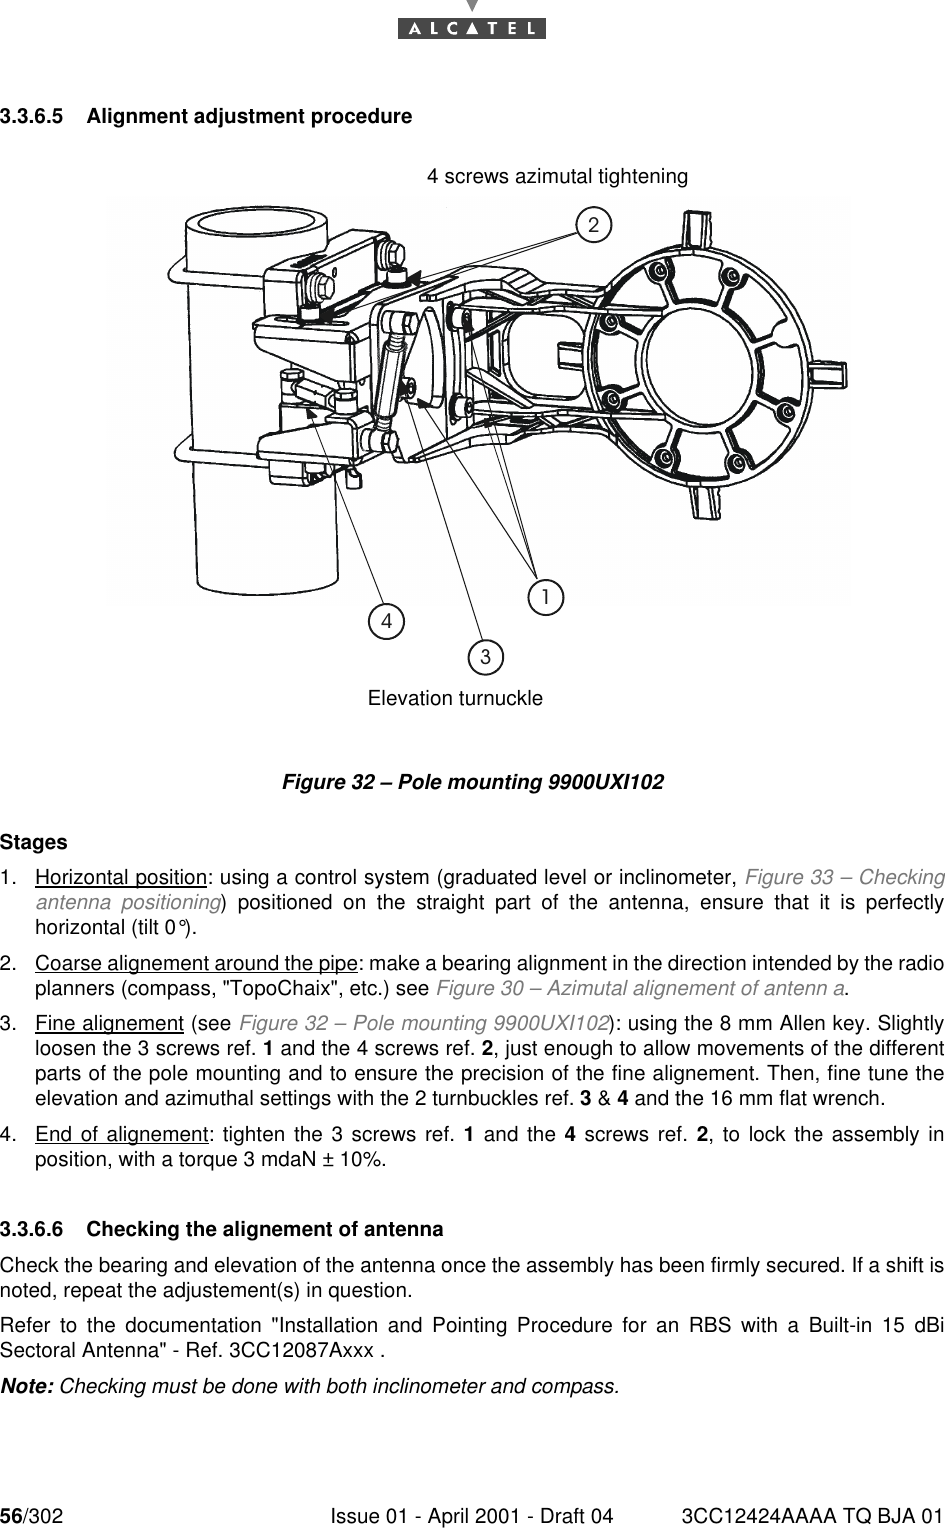
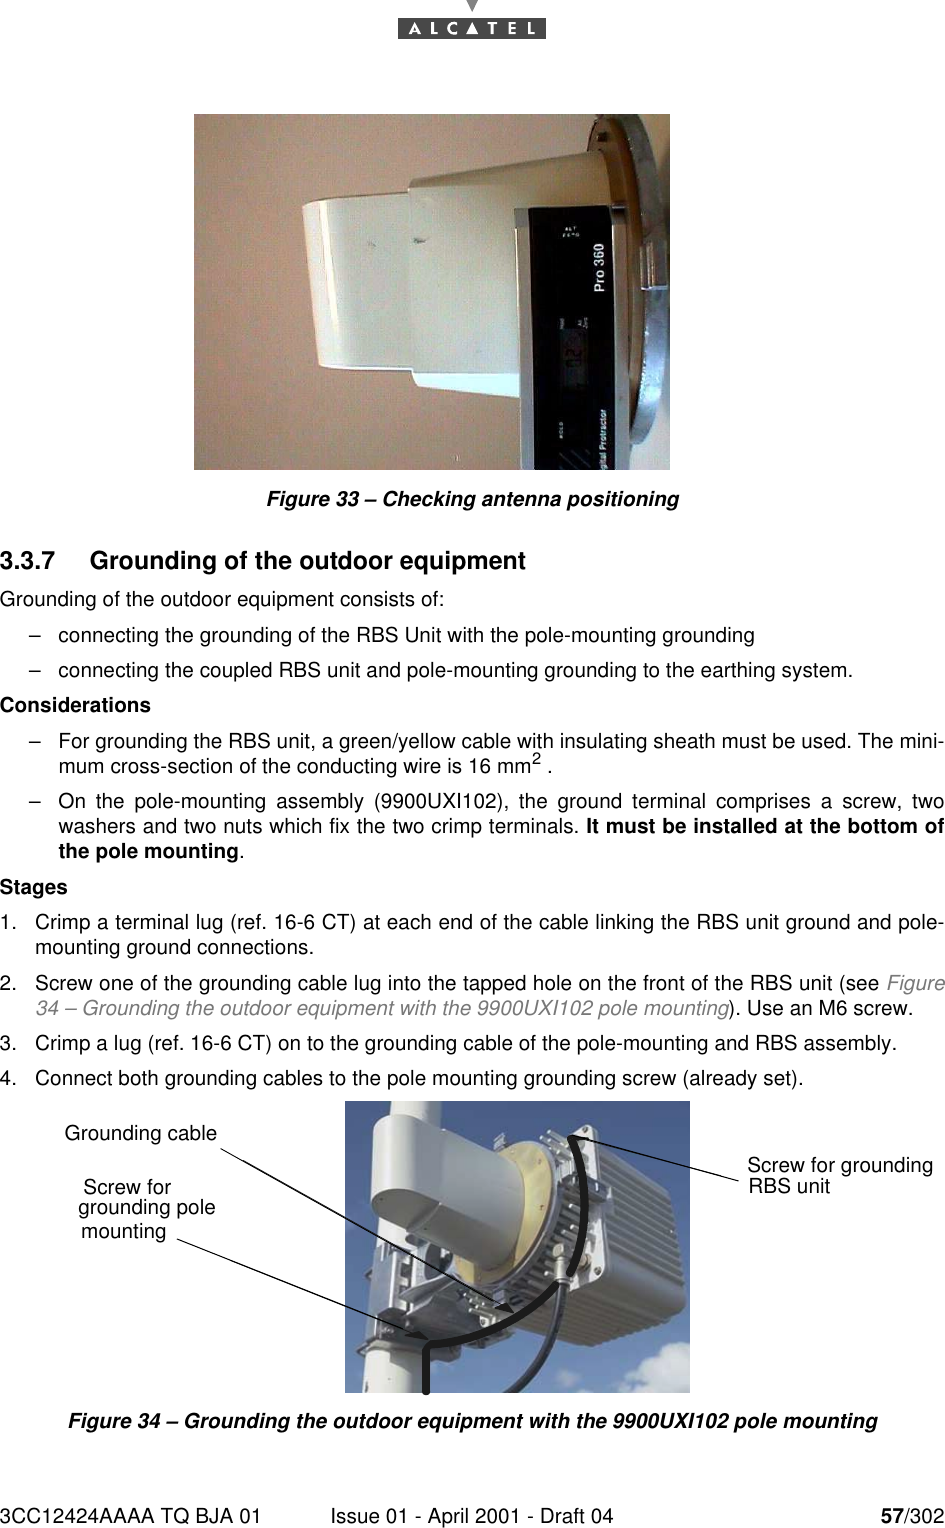
56/302 Issue 01 - April 2001 - Draft 04 3CC12424AAAA TQ BJA 01763.3.6.5 Alignment adjustment procedureFigure 32 – Pole mounting 9900UXI102Stages1. Horizontal position: using a control system (graduated level or inclinometer, Figure 33 – Checkingantenna positioning) positioned on the straight part of the antenna, ensure that it is perfectlyhorizontal (tilt 0°).2. Coarse alignement around the pipe: make a bearing alignment in the direction intended by the radioplanners (compass, "TopoChaix", etc.) see Figure 30 – Azimutal alignement of antenn a.3. Fine alignement (see Figure 32 – Pole mounting 9900UXI102): using the 8 mm Allen key. Slightlyloosen the 3 screws ref. 1 and the 4 screws ref. 2, just enough to allow movements of the differentparts of the pole mounting and to ensure the precision of the fine alignement. Then, fine tune theelevation and azimuthal settings with the 2 turnbuckles ref. 3 & 4 and the 16 mm flat wrench.4. End of alignement: tighten the 3 screws ref. 1 and the 4 screws ref. 2, to lock the assembly inposition, with a torque 3 mdaN ± 10%.3.3.6.6 Checking the alignement of antennaCheck the bearing and elevation of the antenna once the assembly has been firmly secured. If a shift isnoted, repeat the adjustement(s) in question.Refer to the documentation "Installation and Pointing Procedure for an RBS with a Built-in 15 dBiSectoral Antenna" - Ref. 3CC12087Axxx .Note: Checking must be done with both inclinometer and compass.4 screws azimutal tighteningAzimuthal turnuckleElevation turnuckle3 screws elevation tightening
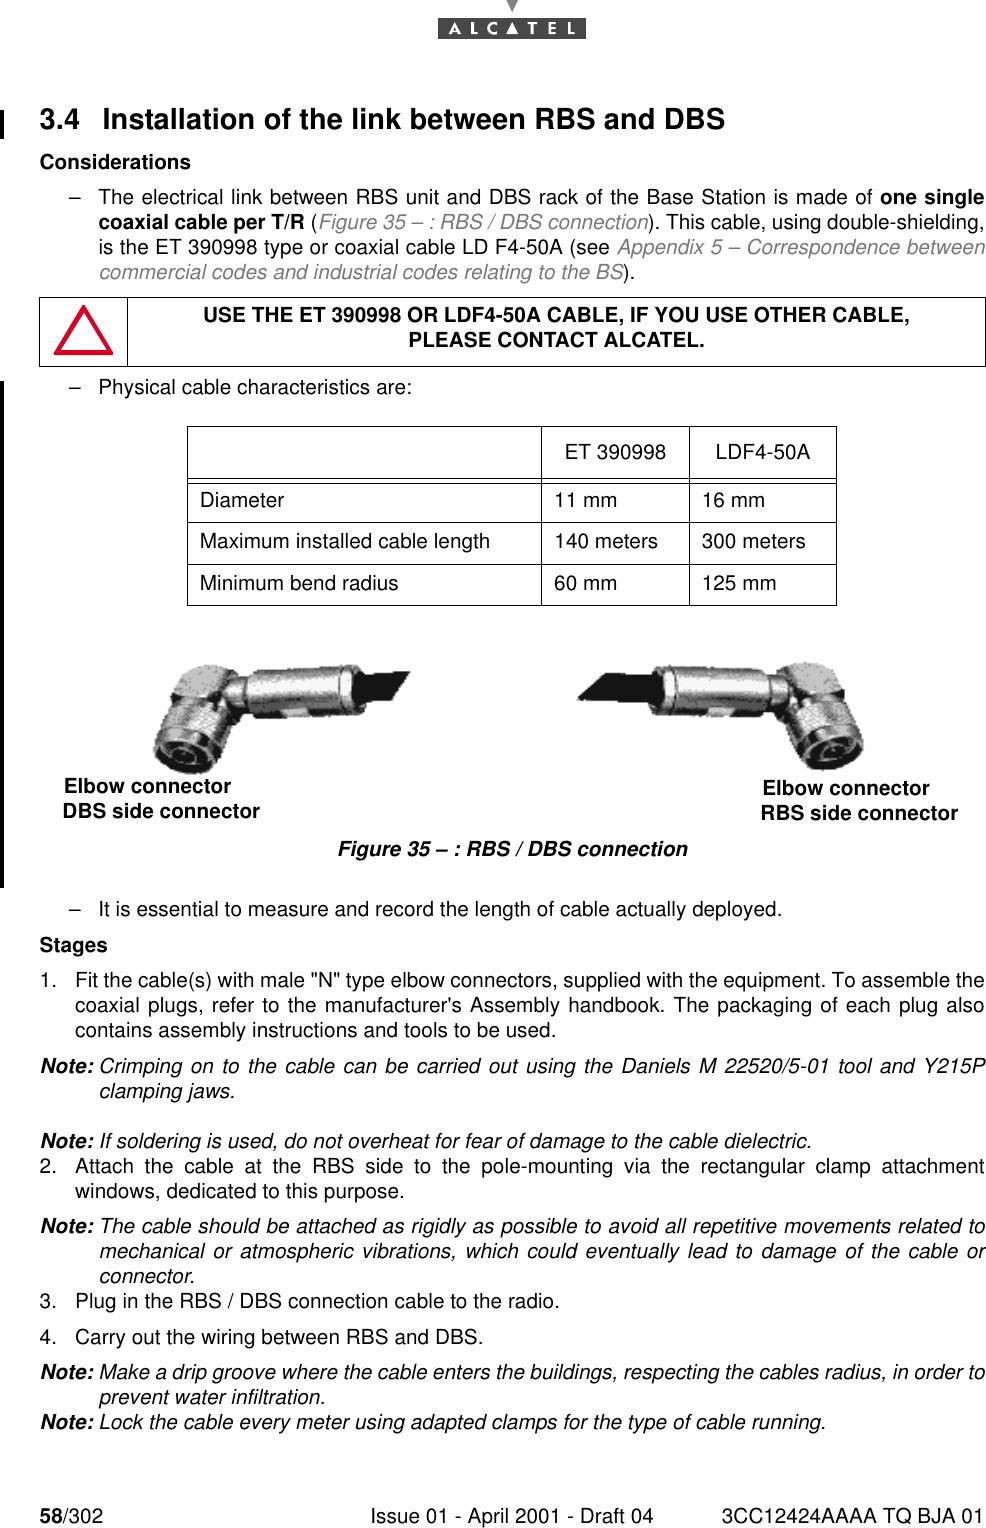
3CC12424AAAA TQ BJA 01 Issue 01 - April 2001 - Draft 04 57/30276Figure 33 – Checking antenna positioning3.3.7 Grounding of the outdoor equipmentGrounding of the outdoor equipment consists of:–connecting the grounding of the RBS Unit with the pole-mounting grounding–connecting the coupled RBS unit and pole-mounting grounding to the earthing system.Considerations–For grounding the RBS unit, a green/yellow cable with insulating sheath must be used. The mini-mum cross-section of the conducting wire is 16 mm2 .–On the pole-mounting assembly (9900UXI102), the ground terminal comprises a screw, twowashers and two nuts which fix the two crimp terminals. It must be installed at the bottom ofthe pole mounting.Stages1. Crimp a terminal lug (ref. 16-6 CT) at each end of the cable linking the RBS unit ground and pole-mounting ground connections.2. Screw one of the grounding cable lug into the tapped hole on the front of the RBS unit (see Figure34 – Grounding the outdoor equipment with the 9900UXI102 pole mounting). Use an M6 screw.3. Crimp a lug (ref. 16-6 CT) on to the grounding cable of the pole-mounting and RBS assembly.4. Connect both grounding cables to the pole mounting grounding screw (already set).Figure 34 – Grounding the outdoor equipment with the 9900UXI102 pole mountingScrew for grounding pole mounting Grounding cableScrew for grounding RBS unit
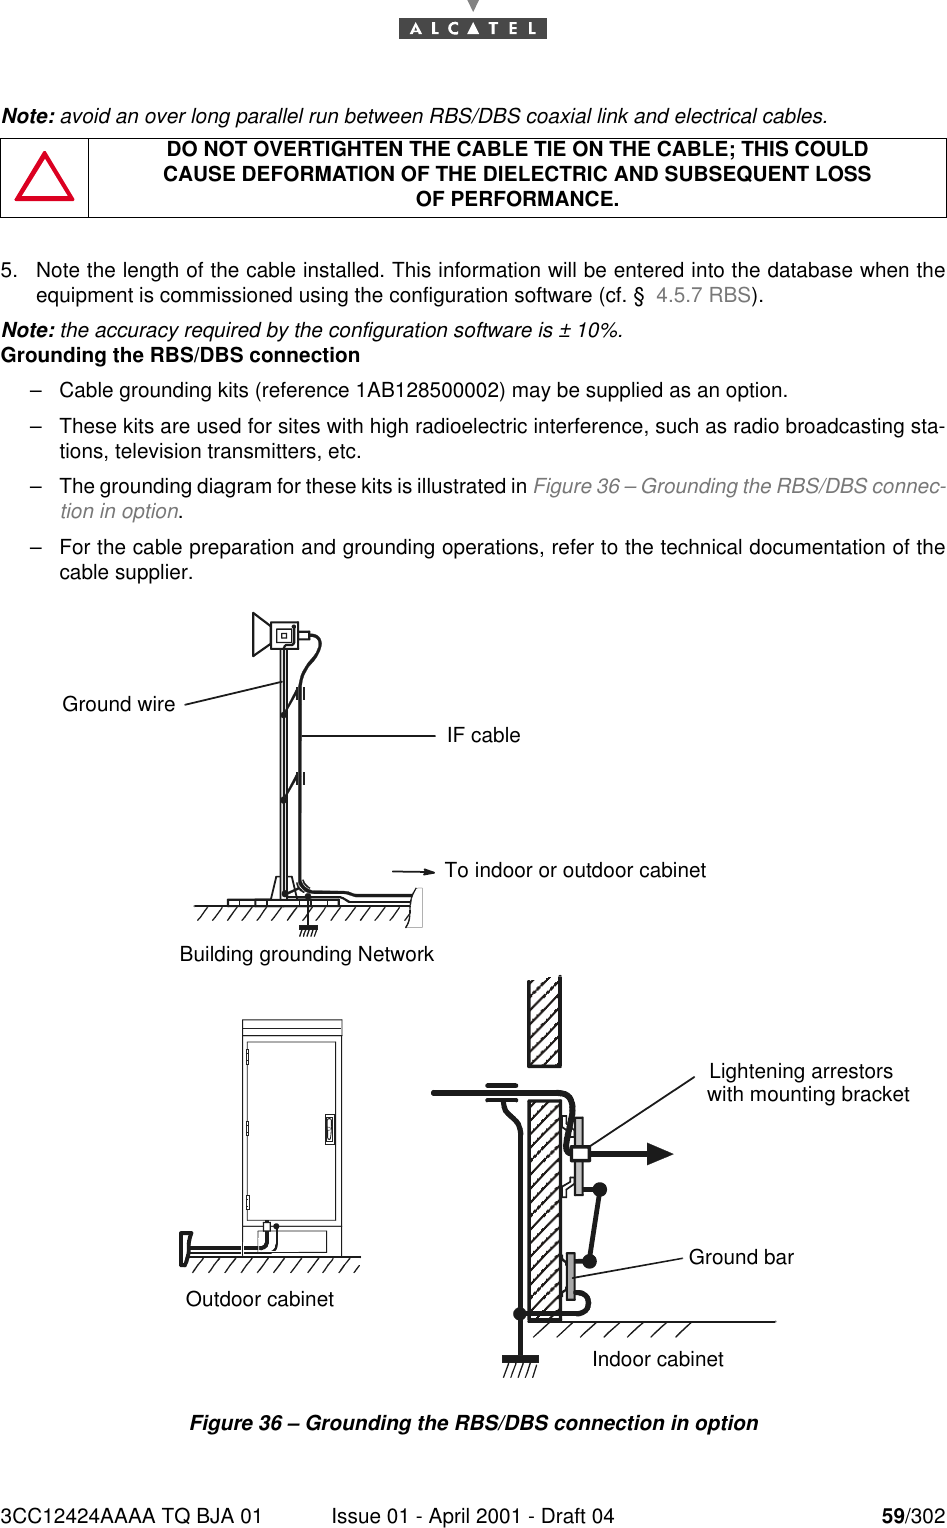
58/302 Issue 01 - April 2001 - Draft 04 3CC12424AAAA TQ BJA 01763.4 Installation of the link between RBS and DBSConsiderations–The electrical link between RBS unit and DBS rack of the Base Station is made of one singlecoaxial cable per T/R (Figure 35 – : RBS / DBS connection). This cable, using double-shielding,is the ET 390998 type or coaxial cable LD F4-50A (see Appendix 5 – Correspondence betweencommercial codes and industrial codes relating to the BS).–Physical cable characteristics are: Figure 35 – : RBS / DBS connection–It is essential to measure and record the length of cable actually deployed.Stages1. Fit the cable(s) with male "N" type elbow connectors, supplied with the equipment. To assemble thecoaxial plugs, refer to the manufacturer's Assembly handbook. The packaging of each plug alsocontains assembly instructions and tools to be used.Note: Crimping on to the cable can be carried out using the Daniels M 22520/5-01 tool and Y215Pclamping jaws.Note: If soldering is used, do not overheat for fear of damage to the cable dielectric.2. Attach the cable at the RBS side to the pole-mounting via the rectangular clamp attachmentwindows, dedicated to this purpose.Note: The cable should be attached as rigidly as possible to avoid all repetitive movements related tomechanical or atmospheric vibrations, which could eventually lead to damage of the cable orconnector.3. Plug in the RBS / DBS connection cable to the radio.4. Carry out the wiring between RBS and DBS.Note: Make a drip groove where the cable enters the buildings, respecting the cables radius, in order toprevent water infiltration.Note: Lock the cable every meter using adapted clamps for the type of cable running.USE THE ET 390998 OR LDF4-50A CABLE, IF YOU USE OTHER CABLE,PLEASE CONTACT ALCATEL.ET 390998 LDF4-50ADiameter 11 mm 16 mmMaximum installed cable length 140 meters 300 metersMinimum bend radius 60 mm 125 mmElbow connector DBS side connector  Elbow connector RBS side connector
3CC12424AAAA TQ BJA 01 Issue 01 - April 2001 - Draft 04 59/30276Note: avoid an over long parallel run between RBS/DBS coaxial link and electrical cables.5. Note the length of the cable installed. This information will be entered into the database when theequipment is commissioned using the configuration software (cf. §  4.5.7 RBS).Note: the accuracy required by the configuration software is ± 10%.Grounding the RBS/DBS connection–Cable grounding kits (reference 1AB128500002) may be supplied as an option.–These kits are used for sites with high radioelectric interference, such as radio broadcasting sta-tions, television transmitters, etc.–The grounding diagram for these kits is illustrated in Figure 36 – Grounding the RBS/DBS connec-tion in option.–For the cable preparation and grounding operations, refer to the technical documentation of thecable supplier.Figure 36 – Grounding the RBS/DBS connection in optionDO NOT OVERTIGHTEN THE CABLE TIE ON THE CABLE; THIS COULDCAUSE DEFORMATION OF THE DIELECTRIC AND SUBSEQUENT LOSSOF PERFORMANCE.IF cable Ground wire Building grounding NetworkOutdoor cabinet To indoor or outdoor cabinet Ground barLightening arrestors with mounting bracket Indoor cabinet
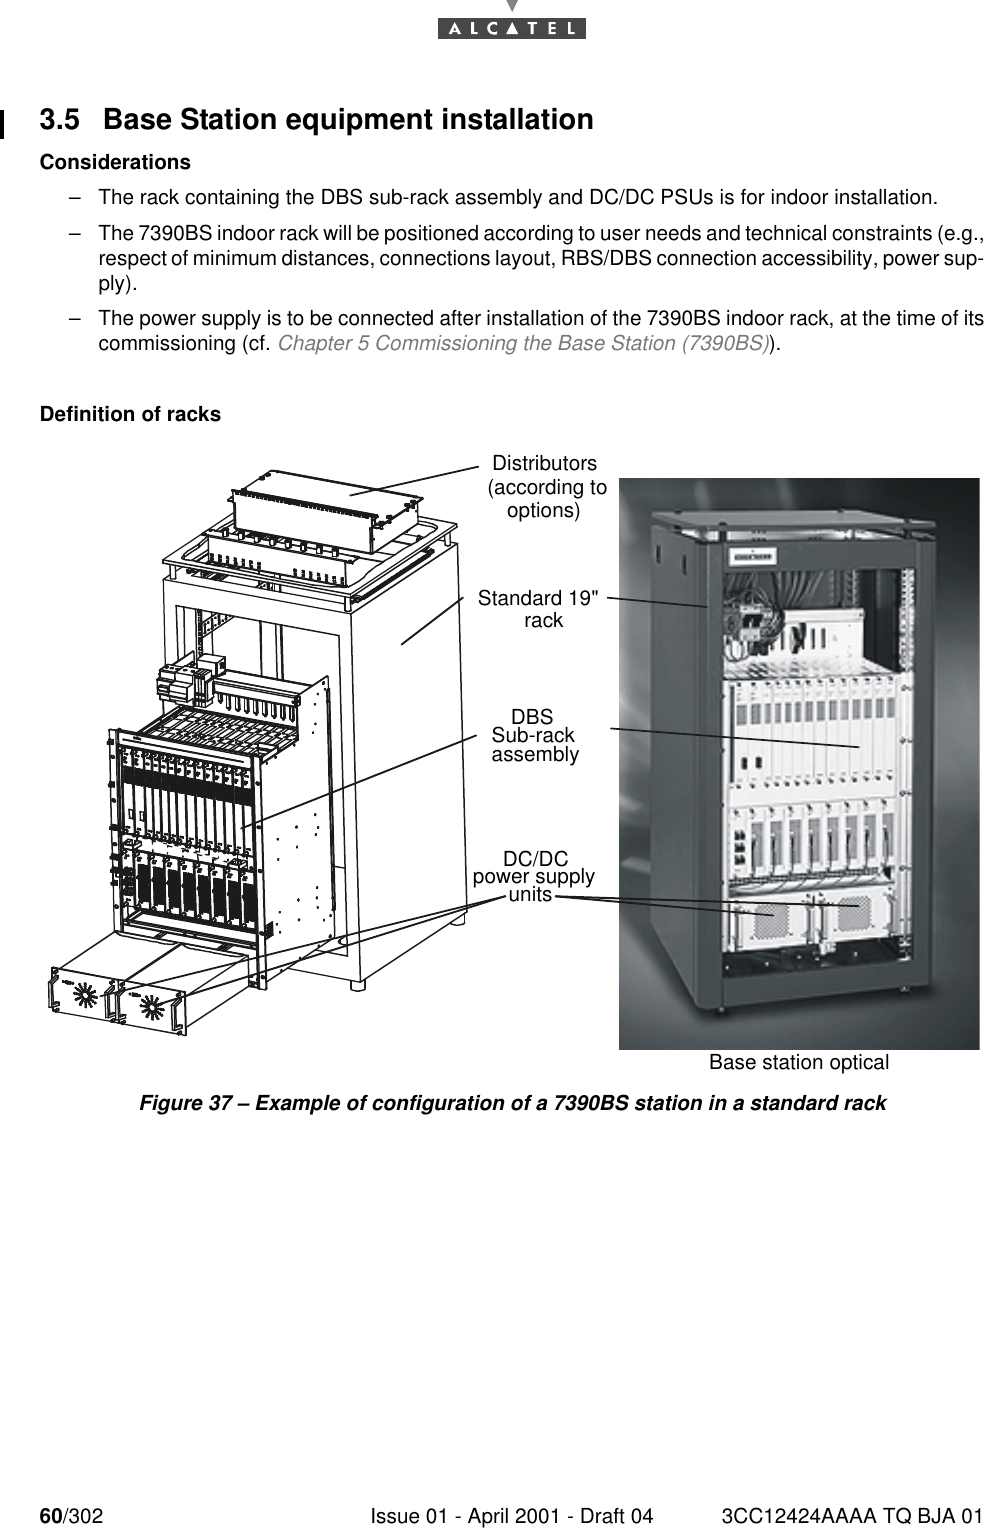
60/302 Issue 01 - April 2001 - Draft 04 3CC12424AAAA TQ BJA 01763.5 Base Station equipment installationConsiderations–The rack containing the DBS sub-rack assembly and DC/DC PSUs is for indoor installation.–The 7390BS indoor rack will be positioned according to user needs and technical constraints (e.g.,respect of minimum distances, connections layout, RBS/DBS connection accessibility, power sup-ply).–The power supply is to be connected after installation of the 7390BS indoor rack, at the time of itscommissioning (cf. Chapter 5 Commissioning the Base Station (7390BS)).Definition of racksFigure 37 – Example of configuration of a 7390BS station in a standard rackDistributors(according to options)  Standard 19" rackDBS Sub-rack assembly  DC/DC power supply units Base station optical

Navigation menu