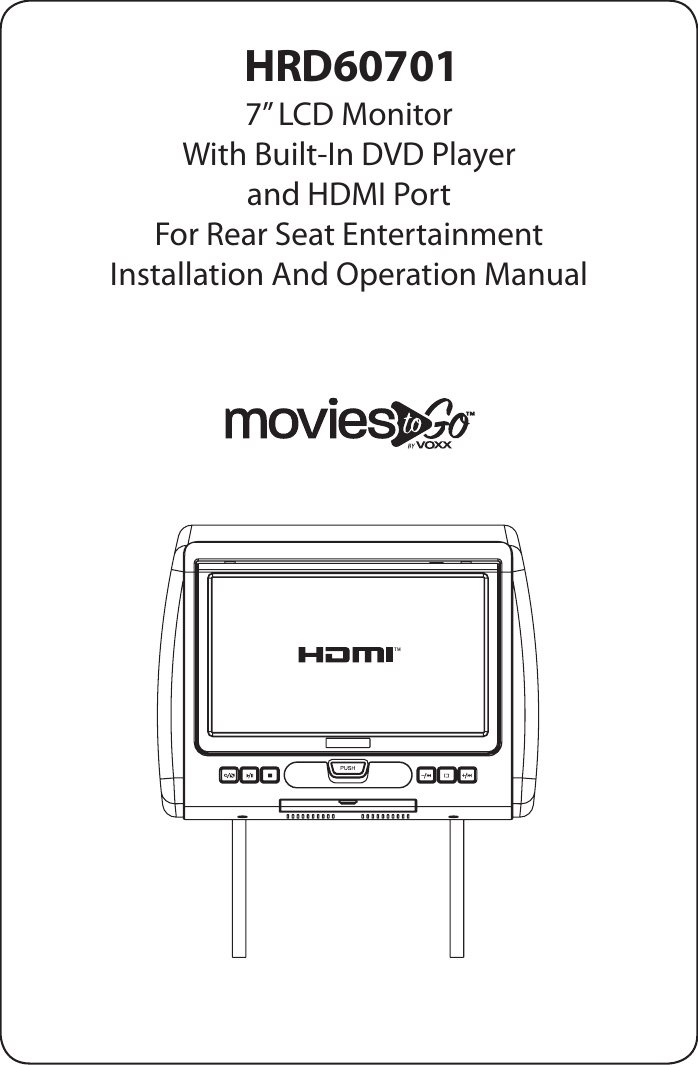
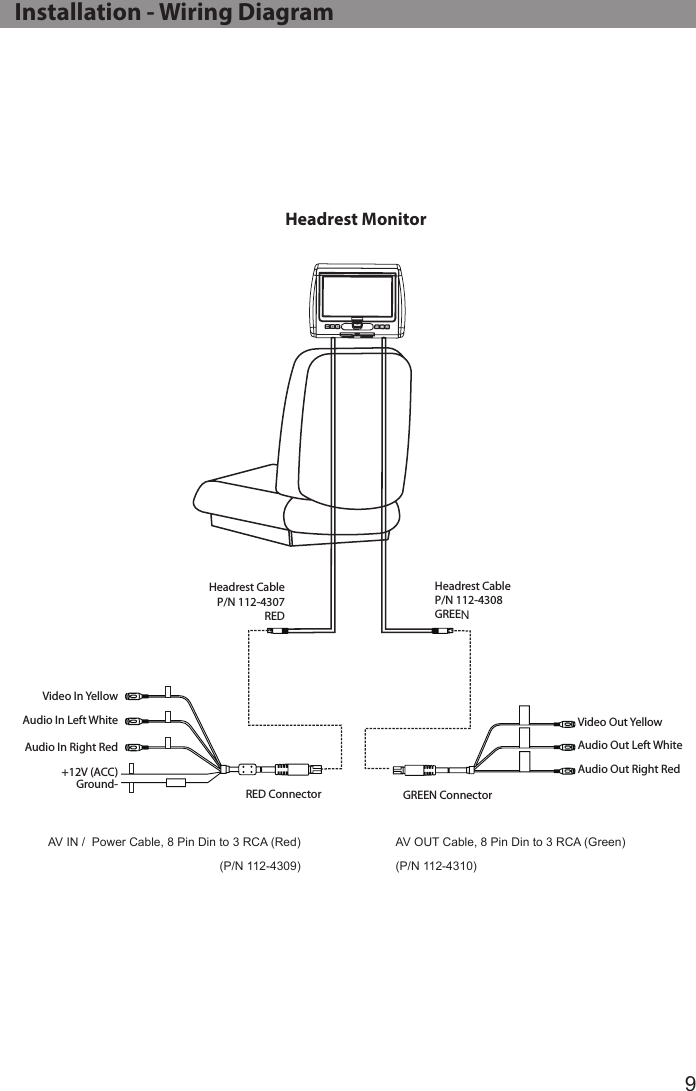
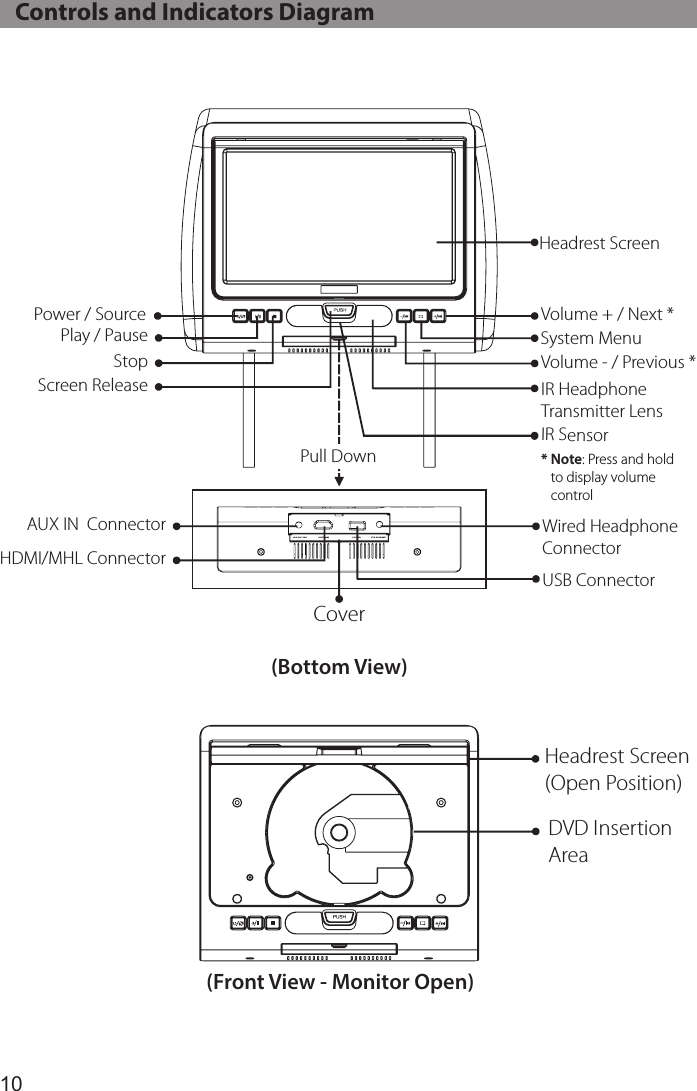
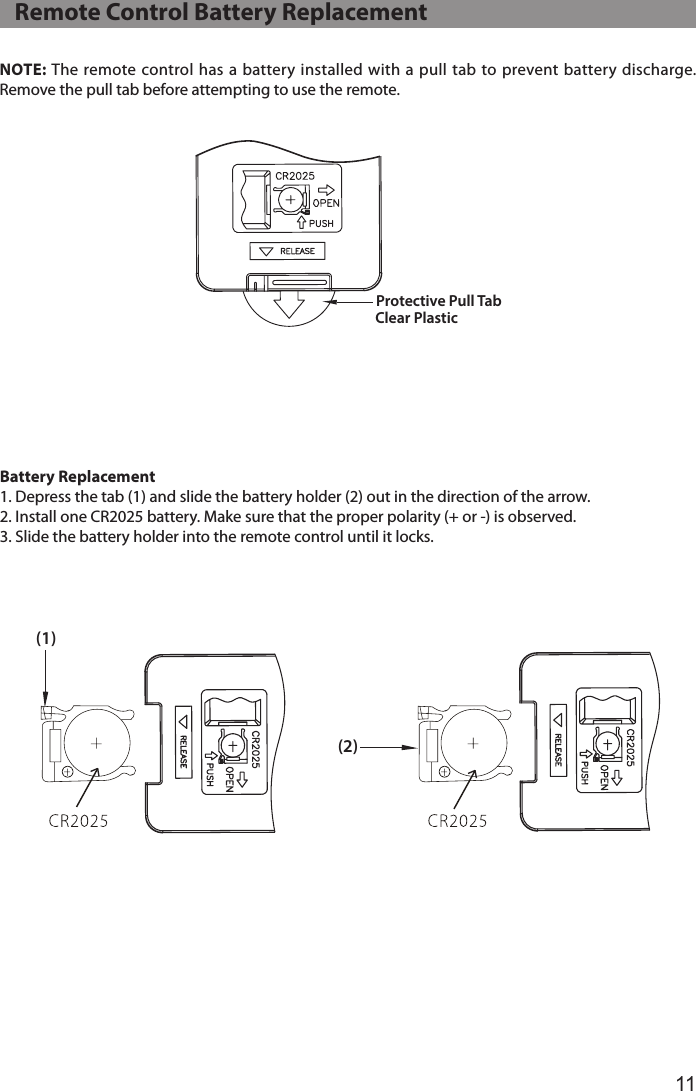
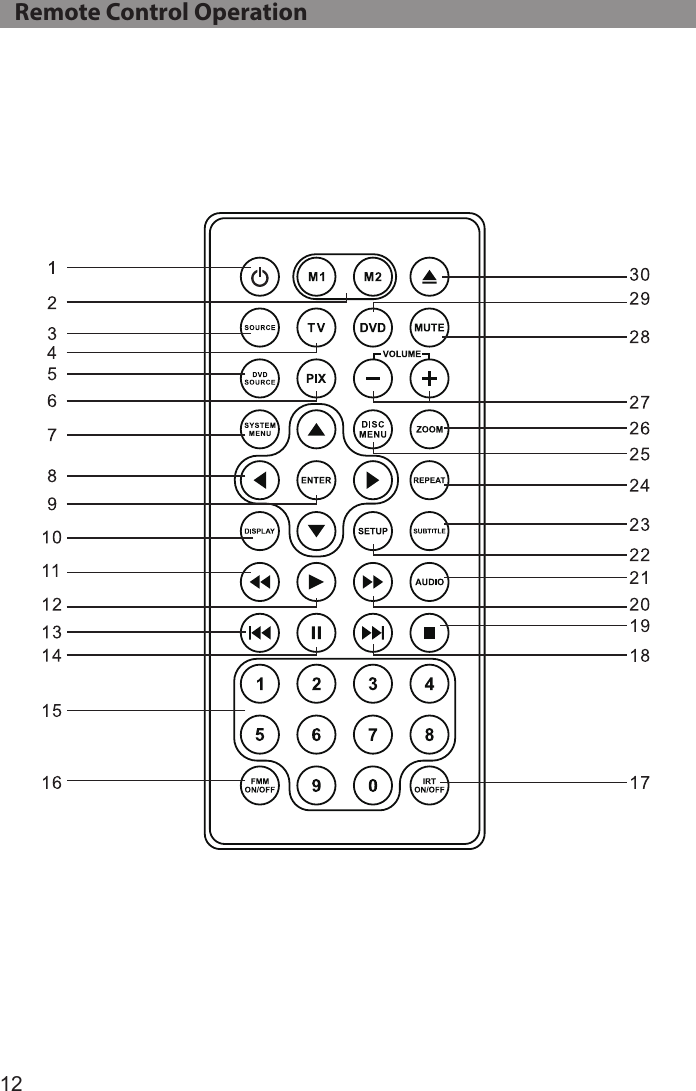
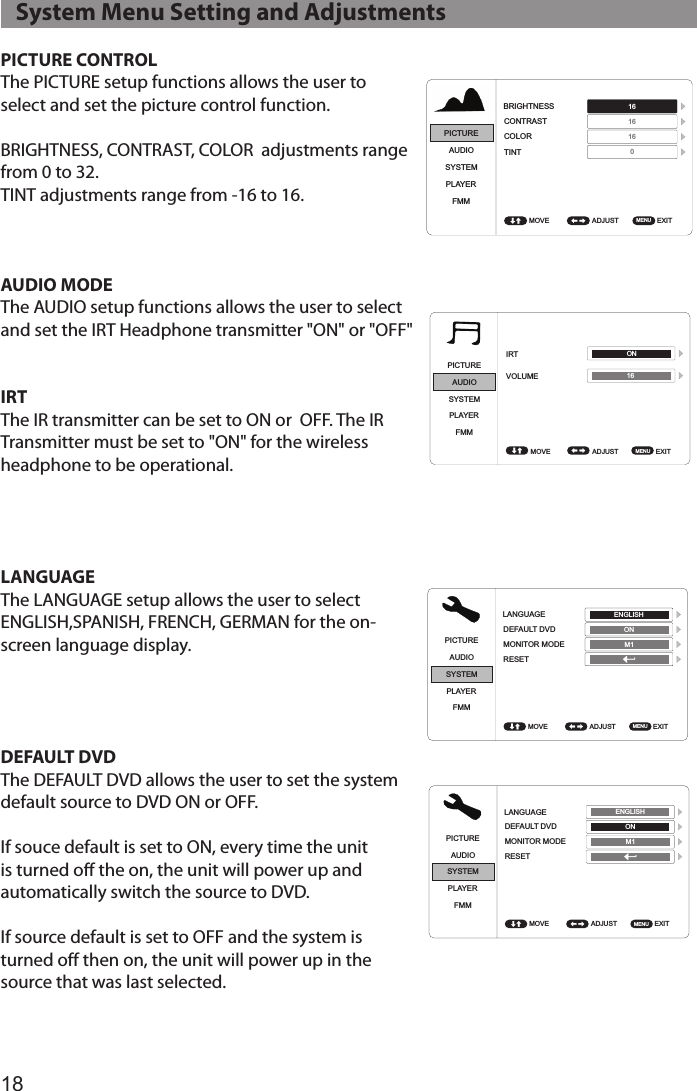
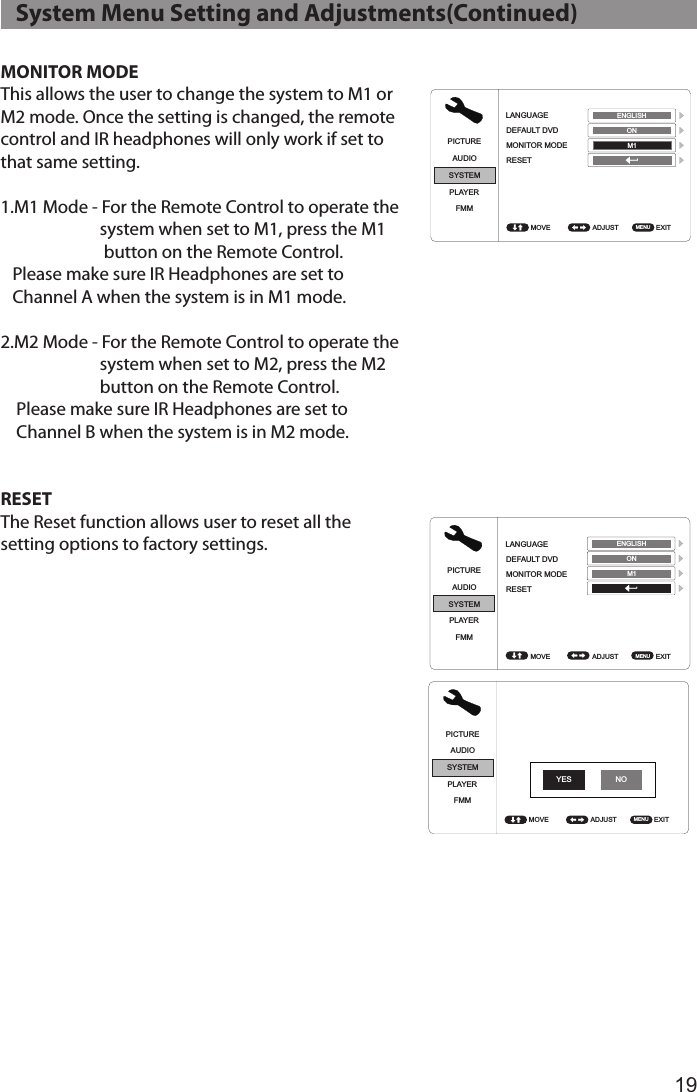
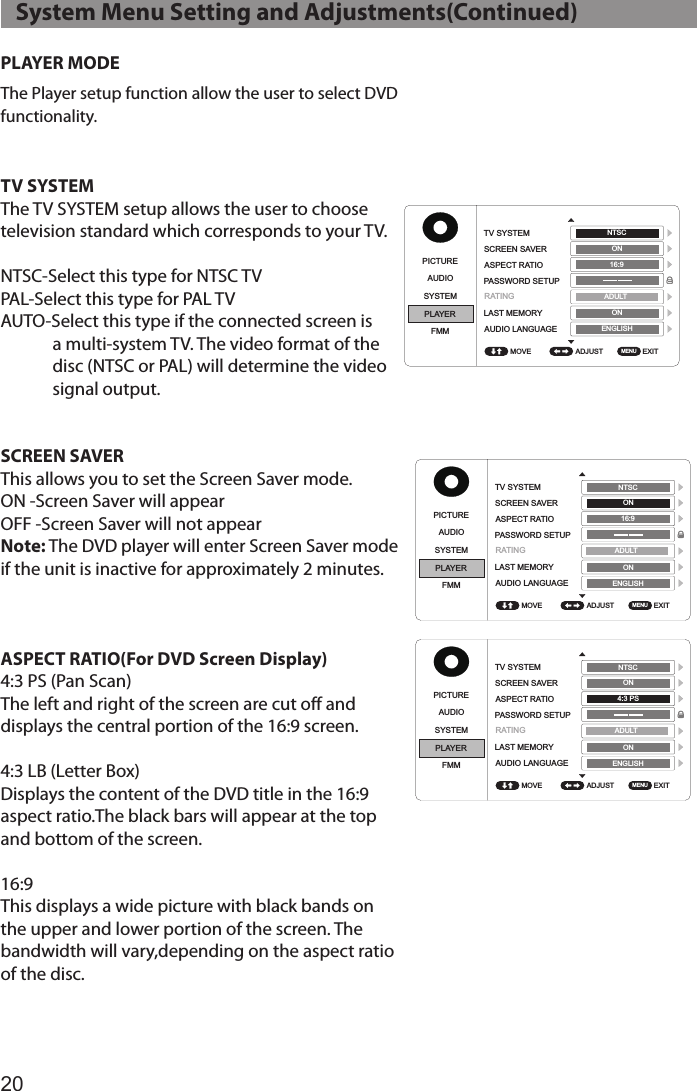
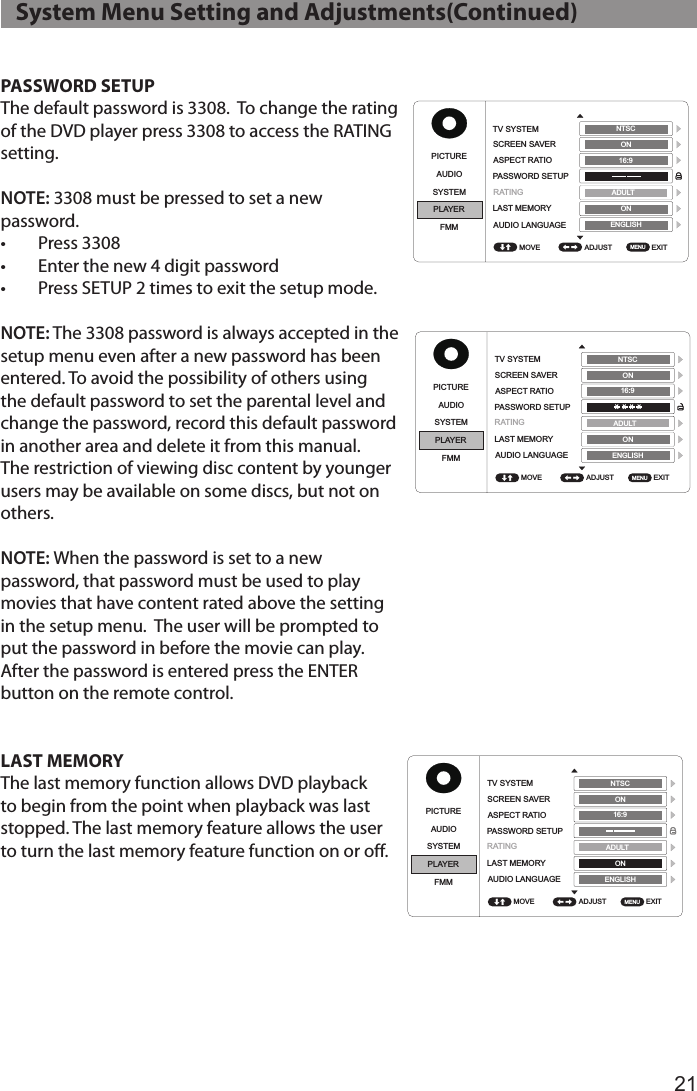
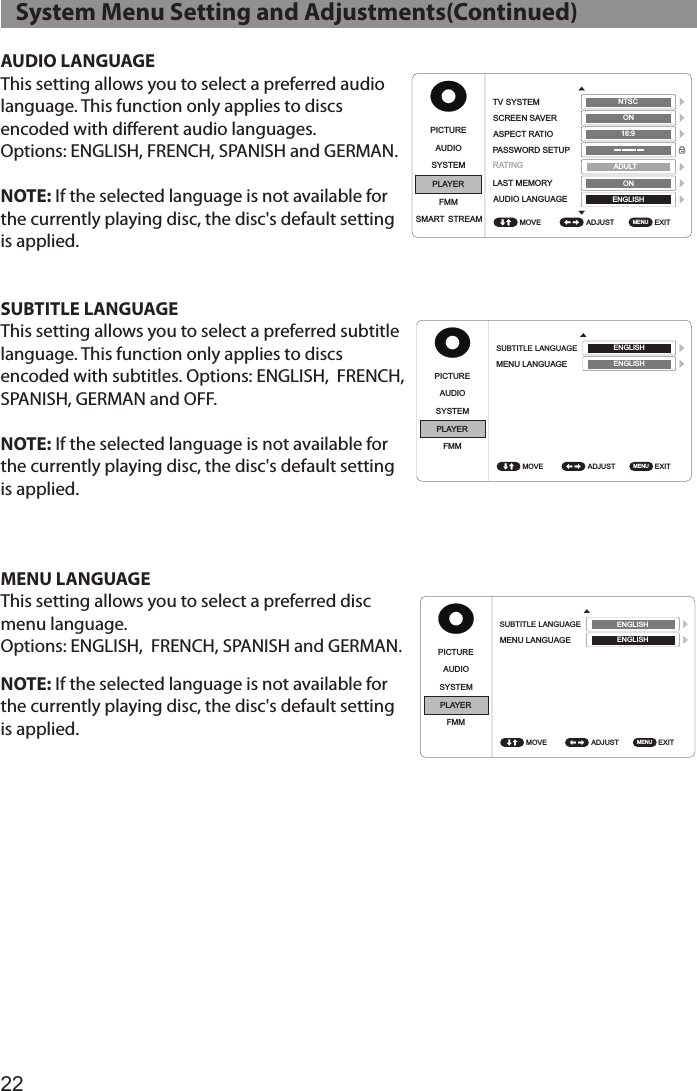
Action Electronics 9R3HRD60701 7 LCD Monitor with built-in DVD Player and HDMI port for rear seat entertainment User Manual 15 HRD60701 UserMan
Action Electronics Co.,Ltd. 7 LCD Monitor with built-in DVD Player and HDMI port for rear seat entertainment 15 HRD60701 UserMan
15_HRD60701 UserMan