ASUSTeK Computer WL500W MIMO WIRELESS ROUTER User Manual USERS MANUAL 4 OF 6
ASUSTeK Computer Inc MIMO WIRELESS ROUTER USERS MANUAL 4 OF 6
UserManual.wiki
>
ASUSTeK Computer
>
WL500W User Manual
>
USERS MANUAL 4 OF 6
Contents
1.
USERS MANUAL 1 OF 6
2.
USERS MANUAL 2 OF 6
3.
USERS MANUAL 3 OF 6
4.
USERS MANUAL 4 OF 6
5.
USERS MANUAL 5 OF 6
6.
USERS MANUAL 6 OF 6
USERS MANUAL 4 OF 6
Navigation menu
Upload a User Manual
Namespaces
Wiki Guide
HTML
PDF
Info
Views
User Manual
Discussion / Help
Navigation
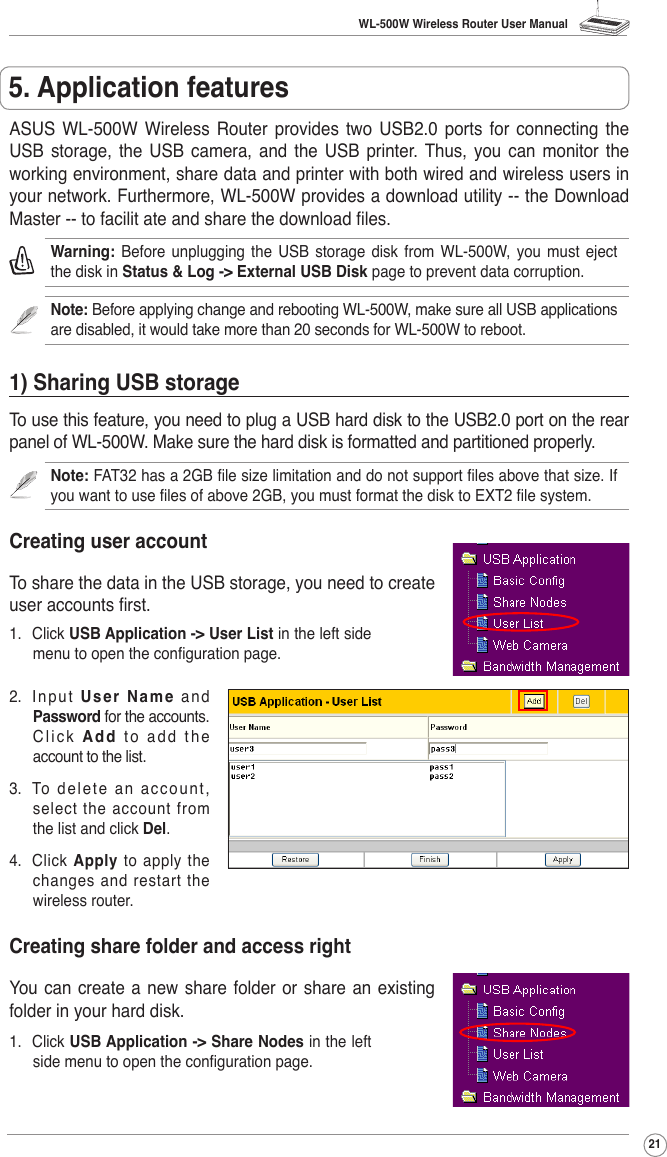
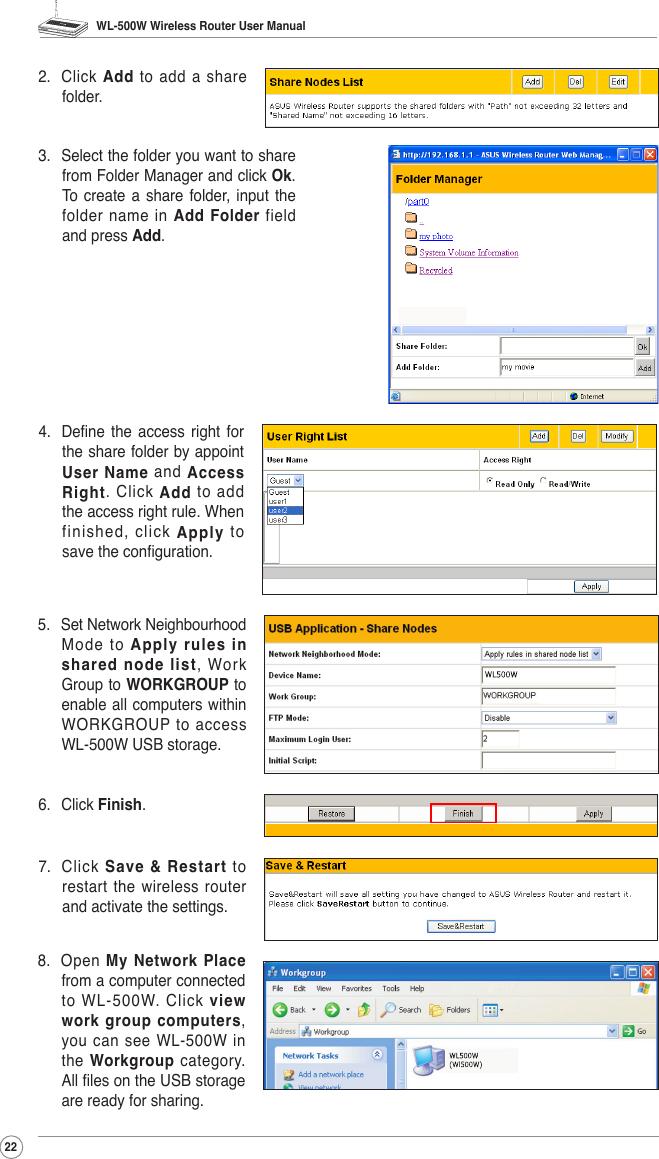
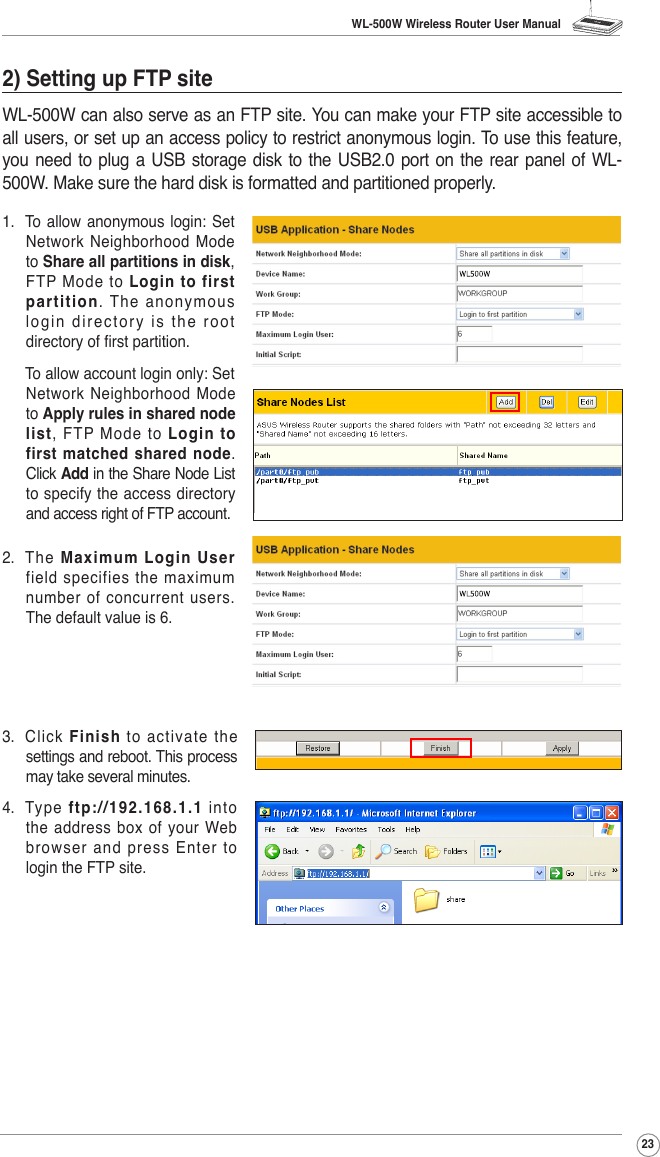
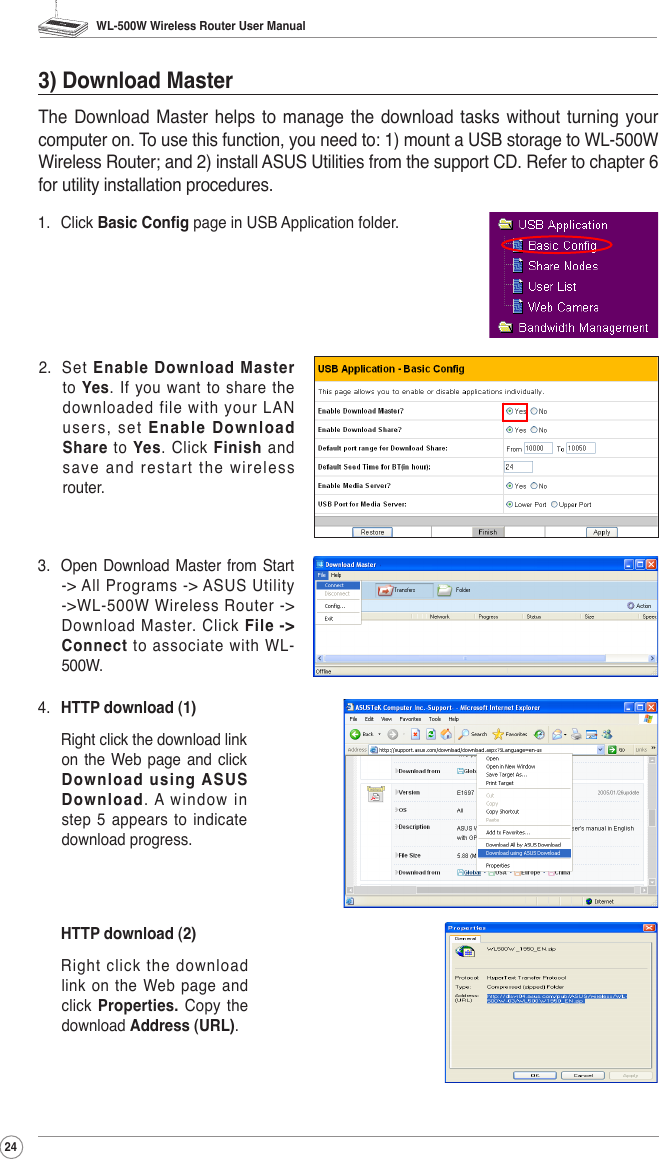

![WL-500W Wireless Router User Manual28 Remote Site 1-6 - Thi s fi el d stands for the IP address and port number of Remote Site. Th e v alu e o f t hi s f i el d i s [ IP Address]:[Connection Port]. Preview - Click Preview to see the view of all the Web Camera sites you set in Remote Site.5) Sharing USB printerYou can connect a compatible USB printer to the USB2.0 port of WL-500W to share the printer with your LAN users. Follow the procedures below to setup your computers to utilize the printer server function of WL-500W.Installing USB printerPlug your USB printer to the USB2.0 port on WL-500W rear panel. To verify whether your printer is properly installed and to WL-500W Wireless router, click Status & Log -> Status. If Printer Model is correct and Printer Status is On-Line, you can share this printer within your LAN.Note: Visit ASUS Website for compatible printer vendor and models.Setting up printer client under Windows XPFollow the steps below to install network printer on your clients.1. Run Add Printer Wizard from Start -> Printers and Faxes -> Add a printer.2. Select Local printer attached to this computer and click Next.](https://usermanual.wiki/ASUSTeK-Computer/WL500W.USERS-MANUAL-4-OF-6/User-Guide-688544-Page-8.png)